
NDS-1514 - Sound system Naxa - Free user manual and instructions
Find the device manual for free NDS-1514 Naxa in PDF.


| Product Type | DJ Speaker / Sound System |
| Brand | Naxa |
| Model | NDS-1514 |
| Woofer Driver Size | 15 inches |
| Wireless Connectivity | Bluetooth® |
| Removable Memory Support | USB and TF Card (up to 32GB) |
| Audio Format Support | MP3 |
| Radio Tuner | FM |
| Input Sources | 3.5mm AUX, 6.3mm Microphone |
| Power Source | DC 9V (UL adapter included) |
| Battery | Rechargeable (DC 9V charging port) |
| Controls | Master Volume, Treble, Bass, Echo, Mic Volume knobs; Power, Mode, Light, Play/Pause, Next/Prev buttons |
| Recording Function | Recording/Playback button with built-in microphone |
| Microphone Priority | Yes (dedicated button) |
| Display | LED Display |
| Battery Status Indicator | Yes |
| Light Effects | Light switch for colorful LED lights |
| Accessories Included | Remote Control, Wired Microphone, User Manual, UL Adapter |
| Cleaning | Clean only with dry cloth |
| Safety Warnings | Do not expose to rain or moisture; avoid heat sources; disconnect during lightning |
Frequently Asked Questions - NDS-1514 Naxa
User questions about NDS-1514 Naxa
0 question about this device. Answer the ones you know or ask your own.
Ask a new question about this device
Download the instructions for your Sound system in PDF format for free! Find your manual NDS-1514 - Naxa and take your electronic device back in hand. On this page are published all the documents necessary for the use of your device. NDS-1514 by Naxa.
USER MANUAL NDS-1514 Naxa
natural_image
Black industrial lamp with colorful circular light pattern and red LED strips (no text or symbols visible)WARNING
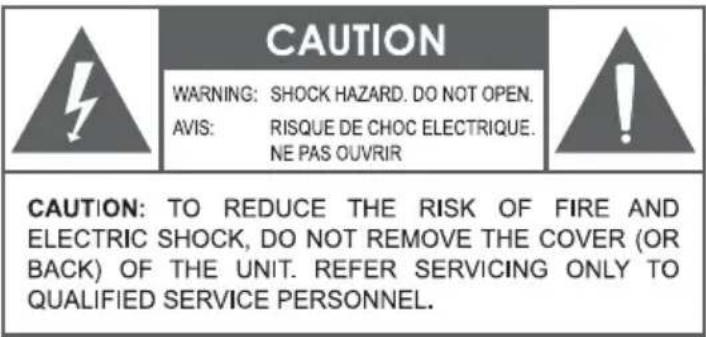
The lightning flash with arrowhead symbol within an equilateral triangle is intended to alert the user to the presence of uninsulated "dangerous voltage" within the product's enclosure that may be of significant magnitude to constitute risk of electric shock. The exclamation point within an equilateral triangle is intended to alert the user to the presence of important operation and servicing instructions in the literature accompanying the appliance.
IMPORTANT SAFETY INSTRUCTIONS
-
Read these instructions.
-
Guard this m anual.
-
Obey a ll a lerts.
-
Follow all instructions.
-
WAR NING: To prevent fire or shock hazard, do not expos e this equipment to rain or moisture. Do not store and operate this product near liquid.
-
C lean only with dry cloth.
-
Not s tore and not operate this product near any heat s ources s uch as radiators and h eat regis ters , s tove or other appliances (including amplifiers ) that produce heat. Keep this product in a well ventilated place.
-
Not ignore the safety purpose of the polarized or grounding plug. A polarized plug has two blades being wider than the other. A grounding plug has two blades plus a round pin to ground. The wide blade or the third prong is intended to provide security. If the provided plug does not fit into your outlet, consult an electrician to replace the outlet.
-
P rotect all wires connected to this unit from being walked on or pinched, particularly at plugs and the point where the cord exits the unit. When unplugging from the electrical outlet, gras p the plug and do not pull the cord.
-
Dis connect the unit during lightning s torms or when long period is to remain unus ed.
-
Keep this unit off when connecting all the devices connected to it.
-
After finis hing the ins talla tion and connections, connect all your equipment with low volume level. Once all devices are connected, slowly increase the volume or level controls to achieve the proper position.
-
Before placement, ins tallation, as s embly or s us pending any product, ins pect all e equipment, s us pens ion, cabinets, trans ducers , brackets and as s ociated equipment.
Any mis sing component, corroded, deformed, or with non-nominal load can reduce the intensity, placement and arrangement of the installation significantly. Any of these conditions can reduce the security of the facility and must be corrected immediately.
Use only suitable equipment for the loading conditions of the installation and that any possibility of reducing term, unexpected overload, never exceed the capacity of the material or equipment.
-
C ons ult a licens ed profes s ional t o ins tall the equipment and make sure that all local, regional and national regulations related to s ecurity are unders tood and adhered to.
-
All services should be performed by qualified professions. Servicing is required when the apparatus has been damaged in any way, as if having the power cord or its damaged connector, or if the machine breaks contact with liquid or if any object is inserted in the unit or if the unit is exposed to rain or moisture, or if the unit does not operate normally, or has been dropped.
CHARGE THE BATTERY FULLY BEFORE FIRST USE TO OPTIMIZE ITS LIFETIME PERFORMANCE.

- USB Port
- Previous Track/Station
- Master Volume Tuning Knob
- Treble Tuning Knob
- Power Switch
- Light Switch
- External DC 12V Input
- Bass Tuning Knob
- Echo Tuning Knob
- Microphone Volume Tuning Knob
-
Play/Pause Button
-
Next Track/Station
- Recording/Playback
(Play a Recording) - Microphone Input
- DC 9V Charging Port
- Microphone Priority Button
- Battery Status Indicator
- LED Display
- Mode Button
- TF Card Slot
- 3.5mm Auxiliary Input
PAIRING A BLUETOOTH® DEVICE
Use Bluetooth ^® mode to stream music from a Bluetooth ^® enabled player (e.g., smartphone or tablet device). A device must be paired with the unit before using them together for first time
- Make sure Bluetooth ^® is enabled on your device and that it is next to the unit before attempting to pair it
- Turn on the DJ Speaker and set it to Bluetooth® mode (Press the MODE Button). The speaker will automatically enter pairing mode and make a beeping sound.
- Use your device to search for nearby Bluetooth devices. The Speaker will be listed as “NDS-1514”. (This function is usually in the Bluetooth® settings menu; refer to your device’s instruction manual to learn more.)
- Select “NDS-1514” from the list of found/available devices. The speaker will make a confirmation tone that connection is successful. You can now start playback on your connected device to begin streaming music to the speaker.
SPECIFICATIONS
Woofer x 1, Driver Size: 15"
Wireless Source: Bluetooth®
Removable Memory Support: USB/Memory Card (32GB Max.)
Audio Format Support: MP3
Tuners: FM
Input Sources: 3.5mm AUX, 6.3mm MIC
Power Source: 9V DC
Accessories Included: Remote Control, Wired Mic., Manual, UL Adapter
FCC NOTICE
This device complies with Part 15 of the FCC Rules. Operation is subject to the following two conditions: (1) this device may not cause harmful interference, and (2) this device must accept any interference received, including that may cause undesired operation.
Note: This equipment has been tested and found to comply with the limits for a Class B digital device, pursuant to Part 15 of the FCC Rules. These limits are designed to provide reasonable protection against harmful interference in a residential installation. This equipment generates, uses and can radiate radio frequency energy and, if not installed and used in accordance with the instructions, may cause harmful interference to radio communications. However, there is no guarantee that interference will not occur in a particular installation. If this equipment does cause harmful interference to radio or television reception, which can be determined by turning the equipment off and on, the user is encouraged to try to correct the interference by one or more of the following measures:
Reorient or relocate the receiving antenna.
Increase the separation between the equipment and receiver.
- Connect the equipment into an outlet on a circuit different from that to which the receiver is connected.
Consult the dealer or an experienced radio/TV technician for help.
CAUTION ON MODIFICATIONS
Any changes or modifications not expressly approved by the grantee of this device may void the authority granted by the FCC to operate the equipment.
SUPPORT
If you have problems with your device, please consult the instructions in this manual. Please also visit us on the web at www.naxa.com to get up to the minute news, alerts, and documentation for your device. For additional assistance, please contact Naxa Technical Support.
Naxa Technical Support
2320 East 49th St. Vernon, CA 90058 (866) 411-6292
http://www.naxa.com/supportcenter/


Brand : Naxa
Model : NDS-1514
Category : Sound system