
NV-GS50EN - Camcorder PANASONIC - Free user manual and instructions
Find the device manual for free NV-GS50EN PANASONIC in PDF.


| Product Type | Digital Video Camera (Camcorder) |
| Model | NV-GS50EN |
| Dimensions (W x H x D) | Approx. 66 x 83 x 110 mm |
| Weight | Approx. 435 g (without battery and cassette); 495 g (with CGA-DU07 and DVM60) |
| Power Source | DC 7.9 / 7.2 V |
| Power Consumption (Recording) | 2.1 W (using viewfinder); 3.0 W (using LCD monitor) |
| Recording Format | Mini DV (Consumer-use Digital Video SD Format) |
| Recording Media | 6.35 mm digital video tape; MultiMediaCard; SD Memory Card |
| Maximum Recording Time (Tape) | SP: 80 min, LP: 120 min (with DVM80) |
| Image Sensor | 1/6-inch CCD |
| Lens | Auto Iris, F1.8, Focal Length 2.3–23 mm, Macro (Full Range AF) |
| Zoom | 10:1 power zoom; digital up to 500x |
| LCD Monitor | 2.5-inch |
| Viewfinder | Color electronic viewfinder |
| Audio Recording | PCM Digital: 16 bit (48 kHz/2ch) or 12 bit (32 kHz/4ch) |
| Minimum Illumination | 1 lx (Color Night View Mode) |
| Still Image Format | JPEG, 640 x 480 pixels |
| Video Output | 1.0 Vp-p, 75 ohm (composite); S-Video: Y/C |
| Digital Interface | DV Input/Output (IEEE1394, 4-pin); USB 2.0 (max 12 Mbps) |
| Accessories Included | AC adaptor, battery pack, remote controller, lens cap, AV cable, S-Video cable, shoulder strap, SD card, USB kit, head cleaner |
| Safety | Do not expose to rain or moisture; use in well-ventilated area; no user-serviceable parts inside. |
| Maintenance | Clean video heads with digital video head cleaner; store in dry place; avoid condensation. |
| Reparability | Refer servicing to qualified service personnel. |
Frequently Asked Questions - NV-GS50EN PANASONIC
User questions about NV-GS50EN PANASONIC
0 question about this device. Answer the ones you know or ask your own.
Ask a new question about this device
Download the instructions for your Camcorder in PDF format for free! Find your manual NV-GS50EN - PANASONIC and take your electronic device back in hand. On this page are published all the documents necessary for the use of your device. NV-GS50EN by PANASONIC.
USER MANUAL NV-GS50EN PANASONIC
Digital Video Camera
數位攝錄影機
Operating Instructions
使別說明書
Model No. NV-GS50EN

Mini D' PAL

MultiMediaCard™

Before use, please read these instructions completely.
使「前,請每新閱讀本說明書。
¥全消息
1 把 DC 輸入導線連接至攝錄影機。
斷開電源時
3 重新裝好手執帶。

用作皮帶拉手時
3 將手執帶繞在手腕上。

安裝肩背帶
2 插入錄影帶。

防止意外抹消
●與此項有關的介紹見 -48-。
打開攝錄影機及選擇工作方式
首先打開電源,然後選擇工作方式。
如何打開電源
7) [OTHER FUNCTIONS1]
其它功能 1 子菜單
[REMOTE]
遥控器方式-8-
[REC LAMP]
錄影指示燈-16-
[BEEP SOUND]
嗶嗶聲-48-
[SHTR EFFECT]
快門效果-18-
[CLOCK SET]
日期和時間設定 -15-
[SELF REC]
自錄-17-
[OWNER ID SET]
擁有者 ID 設定47-
[VOICE POWER SAVE]
聲音節電-54-
8) [OTHER FUNCTIONS2]
其它功能 2 子菜單
[DEMO MODE]
演示方式
- 如 AC 適配器接到攝錄影機,
6) [AV IN/OUT SETUP]
音頻 - 視頻輸入/輸出設定子菜單
[AV JACK]
AV 插座 -32-
[A.DUB INPUT]
音頻拷貝輸入 -32-
[DV OUT]
模擬 - 數位轉換輸出52-
7) [DISPLAY SETUP]
屏幕設定子菜單
8) [OTHER FUNCTIONS]
其它功能子菜單
[REMOTE]
遥控器方式-8-
[CLOCK SET]
日期和時間設定 -15-
[CARD FUNCTIONS]
卡片播放方式主菜單

1) [DELETE CARD FILE]
抹消文件子菜單
[DELETEFILEBYSELECTION]
選擇並抹消某個文件 -43-
[DELETE ALL FILES]
抹消所有文件 -43-
[DELETE TITLE BY SELECTION]
選擇並抹消標題 -43-
2) [CARD EDITING]
可編輯文件子菜單
[RECORD TO TAPE]
錄影到錄影帶-39-
[FILE SEARCH]
搜索文件 -38-
[FILE LOCK]
設定鎖定 -42-
[SLIDE SHOW]
設定幻燈片演示 -39-
[DPOF SETTING]
設定 DPOF42-
[CARD FORMAT]
格式化卡片-43-
3) [DISPLAY SETUP]
屏幕設定子菜單
4) [OTHER FUNCTIONS]
其它功能子菜單
[REMOTE]
遥控器方式-8-
[CLOCK SET]
日期和時間設定 -15-
[VOICE POWER SAVE]
聲音節電-54-
卡片播放方式的捷徑菜單
漸進拍照
●會出現 ⏻ ] 指示。
2 按 [PHOTO SHOT] 鍵 26。

恢復正常錄影時
按 [BACK LIGHT] 鍵。
●與此項有關的介紹見 -49-。
夜視功能
彩色夜視功能
零照度夜視功能
- [AWB] 指示出現。
混合方式:
1 設定 [CAMERA FUNCTIONS] >> [DIGITAL EFFECT] >> [EFFECT1] >> [WIPE] 或 [MIX]。

3 將卡片插口蓋 ⑤ 關緊。
取出卡片時
2 按 [▶] 鍵 ⑧。

•[M.SLIDE▷] 指示顯示。

檢驗選定的圖像
設定 [CARD FUNCTIONS] >>
[CARD EDITING] >> [SLIDE SHOW] >>
[YES] >> [VERIFY] >> [YES]。
3 按 [PHOTO SHOT] 鍵 26。

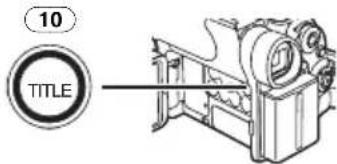
1 按 TITLE 鍵 10。
●會出現標題。
2 按 [MULTI] 鍵 14。

- 會出現標題清單。

- 文件名稱 ①
Information for Your Safety
As this equipment gets hot during use, operate it in a well-ventilated place; do not install this equipment in a confined space such as a bookcase or similar unit.
To reduce the risk of fire, electric shock or product damage, do not expose this equipment to rain, moisture, dripping or splashing and ensure that no objects filled with liquids, such as vases, shall be placed on the equipment.
Movie Camera
●The rating plate is on the underside of the Movie Camera.
AC Adaptor
- The rating plate is on the underside of the AC Adaptor.
Carefully read the Operating Instructions and use the Movie Camera correctly.
- Injury or material damage resulting from any kind of use that is not in accordance with the operating procedures explained in these Operating Instructions are the sole responsibility of the user.
Try out the Movie Camera.
Be sure to try out the Movie Camera before recording your first important event and check that it records properly and functions correctly.
The manufacturer is not liable for loss of recorded contents.
The manufacturer shall in no event be liable for the loss of recordings due to malfunction or defect of this Movie Camera, its accessories or cassettes.
Carefully observe copyright laws.
Recording of pre-recorded tapes or discs or other published or broadcast material for purposes other than your own private use may infringe copyright laws. Even for the purpose of private use, recording of certain material may be restricted.
●Windows is a trademark or registered trademark of Microsoft Corporation U.S.A.
- SD Logo is a trademark.
- All other company and product names in the operating instructions are trademarks or registered trademarks of their respective corporations.
Files recorded on a MultiMediaCard or SD Memory Card
It may not be possible to play back the files on this Movie Camera recorded on and created by other equipment or vice versa. For this reason, check the compatibility of the equipment in advance.
- Keep the Memory Card out of reach of children to prevent swallowing.
Pages for reference
Pages for reference are indicated by dashes either side of a number, for example: -00-
WARNING
Do not remove the cover (or back); there are no user serviceable parts inside.
Refer servicing to qualified service personnel.
Use only the recommended accessories.
Contents
Information for Your Safety 64
Before Use
Standard Accessories 67
Optional Accessories.... 67
Controls and Components.... 68
The Remote Controller 71
Power Supply 72
Charging Time and Available Recording Time 72
The One Touch Free Style Grip Belt.... 73
Attaching the Lens Cap 73
Attaching the Shoulder Strap 74
Inserting a Cassette 74
Turning on the Movie Camera and Selecting Modes 75
Using the Viewfinder/LCD Monitor ..... 75
Using the Menu Screen.... 76
List of Menus 77
Setting Date and Time.... 80
Internal Lithium Battery Recharge..... 80
LP Mode 80
Audio Recording Mode.... 80
Camera Mode
Recording....81
Quick Start.... 82
Photoshot 83
Self-timer Recording.... 84
Zoom In/Out Functions.... 84
Digital Zoom Function 84
Image Stabilizer Function.... 85
Fade In/Out Functions.... 85
Backlight Compensation Function..... 86
Night View Functions.... 86
Wind Noise Reduction Function ..... 87
Cinema Function 87
Recording in Special Situations...... 87
Recording in Natural Colours 88
Adjusting White Balance Manually ..... 88
Manual Shutter Speed Adjustment..... 89
Manual Iris Adjustment.... 90
Manual Focus Adjustment.... 90
Digital Effect Functions.... 90
VCR Mode
Playing Back 94
Finding a Scene You Want to Play Back 94
Slow Motion Playback.... 95
Still Playback/Still Advance Playback.... 95
Finding the End of Recording 96
Index Search Functions 96
Playback Zoom Function 97
Playback Digital Effect Functions...... 97
Playing Back on Your TV 100
Audio Dubbing 100
Copying on an S-VHS (or a VHS) Cassette 101
Recording the Contents of Other Equipment 101
Using the DV Cable for Recording.... 102
CARD Mode
Using a Card.... 103
Recording on a Card.... 103
Playing Back a Card 107
Recording Pictures on a Card to a Tape 108
Slide Show.... 109
Editing a Slide Show.... 110
Creating a Title.... 111
Adding a Title.... 111
Writing Printing Data on a Card ..... 112
Protecting the Files on a Card ..... 112
Deleting the Files Recorded on a Card.... 113
Formatting a Card.... 114
With a PC
USB Connection Kit 115
Using as a Web Camera.... 115
Using a Card in a Personal Computer.... 115
Others
Indications 117
Owner ID 119
Initializing the Modes.... 119
Warning/Alarm Indications 119
Notes and Hints.... 120
Cautions for Use.... 128
Before Requesting Repair
(Problems and Solutions) 133
Explanation of Terms 135
Specifications
Specifications 137
Before Use
Standard Accessories
Illustrated are accessories supplied with the Movie Camera.
 |  | |
 |  |  |
 |  |  |
 |  |  |
1) AC Adaptor, DC Input Lead and AC Mains Lead -72-
●④ Hong Kong Special Administrative Region of China
●⑧ Areas Other than Hong Kong Special Administrative Rigion of China
2) Battery Pack -72-
3) Remote Controller and Button-Type Battery -69-
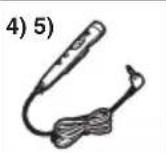
4) Free Style Remote Controller with Mic -70-
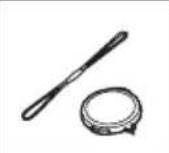
5) Lens Cap and Lens Cap Cord -73-
6) AV Cable -100-
7) S-Video Cable -100-
8) Shoulder Strap -74-
9) SD Memory Card -103-
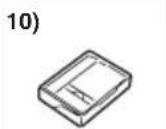
10) Digital Video Head Cleaner -130-
11) USB Connection Kit -115-
Optional Accessories
1) AC Adaptor (VW-AD10E/B)
2) Battery Pack
(Lithium/CGA-DU07/680mAh)
3) Battery Pack (Lithium/CGA-DU14/1360mAh)
4) Battery Pack (Lithium/CGA-DU21/2040mAh)
5) Wide Conversion Lens (VW-LW2707N2E)
6) Tele Conversion Lens (VW-LT2714N2E)
7) ND Filter (VW-LND27E)
8) MC Protector (VW-LMC27E)
9) Stereo Microphone (VW-VMS2E)
10) Shoe Adaptor (VW-SK11E)
11) Tripod (VZ-CT55E)
12) Snow & Rain Jacket (VW-SJGS50E)
13) DV Cable (VW-CD1E)
14) DV Editing Software with DV Interface Board (VW-DTM21E)
15) DV Editing Software with DV Interface Card (VW-DTM22E)
16) DV Editing Software (VW-DTM20E)
17) Internet Videophone Software (VW-DTC1E)
18) SD Memory Card Application Software (VW-SWA1E) • "TitleStudio" software for title creation, and "SD-Jukebox" software for recording music are included. (However, this Movie Camera cannot play back music.)
19) SD Memory Card (RP-SD008/RP-SD016/RP-SD032/ RP-SD064/RP-SD128/RP-SDH256/ RP-SDH512)
20) MultiMediaCard (VW-MMC8E/VW-MMC16E)
21) PC Card Adaptor for SD Memory Card (BN-SDABPE)
22) USB Reader Writer for SD Memory Card (BN-SDCAPE)
- Some optional accessories may not be available in some countries.
Controls and Components
Movie Camera
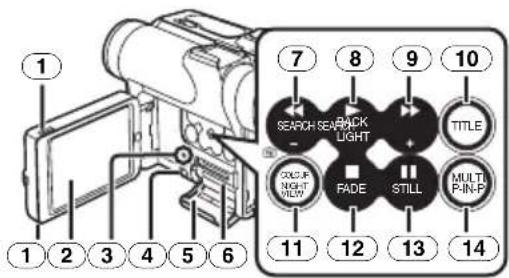
①LCD Monitor Open Knob [OPEN▼] -75-
② LCD Monitor -75-, -132-
Due to limitations in LCD production technology, there may be some tiny bright or dark spots on the LCD Monitor screen. However, this is not a malfunction and does not affect the recorded picture.
③ Card Access Lamp [ACCESS] -103-
④ Card Slot Cover Open Lever [OPEN] -103-
⑤ Card Slot Cover -103-
⑥ Card Slot -103-
⑦ Rewind/Review Button [◀◀] -94-, -107- Reverse Search Button [SEARCH-] -82- Recording Check Button [▶] -81-
⑧ Play Button [▶] -94-, -107- Backlight Button [BACK LIGHT] -86-
⑨ Fast Forward/Cue Button [▶▶] -94-, -107- Forward Search Button [SEARCH+] -82-
10 Title Button TITLE -111-
⑪ Colour Night View Button [COLOUR NIGHT VIEW] -86-
12 Stop Button [■] -94-, -107-Fade Button [FADE] -85-
13 Pause Button [III] -95-, -107-Still Button [STILL] -83-
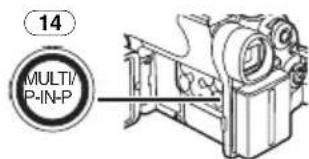
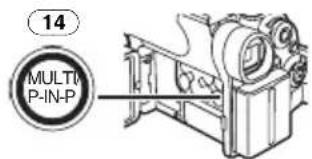
14 Multi Button [MULTI] -93-, -99-, -108-Picture-in-Picture Button [P-IN-P] -92-
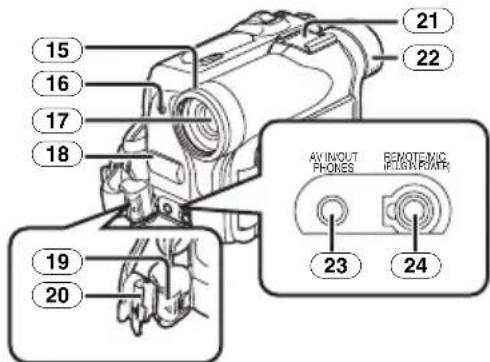
15 Lens Hood -132-
16 Recording Lamp -81-
17 Lens
18 Microphone (built-in, stereo) -84-, -87-
19 Lock Button -73-
20 Lock Cover -73-
21 Accessory Shoe
- Accessories, such as a stereo microphone (VW-VMS2E; optional), are attached here.
22 Eyecup
23 Audio-Video Input/Output Socket [AV IN/OUT] -100- Headphone Socket [PHONES]
- Connecting an AV Cable to this socket activates the Movie Camera's built-in speaker, but connecting a headphone, etc. deactivates it.
- When plugging the pin plug of the AV Cable to this socket, plug it in as far as it goes.
24 Socket for Free Style Remote Controller with Mic [REMOTE]-82-Microphone Socket [MIC]
- When connecting an external microphone or audio equipment to this socket, the built-in microphone does not operate. -124-
- When connecting the Free Style Remote Controller with Mic to this socket and the [TALK] Button is pressed, the built-in microphone does not operate. -82-
- When plugging the pin plug of the Free Style Remote Controller with Mic to this socket, plug it in as far as it goes.
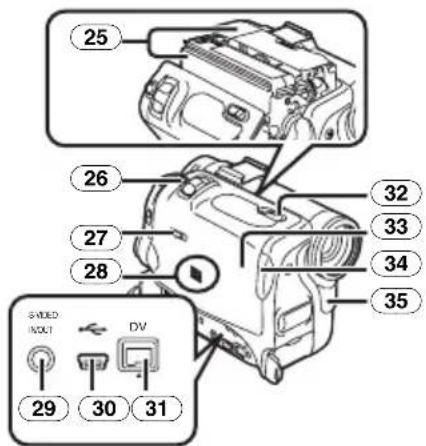
25 Cassette Holder
26 Photoshot Button [PHOTO SHOT] -83-, -104-, -109-
27 Tape/Card Selector [TAPE/CARD/CARD MODE] -103-
28 Speaker -94-
29 S-Video Input/Output Socket [S-VIDEO IN/OUT]-100-
30 USB Socket [ ]-115-
31 DV Terminal [DV] -102-
- Connect this to the digital video equipment.
32 Cassette Eject Lever [OPEN/EJECT] -74-
33 Cassette Compartment Cover -74-
34 Cassette Holder Close Button [PUSH CLOSE] -74-
35 White Balance Sensor -88-Remote Control Sensor -71-

36 Viewfinder -75-, -132-
Due to limitations in LCD production technology, there may be some tiny bright or dark spots on the Viewfinder screen. However, this is not a malfunction and does not affect the recorded picture.
37 Eyepiece Corrector Knob -75-
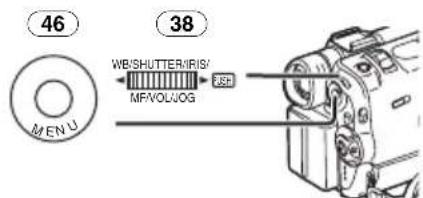
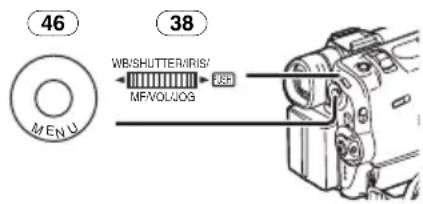
38 Multi-Function Dial [PUSH] -76-, -94-
39 Zoom Lever [W/T] -84-
40 Reset Button [RESET] -119-
41 Quick Start Recording Button [QUICK START] -82-
42 Quick Start Recording Lamp -82-
43 Off/On Mode Selector Switch [OFF/ON/MODE] -75-, -81-, -128-
44 Recording Start/Stop Button
-81-, -105-
45 Operation Mode Lamps [CAMERA/VCR/CARD PB] -75-, -81-, -94-, -107-

46 Menu Button [MENU] -76-
47 Mode Selector Switch [AUTO/MANUAL/FOCUS] -81-, -87-
48 Shoulder Strap Holders -74-
49 Grip Belt (One Touch Free Style Grip Belt) -73-
50 Battery Eject Button [PUSH BATT] -72-
51 Battery Holder
52 Tripod Receptacle
●Used for mounting the Movie Camera on an optional tripod.
Remote Controller
Using the wireless Remote Controller that is supplied with the Movie Camera, most of the Movie Camera functions can be operated from a distance.
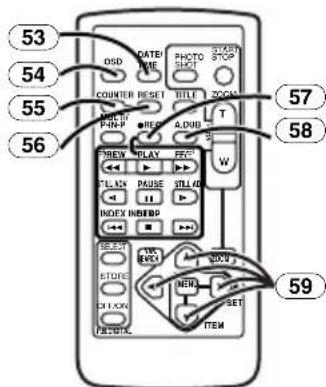
53 Date/Time Button [DATE/TIME] -119-
54 Indication Output Button [OSD] -100-
55 Counter Indication Shift Button [COUNTER] -118-
56 Reset Button [RESET] -136-
57 Recording Button [REC] -102-
58 Audio Dubbing Button [A.DUB] -100-
59 Cursor Buttons for Variable Speed Search Function [▲, ▼] -95-Direction Buttons for Playback Zoom Function [▲, ◀, ▶, ▼] -97-
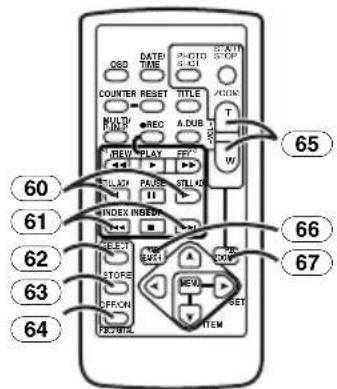
60 Slow Motion/Still Advance Buttons [◀, ▶] (◀: reverse, ▶: forward-)
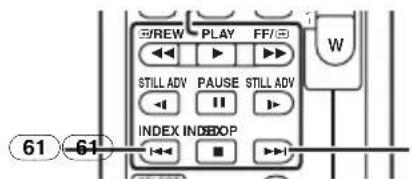
61 Index Search Buttons [|◀◀, ▶▶] (|◀◀: reverse, ▶▶|: forward) -96-
62 Selection Button [SELECT] -98-
63 Store Button [STORE] -98-
64 Off/On Button [OFF/ON] -98-
65 Zoom/Volume Button [ZOOM/VOL] -84-, -94-, -97-
66 Variable Speed Search Button [VAR. SEARCH] -95-
67 Playback Zoom Button [P.B. ZOOM] -97-
The following buttons function in the same manner as the corresponding buttons on the Movie Camera.

68 Photoshot Button [PHOTO SHOT] -83-, -104-, -109-
69 Title Button TITLE -111-
70 Multi-Picture/Picture-in-Picture Button [MULTI/P-IN-P] -92-, -99-, -108-
71 Rewind/Review Button [◀◀]
-94-, -107-
72 Pause Button [III] -95-, -107-
73 Stop Button [■] -94-, -107-
74 Recording Start/Stop Button [START/STOP] -81-, -105-
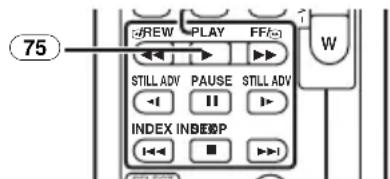
75 Play Button [▶] -94-, -107-
76 Fast-forward/Cue Button [▶▶]
-94-, -107-
77 Menu Button [MENU] -76-
78 Set Button [SET] -76-
79 Item Button [ITEM] -76-
■ Free Style Remote Controller with Mic
This controller allows the scene to be shot in various angles, high to low and is also convenient when the Tripod is used. When you do not use this controller, attach the clip to the Grip Belt for convenience.
This controller allows the Movie Camera to be used more conveniently by a left-handed user.

80 Microphone [MIC] -82-
81 Recording Start/Stop Button [REC]
82 Zoom Lever [W/T]
- Zoom speed changes in 2 stages.
83 Photoshot Button [PHOTO SHOT]
84 Microphone Switch Button [TALK] -82-
- When connecting the Free Style Remote Controller with Mic to [REMOTE] Socket and the [TALK] Button is pressed, the built-in microphone does not operate.
85 Clip
- Insert the plug securely into the [REMOTE] Socket as far as it will goes. A loose connection will spoil normal operation.
The Remote Controller
- Inserting a Button-type Battery
Before using the Remote Controller, insert the supplied button-type battery.
1 While pressing the Stopper ①, pull out the Battery Holder.

2 Insert the button-type battery with the (+) marking facing upward.

3 Insert the Battery Holder into the Remote Controller.

- When the button-type battery is exhausted, replace it with a new CR2025 battery. (A battery is normally expected to last about 1 year. However, it depends on operation frequency.)
●Make sure to match the poles correctly when inserting the battery.
CAUTION
Danger of explosion if battery is incorrectly replaced. Replace only with the same or equivalent type recommended by the equipment manufacturer. Discard used batteries according to manufacturer's instructions.
WARNING
Risk of fire, explosion and burns. Do not recharge, disassemble, heat above 100°C or incinerate. Keep the Button-Type battery out of the reach of children. Never put Button-Type battery in mouth. If swallowed call your doctor.
Using the Remote Controller
1 Direct the Remote Controller to the Remote Control Sensor 35 of the Movie Camera and press an appropriate button.

- Distance from the Movie Camera: Within approximately 5 metres
- Angle: Within approximately 15° in the vertical and horizontal directions from the central axis
●The above operative ranges are for indoor use. Outdoors or under strong light, the Movie Camera may not operate properly even within the above ranges.
- Within a 1-metre range, you can also use the Remote Controller on the LCD Monitor side of the Movie Camera.
Selecting Remote Controller Modes
When 2 Movie Cameras are used simultaneously, they can be operated individually by selecting different Remote Controller Modes.
- If the Remote Controller Mode of the Movie Camera and that of the Remote Controller do not match, [REMOTE] Indication is displayed.
Setup on the Movie Camera:
Set [REMOTE] on the [OTHER FUNCTIONS] Sub-Menu to the desired Remote Controller Mode. (-78-)
Setup on the Remote Controller:
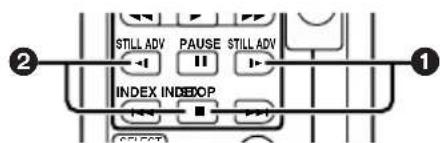
[VCR1]:
Press the [▶] Button and [■] Button simultaneously. ①
[VCR2]:
Press the [◀] Button and [■] Button simultaneously. ②
- When the battery in the Remote Controller is replaced, the mode is automatically reset to [VCR1] Mode.
Power Supply
Using the AC Adaptor

1 Connect the DC Input Lead to the Movie Camera.
2 Connect the DC Input Lead to the AC Adaptor.
3 Connect the AC Mains Lead to the AC Adaptor and the AC mains socket.
- The AC Mains Lead's outlet plug does not fit entirely into the AC Adaptor socket. A gap will remain as shown ①.
- Before connecting or disconnecting the power supply, set the [OFF/ON/MODE] Switch on the Movie Camera to [OFF] and make sure that [CAMERA/VCR/CARD PB] Lamps are not lit.
Using the Battery
Before use, fully charge the Battery.
1 Attach the Battery to the AC Adaptor and charge it.
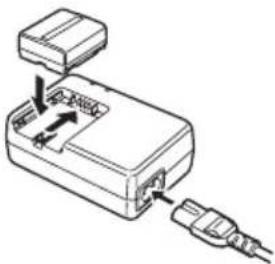
- Since the Battery will not be charged when the DC Input Lead is connected to the AC Adaptor, disconnect it from the AC Adaptor.
●The [POWER] Lamp and [CHARGE] Lamp lights up, and charging starts. - When the [CHARGE] Lamp goes off, charging is completed.
2 Attach the charged Battery to the Movie Camera.

Disconnecting the Power Source
Set the [OFF/ON/MODE] Switch 43 to [OFF] and, while pressing the [PUSH BATT] Button 50, slide the Battery or DC Input Lead upward to disconnect it.

- For other notes concerning this item, see -120-.
Charging Time and Available Recording Time
Ⓐ Charging Time
⑧ Maximum Continuous Recording Time
© Intermittent Recording Time (Intermittent Recording Time is the available recording time with repeated recording and stopping actions.) "1h10min." indicates 1 hour and 10 minutes.
●Battery CGA-DU07 is supplied.
- The times shown in the table are approximate times. The numbers in parentheses indicate the recording time when the LCD Monitor is used. In actual use, the available recording time may be shorter.
- The times shown in the table are for continuous recording at a temperature of 20°C and humidity of 60% . If the Battery is charged at a higher or lower temperature, the charging time may be longer.
The One Touch Free Style Grip Belt
To Use as a Grip Belt
Adjust the length of the Grip Belt to the size of your hand.
1 Detach the tip of the Grip Belt.

2 Slide the pad to obtain the optimum length.

3 Reattach the Grip Belt.
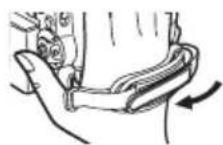
■ To Use as a Hand Strap
Using the Grip Belt as the hand strap makes it easier to handle and carry the Movie Camera. It is more convenient to use with the Free Style Remote Controller with Mic.
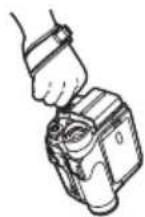
1 Open the Lock Cover 20 by holding the tabs on both sides ①, press the Lock Button 19 and detach the Grip Belt.

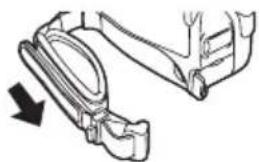
2 Slide the pad of the Grip Belt.
3 Attach the Grip Belt around your wrist.
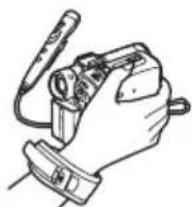
- When putting the Grip Belt back to the Grip Belt Attachment part, press on the Lock Cover ② to be securely locked.

Attaching the Lens Cap
To protect the Lens surface, attach the Lens Cap.
1 Pass one end of the Lens Cap Cord through the attached eye on the Lens Cap. Then pass the other end through the loop made by itself and pull tight.
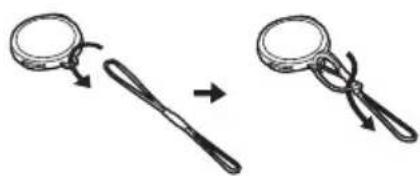
2 Pass the end of the Lens Cap Cord through the hole in the Grip Belt Attachment part and the Lens Cap through the Lens Cap Cord.
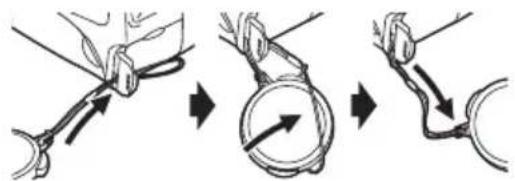
- The removed Lens Cap can be hooked onto the Grip Belt. (It is not possible when using as a hand strap.)
- When you are not recording, be sure to keep the Lens Cap attached to the Lens for protection.

Attaching the Shoulder Strap
We recommend that you attach the Shoulder Strap before going out of doors to record so as to avoid dropping the Movie Camera.
1 Pull the end of the Shoulder Strap through the Shoulder Strap Holder on the Movie Camera.

2 Fold the tip of the Shoulder Strap, run it through the Shoulder Strap Length Adjuster, and pull it.
- Pull it out more than 2 cm ① from the Shoulder Strap Length Adjuster so that it cannot slip off.
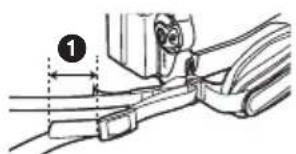
- Attach the other end of the Shoulder Strap to the other Shoulder Strap Holder as the same way.
Inserting a Cassette
1 Slide the [OPEN/EJECT] Lever 32 toward the front and pull down to open the Cassette Compartment Cover.

2 Insert a Cassette.

3 Close the Cassette Holder by pressing the [PUSH CLOSE] Button 34.

4 Close the Cassette Compartment Cover.

Accidental Erasure Prevention
Opening the accidental erasure prevention slider ① on the cassette (by sliding it in the [SAVE] arrow direction) prevents recording. To enable recording, close the accidental erasure prevention slider (by sliding it in the [REC] arrow direction).
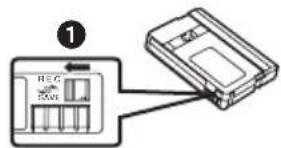
- For other notes concerning this item, see -120-.
Turning on the Movie Camera and Selecting Modes
Turn on the power first and then select modes.
How to Turn on the Power 1 Set the [OFF/ON/MODE] Switch ④3 to [ON] while pressing the button ①.
●The [CAMERA] Lamp 45 lights up.

How to Switch Modes 2 Rotate the [OFF/ON/MODE] Switch 43.
- With each rotate, the Mode changes.
●The appropriate Mode Lamp lights up.

How to Turn off the Power 3 Set the [OFF/ON/MODE] Switch ④3 to [OFF] while pressing the button ①.
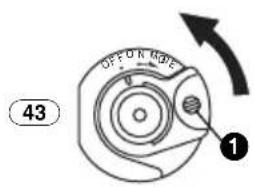
Using the Viewfinder/LCD Monitor
Using the Viewfinder
Before using the Viewfinder, adjust the field of view so that the displays inside the Viewfinder become clear and easy to read.
1 Pull the Viewfinder.
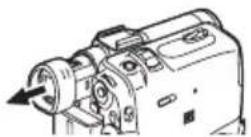
2 Adjust by turning the Eyepiece Corrector Knob 37.

Using the LCD Monitor
With the LCD Monitor open, you can also record the picture while watching it.
1 Put a finger on the [OPEN▼] Knob ① and pull the LCD Monitor ② out about 90° in the direction of the arrow.
●The Viewfinder goes off.

2 Adjust the LCD Monitor angle according to the desired recording angle.
- The LCD Monitor can rotate a maximum of 180° ① from the vertical position to the upward direction and a maximum of 90° ② to the downward direction. Forcefully rotating the LCD Monitor beyond these ranges will damage the Movie Camera.

Closing the LCD Monitor
Push the LCD Monitor until it is securely locked.
- Make sure the Card Slot Cover is closed.
■ Adjusting Brightness and Colour Level
When [LCD/EVF SET] on the [DISPLAY SETUP] Sub-Menu is set to [YES], the following items are displayed.
![LCD/EVF SET LCD BRIGHTNESS [ - ] | | | | ---- [ + ] LCD COLOUR LEVEL [ - ] | | | | ---- [ + ] EVF BRIGHTNESS [ - ] | | | | ---- [ + ] PRESS MENU TO RETURN](/content/2026/05/991746/images/81b4b77ec4315953a7b77d6f47c9fddf68afaf3eb81e5e31c85bd66c1cfc4712.jpg)
LCD Brightness [LCD BRIGHTNESS]
It adjusts the brightness of the image on the LCD screen.
LCD Colour Level
[LCD COLOUR LEVEL]
It adjusts the colour saturation of the image on the LCD screen.
Brightness of the Viewfinder [EVF BRIGHTNESS]
It adjusts the brightness of the image in the Viewfinder.
To Adjust
Press the [PUSH] Dial and select the item to be adjusted, and then turn the [PUSH] Dial to raise or lower the number of vertical bars in the Bar Indication.
●A larger number of vertical bars indicates stronger brightness or colour saturation.
To Increase the Brightness of the Entire LCD Monitor
Set the [LCD MODE] on the [DISPLAY SETUP] Sub-Menu to [BRIGHT].
• These adjustments do not affect the recorded images.
- For other notes concerning this item, see -132-.
Using the Menu Screen
To facilitate the selection of a desired function or setup, this Movie Camera displays various function setups on Menus.
1 Press the [MENU] Button 46.

- The Menu corresponding to the Mode selected by using the [OFF/ON/MODE] Switch 43 is displayed.
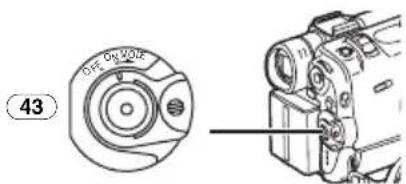
2 Turn the [PUSH] Dial 38 to select a desired Sub-Menu.
- Turn the [PUSH] Dial 38 to display the highlighted item.
3 Press the [PUSH] Dial 38 to display the selected Sub-Menu.
4 Turn the [PUSH] Dial 38 to select the item to be set.
5 Press the [PUSH] Dial 38 to set the selected item to a desired mode.
- With each press of the [PUSH] Dial, the cursor [▶] moves to the next mode. Menu items that cannot be used in combination with the selected item are displayed in dark blue.
- While a Menu is displayed, you cannot record or play back. Menus can be displayed during playback but not during recording. The above operations can be done using the [MENU] Button, [SET] Button and [ITEM] Button on the Remote Controller. (-70-)
To Exit the Menu Screen
Press the [MENU] Button again.
About the Menu Mode Setting
The setting selected on the Menu will be retained even when the Movie Camera is turned off. However, if the Battery or AC Adaptor is disconnected before turning off the Movie Camera, the selected setup may not be retained. (But, the setups of [EFFECT2] (-91-) are not retained.)
- Menu operation flow is shown in this text by >>.
■ File Selection in the Card Playback Mode
A File Selection Operation may be necessary during Menu Operations. In this case, carry out the following procedure.
1 Turn the [PUSH] Dial 38 and select a file.
- The selected file is marked by a frame.

2 Press the [PUSH] Dial 38 to confirm the selection of the file.
● After the above File Selection Procedure, carry out the various Menu Operations. (The above procedure will not be repeated in the following instructions.)
List of Menus
The figures of the Menus are for explanation purposes only, and they are different from the actual Menus.
[CAMERA FUNCTIONS]
Camera Mode Main-Menu
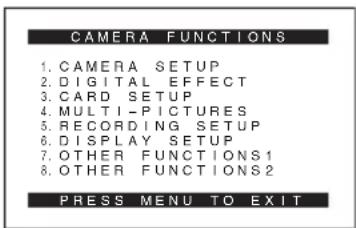
1) [CAMERA SETUP]
Camera Setup Sub-Menu
[PROG.AE]
Auto Exposure Mode -87-
[PROGRESSIVE]
Progressive Photoshot Mode -83-
[SIS]
Image Stabilizer -85-
[D.ZOOM]
Digital Zoom -84-
[CINEMA]
Cinema-like Format Recording -87-
[SELF TIMER]
Self-timer Recording -84-
[WEB CAMERA]
Web Camera Mode -115-
[RETURN]
Returning to the Main-Menu
- If you set [RETURN] to [YES], the menu changes back to the Main-Menu.
2) [DIGITAL EFFECT]
Digital Effect Functions Sub-Menu
[ EFFECT1 ]
Digital Effects 1 -90-
[ EFFECT2]
Digital Effects 2-91-
3) [CARD SETUP]
Card Setup Sub-Menu
[PICTURE QUALITY]
Picture Quality -104-
[MPEG4 MODE]
MPEG4 Picture Quality -106-
[BURST MODE]
Card Continuous Photoshot -104-
[CREATE TITLE]
Title Creation -111-
4) [MULTI-PICTURES]
Multi-Picture Mode Sub-Menu
[SCAN MODE]
Multi-Picture Mode -92-
[SPEED]
Strobe Multi-Picture Speed -92-
[SWING]
Swing Mode -92-
[P-IN-P]
Position of Small Picture inside Normal
Picture -92-
5) [RECORDING SETUP]
Recording Setup Sub-Menu
[REC SPEED]
Recording Speed Mode -80-
[AUDIO REC]
Audio Recording Mode -80-
[SCENE INDEX]
Scene Index Mode -96-
[WIND CUT]
Wind Noise Reduction -87-
[ZOOM MIC]
Zoom Microphone -84-
6) [DISPLAY SETUP]
Display Setup Sub-Menu
[DATE/TIME]
Date and Time Indication -119-
[C.DISPLAY]
Counter Display Mode -118-
10. FEDERAL
Counter Reset -136-
- It resets the counter to zero. However, it cannot reset the Time Code.
[DISPLAY]
Display Mode -119-
[LCD MODE]
LCD Lighting Mode -76-
[LCD/EVF SET]
LCD and Viewfinder Adjustment -76-
7) [OTHER FUNCTIONS1]
Other Functions 1 Sub-Menu
[REMOTE]
Remote Controller Mode -71-
[REC LAMP]
Recording Lamp -81-
[BEEP SOUND]
Beep Sound -120-
[SHTR EFFECT]
Shutter Effect-83-
[CLOCK SET]
Date and Time Setting -80-
[SELF REC]
Recording Yourself -82-
[OWNER ID SET]
Owner ID Setting -119-
[VOICE POWER SAVE]
Voice Power Save-127-
8) [OTHER FUNCTIONS2]
Other Functions 2 Sub-Menu
[DEMO MODE]
Demonstration Mode
- If no operation takes place for approximately 10 minutes after the AC Adaptor was connected to the Movie Camera and the [OFF/ON/MODE] Switch was turned to [ON] without inserting a Cassette or a Card, the Movie Camera is automatically set to Demonstration Mode for introducing its functions. If any button is pressed or operated, the Demonstration Mode is cancelled. The Demonstration Mode can be started by setting [DEMO MODE] to [ON] and by exiting the Menu. To terminate the Demonstration Mode, insert a Cassette or set the [DEMO MODE] to [OFF].
[INITIAL SET]
Initial Setting Mode -119-
[VCR FUNCTIONS]
VCR Mode Main-Menu
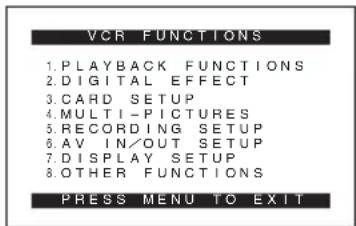
1) [PLAYBACK FUNCTIONS]
Playback Functions Sub-Menu
[BLANK SEARCH]
Blank Search -96-
[RECORD TO CARD]
Recording to Card -105-
[SEARCH]
Index Search Mode -96-
[12bit AUDIO]
Audio Selector -100-
[AUDIO OUT]
Audio Output Mode -124-
[RETURN]
Returning to the Main-Menu
2) [DIGITAL EFFECT]
Playback Digital Effect Functions
Sub-Menu
[ EFFECT]
Digital Effect On/Off -98-
[EFFECT SELECT]
Digital Effect Selection -98-
3) [CARD SETUP]
Card Setup Sub-Menu
[PICTURE QUALITY]
Picture Quality -104-
[MPEG4 MODE]
MPEG4 Picture Quality -106-
[CREATE TITLE]
Title Creation -111-
4) [MULTI-PICTURES]
Multi-Picture Mode Sub-Menu
[SCAN MODE]
Multi-Picture Mode -98-
[SPEED]
Strobe Multi-Picture Speed -98-
[SWING]
Swing Mode -98-
5) [RECORDING SETUP]
Recording Setup Sub-Menu
[REC SPEED]
Recording Speed Mode -80-
[AUDIO REC]
Audio Recording Mode -80-
6) [AV IN/OUT SETUP]
Audio-Video Input/Output Setup
Sub-Menu
[AV JACK]
AV Socket -100-
[A.DUB INPUT]
Audio Dubbing Input -100-
[DV OUT]
Analog-Digital Conversion Output -125-
7) [DISPLAY SETUP]
Display Setup Sub-Menu
●All of the items on the
[DISPLAY SETUP] Sub-Menu are the same as those on the
[DISPLAY SETUP] Sub-Menu of the
[CAMERA FUNCTIONS] Main-Menu.
8) [OTHER FUNCTIONS]
Other Functions Sub-Menu
[REMOTE]
Remote Controller Mode -71-
[CLOCK SET]
Date and Time Setting -80-
![PANASONIC NV-GS50EN - [CLOCK SET] - 1](/content/2026/05/991746/images/46332c0de5f6d741282204221fde4474f7c1c2ea7cf0f3c431c03dff9c882924.jpg)
[CARD FUNCTIONS]
Card Playback Mode Main-Menu
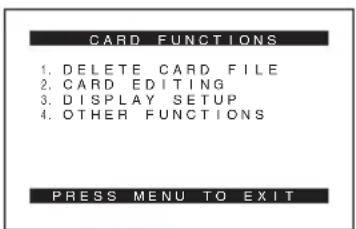
1) [DELETE CARD FILE]
Deleting a File Sub-Menu
[DELETEFILEBYSELECTION]
Selecting and Deleting a File -113-
[DELETE ALL FILES]
Deleting All Files -113-
[DELETE TITLE BY SELECTION]
Selecting and Deleting a Title -113-
2) [CARD EDITING]
Editing a File Sub-Menu
[RECORD TO TAPE]
Recording to Tape -109-
[FILE SEARCH]
Searching a File -108-
[FILE LOCK]
Setting the Lock -113-
[SLIDE SHOW]
Setting a Slide Show -109-
[DPOF SETTING]
Setting DPOF -112-
[CARD FORMAT]
Formatting a Card -114-
3) [DISPLAY SETUP]
Display Setup Sub-Menu
●All of the items on the
[DISPLAY SETUP] Sub-Menu are the same as those on the
[DISPLAY SETUP] Sub-Menu of the
[CAMERA FUNCTIONS] Main-Menu.
4) [OTHER FUNCTIONS]
Other Functions Sub-Menu
[REMOTE]
Remote Controller Mode -71-
[CLOCK SET]
Date and Time Setting -80-
[VOICE POWER SAVE]
Voice Power Save -127-
Short-Cut Menus of the Card
Playback Mode
If you use the Short-Cut Menu, the Card Playback Mode Menu can be called up quickly. Press the [PUSH] Dial to display the Short-Cut Menu, and turn the [PUSH] Dial to select the desired Menu.
FILE SEARCH
DELETE FILE
FILE LOCK
DPOF SETTING
EXIT
[FILE SEARCH]
The [FILE SEARCH] Menu for finding files by number appears. (-108-)
[DELETE FILE]
The [DELETE FILE] Menu for deleting the file being displayed appears. (-113-) Use this Menu after the file to be deleted appears.
[FILE LOCK]
The [FILE LOCK] Menu for avoiding accidental erasure of files (Lock Setting) being displayed appears. (-113-) Use this Menu after the file to be locked appears.
[DPOF SETTING]
The [DPOF SETTING] Menu for setting DPOF to the file displayed appears.
(-112-) Use this Menu after the file for DPOF Setting appears.
[EXIT]
It is for terminating the Short-Cut Menu.
Setting Date and Time
Since the internal clock of the Movie Camera has a slight imprecision, make sure to check the time before recording.
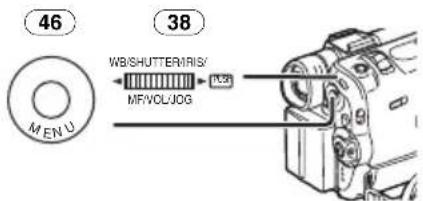
1 Set [CAMERA FUNCTIONS] >>
[OTHER FUNCTIONS1] >>
[CLOCK SET] >> [YES].
Or set [VCR FUNCTIONS] or
[CARD FUNCTIONS] >>
[OTHER FUNCTIONS] >>
[CLOCK SET] >> [YES].
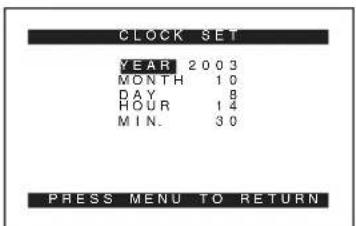
2 Press the [PUSH] Dial 38 to select [YEAR], [MONTH], [DAY], [HOUR] or [MIN.] and turn to set it to a desired value.
- Year will cycle in the order shown below. 2000, 2001, ..., 2089, 2000, ...
3 Press the [MENU] Button 46 to finish setting the date and time.
- The clock operation starts from [00] second.
- The Menu will disappear when the [MENU] Button is pressed again.
- If the built-in battery is weak, the [💡] Indication flashes. In this case, charge the built-in battery.
●The clock employs the 24-hour system.
Internal Lithium Battery Recharge
The internal lithium battery sustains the operation of the clock. When the [∅] Indication flashes, the internal lithium battery is near exhaustion.

1 Connect the AC Adaptor to the Movie Camera with the power turned off and then connect to the AC Mains socket.

● After charging for 4 hours, the built-in lithium battery can power the clock for approximately 3 months.
LP Mode
A desired recording speed can be selected with [REC SPEED] on the [RECORDING SETUP] Sub-Menu. If LP Mode is selected, the recording time becomes 1.5 times longer than that of SP Mode.
Although the image quality does not decrease with the LP Mode recording, mosaic-pattern noise may appear on a playback image, or some normal functions may be restricted.
- The contents that are recorded in LP Mode are not completely compatible with other equipment.
●Audio dubbing is not possible with LP Mode. (-100-)
Audio Recording Mode
The sound quality of the recorded sound can be selected with [AUDIO REC] on the [RECORDING SETUP] Sub-Menu. High sound-quality recording is possible with "16 bit 48 kHz 2 track" Mode. With the "12 bit 32 kHz 4 track" Mode, the original sound can be recorded on 2 tracks in stereo, while the other 2 tracks can be used for Audio Dubbing.
Camera Mode
Recording
When recording with the [AUTO/MANUAL/FOCUS] Switch 47 set to [AUTO], the Movie Camera automatically adjust the focus and white balance. In some cases, they cannot be adjusted automatically and need to be adjusted manually. (-88-, -90-)

- Before turning on the power, remove the Lens Cap. If the Lens Cap is still attached when the power is turned on, Automatic White Balance Adjustment (-88-) may not function correctly.
1 Set the [OFF/ON/MODE] Switch 43 to [ON].
●The [CAMERA] Lamp 45 lights up.

2 Set the [TAPE/CARD/CARD MODE] Selector 27 to [TAPE].
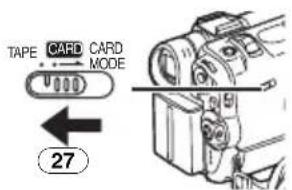
3 Press the Recording Start/Stop Button 44.
- Recording starts.
● After the [RECORD] is displayed, it changes to [REC].

■ Recording Lamp (Tally Lamp)
The Recording Lamp 16 lights up during recording and alerts those being recorded that recording is in progress.

●The Recording Lamp does not light up if the [REC LAMP] on the [OTHER FUNCTIONS1] Sub-Menu is set to [OFF].
To Pause the Recording Press the Recording Start/Stop Button 44 again.
The [PAUSE] Indication is displayed.

- If the Recording Pause Mode continues for more than 6 minutes, the power is turned off automatically for tape protection and power conservation. To resume recording from this condition, turn off, then turn on the power again.
To Check the Recording
By pressing the [☐] Button ⑦ briefly in the Recording Pause Mode, you can play back the last few seconds of the recorded scene.
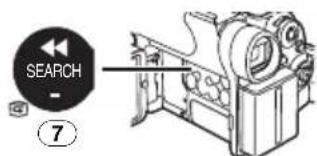
- The [CHK] Indication is displayed. After checking, the Movie Camera resumes the Recording Pause Mode.
■ To View the Recorded Scene while the Recording Is Paused (Camera Search)
The recorded scene can be viewed by keep pressing the [SEARCH-] Button ⑦ or [SEARCH+] Button ⑨ in the Recording Pause Mode.

- When the [SEARCH—] Button is pressed, images are played back in the reverse direction.
- When the [SEARCH+] Button is pressed, images are played back in the forward direction.
■ To Finish the Recording
Set the [OFF/ON/MODE] Switch 43 to [OFF].
- For other notes concerning this item, see -120-.
■ To Add a Sound while Recording
With the supplied Free Style Remote Controller with Mic connected to the [REMOTE] Socket 24, you can add a narration while recording is in progress. While the [TALK] Button 84 is pressed, the [Indication] is displayed and the sound is recorded from [MIC] 80.
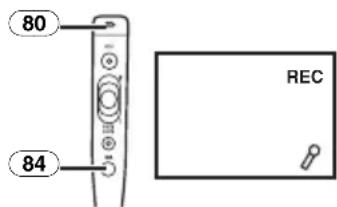
- While the [TALK] Button is pressed, the built-in microphone does not operate.
Recording Yourself
By opening the LCD Monitor and rotating it frontward (to the lens side), you can let the subject in front of the Movie Camera monitor the shot while recording is in progress.

- When the LCD Monitor is opened, the Viewfinder is disabled automatically. However, when the LCD Monitor is rotated frontward, the image is also shown in the Viewfinder.
- If you prefer to have the image on the LCD Monitor to look like an image in a mirror, set [SELF REC] on the [OTHER FUNCTIONS1] Sub-Menu to [MIRROR]. Images are recorded normally and no left and right reversal occurs.
- If [MIRROR] is used during self-recording, only the basic indications, such as the Recording Indication [☐(Red) or [●], Recording Pause Indication [☐(Cyan) or [●■■] and Remaining Battery Power Indication [☐■■■], are displayed.
- If a general Warning/Alarm Indication [!] appears, return the LCD Monitor to the original position in order to check the specific content of the Warning/Alarm Indication.
Quick Start
By pressing the [QUICK START] Button 41, and the Movie Camera will be ready for recording in approximately 1.3 seconds after the Movie Camera is turned on.
1 Press the [QUICK START] Button 41.
●The Quick Start Recording Lamp 42 lights up.
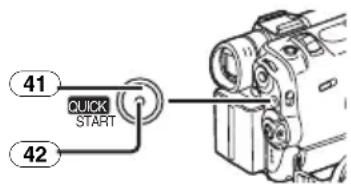
2 Set the [OFF/ON/MODE] Switch 43 to [OFF].
●The Quick Start Recording Lamp remains lit.

3 Set the [OFF/ON/MODE] Switch 43 to [ON].
●The Movie Camera will be ready for recording in approximately 1.3 seconds.
- For other notes concerning this item, see -121-.
Photoshot
This Movie Camera can take approximately 7 seconds still pictures containing sound.
1 Set the [TAPE/CARD/CARD MODE] Selector 27 to [TAPE].
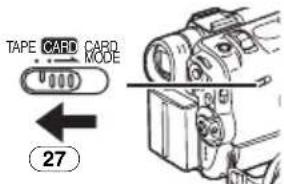
2 Press the [PHOTO SHOT] Button 26 in the Recording Pause Mode.

●The Movie Camera records a still picture for about 7 seconds and then switches back to the Recording Pause Mode.
- If you set [SHTR EFFECT] on the [OTHER FUNCTIONS1] Sub-Menu to [ON], you can add an image and a sound like releasing the shutter.
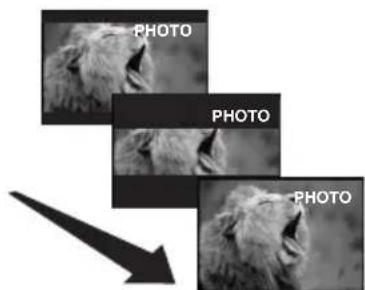
Progressive Photoshot
With the Progressive Photoshot Function, you can record still pictures with higher resolution than with the normal Photoshot Function.
- When [PROGRESSIVE] on the [CAMERA SETUP] Sub-Menu is set to [ON] or [AUTO], the [P] Indication is displayed. When the [P] Indication is displayed, press the [PHOTO SHOT] Button in the Recording Pause Mode.

- This function may not work with some function setups.
Continuous Photoshot
If you set [SHTR EFFECT] on the [OTHER FUNCTIONS1] Sub-Menu to [ON] and keep the [PHOTO SHOT] Button pressed, the Movie Camera will continuously record still pictures in approximately 0.7 seconds intervals until the button is released. (However, this does not operate when using Progressive Photoshot.)
●The screen blinks and, at the same time, a shutter clicking sound is recorded.
Digital Still Picture
When the [STILL] Button 13 is pressed, images become still pictures. When the button is pressed again, the Digital Still Picture Mode is cancelled.
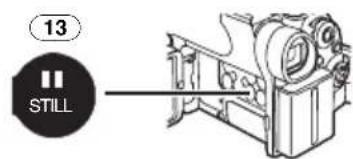
- We recommend that you press the [STILL] Button first at the position where you wish to record the picture so as to enter the Digital Still Picture Mode and then press the [PHOTO SHOT] Button.
- For other notes concerning this item, see -121-.
Self-timer Recording
When you set the self-timer, the still pictures are automatically taken after 10 seconds, on the Tape and the Card.
1 Set [CAMERA FUNCTIONS] >> [CAMERA SETUP] >> [SELF TIMER] >> [ON].

•The [ ]indication appears.
2 Press the [PHOTO SHOT] Button 26.

- The Recording Lamp 16 and the Indication flash and the Photoshot is activated after 10 seconds.
- You can also use the Card Continuous Photoshot. (-104-)
- For other notes concerning this item, see -121-.
Zoom In/Out Functions
It gives special effects to the picture by recording objects close by or with wide-angle shot.
1 For wide-angle shots (zoom out): Push the [W/T] Lever 39 towards [W].
For close-ups (zoom in): Push the [W/T] Lever towards [T].

- Zoom Magnification Indication is displayed for a few seconds.

■ To Take Close-up Shots of Small Subjects
(Macro Close-up Function)
When the zoom magnification is 1×, the Movie Camera can focus on a subject that is as close as approximately 20 mm from the Lens. With this, small subjects like insects can be recorded.
■ To Use the Zoom Microphone Function
Along with the zooming operation, the microphone's directional angle and sensitivity are varied for recording sounds.
- Set [CAMERA FUNCTIONS] >> [RECORDING SETUP] >> [ZOOM MIC] >> [ON]. (The [Z.MIC] Indication is displayed.)

- For other notes concerning this item, see -122-.
Digital Zoom Function
This function is useful when you want to record close-up shots of subjects located beyond a normal zoom range of 1× to 10× magnification. With the Digital Zoom Function, you can select a magnification of 20× or even to 500×.
1 Set [CAMERA FUNCTIONS] >> [CAMERA SETUP] >> [D.ZOOM] >> [20×] or [500×].
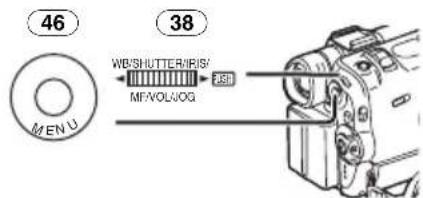
- 20×: Digital zooming to 20× - 500×: Digital zooming to 500×
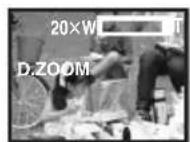
2 Push the [W/T] Lever 39 towards [W] or towards [T] to zoom in or out.

To Cancel the Digital Zoom Function Set [CAMERA FUNCTIONS] >> [CAMERA SETUP] >> [D.ZOOM] >> [OFF].
- For other notes concerning this item, see -122-.
Image Stabilizer Function
If the Movie Camera might be shaken while recording, the camera shake in the image can be corrected.
- If the Movie Camera shakes too much, this function may not be able to stabilize images.
1 Set [CAMERA FUNCTIONS] >> [CAMERA SETUP] >> [SIS] >> [ON].

- The [图标] Indication appears.

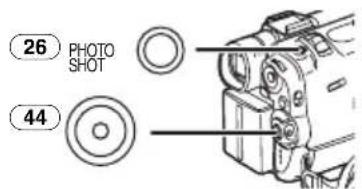
2 Press the Recording Start/Stop Button 44 or [PHOTO SHOT] Button 26 to start recording.
To Cancel Image Stabilizer Set [CAMERA FUNCTIONS] >> [CAMERA SETUP] >> [SIS] >> [OFF].
- For other notes concerning this item, see -122-.
Fade In/Out Functions
Fade In
Fade In brings out images and sounds gradually from a black screen at the beginning of a scene.

1 Keep pressing the [FADE] Button ⑫ during the Recording Pause Mode.
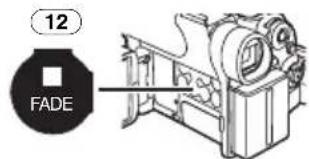
●The image fades out gradually.
2 When the image is completely gone, press the Recording Start/Stop Button 44 to start recording.
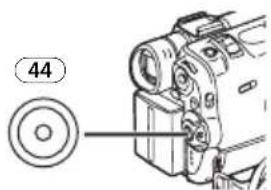
3 Release the [FADE] Button 12 about 3 seconds after starting recording.
●The image reappears gradually.
Fade Out
Fade Out causes images and sounds to disappear gradually, leaving a black screen at the end of a scene.

1 Keep pressing the [FADE] Button ⑫ while recording.

●The image fades out gradually.
2 When the image is completely gone, press the Recording Start/Stop Button 44 to stop recording.
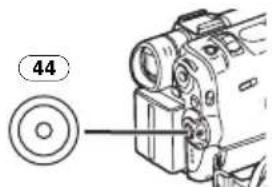
3 Release the [FADE] Button 12.
- The still picture cannot fade in or fade out.
Backlight Compensation Function
This prevents a recording subject from being recorded darker in backlight. (Backlight is the light that shines from behind a recording subject.)
1 Press the [BACK LIGHT] Button ⑧.

- The [☐] Indication flashes and then is displayed.
●The entire screen becomes brighter.

To Resume Normal Recording Press the [BACK LIGHT] Button.
- For other notes concerning this item, see -122-.
Night View Functions
Colour Night View Function
This function allows you to record colour images brightly in a dark place without lighting the Video Flash.
1 Press the [COLOUR NIGHT VIEW] Button 11 until the [C.NIGHT VIEW] Indication appears.


0 Lux Night View Function
Using the LCD Monitor light, a dark scene of almost 0 lux can be recorded.
2 Press the [COLOUR NIGHT VIEW] Button 11 until the [0LUX NIGHT VIEW] Indication appears.

●The [REVERSE THE LCD MONITOR] Indication appears.
3 Rotate the LCD Monitor frontward (to the lens side).
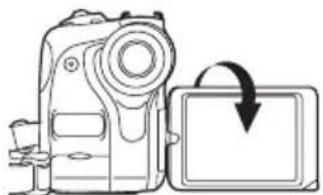
●The screen becomes white and the Viewfinder turns on.
●The available range of the LCD Monitor light is within approximately 1 metre.
To Cancel the Night View Functions
Press the [COLOUR NIGHT VIEW] Button repeatedly until neither the [C.NIGHT VIEW] Indication nor the [OLUX NIGHT VIEW] Indication appears.
- For other notes concerning this item, see -122-.
Wind Noise Reduction Function
This function reduces the sound of a wind hitting the microphone when recording.
1 Set [CAMERA FUNCTIONS] >> [RECORDING SETUP] >> [WIND CUT] >> [ON].

●The [WIND CUT] Indication appears.

To Cancel the Wind Noise Reduction Function
Set [CAMERA FUNCTIONS] >>
[RECORDING SETUP] >> [WIND CUT] >> [OFF].
- For other notes concerning this item, see -122-.
Cinema Function
This function is for recording in a cinema-like screen.
1 Set [CAMERA FUNCTIONS] >> [CAMERA SETUP] >> [CINEMA] >> [ON].

- Black bars appear at the top and bottom of the screen.

To Cancel the Cinema Mode Set [CAMERA FUNCTIONS] >> [CAMERA SETUP] >> [CINEMA] >> [OFF].
- For other notes concerning this item, see -122-.
Recording in Special Situations
(Programme AE)
You can select optimal automatic exposures under specific recording situations.
1 Set the [AUTO/MANUAL/FOCUS] Switch 47 to [MANUAL].

●The [MNL] Indication appears.
2 Set [CAMERA FUNCTIONS] >> [CAMERA SETUP] >> [PROG.AE] >> a desired mode ([ ], [ ], [], [ ] or [ ]).

●The Indication of the selected Mode appears.
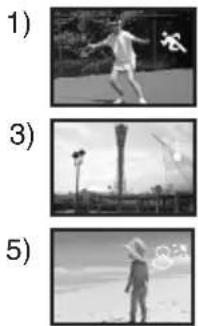

1) [ ] Sports Mode
- For recording scenes involving quick movements, such as sports scenes.
2) [ ] Portrait Mode
- For bringing up people clearly from the background.
3) [△] Low Light Mode
- For recording a dark scene brighter.
4) [∅] Spotlight Mode
- For recording a subject under spotlight in a party, theatre, etc.
5) [icon] Surf & Snow Mode
- For recording in a glaring surrounding, such as skiing grounds, beaches, etc.
To Cancel the Programme AE Function
Set the [AUTO/MANUAL/FOCUS] Switch to [AUTO]. Or, set the [PROG.AE] on the [CAMERA SETUP] Sub-menu to [OFF].
- For other notes concerning this item, see -122-.
Recording in Natural Colours
(White Balance)
Depending on the scene or light condition, the Automatic White Balance Adjustment Mode may not be able to bring out natural colours. In such a case, the white balance can be adjusted manually. When the Movie Camera is turned on with the Lens Cap on, the Automatic White Balance Adjustment may not function properly. Please turn on the Movie Camera after removing the Lens Cap.
1 Set the [AUTO/MANUAL/FOCUS] Switch 47 to [MANUAL].

●The [MNL] Indication appears.
2 Press the [PUSH] Dial 38.
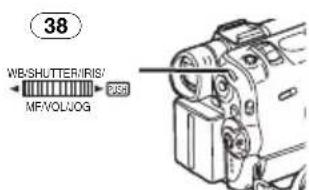
●The [AWB] Indication appears.
3 Turn the [PUSH] Dial 38 to set a desired White Balance Mode.


1) Automatic White Balance Adjustment [AWB]
2) The white balance setting that was previously set manually [■]
3) Outdoor Mode [★]
4) Indoor Mode (recording under incandescent lamp) [✿]
To Resume Automatic Adjustment Turn the [PUSH] Dial until the [AWB] Indication appears. Or, set the [AUTO/MANUAL/FOCUS] Switch to [AUTO].
Adjusting White Balance Manually
White Balance Adjustment recognizes the colour of light and makes adjustment so that the white colour will become pure white. The Movie Camera determines the hue of light that it receives through the Lens and White Balance Sensor, thereby judging the recording condition, and selects the closest hue setting. This function is called Automatic White Balance Adjustment.
For light outside the functional Auto White Balance Adjustment range, use the Manual White Balance Adjustment Mode.
1 Set the [AUTO/MANUAL/FOCUS] Switch 47 to [MANUAL].

●The [MNL] Indication appears.
2 Point the Movie Camera at a full-screen white subject.
3 Press the [PUSH] Dial 38.
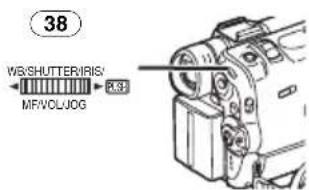
●The [AWB] Indication appears.
4 Turn the [PUSH] Dial 38 until the [■△] Indication is displayed.

5 Keep pressing [PUSH] Dial 38 until the [☐] Indication stops flashing.
To Resume Automatic Adjustment Turn the [PUSH] Dial until the [AWB] Indication is displayed. Or, set the [AUTO/MANUAL/FOCUS] Switch to [AUTO].
About White Balance Sensor
The White Balance Sensor 35 determines the nature of the light source during recording.

- Do not cover the White Balance Sensor with your hand during recording. Otherwise, White Balance will not function normally.
●The red light from the Recording Lamp 16 will be reflected off your hand or object, possibly causing the White Balance sensor to operate incorrectly and changing the colouring.

Outside of the effective range of Automatic White Balance Adjustment, the image will become reddish or bluish. Even within the effective range of Automatic White Balance Adjustment, the Automatic White Balance Adjustment may not function properly if there is more than one light source. In this case, adjust the White Balance.
1) The effective range of Automatic White Balance Adjustment on this Movie Camera
2) Blue sky
3) Cloudy sky (Rain)
4) TV screen
5) Sunlight
6) White fluorescent lamp
7) 2 hours after sunrise or before sunset
8) 1 hour after sunrise or before sunset
9) Halogen light bulb
10) Incandescent light bulb
- For other notes concerning this item, see -123-.
Manual Shutter Speed Adjustment
It is useful for recording fast-moving subjects.
1 Set the [AUTO/MANUAL/FOCUS] Switch 47 to [MANUAL].

●The [MNL] Indication appears.
2 Press the [PUSH] Dial 38 until the Shutter Speed Indication appears.

3 Turn the [PUSH] Dial 38 to adjust the shutter speed.
Range of Shutter Speed Adjustment 1/50–1/8000 s in Tape Mode 1/50–1/500 s in Card Mode The standard shutter speed is 1/50 s. Selecting a speed closer to [1/8000] causes the shutter speed to be faster.
To Resume Automatic Adjustment Set the [AUTO/MANUAL/FOCUS] Switch to [AUTO].
- For other notes concerning this item, see -123-.
Manual Iris Adjustment
(F Number)
You can use this function when the screen is too bright or too dark.
1 Set the [AUTO/MANUAL/FOCUS] Switch 47 to [MANUAL].

●The [MNL] Indication appears.
2 Press the [PUSH] Dial 38 until the Iris Indication appears.
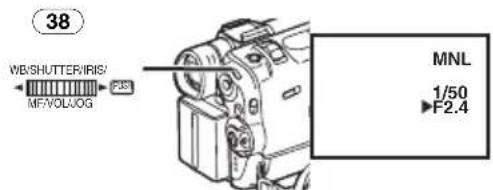
3 Turn the [PUSH] Dial 38 to adjust the iris.
Range of Iris Adjustment
CLOSE (Closed), F16, ..., F2.0, OP (Opened) + 0dB, ..., OP + 18dB When a value closer to [CLOSE] is selected, the image becomes darker. When a value closer to [OP + 18dB] is selected, the image becomes brighter. The value to which + dB is attached indicates a Gain-up value. If this value is too large, the quality of the image deteriorates.
To Resume Automatic Adjustment Set the [AUTO/MANUAL/FOCUS] Switch to [AUTO].
- For other notes concerning this item, see -123-.
Manual Focus Adjustment
Focus can be adjusted manually for recording in a situation where auto focus may not function well.
1 Set the [AUTO/MANUAL/FOCUS] Switch 47 to [MANUAL].

AUTO :MANUAL ↓FOCUS

●The [MNL] Indication appears.
2 Slide the [AUTO/MANUAL/FOCUS] Switch 47 to [FOCUS].

AUTO i MANUAL FOCUS

47
●The [▶MF] Indication (Manual Focus Mode) appears.

3 Turn the [PUSH] Dial 38 to adjust the focus.
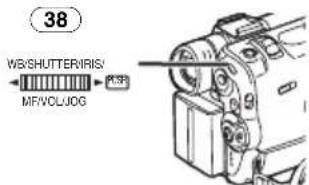
To Resume Automatic Adjustment Set the [AUTO/MANUAL/FOCUS] Switch to [AUTO].
Digital Effect Functions
This Movie Camera is equipped with Digital Effect Functions that add special effects to the scene.
Digital Effects 1 [EFFECT1]
1) MULTI
![PANASONIC NV-GS50EN - Digital Effects 1 [EFFECT1] - 1](/content/2026/05/991746/images/c795a19b884bb21944fcc645a0efc42e73e4936449b0ab9ad4a260cfcddde5ef.jpg)
2) P-IN-P
![PANASONIC NV-GS50EN - Digital Effects 1 [EFFECT1] - 2](/content/2026/05/991746/images/4c242f2ad6cc9daf8e6cbbaa43c4479726eb60c24c43ea66489f07d705fc8a40.jpg)
3) WIPE
![PANASONIC NV-GS50EN - Digital Effects 1 [EFFECT1] - 3](/content/2026/05/991746/images/32653a32e2c77f28e66ac662a63f2390292ffe886bbd6750c38a610701d8b935.jpg)
4) MIX
![PANASONIC NV-GS50EN - Digital Effects 1 [EFFECT1] - 4](/content/2026/05/991746/images/7c80793c03257ced85b200066142f610df62bdb417b41aa9ca943bfc8a9a3192.jpg)
5) STROBE
![PANASONIC NV-GS50EN - Digital Effects 1 [EFFECT1] - 5](/content/2026/05/991746/images/ead8a4f5e63750a0ec6ea9ddc9e61dea41251200fe29edbf95d09dfe47271b0a.jpg)
6) GAIN UP
![PANASONIC NV-GS50EN - Digital Effects 1 [EFFECT1] - 6](/content/2026/05/991746/images/c232c64c09ba3cea22ff7ec0fb7c0accc66693eca6239a005f1224930b08b502.jpg)
7) TRAIL
![PANASONIC NV-GS50EN - Digital Effects 1 [EFFECT1] - 7](/content/2026/05/991746/images/75e81f2d34c816d881ef3fd93ca24bfea2438915cd13241af6edb5105573a6db.jpg)
8) MOSAIC
![PANASONIC NV-GS50EN - Digital Effects 1 [EFFECT1] - 8](/content/2026/05/991746/images/be64564e4ae247e6fe3e2997fa5c858ffbf138f5b0de92a9a38b0194faca217e.jpg)
9) MIRROR
![PANASONIC NV-GS50EN - Digital Effects 1 [EFFECT1] - 9](/content/2026/05/991746/images/39c7431b238cb152bdea8732615d24130eaccc8ae17ba955a5c210134e30e211.jpg)
1) Multi Mode [MULTI]
2) Picture-In-Picture Mode [P-IN-P]
3) Wipe Mode [WIPE]
4) Mix Mode [MIX]
5) Strobe Mode [STROBE]
- It records images with a stroboscopic effect.
6) Gain-up Mode [GAIN UP]
- It brightens images electronically.
- Adjust focus manually when using this mode. (-90-)
7) Trailing Effect Mode [TRAIL]
- It records images with a trailing effect.
8) Mosaic Mode [MOSAIC]
- It produces a mosaic-like image.
9) Mirror Mode [MIRROR]
●The right half of an image becomes a mirror image of the left half.
Digital Effects 2 [EFFECT2]
10) NEGA
![PANASONIC NV-GS50EN - Digital Effects 2 [EFFECT2] - 1](/content/2026/05/991746/images/f4c5d22f56bc04f1a3fa763fa431c9bdf2d095c519b3ff939dd0c72e30bd6a28.jpg)
11) SEPIA
![PANASONIC NV-GS50EN - Digital Effects 2 [EFFECT2] - 2](/content/2026/05/991746/images/139a28df655f1e50575ace3b6140445485213f7683c1f1d475cbbf841de67529.jpg)
12) B/W
![PANASONIC NV-GS50EN - Digital Effects 2 [EFFECT2] - 3](/content/2026/05/991746/images/9de670c7984646a9b3c3cedf4fd6fd573358640837302f429ae2d5b245946b77.jpg)
13) SOLARI
![PANASONIC NV-GS50EN - Digital Effects 2 [EFFECT2] - 4](/content/2026/05/991746/images/24743e2422c36919d2ff53ba5b2557b9068cc186a5dbf74cae41733452278655.jpg)
10) Negative Mode [NEGA]
●The colours of the recorded image are inverted as seen in a negative.
11) Sepia Mode [SEPIA]
- It records a scene with a brownish tint, like the colour of old pictures.
12) Black & White Mode [B/W]
- It records an image in black and white.
- It records an image with a painting-like effect.
To Select a Desired Digital Effect
Set [CAMERA FUNCTIONS] >> [DIGITAL EFFECT] >> [EFFECT1] or [EFFECT2] >> a desired Digital Effect.
To Cancel the Digital Effect
Set [CAMERA FUNCTIONS] >> [DIGITAL EFFECT] >> [EFFECT1] or [EFFECT2] >> [OFF].
- If the Movie Camera is turned off, the [EFFECT2] settings are cancelled.
- For other notes concerning this item, see -123-.
Wipe Mode and Mix Mode Wipe Mode:
Like a curtain is being pulled, the still picture of the last recorded scene gradually changes to the moving image of a new scene.

Mix Mode:
While the moving image of a new scene fades in, the still image of the last recorded scene gradually fades out.

1 Set [CAMERA FUNCTIONS] >> [DIGITAL EFFECT] >> [EFFECT1] >> [WIPE] or [MIX].

●The [WIPE] or [MIX] Indication appears.
2 Press the Recording Start/Stop Button 44 to start recording.

3 Press the Recording Start/Stop Button 44 to pause the recording.
- The last scene is stored in memory. The [WIPE] or [MIX] Indication changes to [WIPE] or [MIX].
4 Press the Recording Start/Stop Button 44 to restart the recording.
●The last image of the previous scene gradually changes to the new scene.
- For other notes concerning this item, see -124-.
Picture-in-Picture Mode
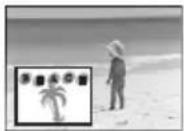
You can display a sub-screen (still picture) inside the screen.
1 Set [CAMERA FUNCTIONS] >> [DIGITAL EFFECT] >> [EFFECT1] >> [P-IN-P].
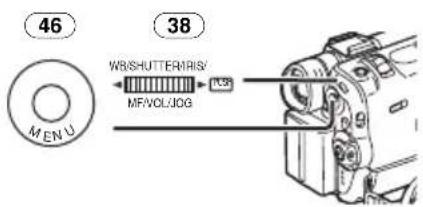
2 Set [CAMERA FUNCTIONS] >> [MULTI-PICTURES] >> [P-IN-P] >> a position (1, 2, 3, 4) where you want to insert a small still picture.

3 Aim the Movie Camera at the scene you want to capture and press the [P-IN-P] Button 14 to insert a small still picture.
- A small still picture is displayed in a normal picture.
- If the [P-IN-P] Button is pressed again, the small still picture is cleared.
4 Press the Recording Start/Stop Button 44 or the [PHOTO SHOT] Button 26 to record on the Cassette.

- For other notes concerning this item, see -124-.
■ Multi-Picture Mode Strobe Multi-Picture Mode:

You can capture and record 9 consecutive small still pictures. Manual Multi-Picture Mode:

You can manually capture and record 9 small still pictures.
1 Set [CAMERA FUNCTIONS] >> [DIGITAL EFFECT] >> [EFFECT1] >> [MULTI].

2 Set [CAMERA FUNCTIONS] >> [MULTI-PICTURES] >> [SCAN MODE] >> [STROBE] or [MANUAL].
When [STROBE] is selected:
- Set the [SPEED] to a desired strobe speed. At the [FAST] setting, 9 consecutive still pictures is captured within approximately 1 second, at NORMAL within approximately 2 seconds, and at [SLOW] within approximately 3 seconds.
- If you set [SWING] to [ON], the intervals at which the 9 still pictures are taken are longer at the beginning and end than in the middle of the swing strobe period, and it is useful for analyzing swing motion, etc. in sports.
When [MANUAL] is selected:
- You can select a desired scene one at a time up to 9 small pictures.
3 Press the [MULTI] Button 14.

- If [MANUAL] is selected, press the [MULTI] Button at each scene you want to capture.
4 Press the Recording Start/Stop Button 44 or the [PHOTO SHOT] Button 26 to record on the Cassette.

Deleting All the Captured Multi-Pictures
While 9 multi-pictures are displayed, press the [MULTI] Button.
- If [MANUAL] has been selected, press the [MULTI] Button after 9 pictures are displayed.
To Display the Multi-Pictures again Press the [MULTI] Button for 1 second or longer.
To Delete Multi-Pictures One by One (When pictures were captured in [MANUAL])
When the [MULTI] Button is pressed for 1 second or longer while the still pictures are displayed, the pictures captured last is deleted continuously.
●After still pictures are deleted one by one, they cannot be displayed again.
- For other notes concerning this item, see -124-.
VCR Mode
Playing Back
The recorded scene can be played back immediately after the recording.
1 Rotate the [OFF/ON/MODE] Switch
43 and set the Movie Camera to the VCR Mode.
●The [VCR] Lamp 45 lights up.
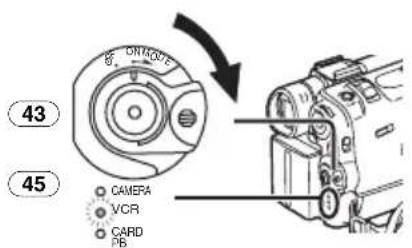
2 Press the [◀◀] Button ⑦ to rewind the tape.

- Rewind the tape to the point where you want to start playback.
- When the tape reaches the beginning, rewinding stops automatically.
3 Press the [▶] Button ⑧ to start playback.
●The [▷] Indication appears.

To Stop Playback
Press the [■] Button 12.

■ Adjusting the Sound Volume
Until the [VOLUME] Indication appears, keep pressing the [PUSH] Dial 38.
Then, turn the [PUSH] Dial to adjust the volume. After the adjustment, press the
[PUSH] Dial to make the [VOLUME] Indication disappear.

To adjust the volume with the Remote Controller, press the [T] or [W] Button to display the [VOLUME] Indication. Press the [T] Button to increase the volume or press the [W] Button to decrease the volume. The [VOLUME] Indication goes off a few seconds after the adjustment is finished.
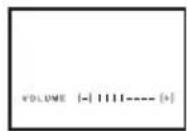
●The sound volume cannot be adjusted using the Remote Controller in Playback Zoom Mode. (-97-)
- If a cassette recorded with a copyright protection signal is played back, the picture is distorted by mosaic-like patterns.
- For other notes concerning this item, see -124-.
Finding a Scene You Want to Play Back
Cue/Review Playback

If the [▶▶] Button ⑨ or [◀◀] Button ⑦ is pressed during Playback, it turns to Cue Playback Ⓐ or Review Playback Ⓑ.

- If the Button is held continuously, it turns to Cue Playback or Review Playback until you release it.
■ Variable Speed Search Function
The speed of Cue Playback or Review Playback can be varied.
1 During playback, press the [▶] Button ⑧.
- The [1× ] Indication appears.

2 Turn the [PUSH] Dial 38 to select a desired search speed.

The following 6 playback speeds are available for the Variable Speed Search Function in both the fast-forwarding and rewinding directions:
1/5× (slow playback in SP Mode only), 1/3× (slow playback in LP Mode only), 1×, 2×, 5×, 10× and 20×.
- This function can be done by pressing the [VAR. SEARCH] and cursor buttons ([▲, ▼]) on the Remote Controller. (-70-)
To Resume Normal Playback Press the [▶] Button ⑧.
●During Cue or Review Playback, fast-moving images may show mosaic-pattern noise.
●The sound is muted during search.
Slow Motion Playback
This Movie Camera can play back at a slow speed.

1 Press the [▶] Button 75.
2 Press the [◀] Button or [▶] Button 60 on the Remote Controller.
- The [▶] or [◀] Indication appears.
![PANASONIC NV-GS50EN - Press the [◀] Button or [▶] Button 60 on the Remote Controller. - 1](/content/2026/05/991746/images/fece25900edd12cf48f9db2874760366388fb04dda3e821d7befbb9c57e0b23a.jpg)
- When the [◀] Button is pressed, Slow Motion Playback proceeds in the reverse direction. When the [▶] Button is pressed, Slow Motion Playback proceeds in the forward direction.
Scenes recorded in the SP Mode are played back at approximately 1/5th of the normal speed.
Scenes recorded in the LP Mode are played back at approximately 1/3rd of the normal speed.
To Resume Normal Playback
Press the [▶] Button 75.
Still Playback/Still Advance Playback
This Movie Camera is capable of still picture playback and frame-advance playback.

1 Press the [▶] Button 75.
2 Press the [11] Button 72.
●The playback image stops in the Still Playback Mode.
3 Press the [◀] Button or [▶] Button 60 on the Remote Controller.
- With each pressing of the [◀] Button, still pictures advance in the reverse direction. With each pressing of the [▶] Button, still pictures advances in the forward direction. If either one of the buttons continues to be pressed, still pictures advance continuously 1 frame at a time until the button is released.
To Resume Normal Playback
Press the [▶] Button 75.
Jog Playback
By turning the Jog Dial ([PUSH] Dial)
38 of the Movie Camera in the Still Playback Mode, still pictures can be advanced one frame at a time in the forward or backward direction.

- If the Movie Camera is left in the Still Playback Mode for more than 6 minutes, the Movie Camera switches to the Stop Mode to protect the video heads from excessive wear and tear.
Finding the End of Recording
(Blank Search Function)
The Blank Search Function aids you locate the end of the recording on the Cassette quickly.
1 Set [VCR FUNCTIONS] >> [PLAYBACK FUNCTIONS] >> [BLANK SEARCH] >> [YES].

●The [BLANK] Indication appears during the Blank Search.
- Approximately 1 second before the last recorded scene, the Movie Camera switches to the Still Playback Mode.
- If there is no blank portion left on the Cassette, the Movie Camera stops at the end of the tape.
To Cancel Blank Search Before Completion
Press the [■] Button.
Index Search Functions
To facilitate searching of desired scene, this Movie Camera automatically records index signals during recording, as explained in the following.
Photoshot Index Signal
These signals are automatically recorded whenever still pictures are taken in Photoshot Mode. (-83-) Photoshot Index Signals are not recorded on still pictures recorded in Continuous Photoshot Mode.
Scene Index Signal
Scene Index Signals are automatically recorded when you start recording after inserting a Cassette.
- If [SCENE INDEX] of [RECORDING SETUP] Sub-Menu on the [CAMERA FUNCTIONS] Main-Menu is set to [2HOUR], an index signal is recorded when recording is restarted after an elapse of 2 hours or longer. If it is set to [DAY], an index signal is recorded when recording is restarted after the date has changed since the last recording. (While the index signal is recorded, the [INDEX] Indication flashes for a few seconds.)
INDEX
- If the Movie Camera is switched from the VCR Mode to Camera Mode or if the date and time is set before the start of recording, the index signal is not recorded.
Photoshot Index Search
T Set [VCR FUNCTIONS] >> [PLAYBACK FUNCTIONS] >> [SEARCH] >> [PHOTO].
2 Press the [▶▶] Button or [◀◀] Button 61 on the Remote Controller.
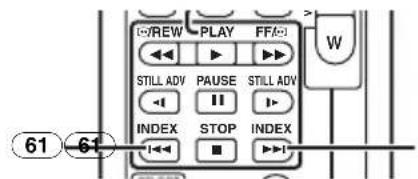
- With each press of the corresponding button, still pictures recorded in Photoshop Mode are searched.
● Sounds are played back for approximately 4 seconds.
Scene Index Search
1 Set [VCR FUNCTIONS] >> [PLAYBACK FUNCTIONS] >> [SEARCH] >> [SCENE].
2 Press the [▶▶] Button or [◀◀] Button 61 on the Remote Controller.
- When the corresponding button is pressed once, the [S 1] Indication appears, and searching of the subsequent scene marked with an index signal starts. Each time the button is pressed after the start of Scene Index Search, the indication changes from [S 2] to [S 9], and the beginning of the scene corresponding to the selected number will be searched.
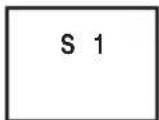
- Up to 9 scene numbers can be selected.
Continuous Index Search
If the [▶▶] Button or the [◀◀] Button 61 is pressed for 2 seconds or longer, search can be continued at several-second intervals. (To cancel, press the [▶] Button 75 or the [■] Button 73.)

- For other notes concerning this item, see -124-.
Playback Zoom Function
A part of the image can be enlarged up to 10 times during playback.
1 During playback, press the [P.B. ZOOM] Button 67 on the Remote Controller.
![graph TD A["SELECT"] --> B["VAR SEASON"] B --> C["P.B ZOOM"] C --> D["SET"] D --> E["MENU"] E --> F["OFF/ON"] F --> G["P.B.DIGITAL"] G --> H["ITEM"] I["59"] --> J["67"]](/content/2026/05/991746/images/10453ce15d3f21b4f22faf98ff2c3d32cb60cc349dd3eba2f8e841900bdc683f.jpg)
●The centre of the image is enlarged to approximately 2 times.

To Change the Zoom Magnification
2 Change the magnification by pressing the [W] Button or [T] Button 65 on the Remote Controller.

To Change the Enlarging Area of an Image
3 Press the Arrow Button (▲, ◀, ▶, ▼) 59 on the Remote Controller that points to the area you want to enlarge.
To Cancel the Playback Zoom Function
Press the [P.B. ZOOM] Button 67 on the Remote Controller.
- For other notes concerning this item, see -124-.
Playback Digital Effect Functions
During playback, special digital effects can be added to the recorded pictures. The same effects as those of Digital Effects 1 and 2, which are used during recording, are obtained.
1 Press the [▶] Button 75.

2 Press the [SELECT] Button 62 on the Remote Controller to select a desired digital effect.
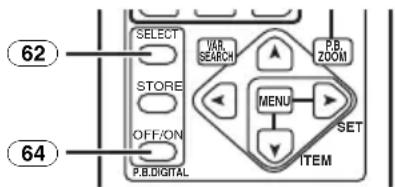
- When the [SELECT] Button is pressed repeatedly, the digital effect selection changes.
- The same setting can be done using [DIGITAL EFFECT] Sub-Menu on the [VCR FUNCTIONS] Main-Menu.
To suspend Playback Digital Effect Temporarily
Press the [OFF/ON] Button 64 to suspend or restart the digital effect. When the digital effect is paused temporarily, the selected effect's indication flashes.
To Cancel the Digital Effect
Press the [SELECT] Button 62 on the Remote Controller and clear the digital effect indication.
- For other notes concerning this item, see -124-.
Wipe Mode and Mix Mode
1 Press the [▶] Button 75.
2 Press the [SELECT] Button 62 on the Remote Controller and select [WIPE] or [MIX].

3 Press the [STORE] Button 63 at the moment you want to save as a still picture.
- The [WIPE] or [MIX] Indication appears, and the image is saved.
4 Press the [OFF/ON] Button 64 in the scene in which you want to use the Wipe or Mix effect.
- The scene changes as a result of the Wipe or Mix effect.
●The Wipe Function and Mix Function can be used only from the Remote Controller during playback.
- If the [OFF/ON] Button 64 is pressed while Wipe or Mix is carried out, the effect will stop temporarily at that point. Pressing the [OFF/ON] Button 64 again will bring back the effect.
■ Playing back with Multi-Picture Mode
Strobe Multi-Picture Mode [STROBE]
You can capture 9 consecutive still pictures from playback video.
Manual Multi-Picture Mode [MANUAL]
Selecting a desired still picture one at a time, you can capture 9 still pictures.
Index Multi-Picture Mode ([PHOTO], [SCENE])
You can capture 9 screens of pictures to which index signals have been attached.
1 Set [VCR FUNCTIONS] >> [DIGITAL EFFECT] >> [EFFECT SELECT] >> [MULTI].
2 Set [VCR FUNCTIONS] >> [MULTI-PICTURES] >> [SCAN MODE] >> [STROBE], [MANUAL], [PHOTO] or [SCENE].
When [STROBE] is selected:
- Set the [SPEED] to a desired strobe speed. At the [FAST] setting, 9 consecutive still pictures is captured within approximately 1 second, at NORMAL within approximately 2 seconds, and at [SLOW] within approximately 3 seconds.
- If you set [SWING] to [ON], the intervals at which the 9 still pictures are taken are longer at the beginning and end than in the middle of the swing strobe period, and it is useful for analyzing swing motion, etc. in sports.
3 Play back the tape.

4 Press the [MULTI] Button 14.
If [STROBE] is selected:
- 9 screens are automatically captured starting at the point which the Button is pressed.
If [MANUAL] is selected:
- Press the [MULTI] Button at each scene you want to capture. When 9 screens are captured, the tape will stop.
If [PHOTO] or [SCENE] is selected:
- From the point at which the [MULTI] Button is pressed, 9 screens of pictures to which index signals are attached are captured in the playback direction. After 9 screens are captured, the tape will stop, but if there are 8 or less pictures to be captured, the tape will stop at its end.
Deleting all the captured Multi pictures
While displaying the multi-pictures that have been captured, press the [MULTI] Button 14.
- If [MANUAL] has been selected, press the [MULTI] Button after 9 pictures are displayed.
To display the Multi-Pictures again
Press the [MULTI] Button 14 for 1 second or longer.
To Delete Multi pictures one by one (When Pictures have been captured in Manual Mode)
When the [MULTI] Button 14 is pressed for 1 second or longer while the still pictures are displayed, the pictures captured last is deleted. If you continue to press the Button, the pictures are deleted consecutively.
● After still pictures are deleted one by one, they cannot be displayed again.
To Cancel Capturing Pictures (When Pictures have been captured in Index Mode)
Press the [■] Button.
To Search the tape position of a desired picture among the playback pictures displayed on 9 screens
1 After displaying pictures in Multi-Picture Mode, turn the [PUSH] Dial 38 to select the image whose tape position you want to search.

●The selected picture is marked with a frame.
2 Press the [◀◀] or [▶▶] Button 61 on the Remote Controller.
● A still picture playback takes place at the selected picture.
- For other notes concerning this item, see -124-.
Playing Back on Your TV
By connecting your Movie Camera with your TV, the recorded scenes can be viewed on your TV screen.
- Before connecting them, turn off the power of both the Movie Camera and TV.
1 Connect the [AV IN/OUT] Socket of the Movie Camera and the Video and Audio Input Sockets of the TV.
![[S-VIDEO IN] [VIDEO IN] [AUDIO IN] ② ① S-VIDEO INOUT AV INOUT PHONES REMOTE NIC PLUS POWER](/content/2026/05/991746/images/debfa9b87129fedc0a0d0cfa030b6b0ba3b7a65ec8094a3d9e8979fd961e6b43.jpg)
- Using the AV Cable ①, make a connection with the TV. If the TV has an S-Video Socket, connect the S-Video Cable ②, too.
- When plugging the pin plug of the AV cable into the [AV IN/OUT] Socket, plug it in as far as it goes.
To Make the Indications Appear on the TV Screen
Press the [OSD] Button 54 on the Remote Controller.

- For other notes concerning this item, see -125-.
Audio Dubbing
You can add music or narration to the recorded Cassette.
- If the tape recorded in the [16bit] Mode is dubbed with the Audio Dubbing function, the original sound is erased. (If you wish to preserve the original sound, use the [12bit] Mode when recording.)
- Audio Dubbing cannot be performed on a recording done in LP Mode. (-80-)
1 Set [VCR FUNCTIONS] >> [AV IN/OUT SETUP] >> [AV JACK] >> [IN/OUT].
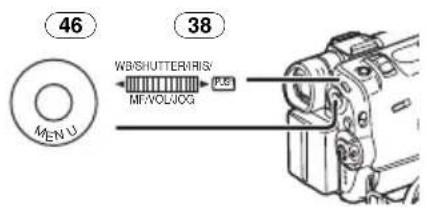
2 Continuing the aforesaid setup, select [A.DUB INPUT] >> [MIC] or [AV IN].
- Set to [AV IN] when external device is used, and to [MIC] when an external or built-in microphone is used.
3 Press the [11] Button 72 on the Remote Controller where you want to add new sound.

4 Press the [A.DUB] Button 58 on the Remote Controller.
5 To start Audio Dubbing, press the [11] Button 72 on the Remote Controller.
To Cancel Audio Dubbing
Press the [■■] Button 72 on the Remote Controller.
The Movie Camera is in the Still Playback Mode again.
To Play Back the Sound Recorded by 12bit Audio Dubbing
Set [VCR FUNCTIONS] >>
[PLAYBACK FUNCTIONS] >>
[12bit AUDIO] >> [ST2] or [MIX].
ST1: It plays back only the original sound.
ST2: It plays back only the sound added by Audio Dubbing.
MIX: It plays back both the original sound and the sound added by Audio Dubbing simultaneously.
To dub audio while listening to a pre-recorded sound
When pausing the audio dubbing, set the [12bit AUDIO] on the [PLAYBACK FUNCTIONS] Sub-Menu to [ST2] and you can check the pre-recorded sound.
When a microphone is used for audio dubbing, use headphones to listen to the pre-recorded sound while dubbing the audio. (When using headphones, set [AV JACK] on the [AV IN/OUT SETUP] Sub-Menu to [OUT/PHONES].) When the line input is used, you can dub audio while listening to a pre-recorded sound from the speaker.
- For other notes concerning this item, see -125-.
Copying on an S-VHS (or a VHS) Cassette
(Dubbing)
After connecting the Movie Camera and the VCR as illustrated, start the following procedures.
![[S-VIDEO IN] [VIDEO IN] [AUDIO IN] ② ① S-VIDEO INPUT AV INPUT PHONES REMO/FIMIC IP/DO/R POWER](/content/2026/05/991746/images/8a7d78f41da6acf2f54e4b3ddbfc1a0be8b5f0149ac0e8b9d8e0dc16233149ac.jpg)
① AV Cable
② S-Video Cable
- Be sure to press the [OSD] Button (-69-) on the Remote Controller prior to copying so that no indications are visible. Otherwise, the displayed tape counter and function indications are also copied.
Movie Camera:
1 Insert the recorded Cassette.
VCR:
2 Insert an unrecorded Cassette with an erasure prevention tab.
- If various setups (such as external input, tape speed, etc.) are required, please refer to the operating instructions of your VCR.
Movie Camera:
3 Press the [▶] Button to start playback.
VCR:
4 Start recording.
5 Press the Pause or Stop Button to stop recording.
Movie Camera:
6 Press the [■] Button to stop playback.
Recording the Contents of Other Equipment
After connecting the Movie Camera and the other equipment as illustrated, start the following procedures.
![[S-VIDEO OUT] [VIDEO OUT] [AUDIO OUT] 2 1 S-VIDEO INPUT AV INPUT PHONES REMOTE INPUT POWER](/content/2026/05/991746/images/f0fadd6972e0f3759c82bb9e9411142d4bf5e502e9381b260b48a7f1645fffaf.jpg)
① AV Cable
② S-Video Cable
Movie Camera:
1 Set [VCR FUNCTIONS] >> [AV IN/OUT SETUP] >> [AV JACK]
[IN/OUT].
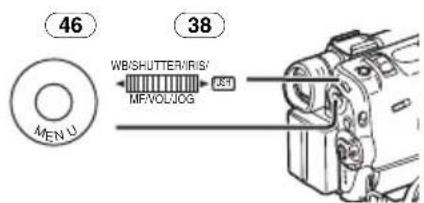
2 Insert an unrecorded Cassette.
Other Equipment:
3 Insert a recorded Cassette and start playback.
Movie Camera:
4 While pressing the [REC] Button 57, press the [PLAY] Button 75.

5 Press the [■] Button 72 or [■] Button 73 to stop recording.
Other Equipment:
6 Press the Stop Button to stop playback.
- For other notes concerning this item, see -125-.
Using the DV Cable for Recording
(Digital Dubbing)
By connecting this Movie Camera with other digital video equipment that has a DV Input/Output Terminal using a DV Cable VW-CD1E (optional) ①, dubbing can be done in the digital format.
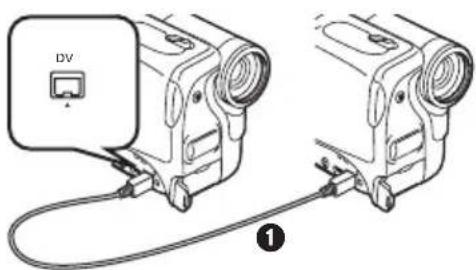
Player/Recorder:
1 Insert the Cassette and set to the VCR Mode.
Player:
2 Press the [▶] Button 75 to start playback.
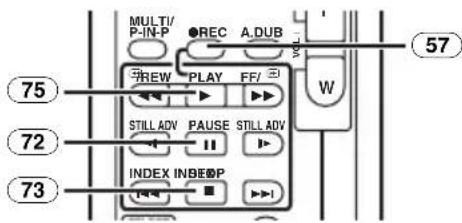
Recorder:
3 While pressing the [REC] Button 57, press the [PLAY] Button 75.
- Recording starts.
To Stop Dubbing
Press the [■■] Button 72 or the [■] Button 73.
- For other notes concerning this item, see -125-.
CARD Mode
Using a Card
A Card can be used to record still pictures.
- Use genuine Card only.
Inserting a Card
Before inserting a Card, be sure to turn off the Movie Camera.
1 Slide the [OPEN] Lever ④ to open the Card Slot Cover ⑤.

2 While holding the Memory Card with its cut corner facing right ①, insert it into the Card Slot ⑥.

3 Close the Card Slot Cover ⑤ securely.
Removing the Card
Open the Card Slot Cover and press the centre of the Card and then pull it straight out.
●After removing the Card, close the Card Slot Cover.
●The Movie Camera may be damaged if the Card is forced out when the Card is fully inserted.
[ACCESS] Lamp ③

While the Movie Camera is making an access to the Card (reading, recording, playback, erasing or moving of images), the [ACCESS] Lamp lights up.
- While the [ACCESS] Lamp is on, never attempt to open the Card Slot Cover, to pull out the Card, to turn off the Movie Camera, or to switch the [TAPE/CARD/CARD MODE] Selector. Such actions will damage the Card, cause loss of recorded data and cause the Movie Camera to malfunction.
Recording on a Card
3 kinds of data can be recorded by selecting with the [TAPE/CARD/CARD MODE] Selector 27. When recording picture, slide the [TAPE/CARD/CARD MODE] Selector until the [PICTURE] Indication 1 appears (Card Photoshot), when recording moving picture, slide the [TAPE/CARD/CARD MODE] Selector until the [MPEG4] Indication 2 appears (MPEG4 Recording), when recording voice, slide the [TAPE/CARD/CARD MODE] Selector until the [VOICE] Indication 3 appears (Voice Recording).

- If the [TAPE/CARD/CARD MODE] Selector 27 is set to [CARD] with a Card inserted, the Movie Camera is automatically turned off when you leave it for about 6 minutes without performing any recording. - When the [TAPE/CARD/CARD MODE] Selector 27 is set to [CARD], you cannot record to the Tape.
Card Photoshot
Still pictures can be recorded on the Memory Card from the Movie Camera lens as well as from scenes that have already been recorded on a cassette.
Recording from the Movie Camera Lens (CAMERA Mode)
1 Set the [TAPE/CARD/CARD MODE] Selector 27 to [CARD].
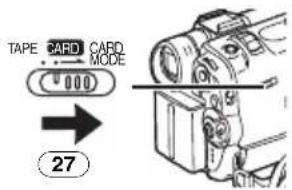
2 Slide the
[TAPE/CARD/CARD MODE]
Selector 27 to [CARD MODE] until the [PICTURE] Indication appears.
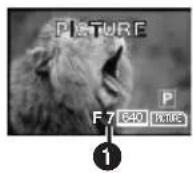
- Remaining Number of Card Photoshot pictures ①
3 Press the [PHOTO SHOT] Button 26.

- The [ ] modification lights up in red.
Recording from a Cassette (VCR Mode)
1 Set the [TAPE/CARD/CARD MODE] Selector 27 to [CARD].

2 Slide the
[TAPE/CARD/CARD MODE]
Selector 27 to [CARD MODE] until the [PICTURE] Indication appears.
3 Start playback and set the Movie Camera to Still Playback Mode at the scene you wish to record, and press the [PHOTO SHOT] Button 26.
Selecting the quality of Card Photoshot images
1 Set [CAMERA FUNCTIONS] or [VCR FUNCTIONS] >> [CARD SETUP] >> [PICTURE QUALITY] > a desired image quality.

Maximum number of images recordable on the supplied Card (8MB)
FINE (high image quality): approximately 44 pictures NORMAL (normal image quality): approximately 85 pictures [ECONOMY] (low image quality): approximately 180 pictures
●These figures vary depending on the subject being photographed.
Card Continuous Photoshot
The still pictures can be recorded on a Card at a regular intervals.
1 Set the [TAPE/CARD/CARD MODE] Selector 27 to [CARD].

2 Set [CAMERA FUNCTIONS] >> [CARD SETUP] >> [BURST MODE] >> [H] or [L].

- The [H] or [L] Indication appears.

3 Press the [PHOTO SHOT] Button 26.
- When [ ] is selected, the still pictures can be recorded in approximately 0.08 seconds intervals until the [PHOTO SHOT] Button is released or 16 pictures are recorded.
- When [ ] is selected, the still pictures can be recorded in approximately 0.7 seconds intervals until the [PHOTO SHOT] Button is released or 8 pictures are recorded.
Automatically Copying Still Pictures That Have Already Been Recorded on a Tape
The images with the Photo Index signals are automatically recorded to the Card.
1 Set the Movie Camera to Still Playback Mode at the scene immediately before you want to start copying images.

2 Set [VCR FUNCTIONS] >> [PLAYBACK FUNCTIONS] >> [RECORD TO CARD] >> [YES].

- During copying, the Indication appears.
![PANASONIC NV-GS50EN - Set [VCR FUNCTIONS] >> [PLAYBACK FUNCTIONS] >> [RECORD TO CARD] >> [YES]. - 2](/content/2026/05/991746/images/d201b2fc6c4b80bb42fda06ebaf0ad02da6ae4517c617a46d565af73e8f42ed3.jpg)
- Search starts from the current Tape position, and images with Photo Index signals are recorded onto the Card sequentially.
To Stop Automatic Recording Press the [■] Button 12.

- For other notes concerning this item, see -126-.
■ Recording a Moving Picture (MPEG4)
You can record moving pictures for e-mailing on a Card. The recorded data can be also played back on Windows Media Player.
Recording from the Movie Camera Lens (Camera Mode)
1 Set the [TAPE/CARD/CARD MODE] Selector 27 to [CARD].
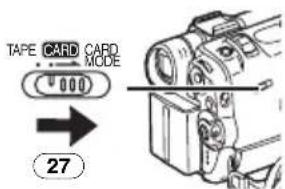
2 Slide the [TAPE/CARD/CARD MODE] Selector 27 to [CARD MODE] until the [MPEG4] Indication appears.
3 Press the Recording Start/Stop Button 44.

- It takes 2 to 3 seconds to start recording.
- During recording the [MPEG4] Indication is lit in red.
●The maximum continuous recording times are:
SUPERFINE (super high image quality): 2 minutes
FINE (high image quality): 2 minutes
NORMAL (normal image quality): 120 minutes
The Movie Camera will automatically stop recording when the relevant time listed above has elapsed.
- When Remaining Time Indication becomes [R:0h00m], this Indication flashes in red. Recording may not be started.
●The picture size of the moving picture (MPEG4) is set to be:
- When attaching to email, we recommend the file size to be less than 1MB.
SUPERFINE: approximately 15 seconds
FINE: approximately 20 seconds
NORMAL: approximately 1 minute
- For other notes concerning this item, see -126-.
Recording from a Cassette (VCR Mode)
1 Set the [TAPE/CARD/CARD MODE] Selector 27 to [CARD].
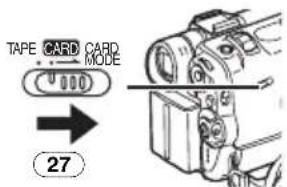
2 Slide the
[TAPE/CARD/CARD MODE]
Selector 27 to [CARD MODE] until the [MPEG4] Indication appears.
3 Start playback and press the
Recording Start/Stop Button 44 at the desired scene.
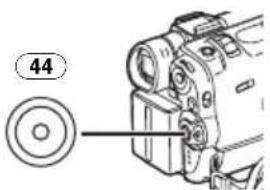
Selecting the quality of MPEG4
Recording images
1 Set [CAMERA FUNCTIONS] or [VCR FUNCTIONS] >> [CARD SETUP] >> [MPEG4 MODE] >> a desired image quality.

Maximum recording time on the supplied Card (8MB)
SUPERFINE: approximately 1 minute and 30 seconds
FINE: approximately 2 minutes
NORMAL: approximately 6 minutes
■ Recording Voice (Voice Recording Function)
You can record voice data on a Card. (Camera Mode only)
1 Set the [TAPE/CARD/CARD MODE] Selector 27 to [CARD].

2 Slide the
[TAPE/CARD/CARD MODE]
Selector 27 to [CARD MODE] until the [VOICE] Indication appears.
3 Press the Recording Start/Stop Button 44.

● Voice from built-in microphone is recorded.
- It takes 2 to 3 seconds to start recording.
- The recorded file is automatically locked (to prevent accidental erasure).
● Voice from external microphone connected to the [MIC] Socket can also be recorded.
- During recording, the [VOICE] Indication is lit in red.
- When Remaining Time Indication becomes [R:0h00m], this Indication flashes in red. Recording may not be started.
Maximum recording time on the supplied Card (8MB)
Approximately 24 minutes
- For other notes concerning this item, see -126-.
Playing Back a Card
It plays back files recorded on a Card.
- When you set the Movie Camera to Card Playback Mode, the Card Contents are displayed to inform you which kind(s) of data (still picture, moving picture and/or voice data) are recorded on the Card.

1 Set the Movie Camera to Card Playback Mode.
●The [CARD PB] Lamp 45 lights up.

2 Slide the
[TAPE/CARD/CARD MODE]
Selector 27 to [CARD MODE] until [PICTURE], [MPEG4] or [VOICE] Indication appears.
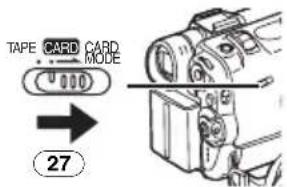
3 Start Playback.
[PICTURE]:
▶: Starting the Slide Show
▶▶: Playing back the next picture
◀◀: Playing back the previous picture
■: Stop the Slide Show
[MPEG4] or [VOICE]:
▶: Playing back the File
▶▶: To the beginning of the next File (in Stop Mode)
◀◀: To the beginning of the previous File (in Stop Mode)
■: Stop playing back
■: Pause playing back (When playing back MPEG4 Data, this button does not pause playing back within 1 second of finishing playing back.)
When [MPEG4] Indication appears at Step 2
- File is numbered in hexadecimal.
- When the object is moving fast or zoom operation is performed, picture may appear to be still or causes mosaic-pattern noise, but this is not a malfunction.
When [VOICE] Indication appears at Step 2
- If the [◀◀] Button or [▶▶] Button is pressed for 1 or more seconds, it becomes 10× playback and keep pressing for 7 or more seconds, it becomes 60× playback. Releasing the button brings back to normal playback.
- When [MPEG4] or [VOICE] Indication appears at step 2, during playback, keep pressing [PUSH] Dial until the volume Indication appears and turn it to adjust the volume. (-94-)

1 Folder-File Number (When the picture is played back)
File Name (When the MPEG4 data is played back)
② Picture Size (When the picture is played back) (-118-)
Playback time (When MPEG4 data or Voice data is played back)
3 File Number (When the picture or Voice data is played back)
File Number and MPEG4 Picture Quality (When the MPEG4 data is played back)
To Select a Desired File and Play It Back
1 Set the [TAPE/CARD/CARD MODE] Selector 27 to [CARD].
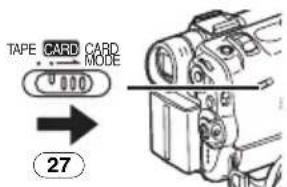
2 Slide the
[TAPE/CARD/CARD MODE]
Selector 27 to [CARD MODE] until the desired type of data indication appears.
3 Press the [MULTI] Button 14.

●The files recorded on the Card are displayed in Multi-Picture Mode.

① Picture Size (When [PICTURE] is selected at Step 2)
MPEG4 Picture Quality (When [MPEG4] is selected at Step 2)
② File Number
3 Folder-File Number (When [PICTURE] is selected at Step 2) File Name (When [MPEG4] is selected at Step 2)
4 Turn the [PUSH] Dial 38 and select a desired file.

●The selected file is marked with a frame.
- When 7 or more files have been recorded, turn the [PUSH] Dial to display the next file. (The [◀◀] Button or [▶▶] Button can be used instead of the [PUSH] Dial.)
5 Press either the [PUSH] Dial 38 or the [MULTI] Button 14.
●The selected file is shown on the entire screen.
Using File Search Mode
1 Set [CARD FUNCTIONS] >> [CARD EDITING] >> [FILE SEARCH] >> [YES].
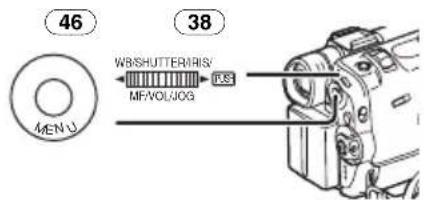
2 Turn the [PUSH] Dial 38 and select the desired file number, and press the [PUSH] Dial 38.
- For other notes concerning this item, see -126-.
Recording Pictures on a Card to a Tape
Card Images can be recorded on the Tape one at a time or all automatically. After setting to Card Playback Mode, please carry out the following procedures.
To Copy 1 Picture
1 Slide the
[TAPE/CARD/CARD MODE]
Selector 27 to [CARD MODE] until the [PICTURE] Indication appears.

2 Display a desired picture.
3 Set the [TAPE/CARD/CARD MODE] Selector 27 to [TAPE].

4 Press the [PHOTO SHOT] Button 26.

- During the copying, the Indication appears.

- It takes a few seconds to record a picture to the Tape.
- When recording to tape, select the tape position before recording. The picture will be recorded to the tape position when the [PHOTO SHOT] Button is pressed at Step 4.
To Copy All the Pictures
1 Slide the
[TAPE/CARD/CARD MODE]
Selector 27 to [CARD MODE] until the [PICTURE] Indication appears.

2 Display the first picture.
- If a picture other than the first one is displayed, only the subsequent pictures will be copied.
3 Set [CARD FUNCTIONS] >> [CARD EDITING] >> [RECORD TO TAPE] >> [YE
●During the copying, the Indication appears.

- It takes a few seconds for each picture to be copied on the Tape. To stop the copying midway, press the [■] Button.
- Moving Picture (MPEG4) and Voice data cannot be recorded from a Card to tape.
- For other notes concerning this item, see -127-.
Slide Show
The recorded still pictures in the Card can be played back like a Slide Show.
To Play Back All the Pictures Continuously
1 Slide the
[TAPE/CARD/CARD MODE]
Selector 27 to [CARD MODE] until the [PICTURE] Indication appears.
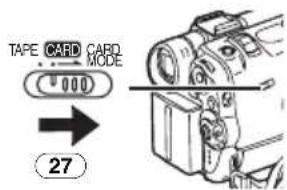
2 Set [CARD FUNCTIONS] >> [CARD EDITING] >> [SLIDE SHOW] >> [YES] >> [SLIDE SHOW] >> [ALL].

- This step is skipped when there is no picture that has set for the Slide Show.
3 Press the [▶] Button ⑧.

- The [SLIDE▷] Indication is displayed.

- All of the pictures are played back for several seconds each.
To Pause the Slide Show
Press the [11] Button.
●The [SLIDEIII] Indication is displayed.
To Stop the Slide Show
Press the [■] Button.
Editing a Slide Show
You can set up a Slide Show or change the contents.
To Select Pictures to Play Back in Your Slide Show
1 Set [CARD FUNCTIONS] >> [CARD EDITING] >> [SLIDE SHOW] >> [YES] >> [EDIT] >> [YES].
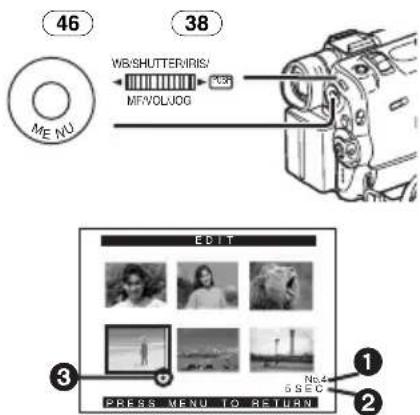
2 Turn the [PUSH] Dial 38 to select a picture and then press the dial.
3 Turn the [PUSH] Dial 38 to select playback order and then press the dial.
- This step is skipped when there is no picture that has set for the Slide Show.
- Playback Order Indication ①
4 Turn the [PUSH] Dial 38 to adjust the playback time and press the dial.
- Playback Time (Second) Indication ②
- The [●] Indication ③ is displayed to the picture set. (-118-)
- To select the next picture, repeat the Steps 2 to 4 above.
5 Press the [MENU] Button 46 to end the setup.
To Play Back the Slide Show That Has Been Set
You must set [SLIDE SHOW] >> [EDIT] first.
1 Set [CARD FUNCTIONS] >> [CARD EDITING] >> [SLIDE SHOW] >> [YES] >> [SLIDE SHOW] >> [PRESET].
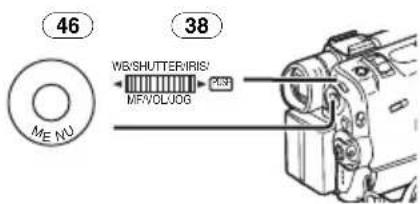
2 Press the [▶] Button ⑧.
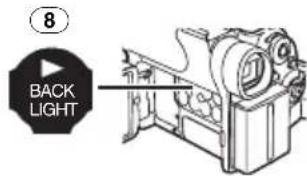
- The [M.SLIDE▷] Indication is displayed.

To Verify the Selected Picture
Set [CARD FUNCTIONS] >> [CARD EDITING] >> [SLIDE SHOW] >> [YES] >> [VERIFY] >> [YES].
- Only the selected pictures are displayed in Multi-Picture Mode in the Playback order.
To Delete the Selected Picture
1 Set [CARD FUNCTIONS] >> [CARD EDITING] >> [SLIDE SHOW] >> [YES] >> [DELETE] >> [YES].

2 Select the picture you wish to delete and press the [PUSH] Dial 38.
●The selected picture is marked with a frame.
To Reset the Slide Show Setup
Set [CARD FUNCTIONS] >> [CARD EDITING] >> [SLIDE SHOW] >> [YES] >> [RESET] >> [YES] >> [YES].
- Slide Show settings are reset.
- For other notes concerning this item, see -128-.
Creating a Title
You can create a title and record on a Card.
1 Camera Mode:
Slide the
[TAPE/CARD/CARD MODE]
Selector 27 to [CARD MODE] until [PICTURE] Indication appears first. Set the Lens to the image you want to use for creating a title.

1 VCR Mode:
Search for the image you want to use for creating a title and set the Movie Camera to the Still Playback Mode.

2 Set [CARD SETUP] >> [CREATE TITLE] >> [YES].
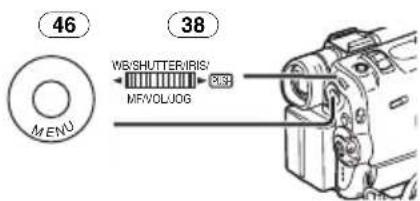
3 Press the [PHOTO SHOT] Button 26.

- The title is stored. - To perform Photoshot again, select [RETURN].
4 Select [LUMINANCE] and press the [PUSH] Dial 38, turn it to adjust the title contrast and press it.
5 Select [COLOUR] and press the [PUSH] Dial 38, turn it to adjust the colour and press it.

- The dark portion of the image is missing ①, and the colours of the bright portion change in order of black, blue, green, cyan, red, magenta, yellow and white, after which the bright portion of the image is missing ② and the colours of the dark portion change in the above order.
6 Select [RECORD] and press the [PUSH] Dial 38.
●The title is recorded on the Card.
- For other notes concerning this item, see -128-.
Adding a Title
A title can be added to the picture. It is displayed in Camera Mode, VCR Mode and Card Playback Mode.
![graph TD A["Person"] --> C["Child"] B["Trees"] --> C["Child"]](/content/2026/05/991746/images/4352cc338daf80958a8f176df8eb178b21daf77595099f1b1528f290fd606281.jpg)
1 Press the TITLE Button 10.

●The title is displayed.
2 Press the [MULTI] Button 14.
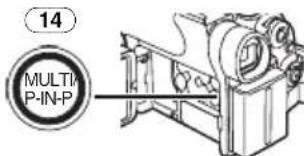
●A list of titles is displayed.
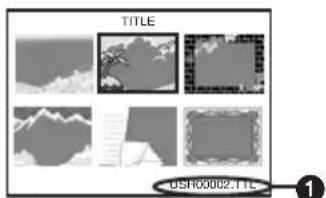
- File Name 1
3 Turn the [PUSH] Dial 38 to select a desired title.

●The selected title is marked with a frame.
4 Press the [PUSH] Dial 38 or press the [MULTI] Button 14.
●The selected title is displayed.
- Recording and Photoshot Recording can be done with pictures that have titles.
To Clear the Title Display Press the [TITLE] Button 10.
- The [ACCESS] Indication appears until the titles are displayed completely. Perform the Recording after the [ACCESS] Indication disappears.
- For other notes concerning this item, see -128-.
Writing Printing Data on a Card
(DPOF Setting)
DPOF Setting Printing data (DPOF Settings), such as the number of images to be printed, can be written to the Card. "DPOF" means Digital Print Order Format.
1 Slide the
[TAPE/CARD/CARD MODE]
Selector 27 to [CARD MODE] until the [PICTURE] Indication appears.
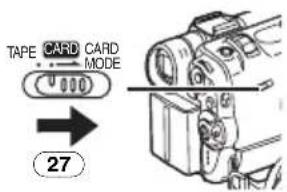
2 Set [CARD FUNCTIONS] >> [CARD EDITING] >> [DPOF SETTING] >> [YES] >> [VARIABLE].

- To print all pictures one at a time, select [ALL 1]. When all images are not printed, select [ALL 0].
3 Select a desired picture and press the [PUSH] Dial 38.
- The selected picture is marked with a frame.
- The number of prints set by DPOF ① is displayed.
4 Turn the [PUSH] Dial 38 and select the number of pictures to be printed, and press the [PUSH] Dial 38.
•[●] Indication ② is displayed in the picture set. (-118-)
5 Repeat Step 3 and 4 and press the [MENU] Button 46 when the setup is completed.
To Verify DPOF Setting
Select [VERIFY] in Step 2. The pictures for which 1 or more print is set in DPOF are played back continuously.
- For other notes concerning this item, see -128-.
Protecting the Files on a Card
(Lock Setting)
Precious files recorded on a Card can be locked (to prevent accidental erasure). (Even if files are locked, the files will be deleted when the Card is formatted.)
1 Set [CARD FUNCTIONS] >> [CARD EDITING] >> [FILE LOCK] >> [YES].

●The [FILE LOCK] Menu is displayed.
2 Select [PICTURE] or TITLE.

3 Select the file to be locked, and press the [PUSH] Dial 38.
- The selected file is locked and the [d]indication ① is attached. Repeat this procedure to lock 2 or more.
- Files recorded by Voice Recording Function is automatically locked (to prevent accidental erasure).
- Press the [PUSH] Dial 38 again to cancel.
●The SD Memory Card has a write protection switch. (-128-) - For other notes concerning this item, see -128-.
Deleting the Files Recorded on a Card
Using the Movie Camera, you can delete the files recorded on a Card. After the file is deleted, it cannot be restored.
To Select and Delete Files
1 Slide the
[TAPE/CARD/CARD MODE]
Selector 27 to [CARD MODE] until the type of data to be erased indication appears.

2 Set [CARD FUNCTIONS] >> [DELETE CARD FILE] >> [DELETE FILE BY SELECTION].

- To erase a title, select [DELETE TITLE BY SELECTION].
3 Select the file you wish to delete and press the [PUSH] Dial 38.
- The frame around the selected file flashes.
- To erase 2 files or more, repeat this step.
4 Press the [PHOTO SHOT] Button 26.

●A verification message appears.
5 Select [YES] and press the [PUSH] Dial 38.
●The selected file is deleted from the Card.
- If [NO] is selected, the file selection is cancelled.
To Select and Delete All Files
1 Slide the
[TAPE/CARD/CARD MODE]
Selector 27 to [CARD MODE] until the type of data to be erased indication appears.

2 Set [CARD FUNCTIONS] >> [DELETE CARD FILE] >> [DELETE ALL FILES].

●A verification message appears.
3 Select [YES] and press the [PUSH] Dial 38.
-
All the files of the selected Card Mode ([PICTURE], [MPEG4] or [VOICE]) are erased.
●A locked file cannot be erased. -
When you delete Voice File, be sure to cancel the Lock setting before deleting.
- Do not delete the Voice Files recorded with this Movie Camera using other devices.
Formatting a Card
If a Card becomes unreadable by the Movie Camera, formatting it may make it reusable. Formatting erases all the data recorded on a Card.
1 Set [CARD FUNCTIONS] >> [CARD EDITING] >> [CARD FORMAT] >> [YES].
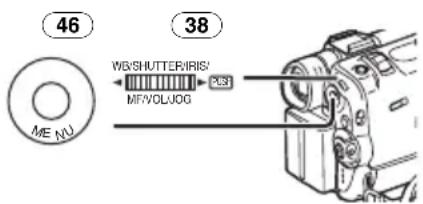
- Since a confirmation message appears, select [YES] and formatting will be carried out.
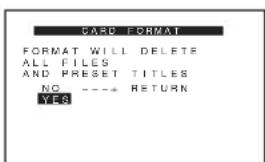
- When the formatting is completed, the screen becomes white.
- It may not be possible to use the Card which was formatted using this Movie Camera on another unit. In this case, format the Card on the unit which will be using the Card. Take steps to ensure that valuable pictures are stored on the personal computer, etc. as well before proceeding.
●A Card formatted with an other equipment (like a Personal Computer) might be unusable or it might take more time for recording. We recommend that you use this equipment to format it.
With a PC
USB Connection Kit
Using the supplied USB Connection Kit, you can import still pictures into your personal computer.
- Do not connect the USB Cable until the USB driver is installed.
1 Install the supplied USB driver.
2 Set the Movie Camera to Card Playback Mode.
3 Set the Movie Camera to Still Playback Mode.
4 Connect the supplied USB Cable to [ ]Socket 30.
- It enters PC connection mode.

- The USB Connection Kit can be used with Windows98 Second Edition/Me/XP.
- Use AC Adaptor as power source for the Movie Camera. (The Card or its contents may be destroyed if battery power is lost while transmitting data.)
- Mode cannot be changed in PC connection mode by operating [OFF/ON/MODE] Switch.
- For more details on the operating environment, installation, connections, and procedures, please refer to USB Connection Kit's operating instructions.
- To disconnect the USB Cable safely, double-click the [icon] in the task tray and follow the instructions on the screen.
Using as a Web Camera
If the Movie Camera is connected to your Personal Computer, you can send video from the Movie Camera to the other parties via the network.
- Do not connect the USB Cable until the USB driver is installed.
1 Install the supplied USB driver.
2 Set the Movie Camera to Camera Mode.
3 Connect the supplied USB Cable to [.]Socket 30.

4 Set [CAMERA FUNCTIONS] >>
[CAMERA SETUP] >>
[WEB CAMERA] >> [ON].

- It enters WEB CAMERA Mode.
5 Start the NetMeeting.
- When using as a web camera, it is not possible to record on a tape or a card or display a title.
- When the LCD Monitor is opened and rotated frontward in the WEB CAMERA Mode, the Viewfinder becomes disactivated.
- For more details on the operating environment, installation, connections, and procedures, please refer to USB Connection Kit's operating instructions.
Using a Card in a Personal Computer
When using Card Data recorded with this Movie Camera, please note the following points.
- To erase pictures that you recorded on the Card by using the Movie Camera, be sure to erase them on the Movie Camera, not on the computer.
- Using the optional DV Editing Software (Motion DV STUDIO) for Windows (VW-DTM20/21/22), variety of visual effects can be added and title can be created.
-
You may not be able to properly play back or search the images on the Movie Camera after editing the recorded data or changing the image data on a personal computer.
-
The image data files recorded on the Card with this Movie Camera conform to the DCF (Design rule for Camera File system) stipulated by JEITA (Japan Electronics and Information Technology Industries Association).
- Moving Picture format (MPEG4) that can be played back on this device is ASF. (Depending on the file, it may not be able to be played back even if it is in ASF format.)
Constructing a Folder when the Card is used with a PC
- When a Card with data recorded on it is inserted into a personal computer, folders will be displayed as in the figure.
SD Memory Card:


MultiMediaCard:


100CDPFP: The images
(IMGA0001.JPG, etc.) in this folder are recorded in the JPEG format.
[MISC]: Files in which DPOF
Data has been set to the image are in this.
TITLE: This contains the data of the preset titles
(PRE00001.TTL) and original titles
(USR00001.TTL, etc.).
[PRL001]: MPEG4 moving picture
is recorded in ASF format (MOL001.ASF etc.). It can be played back with Windows
Media Player (ver.6.4 and later). Because of small size, this File is well suited for transmitting data
through telephone line etc.. To play back moving picture with Windows Media Player, select a file and double click. Necessary software is automatically downloaded and starts playing back. (Internet connection is required.) To play back with Mac OS, Windows Media Player for Macintosh is required.
- [DCIM], [IM01CDPF], [PRIVATE], [VTF], [SD_VIDEO], [SD_VOICE], etc. are necessary items in the folder structure. They have nothing to do with actual operations.
- In the Card Photoshot Mode, the Movie Camera automatically saves file numbers (IMGA0001.JPG, etc.) along with the images. The file numbers are recorded with each image as a consecutive number.
- In the [SD_VC100] folder, the Voice data (MOB001.VM1 etc.) is recorded. It, however, cannot be played back on Personal Computer.
- The [SD_VOICE] folder and the Voice files in the folder are set as hidden. Depending on the settings of your personal computer, this hidden folder and these hidden files might not appear in Windows Explorer or the "My Computer" screen.
- When using the software without indication function, indication data, such as date, are not displayed. Depending on the software in use, the date and the time may not be displayed correctly.
- The memory capacity indicated on the SD Memory Card label corresponds to the total amount of the capacity to protect and manage the copyright and of the capacity available as a conventional memory for a Movie Camera, Personal Computer or others. Capacity that can be used as conventional memory:
8MB Card: about 6,800,000 bytes The supplied SD Memory Card contains Preset title so the actual capacity may be smaller.
Others
Indications
Various functions and the Movie Camera status are shown on the screen.
: Remaining Battery Power
- When the battery power becomes low, the Indication changes. When the battery is discharged completely, the ▲ (□) Indication flashes.
R0:45: Remaining Tape Time
- Remaining tape time is indicated in minutes. (When it reaches less than 3 minutes, the indication starts flashing.)
CINEMA: Cinema Mode -87-
D.ZOOM: Digital Zoom -84-
MULTI: Multi Mode -90-
P-IN-P: P-IN-P Mode -90-
WIPE: Wipe Mode -90-
MIX: Mix Mode -90-
STROBE: Strobe Mode -90-
GAIN UP: Gain-up Mode -90-
TRAIL: Trailing Effect Mode -91-
MOSAIC: Mosaic Mode -91-
MIRROR: Mirror Mode -91-
NEGA: Negative Mode -91-
SEPIA: Sepia Mode -91-
B/W: Black & White Mode -91-
SOLARI: Solarisation Mode -91-
PB ZOOM: Playback Zoom -97-
SP: Standard Mode (Recording Speed Mode) -80-
LP: Long Play Mode (Recording Speed Mode) -80-
INDEX: Index signal recording -96-
S 1: Search Number -97-
5×: Zoom Magnification Indication -84-
AUTO: Automatic Mode -81-
MNL: Manual Mode -87-
: Image Stabilizer -85- MIC, AV IN: Audio Dubbing Input Display -100-
12 bit, 16 bit: Audio Recording Mode -80-
MF: Manual Focus -90-
Back Light Mode -86- Sports Mode
(Programme AE) -87- Portrait Mode
(Programme AE) -87-
Low Light Mode (Programme AE) -87-
Spotlight Mode (Programme AE) -87-
Surf & Snow Mode (Programme AE) -87-
REC: Recording -81-
PAUSE: Recording Pause -81-
Self-Timer Recording -84-
When connecting the Free Style Remote Controller with Mic to [REMOTE] Socket and the [TALK] Button is pressed, this indication appears. -82-
▷: Playback -94-/Forward Camera Search -82-
◀: Reverse Camera Search -82-
II: Still Playback -95-
▷▷: Fast-forward/Cue Playback -94-
◀◀: Rewind/Review Playback -94-
◀I, ▶: Slow Motion Playback -95-
◀■■, ■■▶: Still Advance Playback -95-
✉✉, ▷✉: Index Search -96-
CHK: Recording Check -81-
A.DUB ▷: Audio Dubbing -100-
A.DUB ■: Audio Dubbing Pause -100-
PHOTO: Photoshot Mode Recording -83-
BLANK: Blank Search -96-
R ▷: Repeat Playback -124-
2×▷▷: Variable Speed Search -95-
1/500: When you adjust shutter speed manually, this indication appears. -89-
SLIDE▷: Slide Show Playback -109-
SLIDEIII: Slide Show Playback Pause -109-
M.SLIDE▷: Manual Slide Show Playback -110-
M.SLIDEIII: Manual Slide Show Playback Pause -110-
F2.4: When you adjust the F Number manually, this indication appears. -90-
White Balance setting Mode -88-
*: Outdoor Mode -88-
: Indoor Mode (recording under incandescent lamp) -88-
C.NIGHT VIEW:
Colour Night View Function -86-
0LUX NIGHT VIEW:
0 Lux Night View Function -86-
Z.MIC: Zoom Microphone -84-
WIND CUT: Wind Noise Reduction -87-
P: Progressive Photoshot
Mode -83-
PICTURE: Picture -107-
TITLE: Title picture -111-
MPEG4: Moving Picture (MPEG4) -107-
VOICE: Voice data -107-
0h00m00s: Recording time of MPEG4 or Voice data
VOLUME: Volume adjustment -94-
15:30:45: Date/Time Indication -119-
N (F, E): Card Photoshot Picture Quality (during Card Photoshot recording) [F] means Fine, [N] means Normal and [E] means Economy. -104-
NF, sMPEG4 Picture Quality -106-
ACCESS: While Card is being read (during Playback, Formatting and Multi-Picture Function use). -103-
0: Remaining Number of Card Photoshot pictures -104-
R:0h00m: Remaining time of MPEG4 or Voice data
H, L: Card Continuous Photoshot Recording -104-
0-π: Lock Setting -113-
● (White): DPOF Setting completed (set to 1 or more picture) -112-
● (Green): Slide Show Settings completed -110-
● (Blue): DPOF Setting (set to 1 or more picture)/Slide Show Settings both completed -110-, -112-
640: [640×480] Image size
- For images not recorded with this Movie Camera, the size display is determined as follows according to the number of horizontal pixels.
640: 640 or more, less than 800 (The size is not displayed at under 640 pixels.)
SVGA: 800 or more, less than 1024
XGA: 1024 or more, less than 1280
SXGA: 1280 or more, less than 1600
UXGA: 1600 or more, less than 2048
QXGA: 2048 or more
PICTURE (Cyan): Card Photoshot Mode
PICTURE (Red): While Card Photoshot recording is activated
PICTURE (Red): No Card (Still Picture Mode)
MPEG4 (Cyan): Moving Picture (MPEG4) Recording
MPEG4 (Red): While Moving Picture (MPEG4) recording is activated
MPEG4 (Red): No Card (MPEG4 Mode)
VOICE (Cyan): Voice Recording Mode
VOICE (Red): While Voice Recording is activated
VOICE (Red): No Card (Voice Recording Mode)
■ To Change the Counter Display Mode
By changing [C.DISPLAY] on the [DISPLAY SETUP] Sub-Menu, you can change the Counter Display Mode to Tape Counter Indication [COUNTER] (0:00.00), Memory Counter Indication [MEMORY] (M0:00.00), and Time Code Indication [TIMECODE] (0h00m00s00f). (-78-) By repeatedly pressing the [COUNTER] Button on the Remote Controller, you can change the Counter Display Mode.
■ To Display Date/Time Indication
To display Date/Time Indication, set the appropriate Date/Time in [DATE/TIME] on the [DISPLAY SETUP] Sub-Menu. (-78-)
You can also press the [DATE/TIME] Button of the Remote Controller repeatedly to display or change the Date/Time Indication.
To Change the Display Mode
By changing [DISPLAY] on the [DISPLAY SETUP] Sub-Menu, you can change the Display Mode to All Function Display [ALL], Partial Display [PARTIAL] and Minimum Display [OFF]. (-78-)
Owner ID
You can register your name and address in your Movie Camera to identify the owner.
1 Set [CAMERA FUNCTIONS] >> [OTHER FUNCTIONS1] >> [OWNER ID SET] >> [YES].
●The [OWNER ID] Menu appears.
2 Turn the [PUSH] Dial 38 to select [PIN NUMBER] and press the [PUSH] Dial 38 to input desired numbers.
3 Turn the [PUSH] Dial 38 to select numbers and press the [PUSH] Dial 38 to enter them.
- Be sure to input 4 digits. Otherwise the Pin Number will not be registered.
4 Press the [■] Button.
5 Repeat Steps 2–4 to input desired characters for [NAME] and [POSTCODE].
- You can input up to 12 characters in [NAME], and up to 11 characters in [POSTCODE].
6 Press the [■] Button to finish the setup.
To Verify Owner ID
Keep pressing the [■■] Button for approximately 5 seconds.
To Correct the Contents
If Owner ID has already been set, carrying out Step 1 will display [INPUT PIN NUMBER] on the screen. Input the Pin Number you have already selected. If the number is not correct, the screen will not change. If the number is correct, the contents of the setup will be
displayed. (By repeating Steps 2 to 4, you can change the contents.)
Initializing the Modes
You can change the Menu settings back to the shipping condition.
1 Set [CAMERA FUNCTIONS] >> [OTHER FUNCTIONS2] >> [INITIAL SET] >> [YES].
●The initializing takes for a while.
● After the initializing is completed, the [COMPLETED] Indication appears with beeps.
- Initializing will not erase the Owner ID setting and the clock setting (-80-) that has been adjusted.
Warning/Alarm Indications
If any one of the following indications lights up or flashes, please check the condition of the Movie Camera.
: Condensation has occurred. -130-
The accidental erasure prevention slider on the inserted Cassette is open (that is, set to [SAVE]). You are about to do audio dubbing on the unrecorded (blank) portion of the tape.
No Cassette is inserted. -74-
☐: The Battery is low. Recharge it. -72-
: The built-in battery is low. -80-
⊗: The video heads are dirty. -130-
END:
The tape came to end during recording.
REMOTE:
Wrong Remote Controller Mode has been selected. -71-
UNPLAYABLE TAPE
(OTHER FORMAT):
You are attempting to play back a tape section that has been recorded with a different TV system.
UNABLE TO A. DUB
(LP RECORDED):
Because the original recording was done in LP Mode, audio dubbing cannot be performed.
INCOMPATIBLE TAPE:
This Cassette is incompatible.
PLEASE RE-OPERATE
AFTER PUSHING
RESET BUTTON:
Mechanism Irregular is detected. Press the [RESET] Button (-69-). This may solve the problem.
TO SERVICE:
It is a malfunction.
CARD FULL:
Card does not have sufficient memory remaining.
Select Card Mode and delete unnecessary files.
NO CARD:
Card is not inserted.
NO FILE:
Card has no files recorded on it.
UNPLAYABLE CARD:
You are attempting to play back a data which is not compatible with this Movie Camera.
CARD ERROR:
This Card is not compatible with this Movie Camera.
COPY INHIBITED:
Because the medium is protected by a copy guard, images cannot be recorded correctly.
INCORRECT
OPERATION:
You are attempting to record to a tape in VCR Mode.
You are pressing the
[PHOTO SHOT] Button in MPEG4 Recording or Voice Recording.
You are attempting to record to a tape in Card Mode.
CONNECT USB CABLE:
The [WEB CAMERA] on the [CAMERA SETUP] Sub-Menu of the [CAMERA FUNCTIONS]
Main-Menu is set to [ON] with USB
Cable unconnected. Connect the USB Cable to the Movie Camera and the Personal Computer.
DISCONNECT USB CABLE:
You are pressing the Recording Start/Stop Button, the
[PHOTO SHOT] Button or the
TITLE Button in the WEB CAMERA Mode.
You are pressing the TITLE
Button in Camera Mode or VCR
Mode with a USB Cable connected.
You are attempting to record on a Card with a USB Cable connected.
CANCEL WEB CAMERA MODE:
It is not possible to operate the [OFF/ON/MODE] Switch in the WEB CAMERA Mode.
Notes and Hints
Concerning the Power Supply
- When the Movie Camera is used for a long time, the Camera body becomes warm, but this is not a malfunction.
- If the [CHARGE] Lamp does not light up although the Battery is attached to the AC Adaptor, detach the Battery and reattach it.
- Inserting/Removing the Cassette
- In the case of using a previously recorded Cassette, you can use the Camera Search Function to find the position where you want to continue recording.
- If a new Cassette is inserted, rewind to the beginning of the tape before starting recording.
- When inserting the cassette, make sure it faces in the right direction and then push it in until it stops.
- When the Cassette Holder is in action, do not touch anything except the [PUSH CLOSE] Button.
- When closing the Cassette Compartment Cover, do not get anything caught in the cover, such as a cable of an optional stereo microphone.
Alarm Sounds
When [BEEP SOUND] on the [OTHER FUNCTIONS1] Sub-Menu on the [CAMERA FUNCTIONS] Main-Menu is set to [ON], confirmation/alarm beeps are issued as follows.
1 Beep
- When you start recording
- When you switch the [OFF/ON/MODE] Switch from [OFF] to [ON]
2 Beeps
- When you pause recording
2 Beeps for 4 times
- If you perform a wrong operation before or during recording
Recording Check
- For Recording Check, the recording speed mode (SP/LP) must be the same as the mode used for the recording. If different, playback images will be distorted.
Camera Search
- In Camera Search Mode, images may contain mosaic-pattern noise. This is a phenomenon that is characteristic of digital video and not a malfunction.
- If the recording speed modes (SP/LP) of previous recording and new recording are different, playback images may be distorted.
Quick Start
●During the Quick Start Standby Mode, a minute amount of electricity is consumed.
- When the Movie Camera is left in the Recording Pause Mode for 6 minutes, it will be turned into the Quick Start Standby Mode. To turn the Movie Camera on again, set the [OFF/ON/MODE] Switch to [OFF] and then set it to [ON] again. (The Quick Start Mode will be restored.)
●This Function is not activated in the following cases even if the Quick Start Recording Lamp lights:
●A tape is not inserted, while the Tape Mode is set.
- A Card is not inserted, while the Card Mode is set.
- In the following cases, Quick Start is temporarily cancelled when the Quick Start Mode is set. Set the Camera Mode again, and the Quick Start Mode will be restored.
- Set to the VCR Mode or Card Playback Mode
●The Battery is replaced
- If the [QUICK START] Button is pressed and held for approximately 2 seconds during the Quick Start Standby Mode, the Lamp will go off and the Movie Camera will completely be turned off.
- If the Movie Camera is not operated for approximately 30 minutes when the Quick Start Recording Lamp lights, the Lamp will go off and the Movie Camera will completely be turned off.
- In the Automatic White Balance Mode, the colour may be recorded unnaturally at the beginning of the recording.
- The zoom magnification differs from when it is in the Quick Start Standby Mode and when the recording starts.
Photoshot
- Photoshot Recording results in slightly inferior image quality.
Progressive Photoshot Function
- The still pictures are recorded at a slightly rewound point from where you press the [PHOTO SHOT] Button.
- When you change to the Still Picture Mode, you will hear a click. This is the sound of the iris closing and not an indication of malfunction.
- If you record still pictures in Progressive Photoshot Mode when your Movie Camera is set to Programme AE (-87-), the brightness of the images may change.
- Using the Night View Functions cancels the Progressive Photoshot Function.
About [PROGRESSIVE] Setup
- When the [P] Indication is displayed, you can use the Progressive Photoshot Function.
When [PROGRESSIVE] is [ON]:
You can use the Progressive Photoshot Function at any time. In this case, however, the following functions are disabled.
●Digital Effect Modes in [EFFECT1] -90-
●Digital Zoom [D.ZOOM] -84-
- 1/750 s or faster shutter speed -89-
When [PROGRESSIVE] is set to [AUTO]
You cannot use the Progressive Photoshot Function in the following cases.
- When the zoom magnification is approximately 10 × or higher
- When the shutter speed is 1/750 s or faster
- When [EFFECT1] is set to [WIPE], [MIX], [STROBE], [GAIN UP], [TRAIL], [MOSAIC], [MIRROR]
- When the pictures are displayed on a Multi screen
Self-timer Recording
- When [BEEP SOUND] on the [OTHER FUNCTIONS1] Sub-Menu on the [CAMERA FUNCTIONS] Main-Menu is set to [ON], the beep sound will be emitted along with the Recording Lamp flashing in the Self-timer Standby Mode.
- By operating the [OFF/ON/MODE] Switch, the Self-timer Standby Mode is cancelled.
Zoom In/Out Functions
- When you are zooming on a faraway subject, a sharper focus is achieved if the recording subject is 1.2 metres or more away from the Movie Camera.
Zoom Microphone Function
- The Zoom Microphone Function may not work effectively if the surrounding noise is too loud.
- It does not work with an external microphone.
Digital Zoom Functions
- As the magnification of digital zoom increases, the quality of image may deteriorate.
- White balance cannot be set in the digital zoom range.
■ Image Stabilizer Function
- The Image Stabilizer Function does not operate in a dimly lit place. In this case, the [图标] Indication flashes.
● Under fluorescent lighting, image brightness may change or colours may not look natural.
●After-images may appear.
- When a tripod is used, it is recommended that you turn the Image Stabilizer off.
- Within the digital zoom range, or when recording with a conversion lens attached, the Image Stabilizer Function may not work effectively.
■ Backlight Compensation Function
- When setting the Iris manually, the Backlight Compensation Function does not work.
- By operating the [OFF/ON/MODE] Switch, the Backlight Compensation Function is cancelled.
Night View Functions
- In a bright place, such as the outdoors, the recorded picture may become whitish.
- In a dark place, the recorded picture is presented in a time-lapse-like manner.
- Adjust the Focus manually.
- The Progressive Photoshot Function is automatically turned off.
- The Continuous Photoshot Function cannot be used.
● White Balance cannot be set.
●The shutter speed cannot be adjusted.
- The Image Stabilizer, Programme AE or Digital Effect Modes in [EFFECT1] cannot be set.
- When recording with the Night View Function, it is recommended to use the tripod.
●The Night View Function makes the signal charging time of CCD longer up to 25 times than usual, so that the dark scenes that are invisible for naked eyes can be recorded brightly. For this reason, a bright dots may be seen, but this is not a malfunction.
Wind Noise Reduction Function
- It does not work with the microphone on the Free Style Remote Controller with Mic nor an external microphone.
- When it is set to [ON], directivity of microphone is regulated depending on the strength of wind to reduce wind noise.
Cinema Function
- Using the Cinema Mode does not widen the recording angle.
- If you play back tape recorded in Cinema Mode on a wide-screen (16:9) format TV, playback size is automatically adjusted to fit the TV screen format. Please refer to the TV's operating instructions for details.
- When images are displayed on a TV screen, the Date/Time Indication may be erased in some cases.
- Depending on the TV, the picture quality may be deteriorated.
●The Cinema Mode is cancelled when a Title is displayed. - Using the Cinema Mode deactivates [MULTI] and [P-IN-P] of [EFFECT1].
- Depending on the software in use, the imported Cinema picture may not be displayed correctly.
Programme AE
- If any of the Programme AE Modes is selected, you cannot adjust the shutter speed (-89-) or iris (-90-).
- You cannot use Sports Mode, Portrait Mode or Low-Light Mode with Gain-up Mode [GAIN UP].
- When using Sports Mode, Portrait Mode or Low-Light Mode, using the Night View Function cancels this mode.
Sports Mode
●During normal playback, the image movement may not look smooth.
●Because the colour and brightness of the playback image may change, avoid recording under fluorescent light, mercury light or sodium light.
- If you record a subject illuminated with strong light or a highly reflective subject, vertical lines of light may appear.
- If the light is insufficient, the [图标] Indication flashes.
Sports Mode/Portrait Mode
- If you record a still picture in Progressive Photoshot Mode, the brightness and hue of the recorded still picture may become unstable.
- If this mode is used for indoor recording, playback images may flicker.
Low Light Mode
- Extremely dark scenes may not be able to be made brighter to a satisfactory degree.
Spotlight Mode
- With this mode, recorded images may turn out to be extremely dark.
- If the recording subject is extremely bright, its recorded image may turn out to be whitish.
Surf & Snow Mode
- If the recording subject is extremely bright, its recorded image may turn out to be whitish.
White Balance
In the following cases, you cannot change White Balance:
- When you set [EFFECT1] of [DIGITAL EFFECT] Sub-Menu on the [CAMERA FUNCTIONS] Main-Menu to [GAIN UP] or [EFFECT2] to [SEPIA] or to [B/W].
- When you set the Zoom to 10 × or higher
●During Digital Still Picture Mode - When you display a Menu
- When you use the Night View Mode
In the following cases, the [■] Indication flashes:
●The flashing indicates that the previously adjusted White Balance setting is still kept. This setting will be kept until White Balance is adjusted again.
- You may not be able to achieve correct White Balance Adjustment manually under weak illumination.
■ Manual Shutter Speed Adjustment
- You may see vertical lines of light in the playback image of a brightly shining subject or highly reflective subject.
- During normal playback, movement in the images may not look smooth.
- Because the colour and brightness of the playback image may become unstable, avoid recording under fluorescent light, mercury light or sodium light.
- If you are using Gain-up Mode (-90-), Programme AE Mode (-87-) or Night View Mode (-86-), you cannot adjust the shutter speed.
■ Manual Iris Adjustment
- Depending on zoom magnification, there are iris values that will not be displayed.
- If you are using Night View Mode (-86-) or Programme AE Mode (-87-), you cannot adjust the iris.
- If you attempt to adjust the Shutter Speed after setting the Iris, the value set for the Iris will be cancelled.
Digital Effect Functions
- It is not possible to use [MULTI], [P-IN-P], [WIPE], [MIX] or [TRAIL] of [EFFECT1] together with the digital modes of [EFFECT2] on the [DIGITAL EFFECT] Sub-Menu.
- If you have set [EFFECT2] to [B/W] or [SEPIA], changing the selected White Balance Mode is not possible. (-88-)
- Setting the Cinema Mode cancels the Picture-in-Picture Mode and the Multi-Picture Mode.
In the following cases, using the [EFFECT1] on the [DIGITAL EFFECT] Sub-Menu is not possible.
- When [PROGRESSIVE] is set to [ON] (-83-)
-
When the Night View Mode is set (-86-) In the following cases, using the Digital Effect Function is not possible.
-
Card Mode
•Title In
It is as follows when [GAIN UP] is selected.
- Manual Focus Mode
●The shutter speed and White Balance cannot be operated. - The Sports Mode [ 👉], the Portrait Mode [ 👉] and Low Light Mode [ 👉] are cancelled.
Wipe Mode and Mix Mode
If either one of the following operations is carried out, stored images will be erased, and Wipe and Mix Functions cannot be used.
- Use the Camera Search Function
- Press the [STILL] Button
Picture-in-Picture Mode
- If the [OFF/ON/MODE] Switch is operated, the smaller picture disappears.
- Titles cannot be inserted into the smaller picture.
Multi-Picture Mode
- If the [MULTI] Button is pressed while self-recording Mirror Mode (-82-) is used, the still picture is displayed from the upper right corner of the screen, but, in reality, the picture is recorded from the upper left corner as usual.
- Multi-Picture Mode cannot be used in digital still picture mode.
- The quality of Multi images deteriorates slightly.
- The top and bottom of the Multi pictures will be cut off slightly.
Playing Back Repeat Playback
If you continue to press the [▶] Button for 5 seconds or longer, the Movie Camera switches to Repeat Playback Mode, and the [R ▷] Indication appears. (To cancel Repeat Playback Mode, set the [OFF/ON/MODE] Switch to [OFF].)
Listening to Playback Sound through Headphones
If you want to use the headphones to listen to the playback sound, set [AV JACK] on the [AV IN/OUT SETUP] Sub-Menu to [OUT/PHONES] and connect the headphones to the [PHONES] Socket (-68-) on the Movie Camera. In this case, no sound (including a warning sound and shutter sound) will be reproduced through the built-in speaker of the Movie Camera.
Choosing Sound during Playback
You can select the sound by using the [AUDIO OUT] setting on the [PLAYBACK FUNCTIONS] Sub-Menu. STEREO: Stereo Sound (main sound and sub sound)
L: Left channel sound (main sound)
R: Right channel sound (sub sound)
- If you dub a tape recorded at the [12bit] selected as the [AUDIO REC] on the [RECORDING SETUP] Sub-Menu, playback sound becomes stereo sound regardless of the [AUDIO OUT] setting if [12bit AUDIO] is set to [MIX].
Index Search Functions
- Index Search may not be possible at the beginning of tape.
- Because Photoshot Index Signals are not recorded on still pictures recorded in Continuous Photoshot Mode, the Photoshot Index Search Function cannot be used for these still pictures.
- Scene Index Search may not function properly if the interval between 2 scene index signals is shorter than 1 minute.
■ Playback Zoom Function
- You cannot adjust the sound volume with the Remote Controller in Playback Zoom Mode.
- If you turn off the Movie Camera power or if you switch from VCR Mode to Camera Mode, Playback Zoom Mode is automatically cancelled.
- Even if Playback Zoom Functions are being used, images that are output from the DV Terminal (-69-) are not enlarged.
- As you enlarge an image, the quality of image suffers.
- During a Playback Zoom, the Variable Speed Search Function cannot be changed with the Remote Controller.
■ Playback Digital Effect Functions
- Signals of images to which digital effects are added during playback cannot be output from the DV Terminal (-69-).
- You cannot use the Wipe or Mix Function while playing back the non-recorded portion of tape.
Multi-Picture Mode (VCR Mode)
●The quality of Multi images deteriorates slightly.
- Playback Multi-Mode screens cannot be output through the DV Terminal (-69-).
- If there is input from DV Terminal, a multi screen cannot be created.
- When signals are input from S-Video Input/Output Socket or Audio-Video Input/Output Socket, a Multi Screen cannot be re-displayed.
- Signals input from S-Video Input/Output Socket or Audio-Video Input/Output Socket cannot be displayed on a Multi Screen.
- If you switch the Movie Camera from the Index Multi-Picture Mode over to the Camera Mode, the setting of [SCAN MODE] on the [MULTI-PICTURES] Sub-Menu of the [CAMERA FUNCTIONS] Main-Menu is automatically set to [STROBE].
Playing Back on Your TV
- If you set [AV JACK] on the [AV IN/OUT SETUP] Sub-Menu to [IN/OUT], nothing will be shown on the TV screen except during playback.
●Picture size may be displayed differently when playing back a Cinema picture on a wide-screen TV with [B/W] or [SEPIA] of Playback Digital Effect.
Audio Dubbing
●The blank section of a tape cannot be dubbed.
● Sounds sent through the DV Terminal cannot be dubbed.
- If a tape has a non-recorded portion when the tape is dubbed, images and sounds may be disturbed when this portion of the tape is played back.
- If you set the tape counter back to 0 at the position where you want to stop Audio Dubbing so as to make it possible to use the Memory Stop Function (-136-), Audio Dubbing is terminated automatically when the tape reaches this position.
- In the case of importing data recorded with Audio Dubbing to a PC using the PC's software programme, only the original sound (ST1) may be imported, depending on the software programme.
■ Recording the Contents of Other Equipment
Recording to a Card
If you set the [TAPE/CARD/CARD MODE] Selector to [CARD], you can use the Card Photoshot function for external input signals.
- Black streaks may appear at the 4 edges of the image.
- If the [VOICE] Indication is displayed, recording to a Card is not possible.
Analog-Digital Conversion
- When the Movie Camera is connected with other digital video equipment through its DV Terminal, images recorded in analog form from other external equipment can be output to the digital video equipment through the DV Terminal.
- To DV-output analog video signals sent from other equipment, set [DV OUT] on the [AV IN/OUT SETUP] Sub-Menu to [ON]. (Normally, keep the [DV OUT] set to [OFF]. If it is set to [ON], the quality of the image may be disturbed.)
Using the DV Cable for Recording (Digital Dubbing)
- Regardless of the setting, digital dubbing is carried out automatically in the same audio recording mode as that of the Cassette on the playback-side.
- The images on the monitor of the recording side may be disturbed, but it does not affect the recorded images.
- Even if Playback Digital Effects, Playback Zoom, or Playback Title In have been used, these effects are not output from the DV Terminal.
- Even if you use device equipped with DV Terminals (such as IEEE1394), you may not be able to perform Digital Dubbing in some cases.
- Date or other information to be displayed cannot be displayed if the software of the connected equipment does not support the display function.
Recording on a Card
- Even if the [SHTR EFFECT] is set to [ON], the Shutter Effect cannot be recorded on the picture.
- During automatic copying tape pictures onto a Card, the number of pictures that can still be recorded on the Card is displayed. When it becomes [0], the Tape is set to the Recording Pause Mode.
●Pictures with wide-screen format signals cannot be copied. - When the colour of the screen changes or blurs, adjust the shutter speed manually to 1/50 or 1/100.
Card Photoshot
●The sound cannot be recorded.
●The [PROGRESSIVE] is set to [ON].
- The file format supported by this Movie Camera is JPEG. (Not all the JPEG formatted files will be played back.)
- If NORMAL or [ECONOMY] is selected for recording, mosaic-pattern noise may appear on a playback image depending on the image content.
Card Continuous Photoshot
- When the [BURST MODE] is set to [☐], the [PROGRESSIVE] is automatically set to [OFF], and when [☐], the [PROGRESSIVE] is set to [ON].
- One more still picture may be recorded after you release the [PHOTO SHOT] Button.
-
When the [BURST MODE] is set to [☐ H]:
-
The screen does not become still for each frame.
-
Even if the [CINEMA] is set to [ON], the black bars cannot be recorded on top and bottom of the picture.
-
The Card Continuous Photoshot and Title Function cannot be used simultaneously.
- When the [SELF TIMER] is set to [ON], the Movie Camera records the maximum number of pictures recordable depending on the [BURST MODE] setting.
Recording Moving Pictures (MPEG4)
- The file format supported by this Movie Camera is ASF. (Not all the ASF formatted files will be played back.)
- [PHOTO SHOT] Button does not operate.
●The following functions are disabled:
- Zoom Microphone function -84-
- Digital zooming -84-
●Fade In/Out functions -85-
●Digital Effect functions -90- -
Title functions -111-
●Self-timer -84- -
Even if the [CINEMA] is set to [ON], the black bars cannot be recorded on top and bottom of the picture.
- The sound is recorded in the monaural that is mixed [L] and [R] of the stereo sound.
- When playing back the MPEG4 moving picture recorded by this Movie Camera with other equipment, black bars may appear at the top and bottom of the screen.
- When the MPEG4-recorded image for which the [MPEG4 MODE] was set to SUPERFINE or FINE is played back on the other cameras (NV-EX21, NV-MX8, NV-MX350 etc.), [×] or [PLEASE RE-OPERATE AFTER PUSHING RESET BUTTON] may be displayed. This is not a malfunction.
- More than 100 hours of remaining time is indicated as [R:99h59m].
Recording Voice (Voice Recording Function)
- [PHOTO SHOT] Button does not operate.
- The sound is recorded in the monaural that is mixed [L] and [R] of the stereo sound.
- The continuous recording time for voice depends on the capacity of the memory card. (24 hours, max.)
- More than 100 hours of remaining time is indicated as [R:99h59m].
Playing Back a Card
- If a blank (nothing recorded) Card is played, the screen becomes white and the [NO FILE] Indication appears.
- If you attempt to play back a file recorded in a different format or a file data is defective, the [×] Indication and the [UNPLAYABLE CARD] Indication may appear as warning.
-
When playing back a picture recorded by another equipment, its size and that of this Movie Camera may appear differently.
-
This Movie Camera can also play back the Mega-Pixel still pictures up to 2560×1920 size recorded with the other equipment. However it takes longer than usual time, and the picture may not be playable.
- When playing back a nonstandardized file, the Folder-File Number may not be displayed.
-
In the following cases, black bars may appear, depending on the playback device.
-
When playing back a mega-pixel still-picture with this Movie Camera and recording it onto a tape
- Changing the picture size to 640×480 with DV STUDIO
- When playing back the MPEG4 moving picture with fast moving subject or zooming operation, the image seem to stop momentarily, or a mosaic like pattern may appear. This is not a malfunction.
- MPEG4 data cannot perform Cue/Review Playback, Slow Motion Playback (forward direction and reverse direction), Still Advance Playback (forward direction and reverse direction) or Jog Playback.
- Our Movie Camera products NV-MX8, NV-MX350 and NV-EX21 cannot play back the MPEG4 data recorded with SUPERFINE or FINE.
●The Voice data can be played back with our Movie Camera products NV-MX8, NV-MX350, NV-EX21, NV-GX7, NV-MX500 and others, while it is not available with our Movie Camera product (NV-MX7) which has the music playback function, SD-Jukebox and IC recorder (RR-XR320) supported SD Memory Card. - For the MPEG4 moving pictures recorded by another equipment, [×] may be displayed when they are played back. If the [▶] Button is pressed in this case, [▷] will be displayed for a few seconds and the next image will be displayed.
-
If an MPEG4 moving picture is played continuously for a long time, the playback may stop in the midway and the Movie Camera may freeze while a still picture is being displayed. Under the condition, press the [RESET] Button.
-
When performing Cue or Review Playback of a voice data, the Playback elapsed time may not correspond to the actual recording time of the Voice data.
- The MPEG4 or voice data cannot be output from the DV Terminal.
- When playing back a MPEG4 or voice data recorded by another equipment, a part of the playback elapsed time may be indicated as [--].
- If you attempt to play back a file recorded by another equipment, the [×] Indication may appear and the playback may not be possible. Or during playback, the the [×] Indication may appear, the playback picture may be presented in a time-lapse-like mannar, or the picture and the sound may not synchronize.
Voice Power Save
- Voice Power Save Function is to turn off the monitor to reduce the power consumption when no operation is done in the Voice Recording Mode. When [VOICE POWER SAVE] on the [OTHER FUNCTIONS1] Sub-Menu on the [CAMERA FUNCTIONS] Main-Menu, or on the [OTHER FUNCTIONS] Sub-Menu on the [CARD FUNCTIONS] Main-Menu, is set to [ON], the power save function is activated, and the screen turns off in a few seconds after some operations such as play or recording.
●The Voice Power Saving Function is cancelled when any operation is performed.
- Do not forget to turn off the power.
Recording a Card Image on a ape
- When recording the Card Image on a Tape, its size is transformed into 720 × 576 according to the DV format.
- If you attempt to record a still picture with a large image size on a Tape, there may be a reduction in the quality of the image.
- When recording the Card Images on a Tape, a Photoshot index signal is automatically recorded with a picture.
- Even if you edit the Slide Show, it is not applied to the order in copying the pictures.
●The MPEG4 data and the Voice data cannot be recorded on a Tape.
Slide Show
- The playback time can be set from 7 to 99 seconds for [2048×1496], [UXGA and [∅sized pictures, and from 5 to 99 seconds for other sizes. (-118-)
- Perform the Slide Show Settings with your Movie Camera in use.
- It may take playback time longer than usual time depending on the picture.
- When performing the preset Slide Show after the Titles are displayed, the Titles disappear.
Creating a Title
- When the [MPEG4] or [VOICE] Indication is displayed, Title Creation Function is not possible.
- Even if the contrast of the Title is adjusted, the portions where there is little difference between light and dark and where the boundary between light and dark is unclear may not appear.
●The Title may not appear well if something small is used for it. - If titles are created, the number of images that can be recorded on a Card decreases.
- If the number of images that can be recorded on a Card is small, you may not be able to create a title.
Adding a Title
- When the [MPEG4] or [VOICE] Indication is displayed, Title In Function is not possible.
- Original titles are added after the preset titles.
- If you press the TITLE Button, the last original title is displayed. When an original title is not created, the preset title is displayed. (The supplied Card contains titles.)
●The Title Function and Digital Effects cannot be used simultaneously. - The Title Function and Card Continuous Photoshot cannot be used simultaneously.
- When a title is displayed in Playback Mode, the title is not output from the DV Terminal.
- The Multi-Picture Mode cannot be used once the title is inserted.
● A full-coloured title made by another equipment cannot be played back or added to the picture with this Movie Camera. - A title with size of other than 640×480 cannot be displayed.
DPOF
- Perform the DPOF Settings with your own Movie Camera in use.
- Verifying the DPOF Settings may take a little time. Wait until the [ACCESS] Lamp goes out.
Lock Setting
●The Lock Setting carried out by this Movie Camera is only effective for this Movie Camera.
- The SD Memory Card has a write protection switch on it. If the switch is moved to the [LOCK] side, you cannot write to or format the Card. If it is moved back, you can.
- The MPEG4 data recorded by another Movie Camera may not be able to cancel the lock setting.
Cautions for Use
After Use
1 Take out the Cassette. (-74-)
2 Set the [OFF/ON/MODE] Switch to [OFF].
3 Take out the Card. (-103-)
4 Detach the power supply and retract the Viewfinder or the LCD Monitor. (-72-, -75-)
5 To protect the Lens, attach the supplied Lens Cap.
Cautions for Use
When you use your Movie Camera in a rainy or snowy day or on a beach, make sure that no water enters inside the Movie Camera.
●Water may cause the Movie Camera or Cassette to malfunction. (Irreparable failure may occur.)
- If sea water splashes onto the Movie Camera, wet a soft cloth with tap water, wring it well, and use it to wipe the camera body carefully. Then, wipe it again thoroughly with a soft dry cloth.
Keep the Movie Camera away from magnetized equipment (such as a microwave oven, TV, video game equipment, etc.).
- If you use the Movie Camera on or near a TV, images or sounds may be disturbed due to electromagnetic wave radiation.
-
Do not use near a cell phone because doing so may cause noise to adversely affect the picture and sound.
-
By strong magnetic fields created by speakers or large motors, recording on the tape may be damaged, or images may be distorted.
- Electromagnetic wave radiation generated by a microprocessor may adversely affect the Movie Camera, causing the disturbance of images and sounds.
- If the Movie Camera is affected by magnetically charged equipment and does not function properly, turn off the Movie Camera power and detach the Battery or AC Adaptor and then connect the Battery or AC Adaptor again. Thereafter, turn on the Movie Camera power.
Do not use your Movie Camera near radio transmitters or high-voltage lines.
- If you record pictures near radio transmitters or high-voltage lines, recorded images or sounds may be adversely affected.
Do not use this Movie Camera for surveillance purpose or other business use.
- If you use the Movie Camera for a long period of time, the internal temperature increases and, consequently, this may cause malfunction.
- This Movie Camera is not intended for business use.
When you use your Movie Camera on a beach or similar place, do not let sand or fine dust get into the Movie Camera.
- Sand or dust may damage the Movie Camera or Cassette. (Care should be taken when inserting and removing the Cassette.)
Do not spray insecticides or volatile chemicals onto the Movie Camera.
- If the Movie Camera is sprayed with such chemicals, the camera body may be deformed and the surface finish may peel off.
- Do not keep rubber or plastic product in contact with the Movie Camera for a long period of time.
Do not use benzine, thinner or alcohol for cleaning the Movie Camera.
●The camera body may be deformed and the surface finish may peel off.
- Before cleaning, detach the Battery or pull out the AC Mains Lead from the AC mains socket.
- Wipe the Movie Camera with a soft dry cloth. To remove stubborn stains, wipe with a cloth that is soaked in a detergent diluted with water and afterward finish wiping with a dry cloth.
- For storing or transporting the Movie Camera, place it in a bag or case lined with soft pads so as to prevent the coating on the camera body from being worn.
After use, be sure to take the Cassette out and detach the Battery from the Movie Camera or pull out the AC Mains Lead from AC mains socket.
- If the Cassette is left in the Movie Camera, the tape sags and deteriorates.
- If the Battery is left on the Movie Camera for a long time, the voltage drops excessively, and the Battery will not function even after it is recharged.
About AC Adaptor
- If the temperature of the Battery is extremely high or extremely low, the [CHARGE] Lamp may continue flashing, and the Battery may not be charged. After the temperature of the Battery has decreased or increased sufficiently, charging starts automatically. If the [CHARGE] Lamp continues to flash even after the Battery temperature has decreased or increased sufficiently, the Battery or AC Adaptor may be faulty. In this case, please contact a dealer.
- If the Battery is warm, charging takes a longer time than normal.
- If you use the AC Adaptor near a radio, radio reception may be disturbed. Keep the AC Adaptor 1 metre or more away from radio.
- When the AC Adaptor is in use, it may generate whirring sounds. However, this is normal.
- After use, be sure to pull out the AC Mains Lead from the AC mains socket. (If they are left connected, a minute amount of current is consumed.)
- Keep the electrodes of the AC Adaptor and Battery always clean.
Condensation
If the Condensation Indication flashes after the Movie Camera is turned on, condensation has formed inside the Movie Camera. In this case, the Movie Camera power is turned off automatically after about 1 minute. Follow the steps below:
1 Take out the Cassette.
- None of the other functions operate. Depending on the amount of condensation, removing the Cassette may even become difficult. If this happens, wait for 2 to 3 hours before taking the Cassette out.
2 Open the Cassette Compartment Cover and wait for 2 to 3 hours.
●The number of hours to wait depends on the amount of condensation and ambient temperature.
3 2 to 3 hours later, turn on the Movie Camera power and check to see if the Condensation Indication is displayed.
- Even if the Condensation Indication is not displayed, as a precaution, please wait for another hour before using the Movie Camera.
Watch for Condensation even before the Condensation Indication is displayed.
- Because condensation takes place gradually, the Condensation Indication may not be displayed during the first 10 to 15 minutes of condensation formation inside the Movie Camera. - In extremely cold places, condensation may freeze and form frost. In this case, the frost melts first, thus forming condensation, and then it takes another 2 to 3 hours to eliminate the condensation.
When the Lens is Fogged:
Set the [OFF/ON/MODE] Switch to [OFF] and leave the Movie Camera in this condition for about 1 hour. When the lens temperature becomes close to the ambient temperature, the fog disappears naturally.
■ Video Head Clogging and Care
If the heads (the parts that make contact with tape) are dirty, mosaic-pattern noise may appear on the playback image, or the screen as a whole becomes black. If the heads are extremely dirty, recording performance deteriorates, and, in the worst case, the Movie Camera cannot record at all.
Causes of Dirty Heads
●Large quantity of dust in the air
●High-temperature and high-humidity environment
- Damaged tape
●Long operating hours
Using Mini-DV Format Digital Video Head Cleaner
1 Insert the Head Cleaner into the Movie Camera in the same manner as a Video Cassette.
2 Press the [▶] Button, and approximately 20 seconds later, press the [■] Button. (Do not rewind the tape.)
3 Take out the Head Cleaner. Insert a Video Cassette and start recording. Then, play the tape back to check the recorded image.
4 If the image is not still clear, repeat Steps 1 to 3. (Do not use the Head Cleaner for 3 times or more consecutively.)
Notes:
- Do not rewind every time you use the Head Cleaner. Rewind only when the tape reaches the end, and then use it again from the beginning in the same manner as before.
- If the heads become dirty soon after cleaning, the tape may be damaged. In this case, immediately stop using that Cassette.
- Do not clean the heads excessively. (Excessive cleaning may cause excessive wear of the heads. If the heads are worn, images cannot be played back even after the heads are cleaned.)
- If the dirty heads cannot be cleaned with the Head Cleaner, the Movie Camera needs to be cleaned at a service centre. Please consult a dealer.
- Video Head Cleaners can be purchased from service centres.
- Head cleaning due to dirty heads is not considered a malfunction of the product. It is not covered by the warranty.
Periodical Check-up
To maintain the highest image quality, we recommend replacement of worn parts, such as heads, etc., after approximately 1000 hours of use. (This, however, depends on operating conditions, such as temperature, humidity, dust, etc.)
■ Optimal Use of the Battery Battery Characteristics
This Battery is a rechargeable lithium ion battery. Its ability to generate power is based upon the chemical reaction that takes place inside it. This reaction is susceptible to the surrounding temperature and humidity, and, if the temperature is too high or too low, the operating time of the Battery becomes shorter. If the Battery is used in an extremely cold environment, the Battery may operate only for about 5 minutes. If the Battery becomes extremely hot, a protective function may operate, and the Battery may become unusable for a while.
Be Sure to Detach the Battery after Use
Be sure to detach the Battery from the Movie Camera. (If it is left attached to the Movie Camera, a minute amount of current is consumed even when the Movie Camera power is off.) If the Battery is left attached to the Movie Camera for a long time, over discharge takes place. The Battery may become unusable after it is charged.
Disposing of an Unusable Battery
●The Battery has a limited life.
- Do not throw the Battery into fire because it may cause an explosion.
Always Keep the Terminals of the Battery Clean
Prevent the terminals from getting clogged with dirt, dust, or other substances.
If you drop the Battery accidentally, check to see if the Battery body and terminals are deformed.
Attaching a deformed Battery to the Movie Camera or AC Adaptor may damage the Movie Camera or AC Adaptor.
■ Cautions for Storage
Before storing the Movie Camera, take the Cassette out and detach the Battery.
Store all the components in a dry place with a relatively stable temperature. (Recommended Temperature: 15 to 25°C, Recommended Humidity: 40 to 60%)
Movie Camera
- Wrap it with a soft cloth to prevent dust from getting into the Camera.
- Do not leave the Movie Camera in places that expose it to high temperature.
Battery
- Extremely high temperatures or low temperatures will shorten the life of the Battery.
- If the Battery is kept in smoky or dusty places, the terminal may rust and cause malfunctions.
- Do not allow the Battery terminals to come in contact with metal objects (such as necklaces, hairpins, etc.). This can result in a short circuit or heat generation and, if you touch the Battery in this condition, you may be badly burned.
- Store the Battery in a completely discharged state. To store the Battery for a long period of time, we recommend you charge it once every year and store it again after you completely use up the charged capacity.
Cassette
- Before storing it, rewind the tape to the beginning. If the Cassette is left for more than 6 months with the tape stopped midway, the tape sags (although it depends on the storage condition). Be sure to rewind to the beginning.
-
Store the Cassette in its case. Dust, direct sunlight (ultraviolet rays), or humidity may damage the tape. Dust contains hard mineral particles, and dusty Cassettes damage the heads of the Movie Camera and other components. Develop a habit of returning the Cassette back to its case.
-
Once every half year, wind the tape to the end and then rewind it to the beginning. If the Cassette is left for 1 year or longer without winding or rewinding, temperature and humidity changes may cause the Cassette to deform due to swelling, shrinking, and so forth. The wound tape may stick to itself.
- Do not place a Cassette near highly magnetic substances or equipment.
- The surface of tape is covered with extremely minute magnetic particles, upon which signals are recorded. Magnetic necklaces, toys, etc., have magnetic force that is stronger than you may normally expect, and they may erase the contents of a recording or may cause noise in images and sounds.
Card
- When the Card is being read, do not remove the Card, turn off the power, or subject it to vibration or impact.
- Do not leave the Card in places where there is high temperature or direct sunlight, or where electromagnetic waves or static electricity are easily generated.
- Do not bend or drop the Card. The Card or the recorded content may be damaged.
●After use, be sure to remove the Card from the Movie Camera.
● After usage, store the supplied SD Memory Card in the enclosed bag. - Do not touch the terminals on the back of the Card with your fingers. Do not allow dirt, dust or water to enter it.
LCD Monitor/Viewfinder/Lens Hood
LCD Monitor
- In a place with drastic temperature changes, condensation may form on the LCD Monitor. Wipe it with soft dry cloth.
- If your Movie Camera is extremely cold when you turn its power on, the image on the LCD Monitor is slightly darker than usual at first. However, as the
internal temperature increases, it goes back to the normal brightness.
Extremely high precision technology is employed to produce the LCD Monitor screen featuring a total of approximately 113,000 pixels. The result is more than 99.99% effective pixels with a mere 0.01% of the pixels inactive or always lit. However, this is not a malfunction and does not affect the recorded picture.
Viewfinder
- Do not direct the Viewfinder or Lens to the sun. Internal components may be seriously damaged.
- When the Movie Camera is used with a large capacity Battery (CGA-DU21; optional) attached to it, it is not practical to look in the Viewfinder from behind the Battery.
Extremely high precision technology is employed to produce the Viewfinder screen featuring a total of approximately 113,000 pixels. The result is more than 99.99% effective pixels with a mere 0.01% of the pixels inactive or always lit. However, this is not a malfunction and does not affect the recorded picture.
Lens Hood
- Do not attach other conversion lenses in front of the Lens Hood; there is no mount to be used for the attachment.
- When you wish to attach the Tele Conversion Lens (VW-LT2714N2E; optional), Wide Conversion Lens (VW-LW2707N2E; optional), MC Protector (VW-LMC27E; optional), or ND Filter (VW-LND27E; optional), first of all, turn the Lens Hood counterclockwise. If the MC Protector or ND Filter is used, the Lens Hood can be mounted on the filter.
- If you push the [W/T] Lever toward [W] during recording with the filter and conversion lens attached together to the Movie Camera, 4 corners of the image may become dark (vignetting). For details, please refer to the operating instructions of your accessories.
- Be sure to keep the Lens Hood attached to the Movie Camera so as to shut out unnecessary light.
Before Requesting Repair (Problems and Solutions)
Power
1: The Movie Camera power cannot be turned on.
- Is the power source connected correctly? (-72-)
2: The Movie Camera power is turned off automatically.
- If you leave the Movie Camera in Recording Pause Mode for more than 6 minutes, the power is turned off automatically to protect the tape or a Card and to save the Battery power. (-81-, -103-)
3: The Movie Camera power does not stay on long enough.
- Is the Battery low? Charge the Battery or attach a fully charged Battery. (-72-)
- Has condensation occurred? Wait until the Condensation Indication disappears. (-130-)
Battery
1: Battery runs down quickly.
- Is the Battery fully charged? Charge it with the AC Adaptor. (-72-)
- Are you using the Battery in an extremely cold place? In cold places, the operating time of the Battery becomes shorter. (-131-)
- Has the Battery worn out? If the operating time is still too short even after the Battery is fully charged, the Battery has worn out.
2: The Battery cannot be charged.
- If the DC Input Lead is connected to the AC Adaptor, charging cannot be performed. Disconnect the DC Input Lead.
Normal Recording
1: Recording does not start although power is supplied to the Movie Camera and the Cassette is correctly inserted.
- Is the accidental erasure prevention slider on the Cassette open? If it is open (set to [SAVE]), recording cannot be performed. (-74-)
- Is the tape wound to the end? Insert a new Cassette. (-74-)
- Is the Movie Camera power turned on? (-81-)
- Is the [CAMERA] Lamp on? If the [CAMERA] Lamp is not on, no recording function can be operated. (-81-)
- Has condensation occurred? Wait until the Condensation Indication disappears. (-130-)
Other Recording
1: Auto Focus Function does not work.
- Is Manual Focus Mode selected? If Auto Focus Mode is selected, focus is automatically adjusted. (-90-)
- There are some recording subjects and recording surroundings for which the Auto Focus Function does not operate correctly. In this case, use the Manual Focus Mode to adjust the focus. (-135-)
Editing
1: Audio dubbing cannot be performed.
- Is the accidental erasure prevention slider on the Cassette open? If it is open (set to [SAVE]), recording cannot be performed. (-74-) - Are you attempting to edit a tape portion that was recorded in LP Mode? LP Mode does not allow audio dubbing to operate. (-80-)
Indications
1: The Time Code becomes inaccurate.
- The Time Code Indication counter may not be constant in the reverse direction in Slow Motion Playback Mode, but this is not a malfunction.
2: The Remaining Tape Time Indication disappears.
- When you record still pictures in Photoshot Mode, the Remaining Tape Time Indication may disappear temporarily. However, it reappears when recording normally.
3: The Remaining Tape Time Indication does not match the actual remaining tape time.
- If scenes of less than 15 seconds are continuously recorded, the remaining tape time cannot be displayed correctly.
- In some cases, the Remaining Tape Time Indication may show remaining tape time that is 2 to 3 minutes shorter than the actual remaining tape time.
Playback (Pictures)
1: Pictures cannot be played back even when the [▶] Button is pressed.
- Is the [VCR] Lamp on? If the [VCR] Lamp is not on, the playback function cannot be used. (-94-)
2: Mosaic-pattern noise appears on images during Cue, Review or Slow Motion Playback.
- This phenomenon is characteristic of digital video systems. It is not a malfunction.
3: Although the Movie Camera is correctly connected to a TV, playback images cannot be seen.
- Have you selected "Video Input" on the TV? Please read the operating instructions of your TV and select the channel that matches the input sockets used for the connection.
4: Playback picture is not clear.
- Are the heads of the Movie Camera dirty? If the heads are dirty, playback image cannot be clear. (-130-)
Playback (Sound)
1: Sound is not played back from the built-in speaker of the Movie Camera or the headphones.
- Is the volume too low? During playback, keep pressing the [PUSH] Dial until the [VOLUME] Indication appears. Then, turn the [PUSH] Dial to adjust the volume. (-94-)
2: Different sounds are reproduced at the same time.
• [12bit AUDIO] on the [PLAYBACK FUNCTIONS] Sub-Menu of the [VCR FUNCTIONS] Main-Menu has been set to [MIX]. As a result, the original sound and sound that was recorded by audio dubbing are played back together. It is possible to reproduce the sounds separately. (-100-)
3: The original sound was erased when audio dubbing was performed.
- If you perform audio dubbing on a recording done in [16bit] Mode, the original sound will be erased. If you wish to preserve the original sound, be sure to select [12bit] Mode at the time of recording.
4: Sounds cannot be played back.
- Although a Cassette with no audio dubbing is being played, is [12bit AUDIO] on the [PLAYBACK FUNCTIONS] Sub-Menu of the [VCR FUNCTIONS] Main-Menu set to [ST2]? To play back a Cassette with no audio dubbing, [12bit AUDIO] must be set to [ST1]. (-100-) - Is the Variable Speed Search Function working? Press the [▶] Button to cancel the Variable Speed Search Function. (-95-)
Card
1: Recorded pictures are not clear.
- Is [PICTURE QUALITY] on the [CARD SETUP] Sub-Menu set to NORMAL or [ECONOMY]? If recording is done with it set to NORMAL or [ECONOMY], images with fine details may include a mosaic-like pattern. Set [PICTURE QUALITY] to FINE. (-104-)
2: Card Photoshot Playback images do not look normal.
- The picture may be damaged. In order to prevent the loss of image data, backing up on a Cassette or a personal computer is recommended. (-108-, -115-)
3: During Playback the [×] Indication is displayed.
- The image was either recorded in a different format, or data is damaged.
4: Even if a Card is formatted, it cannot be used.
- Either the Movie Camera or the Card may be damaged. Please consult a dealer.
Others
1: The Free Style Remote Controller with Mic does not operate correctly.
- If it is not plugged in tightly, it will not operate correctly.
2: The Movie Camera clatters when shaking it.
- It is a sound of the lens moving, not a malfunction.
3: When the USB Cable is disconnected, an error message will appear.
- To disconnect the USB cable safely, double-click the [icon] icon in the task tray and follow the instructions on the screen. (-115-)
Explanation of Terms
Digital Video System
In a digital video system, images and sounds are converted into digital signals and recorded on a tape. This complete digital recording is capable of recording and playback with minimal image and sound deterioration.
In addition, it automatically records data, such as Time Code and Date/Time, as digital signals.
Compatibility with S-VHS or VHS Cassettes
Because this Movie Camera employs a digital system for recording image and sound data, it is not compatible with conventional S-VHS or VHS video equipment that employs an analog recording system.
The size and shape of the Cassette are also different.
Compatibility with Output Signals
Because AV signal output from the AV signal output socket is analog (the same as conventional video systems), this Movie Camera can be connected with S-VHS or VHS video or a TV for playback.
Focus
Auto Focus Adjustment
The Auto Focus System automatically moves forward and backward the focusing lens inside the Movie Camera to bring the subject into focus so that the subject can be seen clearly.
However, the Auto Focus System does not function properly for the following subjects or under the following recording conditions.
Please use the Manual Focus Mode instead.
1) Recording a subject whose one end is located closer to the Movie Camera and the other end farther away from it
- Because Auto Focus makes adjustments at the centre of an image, it may be impossible to focus on a subject that is located in both foreground and background.
2) Recording a subject behind dirty or dusty glass
- Because the focus is on the dirty glass, the subject behind the glass will not be focused.
3) Recording a subject in dark surroundings
- Because the light information that comes through the lens decreases considerably, the Movie Camera cannot focus correctly.
4) Recording a subject that is surrounded by objects with glossy surfaces or by highly reflective objects
- Because the Movie Camera focuses on the objects with glossy surfaces or on highly reflective objects, the recording subject may become blurry.
5) Recording a fast-moving subject
- Because the focus lens-inside moves mechanically, it cannot keep up with the fast-moving subject.
6) Recording a subject with little contrast
- Because the Movie Camera achieves focus based upon the vertical lines of an image, a subject with little contrast, such as a white wall, may become blurry.
Time Code
Time Code signals are data that indicate time measured in hours, minutes, seconds, and frames (25 frames per second). If this data is included in a recording, an address is assigned to each image on the tape.
- The Time Code is automatically recorded as a part of the sub-code at each recording.
- When a new (previously unrecorded) Cassette is inserted, the Time Code automatically starts from zero. If a recorded Cassette is inserted, the Time Code picks up from the point where the last scene was recorded. (In this case, when the Cassette is inserted, the zero display [0h00m00s00f] may appear, but the Time Code starts from the previous value.)
- The Time Code cannot be reset to zero.
- Unless the Time Code is continuously recorded from the beginning of a tape, accurate editing may not be possible. To ensure that the Time Code will be recorded with no breaks, we recommend the use of the Camera Search Function (-82-) or the Blank Search Function (-96-) before recording a new scene.
■ Memory Stop Function
The Memory Stop Function is useful for the following operations.
Rewinding or fast-forwarding a tape to a desired position
1 Set [DISPLAY SETUP] >> [C.DISPLAY] >> [MEMORY].
2 Reset the Tape Counter to zero at the tape position from which you want to play it back later. (-70-, -78-)
3 Start playback or recording.
4 After playback or recording has finished: Rotate the [OFF/ON/MODE] Switch and set the Movie Camera to VCR Mode.
●The [VCR] Lamp lights up.
5 Rewind the tape.
- The tape automatically stops approximately at the position where the counter was set to zero.
Stopping editing automatically during audio dubbing
1 Set [DISPLAY SETUP] >> [C.DISPLAY] >> [MEMORY].
2 Reset the Tape Counter to zero at the position where you want to stop editing.
3 Play back the still picture where you want to start audio dubbing.
4 Start audio dubbing. (-100-)
●Audio dubbing automatically stops at the position where the counter was set to zero.
Specifications
Specifications
Digital Video Camera
Information for your safety
Power Source:
DC 7.9/7.2 V
Power Consumption:
Recording
2.1 W (When using Viewfinder)
3.0 W (When using LCD Monitor)
Recording Format:
Mini DV (Consumer-use Digital Video SD
Format)
Tape Used:
6.35 mm digital video tape
Recording/Playback Time:
SP: 80 min.; LP: 120 min. (with DVM80)
Video
Recording System:
Digital Component
Television System:
CCIR: 625 lines, 50 fields PAL colour
signal
Audio
Recording System:
PCM Digital Recording
16 bit (48 kHz/2ch), 12 bit (32 kHz/4ch)
Image Sensor:
1/6-inch CCD Image Sensor
Lens:
Auto Iris, F1.8, Focal Length; 2.3–23 mm,
Macro (Full Range AF)
Filter Diameter:
27 mm
Zoom:
10:1 Power Zoom
Monitor:
2.5-inch LCD
Viewfinder:
Colour Electronic Viewfinder
Microphone:
Stereo
Speaker:
1 round speaker ∅ 20 mm
Standard Illumination:
1,400 lx
Minimum Required Illumination:
1 lx (Colour Night View Mode)
Video Output Level:
1.0 Vp-p, 75 ohm
S-Video Output Level:
Y Output: 1.0 Vp-p, 75 ohm
C Output: 0.3 Vp-p, 75 ohm
Audio Output Level (Line):
316 mV, 600 ohm
Video Input Level:
1.0 Vp-p, 75 ohm
S-Video Input Level:
Y Input: 1.0 Vp-p, 75 ohm
C Input: 0.3 Vp-p, 75 ohm
Audio Input Level (Line):
316 mV, 10 kohm or more
Mic Input:
Mic sensitivity -50 dB (0 dB=1 V/Pa,
Card reader/writer function, USB 2.0
compliant (max. 12 Mbps)
No copyright protection support
Digital Interface:
DV Input/Output Terminal (IEEE1394,
4-pin)
Dimensions:
Approx. 66 (W) × 83 (H) × 110 (D) mm
Weight:
Approx. 435 g (without Battery and DV
cassette)
Approx. 495 g (with CGA-DU07 and
DVM60)
Operating Temperature:
0°C-40°C
Operating Humidity:
10%-80%
Card Memory Functions
Recording Media:
MultiMediaCard, SD Memory Card
Image Compression:
JPEG
Still Image Size:
640×480 pixels (VGA)
Video Compression:
MPEG4
MPEG4 Image Size:
SUPERFINE: 320×240 pixels (QVGA)
FINE: 176×144 pixels (QCIF)
NORMAL: 176×144 pixels (QCIF)
Sound Compression:
G.726
WEB Camera
Compression:
JPEG
Image Size:
160×120 pixels (QQVGA)
AC Adaptor
Information for your safety
Power Source:
AC 110–240 V, 50/60 Hz
Power Consumption:
19 W
DC Output:
DC 7.9 V, 1.4 A (Movie Camera
Operation)
DC 8.4 V, 0.65 A (Battery Charging)
Dimensions:
61 (W)×32 (H)×91 (D) mm
Weight:
Approx. 105 g
Weight and dimensions are approximate
values.
Specifications may change without prior
notice.
Maximum number of still pictures recordable on an SD Memory Card (optional)
| PICTURE QUALITY | FINE NORMAL ECONOMY | ||
| 8MB 45 95 | 190 | ||
| 16MB 100 200 400 | |||
| 32MB 220 440 880 | |||
| 64MB 440 880 1760 | |||
| 128MB 880 1760 3520 | |||
| 256MB 1760 3520 7040 | |||
| 512MB 3520 7040 14080 | |||
●These figures vary depending on the subject being photographed.
Maximum recording time of MPEG4 moving picture on an SD Memory Card (optional)
●Maximum Continuous Recording Time:
SUPERFINE: 2 minutes
FINE: 2 minutes
NORMAL: 120 minutes
Maximum recording time of Voice on an SD Memory Card (optional)
●Maximum Continuous Recording Time: 24 hours
- “1h10min.” indicates 1 hour and 10 minutes.
- The numbers shown in the table are approximations.

VQT0C47-2
F0103Me2033 ( 13000 © )


Matsushita Electric Industrial Co., Ltd.
Web site: http://www.panasonic.co.jp/global/
松下電器產業株式會社
日本國大阪
- ¥全消息
- 斷開電源時
- 用作皮帶拉手時
- 安裝肩背帶
- 打開攝錄影機及選擇工作方式
- [OTHER FUNCTIONS1]
- [REMOTE]
- [REC LAMP]
- [BEEP SOUND]
- [SHTR EFFECT]
- [CLOCK SET]
- [SELF REC]
- [OWNER ID SET]
- [VOICE POWER SAVE]
- [OTHER FUNCTIONS2]
- [DEMO MODE]
- [AV IN/OUT SETUP]
- [AV JACK]
- [A.DUB INPUT]
- [DV OUT]
- [DISPLAY SETUP]
- [OTHER FUNCTIONS]
- [CARD FUNCTIONS]
- [DELETE CARD FILE]
- [DELETEFILEBYSELECTION]
- [DELETE ALL FILES]
- [DELETE TITLE BY SELECTION]
- [CARD EDITING]
- [RECORD TO TAPE]
- [FILE SEARCH]
- [FILE LOCK]
- [SLIDE SHOW]
- [DPOF SETTING]
- [CARD FORMAT]
- 卡片播放方式的捷徑菜單
- 漸進拍照
- 2 按 [PHOTO SHOT] 鍵 26。
- 恢復正常錄影時
- 夜視功能
- 彩色夜視功能
- 零照度夜視功能
- 混合方式:
- 取出卡片時
- 檢驗選定的圖像
- INFORMATION FOR YOUR SAFETY
- MOVIE CAMERA
- AC ADAPTOR
- CAREFULLY READ THE OPERATING INSTRUCTIONS AND USE THE MOVIE CAMERA CORRECTLY
- TRY OUT THE MOVIE CAMERA
- THE MANUFACTURER IS NOT LIABLE FOR LOSS OF RECORDED CONTENTS
- CAREFULLY OBSERVE COPYRIGHT LAWS
- FILES RECORDED ON A MULTIMEDIACARD OR SD MEMORY CARD
- PAGES FOR REFERENCE
- WARNING
- CONTENTS
- BEFORE USE
- CAMERA MODE
- VCR MODE
- CARD MODE
- WITH A PC
- OTHERS
- SPECIFICATIONS
- STANDARD ACCESSORIES
- OPTIONAL ACCESSORIES
- CONTROLS AND COMPONENTS
- REMOTE CONTROLLER
- FREE STYLE REMOTE CONTROLLER WITH MIC
- THE REMOTE CONTROLLER
- INSERTING A BUTTON-TYPE BATTERY
- CAUTION
- USING THE REMOTE CONTROLLER
- SELECTING REMOTE CONTROLLER MODES
- SETUP ON THE MOVIE CAMERA
- SETUP ON THE REMOTE CONTROLLER
- POWER SUPPLY
- USING THE AC ADAPTOR
- USING THE BATTERY
- 2 ATTACH THE CHARGED BATTERY TO THE MOVIE CAMERA
- DISCONNECTING THE POWER SOURCE
- CHARGING TIME AND AVAILABLE RECORDING TIME
- THE ONE TOUCH FREE STYLE GRIP BELT
- TO USE AS A GRIP BELT
- TO USE AS A HAND STRAP
- ATTACHING THE LENS CAP
- ATTACHING THE SHOULDER STRAP
- INSERTING A CASSETTE
- TURNING ON THE MOVIE CAMERA AND SELECTING MODES
- USING THE VIEWFINDER/LCD MONITOR
- ADJUSTING BRIGHTNESS AND COLOUR LEVEL
- LCD BRIGHTNESS [LCD BRIGHTNESS]
- LCD COLOUR LEVEL
- [LCD COLOUR LEVEL]
- BRIGHTNESS OF THE VIEWFINDER [EVF BRIGHTNESS]
- TO ADJUST
- TO INCREASE THE BRIGHTNESS OF THE ENTIRE LCD MONITOR
- USING THE MENU SCREEN
- 1 PRESS THE [MENU] BUTTON 46
- TO EXIT THE MENU SCREEN
- ABOUT THE MENU MODE SETTING
- FILE SELECTION IN THE CARD PLAYBACK MODE
- 1 TURN THE [PUSH] DIAL 38 AND SELECT A FILE
- 2 PRESS THE [PUSH] DIAL 38 TO CONFIRM THE SELECTION OF THE FILE
- LIST OF MENUS
- [CAMERA FUNCTIONS]
- [CAMERA SETUP]
- [PROG.AE]
- [PROGRESSIVE]
- [SIS]
- [D.ZOOM]
- [CINEMA]
- [SELF TIMER]
- [WEB CAMERA]
- [RETURN]
- [DIGITAL EFFECT]
- [ EFFECT1 ]
- [ EFFECT2]
- [CARD SETUP]
- [PICTURE QUALITY]
- [MPEG4 MODE]
- [BURST MODE]
- [CREATE TITLE]
- [MULTI-PICTURES]
- [SCAN MODE]
- [SPEED]
- [SWING]
- [P-IN-P]
- [RECORDING SETUP]
- [REC SPEED]
- [AUDIO REC]
- [SCENE INDEX]
- [WIND CUT]
- [ZOOM MIC]
- [DATE/TIME]
- [C.DISPLAY]
- FEDERAL
- [DISPLAY]
- [LCD MODE]
- [LCD/EVF SET]
- [INITIAL SET]
- [VCR FUNCTIONS]
- [PLAYBACK FUNCTIONS]
- [BLANK SEARCH]
- [RECORD TO CARD]
- [SEARCH]
- [12BIT AUDIO]
- [AUDIO OUT]
- [ EFFECT]
- [EFFECT SELECT]
- SHORT-CUT MENUS OF THE CARD
- PLAYBACK MODE
- [DELETE FILE]
- [EXIT]
- SETTING DATE AND TIME
- INTERNAL LITHIUM BATTERY RECHARGE
- LP MODE
- AUDIO RECORDING MODE
- RECORDING
- TO VIEW THE RECORDED SCENE WHILE THE RECORDING IS PAUSED (CAMERA SEARCH)
- TO FINISH THE RECORDING
- TO ADD A SOUND WHILE RECORDING
- RECORDING YOURSELF
- QUICK START
- 2 SET THE [OFF/ON/MODE] SWITCH 43 TO [OFF]
- 3 SET THE [OFF/ON/MODE] SWITCH 43 TO [ON]
- PHOTOSHOT
- 1 SET THE [TAPE/CARD/CARD MODE] SELECTOR 27 TO [TAPE]
- 2 PRESS THE [PHOTO SHOT] BUTTON 26 IN THE RECORDING PAUSE MODE
- PROGRESSIVE PHOTOSHOT
- CONTINUOUS PHOTOSHOT
- DIGITAL STILL PICTURE
- SELF-TIMER RECORDING
- ZOOM IN/OUT FUNCTIONS
- TO TAKE CLOSE-UP SHOTS OF SMALL SUBJECTS
- TO USE THE ZOOM MICROPHONE FUNCTION
- DIGITAL ZOOM FUNCTION
- IMAGE STABILIZER FUNCTION
- FADE IN/OUT FUNCTIONS
- FADE IN
- FADE OUT
- BACKLIGHT COMPENSATION FUNCTION
- NIGHT VIEW FUNCTIONS
- COLOUR NIGHT VIEW FUNCTION
- TO CANCEL THE NIGHT VIEW FUNCTIONS
- WIND NOISE REDUCTION FUNCTION
- TO CANCEL THE WIND NOISE REDUCTION FUNCTION
- CINEMA FUNCTION
- RECORDING IN SPECIAL SITUATIONS
- (PROGRAMME AE)
- TO CANCEL THE PROGRAMME AE FUNCTION
- RECORDING IN NATURAL COLOURS
- (WHITE BALANCE)
- ADJUSTING WHITE BALANCE MANUALLY
- ABOUT WHITE BALANCE SENSOR
- MANUAL SHUTTER SPEED ADJUSTMENT
- MANUAL IRIS ADJUSTMENT
- (F NUMBER)
- RANGE OF IRIS ADJUSTMENT
- MANUAL FOCUS ADJUSTMENT
- DIGITAL EFFECT FUNCTIONS
- DIGITAL EFFECTS 1 [EFFECT1]
- DIGITAL EFFECTS 2 [EFFECT2]
- TO SELECT A DESIRED DIGITAL EFFECT
- TO CANCEL THE DIGITAL EFFECT
- WIPE MODE AND MIX MODE WIPE MODE
- MIX MODE
- PICTURE-IN-PICTURE MODE
- MULTI-PICTURE MODE STROBE MULTI-PICTURE MODE
- 3 PRESS THE [MULTI] BUTTON 14
- 4 PRESS THE RECORDING START/STOP BUTTON 44 OR THE [PHOTO SHOT] BUTTON 26 TO RECORD ON THE CASSETTE
- DELETING ALL THE CAPTURED MULTI-PICTURES
- TO DISPLAY THE MULTI-PICTURES AGAIN PRESS THE [MULTI] BUTTON FOR 1 SECOND OR LONGER
- TO DELETE MULTI-PICTURES ONE BY ONE (WHEN PICTURES WERE CAPTURED IN [MANUAL])
- PLAYING BACK
- 1 ROTATE THE [OFF/ON/MODE] SWITCH
- 2 PRESS THE [◀◀] BUTTON ⑦ TO REWIND THE TAPE
- 3 PRESS THE [▶] BUTTON ⑧ TO START PLAYBACK
- TO STOP PLAYBACK
- ADJUSTING THE SOUND VOLUME
- FINDING A SCENE YOU WANT TO PLAY BACK
- CUE/REVIEW PLAYBACK
- VARIABLE SPEED SEARCH FUNCTION
- 1 DURING PLAYBACK, PRESS THE [▶] BUTTON ⑧
- 2 TURN THE [PUSH] DIAL 38 TO SELECT A DESIRED SEARCH SPEED
- TO RESUME NORMAL PLAYBACK PRESS THE [▶] BUTTON ⑧
- SLOW MOTION PLAYBACK
- 1 PRESS THE [▶] BUTTON 75
- 2 PRESS THE [◀] BUTTON OR [▶] BUTTON 60 ON THE REMOTE CONTROLLER
- TO RESUME NORMAL PLAYBACK
- STILL PLAYBACK/STILL ADVANCE PLAYBACK
- JOG PLAYBACK
- FINDING THE END OF RECORDING
- (BLANK SEARCH FUNCTION)
- TO CANCEL BLANK SEARCH BEFORE COMPLETION
- INDEX SEARCH FUNCTIONS
- PHOTOSHOT INDEX SIGNAL
- SCENE INDEX SIGNAL
- INDEX
- PHOTOSHOT INDEX SEARCH
- SCENE INDEX SEARCH
- CONTINUOUS INDEX SEARCH
- PLAYBACK ZOOM FUNCTION
- PLAYBACK DIGITAL EFFECT FUNCTIONS
- 2 PRESS THE [SELECT] BUTTON 62 ON THE REMOTE CONTROLLER TO SELECT A DESIRED DIGITAL EFFECT
- TO SUSPEND PLAYBACK DIGITAL EFFECT TEMPORARILY
- WIPE MODE AND MIX MODE
- PLAYING BACK WITH MULTI-PICTURE MODE
- STROBE MULTI-PICTURE MODE [STROBE]
- MANUAL MULTI-PICTURE MODE [MANUAL]
- INDEX MULTI-PICTURE MODE ([PHOTO], [SCENE])
- 3 PLAY BACK THE TAPE
- 4 PRESS THE [MULTI] BUTTON 14
- IF [STROBE] IS SELECTED
- IF [MANUAL] IS SELECTED
- IF [PHOTO] OR [SCENE] IS SELECTED
- DELETING ALL THE CAPTURED MULTI PICTURES
- TO DISPLAY THE MULTI-PICTURES AGAIN
- TO DELETE MULTI PICTURES ONE BY ONE (WHEN PICTURES HAVE BEEN CAPTURED IN MANUAL MODE)
- TO CANCEL CAPTURING PICTURES (WHEN PICTURES HAVE BEEN CAPTURED IN INDEX MODE)
- TO SEARCH THE TAPE POSITION OF A DESIRED PICTURE AMONG THE PLAYBACK PICTURES DISPLAYED ON 9 SCREENS
- PLAYING BACK ON YOUR TV
- AUDIO DUBBING
- TO DUB AUDIO WHILE LISTENING TO A PRE-RECORDED SOUND
- COPYING ON AN S-VHS (OR A VHS) CASSETTE
- (DUBBING)
- VCR
- RECORDING THE CONTENTS OF OTHER EQUIPMENT
- OTHER EQUIPMENT
- USING THE DV CABLE FOR RECORDING
- (DIGITAL DUBBING)
- PLAYER/RECORDER
- PLAYER
- RECORDER
- TO STOP DUBBING
- USING A CARD
- INSERTING A CARD
- REMOVING THE CARD
- RECORDING ON A CARD
- CARD PHOTOSHOT
- RECORDING FROM THE MOVIE CAMERA LENS (CAMERA MODE)
- 2 SLIDE THE
- RECORDING FROM A CASSETTE (VCR MODE)
- SELECTING THE QUALITY OF CARD PHOTOSHOT IMAGES
- MAXIMUM NUMBER OF IMAGES RECORDABLE ON THE SUPPLIED CARD (8MB)
- CARD CONTINUOUS PHOTOSHOT
- 3 PRESS THE [PHOTO SHOT] BUTTON 26
- AUTOMATICALLY COPYING STILL PICTURES THAT HAVE ALREADY BEEN RECORDED ON A TAPE
- 1 SET THE MOVIE CAMERA TO STILL PLAYBACK MODE AT THE SCENE IMMEDIATELY BEFORE YOU WANT TO START COPYING IMAGES
- 2 SET [VCR FUNCTIONS] >> [PLAYBACK FUNCTIONS] >> [RECORD TO CARD] >> [YES]
- TO STOP AUTOMATIC RECORDING PRESS THE [■] BUTTON 12
- RECORDING A MOVING PICTURE (MPEG4)
- 1 SET THE [TAPE/CARD/CARD MODE] SELECTOR 27 TO [CARD]
- 2 SLIDE THE [TAPE/CARD/CARD MODE] SELECTOR 27 TO [CARD MODE] UNTIL THE [MPEG4] INDICATION APPEARS
- 3 PRESS THE RECORDING START/STOP BUTTON 44
- SELECTING THE QUALITY OF MPEG4
- RECORDING IMAGES
- MAXIMUM RECORDING TIME ON THE SUPPLIED CARD (8MB)
- RECORDING VOICE (VOICE RECORDING FUNCTION)
- PLAYING BACK A CARD
- 1 SET THE MOVIE CAMERA TO CARD PLAYBACK MODE
- 3 START PLAYBACK
- [PICTURE]
- [MPEG4] OR [VOICE]
- WHEN [MPEG4] INDICATION APPEARS AT STEP 2
- WHEN [VOICE] INDICATION APPEARS AT STEP 2
- TO SELECT A DESIRED FILE AND PLAY IT BACK
- RECORDING PICTURES ON A CARD TO A TAPE
- SLIDE SHOW
- EDITING A SLIDE SHOW
- CREATING A TITLE
- ADDING A TITLE
- 3 TURN THE [PUSH] DIAL 38 TO SELECT A DESIRED TITLE
- 4 PRESS THE [PUSH] DIAL 38 OR PRESS THE [MULTI] BUTTON 14
- TO CLEAR THE TITLE DISPLAY PRESS THE [TITLE] BUTTON 10
- WRITING PRINTING DATA ON A CARD
- (DPOF SETTING)
- 1 SLIDE THE
- 2 SET [CARD FUNCTIONS] >> [CARD EDITING] >> [DPOF SETTING] >> [YES] >> [VARIABLE]
- 3 SELECT A DESIRED PICTURE AND PRESS THE [PUSH] DIAL 38
- 5 REPEAT STEP 3 AND 4 AND PRESS THE [MENU] BUTTON 46 WHEN THE SETUP IS COMPLETED
- TO VERIFY DPOF SETTING
- PROTECTING THE FILES ON A CARD
- (LOCK SETTING)
- DELETING THE FILES RECORDED ON A CARD
- 3 SELECT [YES] AND PRESS THE [PUSH] DIAL 38
- FORMATTING A CARD
- USB CONNECTION KIT
- USING AS A WEB CAMERA
- 5 START THE NETMEETING
- USING A CARD IN A PERSONAL COMPUTER
- CONSTRUCTING A FOLDER WHEN THE CARD IS USED WITH A PC
- INDICATIONS
- TO CHANGE THE COUNTER DISPLAY MODE
- TO DISPLAY DATE/TIME INDICATION
- TO CHANGE THE DISPLAY MODE
- OWNER ID
- TO VERIFY OWNER ID
- TO CORRECT THE CONTENTS
- INITIALIZING THE MODES
- 1 SET [CAMERA FUNCTIONS] >> [OTHER FUNCTIONS2] >> [INITIAL SET] >> [YES]
- WARNING/ALARM INDICATIONS
- TO SERVICE
- CARD FULL
- NO CARD
- NO FILE
- UNPLAYABLE CARD
- CARD ERROR
- COPY INHIBITED
- INCORRECT
- OPERATION
- CONNECT USB CABLE
- DISCONNECT USB CABLE
- CANCEL WEB CAMERA MODE
- NOTES AND HINTS
- CONCERNING THE POWER SUPPLY
- INSERTING/REMOVING THE CASSETTE
- ALARM SOUNDS
- 1 BEEP
- 2 BEEPS
- RECORDING CHECK
- CAMERA SEARCH
- PROGRESSIVE PHOTOSHOT FUNCTION
- ABOUT [PROGRESSIVE] SETUP
- WHEN [PROGRESSIVE] IS [ON]
- WHEN [PROGRESSIVE] IS SET TO [AUTO]
- ZOOM MICROPHONE FUNCTION
- DIGITAL ZOOM FUNCTIONS
- PROGRAMME AE
- SPORTS MODE
- SPORTS MODE/PORTRAIT MODE
- LOW LIGHT MODE
- SPOTLIGHT MODE
- SURF & SNOW MODE
- WHITE BALANCE
- IN THE FOLLOWING CASES, YOU CANNOT CHANGE WHITE BALANCE
- IN THE FOLLOWING CASES, THE [■] INDICATION FLASHES
- IN THE FOLLOWING CASES, USING THE [EFFECT1] ON THE [DIGITAL EFFECT] SUB-MENU IS NOT POSSIBLE
- IT IS AS FOLLOWS WHEN [GAIN UP] IS SELECTED
- MULTI-PICTURE MODE
- PLAYING BACK REPEAT PLAYBACK
- LISTENING TO PLAYBACK SOUND THROUGH HEADPHONES
- CHOOSING SOUND DURING PLAYBACK
- MULTI-PICTURE MODE (VCR MODE)
- RECORDING TO A CARD
- ANALOG-DIGITAL CONVERSION
- USING THE DV CABLE FOR RECORDING (DIGITAL DUBBING)
- RECORDING MOVING PICTURES (MPEG4)
- VOICE POWER SAVE
- RECORDING A CARD IMAGE ON A APE
- DPOF
- LOCK SETTING
- CAUTIONS FOR USE
- AFTER USE
- DO NOT USE YOUR MOVIE CAMERA NEAR RADIO TRANSMITTERS OR HIGH-VOLTAGE LINES
- DO NOT USE THIS MOVIE CAMERA FOR SURVEILLANCE PURPOSE OR OTHER BUSINESS USE
- WHEN YOU USE YOUR MOVIE CAMERA ON A BEACH OR SIMILAR PLACE, DO NOT LET SAND OR FINE DUST GET INTO THE MOVIE CAMERA
- DO NOT SPRAY INSECTICIDES OR VOLATILE CHEMICALS ONTO THE MOVIE CAMERA
- DO NOT USE BENZINE, THINNER OR ALCOHOL FOR CLEANING THE MOVIE CAMERA
- AFTER USE, BE SURE TO TAKE THE CASSETTE OUT AND DETACH THE BATTERY FROM THE MOVIE CAMERA OR PULL OUT THE AC MAINS LEAD FROM AC MAINS SOCKET
- ABOUT AC ADAPTOR
- CONDENSATION
- 1 TAKE OUT THE CASSETTE
- 2 OPEN THE CASSETTE COMPARTMENT COVER AND WAIT FOR 2 TO 3 HOURS
- 3 2 TO 3 HOURS LATER, TURN ON THE MOVIE CAMERA POWER AND CHECK TO SEE IF THE CONDENSATION INDICATION IS DISPLAYED
- WATCH FOR CONDENSATION EVEN BEFORE THE CONDENSATION INDICATION IS DISPLAYED
- WHEN THE LENS IS FOGGED
- VIDEO HEAD CLOGGING AND CARE
- CAUSES OF DIRTY HEADS
- USING MINI-DV FORMAT DIGITAL VIDEO HEAD CLEANER
- NOTES
- PERIODICAL CHECK-UP
- OPTIMAL USE OF THE BATTERY BATTERY CHARACTERISTICS
- BE SURE TO DETACH THE BATTERY AFTER USE
- DISPOSING OF AN UNUSABLE BATTERY
- ALWAYS KEEP THE TERMINALS OF THE BATTERY CLEAN
- CAUTIONS FOR STORAGE
- BEFORE STORING THE MOVIE CAMERA, TAKE THE CASSETTE OUT AND DETACH THE BATTERY
- BATTERY
- CASSETTE
- CARD
- LCD MONITOR/VIEWFINDER/LENS HOOD
- LCD MONITOR
- VIEWFINDER
- LENS HOOD
- BEFORE REQUESTING REPAIR (PROBLEMS AND SOLUTIONS)
- POWER
- NORMAL RECORDING
- OTHER RECORDING
- EDITING
- PLAYBACK (PICTURES)
- PLAYBACK (SOUND)
- EXPLANATION OF TERMS
- DIGITAL VIDEO SYSTEM
- COMPATIBILITY WITH S-VHS OR VHS CASSETTES
- COMPATIBILITY WITH OUTPUT SIGNALS
- FOCUS
- AUTO FOCUS ADJUSTMENT
- PLEASE USE THE MANUAL FOCUS MODE INSTEAD
- TIME CODE
- MEMORY STOP FUNCTION
Brand : PANASONIC
Model : NV-GS50EN
Category : Camcorder