F434 - Exercise bike BodyCraft - Free user manual and instructions
Find the device manual for free F434 BodyCraft in PDF.


| Product Type | Exercise Bike |
| Model | F434 |
| Brand | BodyCraft |
| Dimensions (L x W x H) | 105 x 50 x 130 cm (41 x 20 x 51 in) |
| Weight | 35 kg (77 lbs) |
| Max User Weight | 136 kg (300 lbs) |
| Resistance Type | Magnetic, 16 levels |
| Display Type | LCD, 8 x 3 cm |
| Display Metrics | Time, distance, speed, calories, pulse |
| Power Supply | Battery (2 x AAA) |
| Programs | 12 preset programs + manual |
| Seat Adjustment | Vertical and horizontal |
| Handlebar Pulse Sensors | Yes, contact pulse |
| Pedals | Adjustable straps |
| Transport Wheels | Yes |
| Frame Warranty | Lifetime |
| Parts Warranty | 2 years |
| Labor Warranty | 1 year |
| Maintenance | Wipe with damp cloth; lubricate chain annually |
| Safety | EN 957 certified, stable frame |
| Spare Parts Availability | Seat, pedals, resistance motor available |
Frequently Asked Questions - F434 BodyCraft
User questions about F434 BodyCraft
0 question about this device. Answer the ones you know or ask your own.
Ask a new question about this device
Download the instructions for your Exercise bike in PDF format for free! Find your manual F434 - BodyCraft and take your electronic device back in hand. On this page are published all the documents necessary for the use of your device. F434 by BodyCraft.
USER MANUAL F434 BodyCraft
natural_image
Technical line drawing of a mechanical lifting device with spring and lever arms (no text or symbols)QUESTION?
As a quality home gym supplier we are committed to your complete satisfaction. If you have questions, or find missing or damaged parts, we will guarantee your complete satisfaction through our authorized dealer service centers or our home office customer service department. Please call your local dealer for assistance or RSI at 800-990-5556 (9:00 AM - 5:00 PM). Our trained technicians will provide immediate assistance to you, free of charge.
We stand behind our products. Every piece, every part of this BODYCRAFT strength training system is guaranteed for as long as you own it. We will repair or replace anything that goes wrong.
Bodycraft is a division of Recreation Supply Inc.
P. O. Box 181
Sunbury, OH 43074
PARTS LIST
NO. DESCRIPTION QTY.
| 101 | RIGHT BASE FRAME | 1 |
| 102 | LEFT BASE FRAME | 1 |
| 103 | CHROMED UPRIGHT | 2 |
| 104 | WEIGHT HOLDER | 2 |
| 105 | LEFT TOP PULLEY ASSEMBLY | 1 |
| 106 | RIGHT TOP PULLEY ASSEMBLY | 1 |
| 107 | TOP FRAME | 1 |
| 108 | TOP FRAME CONNECTOR | 2 |
| 109 | SWIVEL PULLEY BRACKET | 4 |
| 110 | HAND GRIP | 2 |
| 111 | ANKLE STRAP | 1 |
| 112 | 13 LINK CHAIN | 2 |
| 113 | HOOKUP | 4 |
| 114 | HI / LOW CABLE | 2 |
| 115 | PULLEY | 8 |
| 116 | 50 SQ. END CAP | 2 |
| 117 | 50 SQ. END PLUG | 4 |
| 118 | 50 SQ. BUSHING | 4 |
| 119 | RUBBER DOUGHNUT | 4 |
| 120 | SPRING CLIP | 4 |
| 121 | 1/2" X 4-1/4" HEX BOLT | 4 |
| 122 | 1/2" X 3" HEX BOLT | 8 |
| 123 | 3/8" X 3" HEX BOLT | 4 |
| 124 | 3/8" X 1-3/4" HEX BOLT | 4 |
| 125 | 3/8" X 1-1/2" HEX BOLT | 4 |
| 126 | 3/8" X 1/2" HEX BOLT | 12 |
| 127 | 1/2" WASHER (LARGER) | 24 |
| 128 | 1/2" WASHER (SMALL) | 4 |
| 129 | 3/8" WASHER | 20 |
| 130 | 1/2" NYLON NUT | 16 |
| 131 | 3/8" NYLON NUT | 8 |
| 132 | SPRING COIL | 2 |


STEP 1 ASSEMBLY INSTRUCTIONS
Do NOT tighten any bolts until instructed.
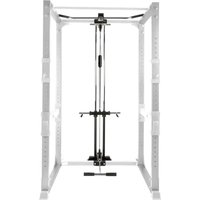
- Attach one 50 SQ End Cap (116) to Right Base (101). Remove Bolts (17) on Right Front Base of Power Rack and attach Right Base (101) to Power Rack using two 1/2" X 4-1/4" Hex Bolts (121), four 1/2" Washers (127), and two 1/2" Nylon Nuts (130). Repeat the procedure for the Left Base (102).
- Insert Chromed Upright (103) into Right Base (101) and secure with two 3/8" X 3" Hex Bolts (123), four 3/8" Washers (129), and two 3/8" Nylom Nuts (131). Slide Spring Coil (132), and Weight Holder (104) onto the Chromed Upright (103) as shown. Slide the Rubber Doughnuts (119) onto each side of the bar on Weight Holder (104). Repeat the procedure for the Left Base (102).
- Attach Right Top Pulley Assembly (106) to the top of right Upright (103) using three 3/8" X 1/2" Hex Bolts (126), and three 3/8" Washer (129). Attach two 50 SQ End Plugs (117) to Right Top Pulley Assembly (106). Repeat the procedure for the Left Top Pulley Assembly (105).
- Attach Top Frame (107) to Left & Right Top Pulley Assemblies (105, 106) using three 3/8" X 1/2" Hex Bolts (126), and three 3/8" Washers (129). Remove the Bolts (18) on Front Top Upright (4) and attach two Top Frame Connectors (108) to Front Upright (4) and Top Frame (107), using four 1/2" X 3" Hex Bolts, four 1/2" Washers (127) and two 1/2" Nylon Nuts (130).
Tighten all bolts and nuts.


HI / LOW CABLE ASSEMBLY
Assemble cable and pulleys simultaneously.
- Attach Swivel Pulley Bracket (109) to pivot on Base Frames (101, 102) and Top Pulley Assemblies (105, 106), using 1/2" Washer (128) and Nylon Nut (130).
- Run Ball end of Hi / Low Cable (114) through Swivel Pulley Bracket (109) on Right Base (101). Route cable up and over pulley welded on Right Top Pulley Assembly (106), then down and around pulley on Weight Holder (104), and then up to the Swivel Pulley Bracket on Top Pulley Assembly as shown.
Repeat the procedure for the left side.

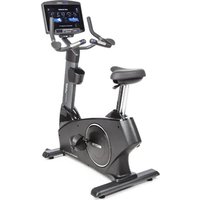
Brand : BodyCraft
Model : F434
Category : Exercise bike