
M-DVD9900 - DVD player Macrom - Free user manual and instructions
Find the device manual for free M-DVD9900 Macrom in PDF.


| Product Type | 1Din Mobile DVD Player |
| Model | M-DVD9900 |
| Dimensions (W x D x H) | 178 x 183 x 50 mm (projecting parts) |
| Weight | 1.4 kg |
| Power Supply | 12V DC (+20%/-10%), 1.5A |
| Power Consumption | Less than 20W |
| Disc Compatibility | DVD, CD, VCD, DVCD, MP3, CD-R, CD-RW |
| Video Outputs | 3 (including one dedicated rear view monitor output) |
| Video Inputs | 1 AUX Video Input, 1 Rear Camera Video Input |
| Audio Output | 1 L/R Analog (2V/100kΩ), 1 Coaxial SPDIF (0.5V/75Ω) |
| Audio Input | 1 L/R Audio Input |
| Signal-to-Noise Ratio | More than 90dB |
| Dynamic Range | More than 85dB |
| Distortion | Less than 0.08% |
| Video Resolution | More than 500 lines |
| Video System | MULTI, NTSC, PAL switchable |
| Operating Temperature Range | -5°C to +55°C (23°F to 131°F) |
| Special Features | Multi-angle, multi-view, multi-audio, play position memory, resume stop, repeat function |
| Safety Features | Class I laser product, parking brake detection for front video output |
| Remote Control | Included (CR2025 battery) |
| Accessories Included | Mounting bracket, rear strap, side brackets, screws, trim ring, IR sensor |
Frequently Asked Questions - M-DVD9900 Macrom
User questions about M-DVD9900 Macrom
0 question about this device. Answer the ones you know or ask your own.
Ask a new question about this device
Download the instructions for your DVD player in PDF format for free! Find your manual M-DVD9900 - Macrom and take your electronic device back in hand. On this page are published all the documents necessary for the use of your device. M-DVD9900 by Macrom.
USER MANUAL M-DVD9900 Macrom
1din mobile DVD Player
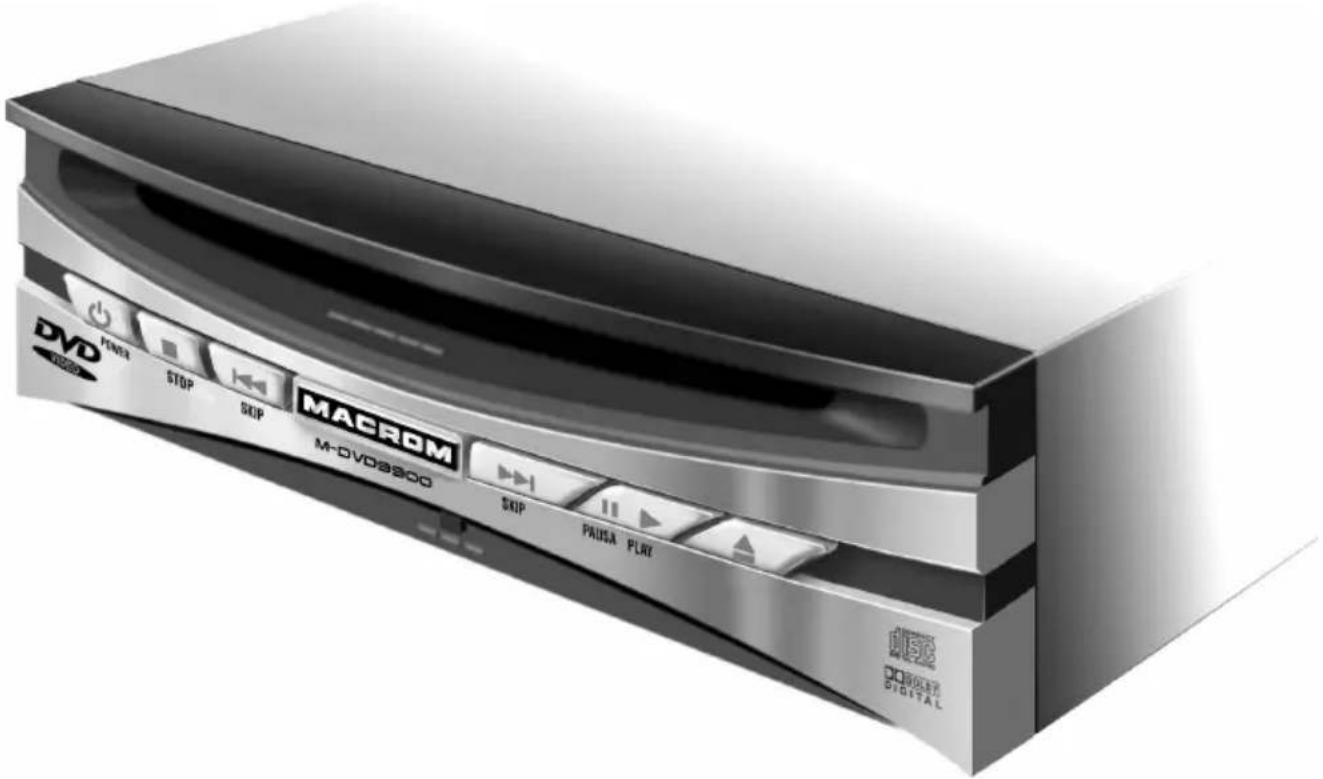
OWNER'S MANUAL
POWER
Operating voltage : 12V +20% -10% DC
Low power consumption design.
COMPATIBILITY
This DVD player can play the following discs:
DVD, CD, VCD, DVCD, MP3, CD-R, CD-RW.
SYSTEM FUNCTIONS
VIDEO OUTPUT SYSTEM
System MULTI, NTSC or PAL switchable.
1 L/R Audio Output
1 L/R Audio Input
1 AUX Video Input
1 Rear Camera Video Input
3 Video Outputs with one dedicated self switching rear view monitor output
■ ADDITIONAL VIDEO FEATURES
Multi-angle, multi-view, multi-audio function
Multi-level forward and backward motion
Play position memory, Resume stop and repeat function
Safety precautions 1
Precautions 2-3
Identification of controls 4-5
When using remote control 6
Connections 7-8
Loading and unloading a disc 9
Turning the power on and off Switching between DVD and AUX Video Input Adjusting the volume 10
Playing a disc Playing/pausing Tuning the sound on and off 11
Stopping playback Fast-forwarding/ fast-reversing Finding the beginning of chapters or tracks 12
Playing from the desired location 13
Chapter/track/title repeat playback Switching the audio language 14
Switching the angle Switching the subtitles 15
Displaying the disc status 16
Adjusting the sound setting.... 17
Changing the default settings (setup) 18-22
MP3 instruction.... 23
Others 24
Note Specifications 25
Accessories and Hardware 26
This digital versatile disc (DVD) video player uses 12V ^+20%_-10% DC.
For future reference, record the model and serial number
(located on the case of the DVD player) in the space provided.
CAUTION:
THIS DVD VIDEO PLAYER IS A CLASS I LASER PRODUCT.
USE OF CONTROLS OR ADJUSTMENTS OR PERFORMANCE OF PROCEDURES OTHER
THAN THOSE SPECIFIED HEREIN MAY RESULT IN HAZARDOUS RADIATION EXPOSURE.
AS THE LASER BEAM USED IN THIS DVD VIDEO PLAYER IS HARMFUL TO THE EYES,
DO NOT ATTEMPT TO DISASSEMBLE THE CABINET.
REFER SERVICING TO QUALIFIED PERSONNEL ONLY.
WARNING : class I laser product - Avoid Long Term viewing of Direct Laser Radiation.
WARNING OF DEW FORMATION
Dew may form on the pickup lens in the following conditions.
- Immediately after a heater has been turned on.
- In a steamy or very humid room.
When the unit is suddenly moved from a cold environment to a warm one.
If dew forms inside this unit, it may not operate properly.
In this case, turn on the power and wait about 2 or 3 hours for the dew to evaporate.
When the unit is used under low temperatures,
the pick up lens might warm up very fast and dew will form.
In this case, turn on the power and wait a while for the dew to evaporate.

Warning
This symbol means important instructions. Failure to heed them can result in serious injury or death.
| Do not disassemble or alter this unit. Doing so may result in an accident, fire or electric shock. |
| Keep small objects such as battery out of the reach of children. If swallowed, consult a physician immediately. |
| Use the correct ampere rating when replacing fuses.Failure to do so may result in fire or electric shock. |
| Use only in cars with a 12 VOLT negative ground.(Check with your dealer if you are not sure.) Failure to do so may result in fire, etc. |
| Do not operate any function that takes your attention away from safely driving your vehicle. Any function that requires your prolonged attention should only be performed after coming to a complete stop. Always stop the vehicle in a safe location before performing these function. Failure to do so may result in an accident. |
| Do not watch video while driving. Watching the video may distract the driver from looking ahead of the vehicle and cause an accident. |
| Keep the volume at a level where you can still hear outside noise while driving. Failure to do so may result in an accident. |
| Use this product for mobile 12V applications. Use for other than its designed application may result in fire, electric shock or other injury. |
| Do not place hands, fingers or foreign objects in insertion slots or gaps. Doing so may result in personal injury or damage to the product. |
| Do not block vents or radiator panels. Doing so may cause heat to build up inside and may result in fire. |

Caution
This symbol means important instructions. Failure to heed them can result in injury or property damage.
| Insert with the correct battery polarity. When inserting the battery, be sure to observe proper polarity(+ and- )as instructed. Rupture of the battery may cause fire or personal injury. |
| Halt use immediately if a problem appears. Failure to do so may cause personal injury or damage to the product. Consult a professional mobile video installer. |
Temperature
Be sure the temperature inside the vehicle is between +55^ C( +131^ F) and -5^ C( +23^ F) before turning your unit on.
Moisture condensation
You may notice the CD playback sound wavering due to condensation. If this happens remove the disc from the player and wait an hour for the moisture to evaporate.
Damaged disc
Do not attempt to play cracked, warped, or damaged discs. Playing a bad disc could severely damage the playback mechanism.
Maintenance
If you have problems, do not attempt to repair the unit yourself. Consult a professional mobile video installer.
Never attempt the following
Do not grip or pull out the disc while it is being pulled back into the player by the automatic reloading mechanism. Do not attempt to insert a disc into the unit when the unit power is off.
Inserting discs
Your player accepts only one disc at a time for playback. Do not attempt to load more than one disc. Make sure the label side is facing up when you insert the disc. Playing a disc while driving on a very bumpy road may result in skips.
Irregular shaped discs
Make sure the discs you use in this unit do not have any irregularities. The outer and inner edges should be round and smooth. Use of irregularly shaped discs may cause damage to the mechanism.
Installation location
Make sure the unit will not be installed in a location subjected to:
- Direct sun and heat
- High humidity and water
Excessive dust
Excessive vibrations
See the page in → for the details.
Front panel
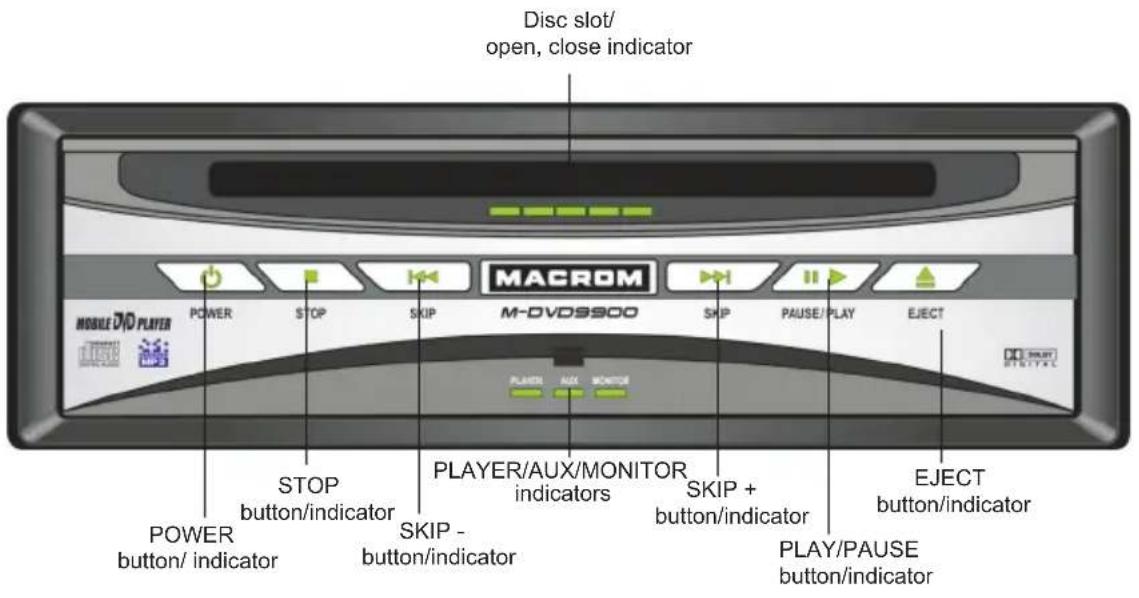
| The button |  |
| POWER | Power on/off by pressing this button 10 |
| EJECT | To eject a disc 9 |
| ▶ II | Play/Pause 11 |
| ■ | To stop playback 12 |
| | | | | | To locate previous/next chapter or track 12 |
Resetting the unit
Press the RESET button with a pointed object, such as a ballpoint pen, as shown.
Unit will turn off momentary after the RESET button is pressed.
Note: Pressing the RESET button will erase some stored contents.

Remote Control

1 POWER on/off button
2 AV SEL button
To select External/Internal Video
3 Number button
Used to input numbers
4 REPEAT button to play repeatedly
5 TITLE button
to locate a specific title chapter or track
6 Joy stick
7 SETUP button to change the default settings
8 SUB button to select subtitle
9 VOL +/- button to control the volume
10 SEL button to select the audio functions
6
▶▶▶▶▶▶▶▶▶▶▶▶▶▶▶▶▶▶▶▶▶▶▶▶▶▶▶▶▶▶▶▶▶▶▶▶▶▶▶▶▶▶▶▶▶▶▶▶▶▶▶▶▶▶▶▶▶▶▶▶▶▶▶▶▶▶▶▶▶▶▶▶▶▶▶▶▶▶▶▶▶▶▶▶▶▶▶▶▶▶▶▶▶▶▶▶▶▶▶▶>

flowchart
graph TD
    A["↑"] --> B["ENTER"]
    C["←"] --> B
    D["→"] --> B
    E["←"] --> B
    F["↓"] --> B
To locate previous chapter or track
In menu mode, the button(s) of these four ▲▼◀▶ are used to select your desired item.
11 EJECT button to eject the disc
12 DISPLAY button to display the disc status
13 ANGLE button to select the camera angle
14 ▶ Button Playing/Pausing
15 ■ Button to stop playback
16 MENU Button
to locate a specific title chapter or track
17 Goto Button to Locate a location by entering its corresponding track number, chapter number or time
18 AUDIO Button to switch the audio language
19 MUTE Button playing with no sound
Preparing the remote control
Insert battery (3V, CR2025) into the remote control.
Make sure the + side of the battery faces up before closing the cover.

natural_image
Line drawing of a hand using a tool to apply a small component (no text or symbols present)1) Open the cover, pull the cover as illustrated

natural_image
Diagram of a mechanical device with a central knob and directional arrows indicating motion (no text or symbols)2) Insert cell (3V), Close the cover
Operating with the remote control
This section shows you how to use the remote control. Point the remote control at the remote sensor and press the buttons.
The remote range: about 4m from the front of the remote sensor.
(Is) off axis: more than 30^ in each direction of the front of the remote sensor.

natural_image
Front view of a computer monitor with a triangular pointer at the bottom (no visible text or symbols)With about 4m

Do not expose the remote sensor of the DVD player and the remote control to a strong light source such as direct sunlight or other illumination. If you do so, you may not be able to operate the DVD player via the remote control.
Notes on battery
To operate the remote control correctly, follow the instructions below.
Do not insert cell into the remote control in the wrong direction.
Do not charge, heat, open, or short-circuit the cell. Do not throw cell into a fire.
If the remote control does not function correctly or if the operating range becomes reduced, replace the cell with new one.
Notes on the remote control
Direct the remote control at the remote sensor of the DVD player.
Do not drop or give the remote control a shock.
Do not leave the remote control near an extremely hot or humid place.
Do not spill water or put anything wet on the remote control.
Do not disassemble the remote control.
Connections
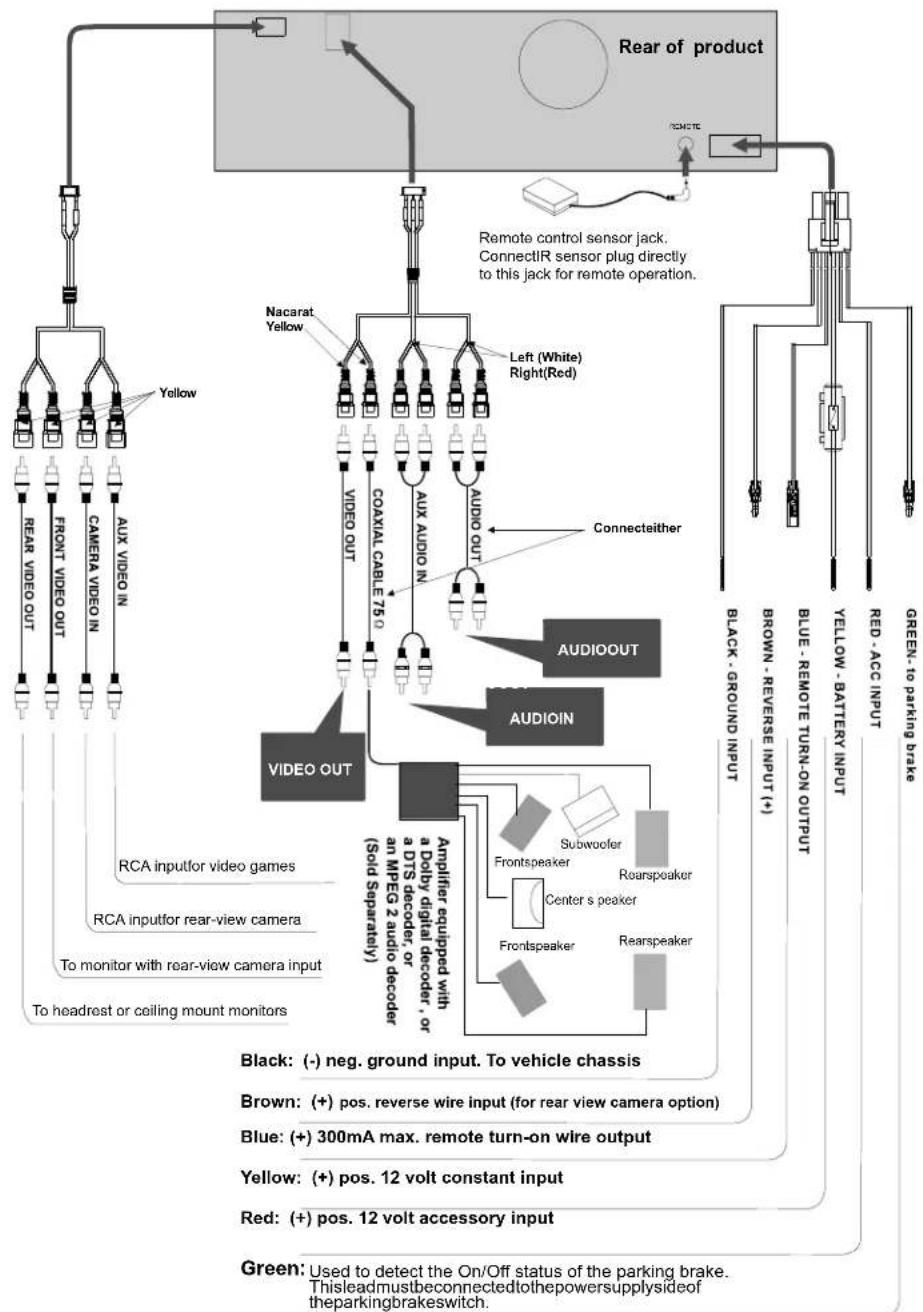
flowchart
graph TD
    A["Remote control sensor jack\nConnectIR sensor plug directly to this jack for remote operation."] --> B["Yellow"]
    A --> C["Nacarat Yellow"]
    A --> D["Left (White) Right(Red)"]
    A --> E["Audio OUT"]
    A --> F["AUDIO OUT"]
    A --> G["AUDIOIN"]
    A --> H["Video OUT"]
    A --> I["Subwoofer"]
    A --> J["Rearspeaker"]
    A --> K["Frontspeaker"]
    A --> L["Center's peaker"]
    A --> M["Front speaker"]
    A --> N["Back speaker"]
    A --> O["Blue - REMOTE TURN-ON OUTPUT"]
    A --> P["BROWN - REVERSE INPUT(+)"]
    A --> Q["BROWN - BATTERY INPUT"]
    A --> R["BROWN - GROUND INPUT"]
    A --> S["BROWN - REVERSE INPUT(+)"]
    A --> T["BROWN - GROUND INPUT(+)"]
    A --> U["BROWN - REVERSE INPUT(+)"]
    A --> V["BROWN - GROUND INPUT(+)"]
    A --> W["BROWN - REVERSE INPUT(+)"]
    A --> X["BROWN - GROUND INPUT(+)"]
    A --> Y["BROWN - REVERSE INPUT(+)"]
    A --> Z["BROWN - GROUND INPUT(+)"]
    A --> AA["BROWN - REVERSE INPUT(+)"]
    A --> AB["BROWN - GROUND INPUT(+)"]
    A --> AC["BROWN - REVERSE INPUT(+)"]
    A --> AD["BROWN - GROUND INPUT(+)"]
    A --> AE["BROWN - REVERSE INPUT(+)"]
    A --> AF["BROWN - GROUND INPUT(+)"]
    A --> AG["BROWN - REVERSE INPUT(+)"]
    A --> AH["BROWN - GROUND INPUT(+)"]
    A --> AI["BROWN - REVERSE INPUT(+)"]
    A --> AJ["BROWN - GROUND INPUT(+)"]
    A --> AK["BROWN - REVERSE INPUT(+)"]
    A --> AL["BROWN - GROUND INPUT(+)"]
    A --> AM["BROWN - REVERSE INPUT(+)"]
    A --> AN["BROWN - GROUND INPUT(+)"]
    A --> AO["BROWN - REVERSE INPUT(+)"]
    A --> AP["BROWN - GROUND INPUT(+)"]
    A --> AQ["BROWN - REVERSE INPUT(+)"]
    A --> AR["BROWN - GROUND INPUT(+)"]
    A --> AS["BROWN - REVERSE INPUT(+)"]
    A --> AT["BROWN - GROUND INPUT(+)"]
    A --> AU["BROWN - REVERSE INPUT(+)"]
    A --> AV["BROWN - GROUND INPUT(+)"]
    A --> AW["BROWN - REVERSE INPUT(+)"]
    A --> AX["BROWN - GROUND INPUT(+)"]
    A --> AY["BROWN - REVERSE INPUT(+)"]
    A --> AZ["BROWN - GROUND INPUT(+)"]
    A --> BA["BROWN - REVERSE INPUT(+)"]
    A --> BB["BROWN - GROUND INPUT(+)"]
    A --> BC["BROWN - REVERSE INPUT(+)"]
    A --> BD["BROWN - GROUND INPUT(+)"]
    A --> BE["BROWN - REVERSE INPUT(+)"]
    A --> BF["BROWN - GROUND INPUT(+)"]
    A --> BG["BROWN - REVERSE INPUT(+)"]
    A --> BH["BROWN - GROUND INPUT(+)"]
    A --> BI["BROWN - REVERSE INPUT(+)"]
    A --> BJ["BROWN - GROUND INPUT(+)"]
    A --> BK["BROWN - REVERSE INPUT(+)"]
    A --> BL["BROWN - GROUND INPUT(+)"]
    A --> BM["BROWN - REVERSE INPUT(+)"]
    A --> BN["BROWN - GROUND INPUT(+)"]
    A --> BO["BROWN - REVERSE INPUT(+)"]
    A --> BP["BROWN - GROUND INPUT(+)"]
    A --> BQ["BROWN - REVERSE INPUT(+)"]
    A --> BR["BROWN - GROUND INPUT(+)"]
    A --> BS["BROWN - REVERSE INPUT(+)"]
    A --> BT["BROWN - GROUND INPUT(+)"]
    A --> BU["BROWN - REVERSE INPUT(+)"]
    A --> BV["BROWN - GROUND INPUT(+)"]
    A --> BW["BROWN - REVERSE INPUT(+)"]
    A --> BX["BROWN - GROUND INPUT(+)"]
    A --> BY["BROWN - REVERSE INPUT(+)"]
    A --> BZ["BROWN - GROUND INPUT(+)"]
    A --> CA["BROWN - REVERSE INPUT(+)"]
    A --> CB["BROWN - GROUND INPUT(+)"]
    A --> CC["BROWN - REVERSE INPUT(+)"]
    A --> CD["BROWN - GROUND INPUT(+)"]
    A --> DD["BROWN - REVERSE INPUT(+)"]
    A --> DEB["BROWN - GROUND INPUT(+)"]
    A --> DF["BROWN - REVERSE INPUT(+)"]
    A --> DG["BROWN - GROUND INPUT(+)"]
    A --> DHB["BROWN - REVERSE INPUT(+)"]
    A --> DIB["BROWN - GROUND INPUT(+)"]
    A --> DJB["BROWN - REVERSE INPUT(+)"]
    A --> DKB["BROWN - GROUND INPUT(+)"]
    A --> DLB["BROWN - REVERSE INPUT(+)"]
    A --> DVB["BROWN - GROUND INPUT(+)"]
    A --> DVW["BROWN - REVERSE INPUT(+)"]
1 NOTE
Connect Audio out( audio related, see page 19)
| Coaxial cable | SPDIF/RAW | RAW DATA VIA SPDIF |
| SPDIF/PCM | PCM DATA VIA SPDIF | |
| Audio cable | ANALOG | ANALOG OUTPUT |
2 NOTE
1 Refer to the owner's manual for "the connected monitor" as well.
2 Refer to the owner's manual of the connected equipment fo
3 When you connect the DVD player to other equipment, be sure to turn off the power .
4 If you place the DVD near a tuner or radio, the radio broadcast sound might be distorted. In this case, place the DVD player away from any other tuner or radio.
5 The output sound of the DVD player has a wide dynamic range. Be sure to adjust the receiver's volume to a moderate listening level. Otherwise, the speakers may be damaged by a sudden high output.
6 Turn off the amplifier before you connect or disconnect the DVD player's power leads. If you leave the amplifier power on, the speakers may be damaged.
3 NOTE
- We advise to connect the EX-VIDEO-CON lead.
And so the front display only will be on while detecting the parking brake ON.
Or if the EX-MONITOR-CON and MONITOR VIDEO IN are used,
the front display will be on while backing the car.
- This product's REAR VIDEO OUT and VIDEO OUT are for connections of displays to enable passengers in the rear seats to watch the DVD or Video CD.

Warning
NEVER install the display in a location that enables the Driver to watch the DVD or Video CD while driving.
This product detects whether your car's parking brake is engaged or not, and prevents you from watching a DVD or Video CD on the display connected to Front Video Out while driving.
Example: When you attempt to watch a DVD, the screen is black. When you park your car in a safe place and apply the parking brake, the picture appears on the screen.
Loading and unloading a disc
Turn on the power before loading and unloading discs.
1 Insert the disc with the side containing words diagrams facing upwards.
Once the disc is partially inserted, it is drawn in automatically. Playback starts.
2 Unloading disc
Press EJECT ▲button, the disc is automatically ejected.

natural_image
Illustration of a hand holding a CD inside a computer drive (no text or symbols visible)Notes:
If wrong disc, upside-down discs or dirty discs have been inserted, "NO DISC" is displayed. Remove the disc.
Do not put any objects other than discs into the disc slot, doing so may cause the player to malfunction.

Tips

These indicate the discs for which the function can be used.
DVD :You can use this function with DVD discs.
MP3 :You can use this function with MP3 discs. CD :You can use this function with CDs.
VCD :You can use this function with VIDEO CDs.
About this owner's manual
This owner's manual explains the basic instructions of this DVD player. Some DVD discs are produced in a manner that allows specific or limited operation during playback. As such, the DVD player may not respond to all operating commands. This is not a defect in the DVD player. Refer to the instruction notes of discs.
" may appear on the screen during operation.
A " 🔊 " means that the operation is not permitted by the DVD player or the disc.

1 Turning the power on and off
Press ⏻ POWER button The power turns on.
To turn the power off, Press ⏻ POWER button again.
Play Position Memory Function
- Even if you turn power off or switch the ignition Key to OFF during playback or change the video source, playback will continue from the point where playback stopped when the power is turned ON again. The play position memory is released if the disc is removed or the Reset switch is pressed.
2 Switching between DVD and AUX Video Input

To switch between DVD and AUX Video input, press the AV SEL on the remote control.
| Connect | AV SEL | |
| Using AUDIO and VIDEO OUT, connect the monitor or audio system | INTERNAL VIDEO | |
| Using AUDIO and VIDEO IN, connect the DVD video player to a VTR, TV/VTR combination or video selector | AUX Video Input | |
3 Adjusting the volume
Press the + button to increase the volume. Press the - button to decrease the volume.


① Press ▶ button.

Playback starts.
If a menu screen appears
On DVDs and video CDs with playback control (PBC), menu screen may appear automatically. If this happens, perform the operation described below to start playback.
Note: For many discs, the menu screen can also be displayed by pressing MENU or TITLE.
DVD menu
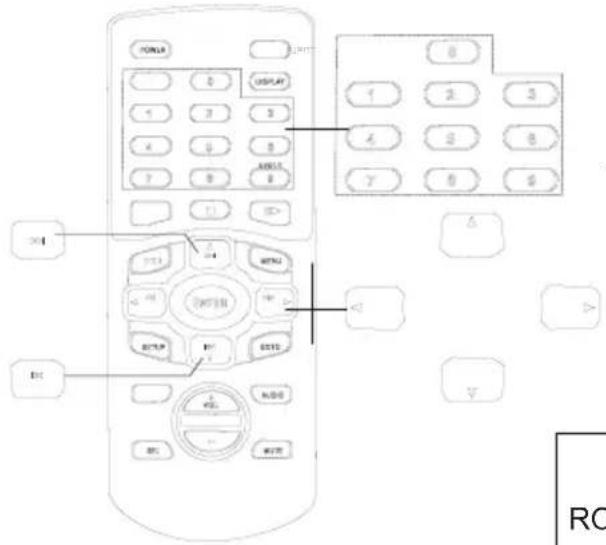
Use the Joystick or the number keys(0\~9) to select the desired item, then press ENTER or ▶

flowchart
graph TD
    A["User Hand Click Button"] -->|Or| B["User Hand Click Button"]
    A -->|Down| C["User Hand Click Button"]
    D["User Hand Click Button"] -->|Or| E["User Hand Click Button"]
    D -->|Down| F["User Hand Click Button"]
Note: For some discs it is not possible to select items for the menu to menu screen using the number buttons (0\~9).
Tips
DVD VCD CD MP3
Using the Number keys
This describes use of the Number keys.
To input 16: Press the 1 button and then press the 6 key. To input 28: Press the 2 key and then press the 8 key. To input 108: Press the 1 key and then press the 0 and 8 button.
After the number input, press ENTER or PLAY button to start the playback.
1 Playing a disc

Caution
With some DVDs, certain operations are disabled. Such operations are not possible on such DVDs.
The DVD functions described in this manual are not supported by all instructions for details on the features supported.
Fingerprints on a disc may adversely affect playback. If a problem occurs, remove the disc and check for fingerprints on the playback side. Clean the disc if necessary.
When using the remote control, be careful to pressing multiple buttons at the same time may cause erroneous operation.
VCD menu
Use the number keys(0\~9) to select the desired item, then press ENTER or ▶


flowchart
graph TD
    A["User Hand Click"] --> B["Calculator Keyboard"]
    B --> C["Mouse Click Button"]
Note: The menu screen does not appear when the PBC function is turned off. If this is the case press MENU to turn on the PBC function.
In PBC off mode, you can use the number keys to input the desired track also.
② Playing/pausing

During playback press I▶ to pause playback. Press I▶ again to resume playback.
③Tuning the sound on and off

During playback press MUTE, no sound is played. Press Mute to resume normal playback with sound.


1 Stopping playback
Press the stop button during playback to stop playback.
Press ■ during playback.

Tips
- Using the PRE-STOP function(DVD only.) When the PRE-STOP function is used, the position at which playback is stopped is stored in the memory, and playback resumes from that position.
① Press ■ once during playback. PRESS PLAY TO CONTINUE is displayed.
② Press ▶ in the PRE-STOP mode. Playback starts from the position at which it was stopped.
• To cancel the PRE-STOP function Either press ■ again in the PRE-STOP mode, eject the disc or turn the power to clear the memory. Playback will start at the beginning of the disc.
Notes:
- For some discs, the position at which playback was stopped may not be accurate.
- For Video CD:
Press ■ during playback,
1 in PBC off mode, playback stops. Press PLAY, playback will start at the beginning of the disc. 2 in PBC on mode, playback stops and press PLAY then it will be back to main page.
2 Fast-forwarding/ DVD VCD CD MP3 fast-reversing
①During playback press ◀◀ (fast-reverse) or ▶▶ (fast-forward)
Each time you press the ◄r button, the playback speed changes to X1, X2, X3, X4 the normal speed or normal speed.
②Press ▶ to return to normal playback.

Notes: No sound or subtitles are played during fast-forwarding/fast-reversing of DVDs or Video CDs. However, sound is played during fast-forwarding/fast-reversing of audio CDs.
3 Finding the beginning of chapters or tracks
①During playback press ◀ or ▶
The chapter/track switches each time the button is pressed, and playback of the selected chapter/track starts.

▶▶:Press this to start playback from the beginning of the next chapter or track. ▶◀:Press this to start playback from the beginning of the previous chapter or track.
Note: Some DVDs do not have chapters.
Supplementary explanation
Chapters are divisions of movies or musical selections on DVDs. Tracks are divisions of movies or musical selections on video and audio CDs.
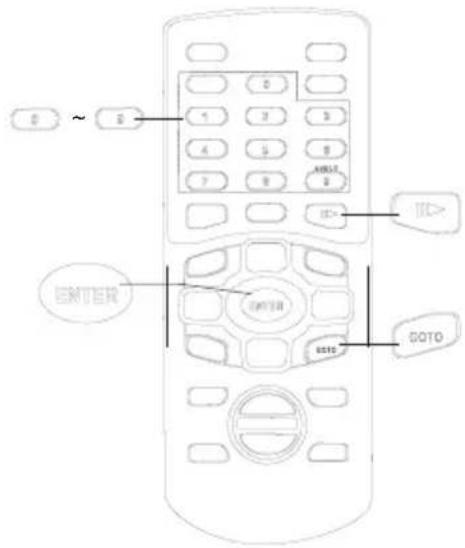
1 Playing from the desired location
Locating a specific location by entering the track number, the chapter number or the time.
①During playback, press GOTO.


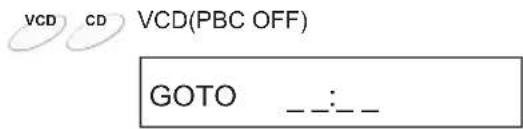
② Input the chapter, the title or the time from which you want to start playback using the joystick and the number keys(0\~9).

(When title 2 is input)

(When chapter 12 is input)

(When 1 hour, 30 minutes is input as the elapsed time)

(When 30 minutes is input as the elapsed time)
Notes:
- Input the hours first, followed by the minutes, then the seconds.
- Press GOTO to cancel the search mode and resume normal playback.
- Some discs may not respond to this process.
• Some scenes may not be located precisely as you specified. - This method for accessing specific locations is available only within the current title of the DVD video disc or within the current track of the VIDEO CD/audio CD.
③Press ENTER
Playback starts from the selected chapter, track or the time.


1 Chapter/track/title repeat playback
① During playback, Press REPEAT

The repeat mode switches each time the button is pressed.

flowchart
graph TD
    A["DVD"] --> B["CHAPTER REPEAT ON"]
    B --> C["TITLE REPEAT ON"]
    C --> D["REPEAT OFF"]
VCD CD VCD(PBC OFF)

flowchart
graph TD
    A["REP - ONE"] --> B["REP-ALL"]
    B --> C["REPEAT OFF"]
2Switching the audio language
On DVDs including multiple audio modes or multiple audio languages, the audio language can be switched during playback.
①During playback, press AUDIO.

The sound switches between the different audio modes recorded on the disc each time the button is pressed.
Notes:
- The language selected with the default setting is set when the power is turned on or the disc is replaced. If the disc does not include that language, the disc's default language is set.
- For some discs it is not possible to switch the audio language during playback.
- Some time may be required for the audio language to change.
Video CDs with multiplex audio
①During playback, press AUDIO.
The combination of the left and right channels changes each time the button is pressed.

flowchart
graph LR
    A["LEFT VOCAL"] --> B["RIGHT VOCAL"] --> C["MONO LEFT"]
    D["STEREO"] <--_E["MONO RIGHT"] <--_F["Stereo"]

1Switching the angle

With DVDs on which images photographed from multiple angles are recorded, the angle can be switched during playback.
①During playback, press ANGLE.
The angle switches between the angles recorded on the disc each time the button is pressed.

Note:
- Some time may be required for the angle to change.
2Switching the subtitles

With DVDs on which multiple subtitle languages are recorded, the subtitle language can be switched during playback.
①During playback, press SUB.
The subtitle language switches between the languages recorded and you also can select whether to display the subtitles on the disc each time the button is pressed.

Note:
- Some time may be required for the subtitle to change.
- The language selected with the default setting is replaced. If the disc does not include that language, the disc's default language is set.
- For some discs, the subtitles will be displayed even when this is set to off.

Switching from the menu
For some discs, the audio language, angle and subtitle can be switched from the disc menu.
Press MENU or TITLE, select the item, then press ENTER.


1 Displaying the disc status DVD
Use the procedure described below to display the status(title number, chapter number, etc.) of the currently playing DVD on the screen.
①During playback, press DISPLAY.
The playback status switches each time the button is pressed.

TITLE 01/01 CHAPTER 001/057 XX:XX:XX
TITLE REMAIN XX:XX:XX
CHAPTER ELAPSED XX:XX:XX
CHAPTER REMAIN XX:XX:XX
the display turns off.
2 Displaying the disc status

Use the procedure described below to display the status(track number, etc.) of the currently playing Video CD or Audio CD on the screen.
①During playback, press DISPLAY.

The playback status switches each time the button is pressed.
TOTAL ELAPSED
xx:xx:xx PLAY:11 TOTAL:22
TOTAL REMAIN
xx:xx:xx PLAY:11 TOTAL:22
SINGLE ELAPSED
SINGLE REMAIN
OFF

1 Adjusting the sound setting
The sound settings can be changed to suit your personal preferences and usage.

To select the audio functions as you like:
| To | Press SEL button on the remote repeatedly until the item you want to adjust appears on the screen | Press the VOL +,- button adjust the setting as you like |
| Balance | BALANCE : L00 | The level changes from L08~L00 and L00~R08 |
| Bass | BASS : -00 | The level changes from -07~+07 |
| Treble | TREBLE : -00 | The level changes from -07~+07 |
| Loudness | LOUDNESS ON | ON or OFF |
| Volume | VOLUME 18 | The level changes from 00~36 |

1 Changing the default settings (setup)
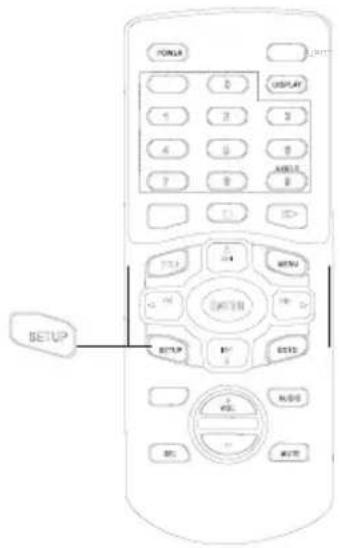
Press SETUP during stop.
The setting menu appears.
Press joystick button to move the cursor to the item, then press ENTER to select the item you want.


flowchart
graph TD
    A["User Hand icon"] --> B["SETUP"]
    B --> C["Access Phone Icon"]
    C --> D["Password Button Icon"]
    D --> E["Enteroid Phone Icon"]
① GENERAL SETUP

flowchart
graph LR
    A["TV DISPLAY"] --> B["NORMAL/PS NORMAL/LB WIDE"]
    C["PIC MODE"] --> D["ON OFF"]
    E["ANGLE MARK"] --> F["ON OFF"]
    G["EXT AMP"] --> H["ON OFF"]
    I["OSD LANG"] --> J["ENGLISH"]
    K["SCR SAVER"] --> L["ON OFF"]
    B --> M["AUTO HI-RES N-FLICKER"]
    D --> N["ON OFF"]
    H --> O["ON OFF"]
TV DISPLAY SET TV DISPLAY MODE
NORMAL/PS NORMAL TV PAN SCAN NORMAL/LB NORMAL TV LETTER BOX WIDE WIDE SCREEN TV
PIC MODE SET PICTURE MODE
AUTO AUTO MODE HI-RES HIGH-RESOLUTION MODE N-FLICKER NONFLICKER MODE
ANGLE MARK ANGLE ON/OFF EXT AMP TURN EXT AMP ON/OFF OSD LANG SET OSD LANGUAGE SCR SAVER SCREEN SAVER
Changing the default settings(setup)


flowchart
graph TD
    A["输入按钮"] --> B["处理按钮"]
    B --> C["输出按钮"]
    C --> D["结束"]
SETUP MENU MAIN PAGE
GENERAL SETUP
SPEAKER SETUP
AUDIO SETUP
PREFERENCES
EXIT SETUP
② SPEAKER SETUP

flowchart
graph LR
    A["DOWNMIX"] --> B["LT/RT STEREO"]

③ AUDIO SETUP

flowchart
graph LR
    A["AUDIO OUT"] --> B["ANALOG SPDIF/RAW SPDIF/PCM"]
    C["OP MODE"] --> D["LINE OUT RF REMOD"]
    E["DUAL MONO"] --> F["STEREO L-MONO R-MONO MIX-MONO"]
    G["DYNAMIC"] --> H["FULL 6/8 4/8 2/8 OFF"]
    I["PRO LOGIC"] --> J["OFF ON AUTO"]
    K["LPCM OUTPUT"] --> L["LPCM 48K LPCM 96K"]


flowchart
graph TD
    A["User Hand icon"] --> B["Password icon"]
    B --> C{Switch}
    C --> D["User Button with 'S'"]
    C --> E["User Button with 'E'"]
    C --> F["User Button with 'F'"]
    D --> G["User Button with 'G'"]
    E --> H["User Button with 'H'"]
    F --> I["User Button with 'I'"]
    G --> J["Next Step"]
    H --> J
    I --> J
SETUP MENU MAIN PAGE
GENERAL SETUP
SPEAKER SETUP
AUDIO SETUP
PREFERENCES
EXIT SETUP
OP MODE
OPERATIONAL MODE SETUP
LINE OUT
LINE OUT MODE
RF REMOD
TV WITH NO AV INPUT
DUAL MONO
DUAL MONO(1+1) SETUP
STEREO
SET STEREO MODE
L-MONO
SET LEFT MONO MODE
R-MONO
SET RIGHT MONO MODE
MIX-MONO
SET MIXED MONO MODE
DYNAMIC
DYNAMIC RANGE
COMPRESSION
FULL
--
6/8
--
4/8
- -
2/8
--
OFF
FULL DYNAMIC RNG COMPRESSION
DYNAMIC RNG COMPRESSION 7/8
DYNAMIC RNG COMPRESSION 3/4
DYNAMIC RNG COMPRESSION 5/8
DYNAMIC RNG COMPRESSION 2/4
DYNAMIC RNG COMPRESSION 3/8
DYNAMIC RNG COMPRESSION 1/4
DYNAMIC RNG COMPRESSION 1/8
DYNAMIC RNG COMPRESSION OFF
PRO LOGIC
SET PRO LOGIC ON/OFF
OFF
PRO LOGIC OFF
ON
PRO LOGIC ON
AUTO
PRO LOGIC AUTO
LPCM OUTPUT
SET LPCM TO 48K OR 96K
LPCM 48K
LPCM OUTPUT 48K
LPCM 96K
LPCM OUTPUT 96K
Changing the default settings(setup)

flowchart
graph TD
    A["TV TYPE"] --> B["MULTI NTSC PAL"]
    C["LOCALE"] --> B
    D["PARENTAL"] --> B
    E["PASSWORD"] --> F["CHANGE"]
    G["DEFAULTS"] --> H["RESET"]
    I["SMART NAV"] --> J["WITH MENU"]
    K["LOGO"] --> L["MPG LOGO JPG LOGO"]
    B --> M["CHINA FRANCE HONG KONG JAPAN TAIWAN GBR USA"]
    F --> N["1 G 2 3 PG 4 PG 13 5 6 PG-R 7 NC-17 8 ADULT NO-PARENTAL"]
    L --> O["OLD PASSWORD: NEW PASSWORD: CONFIRM PWD:"]

Changing the default settings(setup)


flowchart
graph TD
    A["Start Button"] --> B{Interaction}
    B --> C["Arrow to Button"]
    C --> D["Arrow to Button"]
    D --> E["Arrow to Button"]
    E --> F["Arrow to Button"]
    F --> G["Arrow to Button"]
SETUP MENU MAIN PAGE
GENERAL SETUP
SPEAKER SETUP
AUDIO SETUP
PREFERENCES
EXIT SETUP
PARENTAL
SET PARENTAL CONTROL
1G
2
3 PG
4 PG 13
5
6 PG-R
7 NC-17
8 ADULT
NO-PARENTAL
SET TO G, LEVEL 2, PG,
PG13, LEVEL 5, PG-R,
NC-17,ADULT,
OR NO-PARENTAL
PASSWORD
NOTE: Factory default password is 3308.
CHANGE
OLD PASSWORD:
NEW PASSWORD:
CONFIRM PWD:
DEFAULTS
SMART NAV
SMART NAV TYPE
RESET
LOAD FACTORY SETTINGS
WITH MENU
PLAYING MP3 WITH MENU
LOGO
OPEN SCREEN LOGO
MPG LOGO
JPG LOGO
1 MP3 instruction
MP3
Insert the MP3 disc then playback starts, the MENU of elapsed track appears.
| SMART | NAV 1 | ||
| ROOT | MP3 | J&Z | 1 |
| MP3 | xxx | 2 | |
| MP3 | xxx | 3 | |
| Mp3 | xxx | 4 | |
| MP3 | xxx | 5 | |
| PLAY MODE | REP-ONE |
| PRESS | |
| ◀◀ ▶▶ | To play the preceding or the next track |
| ◀ ▶ | In play mode, it starts to fast-forward or fast-revers |
| Number button | To select the track with the number buttonNote: For some discs it is not possible to select items for the menu to menu screen using the number buttons (0~9). |
| PLAY MODE | In stop mode, move cursor to PLAY MODE with joy stick ◀ ▶ ,pressing joy stick ▲ ▼ to change PLAY MODE: SINGLE, REP-ONE,FOLDER, FOLDER REP, DISC SCAN, DISC, DISC REP, RANDOM,SHUFFLE ON , PROGRAM P0. Select the desired mode, thenmove the cursor back to the track menu and you desired trackwith ◀ ▶ ▼ ▲ ,finally press PLAY to start playback again. |
| DISPLAY | STATUS DISPLAYED: CHAPTER ELAPSED XX:XX:XXCHAPTER REMAIN XX:XX:XX |
Playing MP3 disc, the play position memory is not available.
In case of difficulty
If operation freezes, the screen goes black or the unit should otherwise not function properly, try turning the power off then back on. Alternatively, try the following methods in the order listed until the unit returns to normal playback mode.
1) Turn the car's ignition OFF and back ON again.
2) Press the RESET button on the face of the unit
This guide will help you isolate the problem if the unit is at fault. Otherwise, make sure the rest of your system is properly connected or consult a professional mobile video installer.
| Symptom | Cause | Remedy |
| Unit does not operate. | Fuse is blown. | Replace with a fuse of the specified capacity. |
| Monitor's power is not turn on. | Turn on the m onitor's power | |
| Condensation | Wait a while (about 1 hour) for the condensation to dry. | |
| Operation is unstable. | Remote control unit's battery is worn. | Replace the remote control unit's battery with new one. |
| Remote control sensor or transmitter is dirty. | Clean the sensor or transmitter. | |
| No picture is produced. | Monitor's mode is not switched to the mode you want to see. | Switch to the mode you want to see. |
| Playback does not start. | Disc is loaded upside-down. | Check the disc and load it with the labeled side facing upward. |
| Disc is dirty. | Clean the disc. | |
| A disc not able to playback with this unit is loaded. | Check if the disc is able to be played back. | |
| Parental lock is set. | Cancel the parental lock or change the rating level. | |
| Picture is unclear or noisy | Disc is being fast-forwarded or fast-reversed. | The picture may be slightly disturbed, but this is normal. |
| Vehicle's battery power is weak. | Check the battery power and wiring.The unit may malfunction if the battery power is under 10.8 volts with a load applied. | |
| Monitor's fluorescent tube is worn. | Replace the monitor's fluorescent tube. | |
| Image stops sometimes. | Disc is scratched. | Replaced with a non-scratched disc. |
| No disc | No disc is loaded. | Load a disc. |
| Disc is dirty. | Clean the disc. | |
| Not valid | Remote control operation is not possible. | For some discs or playing modes, certain operations are not possible. This not a malfunction. |
| VIDEO SIGNAL SYSTEM IS NOT CORRECT | PAL( or NTSC) disc is loaded. | Change the TV TYPE of the unit(see SET UP). |
| No sound Select | the wrong Audio Out | According to the connection, set ANALOG for using audio cable, set SPDIF/RAM/PCM for using coaxial cable. See page 7,8 and 19. |
Note

Two black sticking papers
There are 2 mounting screws on the case of the DVD player( as above figure shows) to protect the unit during shipping.
You need to remove the sticking papers and screws after unpacking this product. Apply the black sticking papers(supplied)on the screw holes to keep out dust.
Specifications
| Audio | Audio output(analog) 2 V | 100k 0.2 Ω |
| Audio output(coaxial): | 0.5V 75Ω | |
| Signal-to-noise ratio: | more than 90dB | |
| Dynamic range: | more than 85dB | |
| Distortion: | less than 0.08% | |
| Video | Video output: | 1 ¥0.2 |
| Resolution: | more than 500 line | |
| Power | Power requirement: | 12+20%-10% V DC, 1.5A |
| Power consumption: | less than 20W | |
| General | Dimensions(approx.): | 178x50x183mm(w/d)Projecting parts |
| Weight: | 1.4Kg | |
| Normal operating temperature range: 23°F to131 F° | ||
| Design and specifications are subject to change without notice.The illustrations in this manual may appear different from the actual product due to printing conditions. | ||

natural_image
Isometric line drawing of a rectangular electronic component with no visible text or symbolsMounting Bracket (Half Sleeve) X 1
natural_image
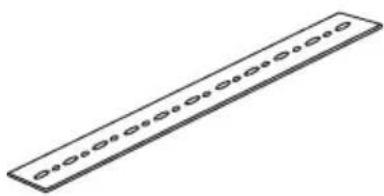
Pure diagram of a rectangular object with evenly spaced circular indentations along its length (no text or symbols)Rear Strap (Brace) X 1
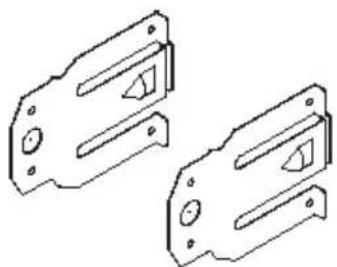
natural_image
Technical line drawing of two mechanical bracket components (no text or symbols)Side bracket X 2

Mounting Screw M5
X 1

Hex bolt M5 x 14
X 2
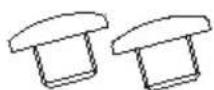
Flat head screw M5 x 4
X 2

Mounting Grommet
X 1
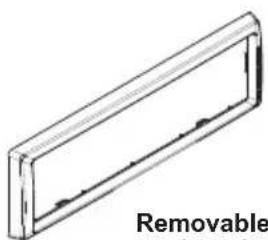
natural_image
Simple line drawing of a rectangular frame with a label 'Removable' below (no other text or symbols)Removable Trim Ring equipped on the unit X 1

natural_image
Black and white remote control device with keypad and buttons (no visible text or symbols)Remote control x 1
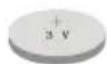
Lithium Button Cell (3V) x 1

IR sensor x1

MACROM SA. L UXEMBOURG, MENDRISO BRANCH
3 MOREE ST., CH 6850 MENDRISIO
SWITZERLAND
- POWER
- COMPATIBILITY
- SYSTEM FUNCTIONS
- ■ ADDITIONAL VIDEO FEATURES
- CAUTION:
- WARNING OF DEW FORMATION
- Warning
- Caution
- Temperature
- Moisture condensation
- Damaged disc
- Maintenance
- Never attempt the following
- Inserting discs
- Irregular shaped discs
- Installation location
- Resetting the unit
- Preparing the remote control
- Operating with the remote control
- Notes on battery
- Notes on the remote control
- NOTE
- NOTE
- NOTE
- Loading and unloading a disc
- Insert the disc with the side containing words diagrams facing upwards.
- Unloading disc
- Tips
- These indicate the discs for which the function can be used.
- About this owner's manual
- Turning the power on and off
- Play Position Memory Function
- Switching between DVD and AUX Video Input
- Adjusting the volume
- If a menu screen appears
- DVD menu
- Using the Number keys
- Playing a disc
- VCD menu
- ② Playing/pausing
- ③Tuning the sound on and off
- Stopping playback
- Notes:
- Fast-forwarding/ DVD VCD CD MP3 fast-reversing
- Finding the beginning of chapters or tracks
- Supplementary explanation
- Playing from the desired location
- ①During playback, press GOTO.
- ③Press ENTER
- Chapter/track/title repeat playback
- ① During playback, Press REPEAT
- 2Switching the audio language
- ①During playback, press AUDIO.
- Video CDs with multiplex audio
- 1Switching the angle
- ①During playback, press ANGLE.
- Note:
- 2Switching the subtitles
- ①During playback, press SUB.
- Displaying the disc status DVD
- ①During playback, press DISPLAY.
- Displaying the disc status
- Adjusting the sound setting
- Changing the default settings (setup)
- Changing the default settings(setup)
- MP3 instruction
- In case of difficulty
- Note
- Specifications
Brand : Macrom
Model : M-DVD9900
Category : DVD player