
IS-01 - Interactive whiteboard Ipevo - Free user manual and instructions
Find the device manual for free IS-01 Ipevo in PDF.


| Product Type | Interactive Whiteboard System |
| Brand | Ipevo |
| Model | IS-01 |
| Diagonal Screen Size | 77 inches (estimated) |
| Dimensions (H x W x D) | 1150 x 1630 x 100 mm (estimated) |
| Weight | 22 kg (estimated) |
| Power Supply | 100-240V AC, 50-60 Hz |
| Power Consumption | 100 W (typical) |
| Touch Technology | Infrared |
| Touch Points | 10 simultaneous touches (estimated) |
| Connectivity Ports | USB 2.0, VGA, HDMI |
| Software Compatibility | Windows, macOS, Linux |
| Included Accessories | Interactive pen, USB cable, wall mount kit, user manual |
| Operating Temperature | 0°C to 40°C (32°F to 104°F) |
| Storage Temperature | -20°C to 60°C (-4°F to 140°F) |
| Cleaning Instructions | Use a soft, dry cloth. Do not use solvents or abrasive cleaners. |
| Safety Certifications | CE, RoHS |
| Repairability | Not user-serviceable. Contact Ipevo support for repairs. |
| Warranty | 1 year limited warranty |
Frequently Asked Questions - IS-01 Ipevo
User questions about IS-01 Ipevo
0 question about this device. Answer the ones you know or ask your own.
Ask a new question about this device
Download the instructions for your Interactive whiteboard in PDF format for free! Find your manual IS-01 - Ipevo and take your electronic device back in hand. On this page are published all the documents necessary for the use of your device. IS-01 by Ipevo.
USER MANUAL IS-01 Ipevo
Interactive Whiteboard System IS-01
User Manual

Table of Contents
What's in the Box ....1
The Basics ....1
Two Ways to Use It....2
How It Works....3
Get to Know It....4
Installing It....5-11
Step 1: Software & Driver Installation....5
Step 2: Positioning and Connecting the Sensor Cam....5-6
Step 3: Securing the Sensor Cam....6-8
Step 4: Connecting to the Computer....9
Step 5: Readying the Interactive Pen....9
Step 6: Calibration....10-11
Using It....12
Using IPEVO Annotator Software....13-15
FAQ....16
Troubleshooting....17
Congratulations on your purchase of the IS-01 Interactive Whiteboard System. After a few simple steps, your system will be calibrated and ready to use.
Your package should contain the following:
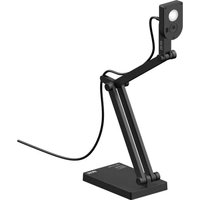
- IS-01 Sensor Cam
• IS-01 Interactive Pen - 2m USB cable
- Replaceable Pen Cap

AAA Batteries

- Ceiling mount
- User Manual (this document)
- Software CD-ROM
• 2 AAA Batteries

Replaceable Pen Cap
User Manual

USB Cable

CD-Rom
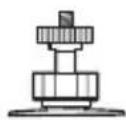
Ceiling Mount
Warning: Disassembling the pen tip may damage the Interactive Pen. Please refrain from loosening or disassembling the pen tip at all times.

The Basics
The IPEVO Interactive Whiteboard System, or IS-01, turns your large projector screen into an interactive touchscreen, giving you the ability to easily draw and annotate for education and business. Plus, because IS-01 is compatible with many different kinds of software, you'll also be able to control your computer (and what's on the screen) at a distance. And this is all possible no matter what make and model of projector you have.
Two Ways to Use It
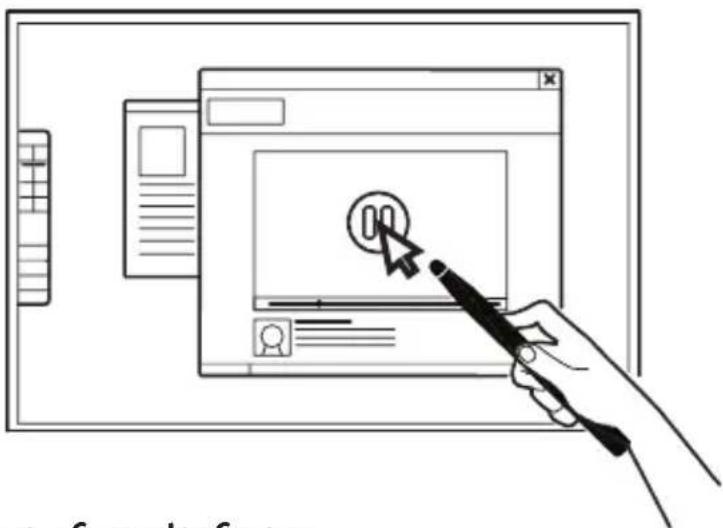
Use the Interactive Pen as a Computer Cursor
The Interactive Pen can behave like a mouse, transforming any surface into a touchscreen. Use the Pen to intuitively perform the actions you'd normally use your mouse to perform.
Note: The Interactive Pen can perform normal mouse actions including click, double click, and drag. However, some actions are not executable with the Pen, such as hovering.
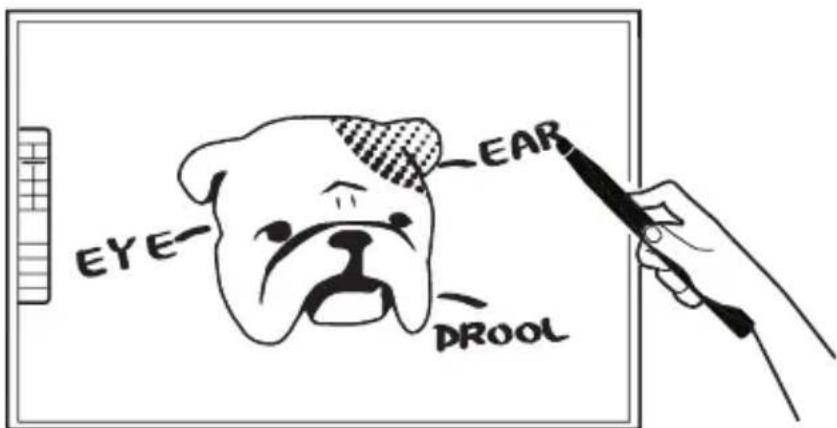
Annotate Your Text and Images
Using IPEVO Annotator, you can draw and write directly on your interactive whiteboard. You can even draw on top of your document camera's live video feed. Engage your audience and clarify your material.
How It Works
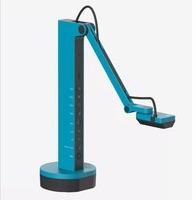
IS-01 is made up of two devices: the Sensor Cam and the Interactive Pen. The Sensor Cam detects the physical location of the Pen and sends this information to your computer, which then translates the Pen's motion into cursor motion. Wherever you move the Pen, the computer will move its cursor in real time. You can also perform mouse clicks and drags with the Pen.


LED indicator
Lights up when powered up and connected.
Lens
Detects signals emitted by the Interactive Pen.
Adjustment Knob
Change and secure sensor angle by tightening knob.

Contact Sensitive Tip
Send signals for left, right, and double mouse clicks. Brief contact performs a left click while pressing in and holding for 2 seconds or longer performs a right click.
Power switch
Turn the unit on and off.
IPEVO button
This is another way to perform mouse clicks. Press for a left click, or press and hold for 2 seconds or longer for a right click.
Battery cover
Open to reveal slots for 2 AAA batteries.
1. Software & Driver Installation
PC: Insert the CD-ROM into your computer and follow the onscreen prompts to complete the installation.
Mac:
- Insert the CD-ROM into your computer.
- Double-click the "IPEVO IS-01.DMG" file. A folder named "IPEVO IS-01" will appear.
- Drag the IPEVO IS-01 folder into the Application folder to complete the installation.
2. Positioning and Connecting the Sensor Cam
Proper position of the Sensor Cam is important for optimum operation. Follow these guidelines to place the Sensor Cam:
- For most projectors, a good position for the Sensor Cam will be the same location as the projector. One exception to this is if you are using a short-throw projector. In that case, you will need to place the Sensor Cam further away from the screen than the projector.
- Minimal distance from your screen depends on screen size. Place the Sensor Cam according to the recommended distances in the chart below:
| Screen Size 50” 60” 80” 100” | ||||
| Minimal Distance | 5 ft(155 cm) | 5.5 ft(170cm) | 7.5 ft(230 cm) | 9.5 ft(290 cm) |
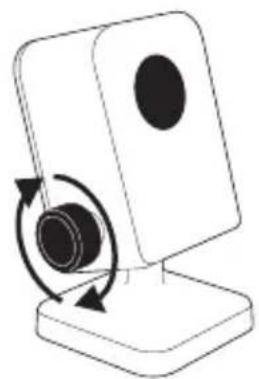
- The Sensor Cam should face directly at the projection screen. Depending on your screen's height, you will have to adjust the Sensor Cam's Head to face upward or downward. Please refer to the steps below:
1 Loosen Adjust Angle Tig 2


3
- The Sensor Cam is best placed opposite the center of the screen at a straight-on angle. However, a straight-on angle is not required for acceptable operation, and the Sensor Cam may be placed at another angle if necessary. Please refer to the diagram below for placement zones according to accuracy quality:
![graph TD A["Projected Image"] --> B["Unavailable"] A --> C["Excellent"] A --> D["Good"] A --> E["Acceptable"] B --> F["Poor"] C --> G["Poor"] D --> H["Poor"] E --> I["Poor"] style A fill:#f9f,stroke:#333 style B fill:#ccf,stroke:#333 style C fill:#cfc,stroke:#333 style D fill:#fcc,stroke:#333 style…](/content/2026/05/991106/images/ab504d4e6e5d9b14a730a93015aeb67ef38b65e31cb0c3c07cb0366c1f169d53.jpg)
As you can see:
- Accuracy is better when the Sensor Cam is closer to the center.
• Accuracy decreases as the angle increases. - Larger screens require more distance between the screen and the Sensor Cam.
Note: Please keep a clear path between the Sensor Cam and the projector screen to ensure proper operation.
3. Securing the Sensor Cam
Once you've found the right position, it's important to make sure your Sensor Cam is steady and secure. There are three ways to secure your Sensor Cam, depending on your setup:
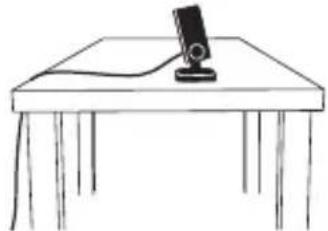
A. Placing on the desktop
Use a flat, smooth desktop surface. Make sure nothing is blocking the Sensor Cam's path to the screen surface. Adjust the knob to angle the Sensor Cam directly at the center of the screen surface.
B. Using an upside-down ceiling mount
IS-01 can be mounted upside-down onto the ceiling or ceiling-mounted projector. To do so:
- Twist the Sensor Cam base onto the screw on the ceiling mount until tight. Turn the star-shaped knob near the base for additional angle adjustment.

- Before affixing the mount to the ceiling, hold the Sensor Cam in an area just below (by a few inches) where you intend to mount the projector. Run the Sensor Cam Position Diagnosis (see Page 11) with the Sensor Cam in this position to ensure maximum accuracy.

- Ensure the mounting surface is clean and free of grit. Remove the sticker from the bottom of the ceiling mount, and affix the ceiling mount firmly onto the mounting surface.

Note: The sticker of Ceiling Mount is extremely adhesive and should only be applied once. The Sensor Cam can be detached without removing the Ceiling Mount. Simply unscrew the Sensor Cam from the Ceiling Mount.
C. Using a tripod
The Sensor Cam comes with a built-in tripod mount. Consider mounting the Sensor Cam onto any standard tripod.

4. Connecting to the Computer
Once you've placed and secured the Sensor Cam, connect it to your computer using the included USB cable. The Sensor Cam LED indicator will light up once connected.

5. Readying the Interactive Pen
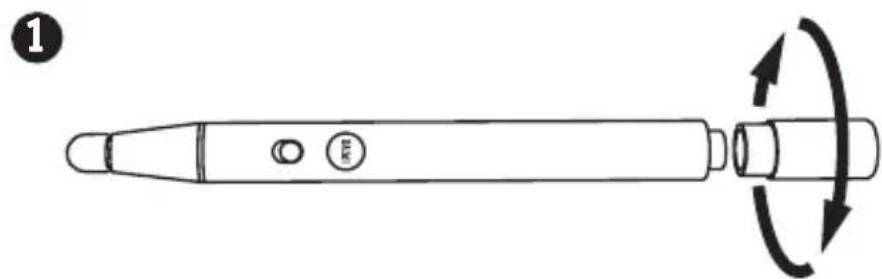
Remove the battery cover from the Interactive Pen and insert 2 AAA batteries. Replace the cover. Turn on the pen when ready to use.

6. Calibration
IS-01 must be calibrated before use to ensure accurate operation. This process only takes a couple of steps.
The calibration application appears the first time the Sensor Cam is connected to the computer. Use the Interactive Pen and follow the instructions on screen (and reprinted below) to complete the calibration.
Any time after the first time that you wish to calibrate, execute the following file:
PC: Start Menu -> Program files -> IPEVO -> IS-01 -> Calibration
Mac: Application folder -> IPEVO IS-01 -> Calibration
Note: the Interactive Pen must have batteries and be switched on for calibration and operation.
Calibration Steps
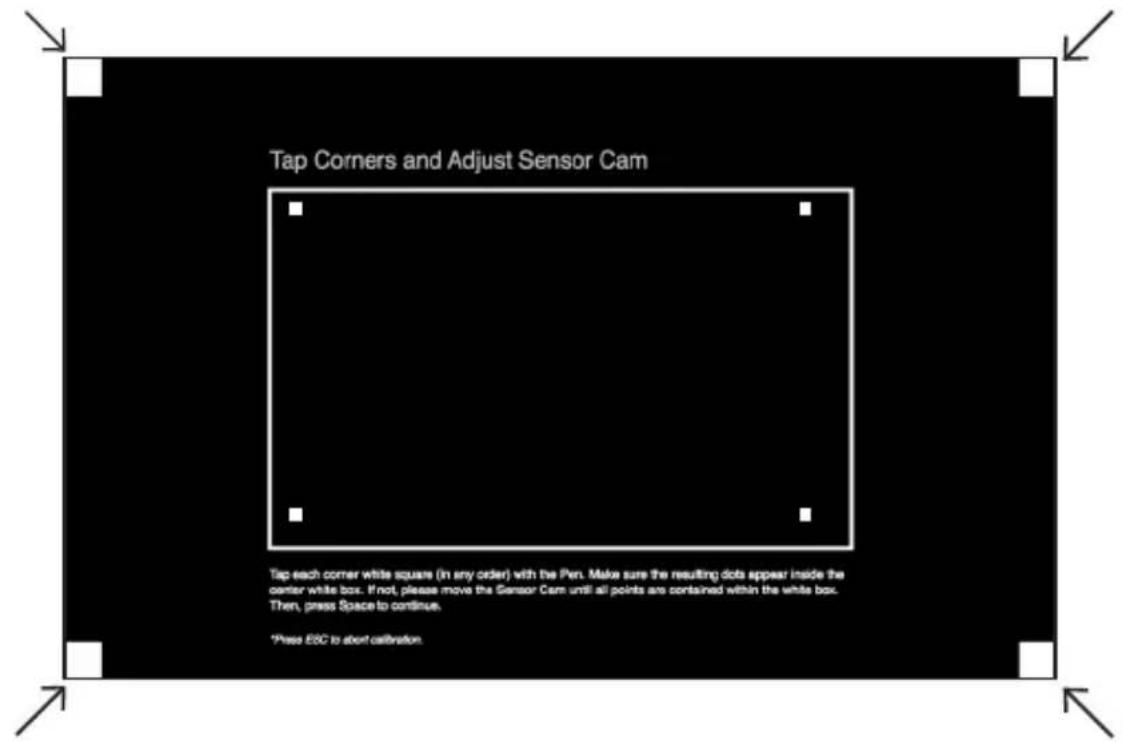
Step 1: Sensor Cam Coverage Detection
Tap each corner white square (in any order) with the tip of the Interactive Pen. Make sure the resulting dots appear inside the center white box. If not, please move the Sensor Cam until all points are contained within the white box. Then, press Space to continue.
Step 2: Accuracy Check
With the Pen, tap the center of each red crosshair that appears. Four crosshairs will appear in total. You MUST tap all four in turn. Failing to do so may impair Pen accuracy.

Step 3: Calibration Completed
After the process you will be returned to your desktop and your IS-01 will be ready for use.
Sensor Cam Diagnosis
If you find the pen trace dithering or inaccurate after the initial calibration, your Sensor Cam may need further adjustment. Please run the Sensor Cam Diagnosis and reposition the Sensor Cam according to the suggestions given.
This diagnostic tool is located in:
Windows:
Start Menu -> Program Files -> IPEVO -> IS-01 -> Sensor Cam Diagnosis
Mac:
Application folder -> IPEVO IS-01 -> Sensor Cam Diagnosis
Controlling cursor movement
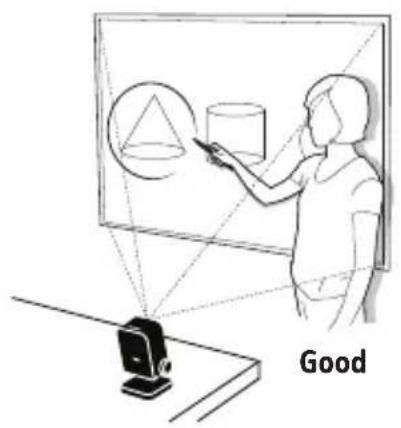
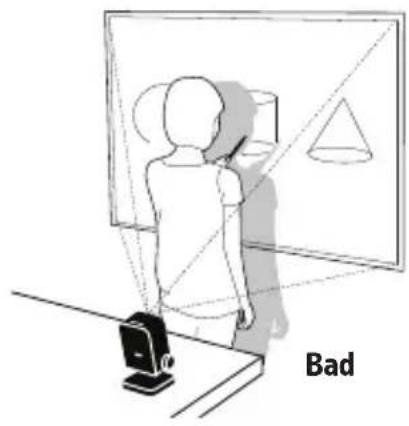
Simply move the pen in front of the screen area, being careful not to block the Pen's path to the Sensor Cam with your body. The mouse cursor will follow the Pen's movement in real time.
Controlling the computer and applications
Mouse clicks can be performed both within the operating system and in a wide variety of software applications. To do so, use either of two methods:

Touch the contact-sensitive Pen tip onto the screen surface.

Press the green button.
A variety of mouse controls are possible using these methods:
Left click: Tap the tip onto the surface, or press the IPEVO button once.
Double click: Quickly tap the tip onto the surface twice, or press the IPEVO button twice.
Right click: Press and hold the tip onto the surface, or press and hold the IPEVO button. Hold for at least 2 seconds.
Click and drag: Press and hold the tip onto the surface, or press and hold the IPEVO button. While doing so, move the pen to the desired spot.
Adding reach with the Extension Wand (Optional Accessory)
When using a larger or taller screen, attach the Extension Wand Accessory to the Interactive Pen to help reach all areas of the screen. The 16.5" (420 mm) Extension Wand for Interactive Pen is available at www.ipevo.com

Installing the Extension Wand
Simply push the Extension Wand into the bottom of the Interactive Pen till you hear a click.

Using IPEVO Annotator Software

IPEVO Annotator Software
IS-01 comes with IPEVO Annotator, a program which can be used in combination with any other software/application. You can draw, write and annotate onto images on the screen. Or, you can create a blank whiteboard to turn your projector screen into an interactive whiteboard.
After calibrating IS-01, you can start IPEVO Annotator by navigating to:
Windows: Start Menu -> Program Files -> IPEVO -> IS-01 -> Annotator
Mac: Application Folder -> IPEVO IS-01 -> Annotator
IPEVO Annotator Software (cont'd)
Desktop Mode
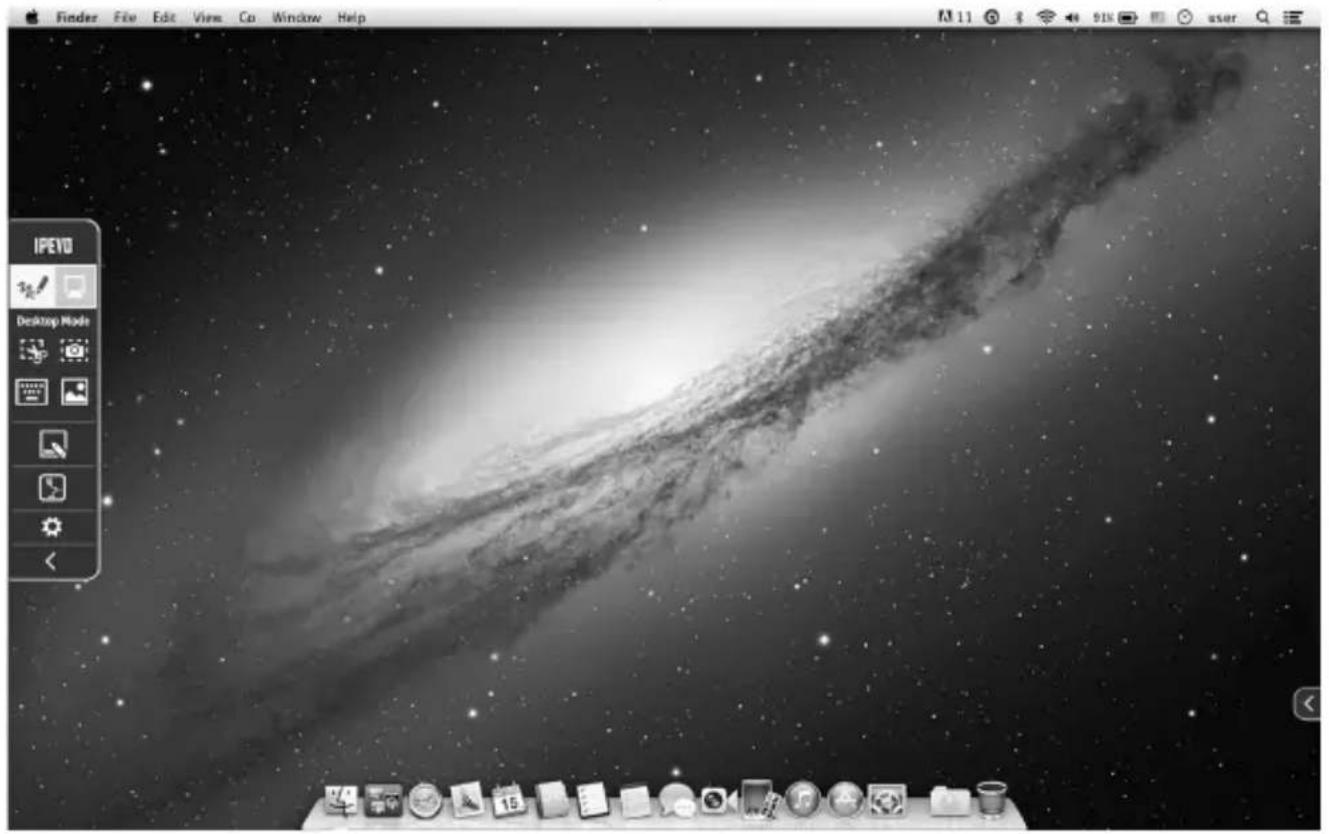

Click the Computer icon to select Desktop Mode

Save all of your current screen as an image

Save part of your current screen as an image

Display a touchscreen keyboard

Hide the toolbar

Use your connected IPEVO doc cam's live feed as your background

For more specific instructions, click the Settings icon

Clicking the small reverse arrow on either side of the screen will show the toolbar again on that side
Drawing Mode


Click the Pen icon to select Drawing Mode (to draw shapes and lines)

Create or select your whiteboard

Mouse

Erase your drawings

Select shape tools

Select one of two drawing tools. Click on the icons to change color and line size

Clear all your drawings

Undo and Redo
How do I quickly determine a good working distance between the screen and Sensor?
Normally, the projector is a good location to place the Sensor. If you are using a short-throw projector, however, please refer to pages 5 and 6 for the recommended Sensor distance guidelines.
Can I use rechargeable AAA batteries for the Interactive Pen?
Yes. Rechargeable alkaline batteries are recommended.
Can I use IS-01 with my own software instead of IPEVO Annotator?
Yes. IS-01 can be used with third-party image processing software and whiteboards. Any mouse-based software should work fine.
How do I stop the IS-01 driver from running at start up?
Follow these steps according to your system:
Mac: System Preference -> Users & Groups -> Login item. Uncheck IS-01 Driver
PC: Start Menu -> Enter "msconfig" in Run (Windows XP) or Search Bar (Windows Vista & 7)
-> Startup tab -> uncheck IS-01 Driver -> OK. Restart to apply this setting.
What should I do if the cursor is not pointing correctly and/or following the Interactive Pen correctly?
The cursor may lose accuracy if the screen resolution or screen ratio has changed, or if the Sensor has been moved. Please run the calibration program again.
Why is there no scrollbar in my browser or finder window in Mac OS X when using IS-01?
By default, scrollbar is enabled only when a mouse is connected to Mac. You can manually enable the scrollbar by going to System Preferences -> General and set "Show scroll bars" to "Always" to enable scrollbars.
When I tap on the corners during calibration, the points don't fall within the center white box. Move the Sensor closer to the area where the corresponding points do not appear. Or, move the Sensor further away from the screen. Run the calibration program again.
The cursor on my screen is jumping around abnormally and I am not able to control it. Remove any strong light source or infrared equipment close to the Sensor, as these may interfere with the Sensor.
During calibration, multiples spots appear or spots appear erratically.
- Remove any strong light source or infrared equipment close to the Sensor, as these may interfere with the Sensor.
- Ensure the projector screen you are using is not made of highly reflective glass or metal. Such reflective materials affect Sensor operation.
The pen trace continually breaks when I write or draw with the Interactive Pen.
- The Sensor might be placed too far away from the screen. Move the Sensor closer to the screen and run the calibration program again.
- Pen trace can only occur if the Sensor vision field is not blocked. Please do not draw or write with your body blocking the Sensor.
- Replace the batteries in the interactive pen. Low batteries can have an adverse effect on pen trace and accuracy.
My pen trace and pointing are inaccurate after I change screen resolution.
Changing the screen resolution throws off the calibration. Please run the calibration app after every resolution change.
My pen and cursor lose accuracy every now and then.
Please make sure the Sensor Cam is positioned on a flat and stable surface, and that the Adjustment Knob is tight. A slight tip of the Sensor Cam may result in inaccurate operation.
I have the task bar set to hidden, and I can't use the task bar with the Interactive Pen.
Please uncheck the auto-hide option and position the task bar on the screen when using IS-01.
© 2013 IPEVO Inc. All rights reserved. IPEVO, IPEVO Annotator, IS-01, the IPEVO logo, and other IPEVO marks are owned by IPEVO Inc. and may be registered. All other trademarks are the property of their respective owners.
- INTERACTIVE WHITEBOARD SYSTEM IS-01
- TABLE OF CONTENTS
- THE BASICS
- TWO WAYS TO USE IT
- USE THE INTERACTIVE PEN AS A COMPUTER CURSOR
- ANNOTATE YOUR TEXT AND IMAGES
- HOW IT WORKS
- LED INDICATOR
- LENS
- ADJUSTMENT KNOB
- CONTACT SENSITIVE TIP
- POWER SWITCH
- IPEVO BUTTON
- BATTERY COVER
- SOFTWARE & DRIVER INSTALLATION
- MAC
- POSITIONING AND CONNECTING THE SENSOR CAM
- SECURING THE SENSOR CAM
- PLACING ON THE DESKTOP
- USING AN UPSIDE-DOWN CEILING MOUNT
- USING A TRIPOD
- CONNECTING TO THE COMPUTER
- READYING THE INTERACTIVE PEN
- CALIBRATION
- CALIBRATION STEPS
- STEP 1: SENSOR CAM COVERAGE DETECTION
- STEP 2: ACCURACY CHECK
- STEP 3: CALIBRATION COMPLETED
- SENSOR CAM DIAGNOSIS
- WINDOWS
- CONTROLLING CURSOR MOVEMENT
- CONTROLLING THE COMPUTER AND APPLICATIONS
- A VARIETY OF MOUSE CONTROLS ARE POSSIBLE USING THESE METHODS
- ADDING REACH WITH THE EXTENSION WAND (OPTIONAL ACCESSORY)
- INSTALLING THE EXTENSION WAND
- USING IPEVO ANNOTATOR SOFTWARE
- IPEVO ANNOTATOR SOFTWARE (CONT'D)
Brand : Ipevo
Model : IS-01
Category : Interactive whiteboard