
CON800 - Saw Clarke - Free user manual and instructions
Find the device manual for free CON800 Clarke in PDF.


| Product Type | Circular Saw |
| Brand | Clarke |
| Model | CON800 |
| Power Rating | 1200 W |
| Power Source | Electric (Mains) |
| Voltage | 230 V / 50 Hz |
| Blade Diameter | 184 mm (7 1/4") |
| Max Cutting Depth at 90° | 62 mm |
| Max Cutting Depth at 45° | 44 mm |
| No-Load Speed | 5500 RPM |
| Bevel Capacity | 0° - 45° |
| Dust Extraction Connection | Yes (38 mm/1.5" port) |
| Weight | 5.2 kg |
| Dimensions (LxWxH) | 310 x 250 x 280 mm |
| Safety Features | Blade guard, spindle lock, safety switch |
| Spare Parts Availability | Blades, carbon brushes, saw shoes |
| Maintenance | Regularly clean dust ports; replace carbon brushes when worn; check blade sharpness |
Frequently Asked Questions - CON800 Clarke
User questions about CON800 Clarke
0 question about this device. Answer the ones you know or ask your own.
Ask a new question about this device
Download the instructions for your Saw in PDF format for free! Find your manual CON800 - Clarke and take your electronic device back in hand. On this page are published all the documents necessary for the use of your device. CON800 by Clarke.
USER MANUAL CON800 Clarke
natural_image
White manual power tool with gray handle and label (no visible text or symbols on body)800W JIGSAW WITH LASER
MODEL No. CON800
Part No. 6462033
Thank you for purchasing this CLARKE 800W Jigsaw with Laser.
Before attempting to use the Jigsaw, please read this manual thoroughly and follow the instructions carefully. In doing so you will ensure the safety of yourself and that of others around you, and you can look forward to the Jigsaw giving you long and satisfactory service.
GUARANTEE
This product is guaranteed against faulty manufacture for a period of 12 months from the date of purchase. Please keep your receipt which will be required as proof of purchase.
This guarantee is invalid if the product is found to have been abused or tampered with in any way, or not used for the purpose for which it was intended.
Faulty goods should be returned to their place of purchase, no product can be returned to us without prior permission.
This guarantee does not effect your statutory rights.
FEATURES
- Variable speed jigsaw • Lock on button
- 3 stage pendulum action • Dust extraction facility
- Parallel fence guide • On board hexagon key
SPECIFICATIONS
Model number......CON800
Rated voltage 230V AC 50Hz
Input power 800 Watts
No load variable speed 800 - 3000 strokes per minute
Pendulum action ....3 stage
Cutting capacities....10 mm in steel
80 mm in wood
Dust port diameter .......Internal 31mm, External 38mm
Sound pressure level L_PA .....94.5 dB (A)
Sound power level L_WA .....105.5 dB (A)
Vibration level ....../< 2.5m/s
Please note that the details and specifications contained herein, are correct at the time of going to print. However, CLARKE International reserve the right to change specifications at any time without prior notice.
GENERAL SAFETY PRECAUTIONS

WARNING:
As with all machinery, there are certain hazards involved with their operation and use. Exercising respect and caution will considerably lessen the risk of personal injury. However, if normal safety precautions are overlooked or ignored, personal injury to the operator or damage to property, may result.
- ALWAYS Learn the machines' applications, limitations and the specific potential hazards peculiar to it. Read and become familiar with the entire operating manual.
- ALWAYS use a face or dust mask if operation is particularly dusty.
- ALWAYS check for damage. Before using the machine, any damaged part, should be checked to ensure that it will operate properly, and perform its intended function. Check for alignment of moving parts, breakage of parts, mountings, and any other condition that may affect the machines' operation. Any damage should be properly repaired or the part replaced. If in doubt, DO NOT use the machine. Consult your local dealer.
- ALWAYS disconnect the tool/machine from the power supply before servicing and when changing accessories.
- ALWAYS wear safety goggles, manufactured to the latest European Safety Standards. Everyday eyeglasses do not have impact resistant lenses, they are not safety glasses.
- ALWAYS keep work area clean. Cluttered areas and benches invite accidents.
- ALWAYS ensure that adequate lighting is available. A minimum intensity of 300 lux
should be provided. Ensure that lighting is positioned that you will not be working in your own shadow.
- ALWAYS keep children away. All visitors should be kept a safe distance from the work area, especially whilst operating the machine.
- ALWAYS maintain machine in top condition. Keep tools/machines clean for the best and safest performance. Follow maintenance instructions.
- ALWAYS handle with extreme care do not carry the tool/machine by its' electric cable, or yank the cable to disconnect it from the power supply.
- ALWAYS ensure the switch is off before plugging in to mains. Avoid accidental starting.
- ALWAYS concentrate on the job in hand, no matter how trivial it may seem. Be aware that accidents are caused by carelessness due to familiarity.
- ALWAYS keep your proper footing and balance at all times don't overreach. For best footing, wear rubber soled footwear. Keep floor clear of oil, scrap wood, etc.
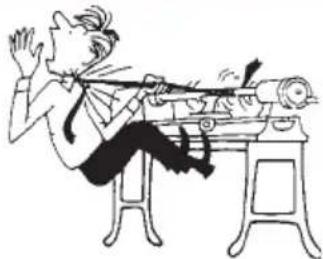
- ALWAYSwear proper apparel. Loose clothing or jewellery may get caught in moving parts. Wear protective hair covering to contain long hair.
- ALWAYS use recommended accessories. The use of improper accessories could be hazardous.

natural_image
Illustration of a tree with a bird perched on it, no text or symbols present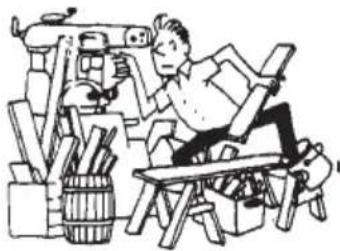
natural_image
Illustration of a person sitting at a desk surrounded by office supplies and tools (no text or symbols visible)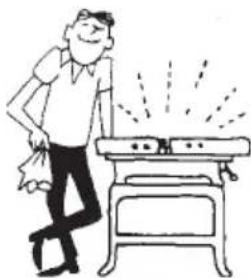
natural_image
Cartoon illustration of a man standing next to a table with steam rising (no text or symbols)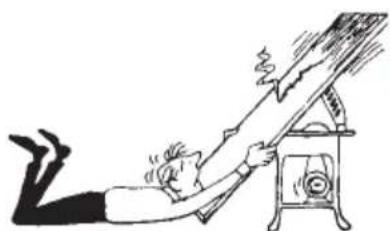
natural_image
Cartoon illustration of a person lying on a slope with a ladder and smoke rising (no text or symbols)GENERAL SAFETY PRECAUTIONS
-
ALWAYS remove plug from electrical outlet when adjusting, changing parts, or working on the machine.
-
NEVER operate machine while under the influence of drugs, alcohol or medication.
-
NEVER leave machine running unattended. Turn power off. Do not leave the machine until it comes to a complete stop.
-
NEVER force the machine. It will do a better and safer job at the rate for which it was designed.
-
NEVER use power tools in damp or wet locations or expose them to rain. Keep your work area well illuminated. Do not use in explosive atmosphere (around paint fumes, flammable liquids etc.). Avoid dangerous environments.
natural_image
Cartoon illustration of a person using a telescope on a workbench (no text or symbols)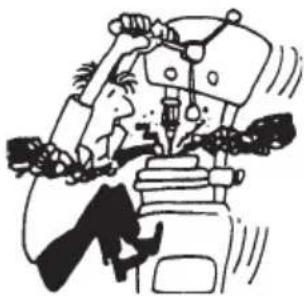
natural_image
Cartoon illustration of a person using a robotic arm (no text or symbols)
WARNING:
The laser guide fitted to this product is a Class 2 laser. There are no user serviceable parts in the laser.
ADDITIONAL PRECAUTIONS FOR JIGSAWS
-
ALWAYS wear ear protectors/defenders as the noise level of this machine can exceed 85dB (A).
-
ALWAYS use the appropriate saw blade for the material being cut.
-
ALWAYS keep the mains cable well away from the machine and ensure an adequate electrical supply is close at hand so that the operation is not restricted by the length of the cable.
-
ALWAYS switch the machine OFF immediately the task is completed.
-
ALWAYS ensure the blade is fully tightened before use.
-
ALWAYS allow sufficient clearance beneath the work to ensure the blade does not come into contact with the floor, table etc.
-
NEVER allow the ventilation slots in the machine to become blocked.
-
DO NOT cut hollow pipe and do not cut material above the specified thickness.
-
DO NOT cut through walls or cavities before checking for hidden electrical wires or water pipes etc.
-
DO NOT remove tool from work until the blade has completely stopped.
-
DO NOT touch the blade immediately after use, allow time for it to cool.
-
DO NOT cut work less than at least twice the pitch of the saw blade. i.e. at least two teeth must be in contact with the work at all times.
-
DO NOT use the machine if the electric cable, plug or motor is in poor condition.
-
When cutting wood, ensure all nails have been removed beforehand. Nails will damage the wood saw blade.
-
When cutting metals, always use a cooling agent i.e. cutting/soluble oil.
-
Replacement blades for wood, plastic and steel are available from your CLARKE dealer. (see Parts List, for details)
Additionally, please keep these instructions in a safe place for future reference.
ELECTRICAL CONNECTIONS

This product is provided with a standard 13 amp, 230 volt (50Hz), BS 1363 plug, for connection to a standard, domestic electrical supply. Should the plug need changing at any time, ensure that a plug of identical specification is used.

WARNING!

This appliance is double insulated, and the two wires in the mains lead should be wired in accordance with the following colour code:
BLUE - NEUTRAL
BROWN - LIVE
- Connect the BLUE coloured wire to the plug terminal marked with a letter "N"
- Connect the BROWN coloured wire to the plug terminal marked with a letter "L"
If this appliance is fitted with a plug which is moulded on to the electric cable (i.e. non-rewireable) please note:
- The plug must be thrown away if it is cut from the electric cable. There is a danger of electric shock if it is subsequently inserted into a socket outlet.
- Never use the plug without the fuse cover fitted.
- Should you wish to replace a detachable fuse carrier, ensure that the correct replacement is used (as indicated by marking or colour code).
- Replacement fuse covers can be obtained from your local Clarke dealer or most electrical stockists.
FUSE RATING
The fuse in the plug must be replaced with one of the same rating (5 amps) and this replacement must be ASTA approved to BS1362.
If in doubt, consult a qualified electrician. Do not attempt any electrical repairs yourself.
CABLE EXTENSION
Always use an approved cable extension suitable for the power rating of this tool (see specifications), the conductor size should also be at least the same size as that on the machine, or larger. When using a cable reel, always unwind the cable completely. If using tool outdoors, only use extension cables intended for outdoor use.
BEFORE USE
FITTING THE JIGSAW BLADE

WARNING!
Before removing, or installing a jigsaw blade, make sure that the mains plug has been removed from the mains supply.
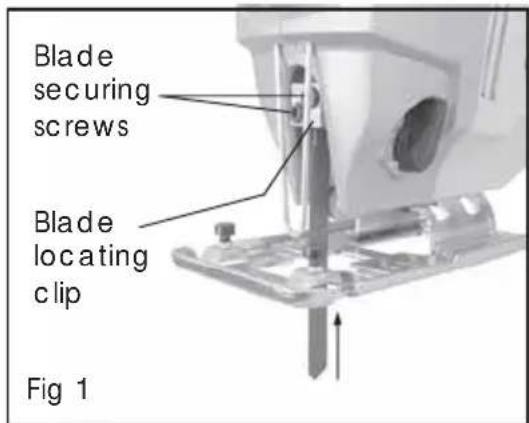
- Loosen the two blade securing screws, using the hexagonal key provided.
- With the blade teeth facing forwards, push the blade shank into the blade locating clip as far as possible.
- Slightly tighten the two blade securing screws alternately, to position the blade.
-
Ensure that the blade is straight and resting on the blade support roller.
-
Fully tighten the two blade securing screws.
FITTING THE PARALLEL FENCE
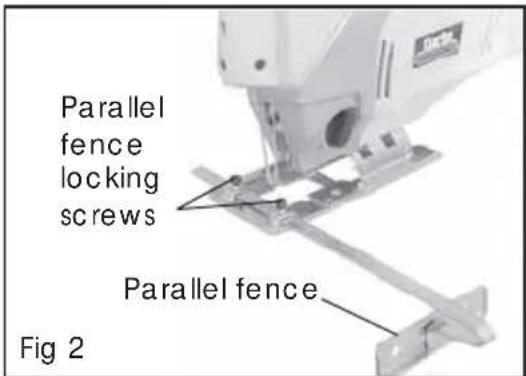
The parallel fence allows you to cut in a straight line, parallel to the edge of the workpiece.
To fit and adjust the parallel fence:
- Loosen the parallel fence locking screws.
- Push the parallel fence through the locating slots on the base plate.
- Set the width required and tighten the locking screws.
- When cutting, ensure that the parallel fence is resting against the edge of the workpiece.
NOTE:
The parallel fence can be fitted to either side of the base plate.
BEFORE USE
ADJUSTING THE CUTTING ANGLE

WARNING!
Before adjusting the cutting angle, make sure that the mains plug has been removed from the mains supply.
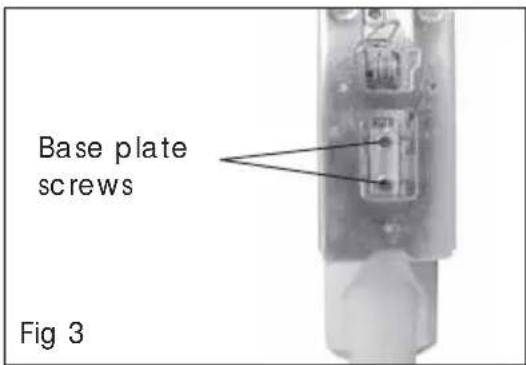
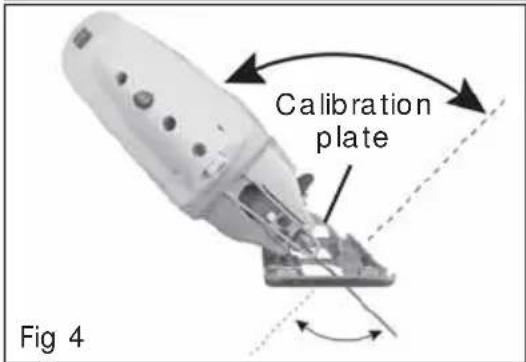
- Loosen the base plate screws using the hexagonal key provided. See Fig 3
- Tilt the base to the required angle.
- There is a calibration plate on the base plate to assist you in selecting the correct angle. See Fig 4.
- Re-tighten the base plate screws to secure the base plate.
You should double check the angle using a protractor before use.
DUST EXTRACTION PORT ADAPTOR
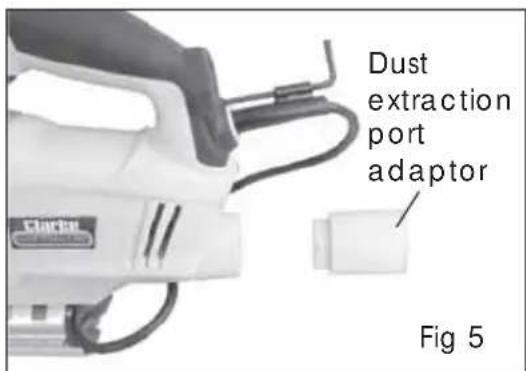
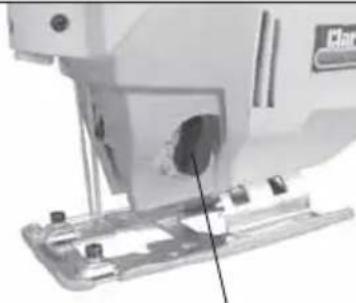
This jigsaw has a dust extraction port to enable you to connect it to a vacuum cleaner. This will minimise the amount of airborne dust generated during cutting.
To fit the dust extraction port adaptor:
- Push the dust extraction port adaptor into the dust extraction port.
- Twist clockwise to secure into position.

WARNING!
If the cutting operation is dusty, we recommend that you use a dust mask.
OPERATING
PENDULUM ACTION
When the pendulum action is selected, the blade achieves maximum penetration on the upward cutting stroke and is lifted back, away from the material, on the downward non-cutting stroke. This gives improved quality of cut, and longer blade life.
To set the pendulum action, rotate the pendulum action switch to the desired setting.
The table below can be used to select the correct settings. This is only a recommendation, you should always make a test cut on a scrap piece of material first.
natural_image
Close-up of a sewing machine's blade and base mount (no visible text or symbols)Fig 6
Pendulum action switch
| mulgnitte$ | udnePdooW | lateM | cits#l | |
| 3 | Fast cuts | PVC | ||
| 2 | Thick Wood | Fibreglassc#c | ||
| 1 | dwyIPChipboard | AluminiumNon-ferrous | ||
| 0 | dmini#esC | Sheet metal |
VARIABLE SPEED SELECTOR
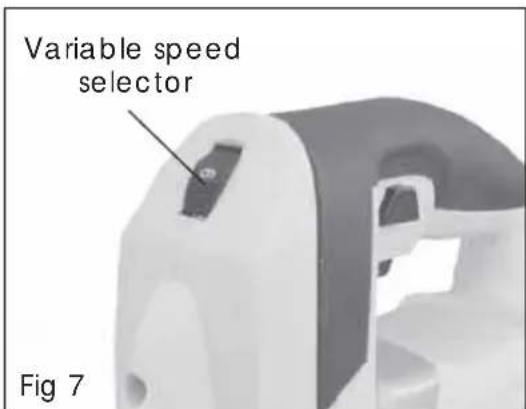
The variable speed selector is used to control the speed of the jigsaw, this is measured in strokes per minute.
- The higher the number selected the faster the stroke rate of the blade.
- The stroke rate should be changed according to the material being cut. This is only a recommendation, you should always make a test cut on a scrap piece of material first.
| AML | DEDMEQGENDESP |
| Wood | 5-6 |
| Metal | 2-3 |
| Aluminium | 3-5 |
| PVC | 3-4 |
OPERATION
ON/OFF SWITCH
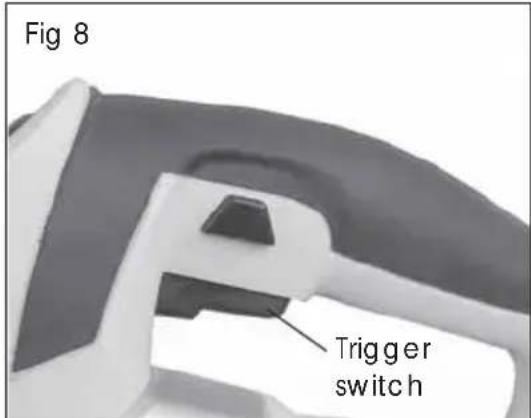
- Squeeze the trigger switch.
The jigsaw will run at the level selected with the variable speed selector.
- To switch off the jigsaw, release the trigger switch. When the blade has stopped remove it from the workpiece

WARNING!
The blade will continue to run for a short period after the trigger has been release. Wait until it stops before removing it from the workpiece.
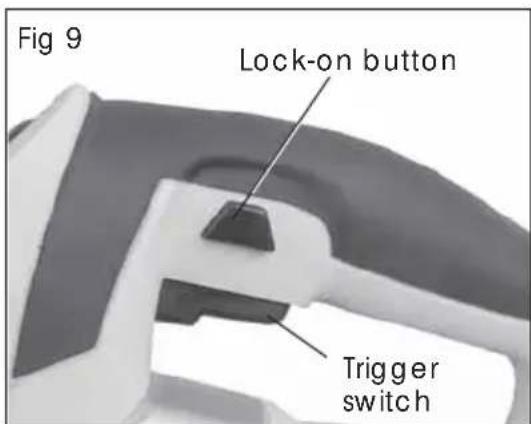
For continuous operation,
-
Squeeze and hold the trigger switch.
-
Press the lock-on button and release the trigger switch.
-
To release the lock-on button, squeeze the trigger switch and then release the trigger switch
LASER GUIDE
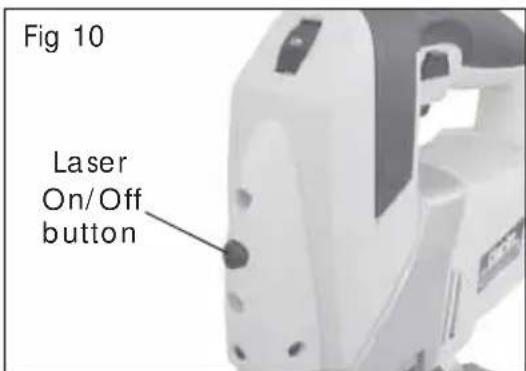
The laser guide is designed to help you keep the blade aligned with the cutting line.
- The laser guide is operated by pressing the Laser on/off button.
- DO NOT allow children or untrained personnel to use this product or the laser guide. It is not a toy!
• DO NOT aim the laser beam at people.
- KEEP the laser beam below eye level where practical.
- This product uses a Class 2 laser. There are no user serviceable parts.
OPERATION
JIGSAW TIPS
- Ensure your cutting line is free from nails before you start cutting.
• If you are not making a cut all the way through the workpiece, allow the blade to come to a complete stop before removing it from the workpiece
Wood
- Use a pencil to draw a cutting line on the wood.
- Select the correct speed and pendulum setting for the wood being cut.
- Allow the jigsaw to reach full speed before applying it to the wood.
Metal
- Use blades designed for cutting metal.
• Take your time, do not force the blade, it will take longer to cut metal than wood. - If possible clamp the workpiece to a backing sheet of plywood.
- Spread a thin film of oil along the cutting line.
- Allow the jigsaw to reach full speed before applying it to the metal.
- Do not attempt to cut hollow pipes.
REPLACEMENT BLADES
Replacement blades are available from your CLARKE dealer. Please quote the following part numbers:
| epyT rebmuNtraP | |
| Metal cutting jigsaw blades (10pk) | 6462085 |
| Wood cutting jigsaw blades (10pk) | 6462087 |
| Plastic cutting jigsaw blades (10pk) | 6462089 |
MAINTENANCE

WARNING!
Before performing any maintenance tasks make sure that the mains plug has been removed from the mains supply.
• After use, clean all dust and wood chippings from the jigsaw.
- Clean all of the ventilation slots on the motor housing.
• Make sure that the base plate is free from dirt and grease.
- The blade locating clip and support roller should be kept clean and lightly oiled at regular intervals.
- Keep the handle clean and free from oil and grease.
- Resin and glue on the blade causes poor cutting results. Clean the blade after use.
• Refer to your CLARKE dealer if internal maintenance is required.
PARTS DIAGRAM
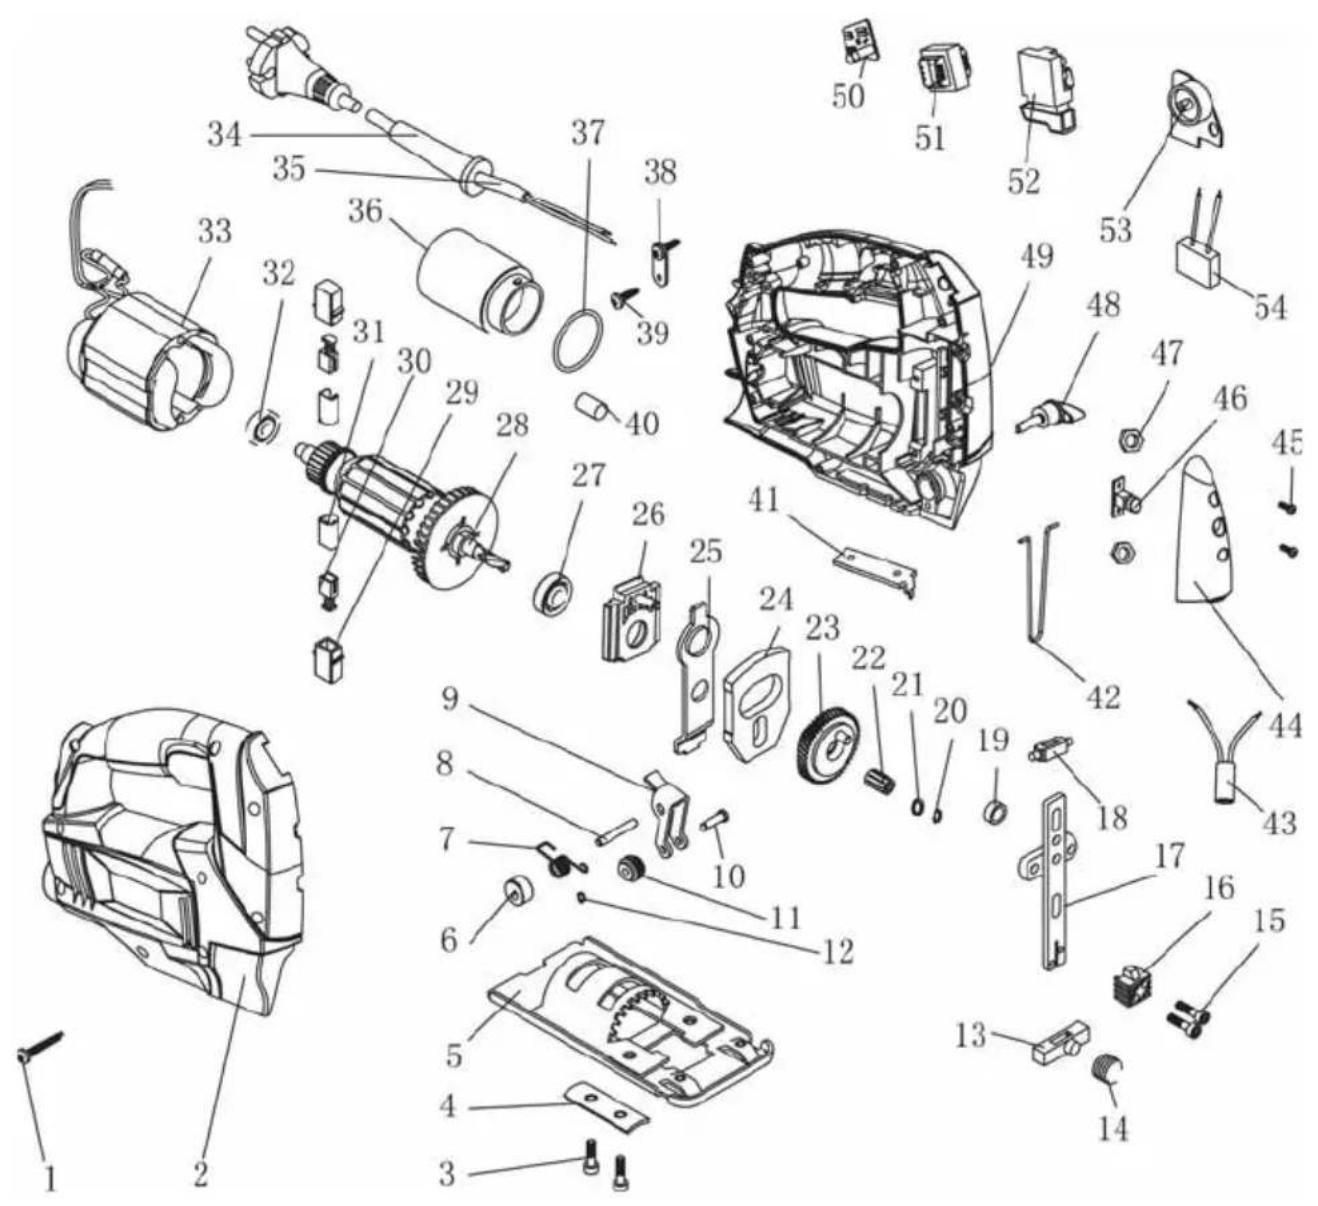
PARTS LIST
| metl | ebmuNtraP noit | pircseD ytQ | sa | elbalia | vA | Description | Qty | sa | |
| tra | terep | Part Number | tra | ||||||
| 1 | KP500200 | Tapping Screw | 7 | No | 28 | KP100040 | Rotor | 1 | No |
| 2 | KP300037 | Left Enclosure | 1 | No | 29 | KP314500 | Brush Holder | 2 | Yes |
| 3 | KP501507 | Adjusting Screw | 2 | No | 30 | KP62400 | Carbon Brush | 2 | Yes |
| 4 | KP224339 | Connecting Plate | 1 | No | 31 | KP222800 | Brush Bushing | 2 | No |
| 5 | KP145002 | Base Plate | 1 | No | 32 | KP520012 | Bearing | 1 | No |
| 6 | KP204003 | Metal Pendulum Switch | 1 | No | 33 | KP110040 | Stator | 1 | Yes |
| 7 | KP241512 | Roller Spring | 1 | No | 34 | KP322002 | Cord Sleave | 1 | No |
| 8 | KP215023 | Saw Holder Pin | 1 | No | 35 | KP160200 | dr@Piog | 1 | |
| 9 | KP223713 | Rolling MetaI Guide | 1 | No | 36 | KP315810 | Dust Connection | 1 | No |
| 10 | KP215022 | Roller Pin | 1 | No | 37 | KP320009 | O Ring | 1 | No |
| 11 | KP215502 | Support Roller | 1 | No | 38 | KP224200 | Strain Releif | 1 | No |
| 12 | KP511004 | Circlip | 2 | No | 39 | KP500201 | Tapping Screw | 2 | No |
| 13 | KP203008 | Holder For Saw Arm | 1 | No | 40 | KP321000 | bbEr Pin | 2 No | |
| 14 | KP241510 | Spring | 1 | No | 41 | KP224376 | Square Nut | 1 | No |
| 15 | KP501506 | Socket Head Screw | 2 | No | 42 | KP242530 | Protecting Wire | 1 | No |
| 16 | KP236500 | Saw Holder | 1 | Yes | 43 | KP163201 | Laser Head | 1 | Yes |
| 17 | KP143612 | Saw Arm | 1 | No | 44 | KP312080 | Laser Facility | 1 | No |
| 18 | KP203009 | Holder For Saw Arm | 1 | No | 45 | KP500802 | Screw | 2 | No |
| 19 | KP204002 | Roller | 1 | No | 46 | KP163616 | Laser Head Button | 1 | Yes |
| 20 | KP511000 | Fixing Ring | 1 | No | 47 | KP502001 | Square Nut | 2 | No |
| 21 | KP503000 | Washer | 1 | No | 48 | KP152538 | Pendulum Switch Knob | 1 | Yes |
| 22 | KP522000 | Needle Roller Bearing | 1 | No | 49 | KP300037 | Right Enclosure | 1 | No |
| 23 | KP144004 | Big Gearing | 1 | No | 50 | KP162810 | PCB | 1 | No |
| 24 | KP203007 | Balance Block | 1 | No | 51 | KP163300 | Transformer | 1 | No |
| 25 | KP224359 | Lifting Knife Plate | 1 | No | 52 | KP163650 | Switch | 1 | Yes |
| 26 | KP147502 | Bearing Holder | 1 | No | 53 | KP162823 | PCB | 1 | No |
| 72 | KP5 13 | Bearing 0 | 0 1 | No 2 | 54 | KP161500 | Capacitor | 1 | No |
saelbalia vA traperapSa
PARTS & SERVICE
For Spare Parts and Service, please contact your nearest dealer, or CLARKE International, on one of the following numbers.
PARTS & SERVICE TEL: 020 8988 7400
or e-mail as follows:
PARTS: parts@clarkeinternational.com
SERVICE: service@clarkeinternational.com
DECLARATION OF CONFORMITY
DECLARATION OF CONFORMITY
We declare that this product complies to the following standards/directives:
98/37/EC
Product Description: Jigsaw
Model No: CON800
Date 09 - August - 2007
Signed :
Engineering Manager
When disposing of this product, ensure it is disposed of according to all local ordinances. It must not be disposed of with general household waste.
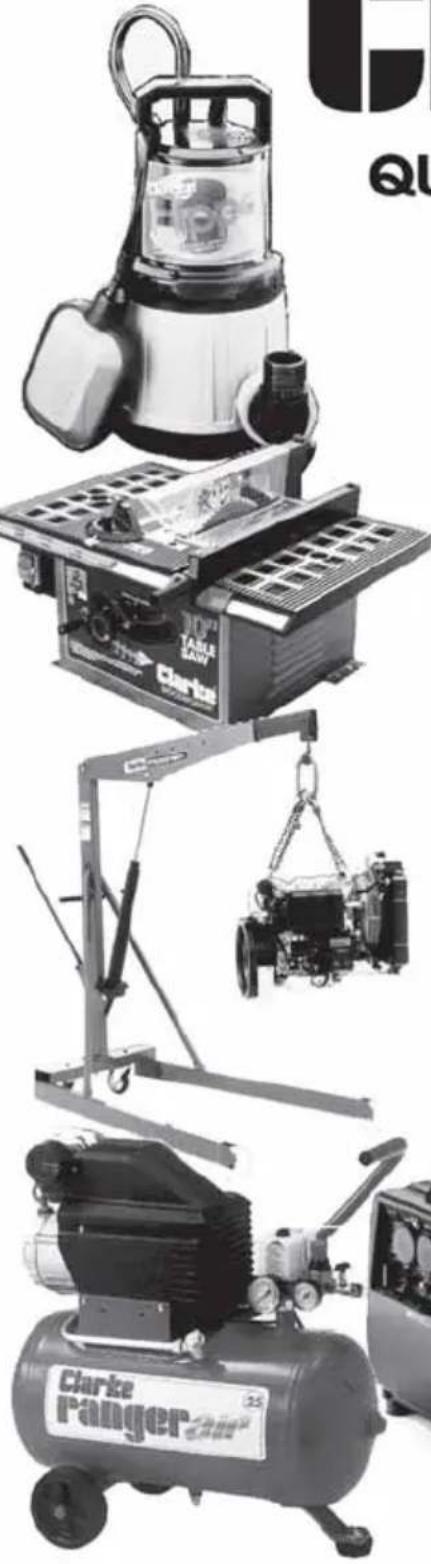
A SELECTION FROM THE VAST RANGE OF
Clarke ^TM
QUALITY PRODUCTS
AIR COMPRESSORS
From DIY to industrial. Plus air tools, spray guns and accessories.
GENERATORS
Prime duty or emergency standby for business, home and leisure.
POWER WASHERS
Hot and cold, electric and engine driven - we have what you need.
WELDERS
Mig, Arc, Tig and Spot. From DIY to auto/industrial.
METALWORKING
Drills, grinders and saws for DIY and professional use.
WOODWORKING
Saws, sanders, lathes, mortisers and dust extraction.
HYDRAULICS
Cranes, body repair kits, transmission jacks for all types of workshop use.
WATER PUMPS
Submersible, electric and engine driven for DIY, agriculture and industry.
POWER TOOLS
Angle grinders, cordless drill sets, saws and sanders.
STARTER/CHARGERS
All sizes for car & commercial use.
natural_image
Product catalog image showing various industrial equipment including a Clarke air purifier, engine cylinder, and air conditioner unit (no visible text or labels)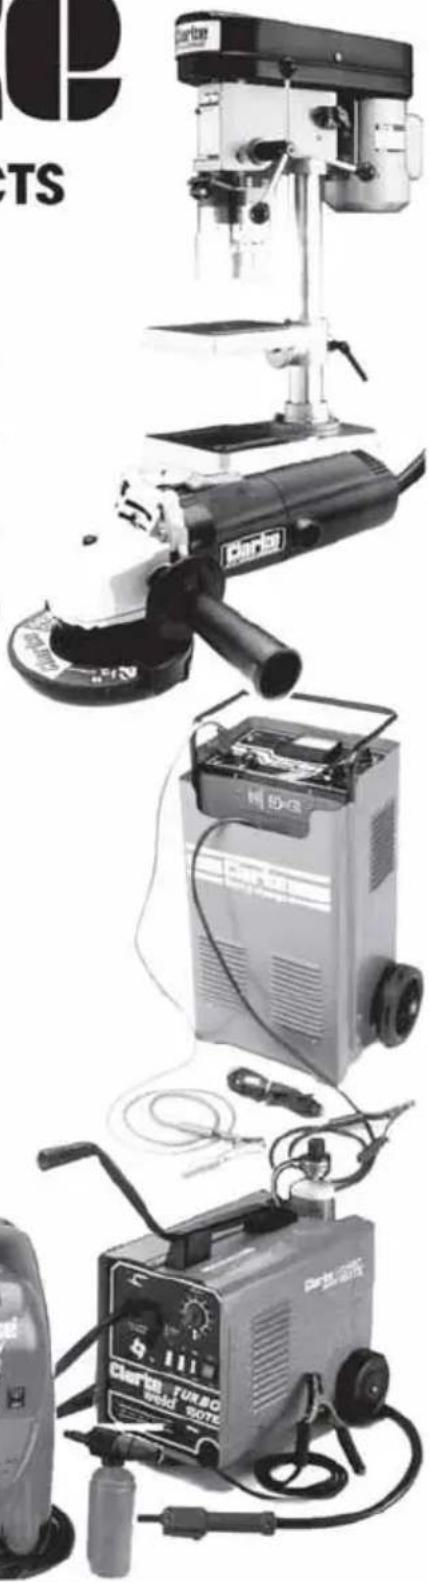
natural_image
Product catalog image showing various industrial machines and tools including a milling cutter, power supply unit, and welding machine (no visible text or labels)Clarke®
INTERNATIONAL
For spare parts and servicing, please contact your nearest dealer, or Clarke International on
020 - 8988 - 7400
e-mail: Parts@clarkeinternational.com e-mail: Service@clarkeinternational.com
- 800W JIGSAW WITH LASER
- MODEL No. CON800
- GUARANTEE
- FEATURES
- SPECIFICATIONS
- GENERAL SAFETY PRECAUTIONS
- WARNING:
- ADDITIONAL PRECAUTIONS FOR JIGSAWS
- ELECTRICAL CONNECTIONS
- FUSE RATING
- CABLE EXTENSION
- BEFORE USE
- FITTING THE JIGSAW BLADE
- WARNING!
- FITTING THE PARALLEL FENCE
- To fit and adjust the parallel fence:
- NOTE:
- ADJUSTING THE CUTTING ANGLE
- DUST EXTRACTION PORT ADAPTOR
- To fit the dust extraction port adaptor:
- OPERATING
- PENDULUM ACTION
- VARIABLE SPEED SELECTOR
- OPERATION
- ON/OFF SWITCH
- For continuous operation,
- LASER GUIDE
- JIGSAW TIPS
- Wood
- Metal
- REPLACEMENT BLADES
- MAINTENANCE
- PARTS & SERVICE
- DECLARATION OF CONFORMITY
- A SELECTION FROM THE VAST RANGE OF
- Clarke TM
- QUALITY PRODUCTS
- AIR COMPRESSORS
- GENERATORS
- POWER WASHERS
- WELDERS
- METALWORKING
- WOODWORKING
- HYDRAULICS
- WATER PUMPS
- POWER TOOLS
- STARTER/CHARGERS
Brand : Clarke
Model : CON800
Category : Saw