
M530 - Smartphone INFOCUS - Free user manual and instructions
Find the device manual for free M530 INFOCUS in PDF.


| Type of product | Smartphone |
| Brand | InFocus |
| Model | M530 |
| Dimensions | 155 x 77 x 9.5 mm |
| Weight | 170 g |
| Display size | 5.5 inches |
| Display resolution | 1920 x 1080 pixels |
| Processor | MediaTek MT6592 Octa-core 2.0 GHz |
| RAM | 2 GB |
| Internal storage | 16 GB |
| Battery capacity | 3200 mAh (removable) |
| Rear camera | 13 MP with autofocus and LED flash |
| Front camera | 8 MP |
| Operating system | Android 4.4 KitKat (upgradable) |
| Connectivity | Wi-Fi 802.11 b/g/n, Bluetooth 4.0, GPS, 4G LTE |
| SIM card | Dual SIM (Micro-SIM) |
| Main functions | Phone calls, messaging, internet browsing, camera, multimedia playback |
| Maintenance and cleaning | Clean with a soft, dry cloth; avoid water and abrasive cleaners |
| Safety precautions | Avoid extreme temperatures, use only original charger, do not disassemble |
| Spare parts and repairability | Screen and battery can be replaced by authorized service centers |
| General information | Manual available in PDF format at notice-facile.com |
Frequently Asked Questions - M530 INFOCUS
User questions about M530 INFOCUS
0 question about this device. Answer the ones you know or ask your own.
Ask a new question about this device
Download the instructions for your Smartphone in PDF format for free! Find your manual M530 - INFOCUS and take your electronic device back in hand. On this page are published all the documents necessary for the use of your device. M530 by INFOCUS.
USER MANUAL M530 INFOCUS
Thank you for choosing InFocus M530 phone. It is recommended that you first read the Quick Start Guide to understand the basic operation of the phone.
Content
Your Phone 2
Inserting SIM Card and Memory Card ..... 3
Charging the Battery 4
First Start Up 4
Home Screen 4
Making Your First Call 5
Contacts 6
Sending a Text Message 7
Setting up WLAN 7
Setting up Email Account 8
Sending and Receiving Emails 8
Using Browser 9
Using Bluetooth 10
Taking Photos and Videos 10
Viewing Photos and Videos 12
Basic Phone Settings 13
Important Safety Information ...... i
Copyright Information .... iii
Your Phone
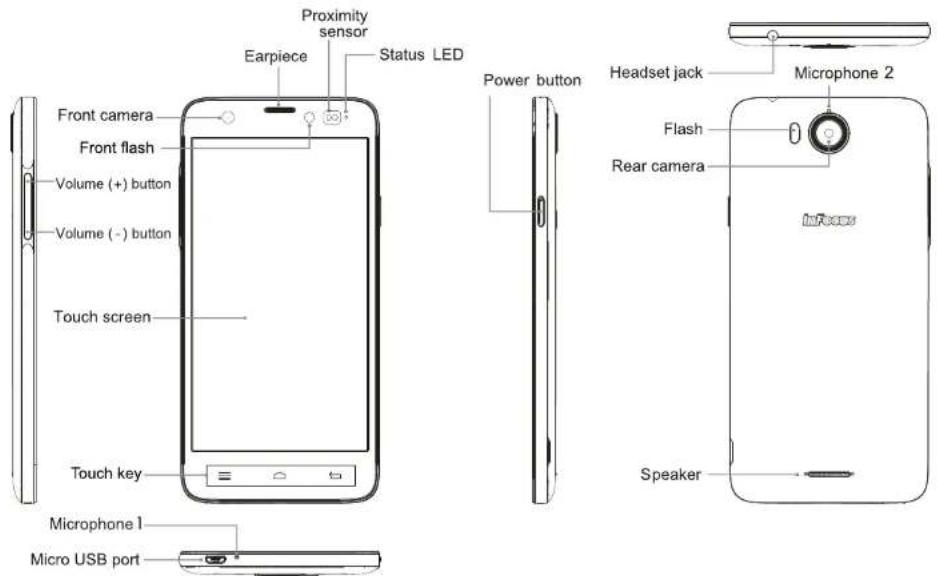
Inserting SIM Card(s) and Memory Card
-
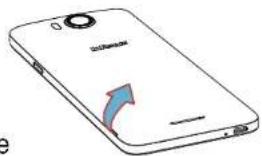
Hold your phone face down.
-
From the notch on the lower left corner of the back cover, gently lift the cover to release the latches and slowly remove the cover.
-
Remove the battery and then insert the SIM card(s) into the slot(s) as illustrated
NOTE:
• To remove the SIM card, take out the battery first and gently slide the SIM card out of the slot.
natural_image
Illustration of a smartphone with a blue curved arrow indicating a change or motion (no text or symbols present)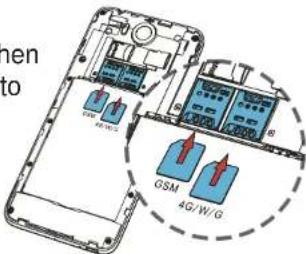
- When using the card adapter, be careful not to remove the SIM card too hard as this may damage the card.
• SIM1 and SIM2 slots can support 2G/3G/4G Micro SIM Card. Double SIM Card network support
type can be freely switched. However, only one SIM Card can connect 4G/3G one at a time.
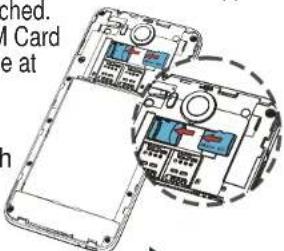
- Insert the memory card into the slot with gold connectors facing down.
- Align the back cover and press along the edges until the latches are fully sealed.
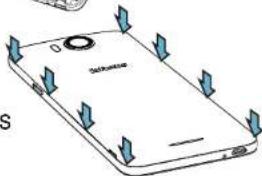
natural_image
Illustration of a smartphone with blue arrows pointing to the screen area (no text or symbols)Charging the Battery
Before using the phone, it is recommended to fully charge the battery first.
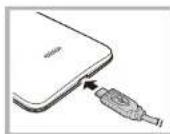
- Connect the smaller end of the USB cable to the USB port of the device.
- Connect the other end of the cable to the USB charger or other USB port with power source (for example, laptop).
- Plug the AC adapter to a wall outlet to start charging.
Warning
- Charge only indoors and in dry environments. - For safety, the overheat protection will be active during charging. If the system temperature reaches above the maximum level, the device will automatically stop charging. The device will only resume charging when normal operating temperature is reached.
First Start Up
After inserting the SIM card(s) and charging the battery, the device is ready to be used.
Home Screen
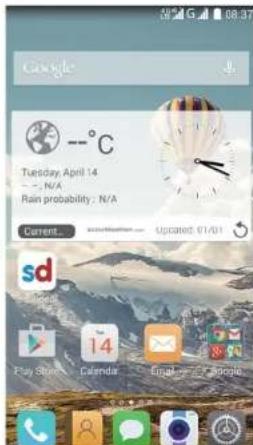
From the Home screen, you can quickly access common features and view notifications of missed calls, received messages, check battery and connection status. Swipe your finger to the left or right to access the applications installed on the device.
Making Your First Call
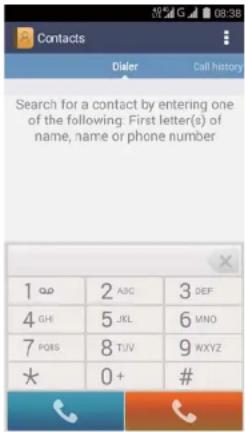
From the Home screen, tap

To make a call
- Enter the phone number on the keypad.
- Tap to correct any number. Tap and hold × to erase the entire number.
- Tap to make a call.
- To end the call, tap.
NOTE: 1. If you have inserted two SIM cards, select the desired SIM network.
- Different SIM card record list identified by different colors. Check the color indication in the SIM card management --> SIM card messages, and corresponding colors to dial pad for sim card1 and sim card2.
To answer a call
To answer a call, tap and drag it to the right

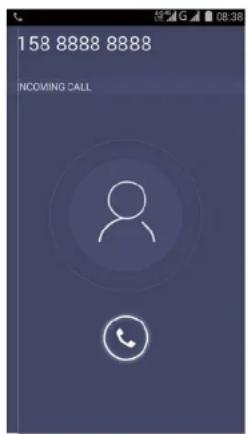
NOTE: When you tap, it automatically changes to

Contacts
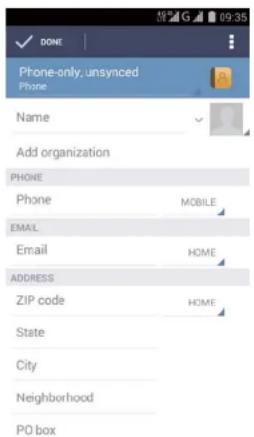
Adding contacts
- From the Home screen, tap
- Tap to add a contact.
- Select one of the location to store the contact to (SIM-only or Phone-only).
- Enter the contact information such as name, phone number, email address, etc.
- Tap to save the contact.

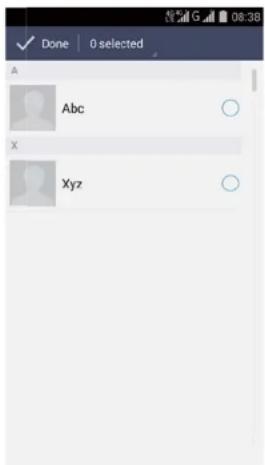
Importing contacts
- From the Home screen, tap
- Tap: Import/Export, and choose to Import/export contacts from or to the SIM card/storage.
- Select the contacts location that you want to copy to or copy from, and tap


Sending a Text Message
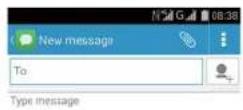
-
From the Home screen, tap .
-
Tap
NOTE: If you have inserted two SIM cards, select the desired SIM network first before tapping.
-
In the To field, enter the recipient's phone number or name.
-
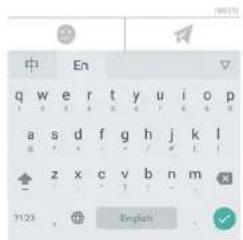
Compose your message.
-
Tap to send your message.
Setting up WLAN
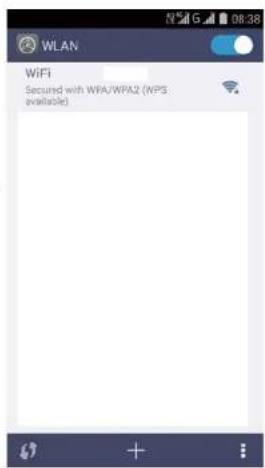
- From the Home screen, tap
- In WIRELESS & NETWORKS, tap WLAN and turn it to on.
- Available networks are listed. Tap a network to connect to or tap -to manually add a connection. NOTE: Connecting to a secured network will prompt for a password. Enter the password, then tap Connect.
Setting up Email Account
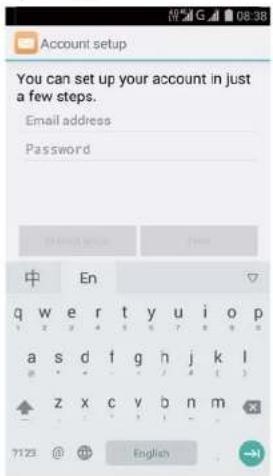
- From the Home screen, tap .
- Enter your Email address and Password and ta Next
- Set the Inbox checking frequency settings and tap Next.
- Enter Name and Account display name.
- Tap Next. Once the account setup is complete, the device will automatically retrieve your emails.

Sending and Receiving Emails
Composing and sending emails
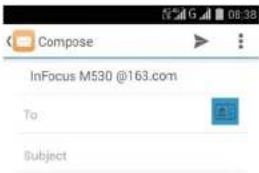
- From the Home screen, tap , tap an email account.
- Tap+ .
- In the To field, enter the recipient's email address.
- Enter the Subject.
- Compose your email.
- Tap: to add attachment.
- Tap to send an email.
Sent from my InFocus M530
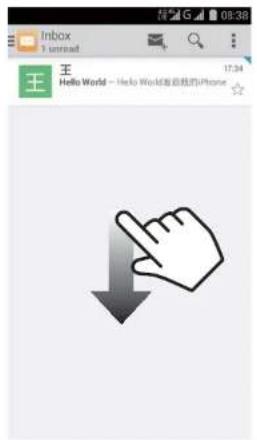
Receiving emails
Emails are automatically received in the Inbox folder when the device connects to a network. To manually retrieve new emails, swipe down to refresh or tap ➤ Refresh.
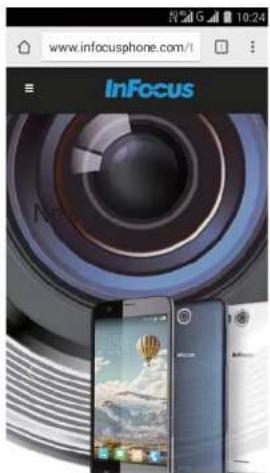
Using Browser
To open a web page
- From the Home screen, tap
- Tap the address bar.
-
Type the URL then tap Go.
-
Tap ≡ to open Tab page or add the page to the Bookmarks
Using Bluetooth

- From the Home screen, tap
- In WIRELESS & NETWORKS, tap Bluetooth and turn it to on.
- Available devices are listed. To search for a new device, tap SEARCH FOR DEVICES.
- Tap a detected device.
-
To start pairing, enter the PIN then tap OK. NOTE:
-
The PIN of the device must be the same PIN on the other bluetooth device.
-
On some devices, tap Pair to start pairing.
-
The paired bluetooth device name is displayed.
Taking Photos and Videos
This device is equipped with rear and front cameras to take photos and videos.
- From the Home screen, tap

NOTE: To switch between front and rear cameras, tap 📄.
-
Aim the device at the subject.
-
Pinch the screen to zoom in or out.
-
Tap to turn on or off the flash.
-
Tap to take the shot.
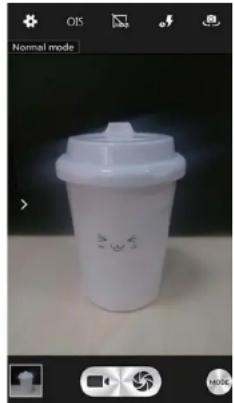
natural_image
White cup with lid and cartoon face design, displayed on a surface (no text or symbols visible)To record video
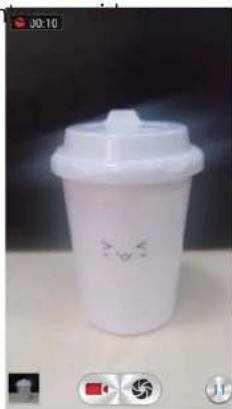
-
From the Home screen, tap
-
Tap to en mode.
NOTE: To switch between front and rear cameras, tap
-
Aim the device at the subject.
-
Tap to stop recording.
natural_image
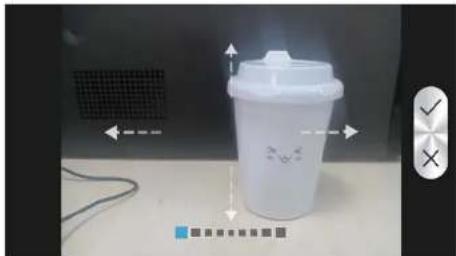
White coffee cup with a cat design on its side, displayed on a surface (no text or symbols visible)To take a panorama shot
-
From the Home screen, tap
-
Tap and Panorama.
-
Aim the device at the subject.
-
Tap to take the shot.
-
Move the device slowly toward one direction shown on the screen.
natural_image
White plastic trash bin with a lid, placed on a surface with measurement indicators and a control panel (no readable text or symbols)- When the shooting guide reaches the end of the shooting point, the shooting ends. You can also manually stop recording by tapping √
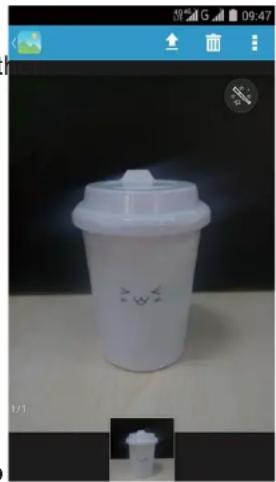
Viewing Photos and Videos
- From the Home screen, tap
- Tap a folder to view the recorded files in thumbnails.
-
Tap an image or a video to view in full screen.
-
Swipe your finger to the left/right to view the previous/next file.
-
To share the image, tap ▪ > Share, t tap an application for sharing.
- To delete the image, tap , then tap OK.
• To play the video, tap - To upload the file to the cloud storage, tap ↑ and login your cloud album.
• To play the slideshow, or show more options, tap - To edit the image, tap Ⓧ.
natural_image
White coffee cup with lid and handwritten marks, displayed on a table (no readable text or symbols)Basic Phone Settings
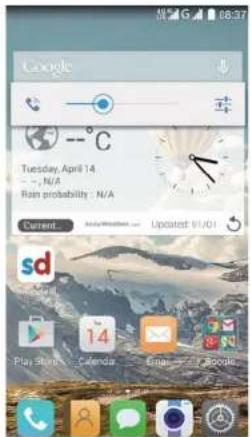
Adjusting the volume
There are two ways to adjust the volume:
- Press the volume (+/-) button repeatedly to adjust the volume.
- Press the volume button once. Drag the volume slider to adjust the volume.
Setting an alarm
-
From the Home screen, tap ▼.
-
Tap
-
To add an alarm, tap . +
-
To set the time, slide the pointer, and tap Done.
-
To set repeat mode, check Repeat and select the desired week days.
-
To set the ringtone, tap, and select the alarm sound.
-
To vibrate when the alarm sounds, check Vibrate.
-
To enter an alarm label, tap Label and tap OK.
NOTE: By default the alarm is set on.
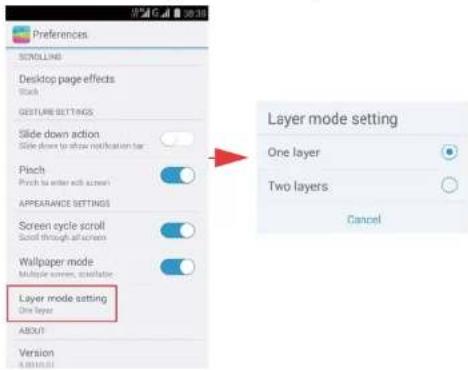
Changing the Launcher layer mode
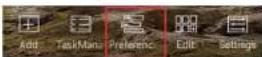
- From the Home screen, tap ≡.
- Tap . The Launcher+ page opens.
- Tap Layer mode setting tab.
- Choose One layer or Two layers.
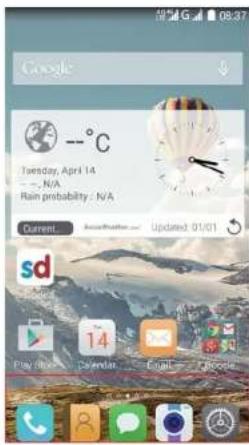
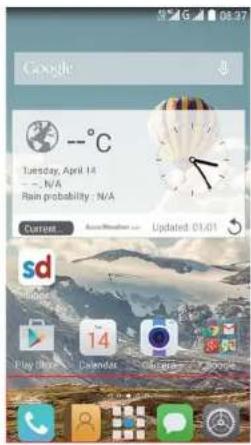
The result is displayed as follows:
One layer
Two layers
Important Safety Information
Please read before proceeding
- DO NOT place objects on top of the device, as they may scratch the screen.
- DO NOT drop your device or subject it to severe impacts. Bending the body and pushing the display or keys with extreme force could damage the device.
• DO NOT use a pen or any sharp object to tap the screen.
• DO NOT expose the device to dirty or dusty environments - DO NOT place the device on an uneven or unstable surface.
• DO NOT insert any foreign objects into the device.
• DO NOT expose the device to strong magnetic or electrical field. - DO NOT use or store this equipment in a place where it will be exposed to high temperatures, such as near an open flame or heat-emitting equipment.
- DO NOT use it or store it where fluids such as water can splash onto it. Raindrops, water spray, juice, coffee, steam, or other types of liquids will also cause malfunctions.
-
Using this device for long periods of time may cause the device to get warm. If you feel the device is too warm, avoid sustained contact with exposed skin otherwise this might cause discomfort, or eventually a burn.
-
Refer to the rating label on the device and be sure that the power adapter complies with the rating. Only use accessories specified by the manufacturer.
- Disconnect the device from an electrical outlet and power off before cleaning the device.
- NEVER attempt to connect or disconnect the power adapter with wet hands.
- Clean the touch screen with a soft cloth. If needed, dampen the cloth slightly before cleaning. Never use abrasives or cleaning solutions.
- DO NOT disassemble the device. Only a certified service technician should perform repair.
- Please check with your Local Authority or retailer for proper disposal of electronic products.
- For USB connection, users must use a USB 2.0 (or higher version) cable.
-
The adapter shall be installed near the equipment and shall be easily accessible.
-
The temperature of the device might increase while the CPU is busy handling resource consuming activities such as high resolution video decoding. The SW protection mechanism will ensure stop charging whenever the temperature is over the predefined threshold and prepare for shut down if necessary. Please worry not.
- Use a wireless hands-free system (headphone, headset) with a low power Bluetooth emitter.
• Make sure the cell phone has a low SAR. - Keep your calls short or send a text message (SMS) instead. This advice applies especially to children, adolescents and pregnant women.
• Use cell-phone when the signal quality is good.
• People having active medical implants should preferably keep the cell phone at least 15 cm away from the implant.
Safety Precautions for Battery Use
- Keep the battery dry and away from any liquid since this may cause a short circuit.
- Keep the battery away from metal objects since this may cause a short circuit.
-
Do not use damaged or deformed batteries.
• If the battery emits a foul odor, discontinue use. -
Keep the battery away from babies and small children.
• If the battery leaks: - Do not allow the leaking fluid to come in contact with your skin, eyes or clothing. If already in contact, rinse with clean water immediately and seek medical advice.
- Keep the battery away from fire since this may cause the battery to explode.
- Do not attempt to open or service the battery yourself.
• Do not dispose battery in fire or water. - Recycle or dispose used batteries according to the local regulations.

Road and Environmental Safety
- Turn off the phone in areas with a potentially explosive atmosphere or where flammable objects exist such as gas stations, fuel depots, and chemical plants among others. Sparks from these areas could cause explosion or fire and result in injury or even death.
- Do not use hand-held phones while driving a vehicle. Use hands-free devices as an alternative.
Safety in Aircraft
Do not use the phone on board an aircraft. The phone's network signals may cause interference to the navigation system. As a safety
measurement, it is against the law in most countries to use the phone on board an aircraft.
Copyright Information
Copyright © InFocus Corporation, 2014. All rights reserved.
This product has an Android ^™ platform based on Linux, which can be expanded by a variety of JME-based application SW.
Google、Google Play、Android and other marks are trademarks of Google Inc.
microSD ^™ is a trademark of SD Card Association.
Bluetooth and the Bluetooth logo are trademarks owned by Bluetooth SIG, Inc.
All products use in this device and trademarks mentioned herein are trademarks or registered trademarks of their respective owners.
LTE is a trade mark of ETSI
Intellectual Property Right Information
Right to all technologies and products that comprise this device are the property of their respective owners:
This product has an Android ^™ platform based on Linux, which can be expanded by a variety of Java-Script-based application SW.
Compliance Information
SAR Information
THIS MOBILE DEVICE MEETS GUIDELINES FOR EXPOSURE TO RADIO WAVES. Your mobile device is a radio transmitter and receiver. It is designed not to exceed the limits for exposure to radio waves recommended by international guidelines. These guidelines were developed by the independent scientific organization ICNIRP and include safety margins designed to assure the protection of all persons, regardless of age and health.
The exposure guidelines for mobile devices employ a unit of measurement known as the Specific Absorption Rate or SAR. The SAR limit stated in the ICNIRP guidelines is 1.6 W/kg averaged over 1 grams of tissue. Tests for SAR are conducted using standard operating positions with the device transmitting at its highest certified power level in all tested frequency bands. The actual SAR level of an operating device can be below the maximum value because the device is designed to use only the power required to reach the network. That amount changes depending on a number of factors such as how close you are to a network base station. The highest SAR value under the ICNIRP guidelines for use of the device at the ear is 0.479. W/kg and at the body is 0.593 W/kg (The measure distance of 1.5 cm). Use of device accessories and enhancements may result in different SAR values. SAR values may vary depending on national reporting and testing requirements and the network band.
WEEE Notice
The WEEE logo on the product or on its box indicates that this product must not be disposed of or dumped with your other household waste. You are liable to dispose of all your electronic or electrical waste equipment by relocating over to the specified collection point for recycling of such hazardous waste. Isolated collection and proper recovery of your electronic and electrical waste equipment at the time of disposal will allow us to help conserve natural resources. Moreover, proper recycling of the electronic and electrical waste equipment will ensure safety of human health and environment. For more information about electronic and electrical waste equipment disposal, recovery, and collection points, please contact your local city center, household waste disposal service, shop from where you purchased the equipment, or manufacturer of the equipment.
RoHS Compliance
This product is in compliance with DIRECTIVE 2011/65/EU OF THE EUROPEAN PARLIAMENT AND OF THE COUNCIL of 8 June 2011, on the restriction of the use of certain hazardous substances in electrical and electronic equipment and its amendments.
Warranty Statement
Limited warranty
InFocus provides "Product Warranty Statement", at the time of its original purchase, from the InFocus or its authorized distributor, describing the product warranty service.
Notes: InFocus does not provide global cross border warranty.
This limited warranty (free of defects in materials and workmanship causing malfunction and defective) shall last for twelve (12) months for the device and six (6) months for the battery from the purchase date. Other than battery, the in-box accessories, including cosmetic parts, button, cables, earphone, AC ... etc. if applied; six (6) month open-box functional failure warranty is provided. The customer shall present the PROOF OF PURCHASE upon claiming the warranty. Throughout the warranty period InFocus or its authorized agent will, at own discretion and subject to section Non-Warranty below repair or replace a defective product. All replaced defective parts or components will become the property of InFocus after returning the repaired/replaced product in good working condition. This repair on the same symptom, one (1) month repair warranty is provided.
Non-Warranty
No warranty may be asserted or claimed if (1) the product serial number, date code, IMEI, water indicator or the warranty seal has been removed, erased, defaced or altered; or (2) the defect is found to be caused by:
(1) By engineering judgement, the product is mishandled/misused carelessly or accidentally. Unauthorized disassembling or repair, repair by use if unauthorized spare parts, or other actions beyond the reasonable control of InFocus.
(2) Improper shipping and packing.
(3) Forces of nature of willful misconduct.
(4) Rough handling, exposure to moisture, dampness or extreme thermal or environmental conditions or a rapid change in such conditions, corrosion, oxidation, unauthorized modifications or connections.
(5) Deterioration of the product due to normal wear and tear. Products installed or integrated with software or applications which are not made or authorized by InFocus.
Be sure to back up data and remove any confidential, proprietary or personal information from the product when asking service. InFocus is not responsible for the damage to or loss of any programs, data, or removable storage media inside or sent with the products. As to Non-warranty product, InFocus will check if a repair is economical/available and provide a chargeable service to customer's consideration.
IN NO EVENT SHALL InFocus BE LIABLE UNDER THIS LIMITED WARRANTY FOR LOSS OF PROFIT. LOSS OF ANTICIPATED SAVINGS, LOSS OF DATA OR INDIRECT LOSS, LOSS OF THE PRODUCT OR ANY ASSOCIATED EQUIPMENT, INCIDENTAL OR CONSEQUENTIAL LOSSES OR DAMAGES OF ANY NATURE WHATSOEVER TO THE FULLEST EXTENT THAT THOSE LOSSES OR DAMAGES CAN BE DISCLAIMED BY LAW.

PKG2015001I-001
- Content
- Inserting SIM Card(s) and Memory Card
- NOTE:
- Charging the Battery
- Warning
- First Start Up
- Home Screen
- Making Your First Call
- To make a call
- To answer a call
- Contacts
- Adding contacts
- Importing contacts
- Sending a Text Message
- Setting up WLAN
- Setting up Email Account
- Sending and Receiving Emails
- Composing and sending emails
- Receiving emails
- Using Browser
- To open a web page
- Using Bluetooth
- Taking Photos and Videos
- To record video
- To take a panorama shot
- Viewing Photos and Videos
- Basic Phone Settings
- Adjusting the volume
- Setting an alarm
- Changing the Launcher layer mode
- The result is displayed as follows:
- Important Safety Information
- Please read before proceeding
- Safety Precautions for Battery Use
- Road and Environmental Safety
- Safety in Aircraft
- Copyright Information
- Intellectual Property Right Information
- Compliance Information
- SAR Information
- WEEE Notice
- RoHS Compliance
- Warranty Statement
- Limited warranty
- Non-Warranty
Brand : INFOCUS
Model : M530
Category : Smartphone