Q Clean R450 - Vacuum Cleaner Canvac - Free user manual and instructions
Find the device manual for free Q Clean R450 Canvac in PDF.


| Product Type | Robot Vacuum Cleaner |
| Brand | Canvac |
| Model | Q Clean R450 |
| Dimensions (diameter x height) | 350 mm x 95 mm |
| Weight | 3.5 kg |
| Battery Type | Lithium-ion, 14.8V 2600mAh |
| Charging Time | 4-5 hours |
| Runtime | 90-120 minutes |
| Dust Bin Capacity | 0.4 L |
| Suction Power | 25 W |
| Noise Level | ≤ 60 dB |
| Filtration System | HEPA filter |
| Navigation | Random/gyroscope |
| Sensors | Anti-drop, anti-collision, cliff |
| Cleaning Modes | Auto, spot, edge, scheduled |
| App Control | Yes (Wi-Fi compatible) |
| Auto Return to Base | Yes (low battery/end of cycle) |
| Brush Type | Main brush + 2 side brushes |
| Maintenance | Empty bin daily; clean filter weekly; replace brushes every 6 months |
| Safety Features | Overheat protection, low battery auto-return |
| Included Accessories | Charging dock, remote control, side brushes, filter |
| Color Options | Black/White |
Frequently Asked Questions - Q Clean R450 Canvac
User questions about Q Clean R450 Canvac
0 question about this device. Answer the ones you know or ask your own.
Ask a new question about this device
Download the instructions for your Vacuum Cleaner in PDF format for free! Find your manual Q Clean R450 - Canvac and take your electronic device back in hand. On this page are published all the documents necessary for the use of your device. Q Clean R450 by Canvac.
USER MANUAL Q Clean R450 Canvac
CANVAC Q CLEAN R400/450
Robotdammsugare
Robot vacuum cleaner

UV-ljus (Canvac Q Clean R450)
1

2

3

4
5
6

7

8

9

10
ROBOTDAMMSUGARENS UPPBYGGNAD

Noshjul
Höger sidoborste
Insugningsöppning
Höger hjulmodul
Bottenplatta
UV-lampa
(Canvac Q Clean R450)

Lock
Dammbehållare
Uttag nätadapter
LADDSTATION & RUMSAVGRÄNSARE
Övre kåpa
Kontrollampa
IR-sändarfönster
Stötfångare
Laddningskontakter

Strömbrytare
IR-sändarfönster
Kontrollampa
Fig b

Punktstädning
2.
3.

4.

5.
Batterilucka

FELSÖKNINGSSCHEMA
CONGRATULATIONS ON YOUR NEW CANVAC QCLEAN R400/450 ROBOT VACUUM CLEANER!
CONTENTS
Safety instructions 23
Product features 24
Components 25
Main unit and accessories 25
Design 26
Charging station and virtual wall 27
Using the product 28
Getting started 28
Battery charging 28
The unit's display 29
Remote control 30
Start/standby/sleep mode 31
Programming cleaning time 32
Cleaning programmes 34
Using the virtual wall 35
Maintaining the product 36
Cleaning the side brushes 36
Cleaning the dust holder and filter 36
Cleaning the wheels, sensors and suction opening 37
Easy-fit mop (Canvac QClean R450) 37
Replacing the battery 37
Troubleshooting 38
Troubleshooting 38
Tecnical data 39
SAFETY INSTRUCTIONS
Before you use this product, please read the safety instructions below and take all the usual precautions.
- Read this user manual carefully and completely before you use the product.
- Save this user manual.
- Any use or actions that do not correspond to what is set out in this user manual may lead to damage or injury.
WARNING!
- Only qualified technicians may dismantle this product.
- Use only the accompanying mains adapter. Other adapters may result in electric shocks, fire or damage to the product.
- Do not touch the power supply cable, plug or mains adapter with wet hands.
- Do not let clothes or any part of the body get drawn into the product's wheels.
- Do not let the product come near cigarette ends, matches or other flammable materials.
- If the product needs cleaning, wait until charging has finished.
- Do not bend the power supply cable excessively and/or subject it to heavy or sharp loads/objects.
- This product may be used indoors only.
- Do not sit on the product and do not place any objects on it.
- Do not use this product in wet or damp environments (any environment where liquids are present).
- Before use, remove all delicate objects, electrical leads, clothes, pieces of paper, textiles, etc. that can get caught in the product.
- Do not put the product where it can easily fall (e.g. on tables, chairs, etc.).
- When you do not need to use the product for a long time, put the power switch into the OFF position.
- Before use, check that the mains adapter is connected correctly to the mains socket and the charging station.
- To avoid anyone tripping over it, inform all those concerned when the product is in active use.
- The product can find it difficult to cross thresholds higher than 10 mm.
- Use the product in temperatures from 0\ °C to 40\ °C . Do not expose it to environments where the temperature is high.
- When removing the battery, the product must be disconnected from the mains.
- Before disposing of the product, the battery must be removed.
- The battery must be disposed of via an approved facility.
- The product must be disposed of via an approved facility.

PRODUCT FEATURES
You are now the owner of an efficient and easy-to-maintain product that has many clever functions!
Powerful suction instead of a rotating brush
Instead of a rotating brush that can easily clog and jam, the Canvac QClean R400/450 has an efficient suction nozzle located centrally in its base. Thanks to this and the two side brushes, every corner is taken care of and even the smallest dust particles are removed!
Intelligent regulation of suction
The product automatically regulates suction to match various floor surfaces. This not only makes cleaning more efficient, it also extends operating time by over 30%!
Mop function (Canvac QClean R450)
Your new robot vacuum cleaner also has a mop function. Fit the specially designed dust-absorbing easy-fit mop to the bottom of the machine. It then automatically mops the floor when the robot is in use.
UV light (Canvac QClean R450)
Your Canvac QClean R450 is additionally equipped with a UV light function that kills bacteria.
Simple touch-button operation
To start a cleaning programme, simply press the unit's touch-buttons. Quick start: press CLEAN twice. To start the cleaning programme via the remote control, press ON/OFF three times. This starts the unit.

Clever dust holder
No bags needed, simply lift the holder out and empty it.
Robust design
The unit is a robust design with large, sprung wheels that can manage most obstacles.
Gets in under low furniture
Only 90 mm high.
Cleaning programmes
Automatic
Spot cleaning
Scheduled cleaning
Edge cleaning
S-cleaning
For details of the cleaning programmes, please see page 32.
COMPONENTS
MAIN UNIT AND ACCESSORIES
| No. | Description Quantity | |
| 1 | Main unit 1 | |
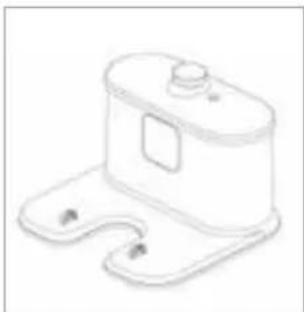
| 2 | Charging station 1 | |
| 3 | Remote control (including batteries) 1 | |
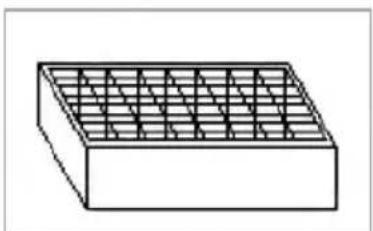
| 4 | Virtual wall 1*, 2** | |
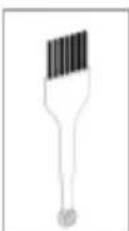
| 5 | Cleaning tool 1 | |
| 6 | Extra side brushes 2 | |
| 7 | User manual 1 | |
| 8 | Extra HEPA filter 1 | |
| 9 | Easy-fit mop 1** | |
| 10 | Mains adapter 1 |
*Canvac Q Clean R400
**Canvac QClean R450

1
2

3

4

5

6

7
8

9

10
DESIGN

Window for receiving IR signals from the remote control
Bumper
Main casing
Lid
Automatic charging contact
Left side brush Battery lid
Left wheel module
Power switch
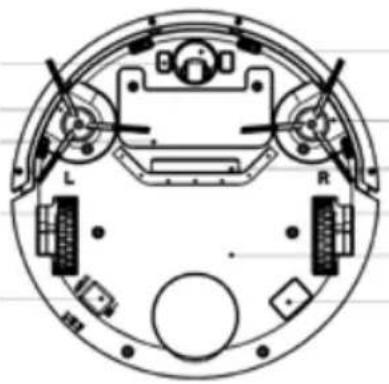
Nose wheel
Right side brush
Suction opening
Right wheel module
Base plate
UV light
(Canvac Q Clean R450)

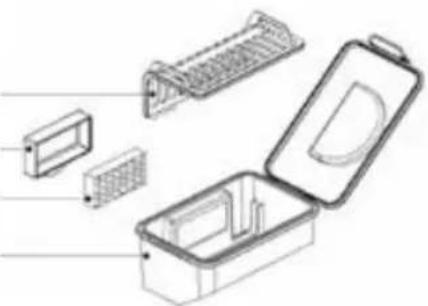
Lid
Dust holder
Mains adapter socket
Primary filter HEPA filter holder HEPA filter Dust holder
Mains adapter socket

Indicator light
IR transmission window
Bumper
Charging contacts

Power switch
IR transmission window
Indicator light
Limiter beam window
Side casing
Base plate
INSTALLING BATTERIES IN THE VIRTUAL WALL

- Lift the lid off the virtual wall.

- Insert two R20/D batteries into the virtual wall.

- Insert the lid's lugs into the corresponding recesses. Press the lid down until it clicks shut into place.
NB! If the unit is not to be used for a long time, remove the batteries!
USING THE PRODUCT
GETTING STARTED
Battery charging
A. Charging station location
Place the charging station against a wall. Ensure that there are no obstacles within 1 metre of either side of the charging station and around 2 metres in front.
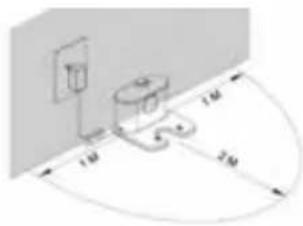
B. Put the power switch on the underside of the robot vacuum cleaner into the ON position
This will cause the display to flash, indicating that the robot is in standby mode.
C. Charge in one of the following ways
a. Connect the charging cable to the robot's charging socket and connect the charger to the mains socket. b. Press the HOME button on the robot or the remote control. The robot then automatically locates the charging station.
Fig a

Fig b
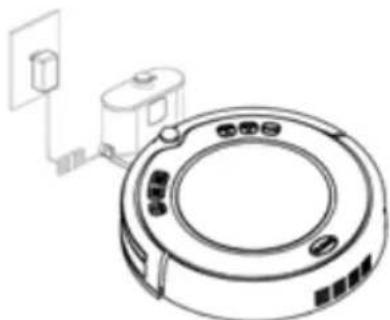
NB! While charging, the LED display shows "1111". When the batteries are fully charged, the LED display shows "FULL". If the CLEAN button flashes in standby mode, it is time to charge the robot vacuum cleaner (in operating mode, the robot locates the charging station itself when charging is required).
For optimum battery life
NB! A. Charge for 12 hours before using the robot for the first time.
B. Charge the robot as soon as it indicates that charging is necessary.
C. If the robot is not to be used for a long time: fully charge the battery, put the power switch into the OFF position and store the robot in a dry and cool place.
Starting the robot vacuum cleaner (Canvac QCLEAN R450)
A. Check that the power switch on the underside is in the ON position.
B. To start cleaning, press CLEAN on the robot's top or ON/OFF on the remote control.
NB! If the robot is in sleep mode, press CLEAN on the robot's top or ON/OFF on the remote control to go into standby mode. Press CLEAN again to start cleaning.

R400/R450 DISPLAY
1. LED-panel
Shows time, charging status and any fault codes (letters, digits and graphics are used).
2. UV light switch
With the robot in standby mode, press the button to activate the bacteria-killing UV light.
3. Auto-charging/Forwards menu selection
In normal mode, this button is used to activate automatic charging (the robot locates the charging station itself). In programming mode, the button is used to step forwards in programme selection.
4. Spot cleaning/Backwards menu selection
In normal mode, this button is used to activate deep cleaning at the spot in question. In programming mode, the button is used to step backwards in programme selection.
5. Programming
Press the button to activate or close the programming mode.
6. Cleaning
Press the button to:
A. Wake the robot from sleep mode to standby mode.
B. Confirm the programme selection made in the programming mode.
C. Start cleaning when the robot is in standby mode.
To put the robot into sleep mode, hold the button down for three seconds. For further information on using the product, please see pages 32 to 35.
REMOTE CONTROL
- Liquid crystal display (LCD)
- Direction buttons
- ON/OFF - Power to the robot
- PLAN - Timer/schedule
- HOME – Auto-charging button
- MODE – Selection of cleaning function
- CLK - Setting the clock
- SPOT - Deep cleaning
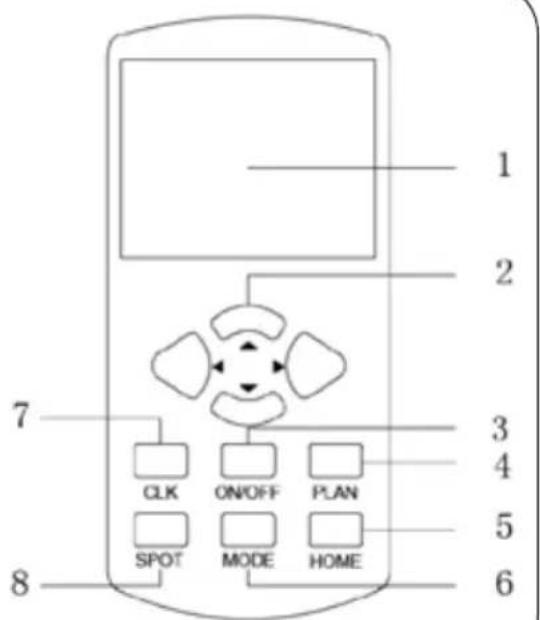
Use the remote control exactly as you do your TV remote control. Switch the robot on and, to control it, point the remote control at the robot.
CLK - Setting the clock (7)
To set the remote control's clock: press CLK and, using the direction buttons, step forwards to set the correct time. To save the set time, press the CLK button once again.
ON/OFF (3)
To wake the vacuum cleaner: press ON/OFF twice.
To start vacuum cleaning: press ON/OFF once again.
Sleep mode: the robot goes into sleep mode automatically after 10 seconds of inactivity.
SPOT - Deep (spot) cleaning (8)
For deep cleaning of a particular area (spot), press SPOT.
MODE - Selection of cleaning function (6)
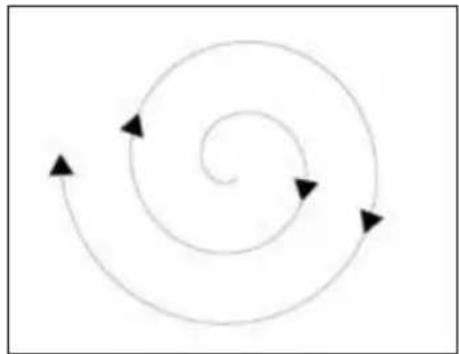
To select a cleaning programme, press MODE one or more times (until the desired programme is shown in the display) while the robot is working. 1: Spiral pattern cleaning. 2: Automatic cleaning. 3: Edge cleaning. 4: S-pattern cleaning.
PLAN - Timer/schedule (4)
Programming: press PLAN and follow the instructions in the Programming section (pages 32 to 33). To see the set programme in the display, hold the PLAN button down.
HOME - Auto-charging button (5)
Automatic charging: press HOME. The robot vacuum cleaner then locates the charging station automatically. Press HOME (or ON/OFF) once again and the robot stops where it is.
Direction buttons (2)
Changing cleaning direction: while the robot is operating, you can control its cleaning pattern by pressing the direction buttons.
Display (1)
Shows your current settings.
The remote control is powered by two AAA batteries.
NB!
First check that the power switch on the robot's underside is in the ON position. Point the remote control at the robot vacuum cleaner and use the buttons to control it. If the remote control is used near the charging station, there is the risk that the signals from the robot vacuum cleaner will not be correctly understood. This may result in incorrect operation.
START/STANDBY/SLEEP MODE
Start
A. Check that the power switch on the underside is in the ON position.
B. To start cleaning, press CLEAN on the robot's top twice or ON/OFF on the remote control three times.
Standby
When the robot is operating, it can be put into standby mode by pressing CLEAN on the robot's top or ON/OFF on the remote control.
Sleep mode
If no new command is sent in the following 10 seconds, the robot automatically goes into sleep mode.
PROGRAMMING CLEANING TIME (PLAN)
The robot vacuum cleaner can be programmed as set out below.
Programming using the buttons on the unit
A. Set the robot vacuum cleaner's clock
a. When the machine is in standby mode or being charged, press PLAN to initiate clock setting. The LED display shows the set time.
b. Press CLEAN to select hours – the two digits on the left of the display flash. Press HOME or SPOT to step forwards or backwards to the correct hour.
c. Press CLEAN once again to set minutes – the two digits on the right of the display flash. Press HOME or SPOT to step forwards or backwards to the correct minute.
d. Press CLEAN once again to confirm the setting.
B. Programming cleaning time
a. Press PLAN twice to initiate the programming of cleaning time. The LED display shows the previously programmed time or, if programming has not previously taken place, 00:00.
b. Press CLEAN to select hours – the two digits on the left of the display flash. Press HOME or SPOT to step forwards or backwards to the correct hour.
c. Press CLEAN once again to set minutes – the two digits on the right of the display flash. Press HOME or SPOT to step forwards or backwards to the correct minute.
d. Press CLEAN once again to confirm the programming.
C. Zeroing cleaning time
a. Setting the start time to 00:00 deletes the timer setting.
NB! The robot vacuum cleaner starts cleaning at the programmed time every day. Because it cancels the timer function, 00:00 cannot be used as the start time.
Programming via the remote control
NB! When you programme the cleaning time via the remote control, you set a delay in relation to the robot vacuum cleaner's clock setting (i.e. not the point of time itself).
For example: the robot's clock shows 09:00. You want the robot to start cleaning at 10.30 every day. Set the remote control to 1:30.
Using the remote control, the start time can only be programmed in 30-minute steps and the cleaning programme cannot be zeroed by selecting 00:00 as the start time.
A. Programming cleaning time
a. Hold PLAN down for 3 seconds to initiate the programming of cleaning time. The two digits on the left of the display flash
b. Press the UP or DOWN direction buttons to step forwards or backwards to the correct hour.
c. Press the RIGHT direction button to set minutes – the two digits on the right of the display flash. Press the UP or DOWN direction buttons to step forwards or backwards to the correct minute.
d. Ensure that the robot vacuum cleaner is in standby mode or being charged. Point the remote control at it and press ON/OFF to confirm the programming. Alternatively, press once again to zero it.
B. Zeroing cleaning time
When you are in programming mode, press ON/OFF twice to zero the programming.
CLEANING PROGRAMMES
Automatic cleaning
In this mode, the robot vacuum cleaner cleans the room automatically and adapts its cleaning pattern to the surroundings. In most cases, this is the only mode you need to use. To start automatic cleaning, press ON/OFF on the remote control or CLEAN on the machine's top.

Spot cleaning
If it detects a particularly dirty area, the robot vacuum cleaner starts the deep cleaning mode itself. However, by pressing the SPOT button, cleaning of such an area can also be started manually.
Scheduled cleaning
When cleaning is programmed to a schedule, the robot vacuum cleaner leaves the charging station and starts cleaning at the programmed time.

Edge cleaning
(Can only be activated via the remote control.)
When the robot vacuum cleaner is in operating mode, press MODE and select mode 3 for edge cleaning. The robot vacuum cleaner then primarily follows the edges of the room.
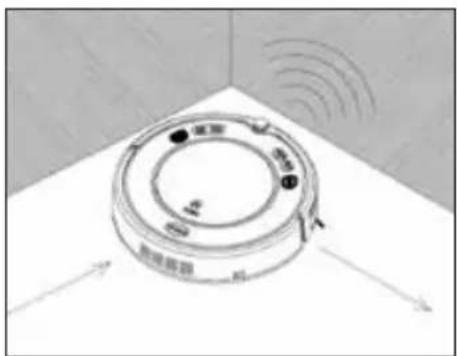
S-pattern cleaning
(Can only be activated via the remote control.)
When the robot vacuum cleaner is in operating mode, press MODE and select mode 4 for S-pattern cleaning.

Using the virtual wall
The virtual wall is used to prevent the robot vacuum cleaner going outside the room or rooms in which you want it to operate. An infrared beam with a reach of around 3 metres is emitted by the virtual wall. For optimum functionality, place the virtual wall at a door opening. Insert batteries, put the power switch into the ON position and place the virtual wall in the desired location. Switch off the power when the unit is not in use.
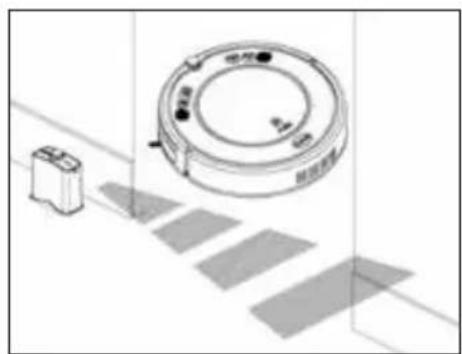
NB! Place the robot vacuum cleaner with the symbol pointing out the line you do not want the robot vacuum cleaner to cross.
MAINTAINING THE PRODUCT
CLEANING THE SIDE BRUSHES
A. Check that the brushes are not damaged and that no foreign objects have got stuck in them.
B. Clean the brushes with a rag or similar.
C. If the brushes have become slightly deformed, dip them in warm water for five seconds so that they regain their original shape.
D. If the brushes are damaged, replace them.
CLEANING THE DUST HOLDER AND FILTER
Whenever necessary, clean and empty the dust holder (see below).
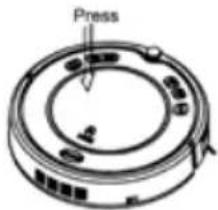 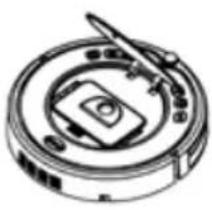 1. To open the lid, press PUSH. 1. To open the lid, press PUSH. | 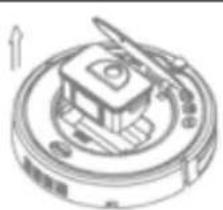 2. Lift the dust holder out. 2. Lift the dust holder out. | ||
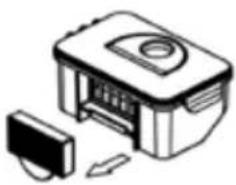 3. Remove the HEPA filter. 3. Remove the HEPA filter. | 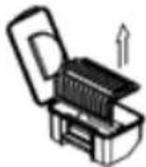 4. Open the dust holder's lid and remove the primary filter. 4. Open the dust holder's lid and remove the primary filter. | 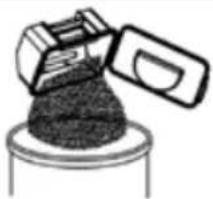 5. Empty the dust holder. 5. Empty the dust holder. | |
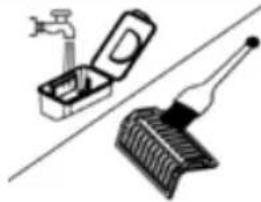 6. Wash the dust holder and the primary filter. Use the brush to clean the HEPA filter. 6. Wash the dust holder and the primary filter. Use the brush to clean the HEPA filter. |  7. When it has dried, refit the primary filter. Next, fit the HEPA filter. 7. When it has dried, refit the primary filter. Next, fit the HEPA filter. | ||
NB! Check that no foreign objects have got stuck in the suction opening.
The HEPA filter should be washed after 15 - 30 days of use.
The filter's service life is around 6 months.
Refit the filter only when it has dried completely. Do not dry the filter in direct sunlight.
Dust holders, brushes and filters are available as spare parts.
CLEANING THE WHEELS AND SENSORS (1)
Wipe all the sensors and wheels with a soft dry rag or similar.
CLEANING THE CHARGING STATION'S TERMINALS (2)
Before cleaning, remove the charging station's mains adapter. Wipe the terminals with a soft dry rag or similar.
CLEANING THE SUCTION OPENING AND THE DUST SENSOR (3)
Wipe the surfaces with a soft dry rag or similar.
EASY-FIT MOP (4) (Canvac Q Clean R450)
As shown in the figure, attach the self-adhering easy-fit mop to the robot vacuum cleaner's underside. Replacing the mop when it is dirty is easy (mops are available from your Canvac dealer).
NB! Guard the sensors from moisture and solvents – do not wipe with anything wet!
REPLACING THE BATTERY (5)
a. Ensure that the robot vacuum cleaner is not connected to the charger.
b. Put the robot vacuum cleaner's power switch into the OFF position
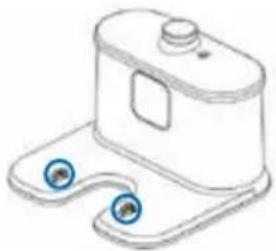
c. Undo the 2 screws in the battery hatch (refer to the figure).
d. Lift out the battery and undo the contact.
1.
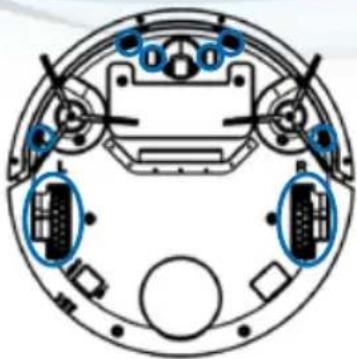
2.

3.

4.

5.
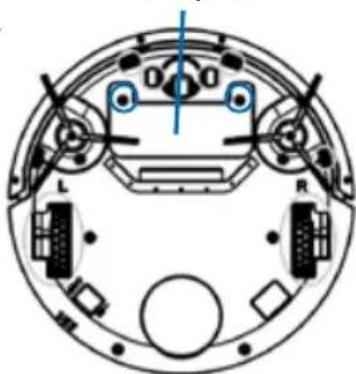
Battery lid
TROUBLESHOOTING
| Fault code Fault source Solution | ||
| E000 All sensors OK - | ||
| E001 Left sensor underneath Clean the sensor | ||
| E002 Upper left sensor underneath Clean the sensor | ||
| E003 Upper right sensor underneath Clean the sensor | ||
| E008 Right sensor underneath Clean the sensor | ||
| E00F All sensors underneath Clean the sensor | ||
| E010 Left IR sensor in the bumper | Clean the bumper's lens | |
| E020 Right IR sensor in the bumper | Clean the bumper's lens | |
| E040 Front left IR sensor in the bumper | Clean the bumper's lens | |
| E080 Front right IR sensor in the bumper | Clean the bumper's lens | |
| E100 Left collision switch Check the bumper | ||
| E200 Right collision switch | Check the bumper | |
| E400 Left wheel not on floor | Put the robot on the floor | |
| E800 Right wheel not on floor | Put the robot on the floor |
| Fault code Fault source Solution | ||
| L000 All functions OK | - | |
| L001 Overloaded left wheel | Check that the wheel has not jammed | |
| L002 Overloaded right wheel | Check that the wheel has not jammed | |
| L004 Overloaded left brush | Check that the brush has not jammed | |
| L008 Overloaded right brush | Check that the brush has not jammed | |
| L010 Overloaded fan | Check that the fan runs freely | |
If the above measures do not help, restart the robot vacuum cleaner by switching the power switch OFF and then ON. If this still does not help, contact a service workshop.
NB! UV light from the robot's underside can damage your eyes and should only be emitted when the machine is operating. If the emitter still shines when the robot is raised, immediately switch off the machine and contact a service workshop.
Sunlight
For navigation during vacuum cleaning, the product uses IR sensors. Sunlight falling into the room that is being cleaned can affect these sensors and impede the robot vacuum cleaner's navigation. Thus, if possible, limit the sunlight in the room.
TECHNICAL DATA R400/450
| Canvac Q Clean R400/450 | |
| Diameter 340 mm | |
| Height 90 mm | |
| Weight 3.0 kg | |
| Supply voltage 14.4 V | |
| Battery NiMH 2000 mAh | |
| Dust holder volume 0.5 litres | |
| Charging Automatic or manual | |
| Operating modes Auto, Spot, Edge, S-cleaning, Timer (schedule) | |
| Charging time 200 – 300 minutes | |
| Running time Around 90 minutes at maximum power | |
| Main unit button type Touch (LED display) | |
| EU declaration | |
EG-FÖRSÄKRAN OM ÖVERENSSTÄMMELSE
Undertecknad representerar Silverkarens representant
| Name: | Canvas AB | ||
| Address: | Fornádigatlan 32, 542 35 Mariestad | ||
| Telefon: | 0501-399000 | Telefax: | 0501-399090 |
Canvac's quality guarantee protects consumers for 2 years. Consumables such as brushes, batteries, etc. are not covered.
CANVAC AB
FÖRRÅDSGATAN 32
542 35 MARIESTAD
SWEDEN
]+46 501 39 90 00
+46 501 39 90 90
WWW.CANVAC.SE
- Canvac q clean R400/450
- Robotdammsugare
- Robot vacuum cleaner
- Uv-ljus (Canvac q clean R450)
- Robotdammsugarens uppbyggnad
- Laddstation & rumsavgränsare
- Punktstädning
- Felsökningsschema
- Congratulations on your new Canvac qclean R400/450 robot vacuum cleaner
- Contents
- Components 25
- Using the product 28
- Maintaining the product 36
- Troubleshooting 38
- Tecnical data 39
- Safety instructions
- Before you use this product, please read the safety instructions below and take all the usual precautions
- Warning
- Product features
- Powerful suction instead of a rotating brush
- Intelligent regulation of suction
- Mop function (Canvac qclean R450)
- Uv light (Canvac qclean R450)
- Simple touch-button operation
- Clever dust holder
- Robust design
- Gets in under low furniture
- Cleaning programmes
- Components
- Design
- Installing batteries in the virtual wall
- Using the product
- Getting started
- Battery charging
- Charging station location
- Put the power switch on the underside of the robot vacuum cleaner into the on position
- Charge in one of the following ways
- For optimum battery life
- Nb! a. charge for 12 hours before using the robot for the first time
- Starting the robot vacuum cleaner (Canvac qclean R450)
- R400/R450 display
- Led-panel
- Uv light switch
- Auto-charging/forwards menu selection
- Spot cleaning/backwards menu selection
- Programming
- Cleaning
- Remote control
- Clk - setting the clock (7)
- On/off (3)
- Spot - deep (spot) cleaning (8)
- Mode - selection of cleaning function (6)
- Plan - timer/schedule (4)
- Home - auto-charging button (5)
- Direction buttons (2)
- Display (1)
- Nb
- Start/standby/sleep mode
- Start
- Standby
- Sleep mode
- Programming cleaning time (plan)
- Programming using the buttons on the unit
- Set the robot vacuum cleaner's clock
- Programming cleaning time
- Zeroing cleaning time
- Programming via the remote control
- Programming cleaning time
- Zeroing cleaning time
- Automatic cleaning
- Spot cleaning
- Scheduled cleaning
- Edge cleaning
- (Can only be activated via the remote control.)
- S-pattern cleaning
- Using the virtual wall
- Maintaining the product
- Cleaning the side brushes
- Cleaning the dust holder and filter
- Cleaning the wheels and sensors (1)
- Cleaning the charging station's terminals (2)
- Cleaning the suction opening and the dust sensor (3)
- Easy-fit mop (4) (Canvac q clean R450)
- Replacing the battery (5)
- Troubleshooting
- Sunlight
- Technical data R400/450
- Eg-försäkran om överensstämmelse
Brand : Canvac
Model : Q Clean R450
Category : Vacuum Cleaner