
SSW 101 Mini - Sewing machine SINBO - Free user manual and instructions
Find the device manual for free SSW 101 Mini SINBO in PDF.


| Product Type | Mini Sewing Machine |
| Model | SSW 101 Mini |
| Brand | SINBO |
| Dimensions (approx.) | 30 x 15 x 25 cm |
| Weight | 2.5 kg |
| Power Supply | AC 100-240V, 50/60Hz |
| Power Consumption | Approx. 60 W |
| Stitch Types | Straight, Zigzag, Reverse |
| Stitch Length Adjustment | Yes, adjustable knob |
| Stitch Width Adjustment | Yes, for zigzag |
| Speed Control | Foot pedal with variable speed |
| Needle Threader | Manual |
| Bobbin Winder | Built-in, automatic |
| LED Light | Yes, built-in |
| Included Accessories | Needles, bobbins, thread spool pin, seam ripper, screwdriver |
| Maintenance | Clean lint regularly, oil moving parts as needed |
| Safety Features | Automatic needle stop, thermal overload protection |
| Warranty | 1 year limited |
Frequently Asked Questions - SSW 101 Mini SINBO
User questions about SSW 101 Mini SINBO
0 question about this device. Answer the ones you know or ask your own.
Ask a new question about this device
Download the instructions for your Sewing machine in PDF format for free! Find your manual SSW 101 Mini - SINBO and take your electronic device back in hand. On this page are published all the documents necessary for the use of your device. SSW 101 Mini by SINBO.
USER MANUAL SSW 101 Mini SINBO
This appliance is not intended for use by persons (including children) with reduced physical, sensory or mental capabilities, or lack of experience and knowledge, unless they have been given supervision or instruction concerning use of the appliances by a person responsible for their safety. Children should be supervised to ensure that they do not play with the appliance.
This appliance is intended to be used in household and similar applications such as:
- staff kitchen areas in shops, offices and other working environments;
- farm houses;
- by clients in hotels, motels and other residential type environments;
- bed and breakfast type environments.
United Favour Development Limited
Unit B, 10/F Lee May Building 788-790 Nathan Road, Mongkok, Kowloon, HK.
- UYGUNLUK BEYANI / CE -
Hong Kong Timeway Technology Development Limited
Rm. 1805, 18/F, Wu Sang House, Nathan Rd. Mongkok, Kln. Hong Kong EMC0407056

natural_image
Black electronic device with attached cables and a power strip, labeled 30 and 31 (no visible text or symbols beyond labels)natural_image
Simple line drawing of a vertical object with a downward arrow, enclosed in a circle (no text or symbols)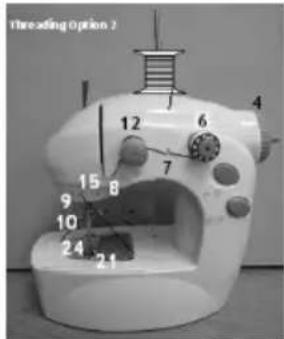
natural_image
Close-up of a sewing machine needle stitching a circular mechanical component (no visible text or symbols)Notlar:
natural_image
Close-up of a mechanical component with bolt holes and a small square feature (no visible text or symbols)natural_image
Interior view of an open battery pack with internal battery cells (no visible text or symbols)Pille Kullanım:
Whenever used, the following terms identify safety and property damage messages and designate a level of hazard seriousness.

This is the safety alert symbol. It alerts you to potential personal
Injury hazards. Obey all safety messages that follow this symbol to avoid possible injury or death.
DANGER – Indicates an imminently hazardous situation, which, if not avoided, will result in death or serious injury. Usage of this signal word is limited to the most extreme situations.
WARNING – Indicates a potentially hazardous situation, which, if not avoided, could result in death or serious injury.
CAUTION – Indicates a potentially hazardous situation, which, if not avoided, may result in minor/moderate injury.
NOTICE – Addresses practices not related to personal injury, such as product and/or property damage.
When using this or any other electrical appliance, always follow these basic safety precautions:
READ ALL INSTRUCTIONS BEFORE USE.
WARNING- To reduce the risk of fire, electric shock, or serious personal injury:
- This product is intended for non-commercial use for sewing fabrics. Do not use the product for any other purpose.
- Keep the product out of the reach of children and pets. This product is not a toy and is not intended for use by children. Extra caution is necessary when using this product near children or pets.
- Do not leave the product unattended while it is in use. Always unplug the product from the electric outlet and remove the batteries when not in use or when changing or threading the needle.
- Do not use attachments not recommended or sold by the product manufacturer.
- This product uses a Power Adapter (included) for the sewing machine. Never plug the product into an electric outlet unless it is properly assembled. Use only the Power Adaptor provided.
IMPORTANT SAFEGUARDS
- Do not place the product in, or expose it to, water or other liquids.
- When using the Power Adapter (included) never operate the product with wet hands, without shoes on, or while standing in water or on a wet surface. Never locate the product where it may fall into a sink or other water/liquid filled container. If the product falls into water or other liquid, do not touch or reach into the water/liquid. Immediately unplug it from the electric outlet before retrieving it from the water/liquid.
- Keep the Power Cord and product away from heated surfaces.
- Unplug the product from the electric outlet and remove batteries prior to putting on or removing parts.
- To disconnect the product adapter from an electric outlet, pull directly on the Plug; do not pull on the Power Cord. Do not put any stress on the Power Cord where it connects to the product adapter, as the Power Cord could fray and break.
- Do not operate the product with the Adapter if the Power Cord is cut, damaged, or if the wires are exposed.
- Do not immerse or expose the Power Cord or Plug to water or other liquids.
- Never operate this product with the Adapter if the Power Cord or Plug is damaged, malfunctions or is not working properly, has been dropped, or damaged. This product has no user-serviceable parts. Never open the main motor case of the product. The mechanism has been factory adjusted. Do not attempt to inspect or repair this product yourself. Only qualified service personnel should perform any servicing; take the product to a sewing machine repair shop of your choice for inspection and repair.
CAUTION-- To reduce the risk of personal injury:
- This product is intended for indoor, non-commercial, non-industrial, household use only.
- Do not allow the Adapter's Power Cord to hang (e.g., over the edge of a table or counter) where it may be tripped over or pulled.
- Do not sew with this machine on fabric/clothing a person is wearing.
- Always check the threading of the product before sewing. Improper threading or improper placement of the Bobbin in the Bobbin Case could damage the machine.
- To avoid breaking the needle and causing damage to the product, do not pull on the fabric as you sew; gently guide the fabric under the Presser Foot.
- To prolong battery life, remove the batteries when the machine is not in use. Always keep extra batteries available to avoid interruption in sewing projects.
Battery Handling and Usage
WARNING: Only adults should handle batteries. Do not allow a child to use this product unless the Battery Compartment Cover is securely attached to the Battery Compartment in accordance with all product usage instructions.
- Follow the battery manufacturer's safety and usage instructions.
- Keep batteries away from children and pets.
- Do not mix a used battery with a new battery, or mix different chemistries or sizes of batteries.
IMPORTANT SAFEGUARDS
- Insert the batteries observing the proper polarity (?/?) as indicated inside the battery compartment. Failure to properly align the battery polarity can cause personal injury and/or property damage.
- Remove spent or discharged batteries from the product. Remove the batteries when not using the product for an extended period.
- Never throw batteries into a fire. Do not expose batteries to fire or other heat sources.
- Dispose or recycle spent/discharged batteries in compliance with all applicable laws. For detailed information, contact your local solid waste authority.
SAVE THESE INSTRUCTIONS FOR FUTURE REFERENCE
Sewing fun is right at your fingertips with this Sewing Machine. Mending clothing, repairing pillows or curtains, and creating new items are as easy as using a big machine, but without all the hassle. Satisfaction comes from saying, "I did it myself!"
Money Saving Tips:
- Mend/alter clothing to fit growing children. Add appliqués or decorative ribbons.
- Make your own home accessories out of sheets purchased on sale.
- Use sheets to create custom bedroom ensembles (e.g., comforter, pillow shams, and curtains).
- Make your own tablecloths and napkins for different holiday looks.
- Get on the mailing list of your local fabric shop. You'll get advance notice for fabric sales and classes available. Watch for pattern sales, too.
Parts and Accessories
- ON/OFF Power Button 18. Foot Holder Pole
- Speed Button 19. Foot Holder Spring
- Rewind Spindle 20. Final Thread Loop
- Hand Wheel 21. Presser Foot
- Short Spool Spindle 22. Needle Thread Guide
- Top Short Spool 23. Needle Clamp Screw
- Thread Guide #1 24. Needle
- Thread Guide #2 25. Bobbin Cover Plate
- Thread Guide #3 26. Adapter Jack
- Thread Guide #4 27. Foot Pedal Jack
- Top Spindle 28. Bobbin Cover Button
- Thread Tension Adjustment Knob 29. Bobbin
- Thread Clamp Spring 30. Power Adapter
- Thread Clamp 31. Foot Pedal
- Take-Up Lever
- Presser Foot Lever
- Needle Pole
USING
Threading the Product:
Threading Option 1: See Photo "Threading Option 1":
- Attach the Top Short Spool (6).
- Carefully pull out the Short Spool Spindle with the Spring (5).
NOTICE: Use care as the Spring will pop off.
- Place the Top Short Spool (6) onto the Short Spool (5), replace the Spring onto the end of the Short Spool, and then insert the Short Spool into the Sewing Machine.
the threading by pulling the thread from the Top Short Spool (6) and put it through Thread Guide #1 (7) in the direction of the front of the machine as shown.
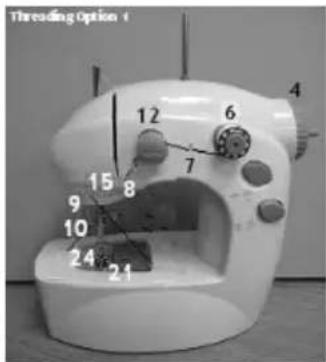
- Bring the thread under the Thread Tension Adjustment Knob (12).
NOTE: To ensure proper stitching, the thread must be positioned between the two disks behind the Thread Tension Adjusting Knob, where the thread tension is controlled during stitching.
-
Insert thread through Thread Guide #2 (8) toward the front of the machine.
-
Insert the thread into the hole in the Take Up Lever (15) (always threading toward the front of the machine).
-
Pull the thread down and insert thread into Thread Guide #3 (9), and then insert the thread through Thread Guide #4 (10), located at the top, left of the needle.
NOTE: In order to thread the needle, you will need to have a lead of thread approximately six inches long. Pull gently on the thread. If there is resistance, rotate the Hand Wheel (4) slightly back and forth as you pull on the thread. This will make the thread pull more easily. When you have sufficient thread lead, rotate the Hand Wheel (4) until the Needle (24) is in its highest position to accept the thread at the tip (see "Parts" section for location of parts).
-
Insert the end of the thread [use a Needle Threader (not included) if necessary], through the eye of the Needle (24) from the front of the machine toward the back as shown in Threading Option 1 Photo.
-
Raise the Presser Foot (21) by lifting up on the Presser Foot Lever (17) at the rear of the Sewing Machine.
-
Pull about ten inches of thread through the Needle (24). [Again, you may need to rotate the Hand Wheel (4) back and forth slightly as explained earlier to allow the thread to pull easily.] Lay the thread on the deck under the Presser Foot (21) pulling it away from you toward the back of the machine.
USING
Threading Option 2:
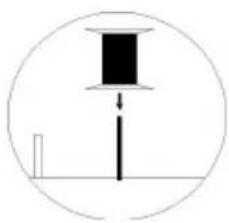
For this option, thread the machine as described for Threading Option 1 except step 1 is extension of the Top Spindle (11) and placement of a Thread Spool as shown.
NOTE: To extend the Top Spindle (11) pull up until it locks in place.
natural_image
Simple line drawing of a vertical object with a downward arrow, enclosed in a circle (no text or symbols)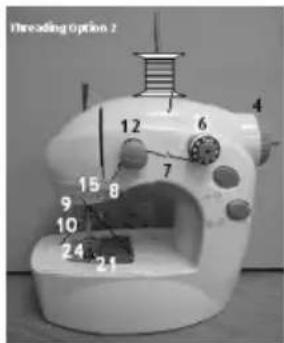
Two-Color Decorative Topstitching:
To make decorative two-color topstitching, thread the machine
with two colors of thread simultaneously, using one color from the Thread Spool and a contrasting color from the Top Short Spool (6).
NOTE: Thread both strands of thread at the same time combining the instructions for Threading Option 1 and Threading Option 2.
Bobbin Placement:
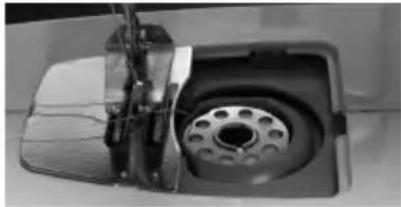
- To remove the clear Bobbin Cover Plate (25), press the Bobbin Cover Button (28) and lift off the clear Bobbin Cover Plate (25).
- Remove the empty Bobbin (29) and replace it with a Bobbin (29) filled with the thread color of your choice. Leave approximately ten inches of thread lead and place it under
the Presser Foot (21) as shown.
NOTES:
- For best sewing results, the Bobbin's thread should always be the same weight and thickness as the top thread.
-
For instructions on winding the Bobbin's thread, see the "Winding the Bobbin" section.
-
Turn the Hand Wheel (4) counterclockwise (toward you). The Needle (24) will go down and pick up the Bobbin's thread. Turn the Hand Wheel (4) until the Needle (24) has descended completely and then come up again to its highest point. Stop when the Needle (24) starts to go down again.
-
Raise the Presser Foot (21) and bring the spool thread lead around to the front of the machine. Pull it gently up and you will see it has caught the Bobbin's thread. Pull the two threads toward the rear of the Sewing Machine (away from you) and lay them under the Presser Foot (21).
- Slide the cover back over the Bobbin Compartment and gently press it into place.
NOTICE:
- Improper threading of the machine may damage the machine and/or the fabric being stitched.
natural_image
Close-up of a mechanical component with a circular housing and internal components (no visible text or symbols)USING
- To avoid breaking the Bobbin Cover Plate (25), handle it gently and use extra care in pressing it back into place.
NOTE: It is important that threading is completed properly. Always practice a few stitches on scrap fabric before sewing on your project.
To Sew:
Using 220 Volt AC Power:
a) Plug the Power Adapter (30) into the back of the product into the Adapter Jack (26).
b) Ensure that the ON/OFF Power Button (1) is in the OFF position, and plug the Power Adapter into a 120 volt AC electrical outlet.
NOTE: In the OFF position the ON/OFF Power Button (1) protrudes. In the ON position, the ON/OFF Power Button (1) is flush with the side of the product.
Using Batteries:
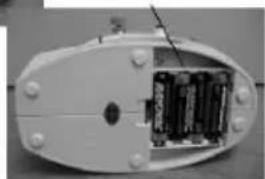
Ensure the ON/OFF Power Button (1) is in the OFF position before inserting the batteries. Install four "AA" size batteries (not included) into the battery compartment on the underside of the product. Follow the +/- indications on the inside of the battery compartment.
CAUTION: The product will begin to sew as soon as the ON/OFF Power Button (1) is pressed ON. Ensure that the fabric is under the Presser Foot (21) and
the Presser Foot (21) is down against the fabric.
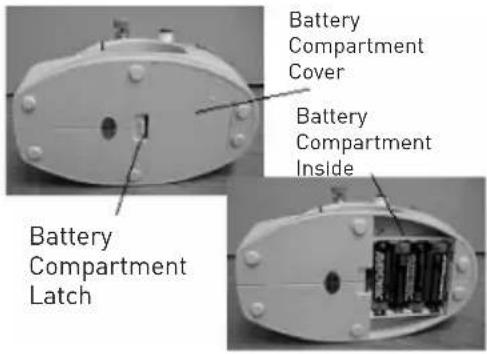
NOTICE: Failure to properly align the batteries could cause damage to the product.
Using the Foot Pedal (Provided):
- Ensure that the ON/OFF Power Button (1) is in the OFF position.
NOTE: Do not use the ON/OFF Power Button (1) to turn the machine on when using the Foot Pedal (31). If you put the ON/OFF Power Button (1) to the ON position with the Foot Pedal (27) attached, the Food Pedal (31) will not function.
-
Plug the Foot Pedal (31) into the Foot Pedal Jack (27) on the end of the product.
-
Before sewing, test stitch on scrap fabric. With scrap material under the Presser Foot (21) and the Needle (24) in the material, press the Foot Pedal (31) to begin sewing. Remove pressure from the Foot Pedal (31) to stop the machine.
USING
Without Using the Foot Pedal:
- Lift the Needle [24] above the Presser Foot [21] by turning the Hand Wheel [4] slightly in the clockwise direction (away from you).
- Raise the Presser Foot (21) by lifting up on the Presser Foot Lever (17) at the back of the machine.
- Position the fabric to be sewn under the Presser Foot (21) with the seam line directly under the Needle (24). Turn the Hand Wheel (4) until the Needle (24) is in the fabric.
- Lower the Presser Foot (21) by releasing the Presser Foot Lever (17).
- Select the sewing speed by pressing the Speed Button (2) (see "Using the Speed Button" section). Use low speed for intricate work. Use high speed for long uninterrupted seams.
CAUTION: When the ON/OFF Button is in the ON position, the sewing machine will immediately begin sewing. Keep fingers away from the Needle (24). The Needle (24) will pierce your skin if your finger comes in contact with it. - Press the ON/OFF Power Button (1) to the ON position. Gently guide the fabric with your fingertips to keep the seam straight. Do not pull on the fabric.
CAUTION: Keep fingers away from the Needle (24). The Needle (24) will pierce your skin if your finger comes in contact with it. - When finished sewing the seam, press the ON/OFF Power Button (1) to the OFF position.
- Raise the Needle (24) by turning the Hand Wheel (4), lift the Presser Foot Lever (17). Pull the fabric toward you leaving approximately ten inches of thread between the fabric and the machine.
NOTE: Do not pull on the fabric if the thread does not pull easily. Turn the Hand Wheel (4) slightly back and forth with one hand while pulling on the fabric with the other hand until there is a ten-inch thread lead. - Cut the thread approximately one inch from the fabric. Tie the thread ends on the fabric into a knot to secure the end of the seam.
- Continue sewing other seams in the same manner.
Adjusting the Thread Tension:
The factory has set the thread tension and no adjustment should be necessary. The Thread Tension Adjustment Knob (12) is extremely sensitive. Adjustments should be made by a qualified sewing machine technician of your choice.
NOTE: Bobbin tension cannot be adjusted.
Changing the Needle:
NOTE: Needles come in various sizes designated by numbers; the smaller the number, the thinner the needle. Use smaller needles for more delicate fabrics and larger needles for heavier fabrics. Replacement Needle size is #14 (#90
USING
European).
- Ensure that the ON/OFF Power Button (1) is in the OFF position and the product is unplugged from the electrical outlet.
- Raise the Needle (24) to its highest position by turning the Hand Wheel (4).
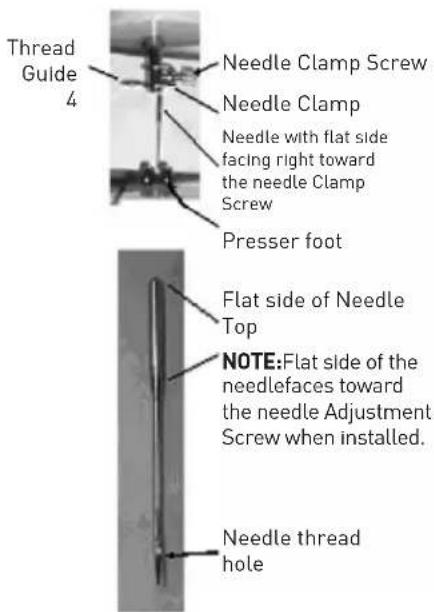
- Loosen the Needle Clamp Screw (23) by turning it counterclockwise (toward you).
- Gently pull down on the Needle (24) until it is clear of the clamp.
- Replace the needle in the slot and tighten the Needle Clamp Screw (23).
NOTE: When replacing the Needle (24), ensure that the flat side on the upper portion of the Needle (24) (the part that slides into the slot) faces inward, toward the Needle Clamp Screw (23).
Using the Speed Button (2):
Depress the Speed Button (2) for a slower sewing speed. This is the best speed for sewing heavier fabrics. When the Speed Button (2) is not depressed, the machine runs at a faster speed for sewing lighter fabrics.
Winding the Bobbin:
To maintain even stitching while sewing, the Bobbin thread should always be the same weight as the Thread Spool.
- Ensure that the ON/OFF Power Button (1) is in the OFF position.
- Remove the Bobbin Cover Plate (25) by pressing the Bobbin Cover Button (28); remove the empty Bobbin (29).
- Place a spool of thread onto the Top Spindle (11) and put the end of the thread through one of the holes in the Bobbin and wind it around the Bobbin (29) several times to anchor the thread.
- Place the Bobbin (29) firmly onto the Rewind Spindle (3).
- The next step requires you to do several things very quickly in order to load the Bobbin (29) evenly.
a. Press the ON Button and then immediately begin guiding the thread evenly onto the Bobbin (29).
NOTE: The Bobbin thread must be wound evenly onto the Bobbin (29) to ensure smooth stitching.
b. To keep the Bobbin (29) from slipping off the Rewind Spindle (3), it may be necessary to press your finger lightly on the Bobbin as thread is loaded onto the Bobbin (29).
USING
c. When the Bobbin (29) is full [1/16" from the edge of the Bobbin (29)], turn off the machine.
d. Remove the Bobbin (29) from the Rewind Thread Spindle (3).
e. Insert the Bobbin (29) into the Bobbin compartment following the instructions for "Bobbin Placement" and "Getting Started."
TROUBLESHOOTING GUIDE
The stitches got looser and looser as I sewed.
The thread has come out from between the discs behind the Thread Tension Knob. Rethread the machine.
The thread breaks during stitching.
The thread is tangled or has an extra loop. Rethread the machine.
The stitches look all right on the top side but they don't hook together on the underside. Do not pull on the fabric as you stitch.
The big thread spool falls off during stitching.
- Check to be sure you have the white spindle cap on the end of the spool.
- Be sure the Spindle is tightened into the machine.
The machine has no power.
- Check to be sure the batteries are inserted correctly. Follow the +/- signs on the inside of the Battery Compartment.
- Check to be sure the batteries are not weak.
The machine sews very slowly.
- Check to be sure the batteries are not weak.
- Check to be sure the spindle cap is not holding the thread spool too tightly.
- Sewing a thick cloth will cause the machine to run more slowly.
عربيية
قواعد هامة للسلامة
التعريف
natural_image
Simple line drawing of a vertical object with a downward arrow, enclosed in a circle (no text or symbols)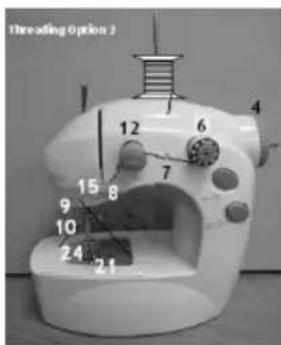
natural_image
Close-up of a sewing machine head with visible mechanical components and a circular base (no text or symbols)(25) الوشيعة
natural_image
Close-up of a white electronic device casing with mounting holes and internal components (no visible text or symbols)غطاء قسم البطارية
داخل قسم البطارية
قال قسم البطارية
natural_image
Interior view of an electronic device showing a battery pack and housing (no visible text or symbols)natural_image
Simple line drawing of a vertical object with a downward arrow, enclosed in a circle (no text or symbols)natural_image
Close-up of a sewing machine's side panel with a circular mechanical component (no visible text or symbols)natural_image
Close-up of a white mechanical component with bolt holes and a small square feature (no visible text or symbols)natural_image
Interior view of an electronic device showing a battery pack and internal components (no visible text or symbols)- Notlar:
- Pille Kullanım:
- IMPORTANT SAFEGUARDS
- CAUTION-- To reduce the risk of personal injury:
- Battery Handling and Usage
- SAVE THESE INSTRUCTIONS FOR FUTURE REFERENCE
- Parts and Accessories
- USING
- Threading the Product:
- Threading Option 2:
- Two-Color Decorative Topstitching:
- Bobbin Placement:
- NOTES:
- NOTICE:
- To Sew:
- Using 220 Volt AC Power:
- Using Batteries:
- Using the Foot Pedal (Provided):
- Without Using the Foot Pedal:
- Adjusting the Thread Tension:
- Changing the Needle:
- European).
- Using the Speed Button (2):
- Winding the Bobbin:
- TROUBLESHOOTING GUIDE
- The stitches got looser and looser as I sewed.
- The thread breaks during stitching.
- The big thread spool falls off during stitching.
- The machine has no power.
- The machine sews very slowly.
- عربيية
- قواعد هامة للسلامة
Brand : SINBO
Model : SSW 101 Mini
Category : Sewing machine