
HomeCam - Security Camera MANHATTAN - Free user manual and instructions
Find the device manual for free HomeCam MANHATTAN in PDF.


| Product Type | Indoor/Outdoor Security Camera |
| Model | HomeCam by Manhattan |
| Dimensions (L x W x H) | 7.2 x 6.5 x 12.8 cm |
| Weight | 250 g |
| Power Supply | DC 5V via USB cable (included) |
| Resolution | 1080p Full HD (1920x1080) |
| Field of View | 130° diagonal |
| Night Vision | Up to 10 meters with IR LEDs |
| Motion Detection | PIR sensor with adjustable sensitivity |
| Audio | Two-way audio with built-in microphone and speaker |
| Connectivity | Wi-Fi 802.11 b/g/n, 2.4 GHz |
| Storage | MicroSD card up to 128 GB (not included) and cloud storage |
| Compatibility | Works with Alexa and Google Assistant |
| Weather Resistance | IP65 rated for outdoor use |
| Mounting | Includes wall mount and mounting kit |
| Operating Temperature | -10°C to 50°C |
| Power Consumption | 5W maximum |
| Warranty | 1 year limited warranty |
| Maintenance | Clean lens with soft dry cloth; avoid water jets |
| Safety Certifications | CE, FCC, RoHS |
| Spare Parts Availability | Contact manufacturer for replacement parts |
| Repairability | User replaceable microSD card; professional service for internal repairs |
Frequently Asked Questions - HomeCam MANHATTAN
User questions about HomeCam MANHATTAN
0 question about this device. Answer the ones you know or ask your own.
Ask a new question about this device
Download the instructions for your Security Camera in PDF format for free! Find your manual HomeCam - MANHATTAN and take your electronic device back in hand. On this page are published all the documents necessary for the use of your device. HomeCam by MANHATTAN.
USER MANUAL HomeCam MANHATTAN
natural_image
White remote control camera with 'manhattan' branding on base (no other text or symbols visible)manhattan® Life just got easier.™
Hardware Installation
- Connect the camera to one of your router's LAN ports with the included network cable.

natural_image
Diagram showing two wireless devices connected via USB cable, no text or symbols present-
Power on the camera.
-
Allow the camera to properly start up. The startup sequence has ended when the camera stops moving its lens up and down and to the left and right.
Connect to the camera with your computer
-
Connect your computer to the same router as the camera, either wirelessly or with a network cable.
-
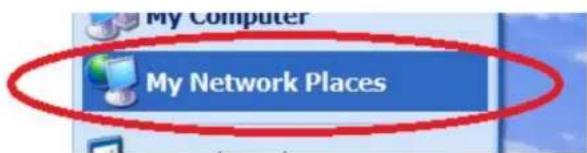
Open up the network environment within Windows.
Windows XP: Click on "My Network Places."

or
Windows 7: Locate and click on the "Network" icon on the desktop.

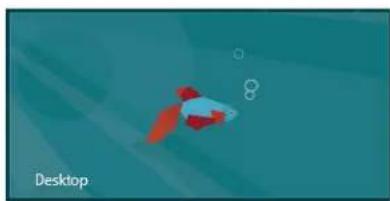
Windows 8 / 8.1: Open the desktop first, and then locate and click on the "Network" icon.
natural_image
Desktop icon showing a red rocket and white body on a teal background (no text or symbols)

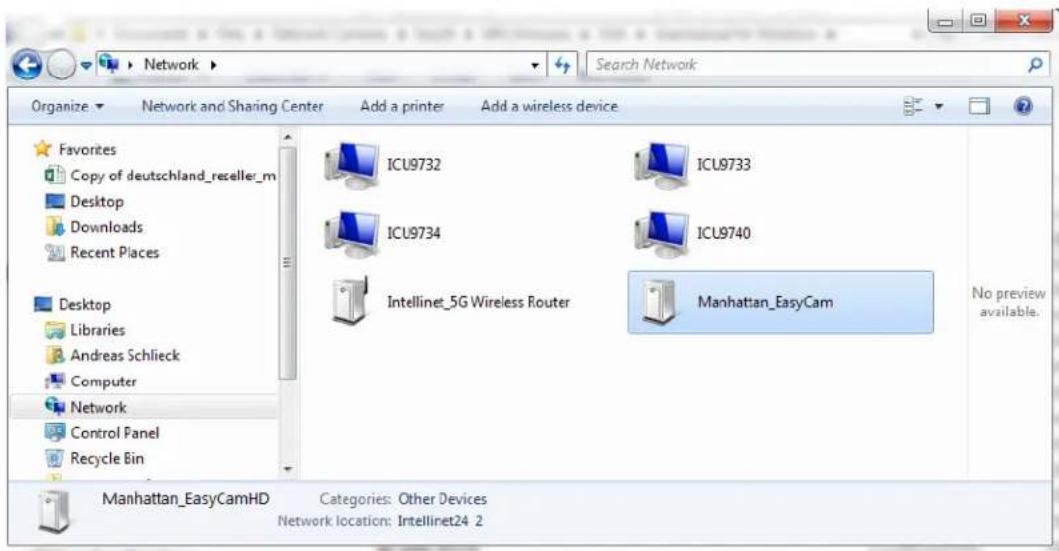
- Windows will show you all connected devices in your network. Among those are likely to be your computers, laptops, printers and network storage devices. You will be able to find the camera in that list.
-
Double-click the camera to open up a Web browser and connect to the camera's Web browser user interface.
-
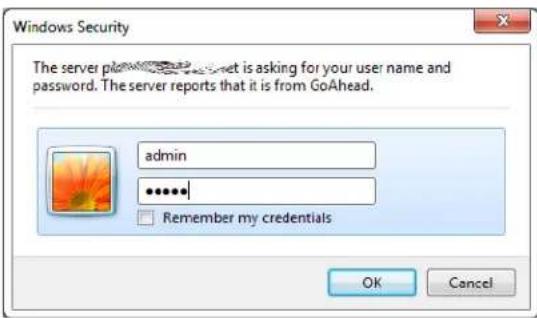
Log in to the camera with the user name "admin" and the password "admin." Note that if the password has been changed before, you will, of course, need to use the updated password.
- Select the correct Sign In method (below). Note that if you are using Microsoft MS Internet Explorer ("IE"), you will need to use the ActiveX Mode and you also must be running Internet Explorer as a computer administrator. If you do not wish to use ActiveX, you need to use a different Web browser — e.g., Chrome, Firefox, Opera or others — and select Server Push Mode.
IP Camera
ActiveX Mode(For IE Browser)
Sign in
Server Push Mode (For Firefox, Google
Chromer)
Sign in
Mobile Phone (For any browser that supports
Javascript)
Sign in
Language: English
Official website Online Support

MS Internet Explorer ActiveX Installation Procedure
MS Internet Explorer must be executed with administrator rights. Right-click on the link (green circle), then select "Save target as..."
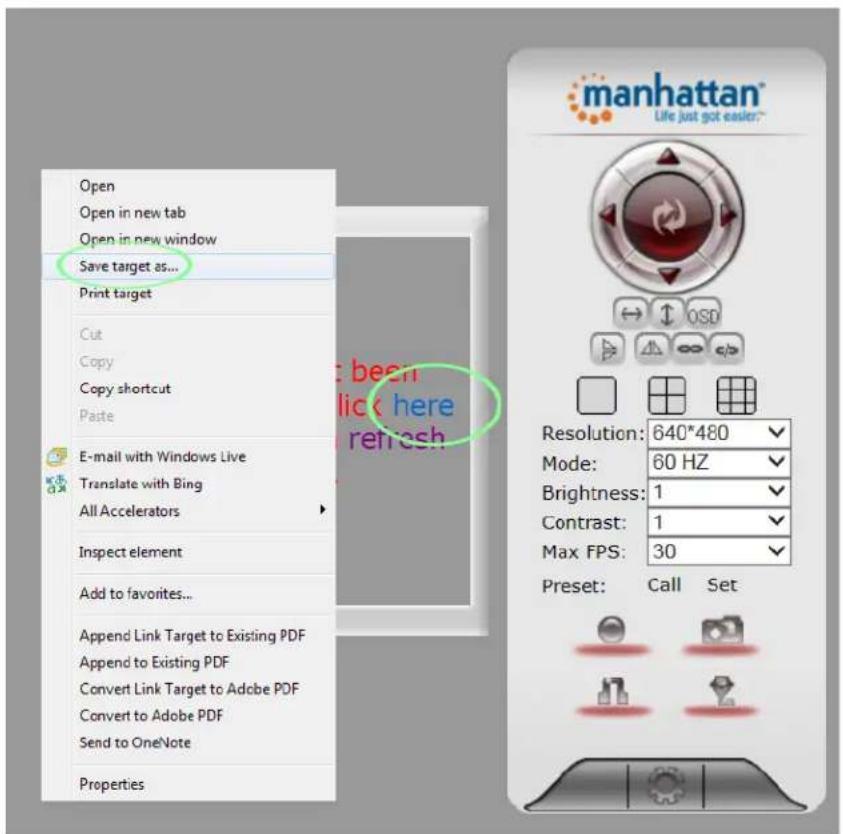
Select the location — e.g., the desktop — and then save the file.

Once the download has finished, on Windows 7 and 8 you will likely see a warning message that this file could harm your computer. This is perfectly normal and should not alarm you. Click "Actions."

Click on "Run anyway." If you are not currently logged on as a computer administrator, you will be asked to enter administrator credentials. After you have done so, the installation of the ActiveX control will commence. Windows XP users: Simply double-click the Manhattan.exe to start the installation process.

The installation will only take a few moments. Click "Finish" when done.
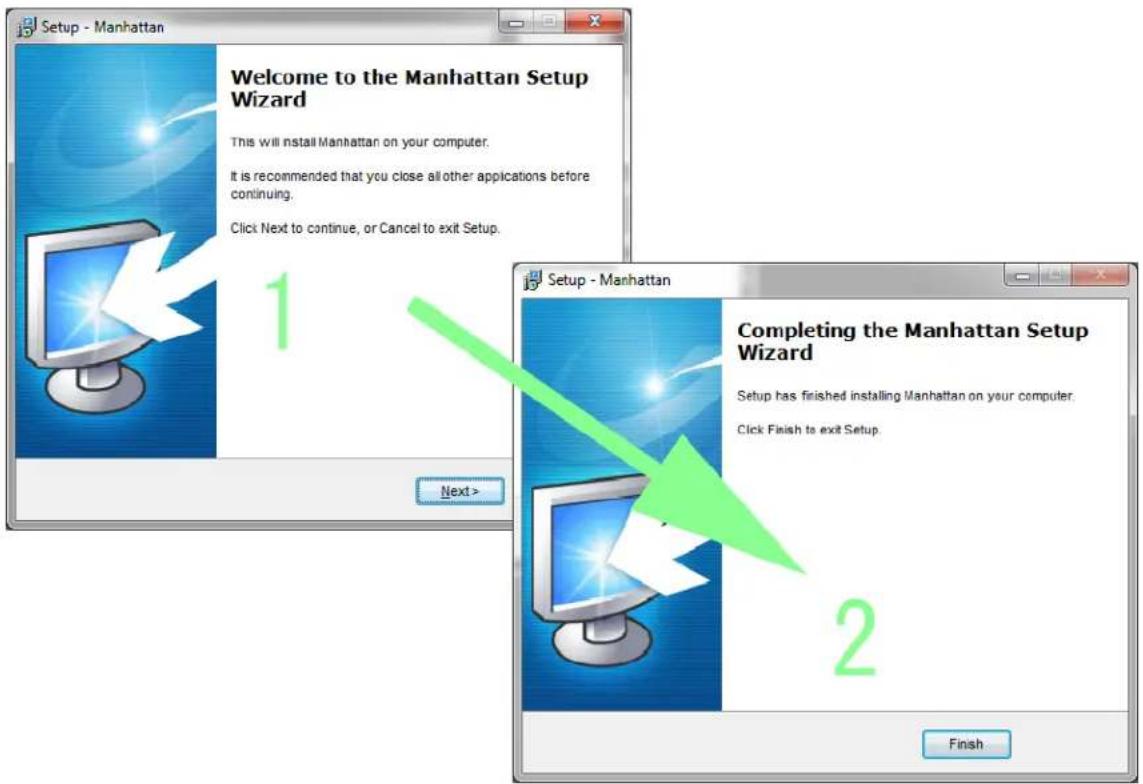
Return to the MS Internet Explorer window, and click "Refresh." Notice the message on the bottom of the screen. Click "Allow."
This webpage wants to run the following add-on: 'oPlayer.ocx' from 'INTRACOM U.S.A. INC'. What's the risk?

Click again on ActiveX for IE, and you will then see the camera's live video.
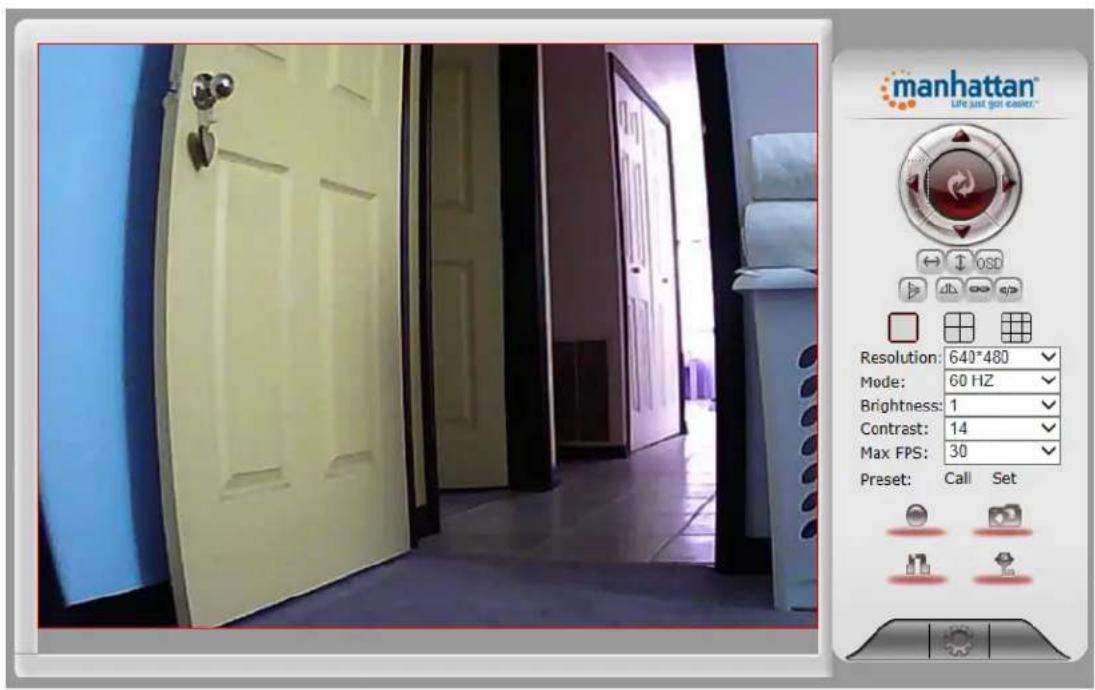
Live Video Camera Page
This page lets you view and control the camera. (Some options only work with MS Internet Explorer.)
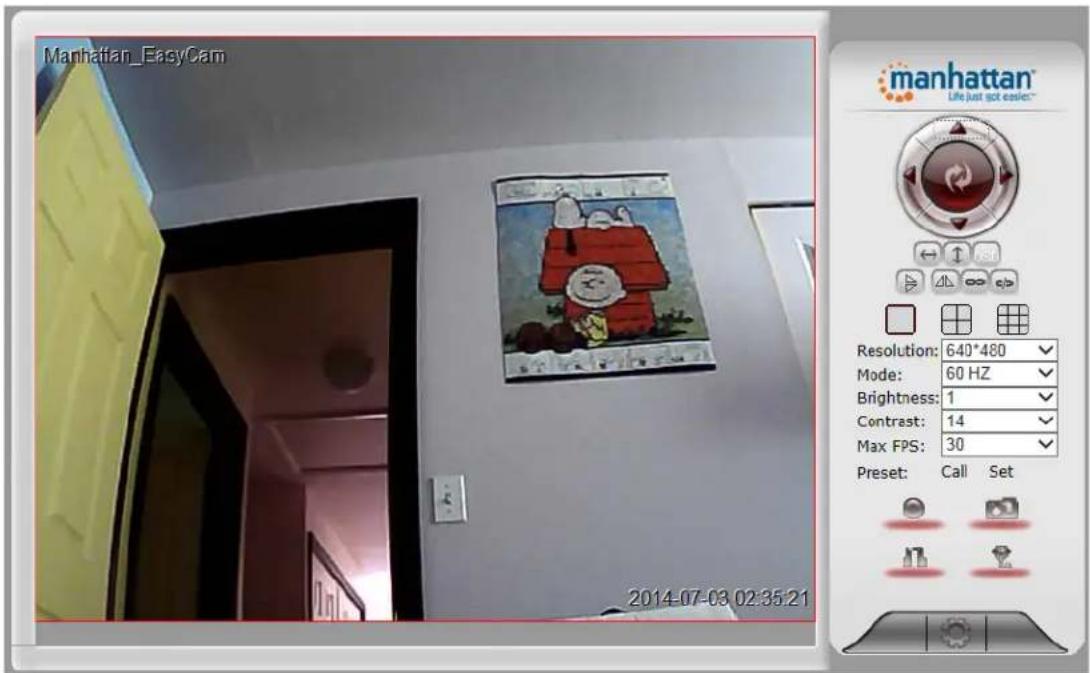


Use the directional arrows to control the moment of the camera. Click the middle area to return the camera to its default position.
Enable or disable the horizontal or vertical patrol. Once enabled, the camera will continuously pan from left to right and back, or up and down.
If you have more than one Manhattan EasyCam, you can view multiple cameras in a Web browser. For that to work, the other cameras will need to be added to the camera configuration, which is explained in the next section.


You can store ("Set") or recall ("Call") up to 16 preset positions with these controls.


With these controls you can record video on your computer's hard drive (MSIE only), or you can take a snapshot and either view it or save it anywhere you like.
MSIE only: Listen to the sound the camera picks up or enable your own microphone and send audio to the camera, which it outputs through its internal speaker.

Click this button to open the camera's Options menu, which provides access to many of the camera's configuration options.
Configuration Menu, Camera Settings
| Camera Information |
| Camera Name |
| Date & Time |
| User Accounts |
| Multi- Camera |
| IP Settings |
| Wireless Settings |
| DDNS Settings |
| PTZ Settings |
| Alarm Log |
| Maintenance |
| Back |
The camera's Settings menu provides access to the configuration parameters of your EasyCam. Under normal conditions there is no need to make any changes here, but you may do so if you are experienced enough to change network-related settings of the camera.
| Item | Explanation | |
| Camera Information | Status information of the camera, including firmware version, MAC addresses and language settings. | |
| Camera Name | Define the name of your camera here. This is how the camera will identify itself on your network. | |
| Date & Time |  Your EasyCam is equipped with an internal clock, and here you set it up. Select the time zone that matches your location, pick an NTP server from the drop-down list, and activate the automatic time update. Your EasyCam is equipped with an internal clock, and here you set it up. Select the time zone that matches your location, pick an NTP server from the drop-down list, and activate the automatic time update. | |
| User Accounts |  You can set up three different user accounts. The guest account only allows viewing the video, but it does not allow you to control the movement, record video or access the settings menu. The operator account allows you to view the video, record and control the camera movement, but it does not allow access to the settings menu. Finally, the administrator account has full access to everything. You can set up three different user accounts. The guest account only allows viewing the video, but it does not allow you to control the movement, record video or access the settings menu. The operator account allows you to view the video, record and control the camera movement, but it does not allow access to the settings menu. Finally, the administrator account has full access to everything. | |
| Multi-Camera | Multi-Camera Settings | |
| Camera #1 | This Device | |
| Camera #2 | None | |
| Camera Name | ||
| Host | ||
| HTTP Port | 0 | |
| User Name: | ||
| Password: | ||
| Add Remove | ||
| Camera #3 | None | |
| Camera #4 | None | |
| Camera #5 | None | |
| Camera #6 | None | |
| Camera #7 | None | |
| Camera #8 | None | |
| Camera #9 | None | |
| Note: If you want to access your camera(s) from the Internet, you need to set up DDNS, and you also need to set up port forwarding in your router. Refer to the user manual for details. | ||
| Set Refresh | ||
| If you have multiple EasyCams installed at home and are using MS Internet Explorer, you can view multiple cameras on one screen. For that to work, you need to add the cameras here manually. You need to know the IP address, HTTP port number, username and password for the camera, and then click "Add." | ||
| IP Settings | Basic Network Settings | |
| Automatic IP Address | ✓ | |
| HTTP Port | 81 | |
| Set Refresh | ||
| Under normal circumstances there is no need to make any changes to this section. Automatic IP address should be enabled, unless you know exactly what you are doing. | ||
| Basic Network Settings | ||
| Automatic IP Address | ||
| IP Address | 192.1680.111 | |
| Subnet Mask | 255.255.255.0 | |
| Gateway | 192.1680.2 | |
| DNS Server1 | ||
| DNS Server2 | 192.1680.2 | |
| HTTP Port | 81 | |
| Set Refresh | ||
| Disable the automatic mode and you will have access to fields such as IP Address, Gateway and DNS Server1. Make sure that you provide information that is suitable for your network or you will not be able to connect to the camera any longer. | ||
| Multi-Camera Settings | ||
| Camera #1 | This Device | |
| Camera #2 | None | |
| Camera Name | ||
| Host | ||
| HTTP Port | 0 | |
| User Name: | ||
| Password: | ||
| AddRemove | ||
| Camera #3 | None | |
| Camera #4 | None | |
| Camera #5 | None | |
| Camera #6 | None | |
| Camera #7 | None | |
| Camera #8 | None | |
| Camera #9 | None | |
| Note: If you want to access your camera(s) from the Internet, you need to set up DDNS, and you also need to set up port forwarding in your router. Refer to the user manual for details. | ||
| Basic Network Settings | ||
| Automatic IP Address | √ | |
| HTTP Port | 81 | |
| Set | Refresh | |
| Basic Network Settings | ||
| Automatic IP Address | ||
| IP Address | 192.168.0.111 | |
| Subnet Mask | 255.255.255.0 | |
| Gateway | 192.168.0.2 | |
| DNS Server1 | ||
| DNS Server2 | 192.168.0.2 | |
| HTTP Port | 81 | |
| Set | Refresh | |
| Wireless Settings | Wireless LAN Settings | |||
| Nearby Wireless Networks | SSID | MAC | ||
| INTELLINET | 00:7F:28:ED:3F:EE | |||
| Manhattan24_2.4Gre | 80:1F:02:FF:7D:CC | |||
| Scan | ||||
| Use Wireless LAN | ✓ | |||
| SSID | INTELLINET | |||
| Network Type | Infra ▼ | |||
| Authentication | WPA2-PSK Personal (AES) ▼ | |||
| Share Key | ********** | |||
| Set Refresh | ||||
| Here you can connect your EasyCam to your wireless network. Click “Scan” to find wireless networks in range. Select a network, then enter the correct password for the wireless network in the Share Key field. Click “Set” to activate the settings. | ||||
| DDNS Settings | Attention: If you only want to connect to your EasyCam with your smartphone or tablet, you will not need to set this up. | |||
| DDNS Service Settings | ||||
| DDNS Service Provider | DynDns.org(dyndns) ▼ | |||
| User Name | username | |||
| Password | ********** | |||
| DDNS Host | mycamdyndns.org | |||
| DDNS Update Status | ||||
| Refer to the instructions on how to set up DDNS. | ||||
| Set Refresh | ||||
| DDNS stands for “Dynamic DNS.” DDNS is useful for all users who have an Internet service with a dynamic IP address. Most DSL services utilize IP addresses that are highly dynamic and change as often as once every 24 hours. Cable modem services typically keep the IP address assigned to a user for a longer period of time; e.g., up to 30 days. In any case, after a certain amount of time the IP address of your network will change unless you have a more business-type Internet service that provides a permanent, static IP address. Why does it matter if the IP address that the ISP assigns to you changes? If you never want to access the camera remotely over the Internet, it wouldn’t matter — and you can skip this section. If you want to connect to your camera from outside your network, however, the changing IP addresses will make this very complicated, as you never know under which IP address you can reach your camera. DDNS is the solution. Services like DYNDNS.ORG allow you to sign up for an account and set up domain names like “mycamera.dyndns.org.” The DDNS service assigns the current IP address that your ISP has assigned to you to the domain name you’ve set up, so that you can always reach your camera at http://mycamera.dyndns.org (example). Note: We recommend using the DDNS client that is integrated into your router for the DDNS service instead of the camera’s DDNS client. The network camera supports three DDNS providers: DYN.COM, Oray, 9299.ORG and 3322.ORG. Server name: Select the service (e.g., DYNDNS.ORG) User ID: Enter your DDNS user account password here. Password: Enter the password of your DDNS account here. Confirm: Repeat the DDNS account password here. Hostname: Enter the dynamic host name (e.g., “mycamera.dynsns.org”) here. Do not enter http://. | ||||
| PTZ Settings | ||||
| Disable preset | ||||
| Started running to the specified preset | ||||
| PTZ speed | ||||
| Cruise Views | ||||
| Set Refresh | ||||
| This section allows controlling the pan/tilt behavior of the EasyCam. The camera allows you to store up to 16 predefined locations, which you can recall from the live video page. This configuration screen provides additional options.Disable preset: Enables or disables the pan/tilt preset function.Started running to the specified preset: This is a fancy way of saying that the camera will move to a certain preset number after it has been restarted.PTZ speed: Determines how fast the camera moves to a PTZ preset.Cruise Views: In Cruise mode, the camera pans from side to side or up, down and up again. If this parameter is set to “Always,” the camera will continue until you use any of the directional keys to stop the Cruise mode. If you want the Cruise mode only to stay on for a certain amount of time, you can select a value from 1 to 10. | ||||
| Alarm Log | Motion detection events are listed here. | |||
| Maintenance | ||||
| Reboot Device Reboot DeviceRestore Factory Settings Restore Factory SettingsUpgrade Device Firmware Browse No file selected. UpgradeUpgrade Device Embedded Web UI Browse No file selected. UpgradeThis menu allows you to reboot the EasyCam, restore all configuration values to the factory defaults, and upgrade the firmware. A new firmware version may be released from time to time to improve the performance of the camera or to add new features. You can find the latest firmware for your EasyCam at manhattanproducts.com. | ||||
| PTZ Settings | |
| Disable preset | |
| Started running to the specified preset | Disable ▼ |
| PTZ speed | medium ▼ |
| Cruise Views | Always ▼ |
| Set Refresh | |
| Maintenance | ||
| Reboot Device | Reboot Device | |
| Restore Factory Settings | Restore Factory Settings | |
| Upgrade Device Firmware | Browse_ No file selected. | Upgrade |
| Upgrade Device Embedded Web UI | Browse_ No file selected. | Upgrade |
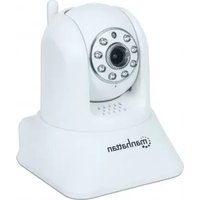
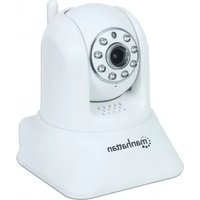
Brand : MANHATTAN
Model : HomeCam
Category : Security Camera