
NVR-800 VMUC - DJ Equipment NEVIR - Free user manual and instructions
Find the device manual for free NVR-800 VMUC NEVIR in PDF.


| Product Type | DJ Controller / Mixer |
| Model | NVR-800 VMUC |
| Brand | Nevir |
| Dimensions (W x D x H) | 480 x 250 x 70 mm |
| Weight | 3.5 kg |
| Power Supply | USB bus power or 5V DC adapter (not included) |
| Number of Channels | 2 |
| Audio Inputs | 2x RCA (Line), 1x Mic (6.35 mm) |
| Audio Outputs | 2x RCA (Master), 1x 6.35 mm (Headphone) |
| USB Connection | USB-B for computer connection |
| Main Functions | Touch-sensitive jog wheels, crossfader, EQ knobs, performance pads, FX controls |
| Compatible Software | Serato DJ Lite, Virtual DJ, rekordbox (partial) |
| Display | LED indicators for levels and tempo |
| Cleaning | Wipe with dry cloth; avoid liquids and abrasives |
| Safety | Use only with provided or compatible power source; keep away from moisture |
| Spare Parts & Repairability | Contact Nevir support; some parts (faders, knobs) replaceable |
Frequently Asked Questions - NVR-800 VMUC NEVIR
User questions about NVR-800 VMUC NEVIR
0 question about this device. Answer the ones you know or ask your own.
Ask a new question about this device
Download the instructions for your DJ Equipment in PDF format for free! Find your manual NVR-800 VMUC - NEVIR and take your electronic device back in hand. On this page are published all the documents necessary for the use of your device. NVR-800 VMUC by NEVIR.
USER MANUAL NVR-800 VMUC NEVIR
natural_image
Black TP-80023014 CD with open lid and control panel, no visible text or symbols on the device itself.UNIDAD PRINCIPAL
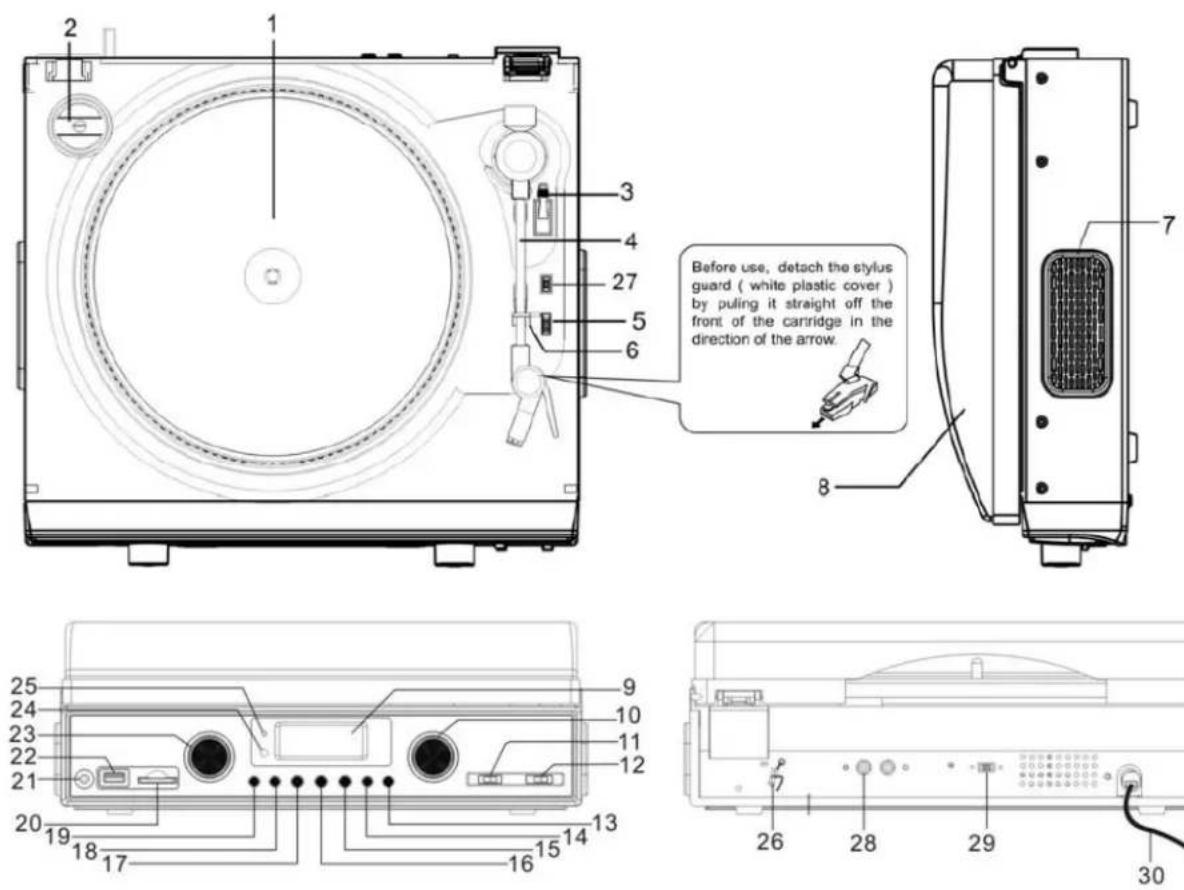
Before use, detach the stylus guard (white plastic cover) by pulling it straight off the front of the cartridge in the direction of the arrow.
ELIMINAR LOS ARCHIVOS
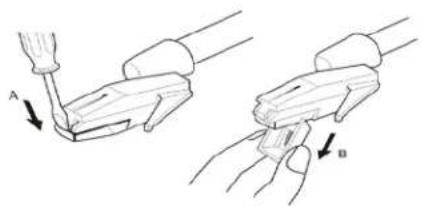
(1) Loose the red part stylus by screw driver and take out as diagram A and B.
natural_image
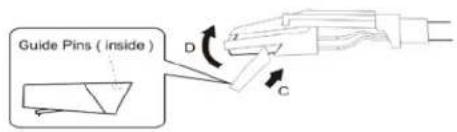
Illustration of two hands holding a tool, labeled A and B, with arrows indicating movement (no text or symbols beyond labels)(2) Replace the new stylus as C and D diagram (not supply).
natural_image
Black vinyl record with open lid and digital display, no visible text or symbols on the device itself.MANUAL DE INSTRUÇÕES
POR FAVOR, LEIA TOTALMENTE ESTE MANUAL DE FUNCIONAMENTO ANTES DE OPERAR ESTA UNIDADE E GUARDE-O PARA CONSULTAS FUTURAS.
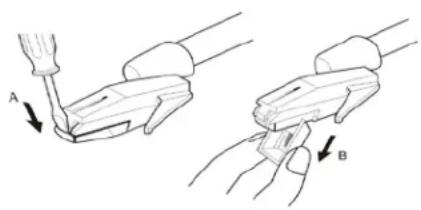
(1) Loose the red part stylus by screw driver and take out as diagram A and B.
natural_image
Illustration of two hands holding a tool, labeled A and B, with no text or symbols present.(2) Replace the new stylus as C and D diagram (not supply).
natural_image
Black vinyl record with open lid and digital display, no visible text or symbolsINSTRUCTION MANUAL
PLEASE READ THIS OPERATING MANUAL COMPLETELY BEFORE OPERATING THIS UNIT AND RETAIN IT FOR FUTURE REFERENCE.
LOCATION OF CONTROLS
MAIN UNIT
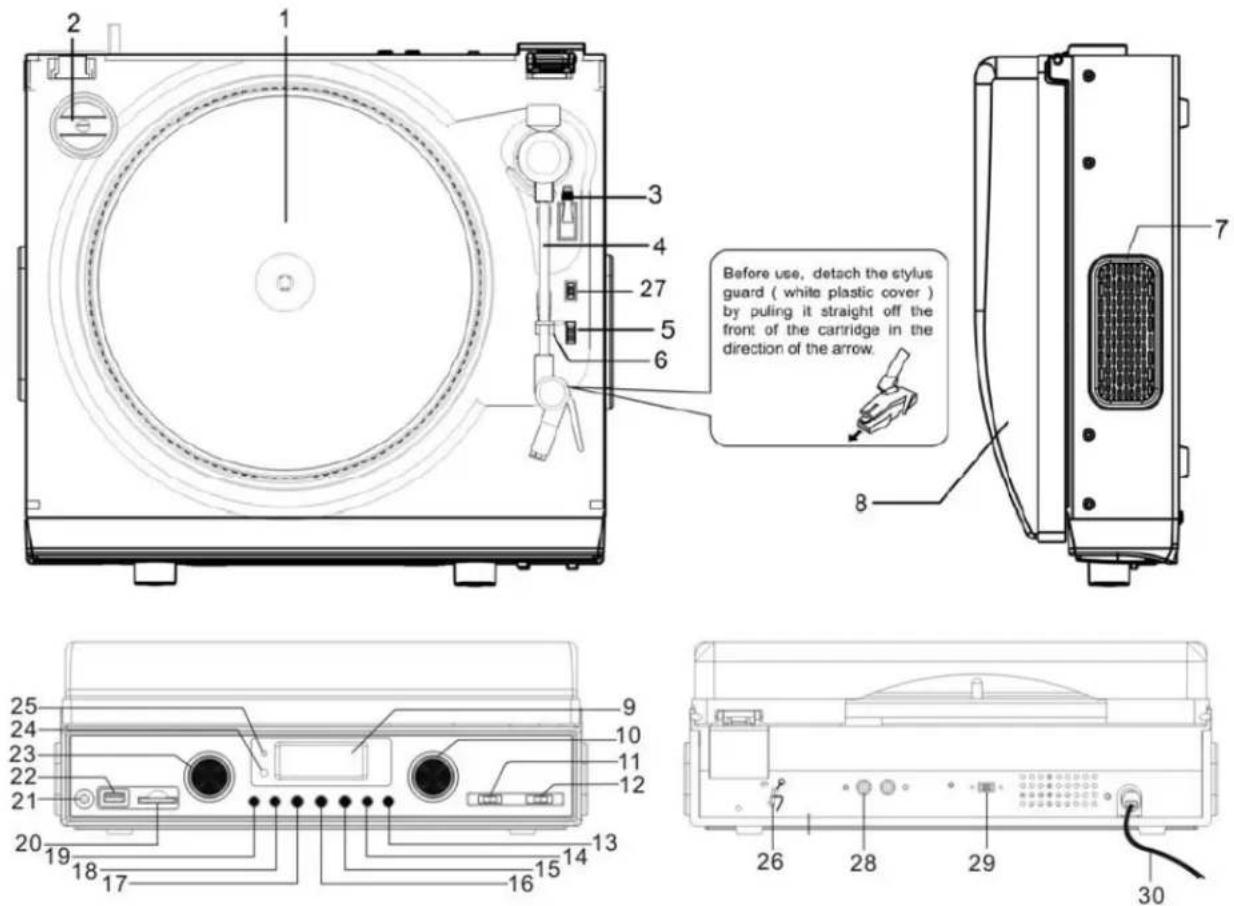
| 1. Turntable | 16. Play / Pause Button |
| 2. 45 RPM Adaptor | 17. Record Button |
| 3. Cue-lever (use this lever to lift the tone arm). | 18. Skip + Button |
| 4. Tone Arm | 19. Skip - Button |
| 5. Speed Selector | 20. SD/MMC Card Slot |
| 6. Tone Arm Holder | 21. Headphone Jack |
| 7. Speaker | 22. USB Port |
| 8. Dust Cover | 23. Volume Control |
| 9. Display | 24. IR Sensor |
| 10. Tuning Control | 25. Power Indicator |
| 11. Band Selector | 26. FM Antenna |
| 12. Function Selector | 27. Auto Stop (ON/OFF) Selector |
| 13. Bass Boost Button | 28. Audio LINE OUT Jacks |
| 14. Mode Button | 29. Internal Speaker (ON / OFF) Selector |
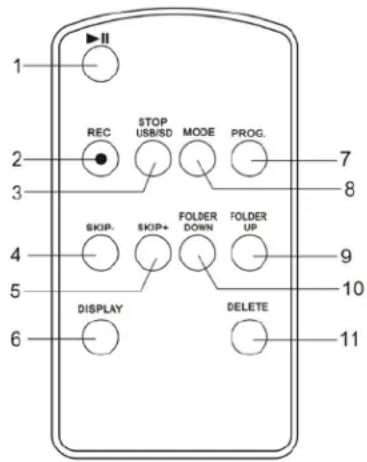
REMOTE CONTROL UNIT
- PLAY/PAUSE BUTTON
- RECORD BUTTON
- STOP/USB/SD BUTTON
- SKIP- BUTTON
- SKIP+ BUTTON
- DISPLAY BUTTON
- PROG BUTTON
- MODE BUTTON
- FOLDER UP BUTTON
- FOLDER DOWN BUTTON
- DELETE BUTTON
IMPORTANT NOTES
Avoid installing the unit in locations described below:
- Places exposed to direct sunlight or close to heat radiating appliances such as electric heaters.
• Dusty, humid or moist places. - Places subject to constant vibration.
PROTECT YOUR FURNITURE!!
This system is equipped with non-skid rubber ‘feet’ to prevent the product from moving when you operate the controls. These ‘feet’ are made from non-migrating rubber material specially formulated to avoid leaving any marks or stains on your furniture. However certain types of oil based furniture polishes, wood preservatives, or cleaning sprays may cause the rubber ‘feet’ to soften, and leave marks or a rubber residue on the furniture.
To prevent any damage to your furniture we strongly recommend that you purchase small self-adhesive felt pads, available at hardware stores and home improvement centers everywhere, and apply these pads to the bottom of the rubber ‘feet’ before you place the product on fine wooden furniture.
POWER SOURCE
This Unit is designed to only operate on normal 230V\~50Hz household power. Do not attempt to operate the System using any other power source. You could cause damage to the unit and void your warranty.
The remote control unit operates on 1 CR2025 Lithium battery (Included).
AC OPERATION
- Plug the AC POWER CORD into a 230V AC \~ 50Hz
- Turn the System on by sliding the Function Selector (12) to either "TUNER", "USB/SD" or "PHONO". The LCD backlight will turn on.
Mains plug should be regularly checked for any damage. If it is damaged do not operate the unit, seek advice from a qualified service technician or contact the distributor of this product via the telephone number at the back of this instruction manual.
Do not attempt to operate the unit on any other power source as this could cause damage to the unit and void your warranty.
Remarks:
If there is a malfunction due to electrostatic discharge (ESD), reset the unit by unplugging the AC CORD from the outlet, wait 30 seconds and then plug the AC CORD in again to reset to normal operation.
ACTIVATING THE REMOTE CONTROL
Remove the plastic insulator tag sticking out of the Battery Compartment of the Remote Control by pulling on it. Once the tag is removed, the Remote Control will be ready for use.
BATTERY CARE
i. If the unit is not to be used for an extended period of time, remove the battery. An old or leaking battery can cause damage to the Remote Control.
ii. Do not dispose of batteries in fire, batteries may explode or leak.
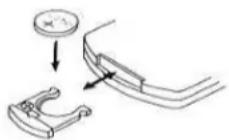
BATTERY REPLACEMENT
When the battery becomes weak, the operating distance of the Remote Control is greatly reduced and you will need to replace the Lithium battery.
-
Remove the battery compartment from bottom of the Remote Control.
-
Install 1 "CR2025" Lithium battery with the positive side facing up.
-
Replace the battery compartment.
IMPORTANT: Be sure that the battery is installed correctly. Wrong polarity may damage the Remote Control and void the warranty.
USING THE REMOTE CONTROL CORRECTLY
Note: The Remote Control is only for operating the USB and MMC Card functions.
- Point the Remote Control at the SENSOR (IR) located on the front of the System.
- The functions of the remote buttons are the same as the corresponding controls on the main unit.
- The performance of the infrared SENSOR may be degraded causing unreliable operation if there is a strong ambient light source in the same room.
● The recommended effective distance for remote operation is about 10-15 feet.
RADIO OPERATION
- Slide the FUNCTION Selector (12) to the "TUNER" position.
- Slide the BAND Selector (11) to either FM or FM ST (FM Stereo Mode).
- Rotate the TUNING CONTROL (10) until you reach the radio station you wish to listen to. The radio station frequency shows on the LCD DISPLAY.
- Adjust the sound level by rotating the VOLUME CONTROL (23).
- To turn off the radio, Slide the FUNCTION Selector (12) to the "OFF" position. The LCD DISPLAY will go "off".
FM STEREO RECEPTION
- With the BAND Selector (11) in the "FM ST" position, the FM Stereo Indicator will light up when listening to a strong station that is broadcasting in "Stereo".
- Slide the BAND Selector (11) to the FM position if the FM stereo reception is weak. The reception may improve, but the sound is now monaural (MONO).
TIPS FOR BEST RECEPTION
FM – During FM reception, always keep the FM Wire Antenna fully extended. If FM reception is weak try repositioning the FM Wire Antenna until you find the strongest FM signal.
To enhance the low frequency sound, press the BASS BOOST BUTTON (13) once (button in) to activate. Press the BASS BOOST Button (13) again (button out) to turn the Bass Boost off.
Note:
Please refer to the ON/OFF graphic on the Front Panel for correct operation of the Bass Boost function.
- Raise the Turntable Dust Cover.
- Remove the stylus protector and release the Tone Arm Clamp (6).
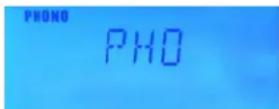
- Slide the Function Selector (12) to "PHONO".
- Place a record on the turntable, over the center spindle.
- Set the Speed Selector Switch to 33, 45 or 78 rpm according to the record you are playing. Place the included 45 RPM adaptor (2) over the center spindle when playing 45 rpm records.
- Move the Tone Arm to the beginning of the record or to the beginning of a particular track. Gently lower the Tone Arm onto the record to start playing. Adjust the Volume if needed. The Turntable will stop automatically when the record finishes.
- To stop the record before it ends, lift the Tone Arm (4) using the Cue-lever (3) and return it carefully onto the Tone Arm Clamp (6).
- Replace the stylus protector on the stylus when not in use.
NOTE:
i. Do not stop or turn the platter manually.
ii. Moving or jarring the turntable without securing the Tone arm clamp could result in damage to the Tone arm.
AUTO-STOP SWITCH OPERATION
The Auto-Stop area on some records may extend beyond the preset setting. As a result the turntable could possibly stop before the last track finishes. If you experience this during playback, set the AUTO-STOP Switch (27) to the "OFF" position. The turntable will now run to the end of the record, but will no longer stop automatically. To stop the turntable you will need to either set the Function Selector (12) to the OFF position or return the AUTO-STOP Switch (27) to the "ON" position. After the record stops, lift and return the Tone Arm (4) carefully back onto the Tone Arm Clamp (6).
IMPORTANT:
Moving or jarring the Turntable without securing the Tone Arm Clamp (6) could result in damage to the Tone Arm (4).
ENCODING RECORDS TO MP3
You can convert you favorite records into MP3 files and store them on a USB Flash Drive or SD/MMC Memory Card via the USB port (22) or SD/MMC slot (20) located on the front panel.
- Insert a USB flash drive into the USB PORT (22) or an SD/MMC Memory Card into the SD/MMC Slot (20) located on the front panel.
- Press the RECORD Button (17), "REC" and "USB" will begin to flash in the display, If a USB Flash Drive is inserted. If an SD/MMC Card is inserted then "REC" and "CARD" will flash in the display. If both USB and SD/MMC card are inserted, then Icon "SEL" will also appear and flash in the Display.
- You can use the SKIP + Button (18) or the SKIP - Button (19) to select what media you want to record to.
- Select the track to be encoded and start playing the record.
- Press the Record button to start sync encoding. The following will be displayed depending on what media you are using to store the music.
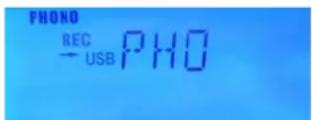
Encoding to USB
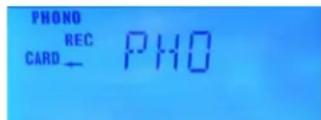
Encoding to Card
- To stop encoding press the STOP/USB/SD Button (15).
Note: To ensure the encoding is successful, remove the USB or Card a few seconds after pressing the STOP Button. - To start recording again, press the RECORD Button (17) again and follow step 2 above.
PLEASE NOTE : If you want to encode an entire side of a record and have separate MP3 files for each track, you must manually press the STOP/USB/SD Button (15) at the end of each track and then press the RECORD Button (17) again to start recording the next track. If you do not manually Stop and Start the recording process after each track, you will end up with one large MP3 file that will have all the songs from the side of the record playing one after the other.
The following tasks can be accomplished by either using the controls on the REMOTE Control or those which have similar function markings on the main unit.
This icon ⚪ indicates that a task can only be performed using the controls on the unit.
- Select the USB / CARD function mode by setting the Function selector (12) to "USB/CARD". The Display will show "USB NO" when the USB port is empty.
- Insert either a USB flash drive into the USB PORT (22) or an SD/MMC Memory Card into the SD/MMC Slot (20). Press and hold the STOP/USB/CARD Button (3) for 2 seconds to switch between USB and CARD modes if necessary.
- The total number of tracks on the USB or SD/MMC card will be displayed and playback will automatically start from the first track depending which mode you have chosen (USB or CARD).
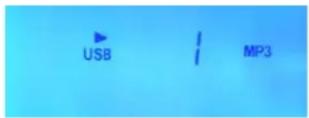
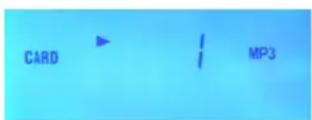
NOTE : i. Only MP3 file formats are supported.
ii. Not all brands of USB flash drives are supported and only PEN-DRIVE. iii. The Display will show "NOF" if there are no MP3 files on the USB or SD/MMC card you inserted.
- To interrupt playback, press the ▶ button (1). The track being played will flash.
- To resume playback, press the ▶Button (1) again.
- Press the DISPLAY Button (6) once then the Title, Artist and Album of the playing song if available will be displayed one by one on the LCD.
- To stop playback, briefly press the STOP button (3).
TRACK SKIP
To select a particular track, in Stop mode or during playback, press the▶▶ or◀◀ Buttons (4, 5) repeatedly until the desired track number appears on the display. The selected track will start playback automatically.
FOLDER SKIP
To select a particular folder, in Stop mode or during playback, press the ▶/◀◀ in the remote control, until the track number (first track number) of the Album appears in the Display. Playback of the first track of the selected folder will start automatically.
REPEAT 1/FOLDER/ ALL PLAYBACK
- During playback, if you want to repeat the same track, simply press the MODE (8) Button once. ‘ 🍴 ’ appears in the Display.
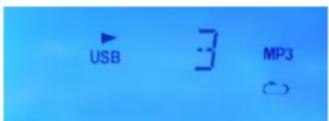
- The track will be repeated and stop until the STOP Button (3) is pressed.
- To repeat a Folder, press the MODE button twice. "FOLDER" will light up.
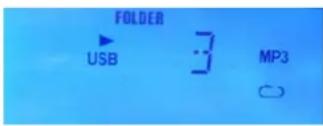
The selected Folder will be repeated and stop until the STOP Button is pressed.
- To repeat all the tracks, press the MODE Button 3 times and the Repeat All Indicator "ALL" will light up.
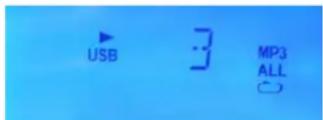
- All the tracks of the storing device will be repeated until the STOP Button is pressed.
- To cancel repeat play, press the MODE button repeatedly until all the repeat indicator disappear in the Display.
INTRO PLAY
This function enables the first 10 seconds of each track to be played.
- During playback press the MODE button four times, the Intro Indicator "INTRO" will light up.
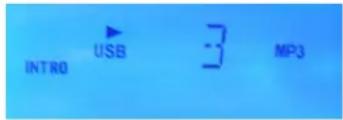
- Press the ▶ button once to start playback from the next track.
- To cancel intro play, press the MODE Button (8) twice.
RANDOM PLAY
- During playback press the MODE button five times, the Random Indicator "RADDOM" will light up.
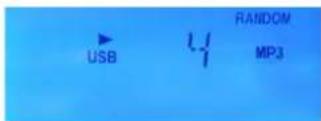
-
Press the ▶ button once. A track is selected at random and playback starts.
-
To cancel random play, press the MODE Button again. The Random Indicator 'RANDOM' disappears in the Display.
PROGRAMMED PLAY
Programmed play can only be achieved in Stop mode.
-
In stop mode, briefly press the MODE button (14) on the unit. Program Channel No. 'P1' will briefly appear. 'P' will then disappear leaving the Program Indicator, 'PROG' and '1' flash in the Display to prompt for input.
-
Press the ▶▶ or ◀◀ Buttons (4, 5) to select your desired track to be stored in the program. For example the first selection is track no.5.
-
Press the MODE button (14) to confirmed when track No.5 flashed in the Display.
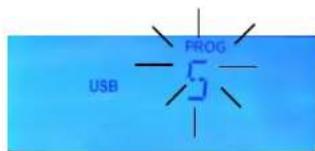
The first program selection is now stored in the program memory.
The Program Channel No. 'P 2' will appear briefly. 'P' will disappear and 2 will revert to 5, i.e. the first selected program and flash together with 'PROG' to prompt for another input.
-
Repeat points 2 and 3 to enter the desired tracks up to max 32 selections.
-
Press the ▶ button once to start playback in your programmed sequence.
-
To clear the program memory, while playing press the Stop button 2 times or select TUNER, PHONO function or turn the System off.
COPYING FILES BETWEEN USB AND CARD
The files stored on your USB flash drive or on the SD/MMC card can be copied to each other. Please follow the instructions below to copy the files between the USB port and the Card slot.
- Insert your USB flash drive into the USB PORT (22) and the SD/MMC Memory Card into the SD/MMC Slot (20).
-
Select the USB / CARD function mode by setting the Function selector (12) to "USB/CARD". The total number of tracks on the USB will be displayed and playback will automatically start from the first track.
-
Press the STOP/USB/SD Button once to stop the playback. Copy of the USB files to the Card is now ready to proceed any time. If you want to copy the files from the Card to the USB, you need to enter the Card playback Stop mode first then proceed to Step 4 below for copying.
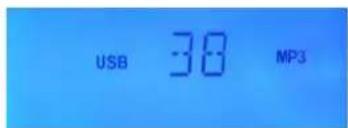
USB Playback Stop Mode
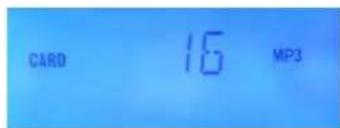
Card Playback Stop Mode
- To start copying briefly press the RECORD Button (2) once. Flashing "CHE" will appear briefly and disappear in the Display and copying will then start right away.
Note: "CHE" means "CHECKING". Every file to be copied will be checked before copying starts.
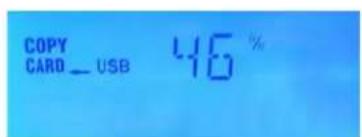
Copying USB Files to Card
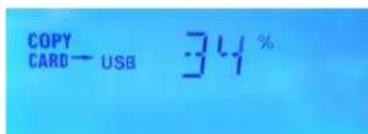
Copying Card Files to USB
- To stop copying, briefly press the STOP Button once.
DELETING FILES
- With the USB or Card in the playback stop mode, press ▶▶ or ◀◀ Buttons to select the track to delete, for example track 5 is selected.
- When the desired track appears in the Display press and hold the RECORD Button(17) to confirm. 'DEL' will flash few times and then disappear. The chosen track, '005', will appear and blink in the Display to prompt for confirmation. In case you want to cancel the delete function just briefly press the STOP Button.
\ |
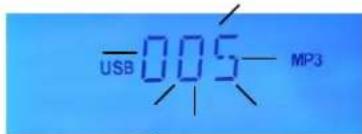
- To confirm, briefly press the RECORD button once. 'DEL' will appear steadily in the Display for few seconds and then the Display will resume to USB/Card playback stop mode with the total track number deducted by 1.
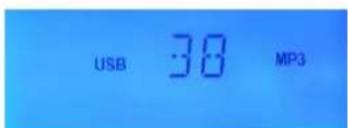
Original 38 Files
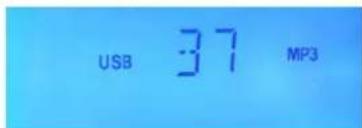
After Deleting Track 5
- Repeat 1-3 above to delete more tracks as desired.
LINE OUT OPERATION (OPTIONAL)
For better playback sound, you can connect the unit to an external Audio Amplifier via the RCA LINE OUT JACKS located at the back panel. Please proceed as following:
- Connect the "L" & "R" LINE OUT Jacks and the AUX IN of your Audio Amplifier. (Connection cable is not included).
- Select the music source by setting the Function Selector (12) to "PHONO", "USB/SD" or "TUNER" as desired.
- Turn on the external Amplifier.
- Sound will then come out from the system's built-in speakers and the external Amplifier's speakers simultaneously.
- Set the INTERNAL SPEAKER SELECTOR to "OFF" and adjust the sound level using the VOLUME CONTROL on the external Amplifier as desired.
- Turn the System and the external Amplifier off when you have finished listening.
- Unplug the connection cable.
USING HEADPHONES (NOT INCLUDED)
This System accepts stereo headphones with a 3.5mm plug and an impedance of 8 ohms or greater.
Inserting the plug of your headphones into the Headphone jack (21) will enable you to listen privately. When using headphones, the speakers will be disconnected automatically.
READ THIS IMPORTANT INFORMATION BEFORE USING YOUR HEADPHONES
- Avoid extended play at very high volume as it may impair your hearing.
- If you experience ringing in your ears, reduce the volume or shut off your unit.
- Keep the volume at a reasonable level even if your headset is an open-air type designed to allow you to hear outside sounds. Please note that excessively high volume may still block outside sounds.
NOTE:
We recommend that you reduce the volume control to a lower level before putting on the headphones. After putting on the headphones, gradually increase the volume to a comfortable listening level.
STYLUS REPLACEMENT
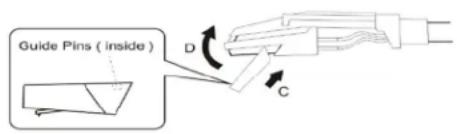
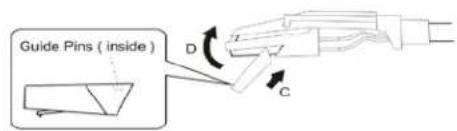
PLEASE REFER TO THE DIAGRAM BELOW TO REPLACE THE STYLUS. NO ADDITIONAL STYLUS IS SUPPLIED WITH THE SYSTEM.
(1) Loose the red part stylus by screw driver and take out as diagram A and B.
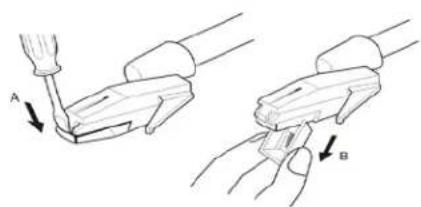
natural_image
Illustration of two hands holding a tool, labeled A and B, with no text or symbols present.(2) Replace the new stylus as C and D diagram (not supply).
CARE AND MAINTENANCE
- Clean your unit with a damp (never wet) cloth. Solvent or detergent should never be used.
- Avoid leaving your unit in direct sunlight or in hot, humid or dusty places.
- Keep your unit away from heating appliances and sources of electrical noise such as fluorescent lamps or motors.
- Always clean the outside of the cabinet thoroughly if it becomes wet with moisture or water splashes. This will help to prevent the internal parts of the unit from entry of water and possible moisture damage.
SPECIFICATIONS
Power supply
AC 230V \~ 50Hz
Radio Frequency coverage
FM: 87.5 - 108MHz
TROUBLESHOOTING GUIDE
| PROBLEM | POSSIBLE CAUSE | REMEDY |
| The unit will not play | The unit is disconnected from the AC outlet | Connect to an outlet. |
| The AC outlet has no power | Try the unit on another outlet | |
| Poor FM reception | Wak signal on distant stations | Rotate the cabinet for better reception |
| Unit ON but there is no volume | The volume Control has been turned all the way down | Turn the Volume control to a higher output |
| Headphones are inserted into the Headphone jack | Pull the headphones out | |
| The Internal Speaker Selector has been set to “OFF” | Reset the Internal Speaker Selector to “ON” |
According to Waste of Electrical and Electronic Equipment (WEEE) directive, WEEE should be separately collected and treated. If at any time in future you need to dispose of this product please do NOT dispose of this product with household waste. Please send this product to WEEE collecting points where available.
In order to fulfill ruling UNE EN-60335, we indicate that if the flexible wire is damaged, it can only be substituted by a technical service recognized by NEVIR, S.A., as per special tooling is required
- ELIMINAR LOS ARCHIVOS
- LOCATION OF CONTROLS
- REMOTE CONTROL UNIT
- IMPORTANT NOTES
- PROTECT YOUR FURNITURE!!
- POWER SOURCE
- AC OPERATION
- Remarks:
- ACTIVATING THE REMOTE CONTROL
- BATTERY CARE
- BATTERY REPLACEMENT
- USING THE REMOTE CONTROL CORRECTLY
- RADIO OPERATION
- FM STEREO RECEPTION
- TIPS FOR BEST RECEPTION
- Note:
- AUTO-STOP SWITCH OPERATION
- IMPORTANT:
- ENCODING RECORDS TO MP3
- TRACK SKIP
- FOLDER SKIP
- REPEAT 1/FOLDER/ ALL PLAYBACK
- INTRO PLAY
- RANDOM PLAY
- PROGRAMMED PLAY
- COPYING FILES BETWEEN USB AND CARD
- DELETING FILES
- LINE OUT OPERATION (OPTIONAL)
- USING HEADPHONES (NOT INCLUDED)
- READ THIS IMPORTANT INFORMATION BEFORE USING YOUR HEADPHONES
- STYLUS REPLACEMENT
- CARE AND MAINTENANCE
- TROUBLESHOOTING GUIDE
Brand : NEVIR
Model : NVR-800 VMUC
Category : DJ Equipment