
CL5716IM - KVM switch ATEN - Free user manual and instructions
Find the device manual for free CL5716IM ATEN in PDF.


| Product Type | KVM Switch with Integrated LCD Screen |
| Brand | ATEN |
| Model | CL5716IM |
| Number of Ports | 16 |
| Screen Size | 17 inches (diagonal) |
| Maximum Resolution | 1280 x 1024 pixels |
| Power Supply | 100-240 VAC, 50-60 Hz |
| Power Consumption | 120 W (max) |
| Dimensions (W x D x H) | 480 x 448 x 43.5 mm |
| Weight | 12 kg |
| Keyboard and Mouse | Integrated Touchpad and Keyboard |
| Connection Type | VGA, USB, PS/2 (via KVM cables) |
| Main Features | OSD switching, auto-scan, multi-platform support (PC, Mac, Sun) |
| Security | OSD Password Lock |
| Maintenance and Cleaning | Clean the screen and casing with a soft, dry cloth; avoid abrasive products |
| Spare Parts and Repairability | Parts available from ATEN after-sales service; repair by qualified technician |
| Warranty | 2 years (depending on country) |
| Operating Temperature | 0 to 40 °C |
| Operating Humidity | 0 to 80% RH (non-condensing) |
Frequently Asked Questions - CL5716IM ATEN
User questions about CL5716IM ATEN
0 question about this device. Answer the ones you know or ask your own.
Ask a new question about this device
Download the instructions for your KVM switch in PDF format for free! Find your manual CL5716IM - ATEN and take your electronic device back in hand. On this page are published all the documents necessary for the use of your device. CL5716IM by ATEN.
USER MANUAL CL5716IM ATEN
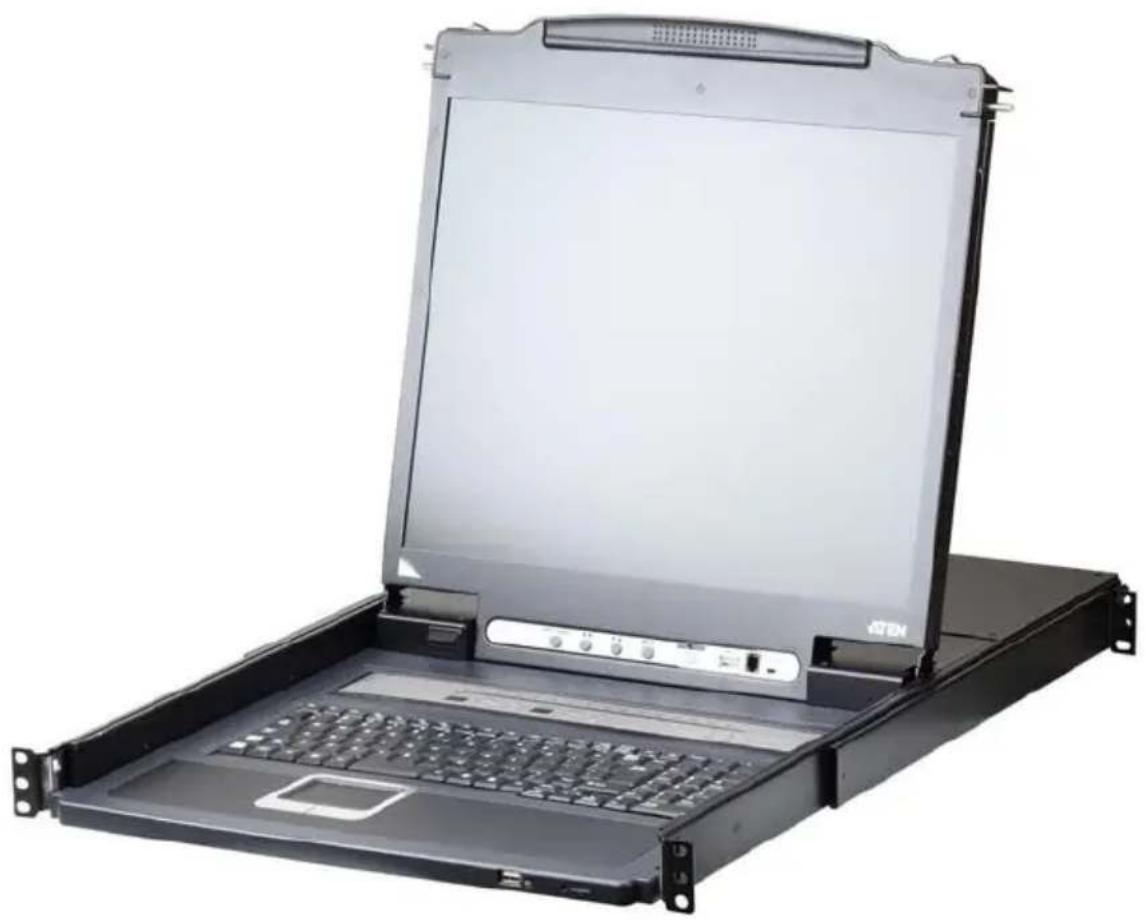
LCD KVM over IP Switch
CL5708I / CL5716I
User Manual
natural_image
Laptop-mounted server rack with open panel and keyboard, no visible text or symbolsEMC Information
FEDERAL COMMUNICATIONS COMMISSION INTERFERENCE
STATEMENT: This equipment has been tested and found to comply with the limits for a Class A digital device, pursuant to Part 15 of the FCC Rules. These limits are designed to provide reasonable protection against harmful interference when the equipment is operated in a commercial environment.
This equipment generates, uses, and can radiate radio frequency energy and, if not installed and used in accordance with the instruction manual, may cause harmful interference to radio communications. Operation of this equipment in a residential area is likely to cause harmful interference in which case the user will be required to correct the interference at their own expense.
This device complies with Part 15 of the FCC Rules. Operation is subject to the following two conditions: (1) this device may not cause harmful interference, and (2) this device must accept any interference received, including interference that may cause undesired operation.
FCC Caution:
Any changes or modifications not expressly approved by the party responsible for compliance could void the user's authority to operate this equipment.
Warning: Operation of this equipment in a residential environment could cause radio interference
Warning: This equipment is compliant with Class A of CISPR 32. In a residential environment this equipment may cause radio interference.
KCC Statement
This product is RoHS compliant.

User Information
Online Registration
Be sure to register your product at our online support center:
International http://eservice.aten.com
Telephone Support
For telephone support, call this number:
| International 886-2-86 | 92-6959 |
| China 86-400-810-0-8 | 10 |
| Japan 81-3-5615-5811 | |
| Korea 82-2-467-6789 | |
| North America 1-888-999-ATEN ext 4988 | |
| United Kingdom 44-8-4481-58923 | |
User Notice
All information, documentation, and specifications contained in this manual are subject to change without prior notification by the manufacturer. The manufacturer makes no representations or warranties, either expressed or implied, with respect to the contents hereof and specifically disclaims any warranties as to merchantability or fitness for any particular purpose. Any of the manufacturer's software described in this manual is sold or licensed as is. Should the programs prove defective following their purchase, the buyer (and not the manufacturer, its distributor, or its dealer), assumes the entire cost of all necessary servicing, repair and any incidental or consequential damages resulting from any defect in the software.
The manufacturer of this system is not responsible for any radio and/or TV interference caused by unauthorized modifications to this device. It is the responsibility of the user to correct such interference.
The manufacturer is not responsible for any damage incurred in the operation of this system if the correct operational voltage setting was not selected prior to operation. PLEASE VERIFY THAT THE VOLTAGE SETTING IS CORRECT BEFORE USE.
Package Contents
Basic Package
The basic CL5708I / CL5716I package consists of:
- 1 CL5708I / CL5716I LCD KVM over IP Switch with standard Rack Mounting Kit
◆ 2 Custom KVM Cable Sets
◆ 1 5-in-1 USB / PS/2 Console Cable
◆ 1 Firmware Upgrade Cable
♦ 1 Power Cord
◆ 1 User Instructions*
Optional Equipment
Depending on any optional equipment that you may have purchased, one of the following may be included in your package:
♦ Standard Rack Mounting Kit - Long
◆ Easy-Installation Rack Mounting Kit - Short
◆ Easy-Installation Rack Mounting Kit - Long
Check to make sure that all the components are present and that nothing got damaged in shipping. If you encounter a problem, contact your dealer.
Read this manual thoroughly and follow the installation and operation procedures carefully to prevent any damage to the unit, and/or any of the devices connected to it.
Contents
EMC Information ii
RoHS. ii
User Information ....iii
Online Registration .....iii
Telephone Support ....iii
User Notice ....iii
Package Contents. iv
Basic Package.... iv
Optional Equipment...... iv
About this Manual . . . . . . . . . . . . . . . . . . . . . . . . . . . . . . . . . . . . . . . . . . . . . . . . . . . . . . . . . . . . . . . . . . . . . . . . . xiii
Conventions ...... xv
Terminology....xvi
Product Information....xvi
Chapter 1.
Introduction
Overview....1
Features 3
Requirements 6
Remote User Computers....6
6
External Console....6
Server 6
Cables 7
Operating Systems 7
Components 9
Front View 9
Rear View ....11
Chapter 2.
Hardware Setup
Overview....13
Before you Begin. 13
Standard Rack Mounting....14
Grounding 15
Single Level Installation 16
Cabling Diagrams .....18
Daisy Chain Installations....19
Chapter 3.
Basic Operation
Opening the Console 21
Closing the Console .22
Operating Precautions 23
Powering Off and Restarting. 24
LCD OSD Configuration 25
The LCD Buttons....25
LCD Adjustment Settings 26
Hot Plugging 27
Changing Station Positions....27
Hot Plugging KVM Ports 27
Hot Plugging External Console Ports 27
Port Selection 28
Manual Port Switching 28
Port ID Numbering 28
USB Peripheral Devices 29
Chapter 4.
OSD Operation
OSD Overview 31
Manufacturing Number 31
OSD Login 31
OSD Hotkey 31
OSD Main Screen. 32
OSD Main Screen Headings....33
OSD Navigation 33
OSD Functions 34
F1: GOTO 34
F2: LIST 35
F3: SET....36
F4: ADM 38
F5: SKP....41
F6: BRC 42
F7: SCAN 43
F8: LOUT 43
Chapter 5.
Keyboard Port Operation
Hotkey Port Control 45
Invoke Hotkey Mode....46
Local Console 46
Number Lock and Minus Keys 46
Control and F12 Keys 46
Remote Sessions 47
Scroll Lock. 47
Control. 47
Select the Active Port 48
Auto Scan Mode 49
Invoking Auto Scan: 49
Skip Mode....50
Computer Keyboard / Mouse Reset 51
Hotkey Beeper Control 51
Quick Hotkey Control ....52
OSD Hotkey Control ....52
Port OS Control....53
Restore Default Values....53
Hotkey Summary Table....54
Chapter 6.
Logging In
Overview....55
The Windows Client AP Connection Screen....58
Connecting – Windows Client AP .....59
The File Menu 60
Java Client AP Login....61
The Java Client AP Connection Screen .....62
Connecting – Java Client AP....63
Chapter 7.
The User Interface
The Web Browser Main Page ....65
Page Components....66
The Tab Bar 67
The AP GUI Main Page.....68
The Control Panel....70
WinClient Control Panel 70
WinClient Control Panel Functions .....72
Macros. 75
Hotkeys 75
Video Settings 81
The Message Board....86
Button Bar 86
Message Display Panel....87
Compose Panel ....87
User List Panel 87
Zoom 88
The On-Screen Keyboard 89
Changing Languages....89
Expanded Keyboard .90
Mouse Pointer Type 91
Mouse DynaSync Mode 92
Automatic Mouse Synchronization (DynaSync)....92
Manual Mouse Synchronization....93
Control Panel Configuration 94
The Java Control Panel....96
Chapter 8.
Port Access
Overview....97
Browser GUI 97
AP GUI 97
The Sidebar 99
The Sidebar Tree Structure. 99
Scan 100
Array 100
Filter 101
Sidebar Utilities 102
Port/Outlet Naming 103
KVM Devices and Ports – Connections Page 105
Device Level 105
Port Level 106
Status 106
Associated Links 106
Favorites....107
Adding a Favorite 107
Modifying a Favorite 109
User Preferences 110
Sessions 112
Access 113
Port Level Browser GUI Interface 113
Port Level AP GUI Interface 115
Saving Changes 116
Port Configuration....117
Device Level 117
Port Level 118
Port Properties 118
Chapter 9.
User Management
Overview....121
Browser GUI 121
AP GUI 121
Users 123
Adding Users. 123
Modifying User Accounts 127
Deleting User Accounts. 127
Device Assignment. 128
Assigning Device Permissions From the User's Notebook.....128
Filters. 130
Chapter 10.
Device Management
KVM Devices....131
Device Information ....131
Operating Mode....132
Network 133
Service Ports 134
Network Transfer Rate....136
Finishing Up. 136
ANMS 137
Event Destination....137
CC Management Settings....140
Security 141
Login Failures ....141
Date/Time 152
Time Zone 152
Network Time....153
Chapter 11.
Log
Overview....155
Browser GUI 155
AP GUI 155
Log Information....156
Filter 156
Chapter 12.
Maintenance
Overview....159
Browser GUI ....159
AP GUI 159
Firmware Upgrade 160
Backup/Restore....161
Backup 161
Restore 162
Ping Host....163
System Operation 164
Clear Port Names:....164
Restore Default Values: 164
Reset on exit: 164
Chapter 13.
Download
Overview....165
Chapter 14.
Port Operation
Overview....167
Connecting to a Port .....169
The Port Toolbar....170
The Toolbar Icons....171
Toolbar Hotkey Port Switching 172
Auto Scanning....172
Skip Mode 173
Recalling the Port Access Page 174
GUI Hotkey Summary Table....174
Panel Array Mode....175
Panel Array Toolbar 176
Chapter 15.
The Log Server
Installation....177
Starting Up 178
The Menu Bar....179
Configure. 179
Events. 180
Search: 180
Maintenance: 182
Options 183
Help. 183
The Log Server Main Screen 184
Overview....184
The List Panel....185
The Event Panel 185
Chapter 16.
Keyboard Emulation
Mac Keyboard....187
Sun Keyboard....188
Chapter 17.
The Firmware Upgrade Utility
Introduction. 189
Downloading the Firmware Upgrade Package ..... 189
Preparation 190
Starting the Upgrade....191
Upgrade Succeeded....193
Upgrade Failed 193
Firmware Upgrade Recovery 194
Appendix
Safety Instructions 195
General 195
Rack Mounting 197
Technical Support....202
International....202
North America 202
Specifications....203
Connection Tables 206
CL5708I to Compatible 8-Port Switches . . . . . . . . . . . . . . . . . . . . . . . . . . . . . . . . . . . . . . . . . . . . . . . . . . . . . . . . . . . . . . . . . . . 206
CL5708I to Compatible 16-Port Switches .....206
CL5716l to Compatible 8-Port Switches . . . . . . . . . . . . . . . . . . . . . . . . . . . . . . . . . . . . . . . . . . . . . . . . . . . . . . . . . . . . . . . . . . 207
CL5716I to Compatible 16-Port Switches . . . . . . . . . . . . . . . . . . . . . . . . . . . . . . . . . . . . . . . . . . . . . . . . . . . . . . . . . . . . . . . . . . . . 207
Supported KVM Switches .....208
Troubleshooting .....209
General Operation. 209
Mouse Problems 211
Web Browser. 212
The WinClient ActiveX Viewer and the WinClient AP .....213
The Java Applet and Java Client AP. 214
Sun Systems 215
Mac Systems. 215
The Log Server 216
Panel Array Mode .....216
IP Address Determination .....219
The Local Console 219
IP Installer 219
Browser 220
IPv6. 221
Link Local IPv6 Address .....221
IPv6 Stateless Autoconfiguration .....222
Port Forwarding. 223
Additional Mouse Synchronization Procedures....224
Windows:....224
Sun / Linux 225
Additional Video Resolution Procedures....226
Trusted Certificates....227
Overview 227
Installing the Certificate. 228
Certificate Trusted. 229
Self-Signed Private Certificates .....231
Examples. 231
Importing the Files....231
Clear Login Information....232
OSD Factory Default Settings. 233
Optional Rack Mounting .....234
Standard - Long. 234
Easy Installation. 234
Troubleshooting .237
Overview....237
Keyboard Invocation Keys 238
About SPHD Connectors 238
Limited Hardware Warranty 239
What is covered by the Limited Hardware Warranty....239
About this Manual
This user manual is provided to help you get the most from your CL5708I / CL5716I system. It covers all aspects of installation, configuration and operation. An overview of the information found in the manual is provided below.
Chapter 1, Introduction, introduces you to the CL5708I / CL5716I system. Its purpose, features and benefits are presented, and its front and back panel components are described.
Chapter 2, Hardware Setup, describes how to set up your installation. The necessary steps from a basic single stage hookup to a complete 32-switch daisy chained operation are provided.
Chapter 3, Basic Operation, explains the fundamental concepts involved in operating the CL5708I / CL5716I.
Chapter 4, OSD Operation, provides a complete description of the CL5708I / CL5716I's on-screen display (OSD), and how to work with it.
Chapter 5, Keyboard Port Operation, details all of the concepts and procedures involved in the hotkey operation of your CL5708I / CL5716I installation.
Chapter 6, Logging In, describes how to log in to the KVM over IP switch with each of the available access methods: from a local console; an Internet browser; a stand-alone Windows application (AP) program; and a stand-alone Java application (AP) program.
Chapter 7, The User Interface, describes the layout and explains the components of the KVM over IP switch user interface.
Chapter 8, Port Access, describes the Port Access page and how to configure the options it provides regarding port and power outlet manipulation.
Chapter 9, User Management, shows super administrators and administrators how to create, modify, and delete users and assign attributes to them.
Chapter 10, Device Management, shows super administrators how to configure and control overall KVM over IP switch operations.
Chapter 11, Log, explains how to view, clear and export event log information, and how to set event notification settings for the KVM over IP switch.
Chapter 12, Maintenance, explains how to upgrade the KVM over IP switch firmware, as well as the firmware of the KVM Adapter Cables used to connect its ports to the installed devices.
Chapter 13, Download, describes how to download stand-alone AP versions of the Win Client, the Java Client, and the Log Server programs.
Chapter 14, Port Operation, provides detailed information on accessing and operating the devices connected to the KVM over IP switch's ports.
Chapter 15, The Log Server, explains how to install and configure the Log Server.
Chapter 16, Keyboard Emulation, provides tables that list the PC to Mac and PC to Sun keyboard emulation mappings.
Chapter 17, The Firmware Upgrade Utility, explains how to use this utility to upgrade the CL5708I / CL5716I's firmware with the latest available versions.
An Appendix, provides specifications and other technical information regarding the CL5708I / CL5716I.
Conventions
This manual uses the following conventions:
Monospaced Indicates text that you should key in.
[ ] Indicates keys you should press. For example, [Enter] means to press the Enter key. If keys need to be chorded, they appear together in the same bracket with a plus sign between them: [Ctrl+Alt].
- Numbered lists represent procedures with sequential steps.
◆ Bullet lists provide information, but do not involve sequential steps.
→ Indicates selecting the option (on a menu or dialog box, for example), that comes next. For example, Start → Run means to open the Start menu, and then select Run.

Indicates critical information.
Terminology
Throughout the manual we make reference to the terms Local and Remote in regard to the operators and equipment deployed in a KVM over IP switch installation. Depending on the point of view, users and servers can be considered Local under some circumstances, and Remote under others:
♦ Switch’s Point of View
- Remote users – We refer to a user as a Remote user when we think of him as someone who logs into the switch over the net from a location that is remote from the switch.
- Local Console – The keyboard, mouse and monitor connected directly to the switch.
- Servers – The servers attached to the switch via KVM Adapter Cables.
- User's Point of View
- Local client users – We refer to a user as a Local client user when we think of him as sitting at his computer performing operations on the servers connected to the switch that is remote from him.
- Remote servers – We refer to the servers as Remote servers when we think of them from the Local Client User’s point of view – since, although they are locally attached to the switch, they are remote from him.
When we describe the overall system architecture, we are usually speaking from the switch's point of view – in which case the users are considered remote. When we speak about operations users perform via the browser, viewers, and AP programs over the net, we are usually speaking from the user's point of view – in which case the switch and the servers connected to it are considered remote.
Product Information
For information about all ATEN products and how they can help you connect without limits, visit ATEN on the Web or contact an ATEN Authorized Reseller. Visit ATEN on the Web for a list of locations and telephone numbers:
| International http://www.aten.com |
| North America http://www.aten-usa.com |
Overview
The CL5708I / CL5716I Slideaway™ LCD KVM over IP Switch is an integrated LCD console and keyboard, video, and mouse (KVM) switch that offers secure access to 8 or 16 attached computers and mounts in only 1U of rack space. It features an independently retractable 17" or 19" LED-backlit LCD monitor and keyboard with built-in touchpad. An extra console port is provided on the rear panel to manage the LCD KVM switch from an external console (monitor, keyboard, and mouse) up to 20 meters away. For added convenience it also supports an external USB mouse.
The CL5708I / CL5716I supports both PS/2 and USB keyboards and mice for the connected computers, and the CL5708I / CL5716I supports USB peripheral devices to be used with the attached computers. A single CL5708I / CL5716I can control up to 8 or 16 computers. As many as 15 additional compatible KVM switches can be daisy chained to the CL5708I / CL5716I, so that up to 128 or 256 computers can all be controlled from a single keyboard, monitor, and mouse console (see the Appendix for a list of compatible ATEN switches).
The CL5708I / CL5716I is built on a modular design. The KVM section can be detached from the switch section for convenient maintenance and repair.
There are four models in the series as outlined in the following table:
| Model LCD | Panel KVM Ports |
| CL5708IM 17" 8 | |
| CL5716IM 17" 16 | |
| CL5708IN 19" 8 | |
| CL5716IN 19" 16 |
Your CL5708I / CL5716I investment is protected by an included firmware upgrade utility. You can stay current with the latest functionality improvements by downloading firmware update files from our website as they become available, and using the utility to quickly and conveniently perform the upgrade.
Setup is fast and easy: plugging cables into their appropriate ports is all that is entailed. Because the CL5708I / CL5716I intercepts keyboard input directly,
there is no software to configure, no need to get involved in complex installation routines, nor any need to be concerned with incompatibility problems. Access to any computer connected to the installation is easily accomplished either by entering hotkey combinations from the keyboard, front panel pushbuttons, or by means of a powerful, keyboard & mouse-driven OSD (on-screen display) menu system. A convenient Auto Scan feature also permits automatic scanning and monitoring of the activities of all computers running on the installation one by one.
There is no better way to save time and money than with a CL5708I / CL5716I installation. By using the CL5708I / CL5716I with its sliding LCD console to manage your installation, you: eliminate the expense of having to purchase a separate keyboard, monitor, and mouse for each computer; save all the space those extra components would take up; save the space that a keyboard, monitor, and mouse would take with a standard KVM switch; save on energy costs; and eliminate the inconvenience and wasted effort involved in constantly moving from one computer to another.
Features
- Exclusive LED illumination light - designed by ATEN to illuminate the keyboard and touchpad to allow visibility in low-light conditions
- Integrated KVM console with 17" or 19" LED-backlit LCD in a Slideaway™ housing
- Space saving technology – up to two consoles (one bus) control up to 8 or 16 computers
◆ One bus for remote KVM over IP access - Daisy chain up to 15 additional units – control up to 128 (CL5708I) or 256 (CL5716I) computers from a single console ^1
- Easy computer selection via pushbuttons, Hotkey Mode, OSD (On Screen Display), and Browser-based GUI
- Dual Interface – supports computers with PS/2 or USB keyboards and mice
- USB port allows each computer to access USB peripherals ^2
- Multiplatform support – Windows, Linux, Mac, and Sun
- Multi-browser support (IE, Mozilla, Firefox, Safari, Opera, Netscape)
◆ Supports multimedia USB keyboards for Windows, Mac and Sun - Auto PS/2 and USB interface detection
- Keyboard and mouse emulation (PS/2 and USB) for smooth switching and simultaneous booting of multiple computers even when the console focus is elsewhere
- Superior video quality – supports resolutions up to 1280 x 1024 @ 75 Hz; DDC2B for the local console; up to 1920 x 1200 @ 60 Hz / 24 bit color depth for remote sessions
- No software required – convenient computer selection via keyboard & mouse-driven, intuitive OSD (on-screen display) menus, front panel pushbuttons, and hotkeys
- Auto-senses station's position on daisy chained installations; no need for manual dip switch setting; front panel LED indicates station's position
-
Two level password security – authorized users view and control computers
-
External (Remote) authentication support: RADIUS, LDAP, LDAPS, MS Active Directory
IPv6 capable
◆ Support for IP/MAC Filter
◆ Local and remote access logged and authenticated - Secure keyboard/mouse/video transmission via RC4 128 bit encryption
- Supports TLS 1.2 data encryption and RSA 2048 bit certificates for secure user logins from a browser
- Auto Scan mode enables continuous monitoring of user-selected computers
♦ Up to 32 concurrent logins - Multilanguage web UI support featuring a tree-structured local and remote OSD
◆ Backup and restore configuration and user account settings - Broadcast support – commands from the keyboard can be broadcast to all available computers on the installation
- Hot pluggable – add or remove computers without having to power down the switch
♦ Beeper on/off via hotkey and OSD - Firmware upgrades to all chained KVM switches (CS1708A / CS1716A) at the same time via the daisy chain cable
- Extra console port – manage computers from an external console (monitor, USB or PS/2 keyboard and mouse)
◆ Supports external USB mouse - Conveniently located station and port selectors, each with two 7-segment LED displays to quickly switch to target computers
♦ Dedicated Hotkey mode and OSD Invocation Keys reduce the number of keystrokes and provide quick access to these functions
♦ OSD tree structure makes finding and managing computers easy - Console lock – enables the console drawer to remain securely locked away when not in use
♦ OSD port list automatically expands when new stations are added -
Security – Administrator/User password authorization for enhanced security protection; Administrator access rights synchronized between master and slave stations
♦ OSD screen automatically adjusts to resolution changes -
Two types of logout: manual and timed
- Slideaway ^TM housing is slightly less than 1U with top and bottom clearance for smooth operation in 1U of rack space
- DDC emulation – video settings of each computer are automatically adjusted for optimal output to the monitor
♦ Standard 105-key keyboard
◆ Keyboard status restored when switching computers
♦ Keyboard language supports English (US), English (UK), French, German, German (Swiss), Greek, Hungarian, Italian, Japanese, Korean, Russian, Spanish, Swedish and Traditional Chinese
Requirements
Remote User Computers
Remote user computers (also referred to as client computers) are the ones the users log into the switch with from remote locations over the Internet (see Terminology, page xvi). The following equipment must be installed on these computers:
- For best results we recommend computers with at least a P III 1 GHz processor, with their screen resolution set to 1024 x 768.
IE8 or above web browser - Browsers must support TLS 1.2 encryption.
- For best results, a network transfer speed of at least 512kbps is recommended.
- For the browser-based WinClient ActiveX Viewer, DirectX 8 must be present, and at least 150MB of memory must be available after installation.
- For the browser-based Java Client Viewer the latest version of the Java Runtime Environment (JRE) must be installed, and at least 205MB of memory must be available after installation.
- For the Windows Client AP, DirectX 8 must be present, and at least 90MB of memory must be available after installation.
- For the Java Client AP, the latest version of the Java Runtime Environment (JRE) must be installed, and at least 145MB of memory must be available after installation.
- For the Log Server, you must have the Microsoft Jet OLEDB 4.0 or higher driver installed.
External Console
The following hardware components are required for the external console:
- A VGA, SVGA, or multisync monitor capable of displaying the highest resolution provided by any computer in the installation.
◆ A USB or PS/2 keyboard and mouse
Server
The following equipment must be installed on each server:
- A VGA, SVGA, or multisync video graphics card with an HDB-15 port.
Note: The integrated LCD monitor's maximum resolution is 1280 x 1024 @ 75 Hz. Make sure that none of the computer resolution settings exceed the LCD monitor's maximum resolution.
◆ PS/2 mouse and keyboard ports (6-pin Mini-DIN), or at least one USB port.
- Direct support Sun USB systems; or, for Sun legacy systems, an ATEN CV130A Sun Console Converter.
Cables
Substandard cables may damage the connected devices or degrade overall performance. For optimum signal integrity and to simplify the layout, we strongly recommend that you use the high quality CS Custom Cable sets described below:
| Function Length Part Number | |||
| KVM switch to KVM switch (Daisy chaining) | 0.6 m | 2L-1700 | |
| 1.8 m | 2L-1701 | ||
| 3 m | 2L-1703 | ||
| 5 m | 2L-1705 | ||
| 15 m | 2L-1715 | ||
| KVM switch to computer PS/2 1.2 m | 2L-5201P | ||
| 1.8 m | 2L-5202P | ||
| 3.0 m | 2L-5203P | ||
| 6.0 m | 2L-5206P | ||
| 1.8 m | 2L-5702P | ||
| USB 1.2 m | 2L-5201U | ||
| 1.8 m | 2L-5202U | ||
| 3.0 m | 2L-5203U | ||
| 5.0 m | 2L-5205U | ||
Operating Systems
Supported operating systems are shown in the table, below:
| OS Version | ||
| Windows 2000 and higher | ||
| Linux RedHat | 7.1 and higher | |
| SuSE 9.0 and higher | ||
| Mandriva (Mandrake) | 9.0 and higher | |
| UNIX AIX 4.3 | and higher | |
| FreeBSD 4.2 and higher | ||
| Sun Solaris 8 and higher | ||
| Novell Netware | 5.0 and higher | |
| Mac OS 9 and higher | ||
| DOS 6.22 | ||
Components
Front View
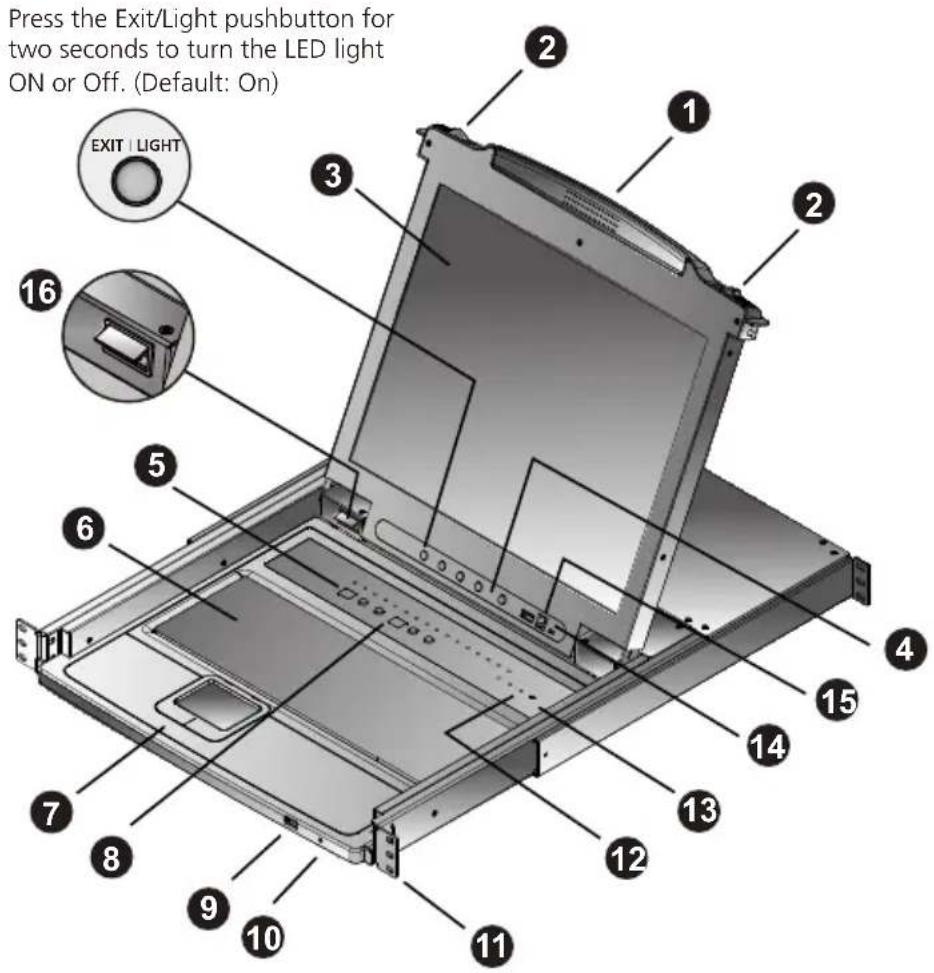
Note: The CL5716I is pictured in the diagrams of this chapter. However, the CL5708I is the same as the CL5716I, except that it has 8 KVM ports.
| No. Component Description | |
| 1 Handle Pull to slide the KVM module out; push to slide the module in (see item 2 in this table). | |
| 2 Slide Release In order to slide the console out, you must first release it by sliding these tabs to the inside. See page 21 for details on sliding the console in and out. | |
| 3 LCD Display After sliding the KVM module out, flip up the cover to access the LCD monitor. | |
| 4 LCD Controls The LCD On/Off switch is located here, as well as buttons to control the position and picture settings of the LCD display. See page 25 for details. | |
| 5 Port LEDs | An ON LINE LED lights to indicate that the computer attached to its corresponding port is up and running. |
| 6 Keyboard Standard 105-key keyboard | |
| 7 Touchpad Standard mouse touchpad | |
| 8 Station/Port Switches | Press the UP or DOWN buttons for the Port ID and Station ID to bring the KVM focus to the computer attached to the corresponding port. See Manual Port Switching, page 28. |
| 9 External Mouse Port | A USB mouse port is provided for users who prefer to use an external mouse. |
| 10 Power LED Lights to indicate that the unit is receiving power. | |
| 11 Rack Mounting Brackets | The rack mount brackets located at each corner of the unit secure the chassis to a system rack. |
| 12 Lock LEDs Num Lock, Caps Lock, Scroll Lock LEDs are located here. | |
| 13 Reset Switch | Located to the right of the Lock LEDs. Press this recessed switch in with a small object to perform a system reset. |
| 14 Firmware Upgrade Section | ◆ Firmware Upgrade Port: The Firmware Upgrade Cable that transfers the firmware upgrade data from the administrator's computer to the CL5708I / CL5716I plugs into this RJ-11 connector.◆ Firmware Upgrade Switch: During normal operation this switch should be in the NORMAL position. (See The Firmware Upgrade Utility, page 189 for firmware upgrading details.) |
| 15 USB Port | The USB port is available to connect a USB 1.1 peripheral device (flash drive, CD-ROM drive, etc.) to the switch. |
| 16 LED Illumination Light | Press the Exit/Light pushbutton for two seconds to turn the LED light ON or Off. (Default: On) |
Rear View
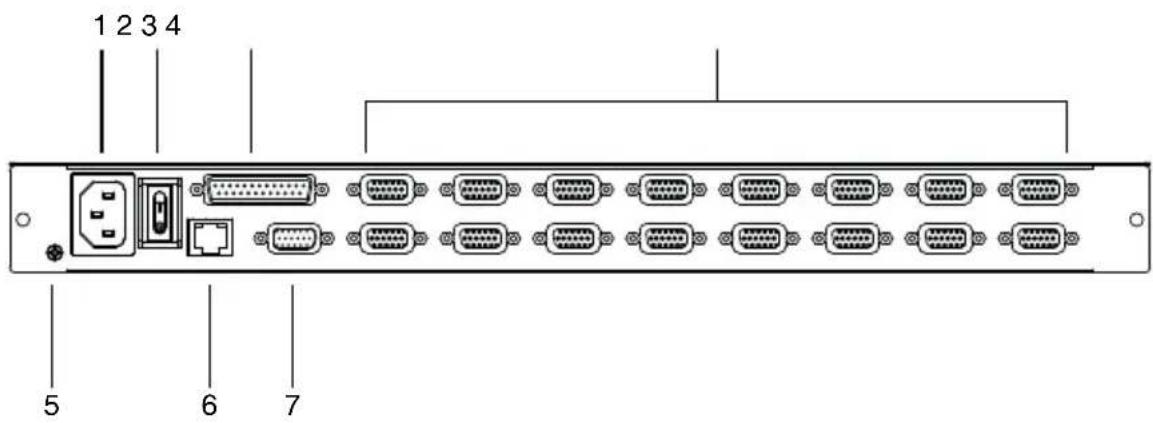
No. Component Description
| 1 Power Socket This is a standard 3-prong AC power socket. The power cord from an AC source plugs in here. | |
| 2 Power Switch This standard rocker switch powers the unit on and off. | |
| 3 Daisy Chain Port When daisy chaining units, the cable plugs in here. | |
| 4 KVM Port Section | The cables that link to the computers plug in here.Note: The shape of these SPHD connectors has been specifically modified so that only KVM cables designed to work with this switch can plug in (see the Cables section on page 7, for details). Do NOT attempt to use ordinary 15 pin VGA connector cables to link these ports to the computers. |
| 5 Grounding Terminal | The grounding wire used to ground the switch attaches here. |
| 6 LAN Port The cable that connects the unit to the network (10/100 Mbps) plugs in here. | |
| 7 External Console Port | For flexibility and convenience, the CL5708I / CL5716I supports an independent, external, KVM console.The external console keyboard, monitor, and mouse cables plug in here. |
This Page Intentionally Left Blank
Overview
For convenience and flexibility that allows mixing PS/2 and USB interfaces, the CL5708I / CL5716I design utilizes custom KVM cables that serve as intermediaries between the KVM switch and the connected computers.
A separate custom KVM cable is required for each computer connection. The custom KVM cables are listed in the Cables section on page 7. Consult your dealer to find out which custom KVM cables best fit your needs.
Before you Begin

-
Important safety information regarding the placement of this device is provided on page 195. Please review it before proceeding.
-
Make sure that the power to all devices connected to the installation are turned off. You must unplug the power cords of any computers that have the Keyboard Power On function.
Note: 1. It takes two people to mount the switch: one to hold it in place, the other to screw it in.
-
The standard rack mounting kit does not include screws or cage nuts. If you need additional screws or cage nuts, contact your rack dealer.
-
Allow at least 5.1 cm on each side for proper ventilation, and at least 12.7 cm at the back for the power cord and cable clearance.
-
Optional mounting kits – including single person Easy Installation kits – are available with a separate purchase. See Optional Rack Mounting, page 234 for details.
Standard Rack Mounting
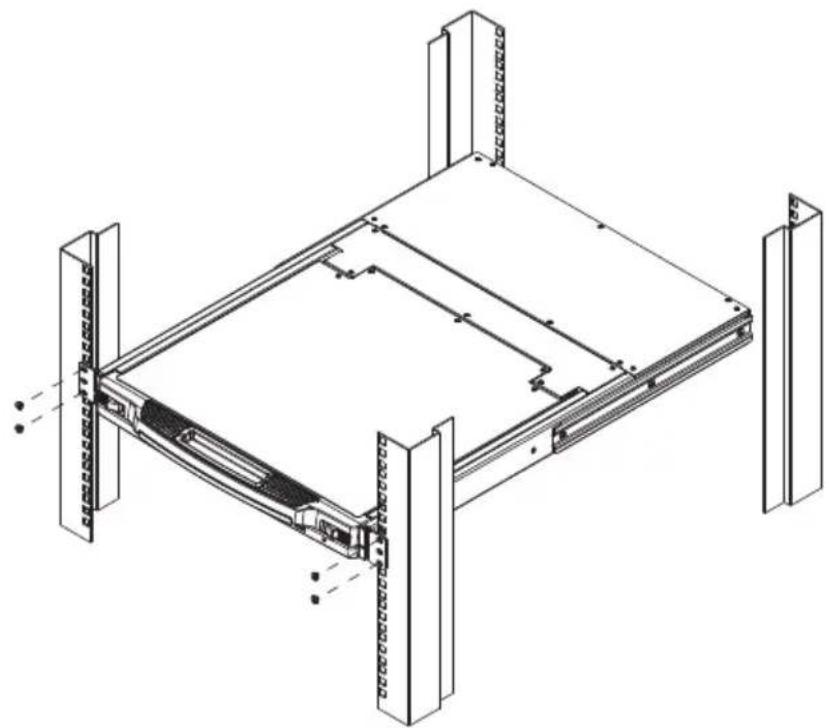
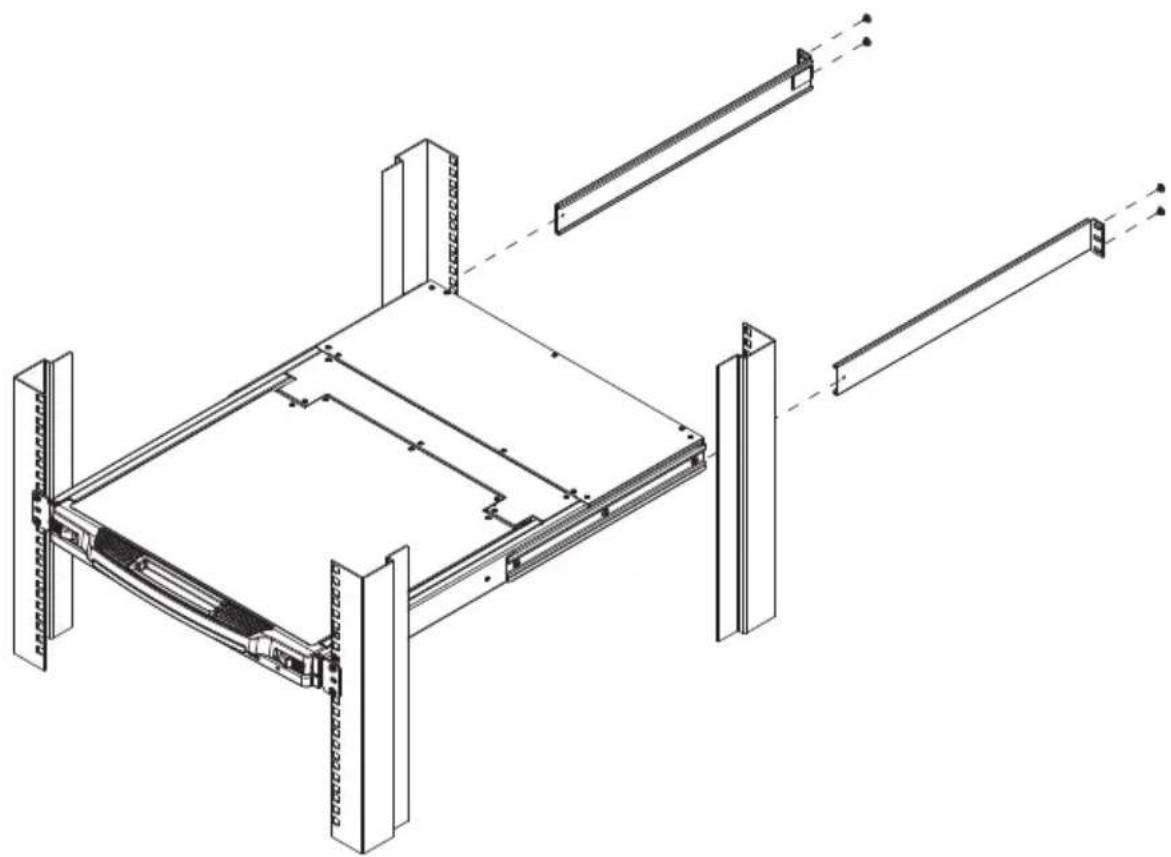
A standard rack mounting kit is provided with your CL5708I / CL5716I. The kit enables the switch to be mounted in rack with a depth of 42.0–77.0 cm.
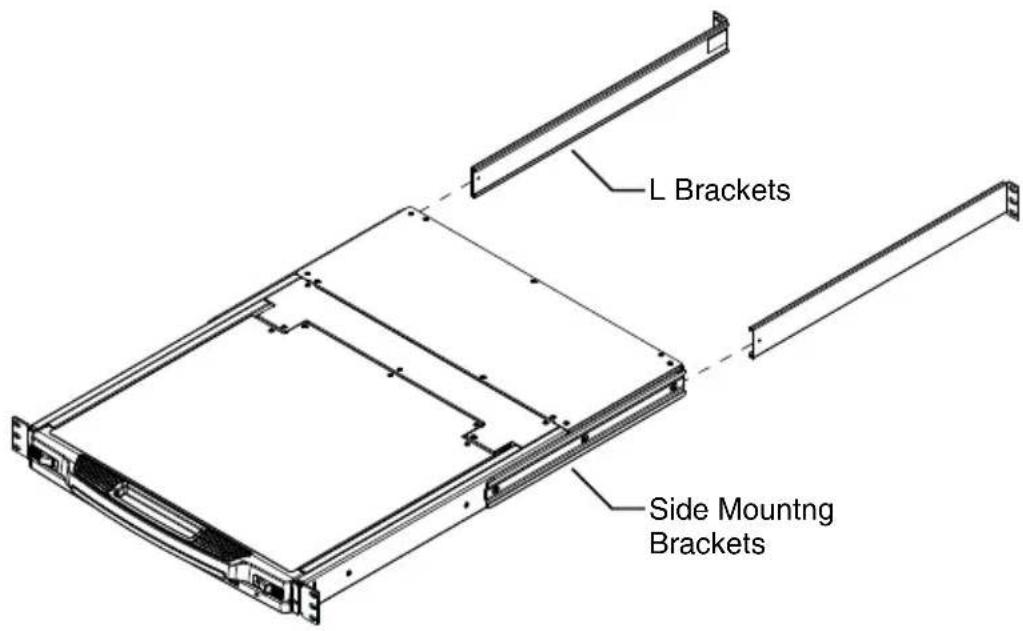
To rack mount the switch, do the following:
- While one person positions the switch in the rack and holds it in place, the second person loosely screws the front brackets to the rack.
natural_image
Isometric technical drawing of a mechanical assembly with mounting brackets and structural supports (no text or symbols)- While the first person still holds the switch in place, the second person slides the L brackets into the switch's side mounting brackets, from the rear until the bracket flanges contact the rack, then screws the L brackets to the rack.
natural_image
Technical line drawing of a mechanical assembly with mounting brackets and structural supports (no text or symbols)- After the L brackets have been secured, tighten the front bracket screws.
Grounding
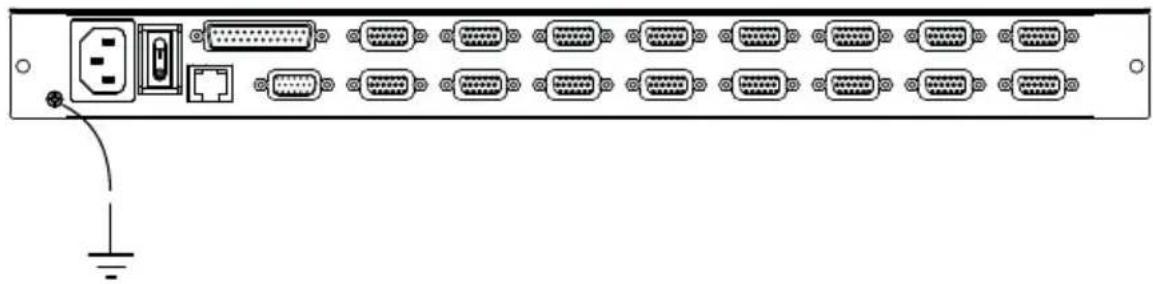
To prevent damage to your installation it is important that all devices are properly grounded.
Use a grounding wire to ground the CL5708I / CL5716I by connecting one end of the wire to the grounding terminal, and the other end of the wire to a suitable grounded object.
natural_image
Front view of a server rack with multiple Ethernet ports and an AC input cable (no text or labels visible)Single Level Installation
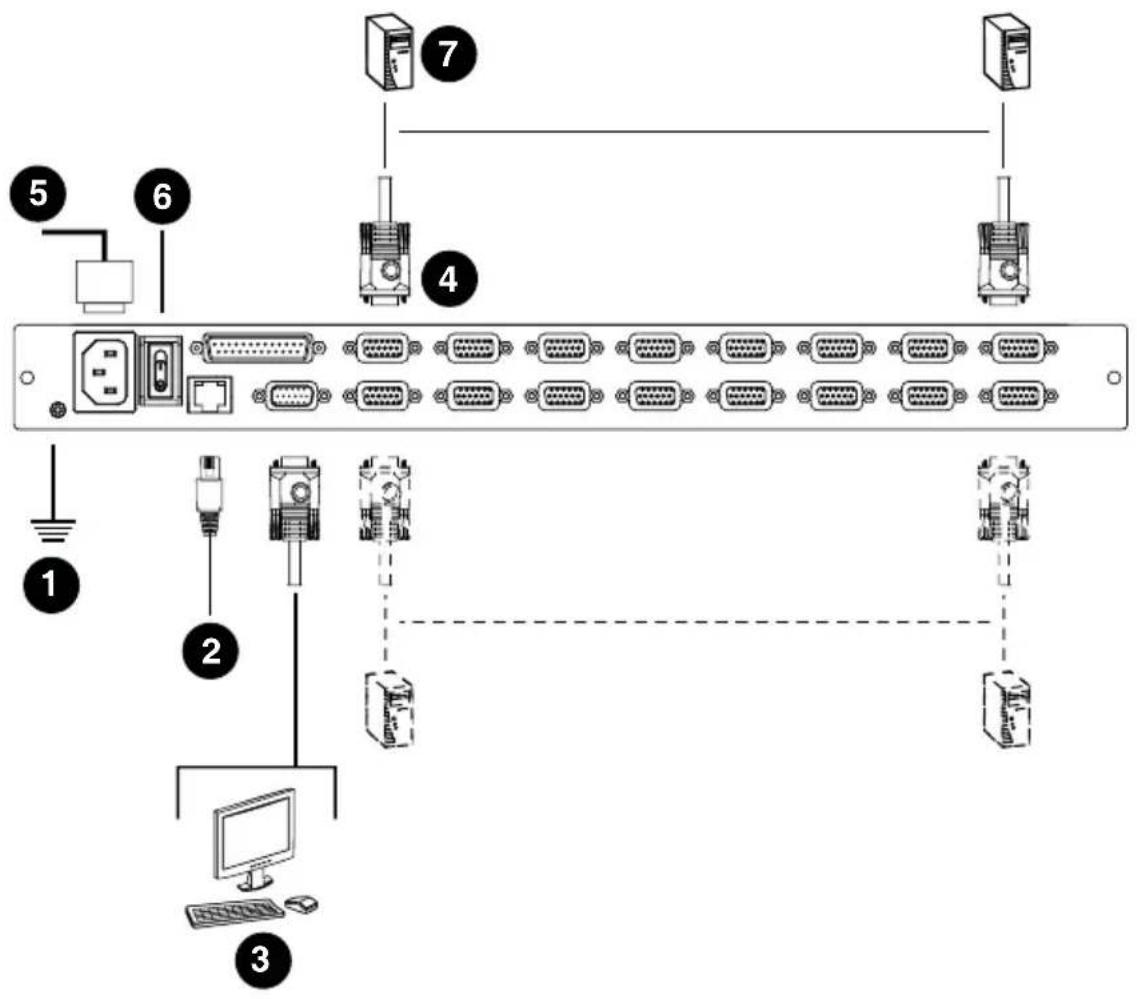
In a single level installation, there are no additional switches daisy chained from the first unit. To set up a single level installation, refer to the installation instructions and diagrams on the following pages (the numbers in the diagrams correspond to the numbers of the installation steps).
- Use the grounding wire to connect the switch's grounding terminal to a suitable grounded object.
- Plug an Ethernet cable from the network into the LAN port.
- (Optional) Use the console cable provided with the package to connect a keyboard, monitor, and mouse to the Console Port. See Cabling Diagrams, page 18.
Note: The maximum distance between the switch and a computer is 10 m.
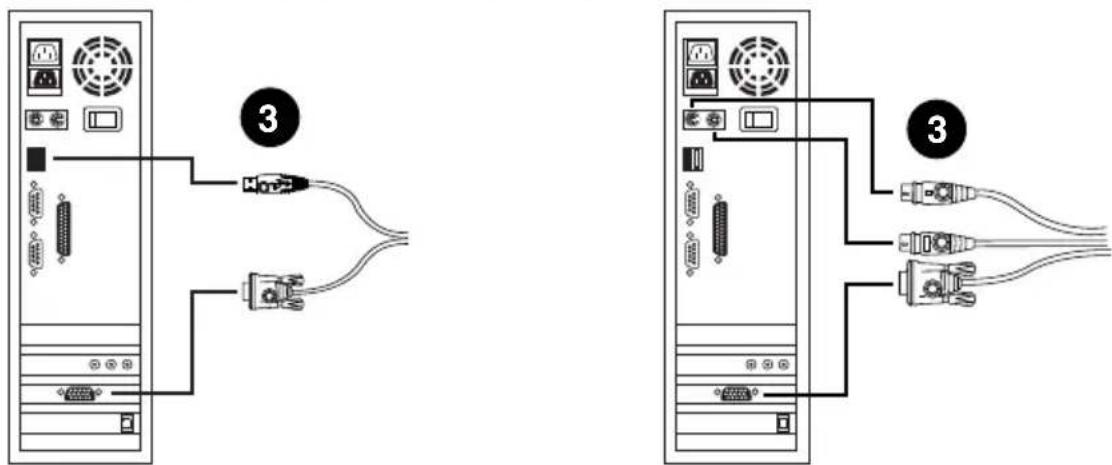
- For each of the computers you are installing, use a KVM cable set to connect a KVM port to the computer's keyboard, video and mouse ports. See KVM Cable Installation Diagrams, page 18.
Note: The maximum distance between the switch and a computer is 10 m.
- Plug the power cord into the CL5708I / CL5716I power socket and into a AC power source.
- Power on the CL5708I / CL5716I.
- After the CL5708I / CL5716I is powered on, power on the computers. See Powering Off and Restarting, page 24 for details.
Installation Diagram
Cabling Diagrams
Use the following diagrams as a guide for attaching cables to an external console and/or computers you will be connecting to the CL5708I / CL5716I.
Console Cable Installation Diagram
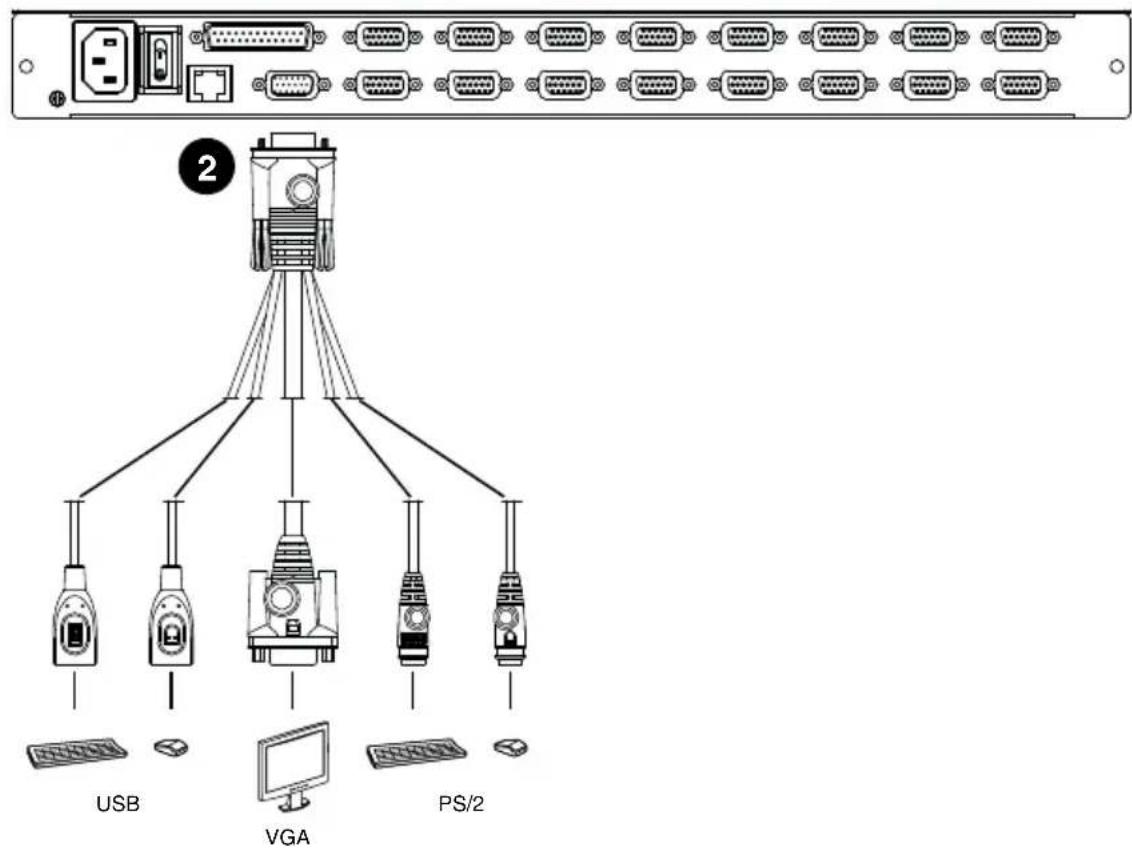
KVM Cable Installation Diagrams
USB KVM Cable Connection PS/2 KVM Cable Connection
Daisy Chain Installations
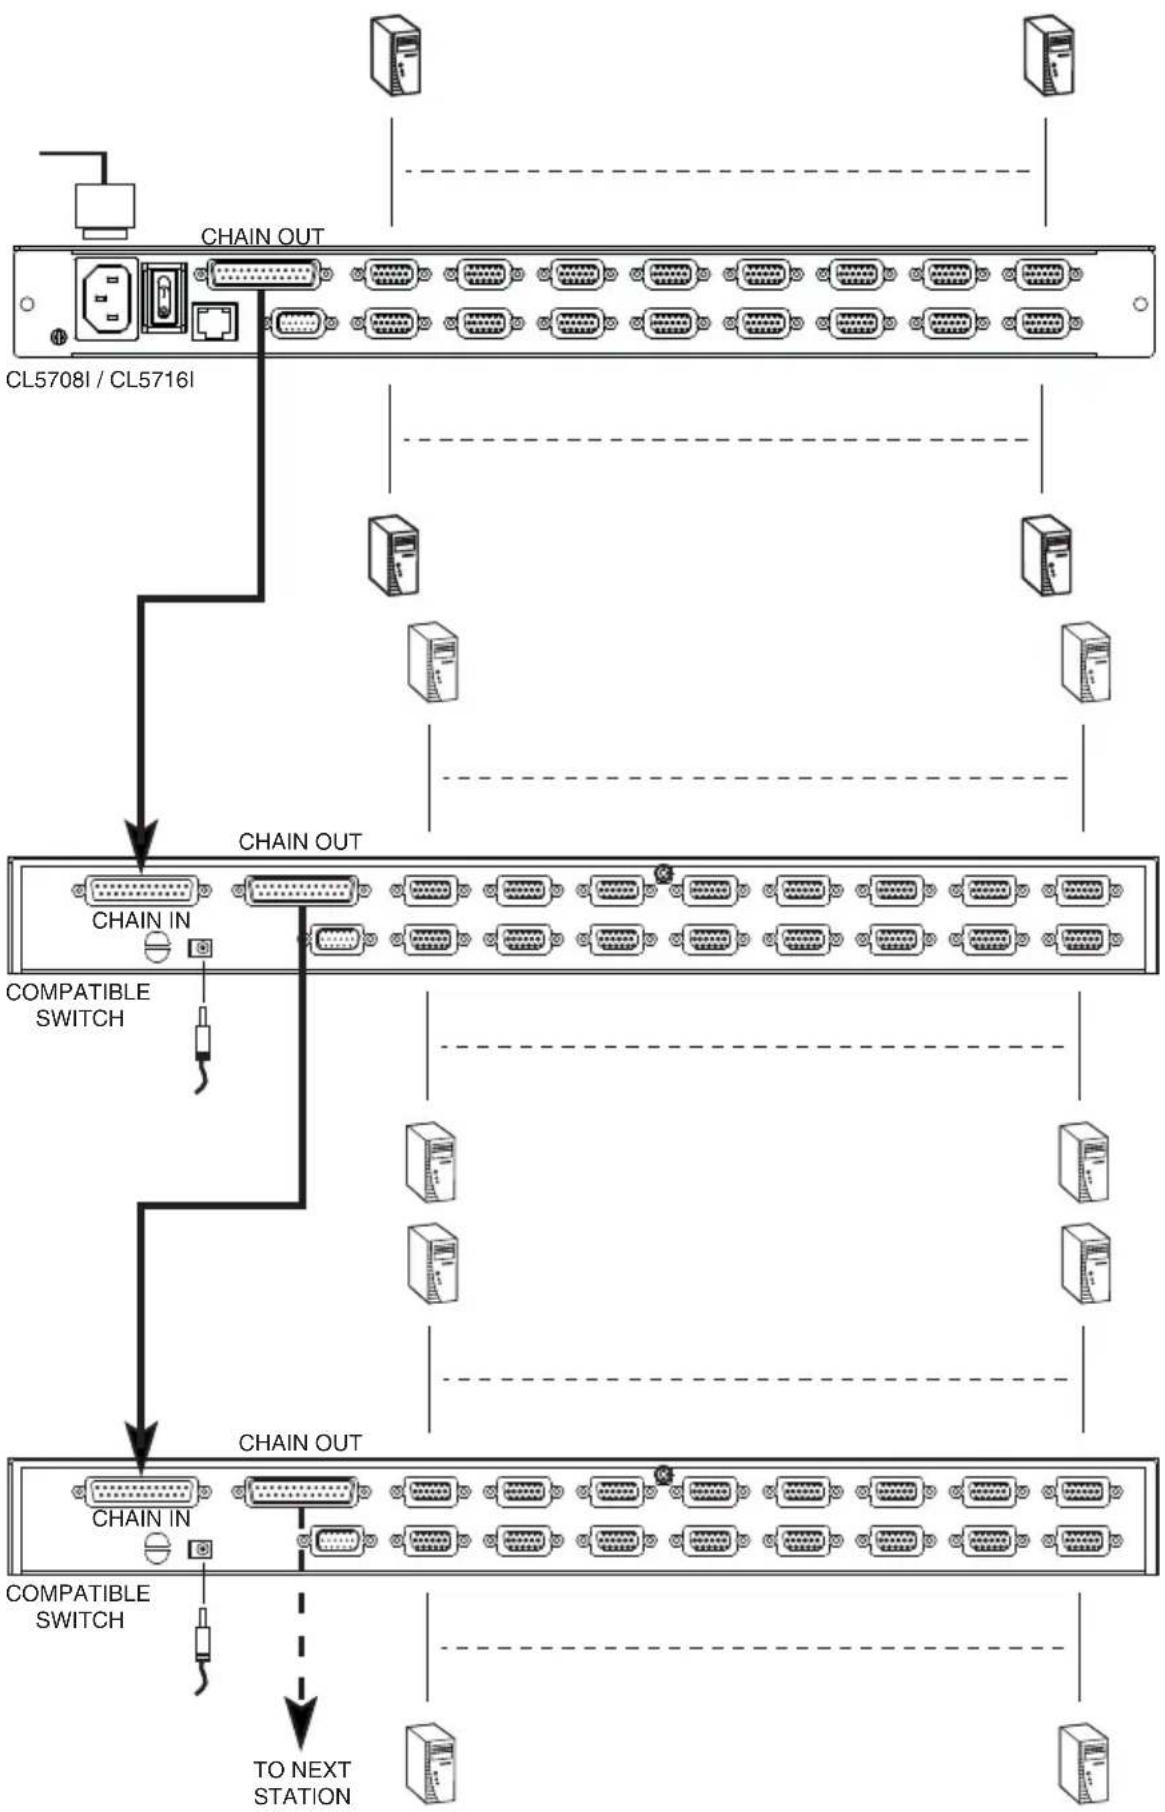
To control even more computers, up to 15 compatible KVM switches can be daisy chained down from the CL5708I / CL5716I (see see Supported KVM Switches, page 208 for a list of compatible ATEN switches). In a complete installation, as many as 128 or 256 computers can be controlled from the CL5708I / CL5716I. Tables showing the relation between the number of computers and the number of units needed to control them are provided on page 206 in the Appendix.
To set up a daisy chain installation, first make sure that power to all the devices you will be connecting have been turned off. Then, refer to the daisy chain installation diagram on page 20, as you do the following:
- Use a daisy chain cable set (described in the Cables section, page 7), to connect the Chain Out port of the CL5708I / CL5716I to the Chain In port of the first slave switch (first station out to second station in, second station out to third station in, etc.).
- Use compatible KVM cable sets to connect any available KVM port on the daisy chained switch to the keyboard, video and mouse ports of the computers you are installing. See KVM Cable Installation Diagrams, page 18.
Note: The maximum distance between the switch and a computer is 10 m.
-
Repeat the above steps for any additional units you wish to add to the chain.
-
Power up the installation according to the following procedure:
a) Power on the CL5708I / CL5716I.
b) Power on each station on the installation in turn (second station, then third station, etc.).
In each case, wait for the station ID to be ascertained and displayed on the current station before powering on the next one.
c) After all the stations are turned on, power on the computers.
Note: 1. The maximum distance between any two stations is 15 m.
- The total maximum distance from the first station to the last station is 100 m, regardless of the number of stations in the chain.
Daisy Chain Installation Diagram
flowchart
Network topology diagram showing connections between CL5708I/CL5716I, CHAIN OUT, and to NEXT Station via connected devices.Chapter 3
Basic Operation
Opening the Console
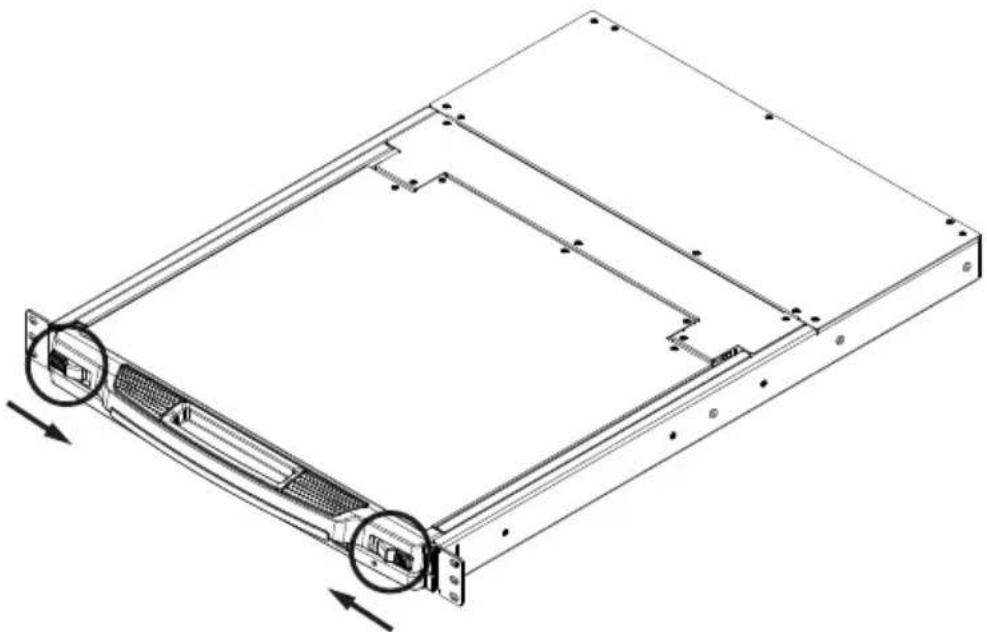
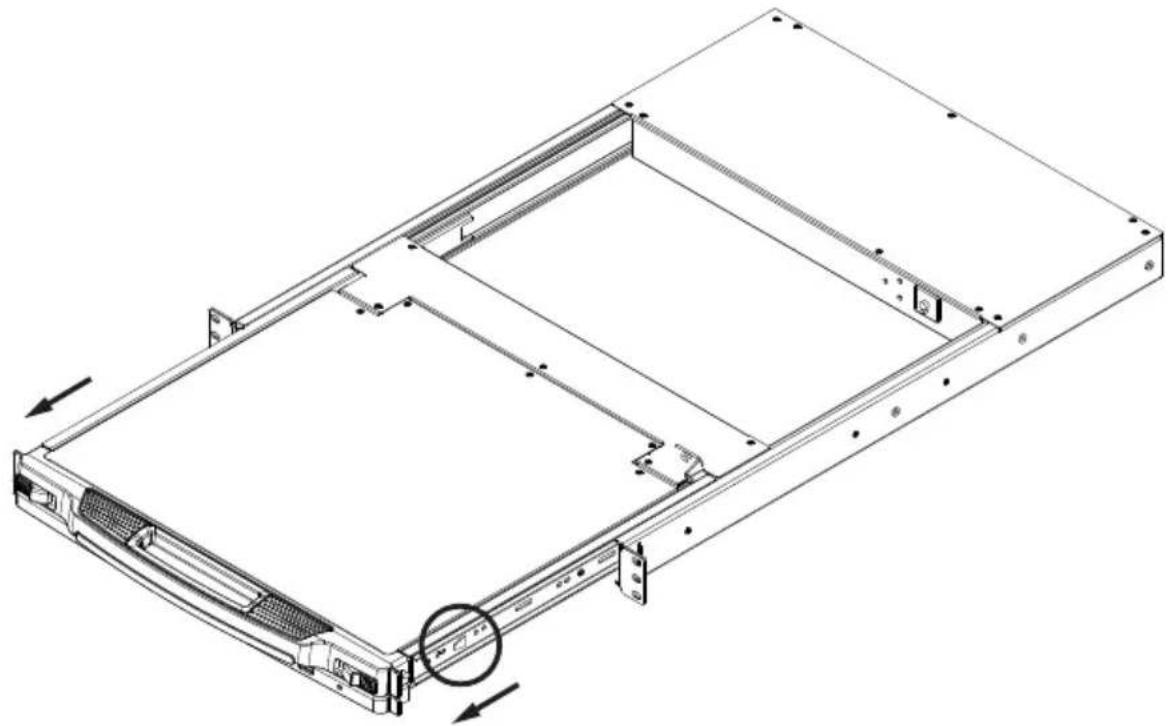
The CL5708I / CL5716I's console is located under the top cover. To access the console, slide the console module out and raise the cover.
Note: As a safety precaution, to keep the console from accidentally sliding out, the console is locked into the In position. Before you can pull the console module out, you must release it by pushing the catches on the unit's front panel toward the center of the switch.
natural_image
Technical line drawing of a server rack with two circular components and directional arrows indicating movement (no text or symbols)Closing the Console
To slide the console module back in, close the cover and do the following:
- Pull the safety catches on the unit's side rails toward you and push the module in until it stops.
- Release the catches; pull the module slightly toward you; then push it all the way in.
natural_image
Technical line drawing of a server rack frame with mounting hardware and ventilation slots (no text or symbols)Note: The reason for the two step procedure is to minimize the chances of you pinching your fingers when sliding the module in.
Operating Precautions

The maximum load bearing capacity of the keyboard module is 30kg. Failure to heed the information below can result in damage to the keyboard module.
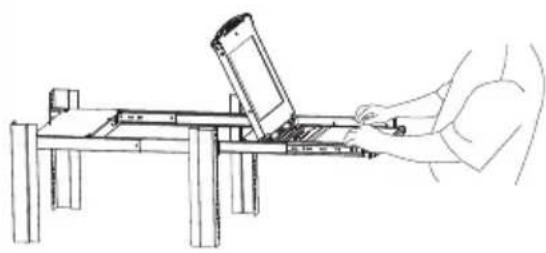 | Right!Rest your hands and arms lightly on the keyboard module as you work. |
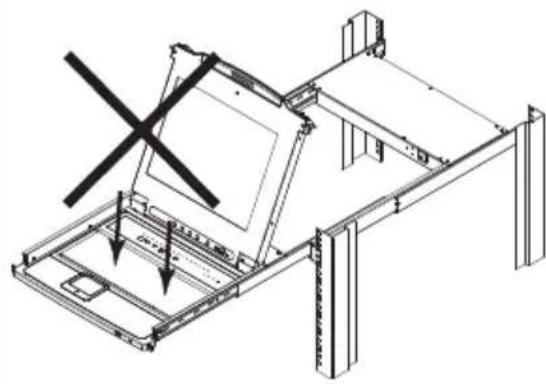 | Wrong!♦ DO NOT lean your body weight on the keyboard module.♦ DO NOT place heavy objects on the keyboard module. |
Powering Off and Restarting
If it becomes necessary to power off the CL5708I / CL5716I, do the following before restarting it:
- Shut down all the computers that are attached to the CL5708I / CL5716I.
Note: Unplug the power cords of any computers that have the Keyboard Power On function. Otherwise, the CL5708I / CL5716I will still receive power from the computers.
-
Unplug the CL5708I / CL5716I from its power source.
-
Wait 10 seconds, then plug the CL5708I / CL5716I back in.
-
After the CL5708I / CL5716I has started and ascertained its station ID, power on the computers.
Note: If you have shut down more than one station, power up the highest station first and work your way down to the lowest one.
LCD OSD Configuration
The LCD Buttons
The LCD OSD allows you to set up and configure the LCD display. Four buttons are used to perform the configuration, as described in the table, below:
| Button Function | |
| MENU | When you have not entered the LCD OSD Menu function, pressing this button invokes the Menu function, and brings up the Main Menu.When you have entered the LCD OSD Menu function, and have reached a setting choice with the navigation buttons, pressing this button brings up its adjustment screen. |
| ▶|▲ | When navigating through the menus, this button moves you Right or Up. When making an adjustment, it increases the value. |
| ◀|▼ | When navigating through the menus, this button moves you Left or Down. When making an adjustment, it decreases the value. |
| EXIT | When you have not entered the LCD OSD Menu function, pressing this button performs an auto adjustment. An auto adjustment automatically configures all the settings for the LCD panel to what the OSD considers their optimum values to be.When you have entered the LCD OSD Menu function, pressing this button exits the current menu and returns you to the previous menu. Use it to leave an adjustment menu when you are satisfied with the adjustment you made.When you are at the Main Menu, pressing this button exits the LCD OSD.Pressing the Exit/Light pushbutton for two seconds turns the keyboard illumination light ON or Off. (Default: On) |
LCD Adjustment Settings
An explanation of the LCD OSD adjustment settings is given in the table below:
| Setting Explanation | |
| Brightness Adjusts the background black level of the screen image. | |
| Contrast Adjusts the foreground white level of the screen image. | |
| Phase If pixel jitter or horizontal line noise is visible on the display, your LCD may have the wrong phase setting. Adjust the phase setting to eliminate these problems. | |
| Clock If vertical banding is visible on the display, your LCD may have the wrong clock setting. Adjust the clock setting to eliminate vertical banding. | |
| H-Position Positions the display area on the LCD panel horizontally (moves the display area left or right). | |
| V-Position Positions the display area on the LCD panel vertically (moves the display area up or down). | |
| Color Temperature Adjusts the color quality of the display. You can adjust the warmth value, color balance, etc. The Adjust Color selection has a further submenu that lets you fine tune the RGB values. | |
| Language Selects the language that the OSD displays its menus in. | |
| OSD Duration Lets you set the amount of time the OSD displays on the screen. If there is no input for the amount of time you choose, the OSD display turns off. | |
| Reset Resets the adjustments on all menus and submenus to their factory default settings. | |
Note: As an alternative to manually adjusting the LCD settings, you can have the LCD auto-adjusted for optimum display by pressing the Exit button. See EXIT, page 25
Hot Plugging
The CL5708I / CL5716I supports hot plugging - components can be removed and added back into the installation by unplugging their cables from the ports without the need to shut the unit down. In order for hot plugging to work properly, however, the procedures described below must be followed:
Changing Station Positions
You can change a station's position by simply disconnecting it from its master and reconnecting it to another switch in the chain. In order for the OSD menus to correspond to the change, the station IDs must be reset in the OSD. See RESET STATION IDS, page 39, for details.
Hot Plugging KVM Ports
You can add or remove computers by plugging/unplugging them into/from a switch's KVM ports. In order for the OSD menus to correspond to the change, however, you must manually reconfigure the OSD to reflect the new Port information. See F3: SET, page 36, and F4: ADM, page 38, for details.
Note: If the computer's Operating System does not support hot plugging, this function may not work properly.
Hot Plugging External Console Ports
The external keyboard, monitor, mouse and front panel mouse connections can all be hot plugged. When hot plugging a mouse:
- You may unplug and replug the mouse (to reset the mouse, for example), as long as you use the same mouse.
- If you plug in a different mouse, all the stations and all the computers on the installation must be shut down for 10 seconds, then restarted following the power up sequence described under Step 5 on page 19.
Port Selection
The CL5708I / CL5716I provides three port selection methods to access the computers on the installation: Manual, an OSD (on-screen display) menu system, and Hotkeys. Manual port switching is discussed below. See Chapter 4, OSD Operation and Chapter 5, Keyboard Port Operation for more information.
Manual Port Switching
Use the UP and DOWN Port ID / Station ID selection buttons located on the keyboard module (page 10) to switch KVM focus to any port on the installation. Continually pressing any button cycles through the list of available ports/stations.
Port ID Numbering
Each KVM port on the installation is assigned a unique Port ID. The Port ID is made up of two parts: a Station Number, and a Port Number:
- The Station Number is a two digit number of the switch's position in the daisy chain sequence. This number is displayed on the front panel station ID LED.
- The Port Number is a two digit number of the port on the CL5708I / CL5716I station that a computer is connected to. This number is displayed on the front panel port ID LED.
- When keying in a Port ID number, the station number precedes the port number.
- Station and port numbers from 1–9 are padded with a preceding zero, so they become 01–09.
For example, a computer attached to Port 6 of Station 12 would have a Port ID of: 12-06.
USB Peripheral Devices
The front panel USB port is available to connect a USB peripheral device (flash drive, CD-ROM drive, printer, etc.) to the CL5708I / CL5716I. Any computer connected to the CL5708I / CL5716I can access the USB peripheral on a one-at-a-time basis. The peripheral device is available to computers connected to the CL5708I / CL5716I on the same level only, and is not available to computers connected to daisy chained switches.
The USB peripheral device is automatically detected on target computers when switching ports on the CL5708I / CL5716I. For example, when switching from a computer connected to port 1 to a computer connected to port 2, the peripheral device automatically disconnects from the computer on port 1 and connects to the computer on port 2.
This Page Intentionally Left Blank
OSD Overview
The OSD (on-screen display) is a mouse and keyboard enabled, menu driven method to handle computer control and switching operations. All procedures start from the OSD main screen.
Manufacturing Number
The “MFG Number” (Manufacturing Number) is an internal serial number used by ATEN’s factory and technical support staff to identify products. This number does not affect products’ warranty. If your product requires after-sales services, you may provide the MFG Number to ATEN’s sales or technical support staff to identify the product and model number.
OSD Login
The OSD incorporates a two level (administrator / user) password system. Before the OSD main screen displays, a login screen appears requiring a password. If this is the first time that the OSD is used, or if the password function has not been set, please use default username and password: Administrator / Password to login. The OSD main screen displays in administrator mode. In this mode, you have administrator privileges, with access to all administrator and user functions, and can set up operations as you like. However, if the password function has been set, you must provide an appropriate administrator/user password in order to access the OSD.
OSD Hotkey
You can display the OSD on the LCD or an external console monitor while also viewing the display of any port on the CL5708I / CL5716I by pressing the [Scroll Lock] key twice.
Note: You can optionally change the OSD hotkey to the Ctrl key, in which case you would press [Ctrl] twice (see OSD Hotkey, page 36). With this method, you must press the same [Ctrl] key.
OSD Main Screen
When you invoke the OSD, a screen similar to the one below appears:
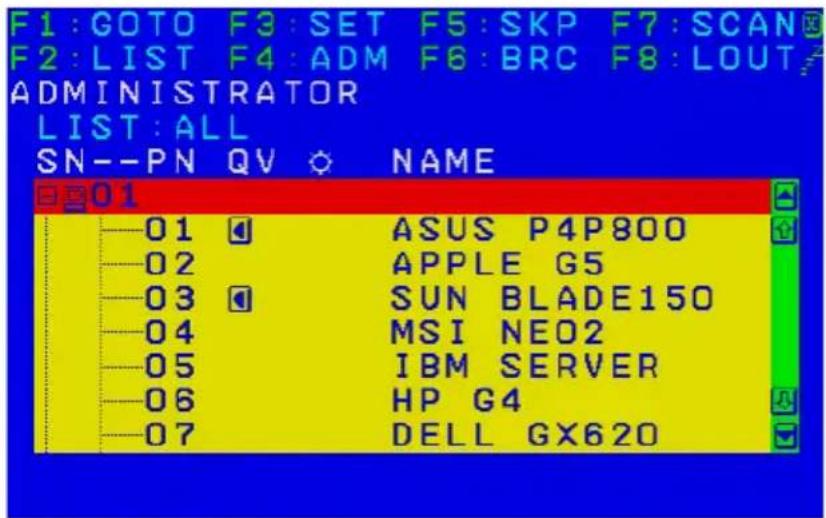
Note: 1. The diagram depicts the administrator's main screen. The user main screen does not show the F4 and F6 functions, since these are reserved for the administrator and can't be accessed by users.
2. The OSD always starts in list view, with the highlight bar at the same position it was in the last time it was closed.
3. Only the ports that have been set accessible by the administrator for the current logged in user are visible (see Access, page 113, for details).
4. If the port list is collapsed, click on a switch number, or move the highlight bar to it then press the right arrow key to expand the list. Similarly, to collapse a switch's port list, click on the switch number, or move the highlight bar to it then press the left arrow key to collapse the list.
OSD Main Screen Headings
The table below describes the OSD Main Screen headings.
| Heading Description | |
| SN--PN This | column lists the port ID numbers (station number - port number) for all the KVM ports on the installation. The simplest method to access a particular computer is move the highlight bar to it, then press [Enter]. |
| QV If a port | has selected for quick view scanning (see Set Quick View Ports, page 39), an arrowhead displays in this column. |
 | The computers that are powered on and are online have a sun symbol in this column. |
| NAME | If a port has been given a name (see Edit Port Names, page 38), its name appears in this column. |
OSD Navigation
- To dismiss the menu, and deactivate OSD, click the X at the upper right corner of the OSD window; or press [Esc].
◆ To log out, click F8 at the top of the main screen, or press [F8]. - To move up or down through the list one line at a time, click the up and down triangle symbols (▲▼) or use the up and down arrow keys. If there are more list entries than what can appear on the main screen, the screen will scroll.
- To move up or down through the list one screen at a time, click the up and down arrow symbols (↑↓), or use the [Pg Up] and [Pg Dn] keys. If there are more list entries than what can appear on the main screen, the screen will scroll.
- To activate a port, double-click it, or move the highlight bar to it, then press [Enter].
- After executing any action, you automatically go back to the menu one level above.
OSD Functions
OSD functions are used to configure and control the OSD. For example, you can rapidly switch to any port, scan selected ports, limit the list you wish to view, designate a port as a quick view port, create or edit a port name, or make OSD setting adjustments.
To access an OSD function:
- Either click a function key field at the top of the main screen, or press a function key on the keyboard.
- In the submenus that appear make your choice either by double-clicking it, or moving the highlight bar to it, then pressing [Enter].
- Press [Esc] to return to the previous menu level.
F1: GOTO
Clicking the F1 field or pressing [F1] activates the GOTO function. GOTO allows you to switch directly to a port either by keying in the port's Name, or its Port ID.
- To use the name method, key in 1; key in the port's Name; then press [Enter].
- To use the port ID method, key in 2; key in the Port ID; then press [Enter].
Note: You can key in a partial name or port ID. In that case, the screen will show all the computers that the user has View rights to (see Access, page 113, for details), that match the name or port ID pattern, regardless of the current list settings (see F2 LIST, page 35, for details).
To return to the OSD main screen without making a choice, press [Esc].
F2: LIST
This function lets you broaden or narrow the scope of which ports the OSD displays on the main screen. The submenu choices and their meanings are given in the table below.
| Choice Meaning | |
| ALL Lists all of the | ports on the installation that have been set accessible by the administrator for the current logged in user. |
| QUICK VIEW Lists | only the ports that have been selected as quick view ports (see SET QUICK VIEW PORTS, page 39). |
| POWERED ON Lists only the ports that have their attached computers powered on. | |
| QUICK VIEW + POWERED ON | Lists only the ports that have been selected as quick view ports (see SET QUICK VIEW PORTS, page 39), and that have their attached computers powered on. |
Move the highlight bar to the choice you want, then press [Enter]. An icon appears before the choice to indicate that it is the currently selected one.
F3: SET
This function allows the administrator and each user to set up his own working environment. A separate profile for each is stored by the OSD and is activated according to the username that was provided during login.
To change a setting:
- Double-click it; or move the highlight bar to it, then press [Enter].
- After you select an item, a submenu with further choices appears. To make a selection, either double-click it; or move the highlight bar to it, then press [Enter]. An icon appears before the selected choice to indicate which one it is. The settings are explained in the following table:
| Setting Function | |
| OSD HOTKEY Selects which hotkey activates the OSD function: [Scroll Lock] [Scroll Lock] or [Ctrl] [Ctrl]. Since the [Ctrl] key combination may conflict with programs running on the computers, the default is the [Scroll Lock] combination. | |
| PORT ID DISPLAY POSITION | Allows each user to customize the position where the port ID appears on the screen. The default is the upper left corner, but users can choose to have it appear anywhere on the screen. Use the mouse or the arrow keys plus Pg Up, Pg Dn, Home, End, and 5 (on the numeric keypad with Num Lock off), to position the port ID display, then double-click or press [Enter] to lock the position and return to the Set submenu. |
| PORT ID DISPLAY DURATION | Determines how long a port ID displays on the monitor after a port change has taken place. The choices are: 3 Seconds (default) and ALWAYS OFF. |
| PORT ID DISPLAY MODE | Selects how the port ID is displayed: the port number plus the port name (PORT NUMBER + PORT NAME) (default); the port number alone (PORT NUMBER); or the port name alone (PORT NAME). |
| SCAN DURATION;Scan | Determines how long the focus dwells on each port as it cycles through the selected ports in Auto Scan mode (see F7 SCAN, page 43). Key in a value from 1–255 seconds, then press [Enter]. Default is 5 seconds; a setting of 0 disables the SCAN function. |
(Continues on next page.)
(Continued from previous page.)
| Setting Function | |
| SCAN-SKIP MODE | Selects which computers will be accessed under skip mode (see F5 SKP, page 41), and Auto Scan mode (see F7 SCAN, page 43. Choices are:ALL - All the ports which have been set accessible (see Access, page 113, for details);QUICK VIEW - Only those ports which have been set accessible and have been selected as quick view ports (see SET QUICK VIEW PORTS, page 39);POWERED ON - Only those ports which have been set accessible and are powered on;QUICK VIEW + POWERED ON - Only those ports which have been set accessible and have been selected as quick view ports and are powered on. The default is ALL.Note: The quick view choices only show up on the administrator's screen, since only he has Quick View setting rights (see SET QUICK VIEW PORTS, page 39, for details). |
| SCREEN BLANKER | If there is no input from the console for the amount of time set with this function, the screen is blanked. Key in a value from 1–30 minutes, then press [Enter]. The default setting of 0 disables this function. |
| HOTKEY COMMAND MODE | Enables / disables the hotkey command function in case a conflict occurs with programs running on the computers. |
| HOTKEY | Sets the keyboard shortcut for invoking Hotkey Mode (see page 45). Choices are: [NUM LOCK] + [-] (minus) (default), and [CTRL] + [F12]. |
| OSD LANGUAGE | Sets the language used in the OSD. Choices are: English, German, Japanese, Simplified Chinese and Traditional Chinese. |
| TOUCHPAD Enables / disables the touchpad. | |
F4: ADM
F4 is an administrator only function. It allows the administrator to configure and control the overall operation of the OSD. To change a setting double-click it, or use the up and down arrow keys to move the highlight bar to it then press [Enter].
After you select an item, a submenu with further choices to select from appears. Double-click an item, or move the highlight bar to it then press [Enter]. An icon appears before the selected item so that you know which one it is. The settings are explained in the following table:
| Setting Function | |
| SET IP ADDRESS | Use this selection to set the IP address of the CL5708I / CL5716I.◆ Enable DHCP to assign the IP address automatically.◆ Disable DHCP to assign a fixed IP address and specify the IP, Mask, and Gateway in the appropriate fields.Note: The default setting for DHCP is disabled. |
| SET LOGOUT TIMEOUT | If there is no input from the console for the amount of time set with this function, the user is automatically logged out. A login is necessary before the console can be used again.This enables other users to gain access to the computers when the original user is no longer accessing them, but has forgotten to log out. To set the timeout value, key in a number from 1–180 minutes, then press [Enter]. The default setting of 0 disables this function. |
| EDIT PORT NAMES | To help remember which computer is attached to a particular port, every port can be given a name. This function allows the administrator to create, modify, or delete port names. To edit a port name:1. Click the port, or use the navigation keys to move the highlight bar to it, then press [Enter].2. Key in the new port name, or modify/delete the old one. The maximum number of characters allowed for the port name is 12. Legal characters include:◆ All alpha characters: A-Z◆ All numeric characters: 0-9◆ * ( ) + : - , ? . / and SpaceCase does not matter; OSD displays the port name in all capitals no matter how they were keyed in.3. When you have finished editing, press [Enter] to have the change take effect. To abort the change, press [Esc]. |
| RESTOREDEFAULTVALUES | This function is used to undo all changes and return the setup to the original factory default settings (see OSD FACTORY DEFAULT SETTINGS, page 233) except for the port name list, username and password information, which are saved. |
| CLEAR THENAME LIST | This function clears the port name list. |
| ACTIVATEBEEPER | Choices are Y (on), or N (off). When activated, the beeper sounds whenever a port is changed; when activating the Auto Scan function (see F7 SCAN, page 43); or an invalid entry is made on an OSD menu. The default is Y. |
| SET QUICKVIEW PORTS | This function lets the administrator select which ports to include as quick view ports.To select/deselect a port as a quick view port, double-click the port, or use the navigation keys to move the highlight bar to it, then press [Spacebar].When a port has been selected as a quick view port, an icon displays in the QV column of the LIST on the main screen.If one of the quick view options is chosen for the LIST view (see F2 LIST, page 35), only a port that has been selected here will display on the list.If one of the quick view options is chosen for auto-scanning (see SCAN/SKIP MODE, page 37), only a port that has been selected here will be auto-scanned.The default has no ports selected for quick view. |
| RESET STATIONIDS | If you change the position of one of the stations in the daisy chain, the OSD settings will no longer correspond to the new location. This function directs the OSD to rescan the station positions of the entire installation and updates the OSD so that the OSD station information corresponds to the new physical layout.Note: Only the station numbers get updated. Except for the port names, all administrator settings (such as SET ACCESSIBLE PORTS, SET QUICK VIEW PORTS, etc.) must be input again for all of the computers affected by the change. |
| SETOPERATINGSYSTEM | This function allows the administrator to define the operating system for the computer connected to each KVM port. The default is WIN (PC compatible).To set the port operating system:From the list, select the port for which you wish to set the computer's operating system.Set the operating system by pressing [Spacebar] to cycle through WIN, MAC, SUN, or OTHER.Press [Esc] to exit. The operating system you selected is assigned to the KVM port. |
| FIRMWAREUPGRADE | In order to upgrade the CL5708I / CL5716I firmware (see page 189), you must first enable Firmware Upgrade mode with this setting.When you bring up this menu, the current firmware version levels are displayed. Select Y to enable Firmware Upgrade mode, or N to leave this menu without enabling it. |
| SET KEYBOARD LANGUAGE | Sets the language for the computer keyboard attached to the KVM port. To select a keyboard language, double-click it, or use the navigation keys to move the highlight bar to it, then press [Enter].Choices are: AUTO (default), ENGLISH (US), ENGLISH (UK), FRENCH, GERMAN (GER.), GERMAN (SWISS), GREEK, HUNGARIAN, ITALIAN, JAPANESE, KOREAN, RUSSIAN, SPANISH, SWEDISH and TRADITIONAL CHINESE. |
| SET CONSOLE MODE | This setting selects which consoles (internal/external) are enabled:0 – Both consoles enabled1 – LCD console only2 – External console onlyUse the spacebar to cycle to the choice you want. The default is 0. |
F5: SKP
Clicking the F5 field or pressing [F5] invokes Skip mode. This function enables you to easily skip backward or forward – switching the console focus from the currently active computer port to the previous or next available one.
- The selection of computers to be available for skip mode switching is made with the Scan-Skip mode setting under the F3: SET function (see page 36).
- When you are in skip mode: press [ ← ] to switch to the previous computer in the list press [ → ] to switch to the next computer in the list press [ ↑ ] to switch to the last computer on the previous station in the list press [ ↓ ] to switch to the first computer on the next station in the list.
Note: When you skip, you only skip to the previous or next available computer that is in the Scan-Skip mode selection (page 37).
- If a port has been selected for Scan-Skip mode, when the focus switches to that port a left/right triangle symbol appears before its port ID display.
- While skip mode is in effect, the console will not function normally. You must exit skip mode in order to regain control of the console.
- To exit skip mode, press [Spacebar] or [Esc].
F6: BRC
F6 is an administrator only function. Clicking the F6 field, or pressing [F6], invokes Broadcast (BRC) mode. When this function is in effect, commands sent from the console are broadcast to all available computers on the installation.
This function is particularly useful for operations that need to be performed on multiple computers, such as performing a system wide shutdown, installing or upgrading software, etc.
- While BRC mode is in effect, a speaker symbol appears before the port ID display of the port that currently has the console focus.
- While BRC mode is in effect, the mouse will not function normally. You must exit BRC mode in order to regain control of the mouse.
- To exit BRC mode, invoke the OSD (with the OSD hotkey), then click the F6 field, or press [F6], to turn BRC mode off.
F7: SCAN
Clicking the F7 field or pressing [F7] invokes Auto Scan mode. This function allows you to automatically switch among the available computers at regular intervals so that you can monitor their activity without having to take the trouble of switching yourself.
- The selection of computers to be included for auto-scanning is made with the Scan-Skip mode setting under the F3: SET function (see page 37).
- The amount of time that each port displays for is set with the Scan Duration setting under the F3: SET function (see page 36). When you want to stop at a particular location, press the [Spacebar] to stop scanning.
- If the scanning stops on an empty port, or one where the computer is attached but is powered Off, the monitor screen will be blank, and the mouse and keyboard will have no effect. After the Scan Duration time is up, the scan function will move on to the next port.
- As each computer is accessed, an S appears in front of the port ID display to indicate that it is being accessed under Auto Scan mode.
- While Auto Scan mode is in effect, the console will not function normally. You must exit Auto Scan mode in order to regain control of the console.
- While you are in Auto Scan mode, you can pause the scanning in order to keep the focus on a particular computer either by pressing [P], or with a left-click of the mouse. See Invoking Auto Scan, page 49, for details.
- To exit Auto Scan mode, press the [Spacebar] or [Esc].
F8: LOUT
Clicking the F8 field, or pressing [F8] logs you out of OSD control of the computers, and blanks the console screen. This is different from simply pressing [Esc] when you are at the main screen to deactivate the OSD. With this function you must log in all over again to regain access to the OSD, whereas with [Esc], all you have to do to reenter the OSD is tap the OSD hotkey.
Note: 1. When you reenter the OSD after logging out, the screen stays blank except for the OSD main screen. You must input your username and password before you can continue.
- If you reenter the OSD after logging out, and immediately use [Esc] to deactivate the OSD without having selected a port from the OSD menu, a null port message displays on the screen. The OSD hotkey will bring up the main OSD screen.
This Page Intentionally Left Blank
Chapter 5
Keyboard Port Operation
Hotkey Port Control
Hotkey port control allows you to provide KVM focus to a particular computer directly from the keyboard. The CL5708I / CL5716I provides the following hotkey port control features:
♦ Selecting the Active Port
- Auto Scan Mode Switching
- Skip Mode Switching
◆ Computer Keyboard / Mouse Reset
The following settings can also be controlled in Hotkey mode:
Setting the Beeper
Setting the Quick Hotkey
Setting the OSD Hotkey
Setting the Port Operating System
♦ Restoring the OSD Default Values
Invoke Hotkey Mode
All hotkey operations begin by invoking Hotkey mode. ^1 There are two possible keystroke sequences to invoke Hotkey mode from the local console, and two alternate keystrokes to invoke Hokey mode from remote (WinClient/Java Client) sessions, though only one from each can be operational at any given time:
Local Console
The following operations are used to invoke Hotkey mode from the local console while accessing a port:
Number Lock and Minus Keys
- Hold down the Num Lock key;
- Press and release the minus key;
- Release the Num Lock key:
[Num Lock] + [-]
Control and F12 Keys
- Hold down the Ctrl key;
- Press and release the F12 key;
- Release the Ctrl key:
[Ctrl] + [F12]
When Hotkey mode is active:
- A command line appears on the monitor screen. The command line prompt is the word Hotkey: in white text on a blue background, and displays the subsequent hotkey information that you key in.
- Ordinary keyboard and mouse functions are suspended – only hotkey compliant keystrokes (described in the sections that follow), can be input.
Pressing [Esc] exits Hotkey mode.
Remote Sessions
The following operations are used to invoke Hotkey mode from remote WinClient/Java Client sessions while accessing a port:
Scroll Lock
- Press [Scroll Lock] [Scroll Lock].
[Scroll Lock] and then [Scroll Lock]
Control
- Press [Ctrl] [Ctrl].
[Ctrl] and then [Ctrl]
When Hotkey mode is active:
- The toolbar appears at the upper left corner of the screen (see The Port Toolbar, page 170).
- Ordinary keyboard and mouse functions are suspended – only hotkey compliant keystrokes (described in the sections that follow), can be input.
Pressing [Esc] exits Hotkey mode.
Select the Active Port
Each KVM port is assigned a port ID (see Port ID Numbering, page 27). You can directly access any computer on the installation with a hotkey combination that specifies the port ID of the KVM port that a computer is connected to. To access a computer using hotkeys:
- Invoke hotkey mode with the [Num Lock] + [-] or [Ctrl] + [F12] combination.
- Key in the port ID.
The port ID numbers display on the command line as you key them in. If you make a mistake, use [Backspace] to erase the wrong number.
- Press [Enter].
After you press [Enter], the KVM focus switches to the designated computer and you automatically exit hotkey mode.
Note: In hotkey mode, KVM focus will not switch to a port if an invalid switch or port number is entered. The hotkey command line will continue to display on the screen until you enter a valid switch and port number combination, or exit hotkey mode.
Auto Scan Mode
Auto Scan automatically switches, at regular intervals, among all the KVM ports that have been set as accessible under Scan-Skip Mode, so that their activity can be monitored automatically. See Scan-Skip Mode on page 37 for more information.
Invoking Auto Scan:
To start Auto Scan, key in the following Hotkey combination:
-
Invoke hotkey mode with the [Num Lock] + [-] or [Ctrl] + [F12] combination.
-
Press [A]. After you press A, then [Enter], you automatically exit hotkey mode, and enter Auto Scan mode.
- While you are in Auto Scan mode, you can pause the scanning in order to keep the focus on a particular computer either by pressing P or with a left click of the mouse. During the time that auto-scanning is paused, the command line displays: Auto Scan: Paused.
Pausing when you want to keep the focus on a particular computer is more convenient than exiting Auto Scan mode because when you resume scanning, you start from where you left off. If, on the other hand, you exited and restarted, scanning would start over from the very first computer on the installation.
To resume Auto Scanning, press any key or left-click. Scanning continues from where it left off.
- While Auto Scan mode is in effect, ordinary keyboard and mouse functions are suspended – only Auto Scan mode compliant keystrokes and mouse clicks can be input. You must exit Auto Scan mode in order to regain normal control of the console.
- To exit Auto Scan mode press [Esc] or [Spacebar]. Auto-scanning stops when you exit Auto Scan mode.
Skip Mode
This feature allows you to switch between computers in order to monitor them manually. You can dwell on a particular port for as long as you like – as opposed to auto-scanning, which automatically switches after a fixed interval. To invoke Skip mode, key in the following hotkey combination:
- Invoke hotkey mode with the [Num Lock] + [-] or [Ctrl] + [F12] combination.
- Key in [Arrow]
- Where [Arrow] refers to one of the arrow keys. After you press an arrow, you automatically exit hotkey mode and enter Skip mode where you can switch ports as follows:
| ← | Skips to the first accessible port. (See Scan/Skip Mode, page 37, for information regarding accessible ports.) |
| → | kips to the next accessible port. |
| ↑ | kips to the last accessible port of the previous station. |
| ↓ | $kips to the first accessible port of the next station. |
- Once you are in Skip mode, you can keep on skipping by pressing the arrow keys. You don't have to use the [Num Lock] + [-] combination again.
-
While Skip mode is in effect, ordinary keyboard and mouse functions are suspended – only Skip mode compliant keystrokes can be input. You must exit Skip mode in order to regain normal control of the console.
-
To exit Skip mode, press [Esc] or [Spacebar].
Computer Keyboard / Mouse Reset
If the keyboard or mouse cease to function on the computer connected to the currently selected port, you can perform a keyboard / mouse reset on the computer. This function is essentially the same as unplugging and replugging the keyboard and mouse on the target computer. To perform a computer keyboard / mouse reset, key in the following hotkey combination:
-
Invoke hotkey mode with the [Num Lock] + [-] or [Ctrl] + [F12] combination.
-
Press [F5].
After you press [F5] you automatically exit Hotkey mode and regain keyboard and mouse control on the computer connected to the KVM port. If you fail to regain keyboard / mouse control on the computer after pressing [F5], perform a system reset. For more information see Reset Switch, page 10.
Hotkey Beeper Control
The beeper (see Activate Beeper, page 39) can be hotkey toggled on and off. To toggle the beeper, key in the following hotkey combination:
-
Invoke hotkey mode with the [Num Lock] + [-] or [Ctrl] + [F12] combination.
-
Press [B].
After you press [B], the beeper toggles on or off. The command line displays Beeper On or Beeper Off for one second; then the message disappears and you automatically exit hotkey mode.
Quick Hotkey Control
The Quick Hotkey (see HOTKEY, page 37) can be toggled between [Num Lock] + [-], and [Ctrl] + [F12]. To toggle the Quick Hotkey:
- Invoke hotkey mode with the [Num Lock] + [-] or [Ctrl] + [F12] combination.
- Press [H].
After you press [H], the command line displays HOTKEY HAS BEEN CHANGED for one second; then the message disappears and you automatically exit Hotkey mode.
OSD Hotkey Control
The OSD Hotkey (see OSD HOTKEY, page 36) can be toggled between [Scroll Lock], [Scroll Lock] and [Ctrl], [Ctrl]. To toggle the OSD Hotkey, key in the following hotkey combination:
- Invoke hotkey mode with the [Num Lock] + [-] or [Ctrl] + [F12] combination.
- Press [T].
After you press [T], the command line displays HOTKEY HAS BEEN CHANGED for one second; then the message disappears and you automatically exit Hotkey mode.
Port OS Control
A port's operating system can be changed to match that of the computer attached to the port. To change a port's operating system, key in the following hotkey combination:
-
Invoke hotkey mode with the [Num Lock] + [-] or [Ctrl] + [F12] combination.
-
Key in [Function], where [Function] refers to one of the function keys in the following table:
| Key Description |
| F1 Sets the Port OS to Windows |
| F2 Sets the Port OS to Mac |
| F3 Sets the Port OS to Sun |
After pressing a function key you automatically exit Hotkey mode.
Restore Default Values
This administrator only hotkey restores the CL5708I / CL5716I default values. See RESTORE DEFAULT VALUES, page 39. To restore the default values, key in the following hotkey combination:
-
Invoke hotkey mode with the [Num Lock] + [-] or [Ctrl] + [F12] combination.
-
Press [R].
-
Press [Enter].
After you press [Enter], the command line displays RESET TO DEFAULT SETTING for three seconds; then the message disappears and you automatically exit Hotkey mode.
Hotkey Summary Table
| [Num Lock] + [-] or [Ctrl] + [F12] | [A] [Enter] or [Q] [Enter] | Invokes Auto Scan mode.When Auto Scan mode is in effect, [P] or left-click pauses auto-scanning.When auto-scanning is paused, pressing any key or another left-click resumes auto-scanning. |
| [B] Toggles the beeper on or off. | ||
| [Esc] or [Spacebar] Exits hotkey mode. | ||
| [F1] Set Operating System to Windows | ||
| [F2] Set Operating System to Mac | ||
| [F3] Set Operating System to Sun | ||
| [F5] Performs a keyboard / mouse reset on the target computer. | ||
| [H] Toggles the Quick Hotkey invocation keys between [Ctrl] + [F12] and [Num Lock] + [-]. | ||
| [R] [Enter] This administrator only hotkey restores the switch's default values. See RESTORE DEFAULT VALUES, page 39. | ||
| [SN]-[PN] [Enter] Switches access to the computer that corresponds to that port ID.SN= Switch Number; PN= Port NumberExample: 01-04 [Enter](on switch 01 change to port 04)You must key in “-” between SN and PN.Note: See Port ID Numbering, page 28 for details. | ||
| [T] Toggles the OSD Hotkey between [Ctrl][Ctrl] and [Scroll Lock] [Scroll Lock]. | ||
| [←] | Invokes Skip mode and skips from the current port to the first accessible port previous to it. | |
| [→] | Invokes Skip mode and skips from the current port to the next accessible port. | |
| [↑] | Invokes Skip mode and skips from the current port to the last accessible port of the previous station. | |
| [↓] | Invokes Skip mode and skips from the current port to the first accessible port of the next station. | |
Overview
KVM over IP switches can be accessed from an Internet browser; a Windows application (AP) program; and a Java application (AP) program.
No matter which access method you choose, the KVM over IP switch's authentication procedure requires you to submit a valid username and password. If you supply invalid login information, the authentication routine will return an Invalid Username or Password, or Login Failed message. If you see this type of message, log in again with a correct username and password.
Note: If the number of invalid login attempts exceeds a specified amount, a timeout period is invoked. You must wait until the timeout period expires before you can attempt to log in again. See Login Failures, page 141 for further details.
Browser Login
KVM over IP switches can be accessed via an Internet browser running on any platform. To access the switch, do the following:
- Open the browser and specify the IP address of the switch you want to access in the browser's location bar.
Note: For security purposes, a login string may have been set by the administrator (see page 145 for details). If so, you must include a forward slash and the login string along with the IP address when you log in. For example:
192.168.0.100/cl5708i
If you don't know the IP address and login string, ask your Administrator.
- When a Security Alert dialog box appears, accept the certificate – it can be trusted. (See Trusted Certificates, page 227, for details.) If a second certificate appears, accept it as well.
Once you accept the certificate(s), the login page appears:
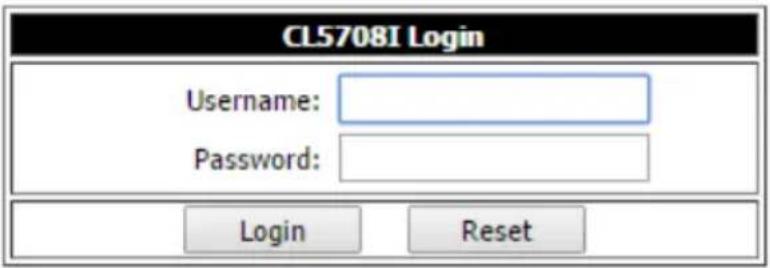
- Provide your username and password (set by the administrator), then click Login to bring up the Web Main Page. For a discussion of the Web Main Page, see page 65.
Windows Client AP Login
In some cases, the Administrator may not want the KVM over IP switch to be available via browser access. The Windows AP Client allows direct remote access to Windows systems users, without having to go through a browser (although you initially download the Windows AP Client program from the browser page – see Chapter 13, Download).
To connect to the KVM over IP switch, go to the location on your hard disk that you downloaded the Windows AP Client program to, and double-click its icon (WinClient.exe) to bring up the Windows Client Connection Screen:
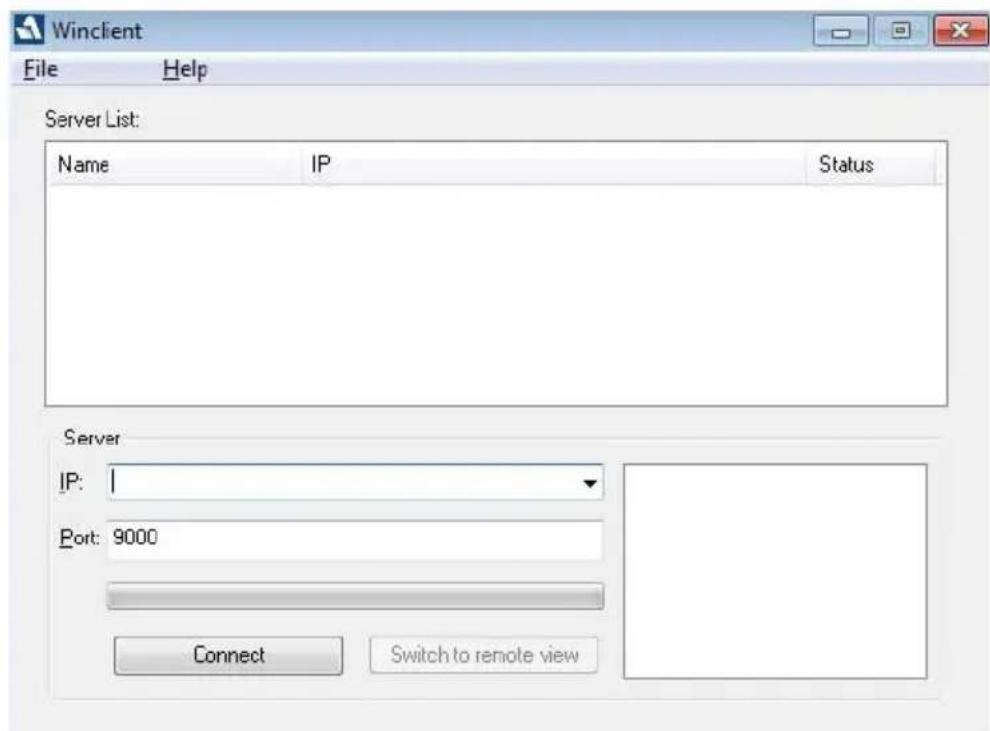
The Windows Client AP Connection Screen
A description of the Connection Screen is given in the following table:
| Item Description | |
| Menu Bar The Menu Bar | contains two items: File and Help.◆ The File Menu allows the operator to Create, Save, and Open user created Work files (see The File Menu, page 60).◆ The Help Menu displays the WinClient AP version. |
| Server List Each time the | WinClient.exe file is run, it searches the user's local LAN segment for KVM over IP switches, and lists whichever ones it finds in this box. If you want to connect to one of these units, double-click it. (See Connecting – Windows Client AP, page 59 for details.)Note:1. The switch will not appear in the list unless its Enable Device List configuration parameter has been enabled. See Operating Mode, page 132 for details.2. Only units whose Access Port settings for Program (see Service Ports, page 134) match the number specified for Port in the Server area of this dialog box appear in the Server List window. |
| Server | This area is used when you want to connect to a KVM over IP switch at a remote location. You can drop down the IP list box and select an address from the list. If the address you want isn't listed, you can key in the target IP address in the IP field, and its port number in the Port field. (If you don't know the port number, contact your Administrator.)◆ When the IP address and Port number have been specified, click Connect. (See Connecting – Windows Client AP, page 59 for details.)◆ When you have finished with your session and come back to this dialog box, click Disconnect to end the connection. |
| Message Panel Located | just to the right of the Server panel, the Message panel lists status messages regarding the connection to the KVM over IP switch. |
| Switch to Remote View | Once you have been authenticated (see Connecting – Windows Client AP, page 59 for details), this button becomes active. Click it to switch to the GUI Main Page. The GUI Main Page is described on page 68. |
Connecting – Windows Client AP
To connect to a KVM over IP switch do the following:
- From the Server List box, double-click the device that you wish to connect to.
-Or-
Specify its IP address and port number in the Server IP and Port input boxes.
- Click Connect.
The Login dialog box appears:
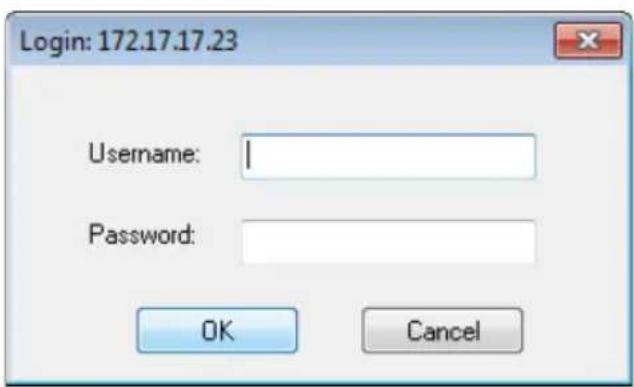
- Key in a valid Username and Password, and then click OK.
- Once you have been authenticated, the Switch to Remote View button becomes active. Click it to connect to the switch and bring up its GUI Main Page. For a description of the GUI Main Page, see page 48.
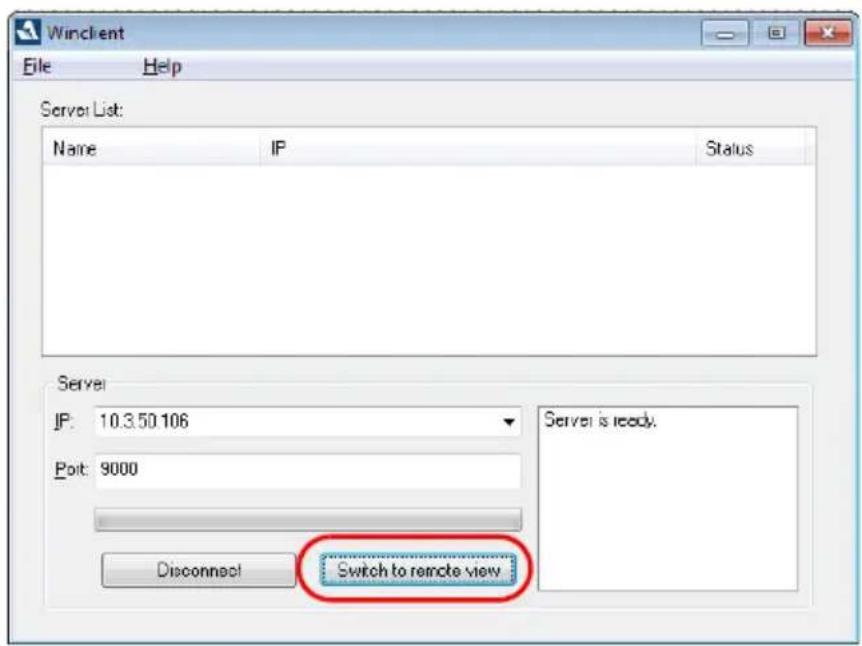
The File Menu
The File Menu allows the operator to Create, Save, and Open user created Work files. A Work File consists of all the information specified in a Client session. This includes the Server List and Server IP list items, as well as the Hotkey settings.
Whenever a user runs the Client program, it opens with the values contained in the current work file. The current work file consists of the values that were in effect the last time the program was closed.
The File menu consists of the following items:
| New Allows the user | to create a named work file so its values will not be lost, and it will be available for future recall. |
| Open Allows the user | to open a previously saved work file and use the values contained in it. |
| Save Allows the user | to save the values presently in effect as the current work file. |
| Exit Exits the WinClient. | |
Java Client AP Login
In those cases in which the Administrator does not want the KVM over IP switch to be available via browser access, but the local client users aren't running Windows, the Java AP Client provides direct remote access to non-Windows systems users (although you initially download the Java AP Client program from the browser page – see Chapter 13, Download).
To connect to the KVM over IP switch, go to the location on your hard disk that you downloaded the Java AP Client program to, and double-click its icon (JavaClient.jar) to bring up the Java Client Connection Screen:
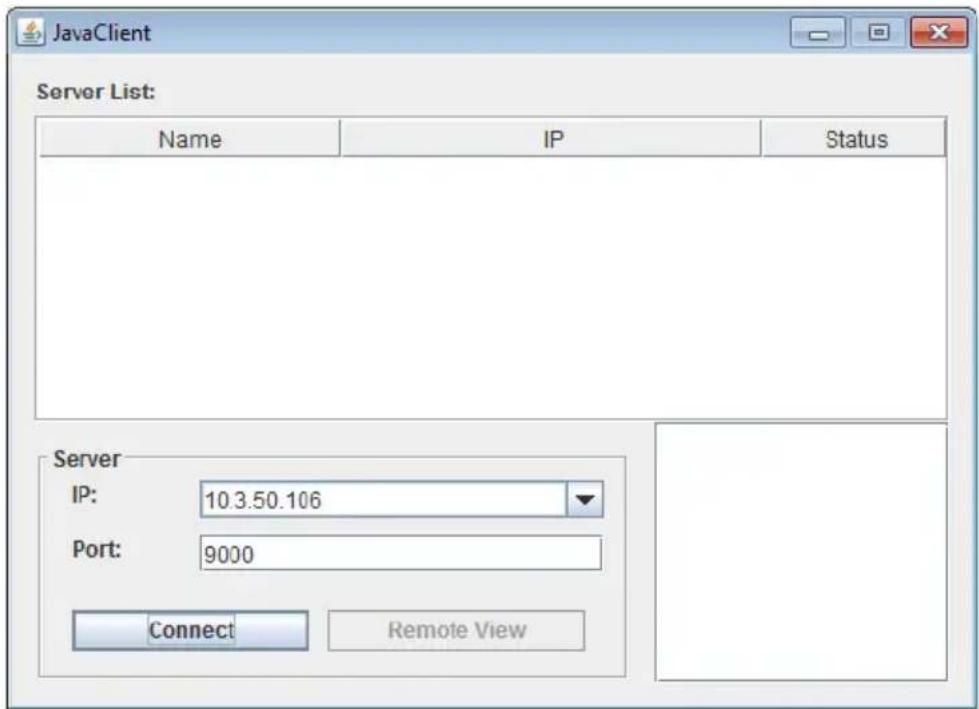
The Java Client AP Connection Screen
A description of the Connection Screen is given in the following table:
| Item Description | |
| Server List Each time the | JavaClient.jar file is run, it searches the User's local LAN segment for KVM over IP switches, and lists whichever ones it finds in this box. If you want to connect to one of these units, double-click it. (See Connecting – Windows Client AP, page 59 for details.)Note:1. The switch will not appear in the list unless its Enable Device List configuration parameter has been enabled. See Operating Mode, page 132 for details.2. Only units whose Access Port settings for Program (see Service Ports, page 134) match the number specified for Port in the Server area of this dialog box appear in the Server List window. |
| Server | This area is used when you want to connect to a KVM over IP switch at a remote location. You can drop down the IP list box and select an address from the list. If the address you want isn't listed, you can key in the target IP address in the IP field, and its port number in the Port field. (If you don't know the port number, contact your Administrator.)◆ When the IP address and Port number have been specified, click Connect. (See Connecting – Windows Client AP, page 59 for details.)◆ When you have finished with your session and come back to this dialog box, click Disconnect to end the connection. |
| Message Panel Located | just to the right of the Server panel, the Message panel lists status messages regarding the connection to the KVM over IP switch. |
| Switch to Remote View | Once you have been authenticated (see Connecting – Windows Client AP, page 59 for details), this button becomes active. Click it to switch to the GUI Main Page. The GUI Main Page is described on page 68. |
Connecting – Java Client AP
To connect to a KVM over IP switch do the following::
- From the Server List box, double-click the device that you wish to connect to.
-Or-
Specify its IP address and port number in the Server IP and Port input boxes.
- Click Login
The Login dialog box appears:
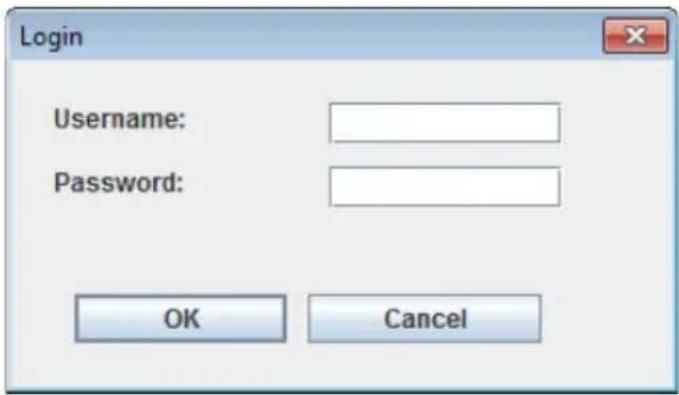
- Key in a valid Username and Password, and then click OK.
- Once you have been authenticated, the Remote View button becomes active. Click it to connect to the switch and bring up its GUI Main Page. For a description of the GUI Main Page, see page 48.
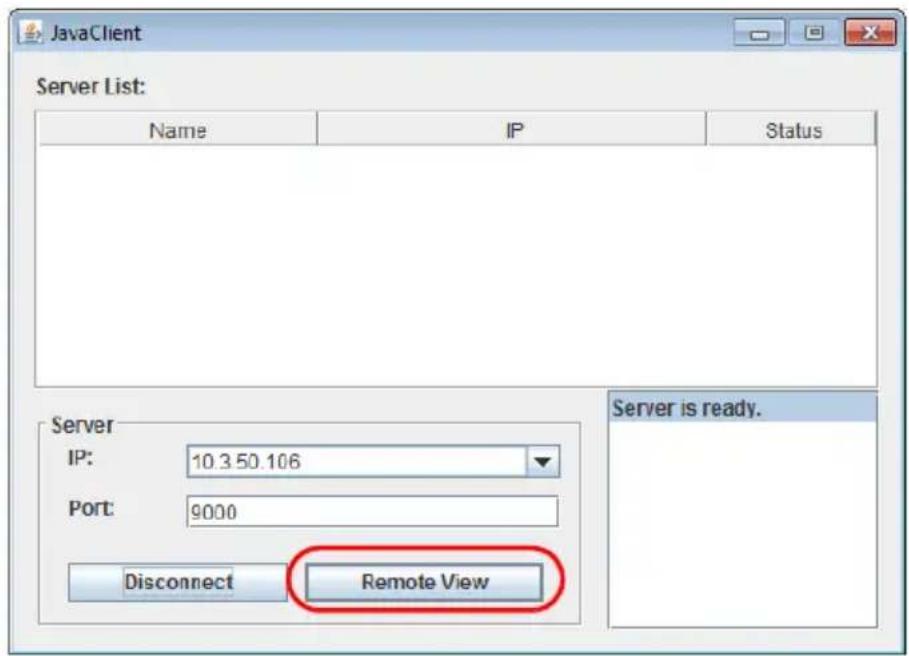
This Page Intentionally Left Blank
Overview
Once you have successfully logged in, the KVM over IP switch's user interface Main Page appears. The look of the page varies slightly, depending on which method you used to log in. Each of the interfaces is described in the sections that follow.
The Web Browser Main Page
To ensure multi-platform interoperability, access to the KVM over IP switches can be accomplished with most standard web browsers. Once users log in and are authenticated (see page 55), the Web Browser Main Page comes up, with the Port Access page displayed:
![1 Port Start User Management Device Management Log Maintenance Download 2 ConnectSenses Favorites User Preferences Settings Access Port Configuration HI administrator, welcome to CLSP08E 3 [01] CL5708E [02] [03] [04] [05] [06] [07] [08] 4 5 6 7 Start Menu Start Menu Service Menu Editars 01-01 CLST08I Offline 01-02 CLST08I Online 01-03 CLST08I Offline 01-04 CLST08I Offline 01-05 CLST08I Offline 01-06 CLST08I Offline 01-07 CLST08I Offline 01-08 CLST08I Offline](/content/2026/05/987336/images/f025cab0d082b1db3bb4e4b3d13b82d20eb27720f45519f922c113ee09818c49.jpg)
Note: The screen depicts a Super Administrator's page. Depending on a user's type and permissions, not all of these elements appear.
Page Components
The web page screen components are described in the table, below:
| No. | Item Description | |
| 1 | Tab Bar The tab bar contains | the KVM over IP switch's main operation categories. The items that appear in the tab bar are determined by the user's type, and the authorization options that were selected when the user's account was created. |
| 2 | Menu Bar The menu bar contains | ains operational sub-categories that pertain to the item selected in the tab bar. The items that appear in the menu bar are determined by the user's type, and the authorization options that were selected when the user's account was created. |
| 3 | Sidebar The Sidebar provides | a tree view listing of ports that relate to the various tab bar and menu bar selections. Clicking a node in the Sidebar brings up a page with the details that are relevant to it.There is aFilterbutton at the bottom of the Sidebar that lets you expand or narrow the scope of the ports that appear in the tree. The Filter function is discussed in detail on page 101 |
| 4 | About About provides information regarding the switch's current firmware version. | |
| 5 | Logout Click this button to log | out of your KVM over IP switch session. |
| 6 | Welcome Message | If this function is enabled (seeWelcome Message*, page 111), a welcome message displays here. |
| 7 | Interactive Display Panel This | is your main work area. The screens that appear reflect your menu choices and Sidebar node selection. |
The Tab Bar
The number and type of icons that appear on the Tab Bar at the top of the page are determined by the user's type (Super Administrator, Administrator, User) and the permissions assigned when the user's account was created. The functions associated with each of the icons are explained in the table below:
| Icon Function | |
 | Port Access: The Port Access page is used to access and control the devices on the KVM over IP switch installation. This page is available to all users. |
 | User Management: The User Management page is used to create and manage Users and Groups. It can also be used to assign devices to them. User Management is discussed on page 121. This tab is available to the Super Administrator, as well as administrators and users who have been given User Management permission. |
 | Device Management: The Device Management page is used to configure and control the overall operation of the KVM over IP switch. This page is available to the Super Administrator, as well as administrators and users who have been given Device Management permission. |
 | Log: The Log page displays the contents of the log file. The Log page is discussed on page 155. |
 | Maintenance: The Maintenance page is used to install new firmware; backup and restore configuration and account information; ping network devices; and restore default values. The Maintenance page is discussed on page 159. This page is available to the Super Administrator (and Administrators and Users with Maintenance permission). |
 | Download: Users can click this icon to download AP versions of the Windows Client; the Java Client; and the Log Server. This page is available to all users. The programs that can be downloaded depend on the user's permissions. |
There are two small icons at the extreme right of the page. Their functions are described in the table, below:
| Icon Function | |
 | Click this icon to brings up a panel with information about the KVM over IP switch firmware version. |
 | Click this icon to log out and end your KVM over IP switch session. |
The AP GUI Main Page
With WinClient AP, and Java Client AP access, once users log in (see Logging In, page 55), the GUI Main Page comes up:
![Remote Views PortAccess User Management Device Management Log Maintenance Download [01]C:\5708 [01] [02] [03] [04] [05] [06] [07] [08] Connections Favorites User Preferences Sessions Access Port Configuration Port Number Port Name Device Name Status 0107 Offline 0102 Offline 0103 Offline 0104 Offline 0105 Offline 0106 Offline 0107 Offline 0108 Offline Double click or press Enter Connect Scan Asay Mode Files Copyright ©2012-2016 ATEH International Co. Ltd V2.1.202.20:70407](/content/2026/05/987336/images/443e2d2e5a6aa5692cd93f587ac0325385b18321acc074eea3fbb4b402fe048e.jpg)
The GUI Main Page is similar to that of the Web Browser. The differences between them are as follows:
- The AP GUI version doesn't have a menu bar below the tab bar; it has a series of tabs like a notebook, instead. Like the Web Browser interface, however, the makeup of the tabbed notebook changes depending on the items selected on the main Tab Bar and in the Sidebar.
- In addition to Filter, there are also buttons for Scan and Array Mode at the bottom of the Sidebar. These functions are discussed in Chapter 8, Port Access.
-
There is a hidden Control Panel at the upper or lower center of the screen that becomes visible when you mouse over it. The default is at the upper center of the screen.
-
There is an additional icon at the extreme right of the page: ✗. Click this icon to close the GUI Main Page and go to the display of the last selected port.
-
The GUI can be navigated via the keyboard as shown in the table, below:
| Keys Action | |
| Ctrl + P Opens the Port Access page. | |
| Ctrl + U Opens the User Management page. | |
| Ctrl + C Opens the Device Management page. | |
| Ctrl + L Opens the Log page. | |
| Ctrl + M Opens the Maintenance page. | |
| Ctrl + D Opens the Download page. | |
| F1 To see About information. | |
| F2 To edit the port name of the selected port. | |
| F4 Selects the Sidebar (left) panel. | |
| F5 Selects the main (right) panel. | |
| F7 Closes the GUI. | |
| F8 To log out. | |
The Control Panel
WinClient Control Panel
Since the WinClient Control Panel (for the ActiveX Web Viewer and WinClient AP) contains the most complete functionality, this section describes the WinClient Control Panel. Although the Java Control Panel (for the Web Viewer and Java Client AP) does not enable all of the features that this one does, the functions that they do share are the same, and you can refer to the information described here when using it.
The Control Panel is hidden at the upper or lower center of the screen (the default is at the upper center), and becomes visible when you mouse over it. The panel consists of three rows: an icon row at the top, and two text rows below it:

Note: The above image shows the complete Control Panel. The icons that appear can be user selected. See Control Panel Configuration, page 94, for details.
- By default, the upper text row shows the video resolution of the remote display. As the mouse pointer moves over the icons in the icon bar, however, the information in the upper text row changes to describe the icon's function. In addition, if a message from another user is entered in the message board, and you have not opened the message board in your session, the message will appear in the upper row.
- The lower row shows the IP address of the device you are accessing at the left of the row.
- The bus and user information in the center of the lower row only displays if it has been enabled (See Bus Info, page 95 for details). In the image above C1/2 means that bus number 1 has 2 users connected.
- Right clicking in the text row area brings up a menu-style version of the toolbar. In addition, it allows you to select options for the Screen Mode, Zoom, Mouse Pointer, Mouse Sync Mode and Marco List (Macro List appears after a user macro is created). These functions are discussed in the sections that follow.
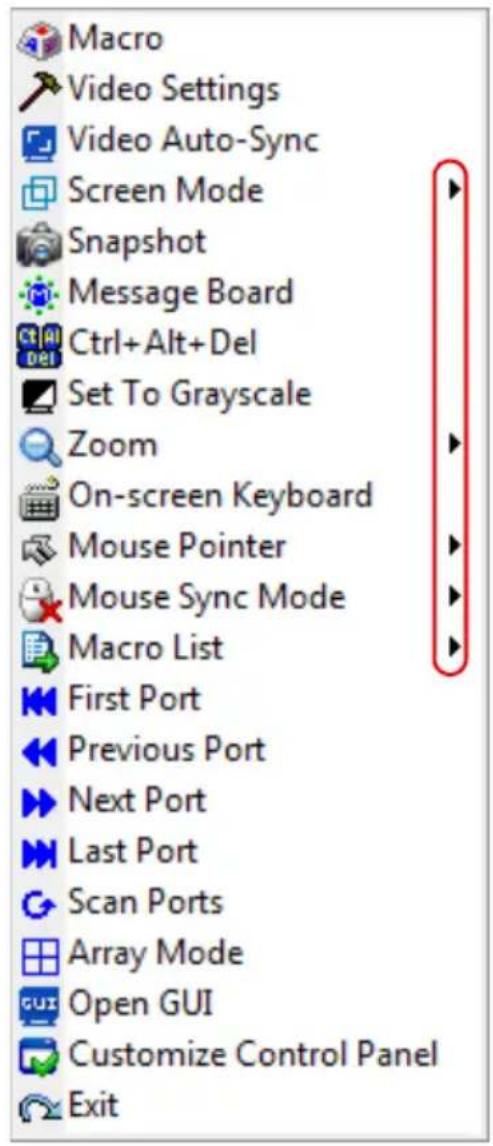
- To move the Control Panel to a different location on the screen, place the mouse pointer over the text row area, then click and drag.
WinClient Control Panel Functions
The Control Panel functions are described in the table below.
| Icon Function | |
 | This is a toggle. Click to make the Control Panel persistent - i.e., it always displays on top of other screen elements. Click again to have it display normally. |
 | Click to bring up the Macros dialog box (see page 75 for details). |
 | Click to bring up the Video Options dialog box. Right-click to perform a quick Auto Sync (see Video Settings, page 81, for details). |
 | Click to perform a video and mouse autosync operation. It is the same as clicking the Auto Sync button in the Video Options dialog box (see Video Settings, page 81). |
 | Toggles the display between Full Screen Mode and Windowed Mode. |
 | Click to take a snapshot (screen capture) of the remote display. See Snapshot, page 95, for details on configuring the Snapshot parameters. |
 | Click to bring up the Message Board (see The Message Board, page 86). |
 | Click to send a Ctrl+Alt+Del signal to the remote system. |
 | Click to toggle the remote display between color and grayscale views. |
 | Click to zoom the remote display window. Note: This feature is only available in windowed mode (Full Screen Mode is off). See Zoom, page 88 for details. |
 | Click to bring up the on-screen keyboard (see The On-Screen Keyboard, page 89). |
  | Click to select the mouse pointer type. Note: This icon changes depending on which mouse pointer type is selected (see Mouse Pointer Type, page 91).Click to toggle Automatic or Manual mouse sync.◆ When the selection isAutomatic, a green√appears on the icon.◆ When the selection isManual, a red X appears on the icon.SeeMouse DynaSync Mode, page 92 for a complete explanation of this feature. |
 | Click to display a dropdown list ofUser macros in order to access and run macros more conveniently than using the Macros dialog box (see theMacrosicon in the table above, and theMacrossection on page 75). |
 | Under an accessed port, click to skip to the first port accessible to the user on the entire installation without having to recall the Port Access page. |
 | Under an accessed port, click to skip to the first port accessible to the user that is previous to the current one without having to recall the Port Access page. |
 | Under an accessed port, click to skip to the first port accessible to the user that is after the current one without having to recall the Port Access page. |
 | Under an accessed port, click to skip to the last port accessible to the user on the entire installation without having to recall the Port Access page. |
 | Under an accessed port, click to begin Auto Scan Mode. The KVM over IP switch automatically switches among the ports that were selected for Auto Scanning with theFilterfunction (seeFilter, page 101). This allows you to monitor their activity without having to switch among them manually. |
 | Under an accessed port, click to invoke Panel Array Mode (seePanel Array Mode, page 175). |
 | Under an accessed port, click to recall the GUI. |
 | Click to bring up the Control Panel Configuration dialog box.SeeControl Panel Configuration, page 94, for details on configuring the Control Panel. |
  | Click to exit the viewer.◆ Exiting from a Browser Viewer session brings you back to the web browser Main Page.◆ Exiting from a WinClient AP session brings you back to the login dialog box (see page 57).◆ Exiting from a Java Client AP session brings you back to the login dialog box (see page 61).These icons show the Num Lock, Caps Lock, and Scroll Lock status of the remote computer.◆ When the lock state is On, the LED is bright green and the lock hasp is closed.◆ When the lock state is Off, the LED is dull green and the lock hasp is open.Click on the icon to toggle the status.Note: These icons and your local keyboard icons are in sync. Clicking an icon causes the corresponding LED on your keyboard to change accordingly. Likewise, pressing a Lock key on your keyboard causes the icon’s color to change accordingly. |

Macros
The Macros icon provides access to two functions found in the Macros dialog box: Hotkeys and User Macros. Each of these functions is described in the following sections.
Hotkeys
Various actions related to manipulating the remote server can be accomplished with hotkeys. The Hotkey Setup utility (accessed by clicking this icon), lets you configure which hotkeys perform the actions.
The hotkeys that invoke an action are shown to the right of its name. Use the checkbox to the left of an action's name to enable or disable its hotkey.
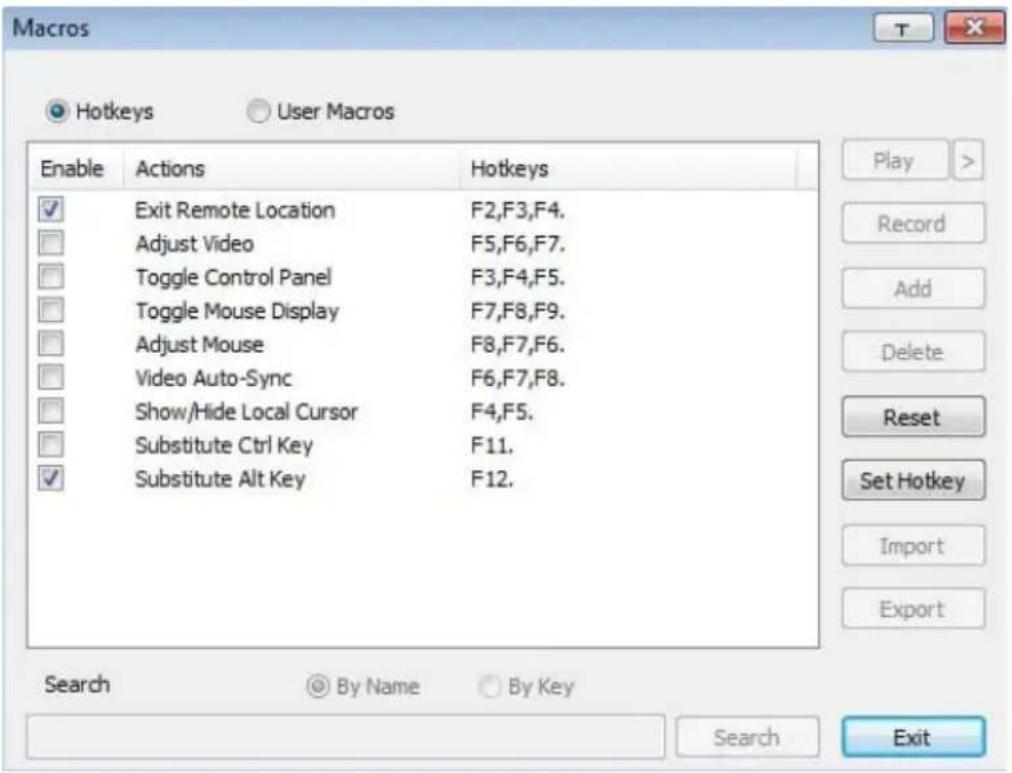
To change the hotkey for an action, do the following:
- Highlight the Name, then click Set Hotkey.
-
Press your selected Function keys (one at a time). The key names appear in the Hotkeys field as you press them.
-
You can use the same function keys for more than one action, as long as the key sequence is not the same.
-
To cancel setting a hotkey value, click Cancel; to clear an action's Hotkeys field, click Clear.
-
When you have finished keying in your sequence, click Save.
To reset all the hotkeys to their default values, click Reset.
An explanation of the Hotkey actions is given in the table below:
| Action Explanation | |
| Exit Remote Location | Breaks the connection to the KVM over IP switch and returns you to local client computer operation. This is equivalent to clicking the Exit icon on the Control Panel. The default keys are F2, F3, F4. |
| Adjust Video | Brings up the Video Settings dialog box. This is equivalent to clicking the Video Settings icon on the Control Panel. The default keys are F5, F6, F7. |
| Toggle Control Panel | Toggles the Control Panel Off and On. The default keys are F3, F4, F5. |
| Toggle Mouse Display | If you find the display of the two mouse pointers (local and remote) to be confusing or annoying, you can use this function to shrink the non-functioning pointer down to a barely noticeable tiny circle, which can be ignored. Since this function is a toggle, use the hotkeys again to bring the mouse display back to its original configuration. This is equivalent to selecting the Dot pointer type from the Mouse Pointer icon on the Control Panel. The default keys are F7, F8, F9.Note: The Java Control Panel does not have this feature. |
| Adjust Mouse This synchronizes the local and remote mouse movements. The default keys are F8,F7,F6. | |
| Video Auto Sync This combination performs an auto-sync operation. It is equivalent to clicking the Video Auto Sync icon on the Control Panel. The default keys are F6,F7,F8. | |
| Show/Hide Local Cursor | Toggles off and on: hides local cursor and locks the mouse pointer and keyboard use within the Windows/Java Client AP window, plus hides the control panel. This is equivalent to selecting the Single pointer type from the Mouse Pointer icon on the Control Panel. The default keys are F4,F5. |
| Substitute Ctrl Key If your local client computer captures Ctrl key combinations, preventing them from being sent to the remote server, you can implement their effects on the remote server by specifying a function key to substitute for the Ctrl key. If you substitute the F11 key, for example, pressing [F11 + 5] would appear to the remote server as [Ctrl + 5]. The default key is F11. | |
| Substitute Alt Key | Although all other keyboard input is captured and sent to the KVM over IP switch, [Alt + Tab] and [Ctrl + Alt + Del] work on your local client computer. In order to implement their effects on the remote server, another key may be substituted for the Alt key. If you substitute the F12 key, for example, you would use [F12 + Tab] and [Ctrl + F12 + Del]. The default key is F12. |
User Macros
User Macros are created to perform specific actions on the remote server. To create the macro, do the following:
- Select User Macros, then click Add.
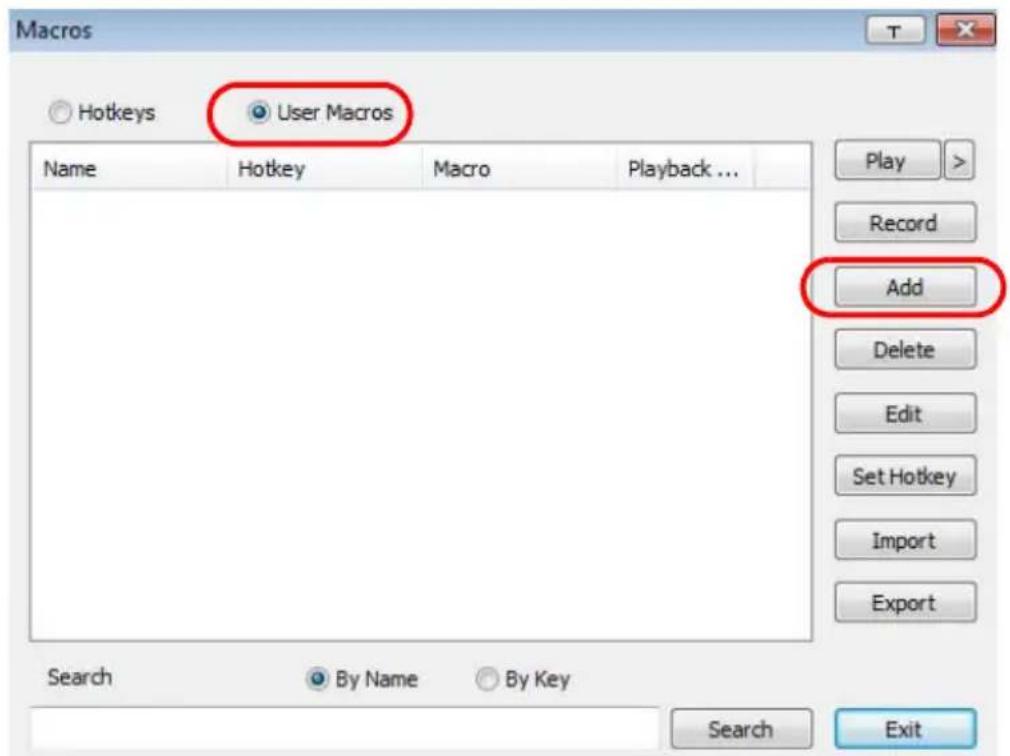
- In the dialog box that comes up, replace the “New Macro” text with a name of your choice for the macro:
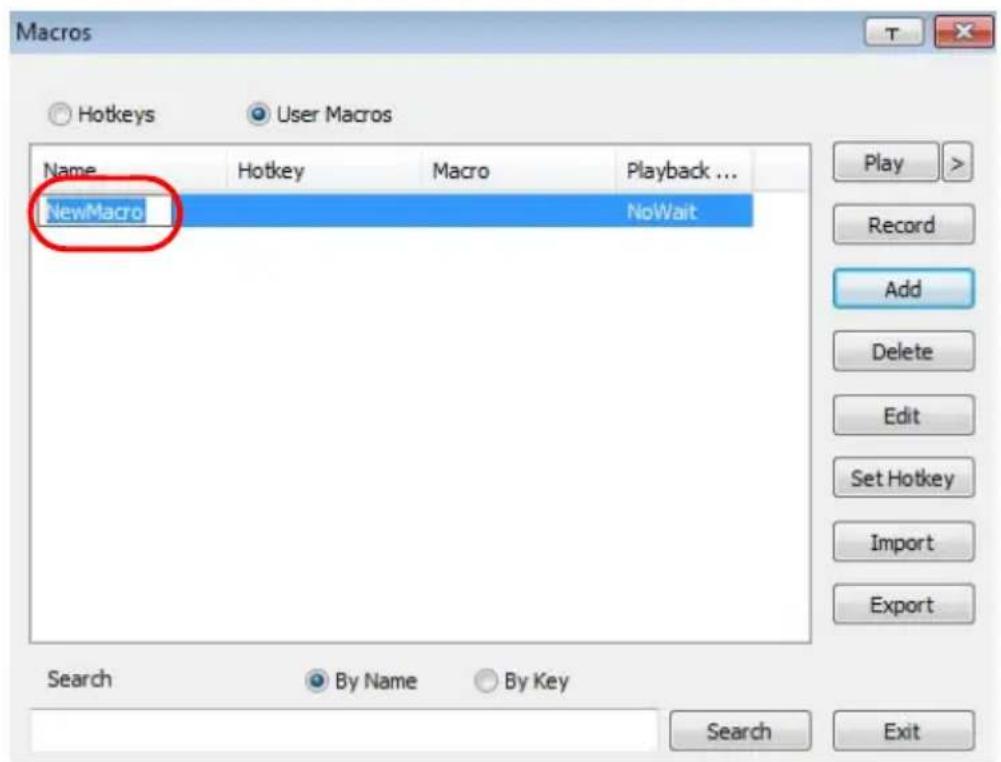
3. Click Record.
The dialog box disappears, and a small panel appears at the top left of the screen:

-
Press the keys for the macro.
-
To pause macro recording, click Pause. To resume, click Pause again.
- Clicking Show brings up a dialog box that lists each keystroke that you make, together with the amount of time each one takes:
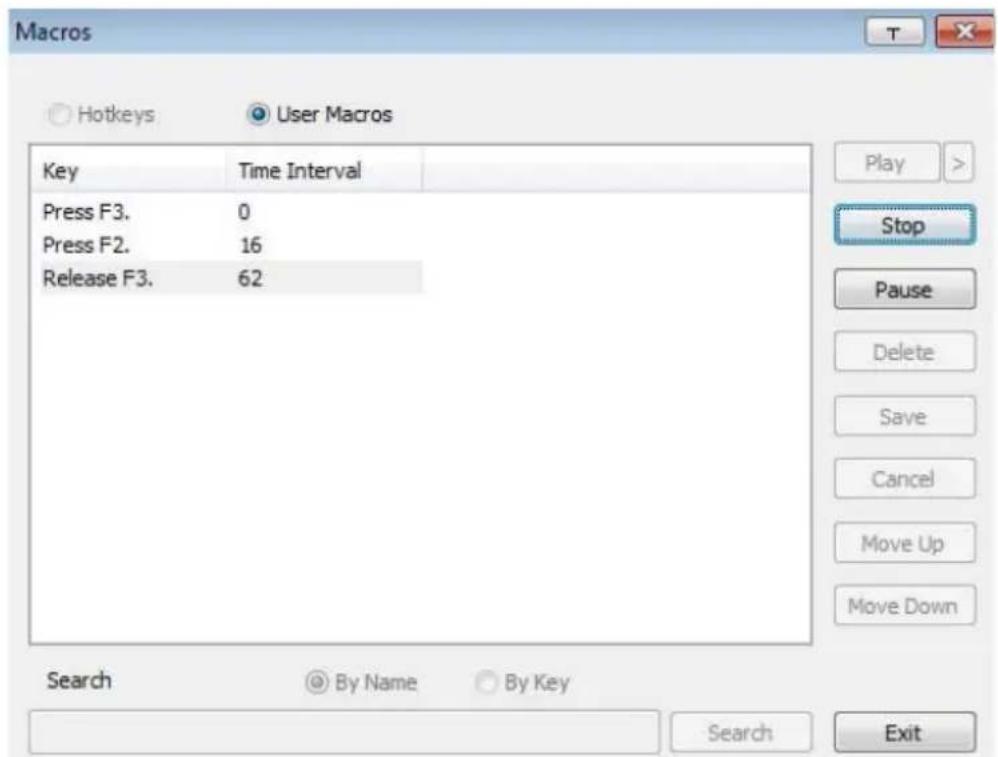
- Clicking Cancel cancels all keystrokes.
- When you have finished, click Record. (This is the equivalent of clicking Done in Step 5.)
- When recording the macro the focus must be on the remote screen. It cannot be in the macro dialog box.
Note: 1. Case is not considered – typing A or a has the same effect.
-
Only the default keyboard characters may be used. Alternate characters cannot be used. For example, if the keyboard is Traditional Chinese and default character is A the alternate Chinese character obtained via keyboard switching is not recorded.
-
If you haven't brought up the Show dialog, click Done when you have finished recording your macro. You return to the Macros dialog box with your system macro key presses displayed in the Macro column:
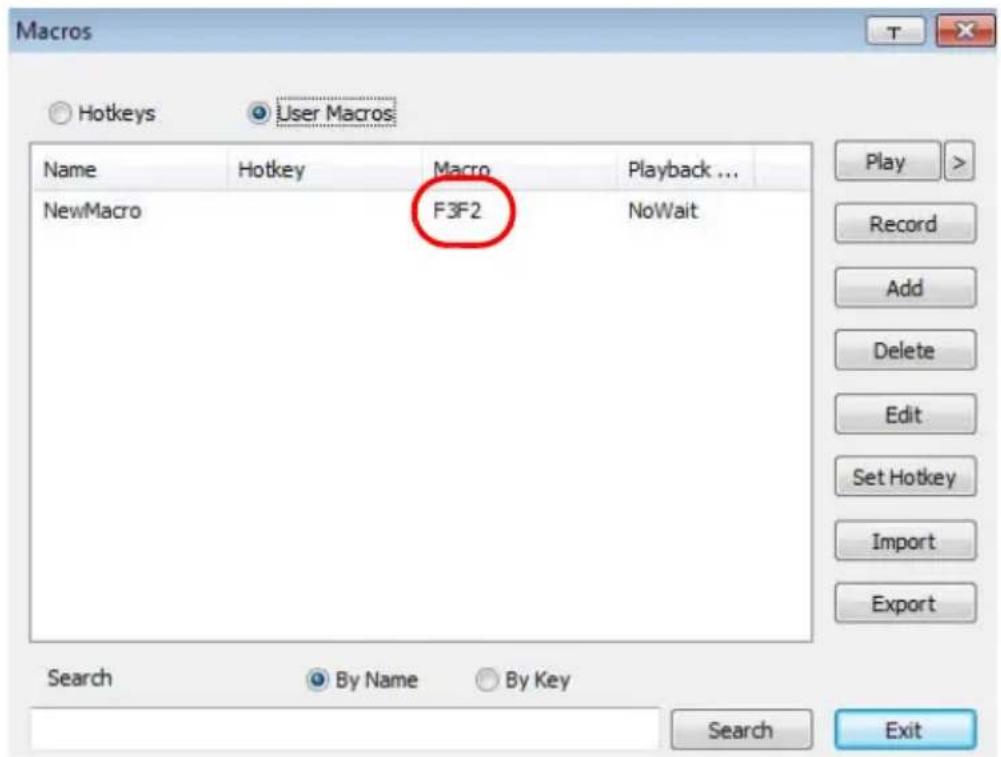
-
If you want to change any of the keystrokes, select the macro and click Edit. This brings up a dialog box similar to the one for Show. You can change the content of your keystrokes, change their order, etc.
-
Repeat the procedure for any other macros you wish to create.
After creating your macros, you can run them in any of three ways:
- By using the hotkey (if one was assigned).
- By opening the Macro List on the Control Panel and clicking the one you want (see page 73).
- By opening this (Macros) dialog box and clicking Play.
If you run the macro from this dialog box, you have the option of specifying how the macro runs.
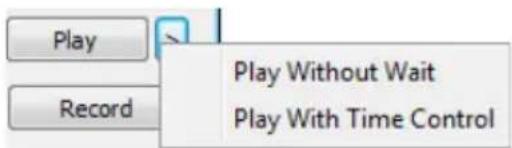
- If you choose Play Without Wait, the macro runs the key presses one after another with no time delay between them.
If you choose Play With Time Control, the macro waits for the amount of time between key presses that you took when you created it. Click on the arrow next to Play to make your choice.
- If you click Play without opening the list, the macro runs with the default choice (NoWait or TimeCtrl), which is shown in the Playback column.
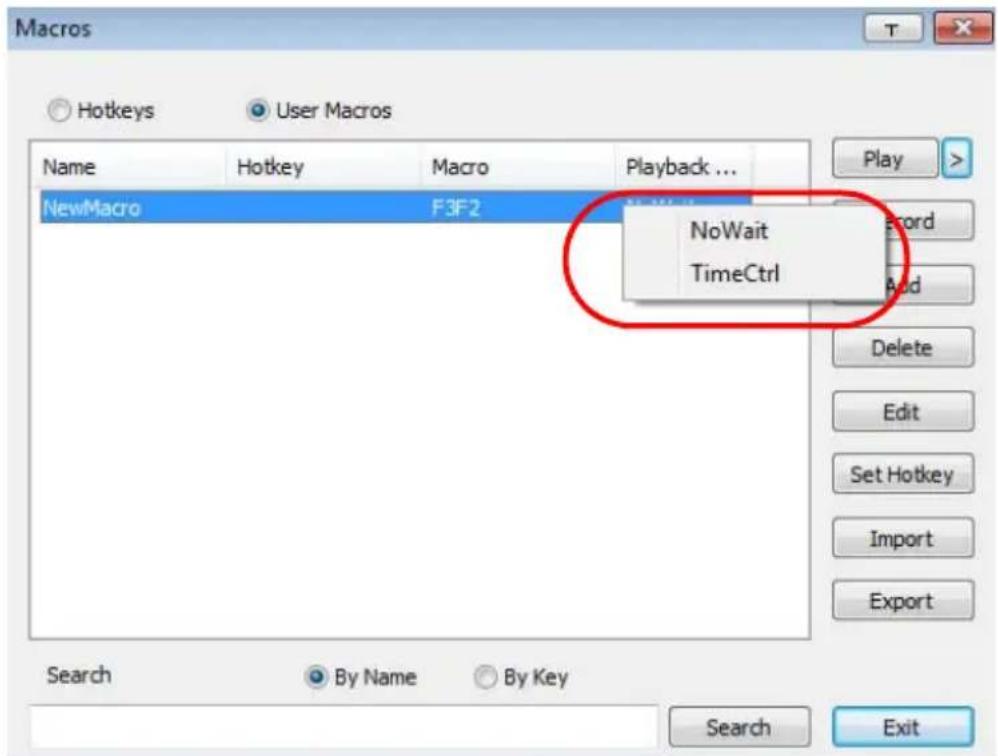
You can change the default choice by clicking on the current choice (NoWait in the screenshot above), and selecting the alternate choice.
Note: 1. Information about the Search function is provided below.
- User Macros are stored on the Local Client computer of each user. Therefore, there is no limitation on the of number of macros, the size of the macro names, or makeup of the hotkey combinations that invoke them.
Search
Search, at the bottom of the dialog box, lets you filter the list of macros that appear in the large upper panel for you to play or edit. Click a radio button to choose whether you want to search by name or by key; key in a string for the search; then click Search. All instances that match your search string appear in the upper panel.

Video Settings
Clicking the Hammer icon on the Control Panel brings up the Basic Video Settings dialog box with basic settings. The options in the basic dialog box allow you to adjust the Screen Position, set Auto Sync, and slide the Performance bar setting. Selecting the Advanced button opens the Advanced Video Settings dialog box, providing more detailed options including RGB, Gamma, Video Quality, Enable Refresh, Transparency and Color Depth Control, as shown below:
Basic Video Settings
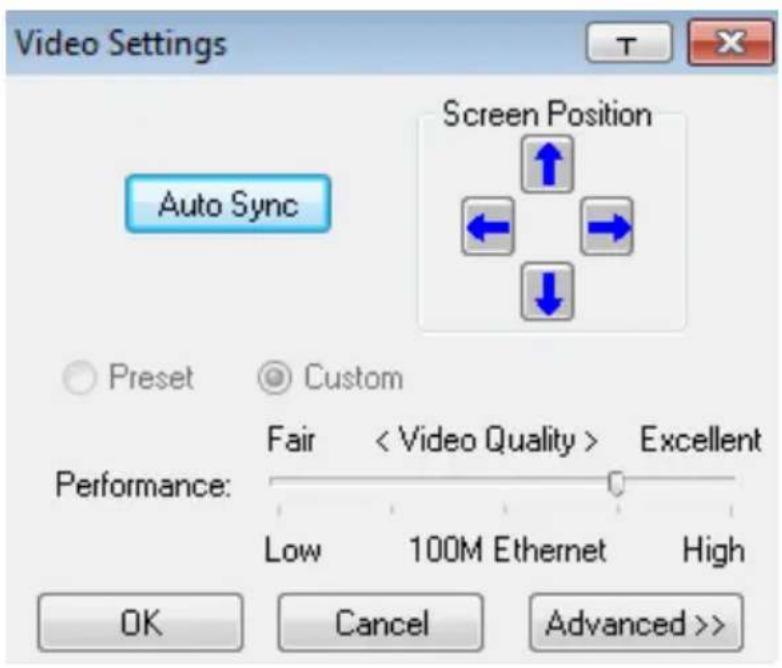
Advanced Video Settings
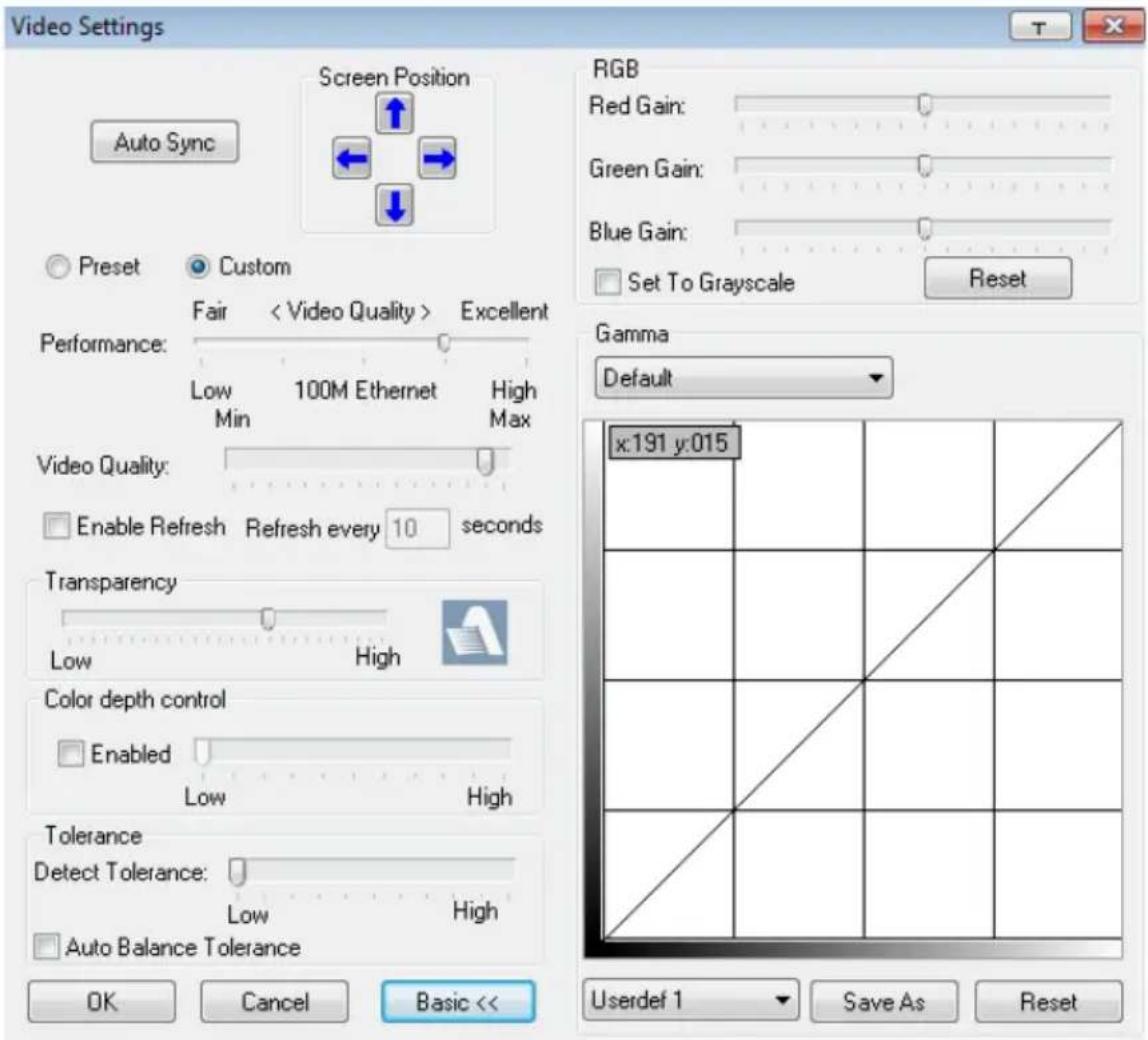
The meanings of the video adjustment options are given in the table below:
| Options Usage | |
| Screen Position | Adjust the horizontal and vertical position of the remote server window by Clicking the Arrow buttons. |
| Auto Sync | Click Auto Sync to have the vertical and horizontal offset values of the remote screen detected and automatically synchronized with the local screen.Note:1. If the local and remote mouse pointers are out of sync, in most cases, performing this function will bring them back into sync.2. This function works best with a bright screen.3. If you are not satisfied with the results, use the Screen Position arrows to position the remote display manually. |
| RGB Drag the slide | der bars to adjust the RGB (Red, Green, Blue) values.When a RGB value is increased, the RGB component of the image is correspondingly increased.If you enableSet to Grayscale,the remote video display is changed to grayscale.Clicking theResetbutton brings the RGB settings back their default values. |
| Gamma This section | allows you to adjust the video display's gamma level.This function is discussed in detail in the next section,Gamma Adjustment. |
| Performance Use | the slide bar to select the type of Internet connection that the local client computer uses. The switch will use that selection to automatically adjust theVideo Qualitysettings to optimize the quality of the video display.Since network conditions vary, if none of the preset choices seem to work well, you can selectAdvancedand use the Video Quality slide bar to adjust the settings to suit your conditions. |
| Video Quality Drag | the slider bar to adjust the overall Video Quality. The larger the value, the clearer the picture and the more video data goes through the network. Depending on the network bandwidth, a high value may adversely effect response time. |
| Enable Refresh | The KVM over IP switch can redraw the screen every 1 to 99 seconds, eliminating unwanted artifacts from the screen. SelectEnable Refreshand enter a number from 1 through 99. The KVM over IP switch will redraw the screen at the interval you specify. This feature is disabled by default. Click to put a check mark in the box next toEnable Refreshto enable this feature.Note:1. The switch starts counting the time interval when mouse movement stops.2. Enabling this feature increases the volume of video data transmitted over the network. The lower the number specified, the more often the video data is transmitted. Setting too low a value may adversely affect overall operating responsiveness. |
| Transparency Adjust | justs the transparency of the toolbar that comes up when the GUI hotkey ([Scroll Lock][Scroll Lock], for example), is invoked. Slide the bar until the display in the example window is to your liking. |
| Color Depth Control | This setting determines the richness of the video display by adjusting the amount of color information. |
| Detect Tolerance | This setting also relates to video quality. It governs detecting or ignoring pixel changes. A high setting can result in a lower quality display due to less data transfer. A lower setting will result in better video quality, but setting the threshold too low may allow too much data to be transferred, negatively impacting network performance.Selecting the Auto Balance Tolerance check box allows the switch to automatically detect and adjust the tolerance settings according to pixel changes as they occur. |
| Preset / Custom | Using the Preset and Custom buttons allow you to set and save custom video settings, and revert back to default video settings. |
Gamma Adjustment
If it is necessary to correct the gamma level for the remote video display, use the Gamma function of the Video Settings dialog box.
- Under Advanced configuration, there are ten preset and four user-defined levels to choose from. Drop down the list box and choose the most suitable one.
- For greater control, clicking the Advanced button brings up the following dialog box:
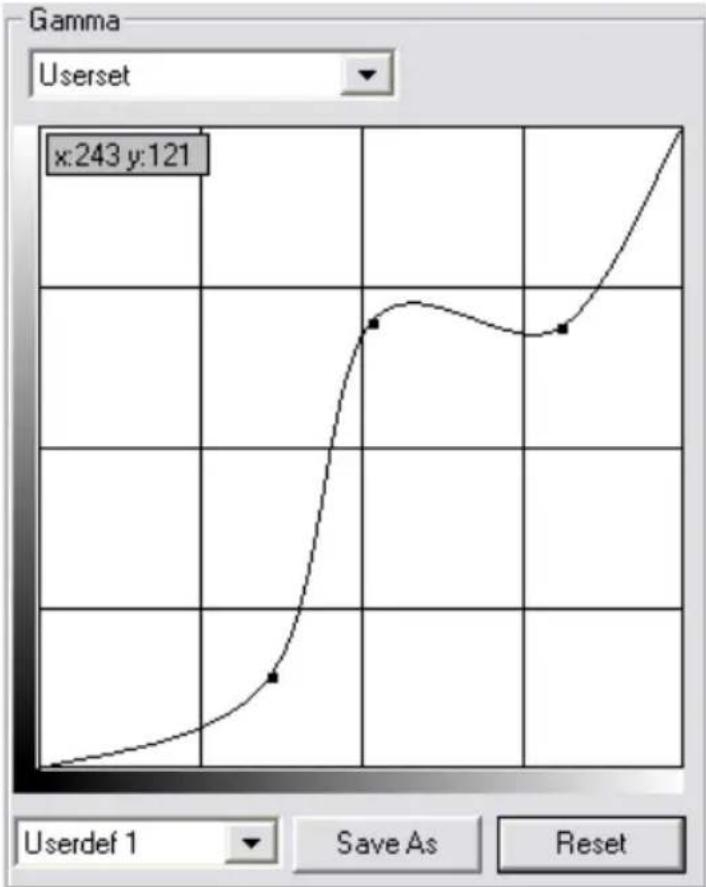
line
| x | y | | ---- | --- | | 243 | 121 |- Click and drag the diagonal line at as many points as you wish to achieve the display output you desire.
- Click Save As to save up to four user-defined configurations derived from this method. Saved configurations can be recalled from the list box at a future time.
- Click Reset to abandon any changes and return the gamma line to its original diagonal position.
- Click OK to save your changes and close the dialog box.
- Click Cancel to abandon your changes and close the dialog box.
Note: For best results, change the gamma while viewing a remote server.

The Message Board
The KVM over IP switch supports multiple user logins, which may cause access conflicts. To alleviate the problem, a message board has been provided, which allows users to communicate with each other:
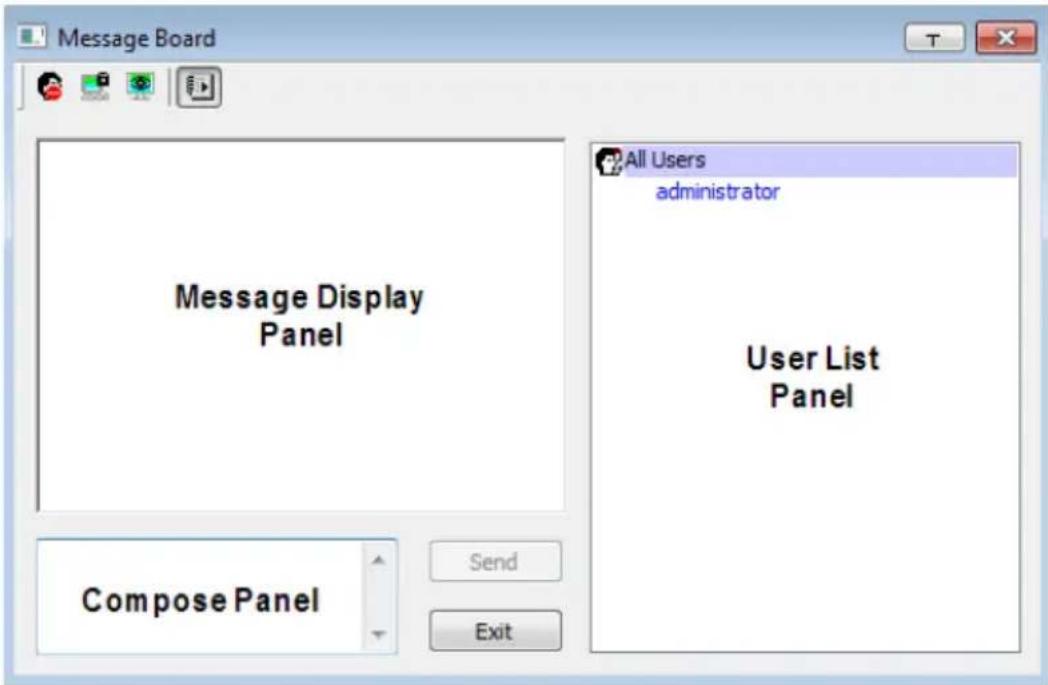
Button Bar
The buttons on the Button Bar are toggles. Their actions are described in the table below:
| Button Action | |
 | Enable/Disable Chat. When disabled, messages posted to the board are not displayed. The button is shadowed when Chat is disabled. The icon displays next to the user's name in the User List panel when the user has disabled Chat. |
 | Occupy/Release Keyboard/Video/Mouse. When you Occupy the KVM, other users cannot see the video, and cannot input keyboard or mouse data. The button is shadowed when the KVM is occupied. The icon displays next to the user's name in the User List panel when the user has occupied the KVM. |
 | Occupy/Release Keyboard/Mouse. When you Occupy the KM, other users can see the video, but cannot input keyboard or mouse data. The button is shadowed when the KM is occupied. The icon displays next to the user's name in the User List panel when the user has occupied the KM. |
 | Show/Hide User List. When you Hide the User List, the User List panel closes. The button is shadowed when the User List is open. |
Message Display Panel
Messages that users post to the board - as well as system messages - display in this panel. If you disable Chat, however, messages that get posted to the board won't appear.
Compose Panel
Key in the messages that you want to post to the board in this panel. Click Send, or press [Enter] to post the message to the board.
User List Panel
The names of all the logged in users are listed in this panel.
- Your name appears in blue; other users' names appear in black.
- By default, messages are posted to all users. To post a message to one individual user, select the user's name before sending your message.
If a user's name is selected, and you want to post a message to all users, select All Users before sending your message. - If a user has disabled Chat, its icon displays before the user's name to indicate so.
- If a user has occupied the KVM or the KM, its icon displays before the user's name to indicate so.
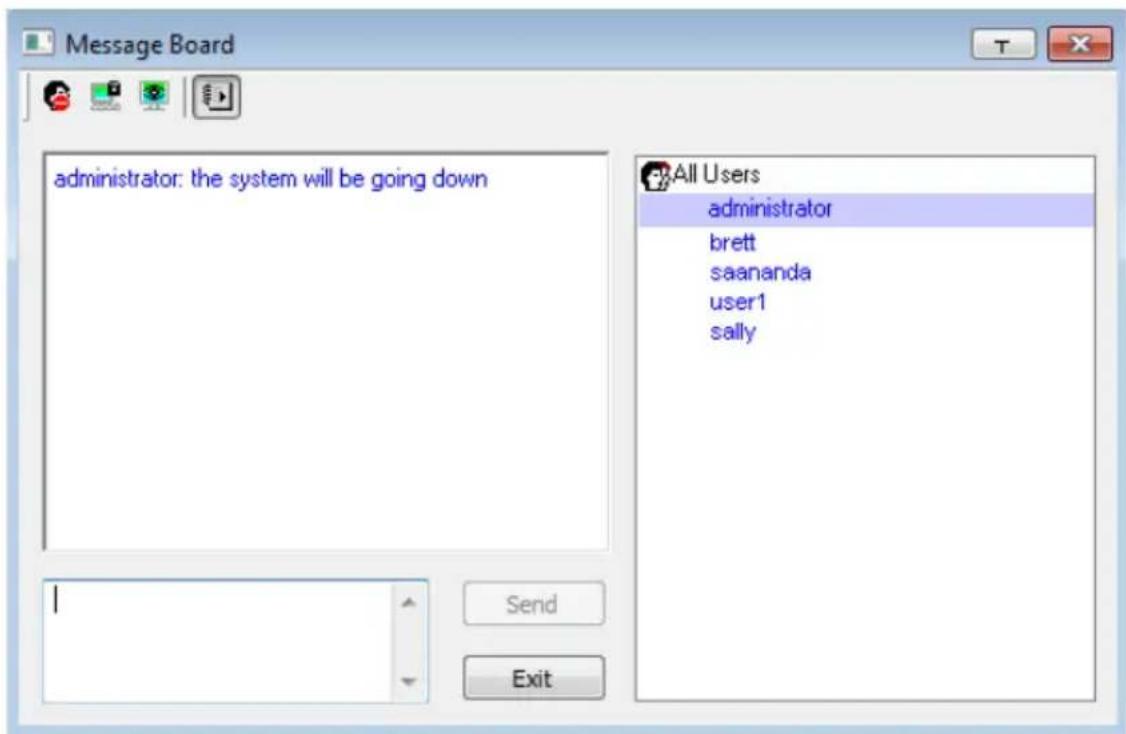

Zoom
The Zoom icon controls the zoom factor for the remote view window.
Settings are as follows:
| Setting Description | |
| 100% Sizes | and displays the remote view window at 100%. |
| 75% Sizes | and displays the remote view window at 75%. |
| 50% Sizes | and displays the remote view window at 50%. |
| 25% Sizes | and displays the remote view window at 25%. |
| 1:1 Sizes and displays the remote view window at 100%. The difference between this setting and the 100% setting is that when the remote view window is resized its contents don’t resize – they remain at the size they were. To see any objects that are outside of the viewing area, move the mouse to the window edge, to have the screen scroll. | |

The On-Screen Keyboard
The KVM over IP switch supports an on-screen keyboard, available in multiple languages, with all the standard keys for each supported language. Click this icon to pop up the on-screen keyboard:
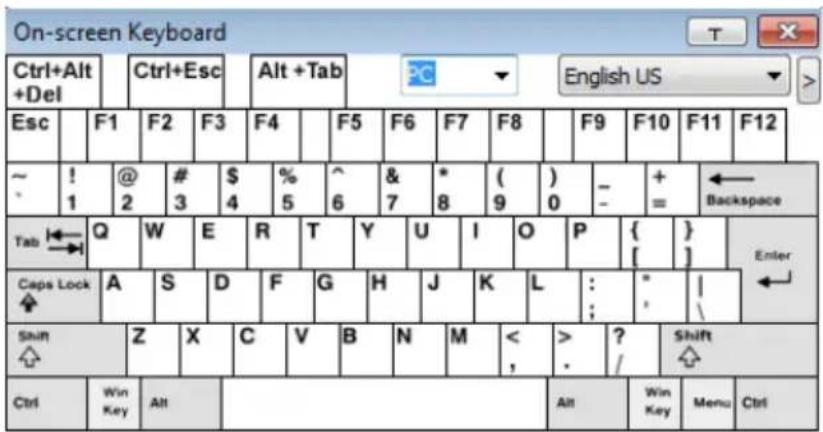
One of the major advantages of the on-screen keyboard is that if the keyboard languages of the remote and local systems aren't the same, you don't have to change the configuration settings for either system. Just bring up the on-screen keyboard; select the language used by the server you are accessing; and use the on-screen keyboard to communicate with it.
Note: You must use your mouse to click on the keys. You cannot use your actual keyboard.
Changing Languages
To change languages, do the following:
- Click the down arrow next to the currently selected language, to drop down the language list.
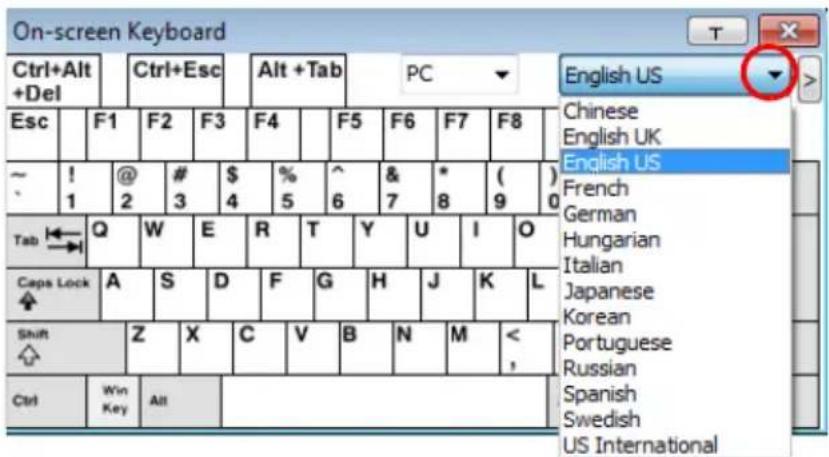
- Select the new language from the list.
Selecting Platforms
The On-screen Keyboard supports the Sun platform as well as the PC. To select the platform, do the following:
- Click the down arrow next to the currently selected platform, to drop down the platform list.
![On-screen Keyboard Ctrl+Alt +Del Ctrl+Esc Alt +Tab PC PC SUN English US Esc F1 F2 F3 F4 F5 F9 F10 F11 F12 ~ ! 1 @ 2 # 3 $ 4 % 5 ^ 6 & 7 * 8 ( 9) 0 - + = ← Backspace Tab Q W E R T Y U I O P { [ }] Enter Caps Lock A S D F G H J K L : " | Shift Z X C V B N M < > Shift Ctrl Win Key Alt Alt Win Key Menu Ctrl](/content/2026/05/987336/images/6fb9660f81659ec15878b755303318b9b8e1e449b500421e67946fbf5d9f96a9.jpg)
- Select the new platform from the list.
Expanded Keyboard
To display/hide the expanded keyboard keys, click the arrow to the right of the language list arrow.
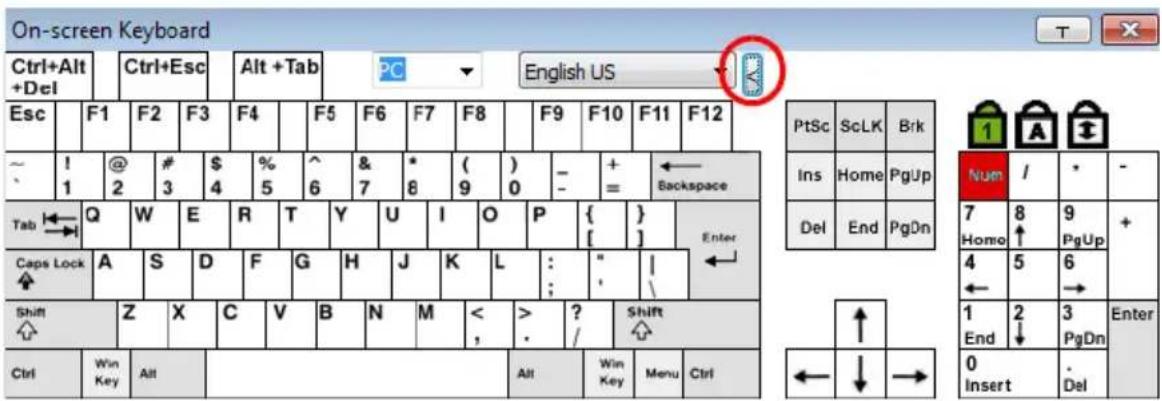

Mouse Pointer Type
KVM over IP switches offer a number of mouse pointer options when working in the remote display. Click this icon to select from the available choices:
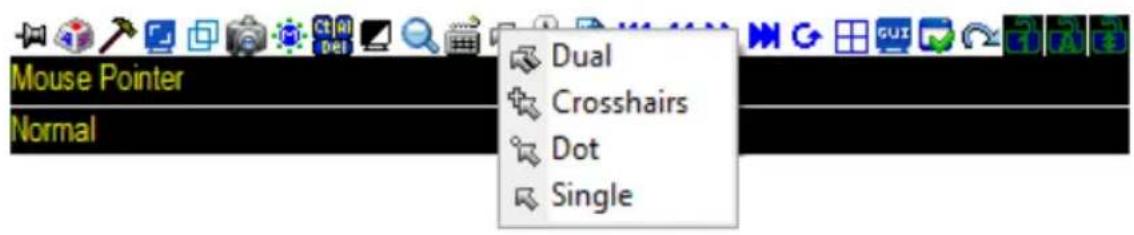
Note: 1. Before accessing a port, only Dual and Crosshairs are available for the Windows Viewers. Once the port is accessed, three pointers are available.
2. The Dot pointer is not available with the Java Client Viewer or the Java Client AP.
3. Selecting the Single pointer has the same effect as the Toggle mouse display hotkey function (see Toggle Mouse Display, page 76 for details).
4. The icon on the Control Panel changes to match your choice.

Mouse DynaSync Mode
Synchronization of the local and remote mouse pointers is accomplished either automatically or manually.
Automatic Mouse Synchronization (DynaSync)
Mouse DynaSync provides automatic locked-in synching of the remote and local mouse pointers – eliminating the need to constantly resync the two movements.
Note: This feature is only available for Windows and Mac systems (G4 and higher) whose adapter attribute OS setting is configured for Win or Mac (see Port Properties, page 118).
All other configurations must use manual mouse synchronization (described in the next section).
The icon on the Control Panel indicates the synchronization mode status as follows:
| Icon Function | |
 | This icon displays in gray to indicate that Mouse DynaSync is not available – you must use manual synching procedures. This is the default setting for all KVM Adapter Cables. |
 | The green check mark on this icon indicates that Mouse DynaSync is available and is enabled. This is the default setting when Mouse DynaSync is available (See Note above). |
 | The red X on this icon indicates that Mouse DynaSync is available but is not enabled. |
When Mouse DynaSync is available, clicking the icon toggles its status between enabled and disabled. If you choose to disable Mouse DynaSync mode, you must use the manual synching procedures described under Manual Mouse Synchronization, page 93.
Mac Considerations
- For Mac OS versions 10.4.11 and higher, there is a second DynaSync setting to choose from. If the default Mouse DynaSync result is not satisfactory, try the Mac 2 setting. To select Mac 2, right click in the text area of the Control Panel and select Mouse Sync Mode → Automatic for Mac 2:
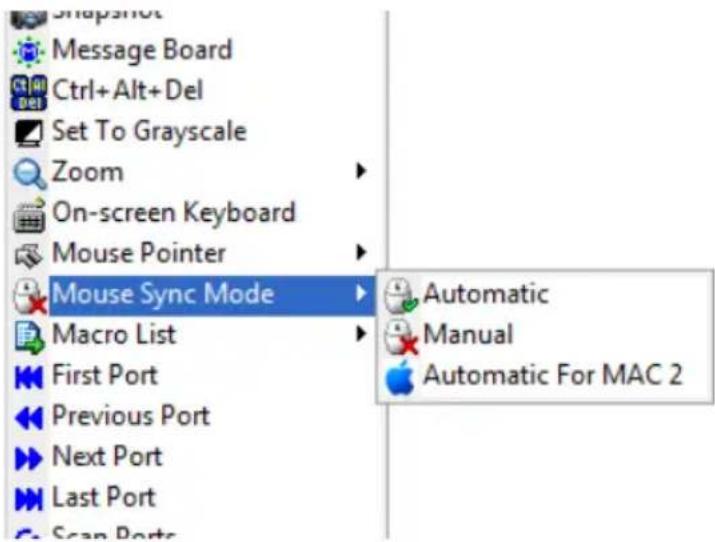
Manual Mouse Synchronization
If the local mouse pointer goes out of sync with the remote system's mouse pointer there are a number of methods to bring them back into sync:
- Perform a video and mouse auto sync by clicking the Video Settings icon on the Control Panel (see page 81).
- Perform an Auto Sync with the Video Adjustment function (see Video Settings, page 81, for details).
- Invoke the Adjust Mouse function with the Adjust Mouse hotkeys (see Adjust Mouse, page 76, for details).
- Move the pointer into all 4 corners of the screen (in any order).
- Drag the Control Panel to a different position on the screen.
- Set the mouse speed and acceleration for each problematic server attached to the switch. See Additional Mouse Synchronization Procedures, page 250, for instructions.
Control Panel Configuration
Clicking the Control Panel icon brings up a dialog box that allows you to configure the items that appear on the Control Panel, as well as its graphical settings:
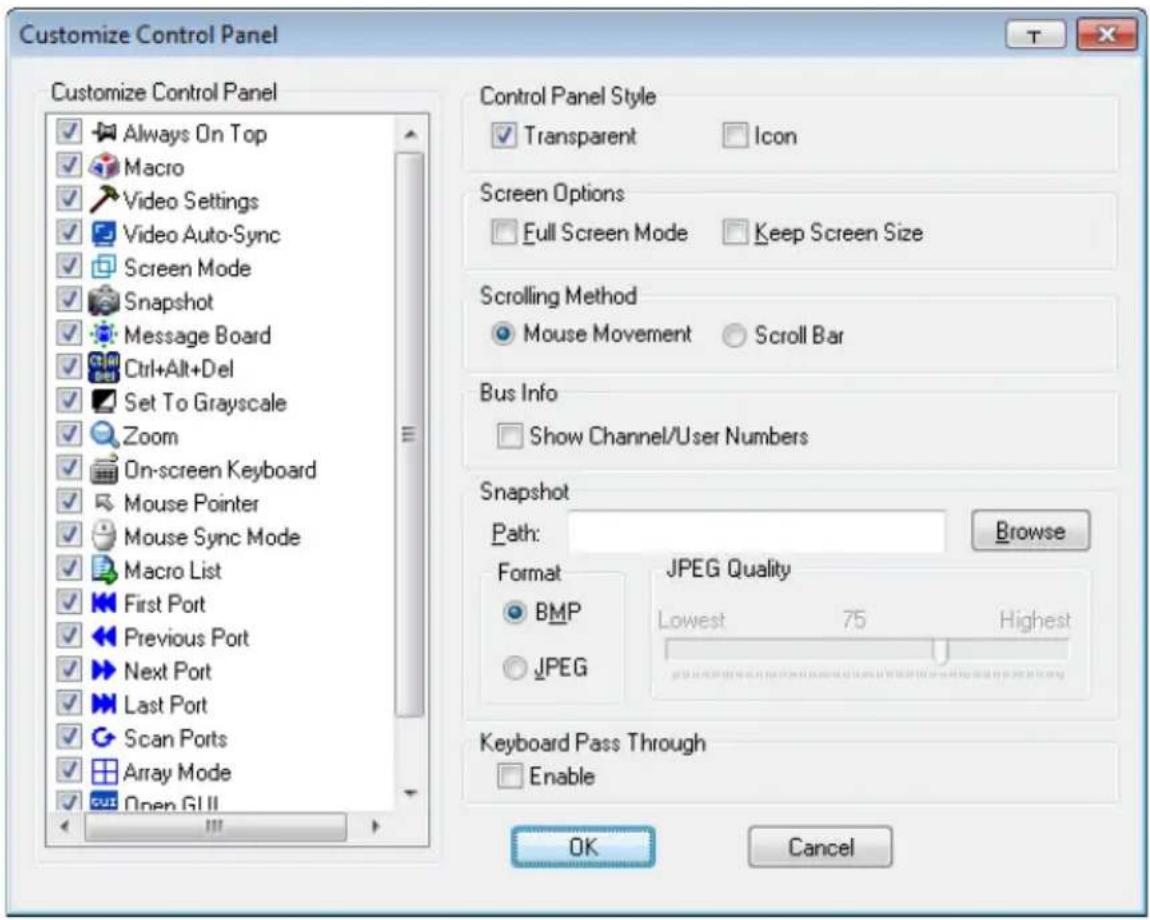
The organization of the dialog box is described in the table, below:
| Item Description | |
| Customize Control Panel | Allows you to select which icons display in the Control Panel. Check the ones you want to see, uncheck the ones you don’t want. |
| Control Panel Style | ♦ Enabling Transparent makes the Control Panel semi-transparent, so that you can see through it to the display underneath.♦ Enabling Icon causes the Control Panel to display as an icon until you mouse over it. When you mouse over the icon, the full panel comes up. |
| Screen Options | ◆ If Full Screen Mode is enabled, the remote display fills the entire screen.◆ If Full Screen Mode is not enabled, the remote display appears as a window on the local desktop. If the remote screen is larger than what is able to fit in the window, move the mouse pointer to the screen border that is closest to the area you want to view and the screen will scroll.◆ If Keep Screen Size is enabled, the remote screen is not resized.◆ If the remote resolution is smaller than that of the local monitor, its display appears like a window centered on the screen.◆ If the remote resolution is larger than that of the local monitor, its display is centered on the screen. To access the areas that are off screen, move the mouse to the corner of the screen that is closest to the area you want to view and the screen will scroll.◆ If Keep Screen Size is not enabled, the remote screen is resized to fit the local monitor's resolution. |
| Scrolling Method | In cases where the remote screen display is larger than your monitor, you can choose how to scroll to the areas that are off-screen.◆ If you select Mouse Movement, the screen will scroll when you move the mouse pointer to your screen border.◆ If you select Scroll Bars, scroll bars appear around the screen borders that you can use to scroll to the off-screen areas. |
| Bus Info | If Bus Info is enabled, the bus you are on, as well as the total number of users on the bus, displays on the bottom row center of the Control Panel as follows: Bus No./Total Users. (See the Control Panel diagram on page 70 for an example.)Example: C1/3 = bus number 1 has 3 users connected. |
| Snapshot These | settings let the user configure the KVM over IP switch's screen capture parameters (see the Snapshot description under The Control Panel, page 70):◆ Path lets you select a directory that the captured screens automatically get saved to. Click Browse; navigate to the directory of your choice; then click OK. If you don't specify a directory here, the snapshot is saved to your desktop.◆ Click a radio button to choose whether you want the captured screen to be saved as a BMP or a JPEG (JPG) file.◆ If you choose JPEG, you can select the quality of the captured file with the slider bar. The higher the quality, the better looking the image, but the larger the file size. |
| Keyboard Pass Through | When this is enabled, the Alt-Tab key press is passed to the remote server and affects that server. If it is not enabled, Alt-Tab acts on your local client computer. |
The Java Control Panel
The Java Client Viewer and Java Client AP Control Panel is similar to the one used by the WinClient:

The major differences between them are:
◆ In the Macros dialog box, Toggle Mouse Display is not available.
◆ The Dot mouse pointer type is not available.
- In the Message Board, there is no Show/ Hide button to show or hide the user list. This function is achieved by clicking the arrows at the top of the bar that separates the User List panel from the Main panel.
- The Control Panel Lock LED icons are not in sync with your keyboard. When you first connect, the LED display may not be accurate. To be sure, click on the LED icons to set them.
- In Control Panel Configuration, the BMP Snapshot format has been replaced by PNG.
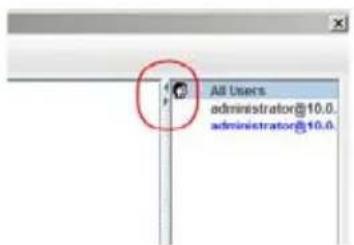
Chapter 8
Port Access
Overview
When you log in to the switch, the Port Access page comes up with the KVM over IP switch's KVM Connections page displayed.
Browser GUI
![Port Access User Management Device Management Log Maintenance Download Consections Favorites User Preferences Sessions Accrs Port Configuration M administrator, welcome to CLS708L [01]CL5708L [01] [02] [03] [04] [05] [06] [07] [08] Port Number Port Name Device Name Mates 01-01 CL5708 Offline 01-02 CL5708 Offline 01-03 CL5708 Offline 01-04 CL5708 Offline 01-05 CL5708 Offline 01-06 CL5708 Offline 01-07 CL5708 Offline 01-08 CL5708 Offline Array Mode Filter ATEN International Co. Ltd. All rights reserved.](/content/2026/05/987336/images/f503f9247828a9a9e5bf2aec262f89650707ead720cec0e452715b037740d845.jpg)
AP GUI
![Port Access ATEN PortAccess User Management Device Management Log Main Resource Download 0105.4.08 [07] [02] [03] [04] [05] [06] [07] [08] Connections | Favorites | User Preferences | Sessions | Access | PortConfiguration | Port Number Port Name Device Name Status 0105 C offline 0102 C offline 0103 C offline 0104 C offline 0105 C offline 0106 C offline 0107 C offline 0108 C offline Double click or press Enter Connect Copyright: C:\202\2014\ATEN.InternationalCo, Ltd. V2.1 202/2017/04/27](/content/2026/05/987336/images/a170e4272c2b50bfb03b514b52f534046eb244b6d4e8fe0a580a8971c55bbc8e.jpg)
The Connections page is organized into several main areas. All the ports that a user is permitted to access are listed in the Sidebar at the left of the page.
After selecting a port in the Sidebar, clicking entries on the menu bar (Browser GUI) or tab bar (AP GUI) opens information and configuration pages related to the item selected in the Sidebar.
The Sidebar
All KVM switches and their ports – are listed in a tree structure in the Sidebar at the left of the screen:
![PortAccess PortAccess User Management [01]CL57.08 [01] [02] [03] [04] [05] [06] [07] [08] Scan Array Mode Filter](/content/2026/05/987336/images/2236368d20a80823d803a53b3de1d4496d5d96d8111c7c4b3d5e9d519dedf8b8.jpg)
The Sidebar Tree Structure
The characteristics of the Sidebar tree structure are the following:
- Users are only allowed to see the devices and ports/outlets that they have access permission for.
◆ Ports and child devices can be nested under their parent devices.
Click the + in front of a device to expand the tree and see the ports/outlets nested underneath it. Click the - to collapse the tree and hide the nested ports/outlets.
A port's ID number is displayed in brackets next to its icon. The ports but can also be named (see Port/Outlet Naming, page 103, for details).
- Switches and ports that are on line have their monitor screen icons in Green; the monitor screens are Gray for devices and ports that are offline.
◆
- To access and operate a port, double-click its icon. Port operation details are discussed in Chapter 14, Port Operation.

Scan
Scan is found at the bottom of the AP GUI Sidebar. It automatically switches among all the ports that are visible in the Sidebar (see Filter, below), at regular intervals, so that their activity can be monitored automatically. See Auto Scanning, page 172, for details.
Note: This item doesn't appear at the bottom of the Sidebar in the Browser version. In that version, you must invoke it from the port's Toolbar. See The Port Toolbar, page 170 for details

Array
Array is found at the bottom of the AP GUI Sidebar. It represents another way of monitoring port activity. Under this function your screen is divided into a grid of panels, with each panel showing the video display of a particular port. Only ports that are visible in the Sidebar (see Filter, below), and that are on line are displayed – all other ports are blank. See Panel Array Mode, page 175 for details
Note: This item doesn't appear at the bottom of the Sidebar in the Browser version. In that version, you must invoke it from the port's Toolbar. See The Port Toolbar, page 170 for details

Filter
Filter allows you to control the number and type of ports that display in the Sidebar, as well as which ports get scanned when Auto Scan and Array Modes are invoked (see Scan and Array, above). When you click Filter, the bottom of the panel changes to look similar to the image, below:
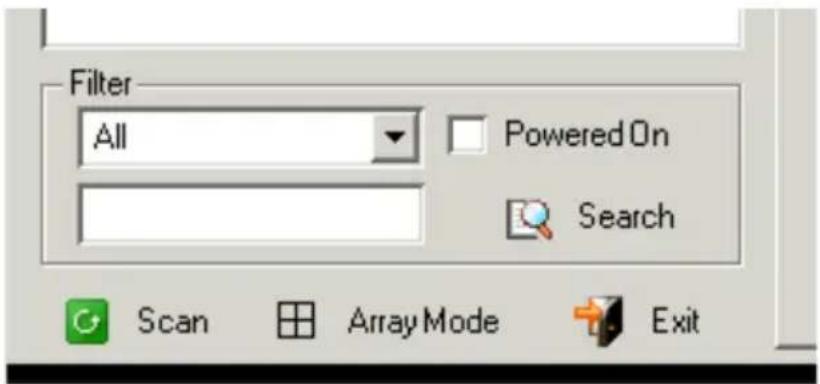
The meanings of the choices are explained in the following table:
| Choices Explanation | |
| All This is the default view. With no other filter options selected, all of the ports that are accessible to the user are listed in the Sidebar.If any Favorites have been specified (see page 107), you can drop down the list box and select Favorites instead of All. If you select Favorites, only the items you have selected as Favorites display in the tree. | |
| Powered On If you enable Powered On (by putting a check in the checkbox) only the ports that have their attached devices powered on display in the tree. | |
| Search | If you key in a search string and click Search, only port names that match the search string display in the tree. Wildcards (? for single characters; * for multiple characters) and the keyword or are supported, so that more than one port can show up in the list.For example:If you key in Web*, both Web Server 1 and Web Server 2 show up in the list.If you key in W*1 or M*2, both Web Server 1 and Mail Server 2 show up in the list. |
| Exit Clicking Exit closes | the filter dialog. |
Sidebar Utilities
The AP GUI version Port Access Connections page provides a convenient method to work with the Sidebar tree. When you right-click an item, a list with various options pops up:
Expand
Copy
Note: The screenshot shows an example of just one of the pop-ups that can appear. The items that appear in the pop-up depend on whether you are logged in remotely or from a Local Console; what your user type is; and whether you selected a switch or a port.
The following table lists and explains all of the possible items that may appear:
| Item User | Type Explanation | |
| Expand/Collapse | AdministratorsUsers | ◆ If the device's ports are nested (not displayed), the dialog box entry is Expand. Click Expand to display the nested ports.◆ If the device's ports are displayed, the dialog box entry is Collapse. Click Collapse to nest the ports.Note: 1. This item only appears for switches, or for ports that have child devices connected to them.2. This has the same effect as clicking the + or - in the tree structure. |
| Copy Administrators | Users | This item is only available for ports. After selecting Copy, you can Paste the port into the Favorites page. See Adding a Favorite, page 107 for details |
Port/Outlet Naming
For convenience – especially in large installations with many devices – administrators and users with port configuration permission, can give each port a name. To assign, modify or delete a name, do the following:
- Click once on the item you want to edit; wait a second; then click again.
Note: 1. This is not a double-click. It involves two separate clicks. A double-click will switch you to the device attached to the port.
2. In the AP GUI version you can right-click on the port you want to edit, then select Rename in the popup box that appears, or you can highlight the port and press F2.
After a second or two, the field changes to provide a text input box:
![Port Access User Management [01] CL57081 [01] [02] [03] [04] [05] [06] [07] [08]](/content/2026/05/987336/images/ae387bd6b661168d48157576ee096713c9795d1e32f4c5c369430e8a291e0d70.jpg)
-
Key in a name for the item (or change/delete a previous one).
-
You can use any combination of letters, numbers, and symbols on the keys of keyboards with a PC US English layout. In this case, the maximum number of characters allowed is 20.
-
You can also activate your local IME to input non-English characters. For languages that use 2 bit encoding, the maximum number of characters allowed is 9.
-
When you have finished editing the name, press [Enter] or click anywhere outside of the input box to complete the operation.
![[01]CL 5708 [01]Server 234 [02] [03] [04] [05] [06] [07] [08]](/content/2026/05/987336/images/64affb25e3a0fafce0ce241ea5f29f8597a39b4e392cbc5ddbdc50003116fee9.jpg)
KVM Devices and Ports – Connections Page
For KVM over IP switches, the Connections page displays port status information at the device level, and port connection configuration options at the port level.
Device Level
When a KVM over IP switch is selected in the Sidebar, the Connections page displays a list of ports for the device that the user is authorized to access or view.
![PortAccess PortAccess User Management Device Management Log Maintenance Download [01] CL5/08 [01] Server 234 [02] [03] [04] [05] [06] [07] [08] Connections Favoxites User Preferences Sessions Access Port Configuration Port Number Port Name Device Name Status 0101 Server 234 Offline 0102 Offline 0103 Offline 0104 Offline 0105 Offline 0106 Offline 0107 Offline 0108 Offline Double click or press Enter Connect Filter All Powered On Search Scan Assay Mode Exit Copyright ©J.2012-2016 A/EN International Co., Ltd V2.1.202.2017.04.07](/content/2026/05/987336/images/3c7a17e020131dba1ee7e19e41e70f5a5e600e674d97fdb4d50ede7662d0e673.jpg)
The following attributes are listed for each device:
- Port Number – the port's number on the switch.
- Port Name – if a name has been assigned to a port it displays here.
◆ Device Name – if a name has been assigned to the switch it displays here. - Status – the current status of the port – online, or offline.
Note: The sort order of the information displayed can be changed by clicking the column headings.
You can access a port from the main panel either by double-clicking anywhere on its line entry, or selecting it anywhere on its line entry and clicking Connect at the bottom right of the page.
Port Level
When a port is selected in the Sidebar, the Connections page changes to display the port connection and configuration options:
![PortAccess PortAccess User Management Device Management Log Maintenance Download [01]CL5709 [01]Server 234 [00] [01] [04] [05] [06] [08] [07] [06] Connections Favoites User Preferences Sessions Access Port Configuration Status Port Status: Offline Connect Associated Link: Link Port: Port Number Port Name Connect File: All Powered On Search Scan Array Mode Exit Copyright©2002-2016ATENInternationalCo., Ltd. V2.1.202.20170407](/content/2026/05/987336/images/243f3e37b1aef8190aad952453b1dc5e5028b3232ee447a12b4f2cbcf04e4ebf.jpg)
The screen is divided into three major panels, as described in the sections that follow.
Status
The Status Panel displays the port's current status information, including whether the port is online or offline.
Click the Connect button to view the port display via the switch's built-in Win Viewer (when using Windows Internet Explorer), or Java Viewer (when using other web browsers).
Associated Links
The Associated Links panel displays ports that have been associated with the currently selected port. Associations are configured on the Port Access → Port Configuration → Associated Links page (see page 120 for details).
Favorites
The Favorites page is similar to a bookmarks feature. Ports that you frequently access can be saved in a list here. Simply open this page and select the port – rather than hunting for it in the Sidebar. This feature is especially handy on large, crowded installations:
![PortAccess User Management Device Management Log Maintenance Download [01]CL5708 [01]Server 234 [02] [03] [04] [06] [07] [08] Connections: Favorites | User Preferences | Sessioned | Access | Port Configuration | Favorites List [01]CL5708 [01]Server 234 [02] [03] [04] [05] [06] [07] [08] Filters All Powered On Search Scan ArrayMode Edit Add Modify AddUp Preview Copyright©2012-2018 ATEN International Co., Ltd. V2.1.202.201.70402](/content/2026/05/987336/images/92420dba1965ae92f0942f7d6508a73d0d9004fbfcf94120dff178c4fae73f70.jpg)
Adding a Favorite
To add a port to the favorites, do the following:
- Right click in the main panel; click Add Favorite.
-or-
Click Add at the bottom left of the main panel.
An Untitled Favorite entry appears:
![Connections Favorites UserPreferences Sessions Access PortConfiguration Favorites List [01]CL5709 [01]Server 234 [02] [03] [04] [05] [07] [08] Untitled Favorite](/content/2026/05/987336/images/e670774ce285ff392f15a8664ffb24c80d9694fcc2a41072d56643fd1be1aee2.jpg)
-
This will be a container to hold your port entries. Click inside the text entry box to erase Untitled Favorite and key in an appropriate name, then click on any empty space in the main panel.
-
To add a port:
Drag it from the Sidebar and drop it onto the container
- or -
Right-click on it in the Sidebar; select Copy. Right-click on the container; select Paste.
- or -
Select the container in the main panel; select the port in the Sidebar; then click Add to at the bottom of the main panel.
The switch that the port belongs to is added to the container; the selected port is appended under the switch.
Note: To add multiple ports at the same time, hold the Shift or Ctrl key down while you make your Sidebar selections then drag or copy the entire group to the Favorites panel.
- Repeat step 3 for any other Favorite categories you wish to create
![Connections Favorites List [01]CL5708 [01]Server 234 [02] [03] [04] [05] [07] [08] Untitled Favorite [01]CL5708 [08] Taipei [01]CL5708 [01]Server 234 [05]](/content/2026/05/987336/images/e8540849f85c1a3e07966d0b019ad082a7e7c70645539165450e711ca3a51cca.jpg)
Note: Favorites can be selected for filtering in the Sidebar. See Filter, page 101 for details
Modifying a Favorite
- To modify a Favorite, or one of the items contained in it, right-click on it, then select a choice from the popup menu that appears.
- To edit a Favorite’s name:
Click on it once, wait a second, then click again. You can edit the name after the display changes to provide a text input box, This is the same procedure as the one described for port naming (see Port/Outlet Naming, page 103).
- or -
Select the Favorite in the main panel, then click Modify at the bottom of the main panel.
User Preferences
The User Preferences page allows users to set up their own, individual, working environments. The switch stores a separate configuration record for each user profile, and sets up the working configuration according to the Username that was keyed into the Login dialog box:
![PortAccess User Management Device Management Log Maintenance Download [01] CL5708 [01] Server 204 [02] [03] [04] [05] [06] [07] [08] Connections Favorites User Preferences Sessions Access Pot Configuration Settings Language: English DSD Hotley: [Out][Out] D Display: PortNumber + Port Nam D Duration: 3 sec Scan Duration: 3 sec Screen Blanker: 9 min Logout Timeout: 99 min Toolbar: Enable Disable Change Password... Save Filter All Powered On Search Scan Array Mode Exit Copyright (D) 2012-2016 ATEN International Co., Ltd. V21.202.20170407](/content/2026/05/987336/images/16ce353576581441720b32278b3e9eb4166589fab43ae2e8d0e63280fd353794.jpg)
The page settings are explained in the following table:
| Setting Function | |
| Language Selects the language that the interface displays in. | |
| OSD Hotkey Selects which Hotkey controls the GUI function: [Scroll Lock] [Scroll Lock] is the default. To select a different combination, click the arrow at the right of the box to drop down the list of choices. | |
| ID Display Selects how the Port ID is displayed: the Port Number alone (PORT NUMBER); the Port Name alone (PORT NAME); or the Port Number plus the Port Name (PORT NUMBER + PORT NAME). The default is PORT NUMBER + PORT NAME. | |
| ID Duration Determines how long a Port ID displays on the monitor after a port change has taken place. You can choose an amount from 1—255 seconds. The default is 3 Seconds. A setting of 0 (zero) means the Port ID is always on. | |
| Scan Duration Determines how long the focus dwells on each port as it cycles through the selected ports in Auto Scan Mode (seeAuto Scanning, page 172). Key in a value from 1—255 seconds. The default is 5 seconds; a setting of 0 disables the Scan function. | |
| Screen Blanker If there is no input from the console for the amount of time set with this function, the screen is blanked. Key in a value from 1—30 minutes. A setting of 0 disables this function. The default is 0 (disabled).Note: Although this function can be set from either the local console or a remote login, it only affects the local console monitor. | |
| Logout Timeout If there is no user input for the amount of time set with this function, the user is automatically logged out. A login is necessary before the KVM over IP switch can be accessed again. | |
| Toolbar Selects whether or not the Port Toolbar is enabled when a port is accessed (seeThe Port Toolbar, page 170 for details).Since the Toolbar functions are also available from the GUI Control Panel (seeThe Control Panel, page 70), you may prefer to disable it here. | |
| Viewer* You can choose which viewer is used when accessing a server:◆Auto Detectwill select the appropriate viewer based on the web browser used; WinClient for Windows Internet Explorer, Java Client for other web browsers (ex. Firefox).◆Java Clientwill open the Java based viewer regardless of the web browser being used. | |
| Welcome Message* | You can choose to hide or show the welcome message displayed in the submenu bar. The default is disabled. |
| Save | ClickSaveto save any changes made to the User Preferences settings. |
| Changing a Password | ◆In the Browser GUI, to change a user's password, key in the old password and new password into their input boxes; key the new password into theConfirminput box, then clickChange Passwordto apply the change.◆In the AP GUI version, clickChange Password; key in the old password and new password into their input boxes; key the new password into theConfirminput box, then clickSave. |
* This item is only available with the Browser version.
Sessions
The Session page lets the administrator and users with User Management permissions see at a glance which users are currently logged into the KVM over IP switch, and provides information about each of their sessions.
![PostAccess User Management Device Management Log Maintenance Download ATEN [01] CL5708 [01]Server 234 [02] [03] [04] [05] [06] [07] [08] Connections | Favorites | User Preferences | Server | Access | Port Configuration | Username IP Login Time Client Category Devices Ports Bus E administrator 10.3.41.129 2017/05/10 13:53:49 Browser SA None administrator 10.3.41.129 2017/05/10 15:20:22 Windows Client SA CL5708 [01-01]Server 234 1 Filter All Powered On Search Scan Area Mode Exit End Session Refresh Copyright[C] 2012-2016/ATEN International Co., Ltd.V2.1.202.20170407](/content/2026/05/987336/images/a7446cadec210ec8301b389a2c5017344b31f85693a30772ffc75511d4e683a6.jpg)
Note: 1. The Session page isn't available for ordinary users.
- Users with User Management permissions can only see the sessions of ordinary users.
- The Category heading lists the type of user who has logged in: SA (Super Administrator); Admin (Administrator); Normal user (User).
The meanings of the headings at the top of the page are fairly straightforward. The IP heading refers to the IP address that the user has logged in from; the Device and Port headings show which device and port the user is currently accessing. The Bus ID refers to the bus that the user is currently on (Bus 0 refers to the Local Console's bus).
Note: 1. The sort order of the information displayed can be changed by clicking the column headings.
- The Bus ID also displays on the control panel (see page 70).
This page also gives the administrator the option of forcing a user logout by selecting the user and clicking End Session at the bottom of the main panel.
Access
Administrators use the Access page to set user access and configuration rights for ports. The Access page only appears for those users with User Management permissions. It isn't available for other users.
Port Level Browser GUI Interface
If a port is chosen in the Sidebar, the Main panel looks similar to the one shown below:
![Part Access User Management Device Management Log Maintenance Download Connections Favorites User Preferences Sessions Access Port Configuration HI administrator, welcome to CLS/08L [01]CL5708I [01]Server 234 [02] [03] [04] [05] [06] [07] [08] Access Information: Name Access Config administrator test123 test1231 test1232 test1233 test1234 test1235 test1236 test1237 test1238 Copy Paste Save Array Mode Filter ATEN International Co. Ltd. All rights reserved.](/content/2026/05/987336/images/51ae527a29e5ddfbf6f8d4be73904007597e12e1fc7f4985ad33af8375f459b7.jpg)
The port access settings are explained in the following table:
Name Each port accessible to the user is listed under the Names column.
| Access The Access column is where device access rights are set. To cycle through the choices, click the icon in the row that corresponds to the user you want to configure. The meanings of the icons are as follows | ||
 | Full Access | The user can view the remote screen and can perform operations on the remote server from his keyboard and monitor. |
 | View Only | The user can only view the remote screen; he cannot perform any operations on it. |
 | No Access | No access rights - the Port will not show up on the User's list on the Main Screen. |
| Config Sets or denies permission for the user to make changes to a port's configuration settings. A check mark (√) indicates that the user has permission; an X means that the user does not have permission. | ||
Port Level AP GUI Interface
If a port is chosen in the Sidebar, the Main panel looks similar to the one below:
![PortAccess PortAccess User Management Device Management log Maintenance Downloaded [01] CL5708 [01]Server 234 [02] [03] [04] [05] [06] [07] [08] Connections | Favorites | User Preferences | Sessions | Access | Port Configuration | Access Information: Name Access Config All All administrators ✓ test123 × × test1231 × × test1232 ✓ test1233 × × test1234 × × test1235 × × test1236 × × test1237 × × test1238 × × Scan Any Mode Filter Copy Paste.Save Copyright:ICJ-2012-2016/AEN InternationalCo., Ltd. V21.202.20170407](/content/2026/05/987336/images/d834d15f4142f165c2978a5780f9616365d9e0076fe6b30f1b97c820be654a5e.jpg)
The page is essentially the same as the one for the Browser GUI (see page 113), with the exception that there are filters at the top of the columns. The filters allow you to expand or limit the scope of the users and groups that are displayed, as described in the following table:
| Filter Description | ||
| Name To filter on the | User or Group name, key in the name, partial name, or partial name and wild card (*) then press Enter. Only the Users and Groups whose names correspond to what you have keyed in appear in the list. | |
| Access | All All Users and Groups appear in the list. | |
| Full Access | Only Users and Groups with Full Access permissions appear in the list. | |
| View Only Only Users and Groups with View Only permissions appear in the list. | ||
| No Access Only Users and Groups with No Access permissions appear in the list. | ||
| Config All Users and Groups appear in the list. | ||
Saving Changes
Click the Save button at the lower right corner of the page to save any changes made on the Access page.
Port Configuration
Device Level
When a device is selected in the Sidebar, there is one item available under Port Configuration on the Port Properties page: Occupy Timeout.
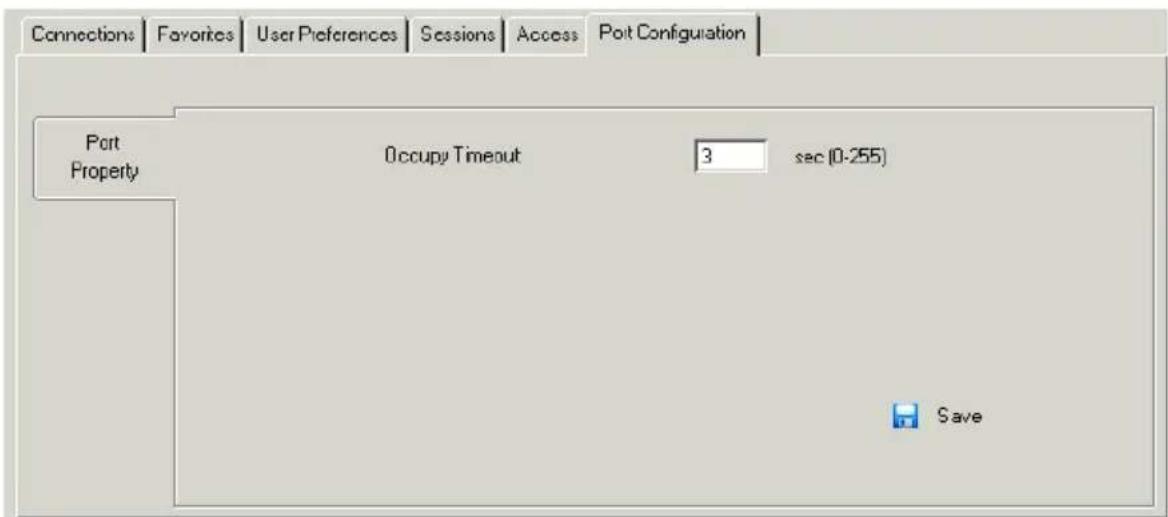
The Occupy Timeout field sets a time threshold for users on ports whose Access Mode has been set to Occupy (see Access Mode, page 119). If there is no activity from the user occupying the port for the amount of time set here, the user is timed out and the port is released. The first user to send keyboard or mouse input after the port has been released gets to occupy the port.
Input a value from 0 to 255 seconds. The default is 3 seconds. A setting of 0 causes the port to be released the instant there is no input.
Port Level
Port Properties
When a port is selected in the Sidebar, the Port Properties page looks similar to the one below:
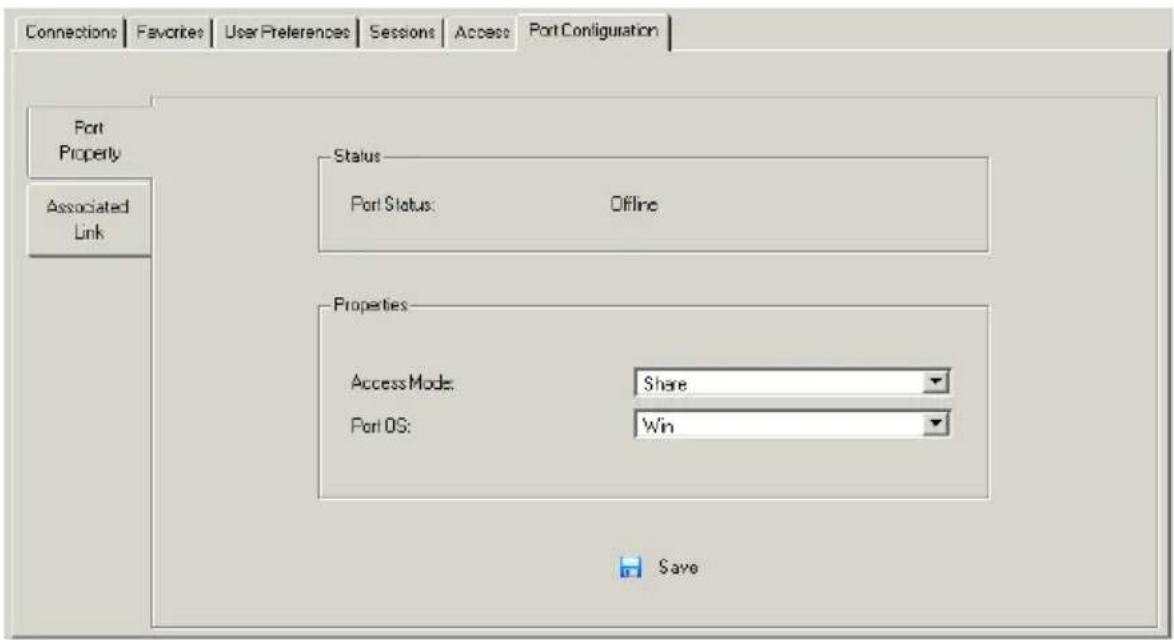
- The Status panel provides information as to whether or not the port is online or offline; the Adapter cable used to connect the server (or other device) to the port; and the Adapter’s firmware level.
- The Properties panel allows you to make configuration settings for the selected port. An explanation of the Port Properties configuration fields is given on the next page, please refer to the table on page 119 for further details.
An explanation of the configuration fields is given in the table, below:
| Field Explanation | |
| Access Mode Defines | how the port is to be accessed when multiple users have logged on, as follows:Exclusive:The first user to switch to the port has exclusive control over the port. No other users can view the port. TheTimeoutfunction does not apply to ports which have this setting.Occupy:The first user to switch to the port has control over the port. However, additional users may view the port's video display. If the user who controls the port is inactive for longer than the time set in theTimeoutbox, port control is transferred to the other user to move the mouse or strike the keyboard.Share:Users simultaneously share control over the port. Input from the users is placed in a queue and executed chronologically. Under these circumstances, users can take advantage of theMessage Board, which allows users to communicate with each other regarding control of the keyboard and mouse or keyboard, mouse, and video of a Share port (seeThe Message Board, page 86). |
| Port OS Specifies the | operating system that the server on the connected port is using. Choices are Win, Mac1, Sun, and Mac2. The default is Win. |
When you have finished making your configuration changes, click Save.
Associated Links
The Associated Links page provides a method of associating other ports on the same switch to the selected port.
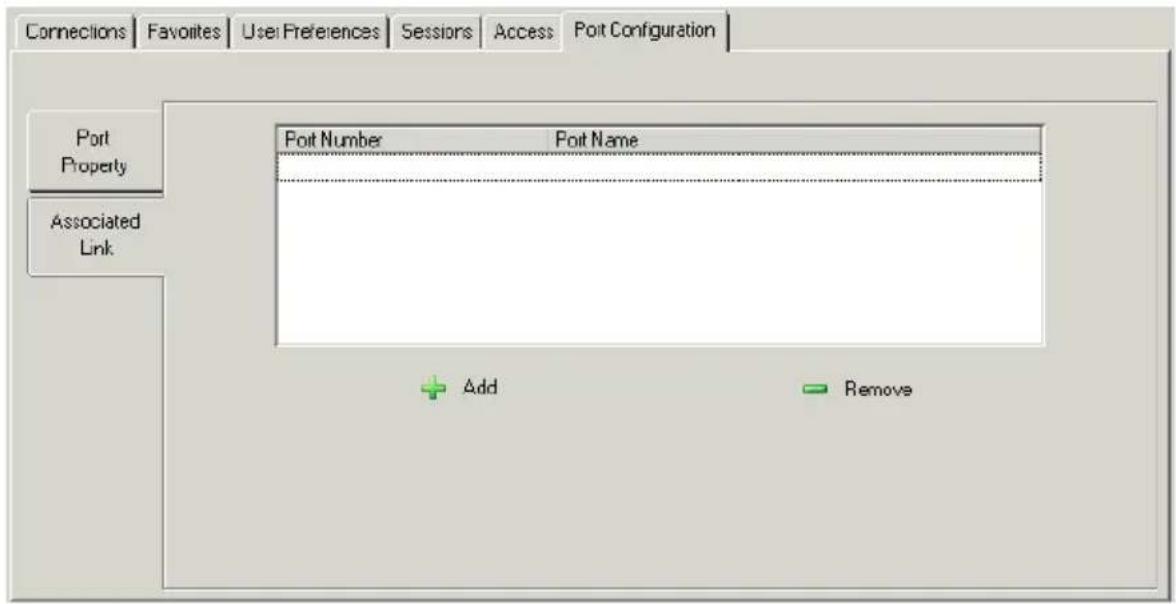
- To associate a port with the currently selected one, click Add. In the dialog box that appears, key in the port's number, then click OK. The port's number and name appear in the main panel.
- To remove an unwanted associated port, select it in the main panel, then click Remove.
Chapter 9
User Management
Overview
When you select the User Management tab the screen comes up with the Users page displayed:
Browser GUI
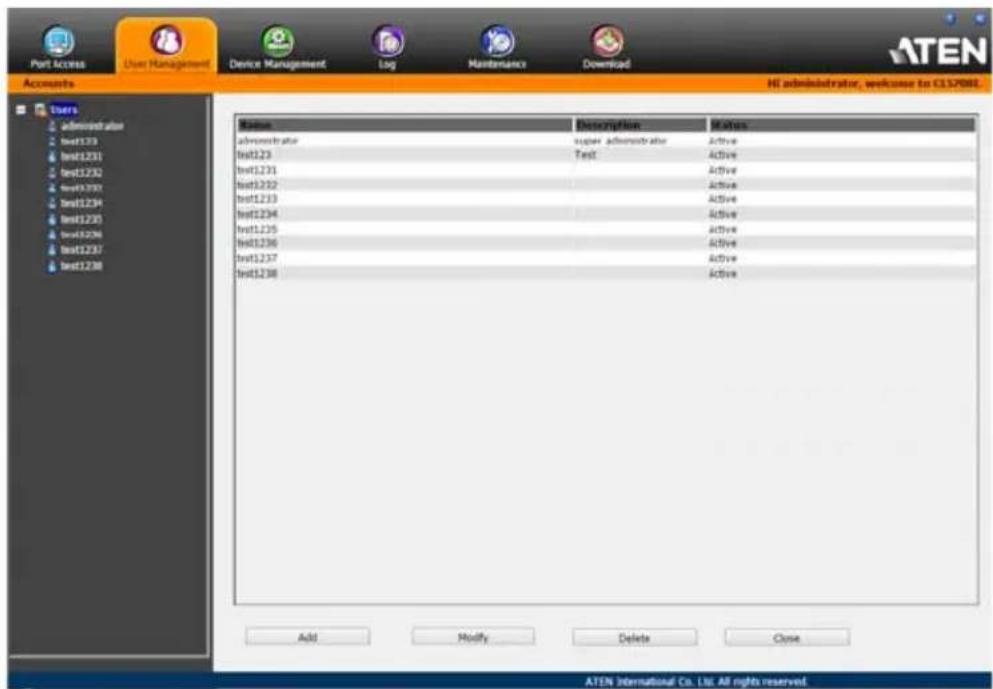
AP GUI
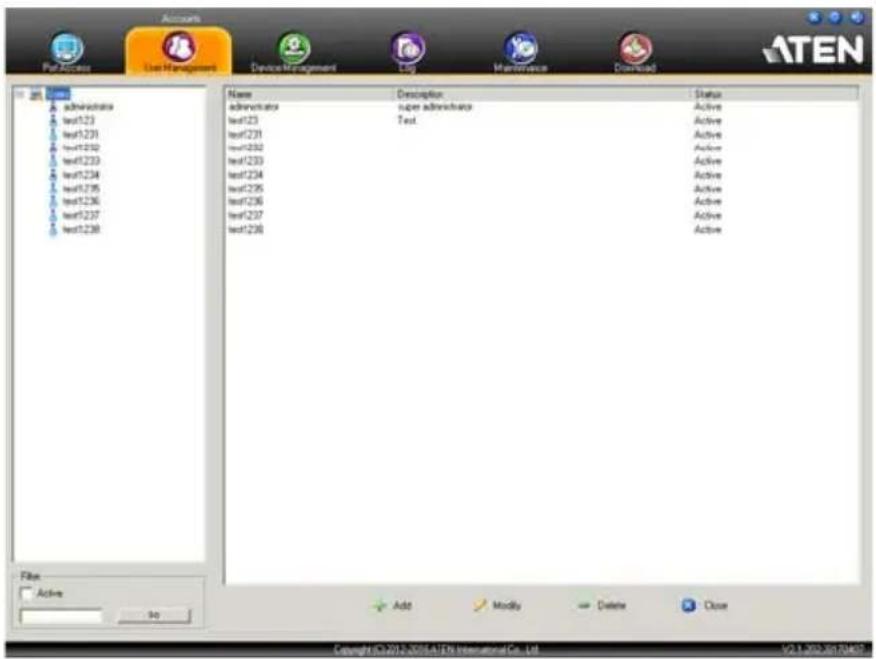
The page is organized into two main areas: the Sidebar at the left, and the large main panel at the right.
- Users appear in the panel at the left of the page. The large panel at the right provides more detailed information at-a-glance for each.
- In the Browser GUI, the sort order of the information displayed can be changed by clicking the main panel column headings.
- In the AP GUI, the section below the Sidebar list provides a filter that allows you to manage the list:
- Click to put a check in the Active checkbox to filter out any users whose accounts are not active.
- To only select Users that match a particular string, key it into the text box in front of the Go button, then click Go. Only Users that match the string will appear in the list.
Wildcards (? for single characters; * for multiple characters) and the keyword or are supported. E.g., h*ds would return hands and hoods; h?nd would return hand and hind, but not hard; h*ds or h*ks would return hands and hooks.
- The buttons below the main panel are used to manage users, as shown in the sections that follow.
Users
The KVM over IP switch supports three types of user, as shown in the table, bellow:
| User Type Role | |
| Super Administrator Access and manage ports and devices. Manage Users.Configure the overall installation. Configure personal working environment. | |
| Administrator Access and manage authorized ports and devices. Manage Users. Configure personal working environment. | |
| User Access authorized ports and devices. Manage authorized ports and devices; configure personal working environment.Note: Users who have been given permission to do so, may also manage other users. | |
Adding Users
To add a user, and assign user permissions, do the following:
- Select Accounts on the menu bar (Browser GUI)
- or -
Select Users in the Sidebar (AP GUI).
- Click Add at the bottom of the main panel. The User notebook opens, with the User tab selected:
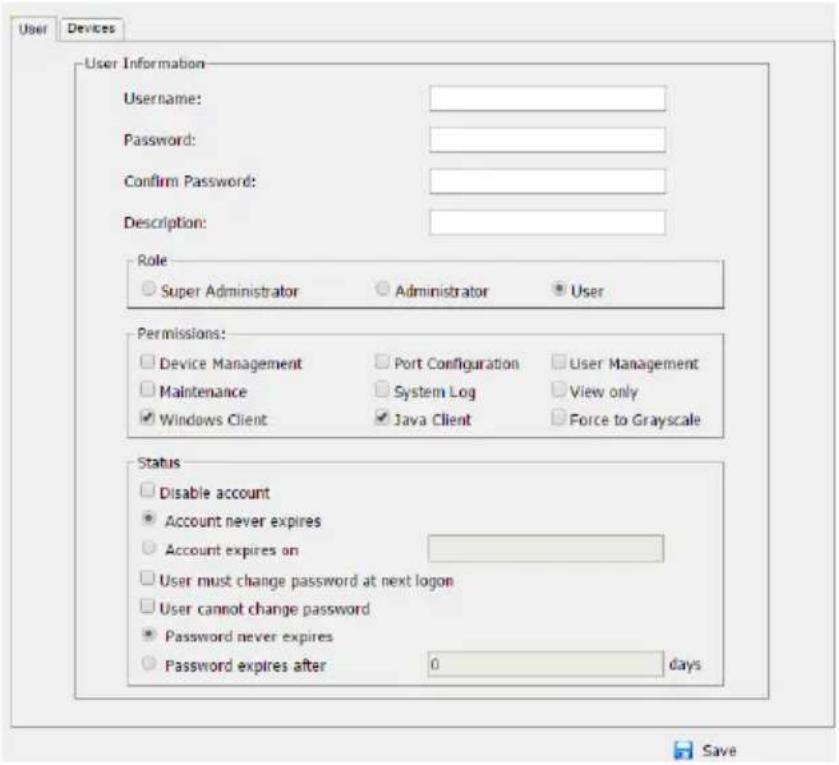
- Enter the required information in the appropriate fields. A description of each of the fields is given in the table below:
| Field Description | |
| Username From 1 to 1 | 6 characters are allowed depending on the Account Policy settings. See Account Policy, page 146. |
| Password From 0 to 1 | 6 characters are allowed depending on the Account Policy settings. See Account Policy, page 146. |
| Confirm Password To | be sure there is no mistake in the password, you are asked to enter it again. The two entries must match. |
| Description Additional | information about the user that you may wish to include. |
| Role There are three | categories: Super Administrator, Administrator and User. There is no limitation on the number of accounts that can be created in each category.◆ The Super Administrator is responsible for the overall installation configuration and maintenance; user management; and device and port assignments. The Super Administrator's permissions (see page 125) are automatically assigned by the system and cannot be altered.◆ The default permissions for Administrators include everything except View only and Force to Grayscale, but the permissions can be altered for each Administrator by checking or unchecking any of the permissions checkboxes.◆ The default permissions for Users include the Win and Java clients, but the permissions can be altered for each User by checking or unchecking any of the permissions checkboxes. |
| PermissionsNote: For ordinary users, in addition to enabling Device Management, Port Configuration, and Maintenance permissions, the user must also be given those rights for each device and port that he will be allowed to manage. See Device Assignment, page 128 for details. | ♦ Enabling Device Management allows a user to configure and control the settings for overall KVM over IP switch operations (see Device Management, page 131).♦ Enabling Port Configuration allows a user to configure and control the settings for individual ports (see Port Configuration, page 117).♦ Enabling User Management allows a user to create, modify, and delete user accounts.♦ Enabling Maintenance allows a user to perform all the Maintenance operations available under the Maintenance tab (see Maintenance, page 159).♦ Enabling System Log allows a user to access the system log (see Log, page 155).♦ Enabling View Only limits users to only being able to view the display of connected devices. They cannot control port access, nor can they input any keyboard or mouse signals to the devices they view.♦ Enabling Windows Client allows a user to download the Windows Client AP software, and access the KVM over IP switch with it, in addition to (or instead of) the browser access method.♦ Enabling Java Client allows a user to download the Java Client AP software, and access the KVM over IP switch with it, in addition to (or instead of) the browser access method.♦ Force to Grayscale forces the user's view of the remote display to be in grayscale. This can speed up I/O transfer in low bandwidth situations. |
| Status Status allows | you to control the user's account and access to the installation, as follows:Disable Account lets you suspend a user's account without actually deleting it, so that it can be easily reinstated in the future.If you don't want to limit the time scope of the account, select Account never expires; if you do want to limit the amount of time that the account remains in effect, select Account expires on, and key in the expiration date.To require a user to change his password at the next logon, select User must change password at next logon. This can be used by the administrator to give the user a temporary password to log in for the first time, and then let the user set the password of his choice for future logins.To make a password permanent, so that the user cannot change it to something else, select User cannot change password.For security purposes, administrators may want users to change their passwords from time to time.If not, select Password never expires. This allows users to keep their current passwords for as long as they like.If so, select Password expires after, and key in the number of days allowed before the password expires. Once the time is up, a new password must be set. |
- At this point you can assign the new user's port access rights by selecting the Devices tab – the Devices page is discussed on page 128.
Note: Optionally, you can skip this step now to add more users and come back to it later.
- When your selections have been made click Save.
-
When the Operation Succeeded message appears, click OK.
-
Click Users in the Sidebar to return to the main screen. The new user appears in the Sidebar list and in the main panel, as well.
-
The Sidebar Users list can expand and collapse. If the list is expanded, click the minus symbol (−) next to the Users icon to collapse it; if it is collapsed there is a plus symbol (+) next to the icon. Click the plus symbol to expand it.
- The icon for super administrators has two red bands; the icon for administrators has one black band.
- The large main panel shows the user’s name; the description that was given when the account was created; and whether the account is currently active or has been disabled.
Modifying User Accounts
To modify a user account, do the following:
- In the Sidebar User list, click the user's name
- or -
In the main panel, select the user's name
-
Click Modify.
-
In the User page that comes up, make your changes, then click Save.
Note: The User page is discussed on page 123; the Devices page is discussed on page 128.
Deleting User Accounts
To delete a user account do the following:
- In the main panel, select the user's name.
- Click Delete.
- Click OK.
Device Assignment
When a user logs in to the KVM over IP switch, the interface comes up with the Port Access page displayed. All the ports that the user is permitted to access are listed in the Sidebar at the left of the page. Access permissions for those ports and the devices connected to them are assigned on a port-by-port basis from the User list on the Sidebar of the User Management page.
Assigning Device Permissions From the User's Notebook
To assign a device permissions to a user from the User's notebook, do the following:
- In the Sidebar User list, click the user's name
- or -
In the main panel, select the user's name.
-
Click Modify.
-
In the User notebook that comes up, select the Devices tab. A screen, similar to the one below, appears:
![User Devices Name Access Config I ALL ALL [01] CL5708 [01] Server 234 X X [02] X [03] X [04] X X [05] X X [06] X X [07] X X [08] X X Save](/content/2026/05/987336/images/8266c6b04da543baed4605ff83c6224eb7ad888879188ada1ee2b3db2e7d2b72.jpg)
- Make your permission settings for each port according to the information provided below:
Name: Each port accessible to the user is listed under the Names column.
Access: The Access column is where device access rights are set. Click the icon in the row that corresponds to the port you want to configure to cycle through the choices. The meanings of the icons are described in the table, below:
 | Full Access | The user can view the remote screen and can perform operations on the remote server from his keyboard and monitor. |
 | View Only | The user can only view the remote screen; he cannot perform any operations on it. |
 | No Access | No access rights - the Port will not show up on the User's list on the Main Screen. |
Config: The Config column is where a user's permission to make changes to a port's configuration settings are permitted/restricted. Click the icon in the row that corresponds to the port you want to configure to cycle through the choices.
A check mark ( ) indicates that the user has permission to make changes to the port's configuration settings; an X means that the user is denied permission to make configuration changes.
- When you have finished making your choices, click Save.
- In the confirmation popup that appears, click OK.
Note: In any of the columns, you can use Shift-Click or Ctrl-Click to select a group of ports to configure. Clicking to cycle through the choices on any one of the selected ports causes all of them to cycle in unison.
Filters
There are five filters at the top of the columns that allow you to expand or limit the scope of the ports that are displayed in the Name column, as described in the following table:
| Filter Description | ||
| Name To filter on the | port name, key in the name then press Enter.Only the ports whose names correspond to what you have keyed in appear in the list.Wildcards (? for single characters; * for multiple characters) and the keyword or are supported. E.g., h*ds would return hands and hoods; h?nd would return hand and hind, but not hard; h*ds or h*ks would return hands and hooks. | |
| Access | All All ports appear in the list. | |
| Full Access | Only ports configured as Full Access ports appear in the list. | |
| View Only Only ports configured as View Only ports appear in the list. | ||
| No Access Only ports configured as No Access ports appear in the list. | ||
| Config All All ports appear in the list. | ||
KVM Devices
Device Information
The Device Management page opens with the top level KVM over IP switch selected in the Sidebar and the Device Information item selected on the menu bar:
Browser GUI
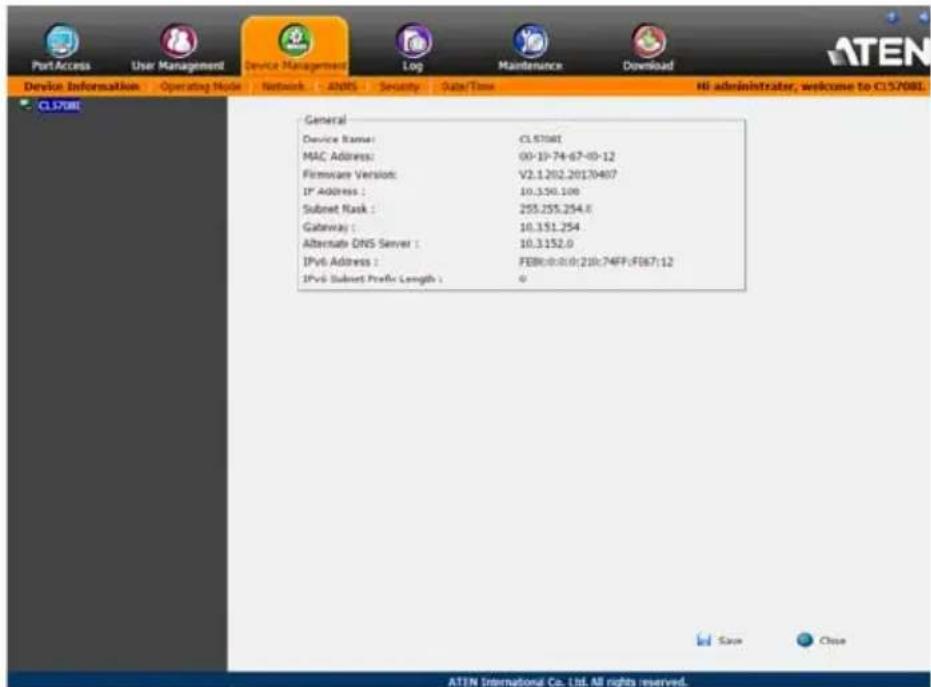
AP GUI
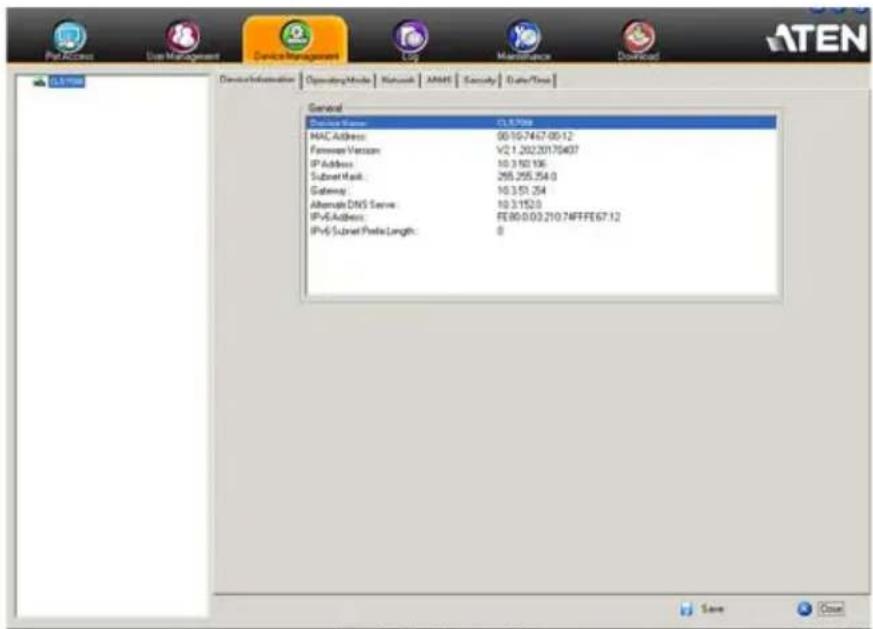
General
The General section of the Device Information page displays the name of the selected device, its firmware version and information about its network configuration.
Note: The AP GUI version presents the same information as the Browser version. Scroll through the list to see the additional entries.
Operating Mode
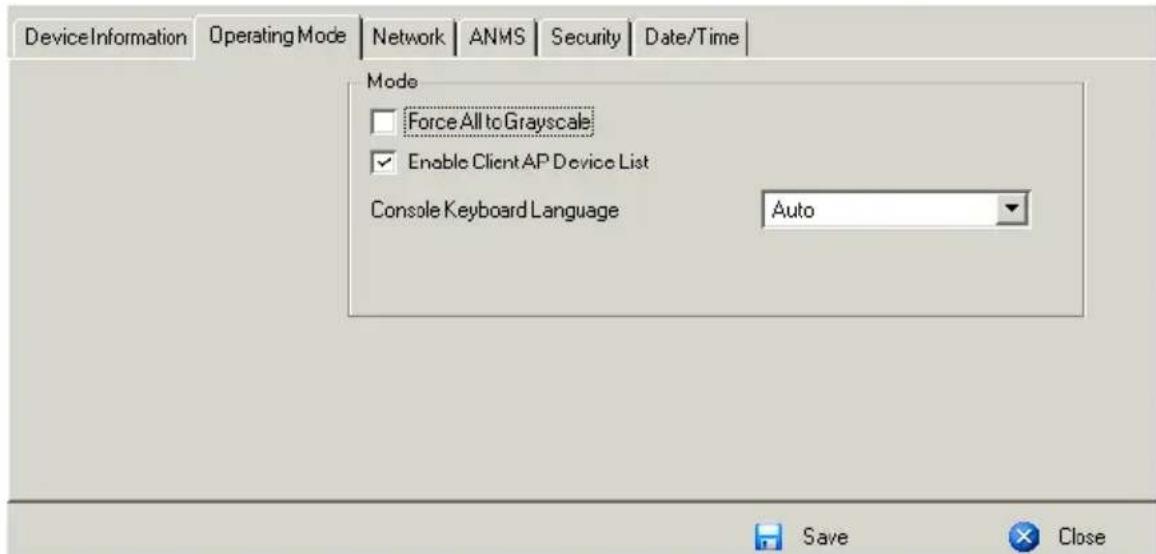
The Operating Mode page is used to set working parameters, as described below:
- If Force all to grayscale is enabled, the remote displays of all devices connected to the KVM over IP switch are changed to grayscale. This can speed up I/O transfer in low bandwidth situations.
- If Enable Client AP Device List is enabled, the switch appears in the Server List when using the WinClient or Java Client AP (see Windows Client AP Login, page 57, and Java Client AP Login, page 61). If this option is not enabled, the switch can still be connected to, but its name will not appear in the Server List.
- The Console Keyboard Language setting lets you specify which keyboard mapping is being used by the Local Console keyboard. Drop down the list to make your choice.
Network
The Network page is used to specify the network environment.
![IP Installer Enabled View Only Disabled Service Ports Program: 9000 HTTP: 80 HTTPS: 443 IPv4 Settings IP Address: Obtain IP address automatically [DHCP] Set IP address manually [Fixed IP] IP Address: 10.3.41.119 Subnet Mask: 255.255.255.0 Default Gateway: 10.3.41.254 DNS Server: Obtain DNS server address automatically Set DNS server address manually Preferred DNS server: 0.0.0.0 Alternate DNS server: 10.3.152.0 IPv6 Settings IP Address: Obtain IPv6 address automatically [DHCP] Set IPv6 address manually [Fixed IP] IPv6 Address: Subnet Prefix Length: 64 Default Gateway: DNS Server: Obtain DNS server address automatically Set DNS server address manually Preferred DNS server: Alternate DNS server: Network Transfer Rate: 99999 KBps Save Close](/content/2026/05/987336/images/f8a1ca3b4dab70751bbb625411d847811a007094a94606fc4c2c6689e58b0dcb.jpg)
Each of the elements on this page is described in the sections that follow.
IP Installer
The IP Installer is an external Windows-based utility for assigning IP addresses to the KVM over IP switch.
Click one of the radio buttons to select Enable, View Only, or Disable for the IP Installer utility. See IP Installer, page 219, for IP Installer details.
Note: 1. If you select View Only, you will be able to see the KVM over IP switch in the IP Installer's Device List, but you will not be able to change the IP address.
- For security, we strongly recommend that you set this to View Only or Disable after each use.
Service Ports
As a security measure, if a firewall is being used, the Administrator can specify the port numbers that the firewall will allow. If a port other than the default is used, users must specify the port number as part of the IP address when they log in. If an invalid port number (or no port number) is specified, the KVM over IP switch will not be found. An explanation of the fields is given in the table below:
| Field Explanation | |
| Program This is the port number for connecting with the WinClient ActiveX Viewer, WinClient AP, Java Client Viewer, or Java Client AP. The default is 9000. | |
| HTTP The port number for a browser login. The default is 80. | |
| HTTPS The port number for a secure browser login. The default is 443. |
Note: 1. Valid entries for all of the Service Ports are from 1–65535.
-
Service ports cannot have the same value. You must set a different value for each one.
-
If there is no firewall (on an Intranet, for example), it doesn't matter what these numbers are set to, since they have no effect.
IPv4 Settings
IP Address:
IPv4 is the traditional method of specifying IP addresses. The KVM over IP switch can either have its IP address assigned dynamically (DHCP), or it can be given a fixed IP address.
- For dynamic IP address assignment, select the Obtain IP address automatically [DHCP] radio button. (This is the default setting.)
- To specify a fixed IP address, select the Set IP address manually [Fixed IP] radio button and fill in the fields with values appropriate for your network.
Note: 1. If you choose Obtain IP address automatically [DHCP], when the switch starts up it waits to get its IP address from the DHCP server. If it hasn't obtained the address after one minute, it automatically reverts to its factory default IP address (192.168.0.60.)
2. If the switch is on a network that uses DHCP to assign network addresses, and you need to ascertain its IP address, see IP Address Determination, page 219, for information./
DNS Server
- For automatic DNS Server address assignment, select the Obtain DNS Server address automatically radio button.
- To specify the DNS Server address manually, select the Set DNS server address manually radio button, and fill in the addresses for the Preferred and Alternate DNS servers with values appropriate for your network.
Note: Specifying the Alternate DNS Server address is optional.
IPv6 Settings
IP Address:
IPv6 is the new (128-bit) format for specifying IP addresses. (See IPv6, page 221 for further information.) The KVM over IP switch can either have its IPv6 address assigned dynamically (DHCP), or it can be given a fixed IP address.
- For dynamic IP address assignment, select the Obtain IP address automatically [DHCP] radio button. (This is the default setting.)
- To specify a fixed IP address, select the Set IP address manually [Fixed IP] radio button and fill in the fields with values appropriate for your network.
DNS Server
- For automatic DNS Server address assignment, select the Obtain DNS Server address automatically radio button.
- To specify the DNS Server address manually, select the Set DNS server address manually radio button, and fill in the addresses for the Preferred and Alternate DNS servers with values appropriate for your network.
Note: Specifying the Alternate DNS Server address is optional.
Network Transfer Rate
This setting allows you to tailor the size of the data transfer stream to match network traffic conditions by setting the rate at which the KVM over IP switch transfers data between itself and the client computers. The range is from 4–99999 Kilobytes per second (KBps).
Finishing Up
After making any network changes, be sure Reset on exit on the Maintenance → System Operation page (see Reset on exit:, page 164) has been enabled (there is a check in the checkbox), before logging out. This allows network changes to take effect without having to power the switch off and on.
ANMS
The ANMS (Advanced Network Management Settings) page is used to set up login authentication and authorization management from external sources. It is organized as a notebook with two tabs – each with a series of related panels, as described, below:
Event Destination
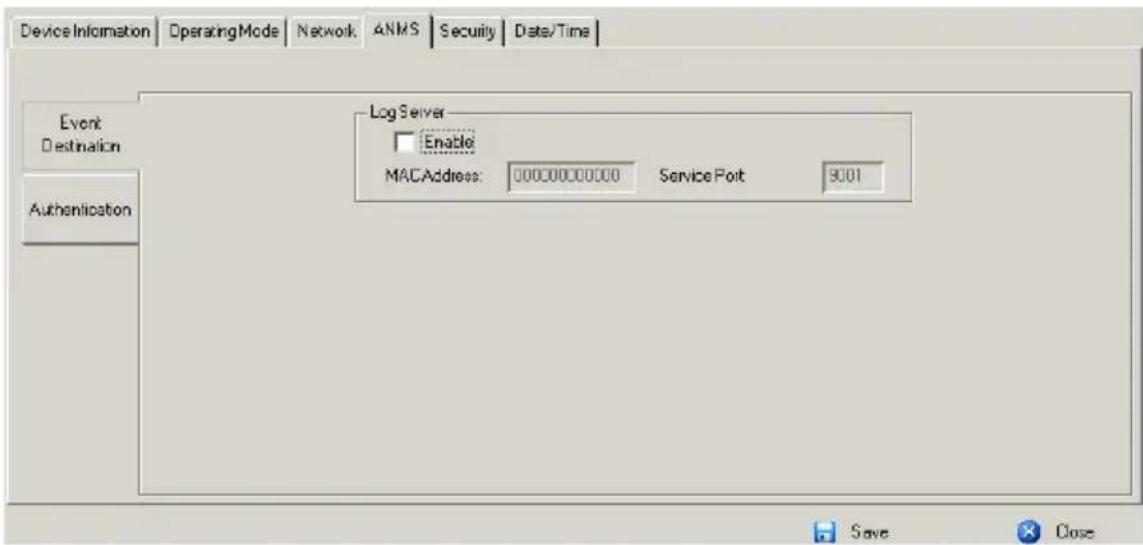
Log Server
Important transactions that occur on the KVM over IP switch, such as logins and internal status messages, are kept in an automatically generated log file.
- Specify the MAC address of the computer that the Log Server runs on in the MAC address field.
- Specify the port used by the computer that the Log Server runs on to listen for log details in the Port field. The valid port range is 1–65535. The default port number is 9001.
Note: The port number must different than the one used for the Program port (see Program, page 134).
See Chapter 15, The Log Server, for details on setting up the log server. The Log File is discussed on page 156.
Authentication
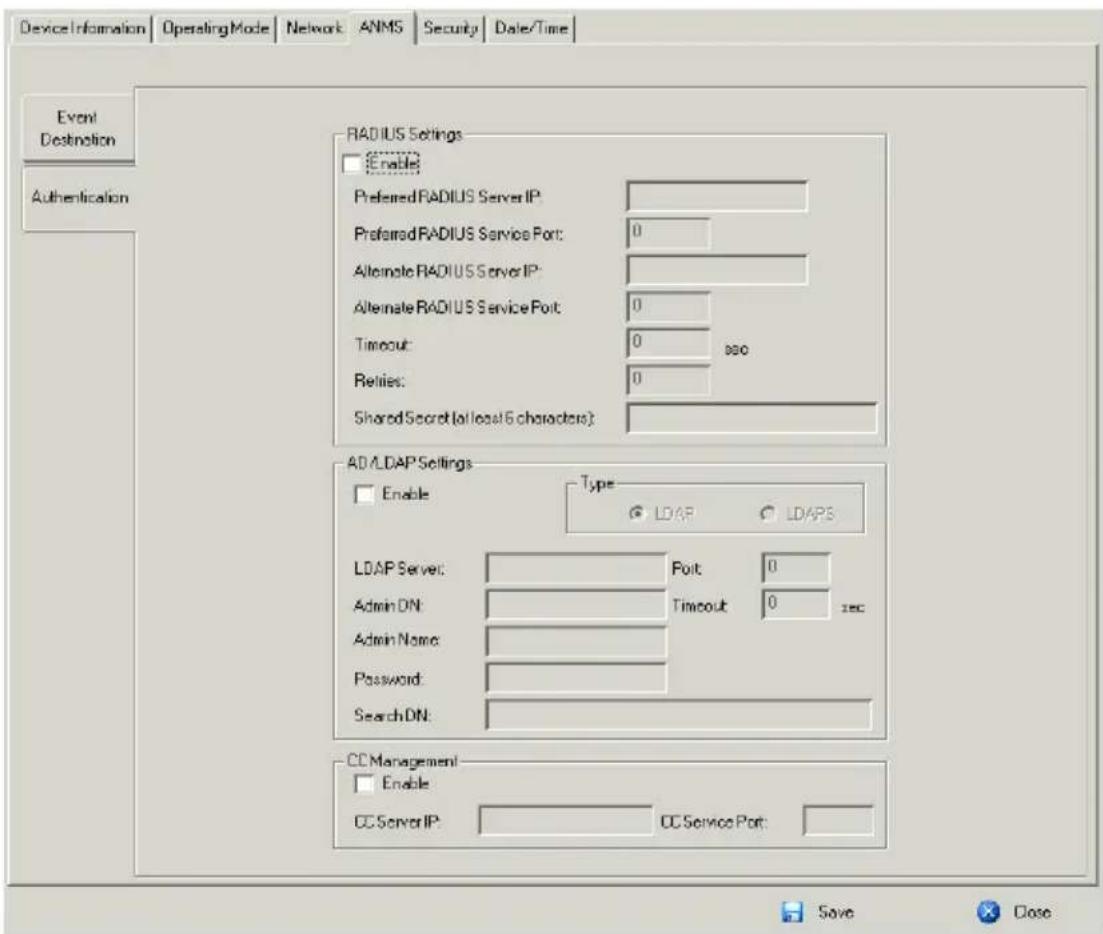
♦ RADIUS Settings
To allow authentication and authorization for the KVM over IP switch through a RADIUS server, do the following:
- Check Enable.
- Fill in the IP addresses and service port numbers for the Preferred and Alternate RADIUS servers. You can use the IPv4 address, the IPv6 address or the domain name in the IP fields.
- In the Timeout field, set the time in seconds that the KVM over IP switch waits for a RADIUS server reply before it times out.
- In the Retries field, set the number of allowed RADIUS retries.
- In the Shared Secret field, key in the character string that you want to use for authentication between the KVM over IP switch and the RADIUS Server. A minimum of 6 characters is required.
- On the RADIUS server, Users can be authenticated with any of the following methods:
- Set the entry for the user as su/xxxx
Where xxxx represents the Username given to the user when the account was created on the KVM over IP switch.
- Use the same Username on both the RADIUS server and the KVM over IP switch.
- Use the same Group name on both the RADIUS server and the KVM over IP switch.
- Use the same Username/Group name on both the RADIUS server and the KVM over IP switch.
In each case, the user's access rights are the ones assigned that were assigned when the User of Group was created on the KVM over IP switch. (See Adding Users, page 123.)
◆ LDAP / LDAPS Authentication and Authorization Settings
To allow authentication and authorization for the KVM over IP switch via LDAP / LDAPS, refer to the information in the table, below:
| Item Action | |
| Enable | Put a check in the Enable checkbox to allow LDAP / LDAPS authentication and authorization. |
| Type Click a radio button to specify whether to use LDAP or LDAPS. | |
| LDAP Server IP and Port | Fill in the IP address and port number for the LDAP or LDAPS server.◆ You can use the IPv4 address, the IPv6 address or the domain name in the LDAP Server field.◆ For LDAP, the default port number is 389; for LDAPS, the default port number is 636. |
| Admin DN Consult | the LDAP / LDAPS administrator to ascertain the appropriate entry for this field. For example, the entry might look like this:ou=kn8132,dc=aten,dc=com |
| Admin Name Key in the LDAP administrator's username. | |
| Password Key in the LDAP administrator's password. | |
| Search DN Set the | distinguished name of the search base. This is the domain name where the search starts for user names. |
| Timeout | Set the time in seconds that the KVM over IP switch waits for an LDAP or LDAPS server reply before it times out. |
On the LDAP / LDAPS server, Users can be authenticated with any of the following methods:
- With MS Active Directory schema.
- Without schema – Only the Usernames used on the KVM over IP switch are matched to the names on the LDAP / LDAPS server. User privileges are the same as the ones configured on the switch.
- Without schema – Only Groups in AD are matched. User privileges are the ones configured for the groups he belongs to on the switch.
- Without schema – Usernames and Groups in AD are matched. User privileges are the ones configured for the User and the Groups he belongs to on the switch.
Note: For more information on configuring LDAP, you can download the full LDAP instructional manual from our website.
CC Management Settings
To allow authorization for the KVM over IP switch through a CC (Control Center) server, check Enable and fill in the CC Server's IP address and Service port in the appropriate fields. You can use the IPv4 address, the IPv6 address or the domain name in the CC Server IP field.
Security
The Security page is divided into 7 main panels, as described in the sections that follow.
Login Failures
For increased security, the Login Failures section allows administrators to set policies governing what happens when a user fails to log in successfully.
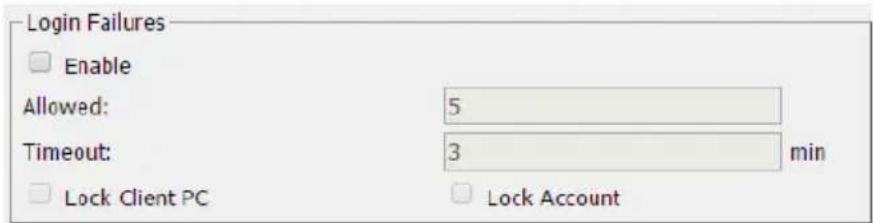
To set the Login Failures policy, check the Enable checkbox (the default is for Login Failures to be enabled). The meanings of the entries are explained in the table below:
| Entry Explanation | |
| Allowed Sets the number of consecutive failed login attempts that are permitted from a remote computer. The default is 5 times. | |
| Timeout Sets the amount of time | a remote computer must wait before attempting to login again after it has exceeded the number of allowed failures. The default is 3 minutes. |
| Lock Client PC If this is enabled, | after the allowed number of failures have been exceeded, the computer attempting to log in is automatically locked out. No logins from that computer will be accepted. The default is enabled.Note: This function relates to the client computer's IP. If the IP is changed, the computer will no longer be locked out. |
| Lock Account If this is enabled, after the allowed number of failures have been exceeded, the user attempting to log in is automatically locked out. No logins from the username and password that have failed will be accepted. The default is enabled. | |
Note: If Login Failures is not enabled, users can attempt to log in an unlimited number of times with no restrictions. For security purposes, we recommend that you enable this function and enable the lockout policies.
Filter
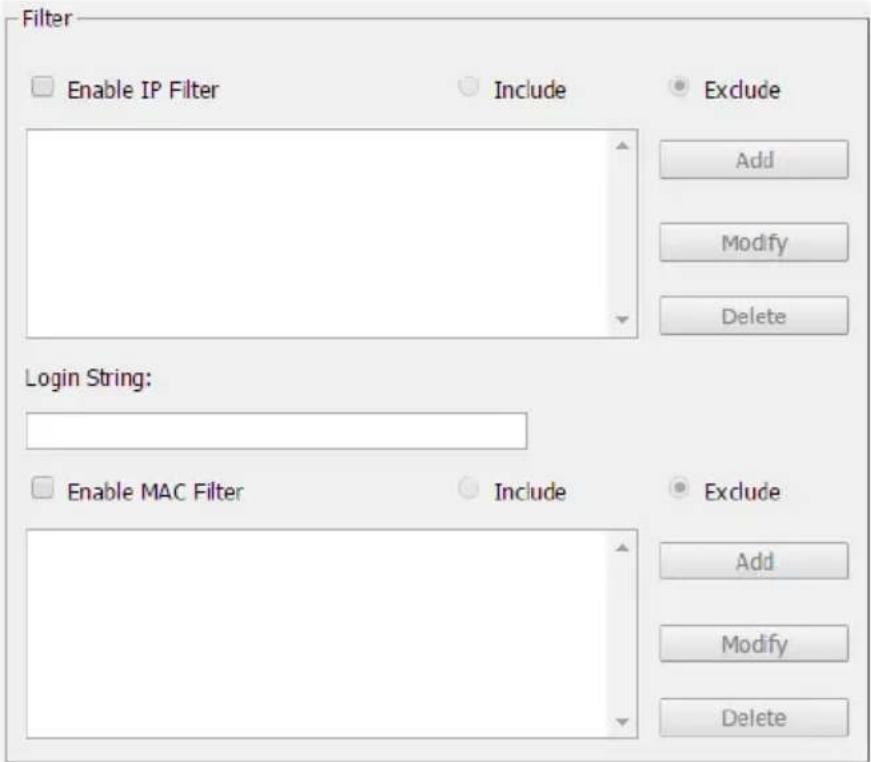
IP and MAC Filtering
IP and MAC Filters control access to the KVM over IP switch based on the IP and/or MAC addresses of the client computers attempting to connect. A maximum of 100 IP filters and 100 MAC filters are allowed. If any filters have been configured, they appear in the IP Filter and/or MAC Filter list boxes.
To enable IP and/or MAC filtering, Click to put a check mark in the IP Filter Enable and/or MAC Filter Enable checkbox.
- If the include button is checked, all the addresses within the filter range are allowed access; all other addresses are denied access.
- If the exclude button is checked, all the addresses within the filter range are denied access; all other addresses are allowed access.
- Adding Filters
To add an IP filter, do the following:
- Click Add. A dialog box similar to the one below appears:
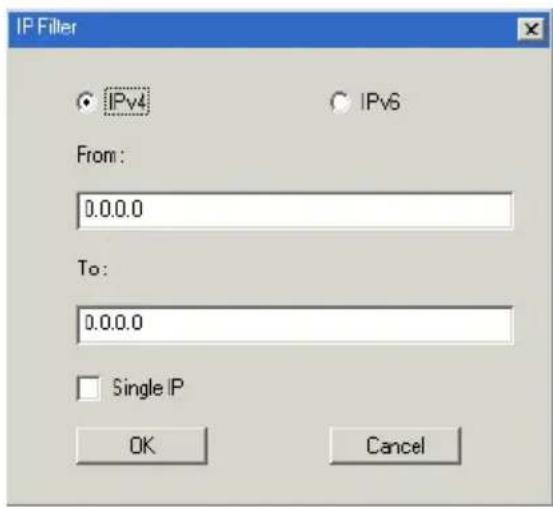
- Specify whether you are filtering an IPv4 or IPv6 address.
-
Key the address you want to filter in the From: field.
-
To filter a single IP address, click to put a check in the Single IP checkbox.
- To filter a continuous range of addresses, key in the end number of the range in the To: field.
Note: This description is for the AP GUI. The Browser GUI differs as follows:
- It doesn't offer an IPv4 or IPv6 choice. It only has From and To fields for IPv4 filtering.
-
It doesn't have a checkbox to specify a single IP address. To filter a single IPv4 address, key the same address in both the From and To fields.
-
After filling in the address, click OK.
- Repeat these steps for any additional IP addresses you want to filter.
To add a MAC filter, do the following:
- Click Add. A dialog box similar to the one below appears:
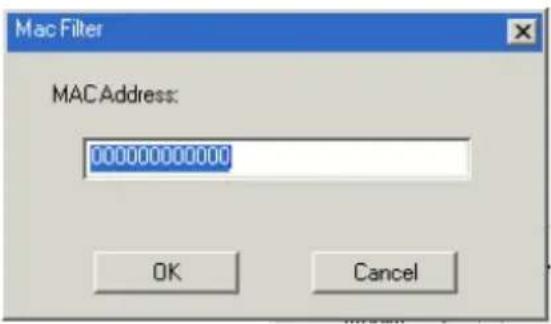
- Specify the MAC address in the dialog box, then click OK.
- Repeat these steps for any additional MAC addresses you want to filter.
◆ IP Filter / MAC Filter Conflict
If there is a conflict between an IP filter and a MAC filter – in other words, if a computer's address is allowed by one filter but blocked by the other – then the blocking filter takes precedence (the computer's access is blocked).
♦ Modifying Filters
To modify a filter, select it in the IP Filter or MAC Filter list boxes and click Modify. The Modify dialog box is similar to the Add dialog box. When it comes up, simply delete the old address(es) and replace it with the new one(s).
- Deleting Filters
To delete a filter, select it in the IP Filter or MAC Filter list box and click Delete.
Login String
The Login String entry field lets the super administrator specify a login string (in addition to the IP address) that users must add to the IP address when they access the KVM over IP switch with a browser.
For example, if 192.168.0.126 were the IP address, and abcdefg were the login string, then the user would have to key in:
192.168.0.126/abcdefg
Note: 1. Users must place a forward slash between the IP address and the string.
- If no login string is specified here, anyone will be able to access the KVM over IP switch login page using the IP address alone. This makes your installation less secure.
The following characters are allowed in the string:
$$ 0 - 9 \text { a - z A - Z } \sim ! @ \& * () _ {-} = + [ ]. $$
The following characters are not allowed:
$$ \% \wedge ": /? # \backslash {} ^ {\prime} {}; ^ {\prime} < > [ \text {Space} ] $$
Compound characters (É Ç ñ ... etc.)
The following examples are not allowed:
192.168.0.126/.
192.168.0.126/..
192.168.0.126/...
For security purposes, we recommend that you change this string occasionally.
Account Policy
In the Account Policy section, system administrators can set policies governing usernames and passwords.
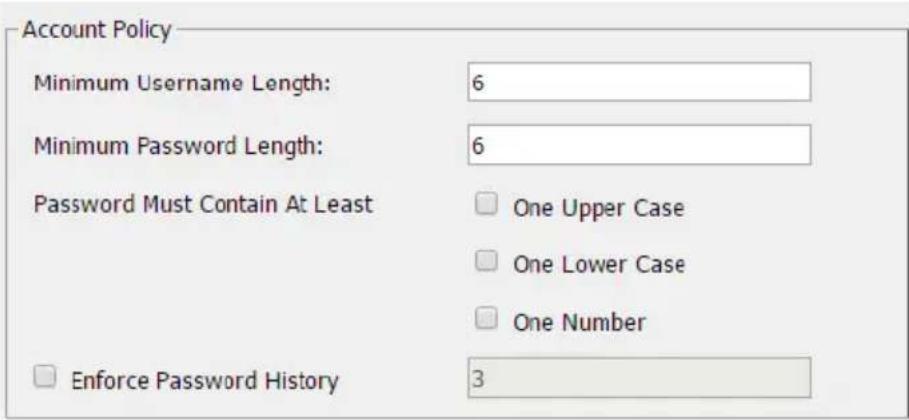
The meanings of the Account Policy entries are explained in the table below:
| Entry Explanation | |
| Minimum Username Length Sets | the minimum number of characters required for a username. Acceptable values are from 1–16. The default is 6. |
| Minimum Password Length Sets | the minimum number of characters required for a password. Acceptable values are from 0–16. A setting of 0 means that no password is required. Users can login with only a Username. The default is 6. |
| Password Must Contain At Least | Checking any of these items requires users to include at least one uppercase letter, one lowercase letter or one number in their password.Note: This policy only affects user accounts created after this policy has been enabled, and password changes to existing user accounts. Users accounts created before this policy was enabled, and there is no change to the existing passwords, are not affected. |
| Enforce Password History Check | this box to prevent users from using old passwords for the number of times entered in the box. A user will not be able to use the same password again until the number of password changes has been exceeded the number entered here. |
Encryption
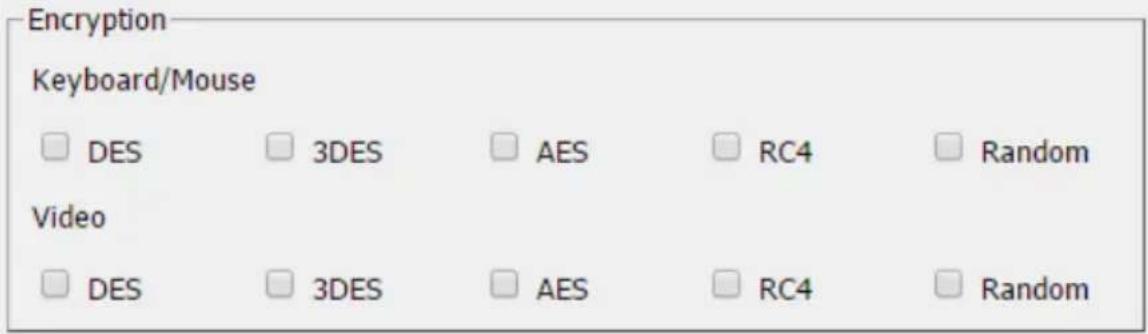
These flexible encryption alternatives for keyboard/mouse and video data let you choose any combination of DES; 3DES; AES; RC4; or a Random cycle of any or all of them.
Enabling encryption affects system performance – no encryption offers the best performance; the greater the encryption the greater the adverse effect. If you enable encryption, the performance considerations are as follows:
- RC4 offers the least impact on performance; DES is next; then 3DES or AES
- The RC4 + DES combination offers the least impact of any combination
Mode
Mode

Enable ICMP

Enable Multiuser Operation

An explanation of the Mode items is given in the table, below:
| Item Explanation | |
| Enable ICMP | If ICMP is enabled, the KVM over IP switch can be pinged. If it is not enabled, the device cannot be pinged. The default is Enabled. |
| Enable Multiuser Operation | Enabling Multiuser operation permits up to 32 users to log in at the same time to share the remote bus. If not enabled, only one user can log in at a time. The default is Enabled. |
| Browser Service En | Enabling Browser Service allows the administrator to restrict browser access to the KVM over IP switch. After checking Browser Service, drop down the listbox to select the degree of restriction:Disable Browser: means no browser access is permitted.Disable HTTP: means browser access is permitted, but users must access the switch with an HTTPS URL.Disable HTTPS: means browser access is permitted, but users must access the switch with an HTTP URL. |
Private Certificate
When logging in over a secure (SSL) connection, a signed certificate is used to verify that the user is logging in to the intended site. For enhanced security, the Private Certificate section allows you to use your own private encryption key and signed certificate, rather than the default ATEN certificate.
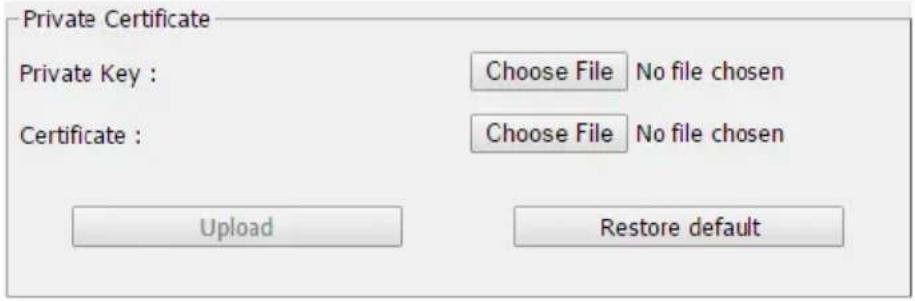
There are two methods for establishing your private certificate: generating a self-signed certificate; and importing a third-party certificate authority (CA) signed certificate.
- Generating a Self-Signed Certificate
If you wish to create your own self-signed certificate, a free utility – openssl.exe – is available for download over the web. See Self-Signed Private Certificates, page 231 for details about using OpenSSL to generate your own private key and SSL certificate.
- Obtaining a CA Signed SSL Server Certificate
For the greatest security, we recommend using a third party certificate authority (CA) signed certificate. To obtain a third party signed certificate, go to a CA (Certificate Authority) website to apply for an SSL certificate. After the CA sends you the certificate and private encryption key, save them to a convenient location on your computer.
- Importing the Private Certificate
To import the private certificate, do the following:
-
Click Browse to the right of Private Key; browse to where your private encryption key file is located; and select it.
-
Click Browse to the right of Certificate; browse to where your certificate file is located; and select it.
-
Click Upload to complete the procedure.
Note: 1. Clicking Restore Default returns the device to using the default ATEN certificate.
- Both the private encryption key and the signed certificate must be imported at the same time.
Certificate Signing Request
The Certificate Signing Request (CSR) section provides an automated way of obtaining and installing a CA signed SSL server certificate.
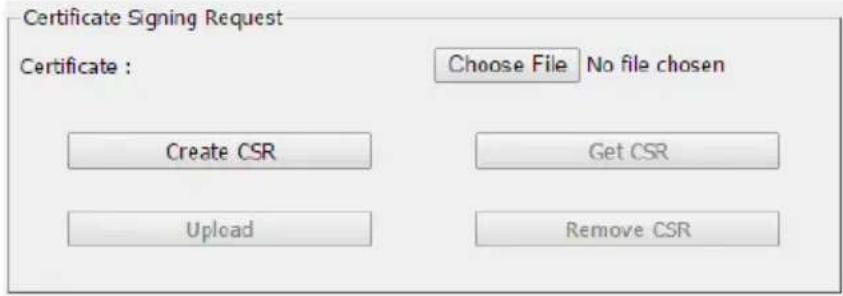
To perform this operation do the following:
- Click Create CSR. The following dialog box appears:
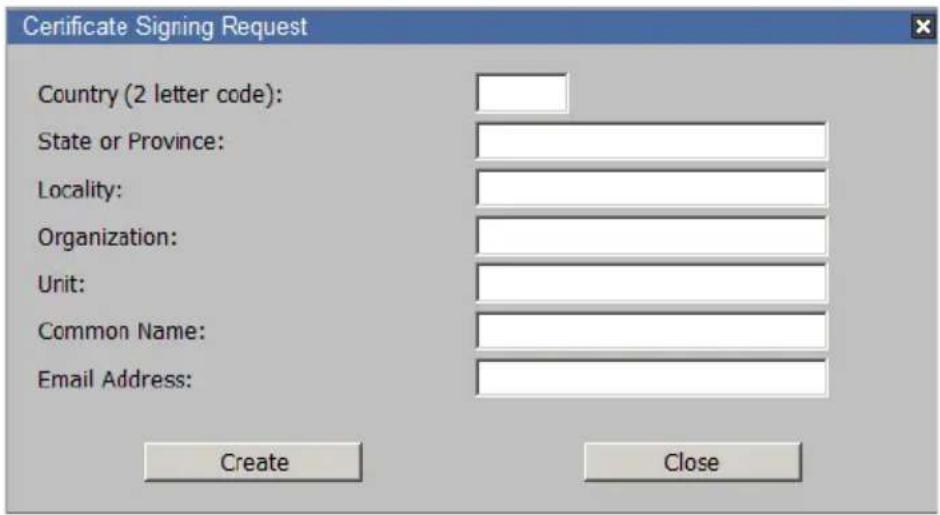
- Fill in the form – with entries that are valid for your site – according to the example information in the following table:
| Information Example | |
| Country (2 letter code) TW | |
| State or Province Taiwan | |
| Locality Taipei | |
| Organization Your Company, Ltd. | |
| Unit Techdoc Department | |
| Common Name mycompany.com | |
| Note: This must be the exact domain name of the site that you want the certificate to be valid for. If the site's domain name is www.mycompany.com, and you only specify mycompany.com, the certificate will not be valid. | |
| Email Address administrator@yourcompany.com | |
- After filling in the form (all fields are required), click Create.
A self-signed certificate based on the information you just provided is now stored on the KVM over IP switch.
- Click Get CSR, and save the certificate file (csr.cer) to a convenient location on your computer
This is the file that you give to the third party CA to apply for their signed SSL certificate.
- After the CA sends you the certificate, save it to a convenient location on your computer. Click Browse to locate the file; then click Upload to store it on the KVM over IP switch.
Note: When you upload the file, the KVM over IP switch checks the file to make sure the specified information still matches. If it does, the file is accepted; if not, it is rejected.
If you want to remove the certificate (to replace it with a new one because of a domain name change, for example), simply click Remove CSR.
Date/Time
The Date/Time dialog page sets the KVM over IP switch time parameters:

| Date May ▼ < 2017 > | ||||||
| May 2017 | ||||||
| Su | Mo | Tu | We | Th | Fr | Sa |
| 1 | 2 | 3 | 4 | 5 | 6 | |
| 7 | 8 | 9 | 10 | 11 | 12 | 13 |
| 14 | 15 | 16 | 17 | 18 | 19 | 20 |
| 21 | 22 | 23 | 24 | 25 | 26 | 27 |
| 28 | 29 | 30 | 31 | |||

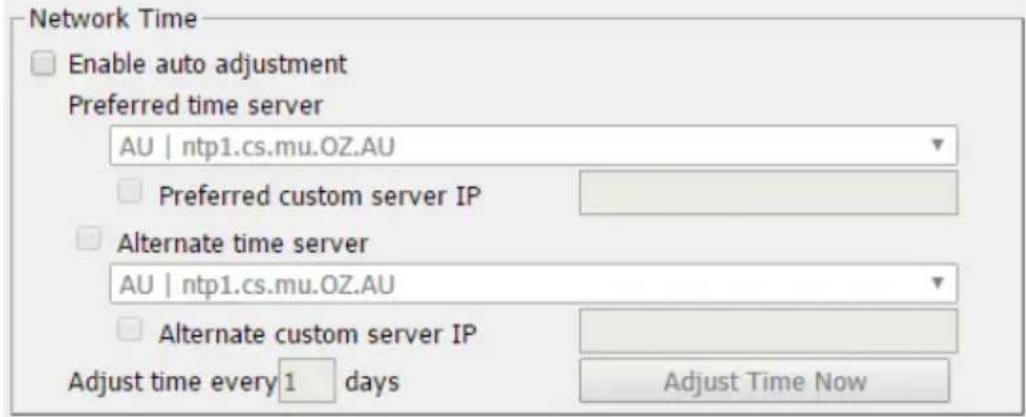
Set the parameters according to the information below.
Time Zone
- To establish the time zone that the KVM over IP switch is located in, drop down the Time Zone list and choose the city that most closely corresponds to where it is at.
- If your country or region employs Daylight Saving Time (Summer Time), check the corresponding checkbox.
Date
- Select the month from the drop down listbox.
- Click < or > to move backward or forward by one year increments.
◆ In the calendar, click on the day.
◆ To set the time, use the 24 hour HH:MM:SS format. - Click Set to save your settings.
Network Time
To have the time automatically synchronized to a network time server, do the following:
- Check the Enable auto adjustment checkbox.
- Drop down the time server list to select your preferred time server
- or -
Check the Preferred custom server IP checkbox, and key in either the IPv4 address, IPv6 address, or domain name of the time server of your choice. - If you want to configure an alternate time server, check the Alternate time server checkbox, and repeat step 2 for the alternate time server entries.
- Key in your choice for the number of days between synchronization procedures.
- If you want to synchronize immediately, click Adjust Time Now.
This Page Intentionally Left Blank
Overview
The KVM over IP switch logs all the events that take place on it. To view the contents of the log, click the Log tab. The device's Log Information page, similar to the one below, appears:
Browser GUI
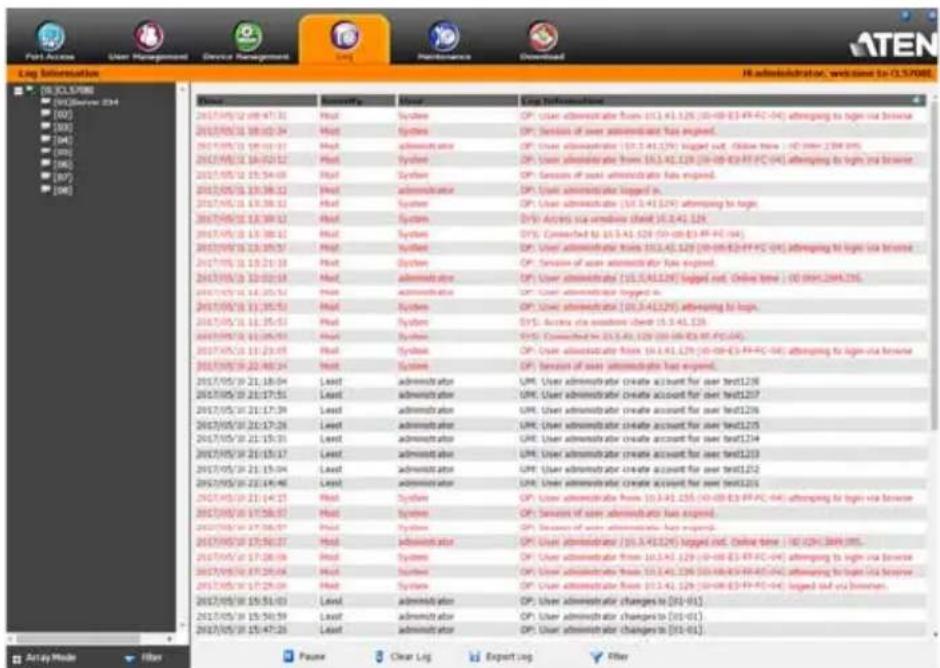
AP GUI
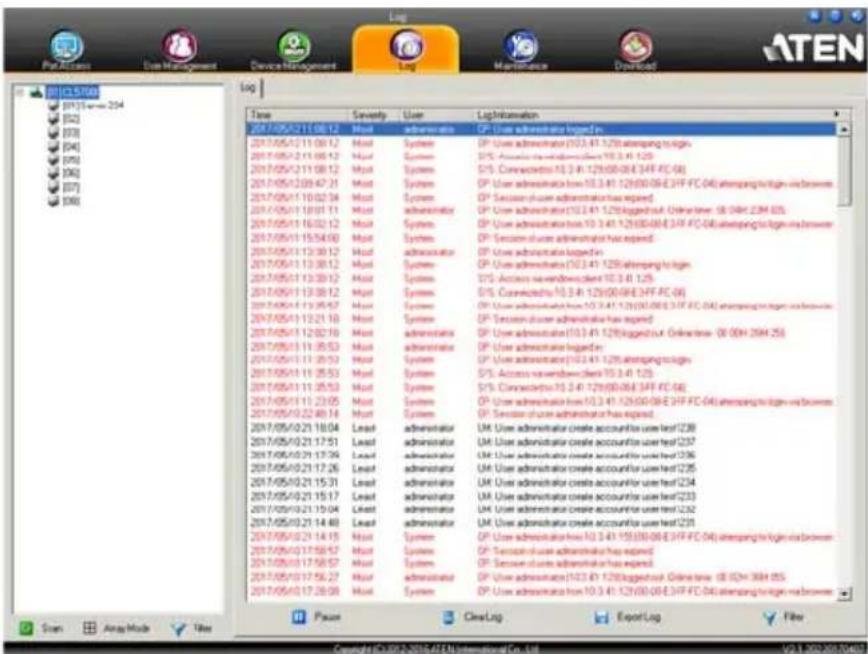
Log Information
The Log Information page displays events that take place on the KVM over IP switch, and provides a breakdown of the time, the severity, the user, and a description of each one. You can change the sort order of the display by clicking on the column headings.
The log file tracks a maximum of 512 events. When the limit is reached, the oldest events get discarded as new events come in. To record more than 512 events, see The Log Server, page 177. The purpose of the buttons at the bottom of the page are described in the following table:
| Button Explanation | |
| Pause Clicking Pause stops | the display of new events. Whenthe display is paused the button changes to Resume.ClickResumeto start displaying events again. |
| Clear Log Clicking Clear Log | clears the log file. |
| Export Log | Clicking Export Log lets you save the contents of the log to a file on your computer. |
| Filter | Clicking Filter allows you to search for particular events by date or by specific words or strings, as described in the next section. |
Filter
Filter lets you narrow the log event display to ones that occurred at specific times; ones containing specific words or strings; or ones involving specific users. When you access this function, the log filter dialog box appears at the bottom of the page:
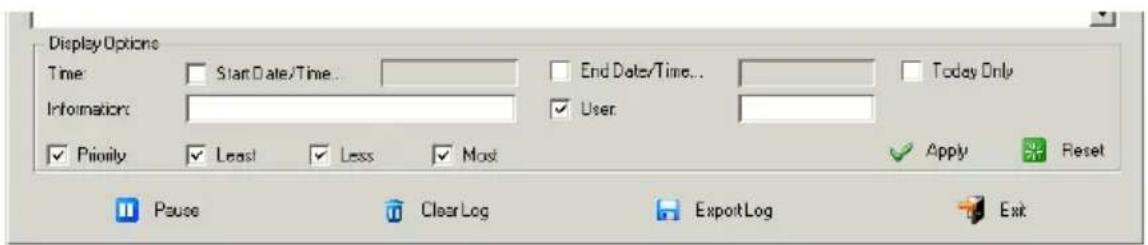
A description of the filter items is given in the table, below:
| Item Description | |
| Time This feature lets you filter for events that occurred at specific times, as follows:Today Only: Only the events for the current day are displayed.Start Date/Time: Filters for events from a specific date and time to the present. Put a check in the checkbox to bring up a calendar. Set the date and time that you want the filtering to start from. All events from the Start date/time to the present are displayed.For the Web Browser interface, after checking Start Date/Time, you have to click inside the text box in order to bring up the calendar. When you have made your calendar choices, click the A icon at the lower right of the calendar panel.End Date/Time: Filters for events from a specific date and time to a specific date and time. First select the Start Date/Time (described above); check End Date/Time to set the ending date and time.For the Web Browser interface, after checking End Date/Time, you have to click inside the text box in order to bring up the calendar. When you have made your calendar choices, click the A icon at the lower right of the calendar panel. | |
| Information Filters for a particular word or string. Key the word or string into the Information text box. Only events containing that word or string are displayed. Wildcards (? for single characters; * for multiple characters) and the keyword or are supported. E.g., h*ds would return hands and hoods; h?nd would return hand and hind, but not hard; h*ds or h*ks would return hands and hooks. | |
| User | Filters for specific users. First put a check in the User checkbox; then key in the user's Username; then click Apply. Only events containing that Username are displayed.Note: If the User checkbox is not checked here in the Filter panel, the entire User column does not appear in the main panel. |
| Severity Filters based on the severity rating of the event. Least events appear in black; Less events appear in blue; Most events appear in red.First put a check in the Severity checkbox; then check the severity options you want to filter for (you can check more than one item). Only events that match the severity ratings you specified appear in the display.Note: If the Severity checkbox is not checked here in the Filter panel, the entire Severity column does not appear in the main panel. | |
| Apply Click to apply the filter choices. | |
| Reset Click this button to clear the entries in the dialog box and start with a clean slate. | |
| Exit Click this button to exit the log filter function. | |
This Page Intentionally Left Blank
Overview
The Maintenance function is used to upgrade firmware; backup and restore configuration and account information; send terminal commands, ping network devices; and restore default values.
Browser GUI
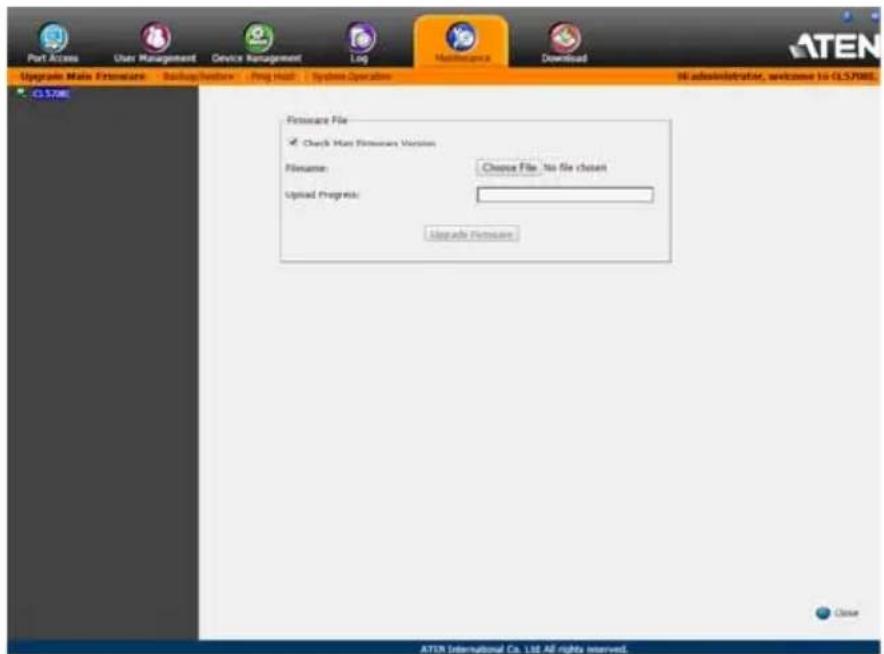
AP GUI
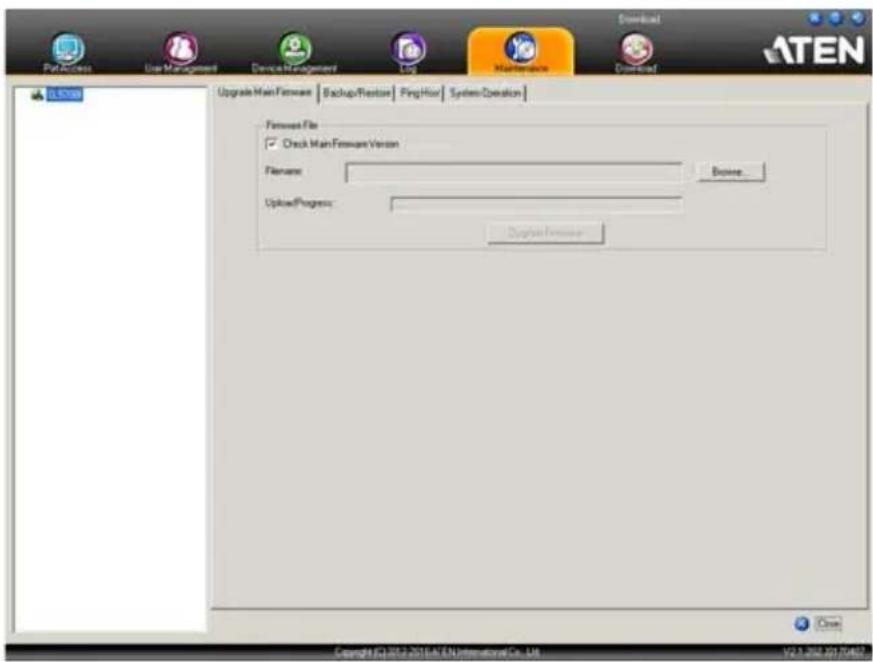
Firmware Upgrade
As new versions of the iCard Firmware become available, they can be downloaded from our website and installed using this page. Check the website regularly to find the latest information and packages to update your KVM switch. Our website provides firmware upgrade packages that are specific for each device. The Mainboard Firmware can only be upgraded via the Firmware Upgrade Port (see The Firmware Upgrade Utility, page 189 for details).
To upgrade the main firmware, do the following:
- Download the new iCard firmware file to your computer.
- Log in to the KVM over IP switch; and click the Maintenance tab. The Maintenance tab opens to the Upgrade Main Firmware* page:
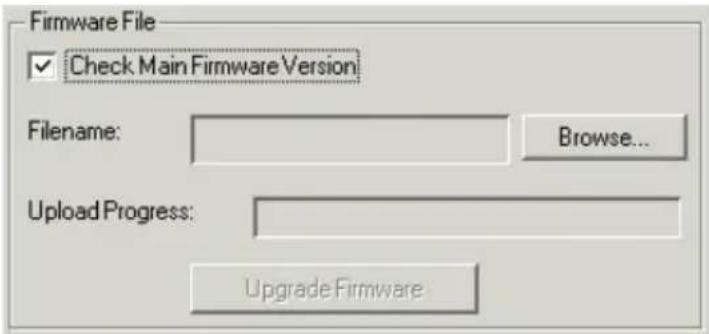
- Click Browse; navigate to the directory that the new iCard firmware file is in and select the file.
-
Click Upgrade Firmware to start the upgrade procedure.
-
If you enabled Check Main Firmware Version* the current firmware level is compared with that of the upgrade file. If the current version is equal to or higher than the upgrade version, a popup message appears, to inform you of the situation and stops the upgrade procedure.
- If you didn't enable Check Main Firmware Version*, the upgrade file is installed without checking what its level is.
- As the upgrade proceeds, progress information is shown in the Progress bar.
-
Once the upgrade completes successfully, the switch resets itself.
-
Log in again, and check the firmware version to be sure it is the new one.
Note: The term “Main Firmware” in this section refers to the CL5708I / CL5716I’s iCard firmware and not the Mainboard firmware.
Backup/Restore
Selecting the Backup/Restore menu item gives you the ability to back up the switch's configuration and user profile information:
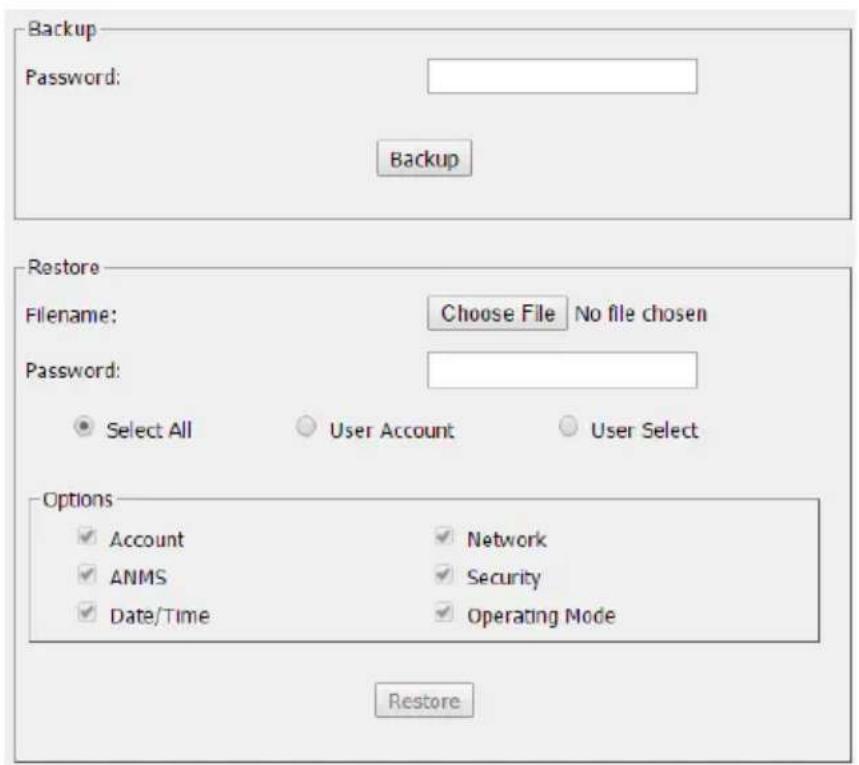
Backup
To backup the device's settings do the following:
- In the Password field, key in a password for the file.
Note: 1. Setting a password is optional. If you do not set one, the file can be restored without specifying a password.
2. If you do set a password, make a note of it, since you will need it to be able to restore the file.
- Click Backup.
- When the browser asks what you want to do with the file, select Save to disk; then save it in a convenient location.
Restore
To restore a previous backup, do the following:
- Click Browse; navigate to the file and select it.
Note: If you renamed the file, you can leave the new name. There is no need to return it to its original name.
- If you set a password when you created the file, key it in the Password field.
- Select as many of the options that are presented as you wish to restore.
- Click Restore.
After the file is restored, a message appears to inform you that the procedure succeeded.
Ping Host
The Ping Host page allows you to ping a device to check its connection status on the network. Enter an IP address or Host Name in the text box and then click Ping to ping a device.
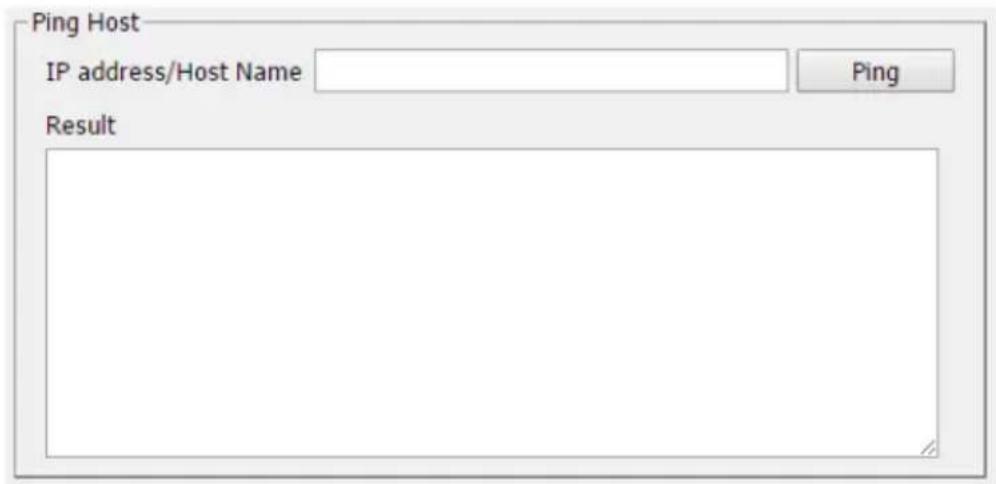
System Operation
The System Operation page lets you restore certain configuration changes that were made to the KVM over IP switch back to their original factory default values.
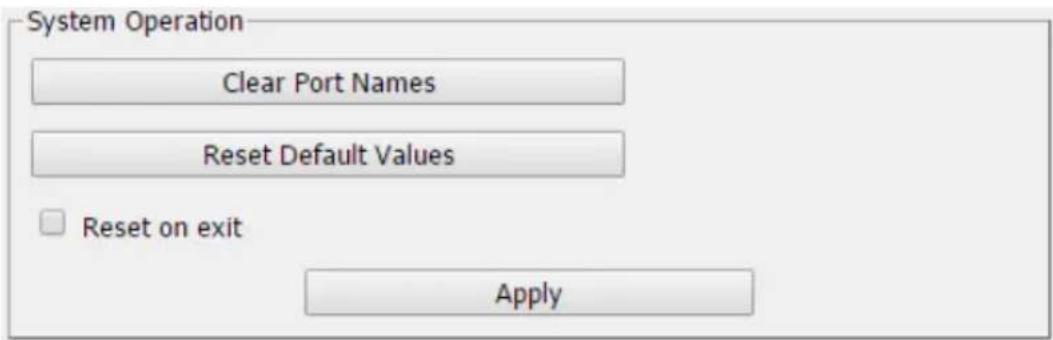
The functions performed on this page are as follows:
Clear Port Names:
Clicking this button removes names that have been assigned to the ports
Restore Default Values:
Clicking this button undoes all Customization page changes that have been made to the KVM over IP switch (except for the Port Names), as well as the Network Transfer Rate (on the Network page), and returns the parameters to the original factory default settings.
Reset on exit:
Place a check here and click Apply to have the KVM over IP switch reset itself and implement all the new settings when you log out. (Following the reset, wait approximately 30 to 60 seconds before logging back in.)
If you change the switch's IP Address (see Network, page 133), the checkbox is automatically checked and the KVM switch will reset when you log out. If you clear the check mark before logging out, the changed IP settings will be ignored and the original IP address settings will remain in effect.
Note: Even though the changed IP settings are ignored, they still remain in the network settings fields. Which means that the next time you open this page the Reset on exit checkbox will automatically be enabled, and when the switch resets, the new IP settings that you thought you discarded will become the ones used by the switch. To avoid this problem, you should go back to the network settings page and be sure that the IP settings that appear in the fields are the ones you want to use.
Chapter 13 Download
Overview
Download is used to download stand-alone AP versions of the Windows Client, the Java Client, and the Log Server:
![Port/Access User Management Device Management Log Maintenance Download ATEN [01]CL5708 [01]Server 234 [02] [03] [04] [05] [06] [07] [08] Connections Favorites User Preferences Sessions Access Port Configuration Port Number Port Name Device Name Status 0102 Offline 0103 Offline 0104 Offline 0105 Offline 0106 Offline 0107 Offline 0108 Offline 0101 Serve 234 Offline Double click or press Enter Connect Scan Away Mode Filter Copyright©2012-2016.ATEN.International@Co.,LM V2.1.202.20:20497](/content/2026/05/987336/images/b683d06ab8d9fe3eb49950cb04a5860de430b1a3085371790996f2998809484c.jpg)
Click the program you want to download; save it to a convenient location on your hard disk, and run it from there.
This Page Intentionally Left Blank
Overview
After you have successfully logged in (see Logging In, page 55), the KVM over IP switch opens to the Port Access tab's Connections page:
Browser GUI
![Port Access User Management Device Management Log Maintenance Download Connections Favorites User Preferences Gespline Access Port Configuration HI administrator, welcome to CL5708I. [01]CL5708I [01]Server 214 [02] [03] [04] [05] [06] [07] [08] Port Number Port Name Device Name Status 01-01 Server 214 CL5708I Offline 01-02 CL5708I Offline 01-03 CL5708I Offline 01-04 CL5708I Offline 01-05 CL5708I Offline 01-06 CL5708I Offline 01-07 CL5708I Offline 01-08 CL5708I Offline Connect](/content/2026/05/987336/images/0925d6d80552b6f204d7aa2cd33c4ab0c9585c5fb7f0f0b0b9033aed57d158d9.jpg)
AP GUI
![PortAccess PortAccess Sub Management Device Management Dog Maintenance Divided ATEN Port C:\Users\NT1\Server 234 [01] [02] [03] [04] [05] [06] [07] [08] Connections | Favorites | Use Preferences | Sessions | Access | PortConfiguration | Port Number Port Name Device Name Status 0103 Server 234 C offline 0102 C offline 0103 C offline 0104 C offline 0105 C offline 0106 C offline 0107 C offline 0108 C offline Double click on press Enter Connect](/content/2026/05/987336/images/0f0bf7ea009b8f8766cae4cdf4ca35bac76b9058bedcc908818c116f68f9951c.jpg)
Note: 1. The WinClient and Java Client AP programs have a hidden Control Panel at the upper center of the screen that becomes visible when you mouse over it. The Browser version's Control Panel only appears after you switch to a port. The Control Panel is discussed on page 70.
2. See KVM Devices and Ports – Connections Page, page 105 for details about the Port Access Connections page.
Connecting to a Port
All the devices, ports, and outlets that a user is permitted to access are listed in the Sidebar at the left of the page.
- To connect to a port when a device is selected in the Sidebar, double click its icon in the Sidebar; or double click anywhere on its line entry in the main central panel; or select it in the main panel and click Connect at the bottom right of the page.
- To connect to a port when the port is selected in the Sidebar, click Connect at the right of the Status panel (see Status, page 106).
Once you switch to a port, its screen displays on your monitor, and your keyboard and mouse input affects the remote server:
![Java Client 1.1.104 Applications Places System 5:30 AM M<>MTX X田 [20] Computer jre-6u12-linux-i586.bin Terminal Trash root's Home System Monitor jre-6u12-linux-i586.bin fedora™ [plugins - File Browser]](/content/2026/05/987336/images/4707fe17c4fc7d3eadc856fd5022a038e193ca547c10ba05c92e75947cd7e759.jpg)
The Port Toolbar
The KVM over IP switch's interface provides a toolbar to help you with port switching operations from within the captured port. To bring up the toolbar, tap the GUI Hotkey (Scroll Lock or Ctrl), twice. The toolbar appears at the upper left corner of the screen:

![[01-03]](/content/2026/05/987336/images/5b43826076bd8796d3610c5685972de2776233bf234b94ef8cbd1fb44e86ef62.jpg)
Depending on the settings that were selected for ID Display (see page 110), the Port Number and/or the Port Name display at the right of the toolbar. The meanings of the toolbar icons are given in a table on page 171.
When the toolbar displays mouse and keyboard input has no effect on the server connected to the port. To carry out operations on the server, close the toolbar by clicking its X icon.
To return to the Port Access Connections page, either click the appropriate icon (see The Toolbar Icons, page 171), or tap the GUI hotkey again.
Note: 1. You can adjust the toolbar transparency (see Video Settings, page 81).
- The toolbar functions and icons are also incorporated in the Control Panel. If you choose to enable them in the Control Panel (see Control Panel Configuration, page 94), you can disable the Toolbar (see User Preferences, page 110 for details). To recall the Port Access Connections page when there is no Toolbar, simply tap the GUI hotkey twice.
The Toolbar Icons
The meanings of the toolbar icons are explained in the table below.
| Icon Purpose | |
 | Click to skip to the first accessible port on the entire installation, without having to recall the Port Access page. |
 | Click to skip to the first accessible port previous to the current one, without having to recall the Port Access page. |
 | Click to begin Auto Scan Mode. The KVM over IP switch automatically switches among the ports that were selected for Auto Scanning with the Filter function (see Filter, page 101). This allows you to monitor their activity without having to switch among them manually. |
 | Click to skip from the current port to the next accessible one, without having to recall the Port Access page. |
 | Click to skip from the current port to the last accessible port on the entire installation, without having to recall the Port Access page. |
 | Click to return to the OSD. |
 | Click to close the toolbar. |
 | Click to invoke Panel Array Mode (see Panel Array Mode, page 175). |
Toolbar Hotkey Port Switching
When the toolbar displays, you can use hotkeys to provide KVM focus to a port directly from the keyboard. The KVM over IP switch provides the following hotkey features:
- Going directly to a port by keying in its port number and clicking Enter.
- Auto Scanning
♦ Skip Mode Switching
The hotkeys are: A and P for Auto Scanning; and the Arrow Keys for Skip Mode.
Note: 1. In order for hotkey operations to take place, the toolbar must be visible (see The Port Toolbar, page 170).
- To use the keys designated as hotkeys (i.e. A, P, etc.) for normal, non-hotkey purposes, you must first close the toolbar.
- For issues affecting multiple user operation in Auto Scan Mode, see Panel Array Mode, page 216.
Auto Scanning
The Scan function automatically switches among all the ports that are accessible to the currently logged on user at regular intervals, so that the user can monitor their activity automatically. Users can also limit the number of ports scanned with the Filter function of the Sidebar. See KVM Devices and Ports – Connections Page, page 105, and Filter, page 101, for further details.
Setting the Scan Interval:
The amount of time Auto Scan dwells on each port is set with the Scan Duration setting (see Scan Duration, page 111).
- Invoking Auto Scan
To start Auto Scanning, with the toolbar showing, tap the A key. The Auto Scan function cycles through the ports in order – starting from the first port on the installation. An 📄 appears in front of the Port ID Display to indicate that the port is being accessed under Auto Scan Mode.
♦ Pausing Auto Scan
While you are in Auto Scan Mode, you can pause the scanning in order to keep the focus on a particular server by pressing P. During the time that Auto Scanning is paused, the S in front of the Port ID blinks On and Off.
Pausing when you want to keep the focus on a particular server can be more convenient than exiting Auto Scan Mode because when you Resume scanning, you start from where you left off. If, on the other hand, you were to exit and then restart Auto Scan Mode, the scanning would start over from the very first server on the installation.
To Resume Auto Scanning after a pause, press any key except [Esc] or the [Spacebar]. Scanning continues from where it left off.
- Exiting Auto Scan
While Auto Scan Mode is in effect, ordinary keyboard functions are suspended. You must exit Auto Scan Mode in order to regain normal control of the keyboard. To exit Auto Scan Mode press [Esc] or the [Spacebar]. Auto Scanning stops when you exit Auto Scan Mode.
Skip Mode
Skip Mode allows you to switch ports in order to monitor the servers manually. You can dwell on a particular port for as long or as little as you like - as opposed to Auto Scanning, which automatically switches after a fixed interval. The Skip Mode hotkeys are the four Arrow keys. Their operation is explained in the table below:
| Arrow Action | |
| ← | Skips from the current port to the first accessible port previous to it. |
| → | Skips from the current port to the first accessible port that comes after it. |
| ↑ | Skips from the current port to the very first accessible port on the installation. |
| ↓ | Skips from the current port to the very last accessible port on the installation. |
Recalling the Port Access Page
To dismiss the toolbar and bring back the Port Access page, do one of the following:
Tap the GUI Hotkey once.
- From the toolbar, click the icon that recalls the Port Access page (see The Toolbar Icons, page 171).
The toolbar closes, and the Port Access Page appears.
GUI Hotkey Summary Table
The following table presents a summary of the GUI Hotkey actions after you have accessed a port. See User Preferences, page 110 to set the GUI Hotkey.
| To... Do This... | ||
| Open the Toolbar Click the GUI Hotkey twice | ||
| Open the Port Access Page | The Toolbar is open Click the GUI Hotkey once | |
| The Toolbar is not open Click the GUI Hotkey three times | ||
Panel Array Mode
Clicking the toolbar's Panel icon invokes Panel Array Mode. Under this mode, the screen divides into a grid of up to 42 panels:
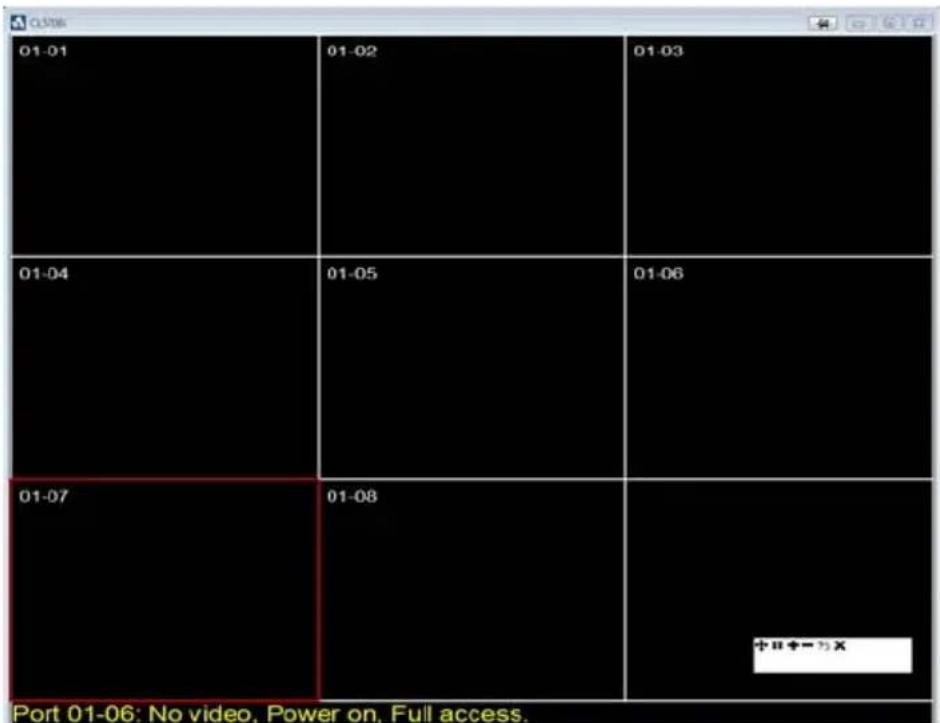
Each panel represents one of the switch's ports beginning with Port 1 at the upper left, and going from left to right; top to bottom.
- The number of panels in the array can be selected by clicking the Show More Ports, and Show Fewer Ports symbols on the panel array toolbar (see the following page for an explanation of the panel array toolbar).
- When the Array is first invoked, it scans through each of the ports that were selected for Auto Scanning with the Filter function (see Filter, page 101). As it scans, the border of the panel that has the focus becomes highlighted.
- Only ports that are accessible to the user are displayed. For ports that are not accessible, the panel is blank.
- If the server connected to a port is on line, its screen displays in its panel, otherwise the panel is blank.
- Mousing over a panel displays information about the port (port name, online status, port access status, and resolution).
- You can access a server connected to a port by moving the mouse pointer over its panel and clicking. You switch to the server exactly as if you had selected it from the Port Access page.
Panel Array Toolbar
The panel array toolbar provides shortcut navigation and control of the panel array. The toolbar can be dragged anywhere on the screen. Mousing over an icon brings up a “tooltip” that provides a short description of the icon’s function. The icon functions are described in the table below:
| Click and drag to move the toolbar.Note: This icon is only available with the Windows Clients. To move the Java Client toolbars, click on any empty space and drag. | |
| II | Pause panel scanning, leaving the focus on the panel that currently has it. |
| + | Show More Ports: Increase the number of panels in the array. |
| - | Show Fewer Ports: Decrease the number of panels in the array. |
| 43 | Toggle 4/3 aspect ratio. |
| x | Exit Panel Array mode. |
Note: For issues affecting multiple user operation in Panel Array Mode, see Panel Array Mode, page 216.
Chapter 15
The Log Server
The Windows-based Log Server is an administrative utility that records all the events that take place on selected KVM over IP switches and writes them to a searchable database. This chapter describes how to install and configure the Log Server.
Installation
- Log into the KVM over IP switch (see page 55).
- Click the Download tab and download the Log Server AP program.
- Go to the location on your hard disk that you downloaded the Log Server program to, and double click its icon (LogSetup.exe) to bring up the Setup screen.
Note: If the browser cannot run the file, save it to disk, instead, and run the file from your disk.
The Log Server installation screen appears:
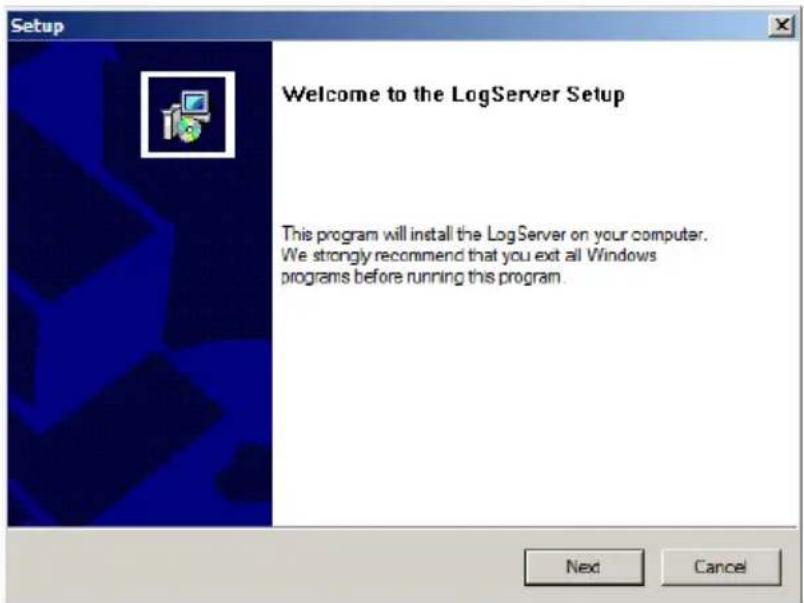
- Click Next. Then follow the on-screen instructions to complete the installation and have the Log Server program icon placed on your desktop.
Starting Up
To start the Log Server, either double click the program icon, or key in the full path to the program on the command line. The first time you run it, a screen similar to the one below appears:
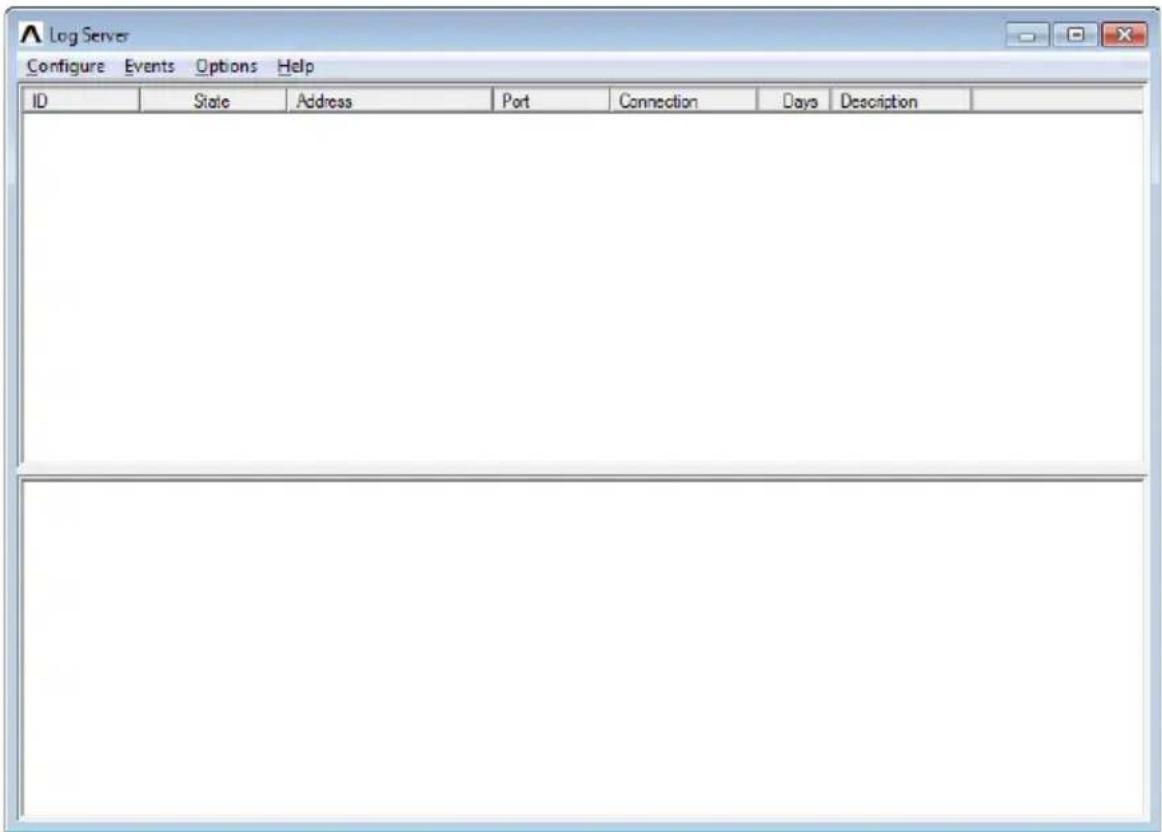
Note: 1. The MAC address of the Log Server computer must be specified in the ANMS settings – see Log Server, page 137.
2. The Log Server requires the Microsoft Jet OLEDB 4.0 driver. See The Log Server program does not run., page 216 if the program doesn't start.
The screen is divided into three components:
◆ A Menu Bar at the top
A panel that will contain a list of KVM over IP switches in the middle (see The Log Server Main Screen, page 184).
◆ A panel that will contain an Events List at the bottom
Each of the components is explained in the sections that follow.
The Menu Bar
The Menu bar consists of four items:
- Configure
Events
Options
◆ Help
These are discussed in the sections that follow.
Note: If the Menu Bar appears to be disabled, click in the List window to enable it.
Configure
The Configure menu contains three items: Add; Edit; and Delete. They are used to add new units to the List; edit the information for units already on the list; or delete units from the list.
◆ To add a unit to the list, click Add.
- To edit or delete a listed unit, first select the target in the List window, then open this menu and click Edit or Delete.
When you choose Add or Edit, a dialog box, similar to the one below, appears:
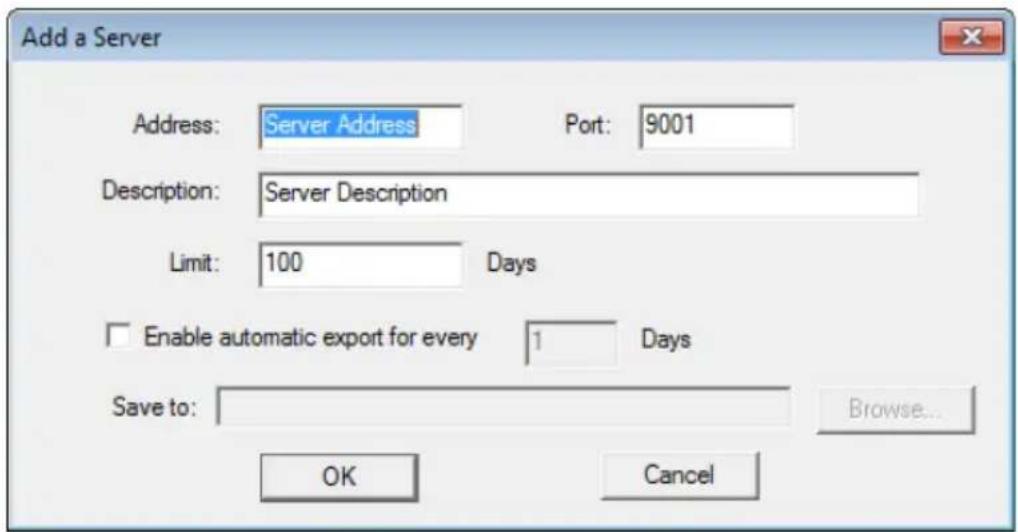
A description of the fields is given in the table, below:
| Field Explanation | |
| Address This can either be the IP address of the computer the Log Server is running on, or its DNS name. | |
| Port The port number that was assigned to the Log Server under Device Management (see Log Server, page 137). | |
| Description This field is provided so that you can put in a descriptive reference for the unit to help identify it. | |
| Limit This specifies the number of days that an event should be kept in the Log Server's database. Events that exceed the amount of time specified here can be removed with the Maintenance function (see Maintenance:, page 182). | |
| Enable Automatic Export for every / Save to | Check the box and enter the number of days to pass before the system auto exports a log file. Click Browse to select the directory location where the log file will export to. |
Fill in or modify the fields, then click OK to finish.
Events
The Events Menu has two items: Search and Maintenance.
Search:
Search allows you to search for events containing specific words or strings. When you access this function, a screen, similar to the one below, appears:
![Search Dialog Search Options New search Search last results Search excluding last results Server List Priority List: Last Less Most Start date: Start time End date: End time: Pattern: 6/26/2016 3:15:26 PM 6/27/2016 3:15:26 PM Result: Server: 10.0 13.233 2009/11/16 15:13:27 : User administrator changes to [0:3] 9120 CN8 to .14. 2009/11/17 13:49:06 : User administrator from 00-19-DB-EA-8C-C5 10.0.13.178 attempting to login. 2009/11/17 13:51:02 : User at 00-19-DB-EA-8C-C5 10.0.13.178 logged out 2009/11/17 13:51:48 : Sys: Connected to 10.0.13.178 (00-19-DB-EA-8C-C5) 2009/11/17 13:51:49 : User administrator (IP = 10.0.13.178) attempting to login. 2009/11/17 13:51:49 : Sys: Access via Java client (IP = 10.0.13.178). 2009/11/17 13:51:56 : Sys: Disconnected from 10.0.13.178 (00-19-DB-EA-8C-C5) 2009/11/17 13:51:56 : User (IP = 10.0.13.178) logged out 2009/11/17 13:52:21 : Sys: Connected to 10.0.13.178 (00-19-DB-EA-8C-C5) 2009/11/17 13:52:22 : User administrator (IP = 10.0.13.178) attempting to login. Search Print Export Exit](/content/2026/05/987336/images/a7b9b3c2f5abb92d4166a4e1f0141c93b804a9bb17d37591b5119b700ed543e2.jpg)
A description of the items is given in the table, below:
| Item Description | |
| New search This is one | of three radio buttons that define the scope of the search. If it is selected, the search is performed on all the events in the database for the selected unit. |
| Search last results This | is a secondary search performed on the events that resulted from the previous search. |
| Search excluding last results | This is a secondary search performed on all the events in the database for the selected unit excluding the events that resulted from the previous search. |
| Server List | KVM over IP switches are listed according to their IP address. Select the unit that you want to perform the search on from this list. You can select more than one unit for the search. If no units are selected, the search is performed on all of them. |
| Priority Sets the level for how detailed the search results display should be. Least is the most general; Most is the most specific. Least results appear in black; Less results appear in blue; Most results appear in red. | |
| Start Date Select the date that you want the search to start from. The format follows the YYYY/MM/DD convention, as follows: 2009/11/04 | |
| Start Time Select the time that you want the search to start from. The format follows the HH:MM:SS convention. | |
| End Date Select the date that you want the search to end at. | |
| End Time Select the time that you want the search to end at. | |
| Pattern Key in the pattern that you are searching for here. The multiple character wildcard (%) is supported. E.g., h%ds would match hands and hoods. | |
| Results Lists the events that contained matches for the search. | |
| Search Click this button to start the search. | |
| Print Click this button to print the search results. | |
| Export Click this button to save the search results to file. | |
| Exit Click this button to exit the Log Server. | |
Maintenance:
This function allows the administrator to perform manual maintenance of the database, such as erasing specified records before their expiration time is up.
Options
Network Retry allows you to set the number of seconds that the Log Server should wait before attempting to connect if its previous attempt to connect failed. When you click this item, a dialog box, similar to the one below, appears:
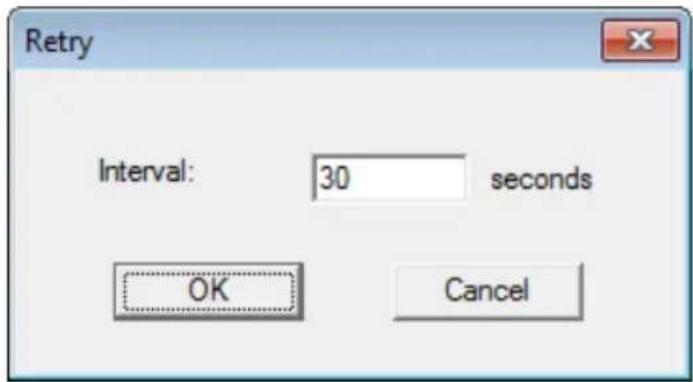
Key in the number of seconds, then click OK to finish.
Help
From the Help menu, click Contents to access the online Windows Help file. The help file contains instructions about how to setup, operation and troubleshoot the Log Server.
The Log Server Main Screen
Overview
The Log Server Main Screen is divided into two main panels.
- The upper (List) panel lists all of the units that have been selected for the Log Server to track (see Configure, page 179).
- The lower (Event) panel displays the tick information for the currently selected unit. (If there are more than one unit, the selected unit is the one that is highlighted).
◆ To select a unit in the list, simply click on it.
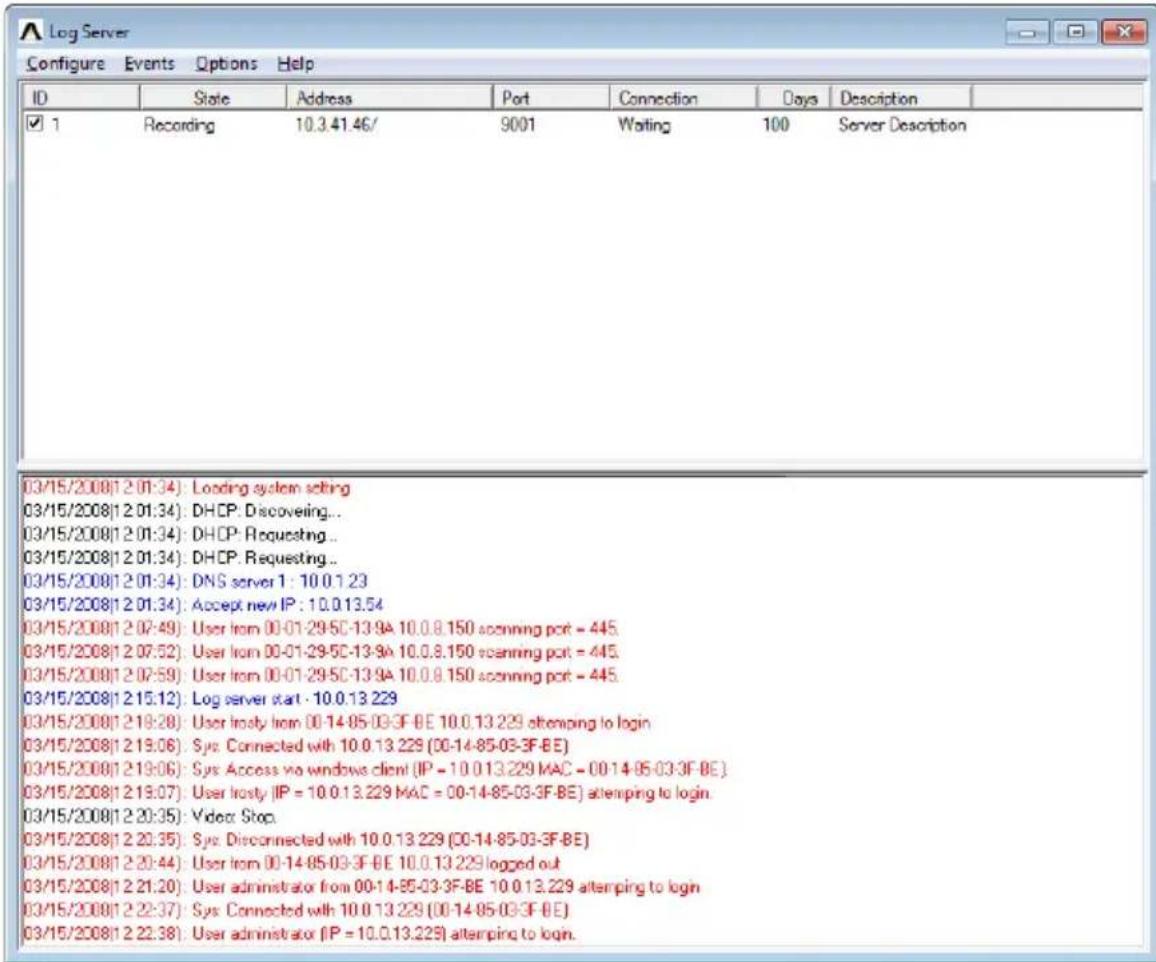
The List Panel
The List panel contains six fields:
| Field Explanation | |
| ID / State Shows the ID | number of the device and determines whether the Log Server records the ticks for this unit, or not. If the ID checkbox is checked, the State field displays Recording, and the ticks are recorded. If the ID checkbox is not checked, the State field displays Paused, and the ticks are not recorded.Note: Even though a unit is not the currently selected one, if its Recording checkbox is checked, the Log Server will still record its ticks. |
| Address This is the IP | Address or DNS name that was given to the unit when it was added to the Log Server (see Configure, page 179). |
| Port This is the Access | Port number assigned to the unit (see Configure, page 179). |
| Connection | ◆ If the Log Server is connected to the unit, this field displays Connected.◆ If the Log Server is not connected, this field displays Waiting. This means that the Log Server's MAC address has not been set properly. It needs to be set on the Device Management Date/Time page (see page 152). |
| Days This field displays | the number of days that the unit's log events are to be kept in the Log Server's database before expiration (see Configure, page 179). |
| Description This field dis | plays the descriptive information given for the unit when it was added to the Log Server (see Configure, page 179). |
The Event Panel
The lower panel displays log events for the currently selected unit. Note that if there are more than one units, even though they aren't currently selected, if their Recording checkbox is checked, the Log Server records their log events and keeps them in its database.
This Page Intentionally Left Blank
Chapter 16
Keyboard Emulation
Mac Keyboard
The PC compatible (101/104 key) keyboard can emulate the functions of the Mac keyboard. The emulation mappings are listed in the table below.
| PC Keyboard Mac Keyboard | |
| [Shift] Shift | |
| [Ctrl] Ctrl | |
 |  |
| [Ctrl] [1] |  |
| [Ctrl] [2] |  |
| [Ctrl] [3] |  |
| [Ctrl] [4] |  |
| [Alt] Alt | |
| [Print Screen] F13 | |
| [Scroll Lock] F14 | |
| [CTT4] | [1045] |
| [Enter] Return | |
| [Backspace] Delete | |
| [Insert] Help | |
| [Ctrl] [X03X] | F15 |
Note: When using key combinations, press and release the first key (Ctrl), then press and release the activation key.
Sun Keyboard
The PC compatible (101/104 key) keyboard can emulate the functions of the Sun keyboard when the Control key [Ctrl] is used in conjunction with other keys. The corresponding functions are shown in the table below.
| PC Keyboard Sun Keyboard | |
| [Ctrl] [T] Stop | |
| [Ctrl] [F2] Again | |
| [Ctrl] [F3] Props | |
| [Ctrl] [F4] Undo | |
| [Ctrl] [F5] Front | |
| [Ctrl] [F6] Copy | |
| [Ctrl] [F7] Open | |
| [Ctrl] [F8] Paste | |
| [Ctrl] [F9] Find | |
| [Ctrl] [F10] Cut | |
| [Ctrl] [1] | |
| [Ctrl] [2] | |
| [Ctrl] [3] | |
| [Ctrl] [4] | |
| [Ctrl] [H] Help | |
| Compose | |
Note: When using key combinations, press and release the first key (Ctrl), then press and release the activation key.
The Firmware Upgrade Utility
Introduction
The purpose of the Windows-based firmware upgrade utility is to provide an automated process for upgrading the CL5708I / CL5716I's Mainboard Firmware and compatible adapter cable firmware. The program comes as part of a firmware upgrade package that is specific for each device.
The CL5708I / CL5716I's iCard Firmware can only be upgraded via the Browser or AP GUI (see Firmware Upgrade, page 160 for details).
As new firmware versions become available, new firmware upgrade packages are posted on our website. Check the website regularly to find the latest information and packages.
Downloading the Firmware Upgrade Package
To download the firmware upgrade package:
- From a computer that is not part of your KVM installation go to our website and choose the model name that relates to your device. A list of available firmware upgrade packages appears.
- Choose the firmware upgrade package that you wish to install (usually the most recent) and download it to your computer.
Preparation
To prepare for the firmware upgrade, do the following:
- Use the Firmware Upgrade Cable (provided with this unit), to connect a COM port on your computer to the Firmware Upgrade Port of your switch.
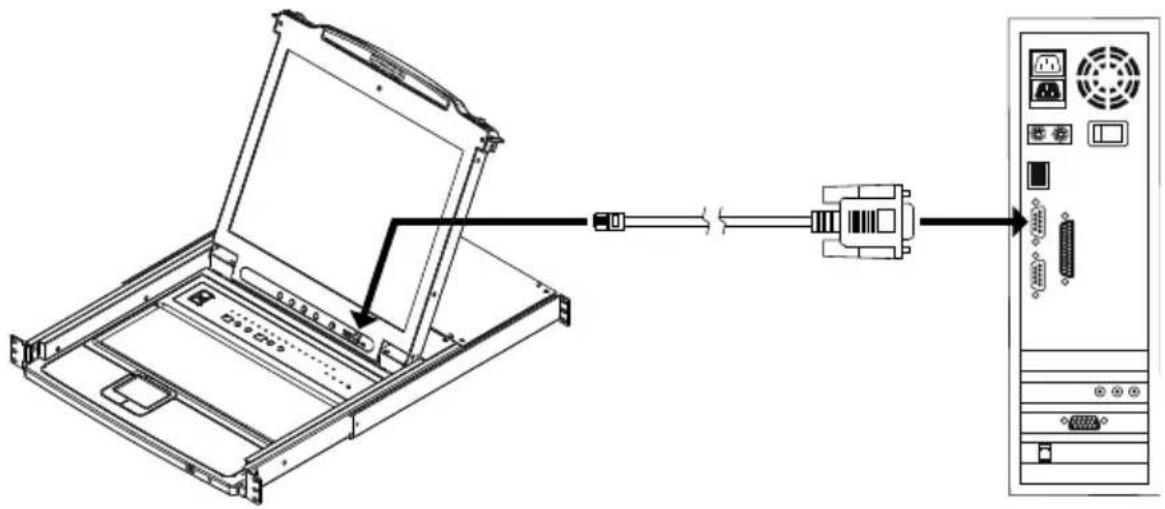
natural_image
Line drawing of a laptop connected to an RJ412 network interface (no text or symbols present)Note: On a daisy chained installation, the chained stations will automatically receive the upgrade via the daisy chain cables.
- Shut down all the computers, but not the stations, on the KVM installation.
- From your KVM switch console, login to the OSD as the administrator (see page 31) and select the F4 ADM function.
- Scroll down to FIRMWARE UPGRADE. Press [Enter], then press [Y] to invoke Firmware Upgrade mode (see page 40.).
Note: During Firmware Upgrade mode, the port LEDs will flash on and off.
Starting the Upgrade
To upgrade the firmware:
- Run the downloaded firmware upgrade package file either by double-clicking the file icon, or by opening a command line and entering the full path to it.
The Firmware Upgrade Utility welcome screen appears:
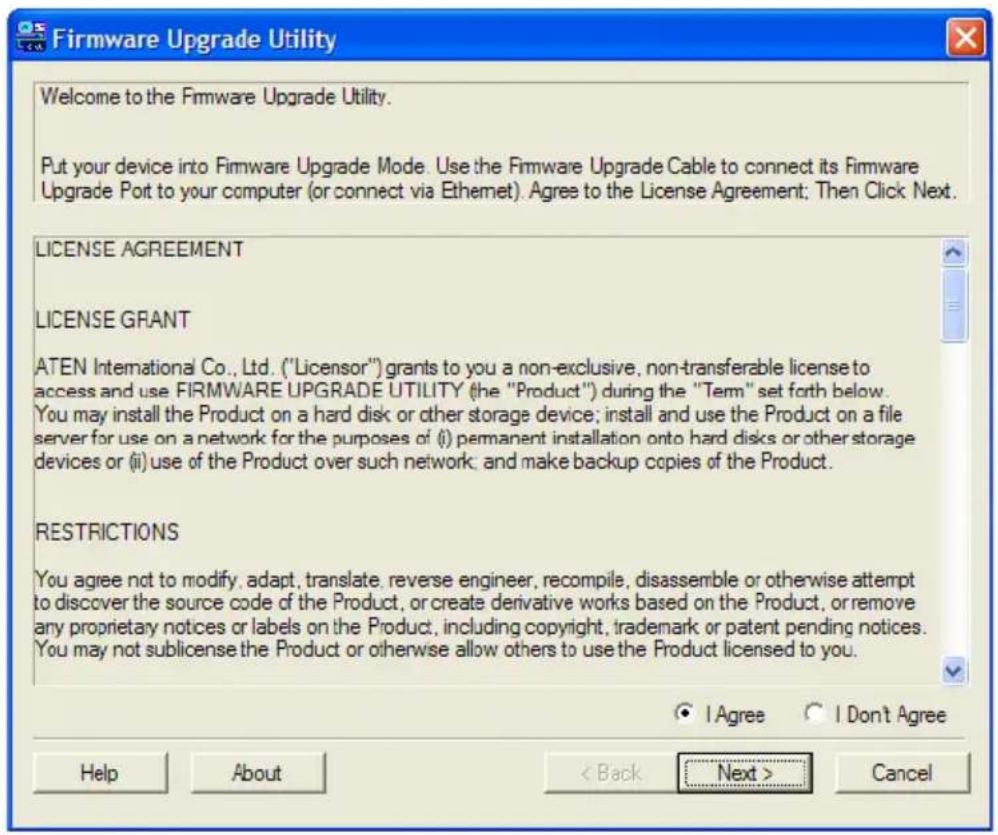
Note: The screens shown in this section are for reference only. The wording and layout of the actual screens put up by the Firmware Upgrade Utility may vary slightly from these examples.
- Read and Agree to the License Agreement (enable the I Agree radio button).
- Click Next to continue.
The Firmware Upgrade Utility main screen appears. The devices capable of being upgraded are listed in the Device List panel:
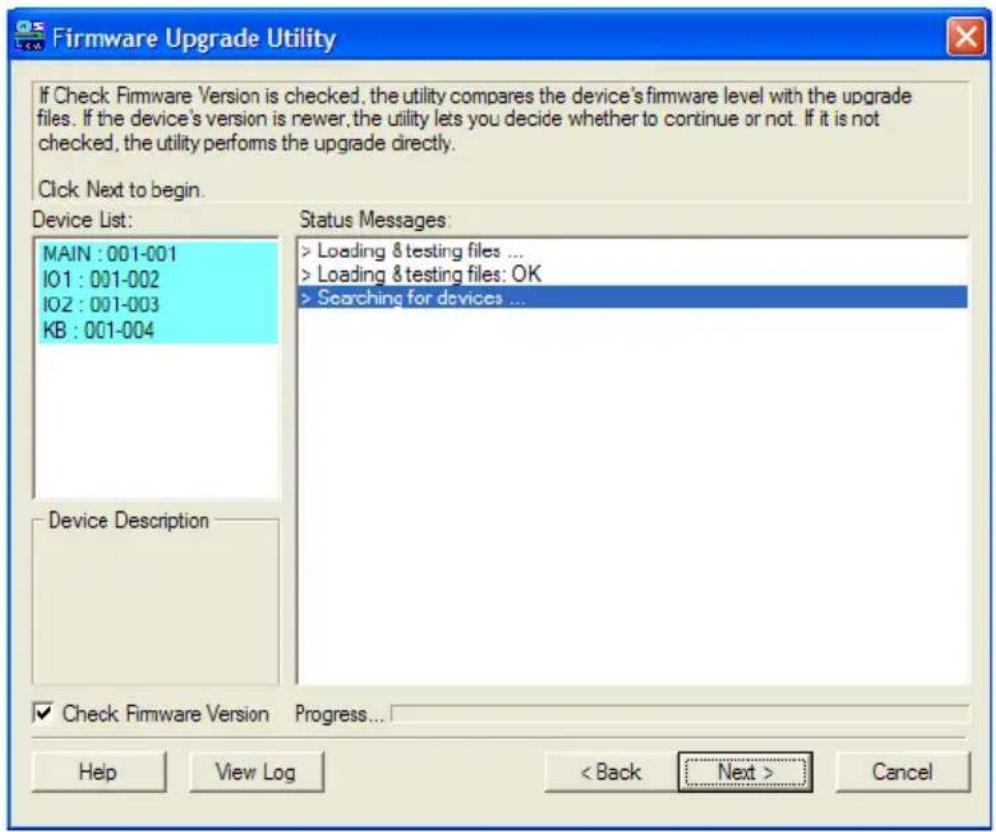
4. Click Next to perform the upgrade.
If you enabled Check Firmware Version, the utility compares the device's firmware level with that of the upgrade files. If it finds that the device's version is higher than the upgrade version, it brings up a dialog box informing you of the situation and gives you the option to continue or cancel.
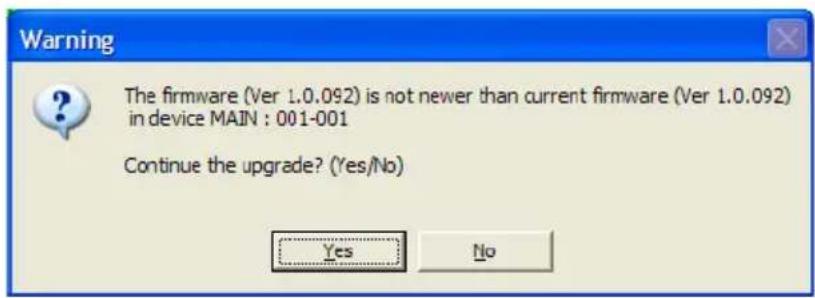
If you didn't enable Check Firmware Version, the utility installs the upgrade files without checking whether they are a higher level, or not.
As the upgrade proceeds, status messages appear in the Status Messages panel, and the progress toward completion is shown on the Progress bar.
Upgrade Succeeded
After the upgrade has completed, a screen appears to inform you that the procedure was successful:
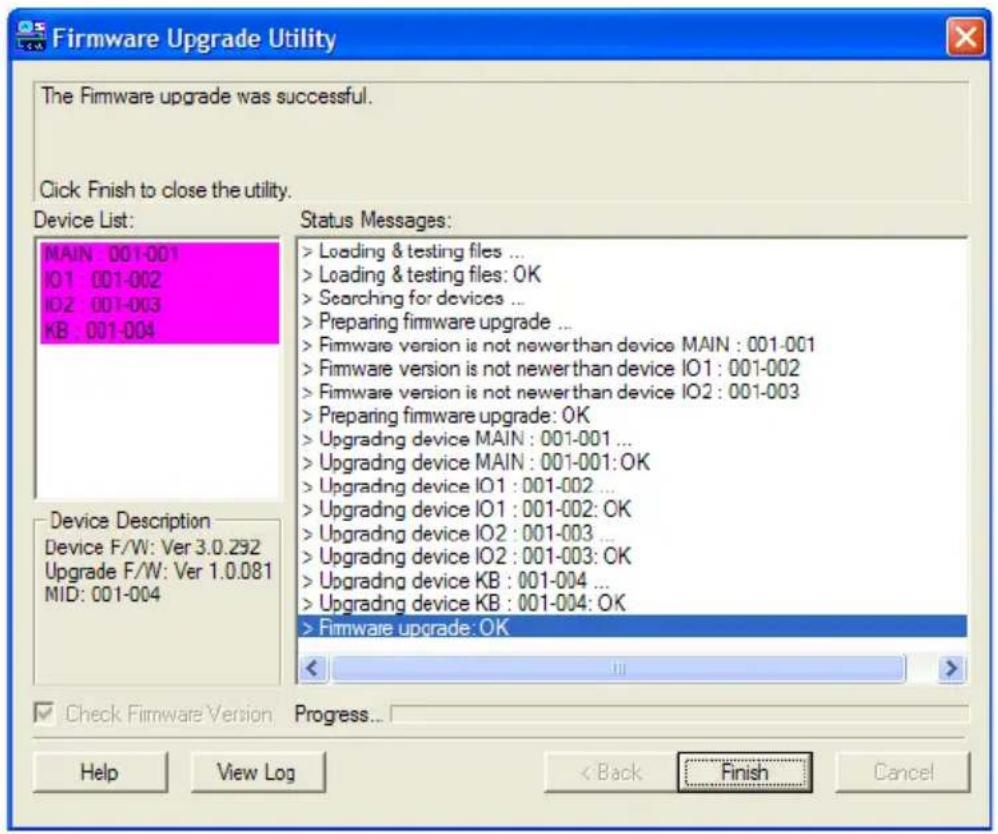
Click Finish to close the firmware upgrade utility.
Upgrade Failed
If the Upgrade Succeeded screen doesn't appear, it means that the upgrade failed to complete successfully. See the next section, Firmware Upgrade Recovery, for how to proceed.
Firmware Upgrade Recovery
There are three conditions that call for firmware upgrade recovery:
- When a firmware upgrade is manually aborted.
- When the mainboard firmware upgrade fails.
- When the I/O firmware upgrade fails.
To perform a firmware upgrade recovery, do the following:
- Power off the switch. If it is part of a daisy chain, disconnect it from the chain.
- Connect the Firmware Upgrade Cable to its Firmware Upgrade Port.
- Slide the Firmware Upgrade Recovery Switch to the Recover position.
- Power the switch back on and repeat the upgrade procedure.
- After the switch has been successfully upgraded, power it off, and slide the Firmware Upgrade Recovery Switch back to the Normal position.
- If the switch is part of a daisy chain, replace it in the chain.
- Power the switch back on.
Safety Instructions
General
- This product is for indoor use only.
- Read all of these instructions. Save them for future reference.
◆ Follow all warnings and instructions marked on the device. - Do not place the device on any unstable surface (cart, stand, table, etc.). If the device falls, serious damage will result.
♦ Do not use the device near water. - Do not place the device near, or over, radiators or heat registers.
- The device cabinet is provided with slots and openings to allow for adequate ventilation. To ensure reliable operation, and to protect against overheating, these openings must never be blocked or covered.
- The device should never be placed on a soft surface (bed, sofa, rug, etc.) as this will block its ventilation openings. Likewise, the device should not be placed in a built-in enclosure unless adequate ventilation has been provided.
- Never spill liquid of any kind on the device.
- Unplug the device from the wall outlet before cleaning. Do not use liquid or aerosol cleaners. Use a damp cloth for cleaning.
- Avoid circuit overloads. Before connecting equipment to a circuit, know the power supply’s limit and never exceed it. Always review the electrical specifications of a circuit to ensure that you are not creating a dangerous condition or that one doesn’t already exist. Circuit overloads can cause a fire and destroy equipment.
- The device should be operated from the type of power source indicated on the marking label. If you are not sure of the type of power available, consult your dealer or local power company.
- The device is designed for IT power distribution systems with 230V phase-to-phase voltage.
- To prevent damage to your installation it is important that all devices are properly grounded.
- The device is equipped with a 3-wire grounding type plug. This is a safety feature. If you are unable to insert the plug into the outlet, contact your
electrician to replace your obsolete outlet. Do not attempt to defeat the purpose of the grounding-type plug. Always follow your local/national wiring codes.
- Do not allow anything to rest on the power cord or cables. Route the power cord and cables so that they cannot be stepped on or tripped over.
If an extension cord is used with this device make sure that the total of the ampere ratings of all products used on this cord does not exceed the extension cord ampere rating. Make sure that the total of all products plugged into the wall outlet does not exceed 15 amperes. - To help protect your system from sudden, transient increases and decreases in electrical power, use a surge suppressor, line conditioner, or un-interruptible power supply (UPS).
- Position system cables and power cables carefully; Be sure that nothing rests on any cables.
- Never push objects of any kind into or through cabinet slots. They may touch dangerous voltage points or short out parts resulting in a risk of fire or electrical shock.
- Do not attempt to service the device yourself. Refer all servicing to qualified service personnel.
- If the following conditions occur, unplug the device from the wall outlet and bring it to qualified service personnel for repair.
- The power cord or plug has become damaged or frayed.
◆ Liquid has been spilled into the device. - The device has been exposed to rain or water.
- The device has been dropped, or the cabinet has been damaged.
- The device exhibits a distinct change in performance, indicating a need for service.
- The device does not operate normally when the operating instructions are followed.
- Only adjust those controls that are covered in the operating instructions. Improper adjustment of other controls may result in damage that will require extensive work by a qualified technician to repair.
- Do not connect the RJ-11 connector marked “UPGRADE” to a public telecommunication network.
Rack Mounting
- Before working on the rack, make sure that the stabilizers are secured to the rack, extended to the floor, and that the full weight of the rack rests on the floor. Install front and side stabilizers on a single rack or front stabilizers for joined multiple racks before working on the rack.
- Always load the rack from the bottom up, and load the heaviest item in the rack first.
- Make sure that the rack is level and stable before extending a device from the rack.
- Use caution when pressing the device rail release latches and sliding a device into or out of a rack; the slide rails can pinch your fingers.
- After a device is inserted into the rack, carefully extend the rail into a locking position, and then slide the device into the rack.
- Do not overload the AC supply branch circuit that provides power to the rack. The total rack load should not exceed 80 percent of the branch circuit rating.
- Make sure that all equipment used on the rack – including power strips and other electrical connectors – is properly grounded.
- Ensure that proper airflow is provided to devices in the rack.
- Ensure that the operating ambient temperature of the rack environment does not exceed the maximum ambient temperature specified for the equipment by the manufacturer
- Do not step on or stand on any device when servicing other devices in a rack.
- Caution: Slide/rail (LCD KVM) mounted equipment is not to be used as a shelf or a work space.

Technical Support
International
- For online technical support – including troubleshooting, documentation, and software updates: http://eservice.aten.com
- For telephone support, see Telephone Support, page iii:
North America
| Email Support support@aten-usa.com | ||
| Online Technical Support | Troubleshooting Documentation Software Updates | http://support.aten.com |
| Telephone Support 1-888-999-ATEN | ext 4988 | |
When you contact us, please have the following information ready beforehand:
Product model number, serial number, and date of purchase.
- Your computer configuration, including operating system, revision level, expansion cards, and software.
◆ Any error messages displayed at the time the error occurred.
◆ The sequence of operations that led up to the error.
◆ Any other information you feel may be of help.
Specifications
| Function CL5708I | |||
| LCD CL5708IM 17" | |||
| Computer Connections | Direct 8 | ||
| Max 128 (via Daisy-Chain) | |||
| Port Selection OSD, Hotkeys, Pushbuttons | |||
| Connectors External Console Port 1 x SPHD-18 (Male) | |||
| Function CL5708I | ||
| Power Consumption 17": 120V, 15.2W / | 230V, 16W19": 120V, 24W / 230V, 25W | |
| Environment | Operating Temp. | 0–50°C |
| Storage Temp. | -20–60°C | |
| Humidity 0–80% RH, Noncondensing | ||
| Physical Properties | Housing Metal + Plastic | |
| Weight 17": 13.49 kg | 19": 13.41 kg | |
| Dimensions (L x W x H) | 17": 48.00 x 64.27 x 4.40 cm19": 48.00 x 68.92 x 4.40 cm | |
| Function CL5716I | ||
| LCD CL5716IM 17" | ||
| Computer Connections | Direct 16 | |
| Max 256 (via Daisy-Chain) | ||
| Port Selection OSD, Hotkeys, Pushbuttons | ||
| Connectors External Console Port | 1 x SPHD-18 (Male) | |
| Switches | Reset | 1 x Semi-recessed Pushbutton |
| Power | 1 x Rocker Switch | |
| Firmware Upgrade | 1 x Switch | |
| LCD Adjust | 4 x Pushbutton | |
| LCD On/Off | 1 x LED Pushbutton (Orange) | |
| Port Selection | 2 x Pushbutton | |
| Station Selection | 2 x Pushbutton | |
| Function | CL5716I | ||
| LEDs | Online 16 (Orange) | ||
| 10/100 Mbps 1 (Orange/Green) | |||
| Port ID 2 x 7-segment LED Display (Yellow) | |||
| Station ID 2 x 7-segment LED Display (Yellow) | |||
| Power 1 (Dark Green) | |||
| Lock Num | 1 (Green) | ||
| Caps 1 (Green) | |||
| Scroll 1 (Green) | |||
| Emulation Keyboard / Mouse PS/2, USB | |||
| Video Local 1280 x 1024 @ 75 Hz; DDC2B | |||
| Scan Interval (OSD Select) 1–255 sec. | |||
| I/P Rating | 100–240 VAC, 50/60 Hz, 1 A | ||
| Power Consumption | 17": 120V, 17W / 230V, 18W19": 120V, 26W / 230V, 26.8W | ||
| Environment | Operating Temp. | 0–50°C | |
| Storage Temp. | -20–60°C | ||
| Humidity | 0–80% RH, Noncondensing | ||
| Physical Properties | Housing | Metal + Plastic | |
| Weight | 17": 13.61 kg19": 13.67 kg | ||
| Dimensions (L x W x H) | 17": 48.00 x 64.27 x 4.40 cm19": 48.00 x 68.92 x 4.40 cm | ||
Connection Tables
The following tables indicate the relationship between the number of units and the number of computers that they control on a daisy chained installation.
CL5708I to Compatible 8-Port Switches
| No. | Computers No. | Computers | |
| 1 | 1–8 9 | 65–72 | |
| 2 | 9–16 | 10 73–80 | |
| 3 | 17–24 | 11 81–88 | |
| 4 | 25–32 | 12 89–96 | |
| 5 | 33–40 | 13 97–104 | |
| 6 | 41–48 | 14 105–112 | |
| 7 | 49–56 | 15 113–120 | |
| 8 | 57–64 | 16 121–128 |
CL5708I to Compatible 16-Port Switches
| No. | Computers No. | Computers | |
| 1 | 1–8 9 | 121–136 | |
| 2 | 9–24 | 10 137–152 | |
| 3 | 25–40 | 11 152–168 | |
| 4 | 41–56 | 12 169–184 | |
| 5 | 57–72 | 13 185–200 | |
| 6 | 73–88 | 14 201–216 | |
| 7 | 89–104 | 15 217–232 | |
| 8 | 105–1 | 20 16 233–248 |
CL5716I to Compatible 8-Port Switches
| No. | Computers No. | Computers | |
| 1 | 1–16 9 | 73–80 | |
| 2 | 17–24 | 10 81–88 | |
| 3 | 25–32 | 11 89–96 | |
| 4 | 33–40 | 12 97–104 | |
| 5 | 41–48 | 13 105–112 | |
| 6 | 49–56 | 14 113–120 | |
| 7 | 57–64 | 15 121–128 | |
| 8 | 65–72 | 16 129–136 |
CL5716I to Compatible 16-Port Switches
| No. | Computers No. | Computers | ||
| 1 | 1–16 9 | 129–144 | ||
| 2 | 17–32 | 10 145–160 | ||
| 3 | 33–48 | 11 161–176 | ||
| 4 | 49–64 | 12 177–192 | ||
| 5 | 65–80 | 13 193–208 | ||
| 6 | 81–96 | 14 209–224 | ||
| 7 | 97–112 | 15 225–240 | ||
| 8 | 113–1 | 28 16 241–256 |
Supported KVM Switches
The table below lists KVM switches that are compatible with the CL5708I / CL5716I and the type of expansion that they use. (KVM switches listed below are sold separately. Contact your dealer for details.)
| Expansion Type | Brand Model | Name | |
| Daisy Chain ATEN ACS1208A | 8 Port PS/2 | KVM Switch | |
| ACS1216A | 16 Port PS/2 KVM Switch | ||
| CS1708A 8 | Port USB / PS/2 KVM Switch | ||
| CS1716A 16 | Port USB / PS/2 KVM Switch | ||
Please keep in mind the following limitations when installing more than one KVM switch:
- The maximum distance between the CL5708I / CL5716I and the last switch in the daisy chain cannot exceed 100 meters, regardless of the number of switches in the daisy chain.
- The maximum distance between any two KVM switches in the daisy chain cannot exceed 15 meters.
Troubleshooting
General Operation
| Problem Resolution | |
| I am confused about which equipment the terms Local and Remote refer to. | See Terminology, page xvi for details. |
| Erratic Operation | The KVM over IP switch needs to be started before any cascaded switches.1. Make sure to power it on before powering on the switch.2. If the cascaded switch was started before the KVM over IP switch, reset or restart the cascaded switch. |
| Press and release the Reset switch (see Reset Switch, page 14). | |
| I have been given an account but I am unable to log in. | 1. Make sure that you have correctly specified your Username and Password.2. Make sure that the administrator has given you the necessary permission to access the switch.3. Ask your administrator to see if the switch is under CC management. If it is, he will have to resolve the situation either by disabling CC management on the switch (see page 150), or by deselecting it on the CC server (see the CC User Manual for details). |
| I can't access the switch, even though I have specified the IP address and port number correctly. | If the switch is behind a router, the router's Port Forwarding (also referred to as Virtual Server) feature must be configured. See Port Forwarding, page 223, for details. |
| When logging in from a browser, the following message appears: 404 Object Not Found. | If a login string has been set, make sure to include the forward slash and correct login string when you specify the KVM over IP switch's IP address. (See Login String, page 162.) |
| Sudden loss of network connection. | Close your connection to the KVM over IP switch. Wait approximately 30 seconds, and log in again. |
| No remote server video display on the client computer. | Set the remote server resolution to 1280 x 1024 or less. |
| No remote server video display on the client computer, but mouse movements appear on the local console and mouse clicks have no effect | Press and release the left Alt key, then press and release the right Alt key. |
| The display on the client computer is distorted and performing an Autosync doesn't resolve the problem. | Switch ports to a port with a different resolution, then switch back.If the above didn't resolve the problem, change the resolution and refresh rate for the system running on the port. Afterward, you can either run at the new resolution, or switch back to the original resolution. |
| The Lock Key LEDs on the Control Panel don't accurately reflect the actual locked status of my keyboard input. | When you first connect, the LED display may not accurately reflect the LEDs on your keyboard. To resolve the problem, click the LEDs on the Control Panel until they match your keyboard. Afterward, when you change them from the keyboard they will change on the Control Panel. |
| When I log in, the browser generates a CA Root certificate is not trusted, or a Certificate Error response. | The certificate's name is not found on Microsoft's list of Trusted Authorities. The certificate can be trusted. See Trusted Certificates, page 227, for details. |
| In multiuser operation I had exclusive (or occupy) rights on the port I was viewing. After I recalled the Port Access page and then came back to the port I was occupying, it had been taken over by another user. Why did this happen? | If you try to return to the port by selecting again in the tree, the switch acts as if you are accessing the port for the first time. If another user was waiting on the port, he takes precedence and gets the port.The correct way to return to the port is to click the Close icon at the top right of the Port Access page. |
Mouse Problems
| Problem Resolution | |
| Mouse and/or Keyboard not responding. | Unplug the cable(s) from the console port(s), then plug it/ them back in. |
| Mouse movement extremely slow | There is too much data being transferred for your connection to keep up with. Lower the video quality (see Video Settings, page 67) so that less video data is transmitted. |
| There are two mouse pointers after the remote server is accessed. | You can select another pointer type. See Mouse Pointer Type, page 80 for details |
| When the mouse pointer is in Single Pointer mode, I can't access the Control Panel. | Recall the Control Panel and immediately change the pointer to Dual mode. |
| Why is there a Dual Pointer mode? | When you are not in Mouse DynaSync Mode, you need the two pointers so that you know the remote server pointer is actually at the location you think it is at. Otherwise, you might perform a mouse operation and because of net lag the remote server pointer may not be at the location that your client computer pointer is at. |
| Mouse pointer confusion If you find the display of two mouse pointers (local and remote) to be confusing or annoying, you can use the Toggle Mouse Display function to shrink the non-functioning pointer. See Toggle Mouse Display, page 59, and Mouse Pointer Type, page 80. | |
| When I log in with my Windows system, the local and remote mouse pointers do not sync. | 1. Check the status of the Mouse Sync Mode setting (see Mouse DynaSync Mode, page 82). If it is set to Automatic, change the setting to Manual and refer to the information for Manual Mouse Synchronization on page 83.2. If you are in Manual mode, use the AutoSync feature (see Video Settings, page 67), to sync the local and remote monitors.3. If that doesn't resolve the problem, use the Adjust Mouse feature (see Adjust Mouse, page 59) to bring the pointers back in step.4. If the above fails to resolve the problem, refer to Additional Mouse Synchronization Procedures, page 224, for further steps to take. |
| When I log in with my Mac system, the local and remote mouse pointers do not sync. | There are two automatic Mouse DynaSync settings: the default, and Mac2. If mouse synchronization is not satisfactory with the default, try the Mac 2 setting. See the Note on page 83 for details. |
| When I log in with my Sun system, the local and remote mouse pointers do not sync | Automatic Mouse DynaSync sync only supports USB mice on Windows and Mac (G4 or higher) systems. You must sync the pointers manually. See Mouse DynaSync Mode, page 82, and Manual Mouse Synchronization, page 83, for further details.After doing the above, refer to Sun / Linux, page 225, under Additional Mouse Synchronization Procedures for further steps to take. |
| When I log in with my Linux system, the local and remote mouse pointers do not sync. | Automatic Mouse DynaSync sync only supports USB mice on Windows and Mac (G4 or higher) systems. You must sync the pointers manually. See Mouse DynaSync Mode, page 82, and Manual Mouse Synchronization, page 83, for further details.After doing the above, refer to Sun / Linux, page 225, (under Additional Mouse Synchronization Procedures), for further steps to take. |
Web Browser
| Problem Resolution | |
| After upgrading the firmware, after logging in with my web browser, the switch appears to still be using the old firmware version. | The switch is using the new firmware version but the browser is displaying a page that is stored in its cache. Simply log out and clear your browser's cache.◆ IE: Tools → Internet Options → Temporary Internet Files → Delete Files◆ Firefox: Tools → Clear Private Data |
| Firefox only opens the Java Client Viewer. It doesn't open the WinClient ActiveX Viewer. | The WinClient ActiveX Viewer requires ActiveX. Since Firefox doesn't support ActiveX only the Java Client Viewer is available. |
The WinClient ActiveX Viewer and the WinClient AP
| Problem Resolution | |
| My CL5708I / CL5716I units don't show up in the Server List window when I start the WinClient AP program. | Only units whose Access Port settings for Program (see page 145) match the number specified for Port in the Server area of this dialog box appear in the Server List window. Make sure that your entry for Port matches the entry you have specified for Program on the Device Management Network page. |
| The WinClient ActiveX Viewer and the WinClient AP won't connect to the KVM over IP switch. | DirectX 8.0 or higher must be installed on your client computer. |
| After upgrading the firmware, the WinClient ActiveX Viewer or WinClient AP do not run. | The old version of your .ocx file was not deleted. You must delete the old file. There are two methods to delete the file.1. For the ActiveX Viewer: Open IE → Tools → Manage Add-ons. Delete or disable all occurrences of WinClient.2. For the WinClient AP: Open Explorer and search for WinClient.ocx. Delete all occurrences. |
| Part of the remote window is off my monitor. | 1. Perform an Auto Sync (see WinClient Control Panel Functions, page 55 for details).2. If Keep Screen Size is not enabled (see Screen Options, page 85), use the AutoSync feature (see Video Settings, page 67), to sync the local and remote monitors.3. If Keep Screen Size is enabled, you can scroll to the areas that are off screen. |
| The remote screen is rotated 90 degrees. | Enable Keep Screen Size (see Control Panel Configuration, page 84). |
| I cannot run Net Meeting when the WinClient is running. | Enable Keep Screen Size (see Control Panel Configuration, page 84). |
| After logging in I can't open the WinClient ActiveX viewer. | 1. You don't have the authority to install the WinClient Control add-on on your client computer. Have the person with administrator privileges on your client computer run the program the first time to get it installed. It will open for you after that.2. Under Vista, you must also add the switch's URL address to the list of trusted sites: Tools → Internet Options → Security → Trusted Sites → Sites. |
The Java Applet and Java Client AP
| Problem Resolution | |
| I can't connect to the KVM over IP switch. | 1. The latest Java version must be installed on your client computer.2. Check if you need to specify the Program port along with the IP address. See Java Client AP Login, page 43 for details3. Close Java reopen it, and try again. |
| I have installed the latest Java JRE, but I am having performance and stability problems. | There may be issues with the latest version because it is so new. Try using a Java version that is one or two versions earlier than the latest one. |
| After upgrading the firmware, after logging in with the Java Client Viewer or the Java Client AP, the switch appears to still be using the old firmware version. | Log out. Delete your Java temporary internet files as follows:1. Open Control Panel → Java.2. In the Temporary Internet Files section, click Settings.3. In the Disk Space section, click Delete Files.4. In the dialog box that comes up, click OK. |
| The national language characters that I input do not appear. | Change the keyboard language of your client computer to English-UK. |
| Use the KVM over IP switch's On-Screen Keyboard and set the on-screen keyboard to the same language that the other system is using. (See The On-Screen Keyboard, page 78.) | |
| Java performance deteriorates. | Exit the program and start again. |
| Pressing the Windows Menu key has no effect. | Java doesn't support the Windows Menu key. |
Sun Systems
| Problem Resolution | |
| Video display problems with HDB15 interface systems (e.g. Sun Blade 1000 servers).* | The display resolution should be set to 1024 x 768 @ 60Hz:Under Text Mode:Go to OK mode and issue the following commands:setenv output-device screen:r1024x768x60reset-allUnder XWindow:1. Open a console and issue the following command:m64config -res 1024x768x602. Log out3. Log in |
| Video display problems with 13W3 interface systems (e.g. Sun Ultra servers).* | The display resolution should be set to 1024 x 768 @ 60Hz:Under Text Mode:Go to OK mode and issue the following commands:setenv output-device screen:r1024x768x60reset-allUnder XWindow:1. Open a console and issue the following command:fbconfig -res 1024x768x602. Log out3. Log in |
* These solutions work for most common Sun VGA cards. If using them fails to resolve the problem, consult the Sun VGA card's manual.
Mac Systems
| Problem Resolution | |
| When I log in to the KVM over IP switch with my Safari browser, it hangs when I use the Snapshot feature. | Force close Safari, then reopen it. Don’t use the Snapshot feature in the future. |
| To use the Snapshot feature with Safari, upgrade to Mac OS 10.4.11 and Safari 3.0.4. |
The Log Server
| Problem Resolution | |
| The Log Server program does not run. | The Log Server requires the Microsoft Jet OLEDB 4.0 driver in order to access the database.This driver is automatically installed with Windows ME, 2000 and XP.For Windows 98 or NT, you will have to go to the Microsoft download site:http://www.microsoft.comand do a search for MDAC to retrieve the driver file:MDAC 2.7 RTM Refresh (2.70.9001.0)Since this driver is used in Windows Office Suite, an alternate method of obtaining it is to install Windows Office Suite. Once the driver file or Suite has been installed, the Log Server will run. |
Panel Array Mode
| Problem Resolution | |
| Low resolution video – the screens don’t display clearly. | This sometimes occurs due to the screens being scaled to fit in the panels. Decrease the number of panels that are displayed. |
| When multiple remote users are logged in, some of them only receive a partial image. | The first user to invoke Panel Array Mode should set it to display at least four panels. |
Q1: When I open a viewer, the web page does not display or work correctly, and I receive an error message that is similar one of the following:
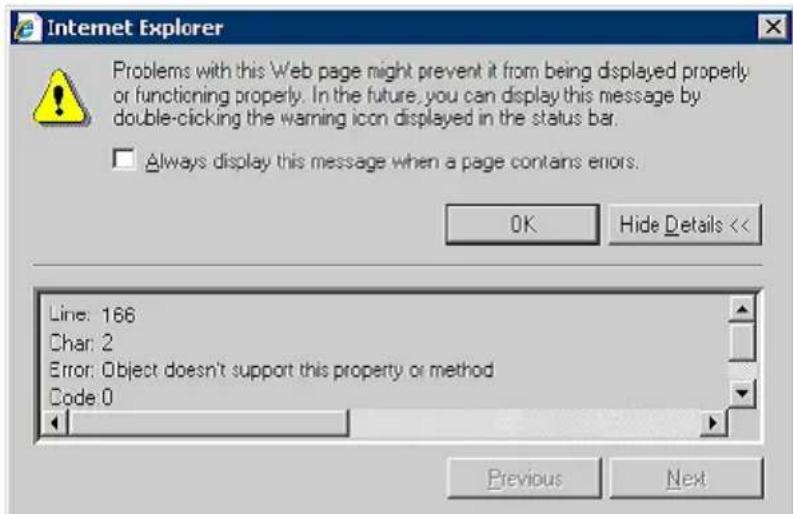
- Reset the Internet Explorer security settings to enable Active Scripting, ActiveX controls, and Java applets
By default, Internet Explorer 6 and some versions of Internet Explorer 5.x use the High security level for the Restricted sites zone and Microsoft Windows Server 2003 uses the High security level for both the Restricted sites zone and the Internet zone. To enable Active Scripting, ActiveX controls, and Java applets, follow these steps:
a) Start Internet Explorer.
b) On the Tools menu, click Internet Options.
c) In the Internet Options dialog box, click Security.
d) Click Default Level.
e) Click OK.
-
Verify that Active Scripting, ActiveX, and Java are not blocked If some client computers work but others do not, verify that Internet Explorer or another program on your client computer such as an anti-virus program or a firewall are not configured to block scripts, ActiveX controls, or Java applets.
-
Verify that your anti-virus program is not set to scan the Temporary Internet Files or Downloaded Program Files folders
-
Delete all the temporary Internet-related files
To remove all the temporary Internet related files from your client computer, follow these steps:
a) Start Internet Explorer.
b) On the Tools menu, click Internet Options.
c) Click the General tab.
d) Under Temporary Internet files, click Settings.
e) Click Delete Files.
f) Click OK.
g) Click Delete Cookies.
h) Click OK.
i) Under History, click Clear History, and then click Yes.
j) Click OK.
- Make sure that you have the latest version of Microsoft DirectX installed For information about how to install the latest version of Microsoft DirectX, visit the following Microsoft Web site:
http://www.microsoft.com/windows/directx/default.aspx?url=/windows/directx/downloads/default.htm
- Make sure that you have the latest version of the Java JRE installed.
For information about how to install the latest version of the JRE visit the Java Web site: www.java.com.
IP Address Determination
If you are an administrator logging in for the first time, you need to access the KVM over IP switch in order to give it an IP address that users can connect to. There are three methods to choose from. In each case, your client computer must be on the same network segment as the KVM over IP switch. After you have connected and logged in you can give the KVM over IP switch its fixed network address. (See Network, page 145.)
The Local Console
The easiest way to assign an IP address is from the local console. Refer to First Time Setup, page 31, for details on the procedure involved.
IP Installer
For client computers running Windows, an IP address can be assigned with the IP Installer utility. The utility can be obtained from the Download area of our website. Look under Driver/SW, and the model of your switch. After downloading the utility to your client computer, do the following:
- Unzip the contents of IPInstaller.zip to a directory on your hard drive.
- Go to the directory that you unzipped the IPInstaller program to and run IPInstaller.exe. A dialog box similar to the one below appears:
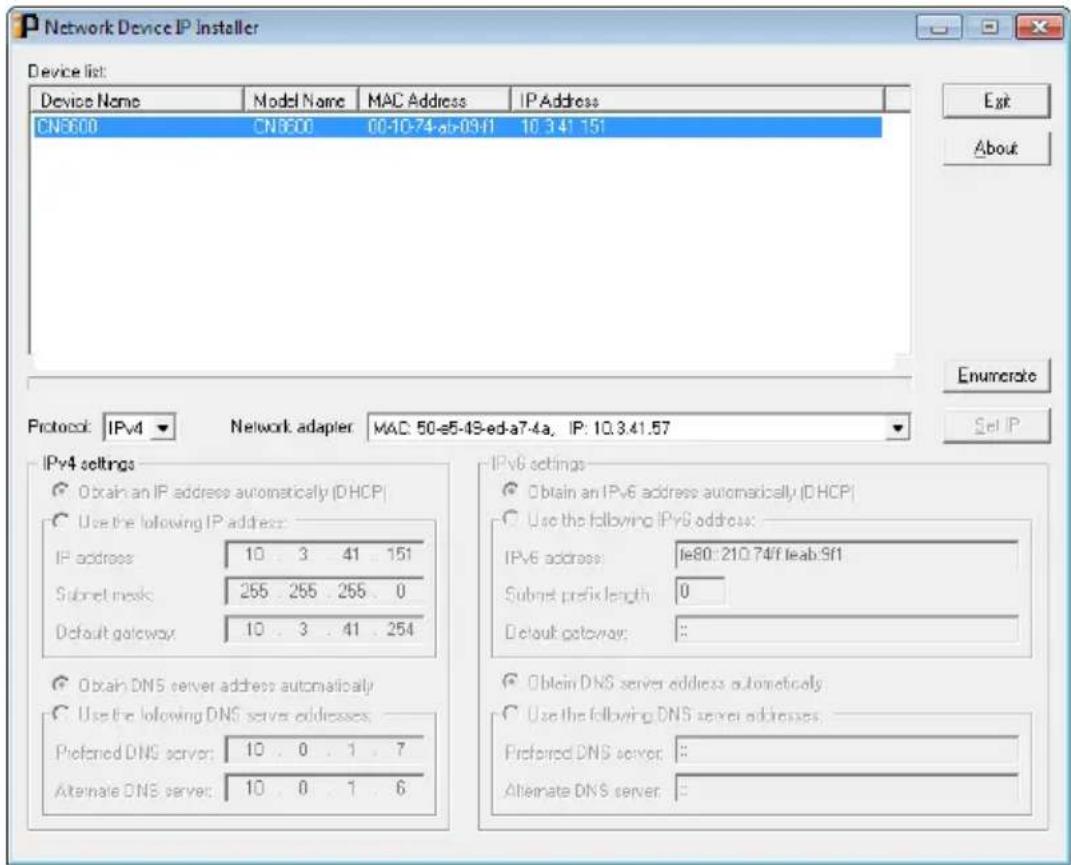
- Select the KVM over IP switch in the Device List.
Note: 1. If the list is empty, or your device doesn't appear, click Enumerate to refresh the Device List.
-
If there is more than one device in the list, use the MAC address to pick the one you want. The KVM over IP switch's MAC address is located on its bottom panel.
-
Use the drop-down menu to select the Protocol (IPv4 or IPv6) and then configure the IP settings below.
- Select either Obtain an IP address automatically (DHCP), or Use the following IP address. If you chose the latter, fill the IP Address, Subnet Mask, and Default Gateway fields with the information appropriate to your network.
- Select either Obtain DNS server address automatically, or Use the following DNS server addresses. If you chose the latter, fill the Preferred DNS Server and Alternate DNS server with the IP addresses appropriate to your network.
- Click Set IP.
- After the IP address shows up in the Device List, click Exit. See IP Installer, page 146 for more information.
Browser
- Set your client computer's IP address to 192.168.0.XXX Where XXX represents any number or numbers except 60. (192.168.0.60 is the default address of the KVM over IP switch.)
- Specify the switch's default IP address (192.168.0.60) in your browser, and you will be able to connect.
- Assign a fixed IP address for the KVM over IP switch that is suitable for the network segment that it resides on.
- After you log out, reset your client computer's IP address to its original value.
IPv6
At present, the KVM over IP switch supports three IPv6 address protocols: Link Local IPv6 Address, IPv6 Stateless Autoconfiguration, and Stateful Autoconfiguration (DHCPv6).
Link Local IPv6 Address
At power on, the KVM over IP switch is automatically configured with a Link Local IPv6 Address (for example, fe80::210:74ff:fe61:1ef). To find out what the Link Local IPv6 Address is, log in with the KVM over IP switch's IPv4 address and open the Device Management → Device Information page. The address is displayed in the General list box (see page 142).
Once you have determined what the IPv6 address is, you can use it when logging in from a browser or the Win and Java Client AP programs.
For example:
If you are logging in from a browser, you would key in
http://[fe80::2001:74ff:fe6e:59%5]
for the URL bar.
If you are logging in with the AP program, you would key:
fe80::2001:74ff:fe6e:59%5
for the IP field of the Server panel (see Windows Client AP Login, page 39).
Note: 1. To log in with the Link Local IPv6 Address, the client computer must be on the same local network segment as the KVM over IP switch
2. The %5 is the %interface used by the client computer. To see your client computer's IPv6 address: from the command line issue the following command: ipconfig /all. The % value appears at the end of the IPv6 address.
IPv6 Stateless Autoconfiguration
If the KVM over IP switch's network environment contains a device (such as a router) that supports the IPv6 Stateless Autoconfiguration function, the KVM over IP switch can obtain its prefix information from that device in order to generate its IPv6 address. For example, 2001::74ff:fe6e:59.
As above, the address is displayed in the General list box of the Device Management → Device Information page (see page 142).
Once you have determined what the IPv6 address is, you can use it when logging in from a browser or the Win and Java Client AP programs.
For example:
If you are logging in from a browser, you would key in
http://[2001::74ff:fe6e:59]
for the URL bar.
If you are logging in with the AP program, you would key:
2001::74ff:fe6e:59
for the IP field of the Server panel (see Windows Client AP Login, page 39).
Port Forwarding
For devices located behind a router, port forwarding allows the router to pass data coming in over a specific port to a specific device. By setting the port forwarding parameters, you tell the router which device to send the data that comes in over a particular port to.
For example, if the KVM over IP switch connected to a particular router has an IP address of 192.168.1.180, you would log into your router's setup program and access the Port Forwarding (sometimes referred to as Virtual Server) configuration page. You would then specify 192.168.1.180 for the IP address and the port number you want opened for it (9000 for Internet access, for example).
Since configuration setup can vary somewhat for each brand of router, refer to the router's User Manual for specific information on configuring port forwarding for it.
Additional Mouse Synchronization Procedures
If you use Manual Mouse Synchronization, you should perform the following operations on the servers that connect to the switch.
Note: 1. These procedures are to be performed on the servers attached to the switch's ports - not on the client computer you are using to access the KVM over IP switch.
2. In order for the local and remote mice to synchronize, you must use the generic mouse driver supplied with the Windows operating system. If you have a third party driver installed - such as one supplied by the mouse manufacturer - you must remove it.
Windows:
- Windows 2000:
a) Open the Mouse Properties dialog box (Control Panel → Mouse → Mouse Properties)
b) Click the Motion tab
c) Set the mouse speed to the middle position (6 units in from the left)
d) Set the mouse acceleration to None
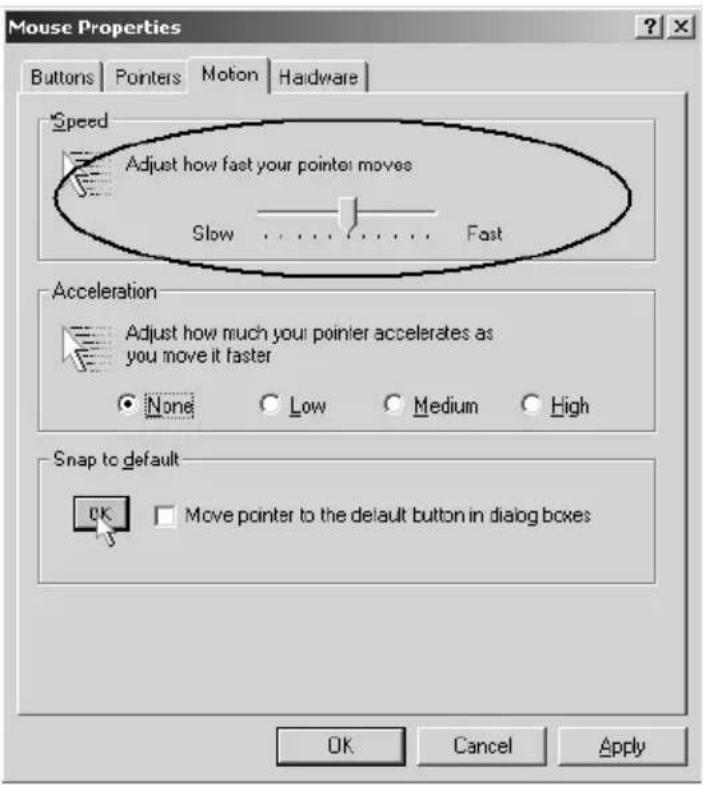
- Windows XP / Windows Server 2003:
a) Open the Mouse Properties dialog box (Control Panel → Mouse)
b) Click the Pointer Options tab
c) Set the mouse speed to the middle position (6 units in from the left)
d) Disable Enhance Pointer Precision
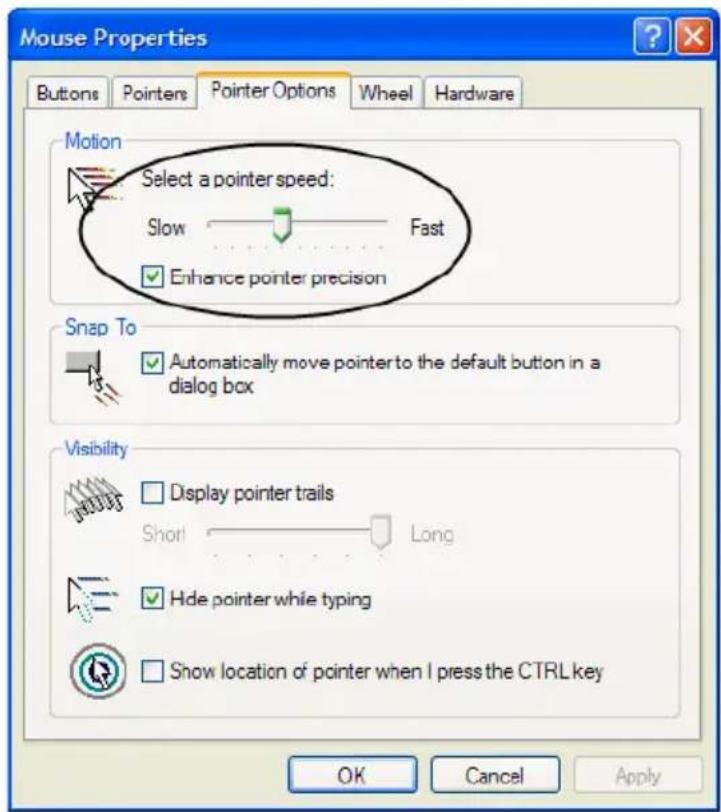
- Windows ME:
Set the mouse speed to the middle position; disable mouse acceleration (click Advanced to get the dialog box for this).
- Windows NT / Windows 98 / Windows 95:
Set the mouse speed to the slowest position.
Sun / Linux
Open a terminal session and issue the following command:
Sun: xset m 1
Linux: xset m 0
or
xset m 1
(If one doesn't help, try the other.)
Linux using the Redhat AS3.0 mouse mode: xset m 1
Additional Video Resolution Procedures
If you are running Windows, and wish to use new refresh rates, do the following:
- Open Control Panel → Display → Settings → Advanced → Monitor.
- In the dialog box that comes up, make sure that the Hide modes that this monitor cannot display checkbox is unchecked.
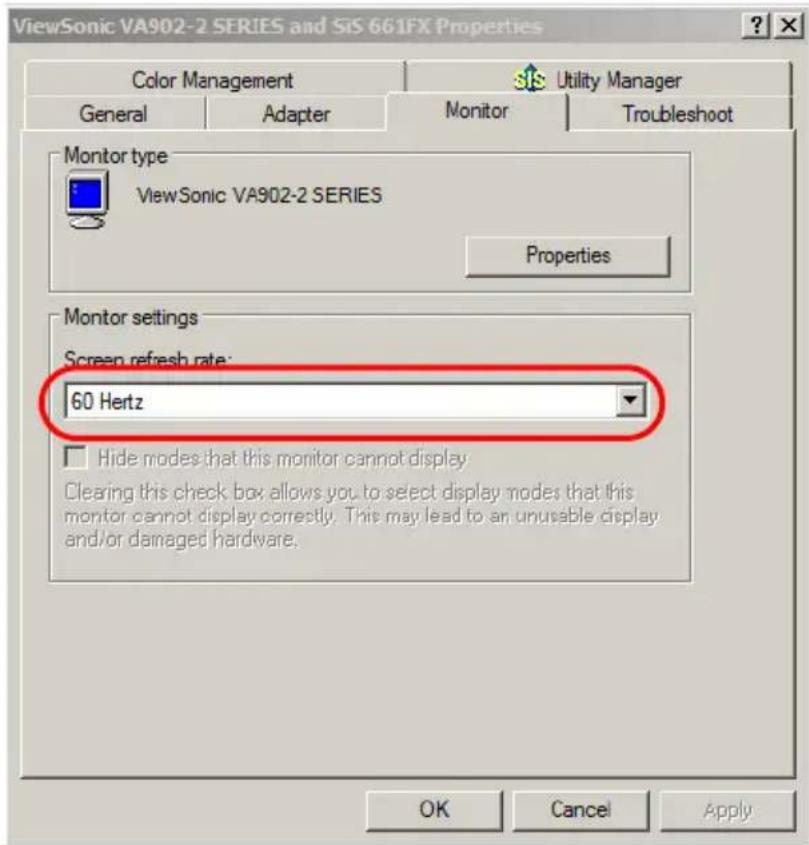
- Click the arrow at the right of the Screen refresh rate listbox, and select the refresh rate you want from the list that appears.
Note: Make sure that your monitor supports the refresh rate you choose – if not, you may seriously damage your monitor.
Trusted Certificates
Overview
When you try to log in to the device from your browser, a Security Alert message appears to inform you that the device's certificate is not trusted, and asks if you want to proceed.
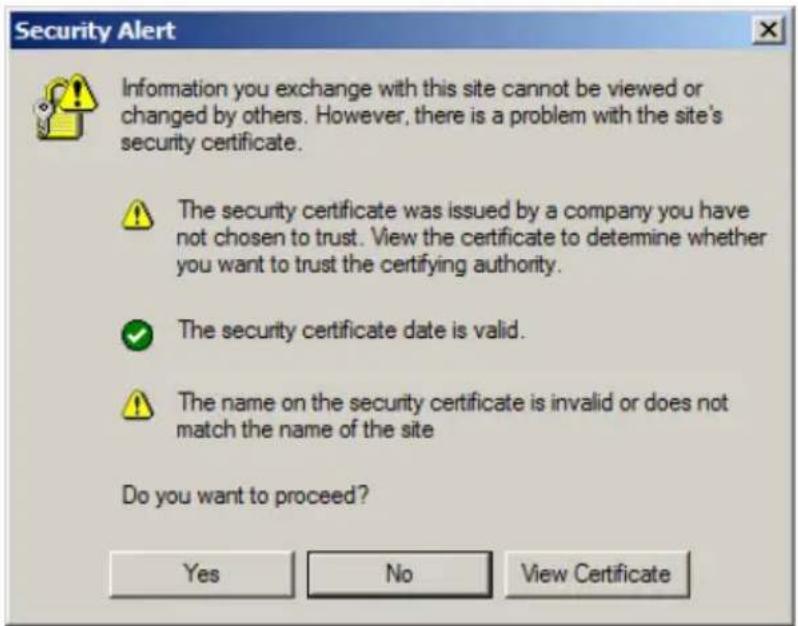
The certificate can be trusted, but the alert is triggered because the certificate's name is not found on Microsoft list of Trusted Authorities. You have two options: 1) you can ignore the warning and click Yes to go on; or 2) you can install the certificate and have it be recognized as trusted.
- If you are working on a client computer at another location, accept the certificate for just this session by clicking Yes.
If you are working at your own client computer, install the certificate on your client computer (see below for details). After the certificate is installed, it will be recognized as trusted.
Installing the Certificate
To install the certificate, do the following:
- In the Security Alert dialog box, click View Certificate. The Certificate Information dialog box appears:
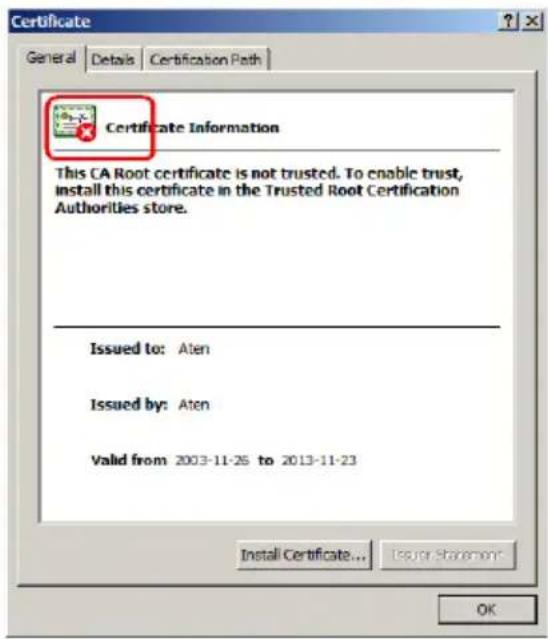
Note: There is a red and white X logo over the certificate to indicate that it is not trusted.
- Click Install Certificate.
- Follow the Installation Wizard to complete the installation. Unless you have a specific reason to choose otherwise, accept the default options.
- When the Wizard presents a caution screen, click Yes.:
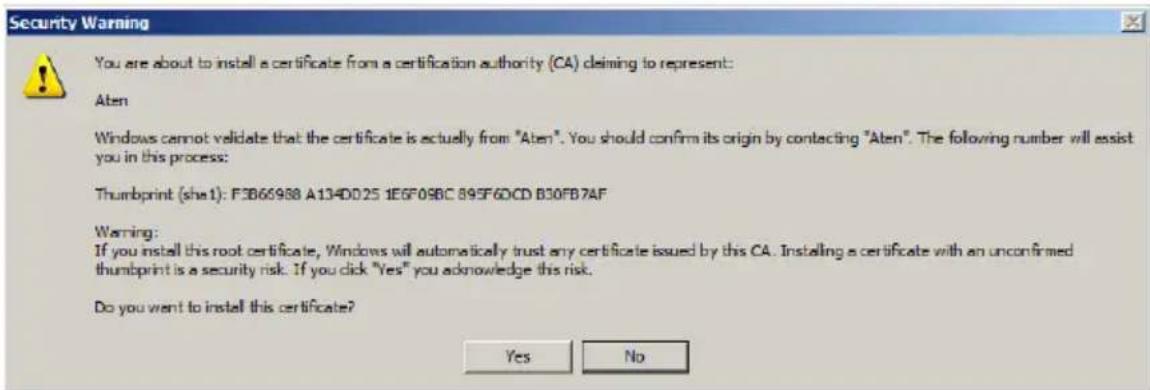
- Click Finish to complete the installation; then click OK to close the dialog box.
Certificate Trusted
The certificate is now trusted:
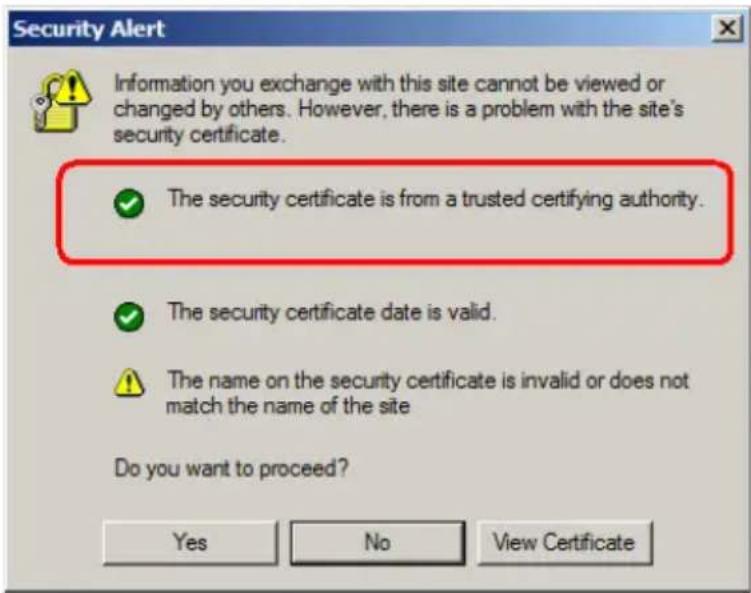
When you click View Certificate, you can see that the red and white X logo is no longer present – further indication that the certificate is trusted:
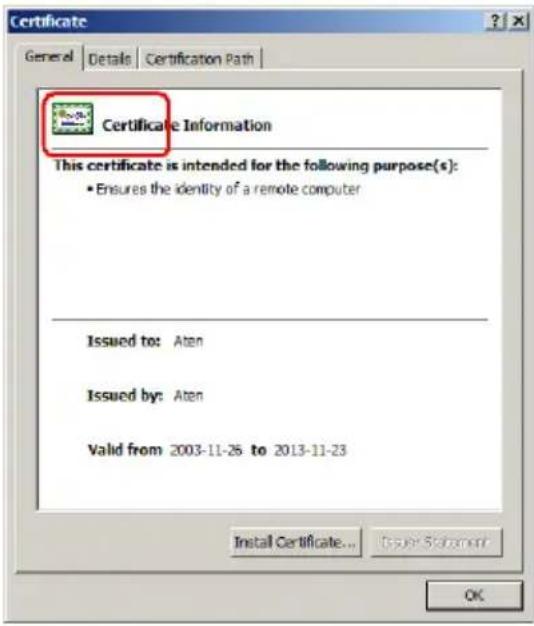
Mismatch Considerations
If the site name or IP address used for generating the certificate no longer matches the current address of the switch a mismatch warning occurs:
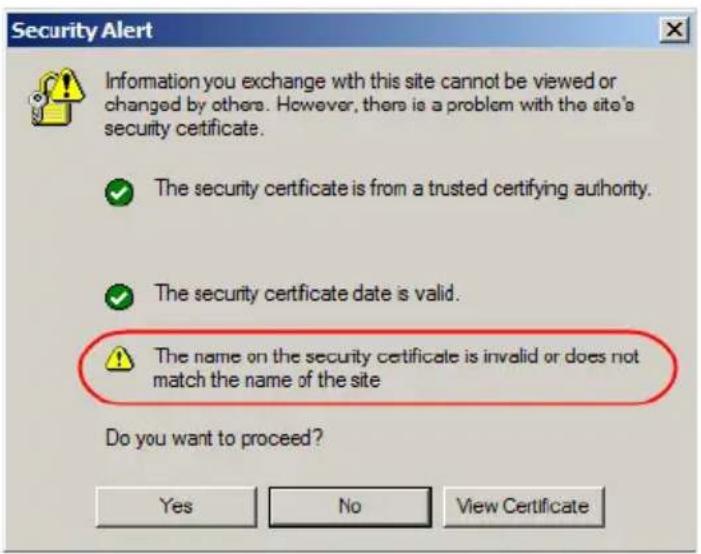
You can click Yes to go on, or you can disable mismatch checking.
To disable mismatch checking, do the following:
- After the page you are logging in to comes up open the browser's Tools menu; Select Internet Options → Advanced.
- Scroll to the bottom of the list and uncheck Warn about trusted certificates:
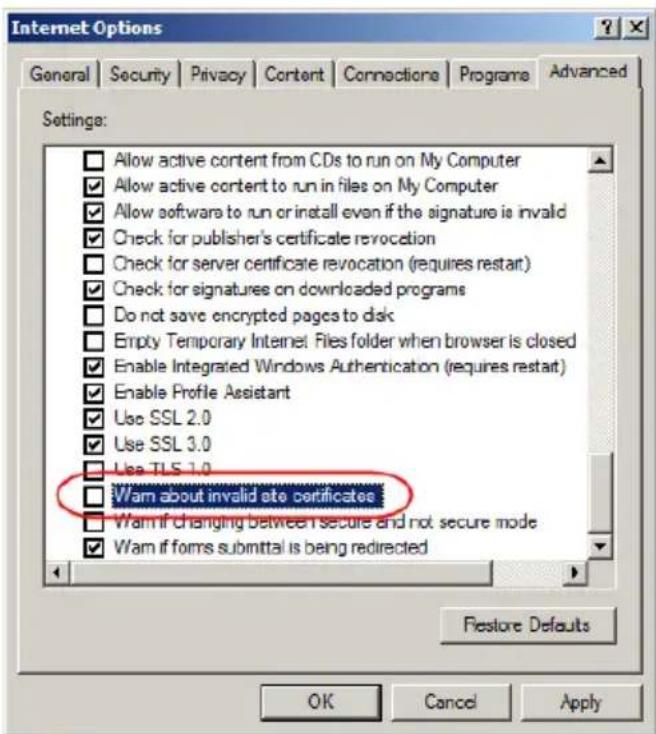
- Click OK. The next time you run the browser the change will be in effect.
Self-Signed Private Certificates
If you wish to create your own self-signed encryption key and certificate, a free utility – openssl.exe – is available for download over the web at www.openssl.org. To create your private key and certificate do the following:
- Go to the directory where you downloaded and extracted openssl.exe to.
- Run openssl.exe with the following parameters:
openssl req -new -newkey rsa:1024 -days 3653 -nodes -x509 -keyout CA.key -out CA.cer -config openssl.cnf
Note: 1. The command should be entered all on one line (i.e., do not press [Enter] until all the parameters have been keyed in).
- If there are spaces in the input, surround the entry in quotes (e.g., "ATEN International").
To avoid having to input information during key generation the following additional parameters can be used:
/C /ST /L /O /OU /CN /emailAddress.
Examples
openssl req -new -newkey rsa:1024 -days 3653 -nodes -x509 -keyout CA.key -out CA.cer -config openssl.cnf -subj /C=yourcountry/ST=yourstateorprovince/L=yourlocationor city/O=yourorganization/OU=yourorganizationalunit/CN=yourcommonname/emailAddress=name@yourcompany.com
openssl req -new -newkey rsa:1024 -days 3653 -nodes -x509 -keyout CA.key -out CA.cer -config openssl.cnf -subj /C=CA/ST=BC/L=Richmond/O="ATEN International"/OU=ATEN/CN=ATEN/emailAddress=eservice@aten.com.tw
Importing the Files
After the openssl.exe program completes, two files – CA.key (the private key) and CA.cer (the self-signed SSL certificate) – are created in the directory that you ran the program from. These are the files that you upload in the Private Certificate panel of the Security page (see Security, page 158, and Private Certificate, page 166).
Clear Login Information
If you are unable to perform an Administrator login (because the Username and Password information has become corrupted, or you have forgotten it), you can clear the login information with the following procedure.
- Power off the switch and remove the top cover from the unit chassis.
- Short the jumper labeled Default Password on the switch's main board
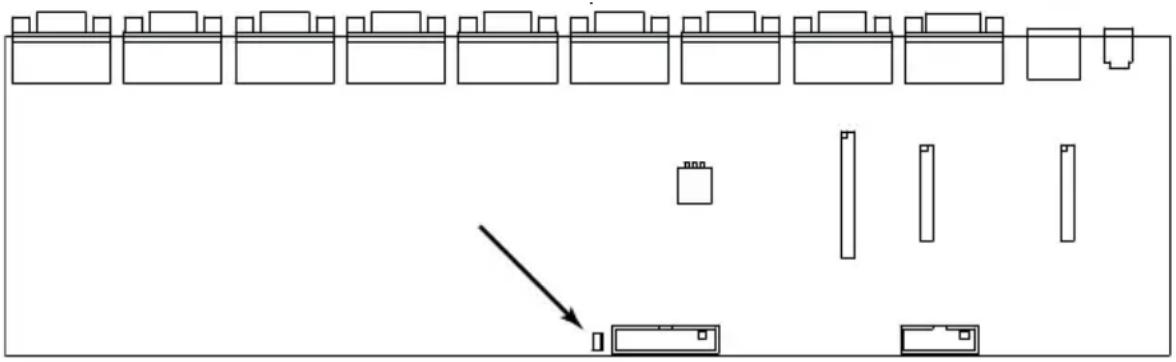
natural_image
Pure architectural floor plan lines without any text, numbers, or symbols- Power on the switch.
When you power the switch on, the following message appears on the LCD display:
USERNAME AND PASSWORD INFORMATION HAS BEEN CLEARED. PLEASE POWER OFF THE SWITCH, REMOVE THE JUMPER, CLOSE THE CASE, THEN RESTART.
- After you start back up, the OSD login function acts exactly the way it did the first time the switch was run (see OSD Overview, page 31) and you can reset passwords for the Administrators and Users.
OSD Factory Default Settings
The factory default settings are as follows:
| Setting Default | |
| OSD Hotkey [Num Lock] + [-] | |
| Remote Hotkey [Scroll Lock] [Scroll Lock] | |
| Port ID Display Position Upper | Left Corner |
| Port ID Display Duration 3 Seconds | |
| Port ID Display Mode Port Number | per plus the Port Name |
| Scan Duration 5 Seconds | |
| Scan/Skip Mode All | |
| Screen Blanker 0 (Disabled) | |
| Logout Timeout 0 (Disabled) | |
| Beeper Y (Activated) | |
| Accessible Ports F (Full) for all users on all ports | |
Optional Rack Mounting
For convenience and flexibility, three optional rack mounting kits are available:
♦ A long bracket standard rack mounting kit for 68.0–110.0 cm racks;
A short bracket Easy-Installation rack mount kit for 52.0–70.0 cm racks;
- A long bracket Easy-Installation rack mount kit for 68.0–110.0 cm racks.
Standard - Long
To install the long bracket standard rack mount kit, simply replace the short L brackets on the standard rack mount kit with the long ones, and mount the switch according to the instructions given for Standard Rack Mounting, page 14.
Easy Installation
With an Easy-Installation, kit, one person can mount the switch. To install the Easy-Installation kit, do the following:
- Remove the standard L brackets, and the side mounting brackets from both sides of the switch.
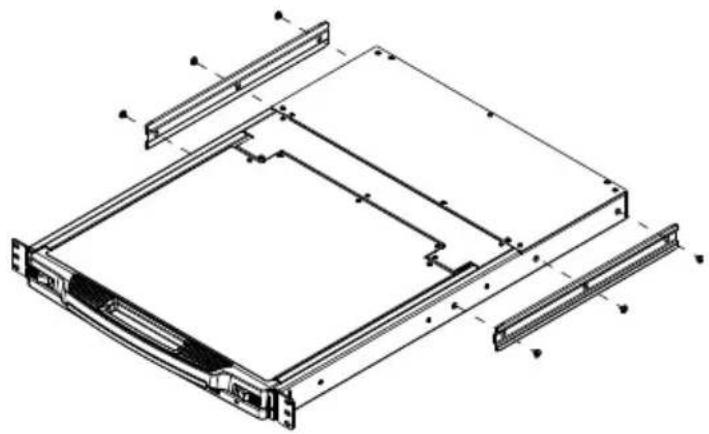
natural_image
Technical line drawing of a server rack unit with mounting brackets and internal compartments (no text or symbols)- Attach the left and right easy-installation mounting rails to the inside of the rack. The flange that supports the switch will be to the inside.
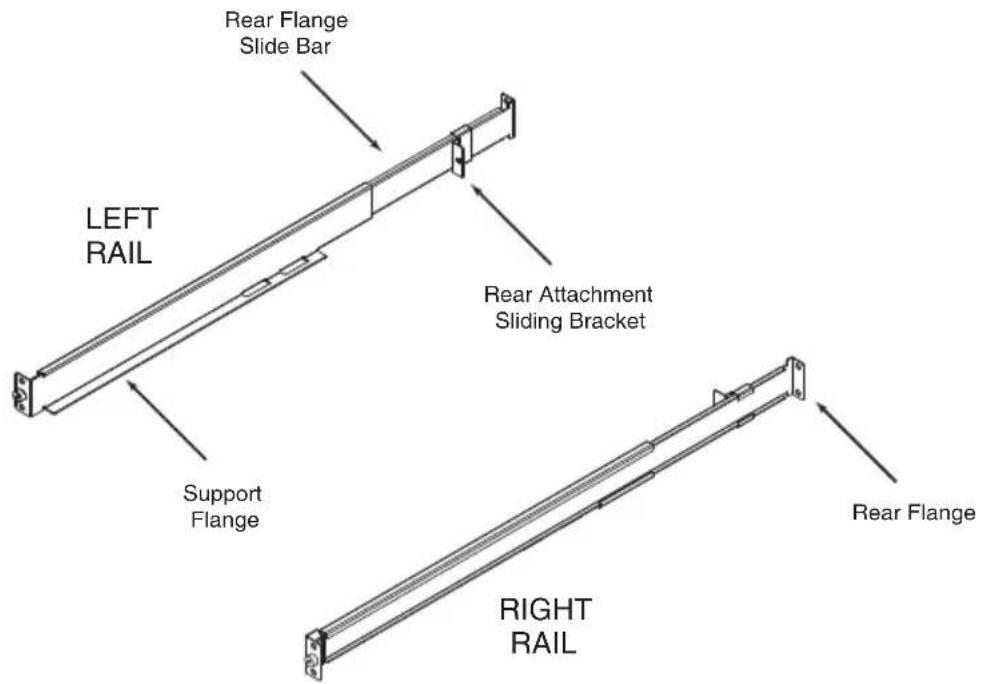
a) Screw the front flanges to the rack first.
b) Slide the bars with the rear flanges toward the rack until the flanges make contact with the rack, then screw the rear flanges to the rack.
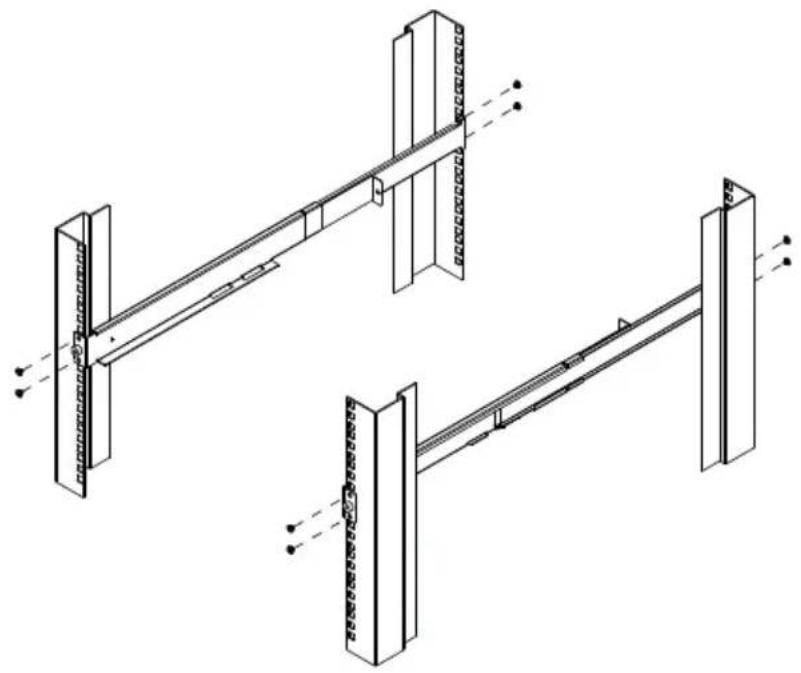
natural_image
Technical line drawing of two structural beams with supports and connection points (no text or symbols)(Continues on next page.)
(Continued from previous page.)
- Slide the switch onto the support flanges. Use the screws supplied with this package to loosely attach the front of the switch to the front of the rack (only tighten the screws part way).
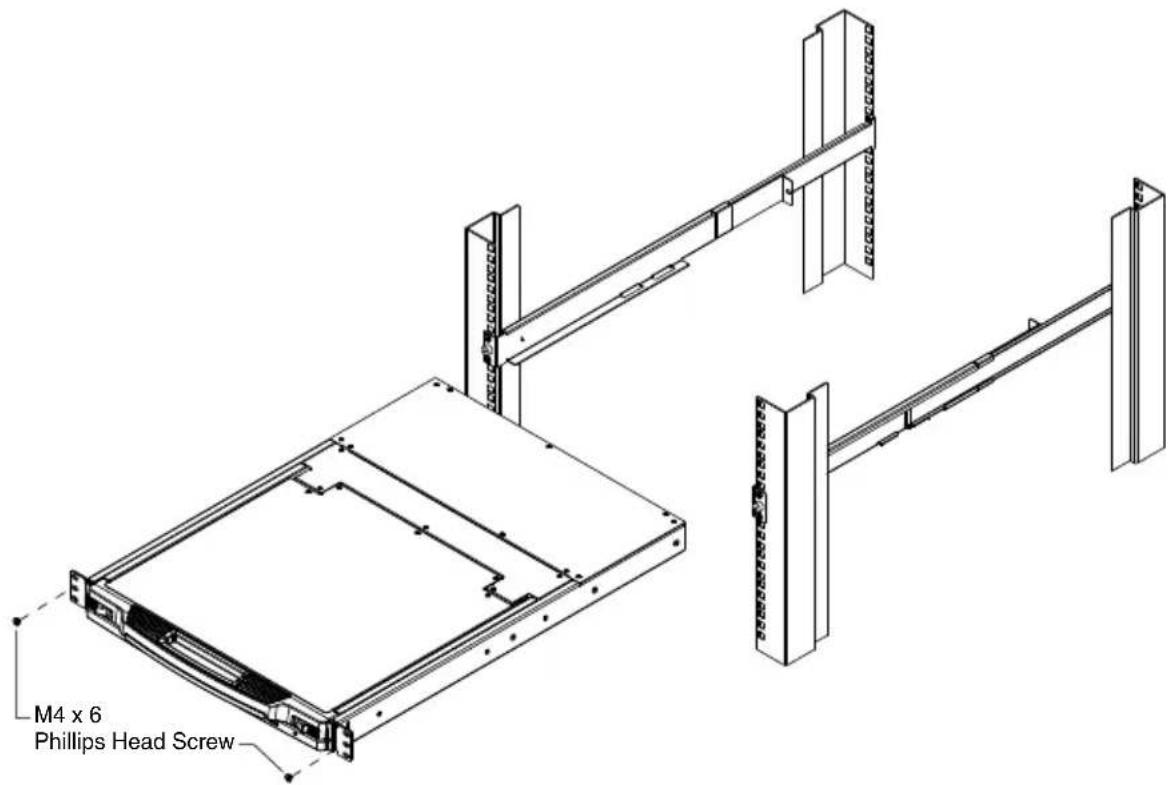
- Slide the rear attachment sliding brackets along the slide bars until they contact the rear of the switch, then use the screws supplied with this package to attach the bars to the rear of the switch (tighten the screws all the way).
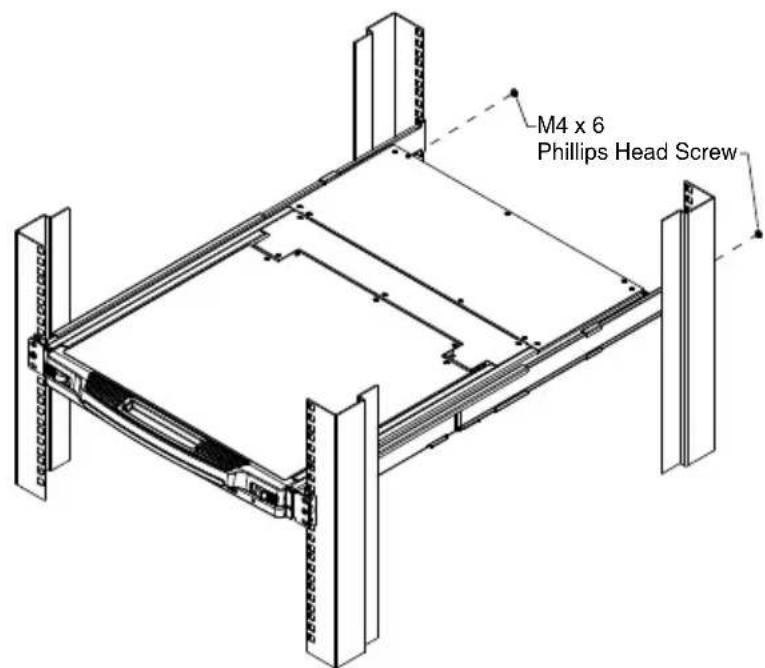
-
Slide the switch open and closed a couple of times to be sure that it is properly aligned and operating smoothly. (See p. 21 for opening and closing procedures.)
-
After determining that the switch is properly lined up and operating correctly, finish up by fully tightening down the partially tightened front attachment screws inserted in step 3.
Troubleshooting
Overview
Operation problems can be due to a variety of causes. The first step in solving them is to make sure that all cables are securely attached and seated completely in their sockets.
In addition, updating the product's firmware may solve problems that have been discovered and resolved since the prior version was released. If your product is not running the latest firmware version, we strongly recommend that you upgrade. See The Firmware Upgrade Utility, page 189, for upgrade details.
| Problem Solution | |
| There are ghost images on the external monitor. | The distance between the external console and the CL5708I / CL5716I is too great. The maximum VGA cable distance should not exceed 20m and, in some cases, may need to be shorter. Replace the VGA cable with one of an appropriately short length. |
Keyboard Invocation Keys
Two dedicated keys are provided on the keyboard module to make it easy to invoke Hotkey mode and the OSD, as shown in the diagram, below
Note: These keys are toggles. Press them once to invoke the feature, press them again to exit.
About SPHD Connectors
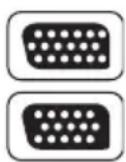
This product uses SPHD connectors for its KVM and/or Console ports. We have specifically modified the shape of these connectors so that only KVM cables that we have designed to work with this product can be connected.
LIMITED HARDWARE WARRANTY
ATEN warrants its hardware in the country of purchase against flaws in materials and workmanship for a Warranty Period of two [2] years (warranty period may vary in certain regions/countries) commencing on the date of original purchase. This warranty period includes the LCD panel of ATEN LCD KVM switches. Select products are warranted for an additional year (see A+ Warranty for further details). Cables and accessories are not covered by the Standard Warranty.
WHAT IS COVERED BY THE LIMITED HARDWARE
WARRANTY
ATEN will provide a repair service, without charge, during the Warranty Period. If a product is defective, ATEN will, at its discretion, have the option to (1) repair said product with new or repaired components, or (2) replace the entire product with an identical product or with a similar product which fulfills the same function as the defective product. Replaced products assume the warranty of the original product for the remaining period or a period of 90 days, whichever is longer. When the products or components are replaced, the replacing articles shall become customer property and the replaced articles shall become the property of ATEN.
To learn more about our warranty policies, please visit our website:
http://www.aten.com/global/en/legal/policies/warranty-policy/
Index
A
Access, 113
Access Ports, 134
Activate Beeper, 39
Active Port selecting, 48
Adding Users, 123
Additional Video Resolution
Procedures, 226
ADM, 38
ANMS, 137
AP GUI, 68
Array, 100
Associated Links, 120
Authentication external, 137
Auto Scan Mode, 43, 49
Auto Scanning, 172 Exiting, 173
Invoking, 172
Invoking Auto Scan, 49
Pausing, 49, 173
Scan Interval, 172
Stopping, 49
Auto scanning, 100
B
Backup, 161
Beeper, 39, 51
Hotkey Control, 52
BRC, 42
Broadcast Mode, 42
Browser Login, 56
C
CC Management, 140
Certificate
private, 149
Signing Request, 150
CL5708 / CL5716
AC Power Rear view, 11
Front view, 9
Overview, 1
CL5708D / CL5708E
Specifications, 203
CL5708M / CL5708N
Specifications, 203
CL5716M / CL5716N
Specifications, 204
Clear Login Information, 232
Clear Name List, 39
Closing the console, 22
Components, 9
Connecting
Java Client AP, 63
Windows Client AP, 59
Connection screen
Java Client AP, 62
Windows Client AP, 58
Connection Tables, 206, 207
Connections
KVM Devices/Ports, 105
Console
Closing, 22
Opening, 21
Control Panel, 68
Java Client AP, 96
WinClient, 70
Create CSR, 150
D
Daisy chain connection tables, 206, 207
Daisy chaining, 19
Date/Time, 152
Deleting user accounts, 127
Device Assignment, 128
Device Management ANMS, 137
Date/Time, 152
General, 132
KVM Devices, 131
Network, 133
Operating Mode, 132
Security, 141
Device Permissions
assigning, 128
DNS Server, 135, 136
DynaSync, 92
E
Easy installation rack
mounting, 234
Edit Port Names, 38
Event Panel, 185
External authentication, 137
F
F1 GOTO, 34
F2 LIST, 35
F3 SET, 36
F4 ADM, 38
F5 SKP, 41
F6 BRC, 42
F7 SCAN, 43
F8 LOUT, 43
Factory default settings, 233
Favorites, 107
Features, 3
Filter, 101, 156
Filtering
IP, 142
MAC, 142
Firmware
upgrading, 159
Firmware Upgrade
Main firmware, 160
Firmware upgrade
enabling, 40
firmware upgrade port, 190
preparation, 190
recovery, 194
Front View, 9
G
General page, 132
GOTO, 34
GUI
AP, 68
H
Hardware requirements
cables, 7
external console, 6
Hot Plugging, 27
External console ports, 27
KVM ports, 27
Hotkey
Beeper Control, 51
Command Mode, 37
OSD, 36
Selecting the Active Port, 48
Summary Table, 54
Hotkey invocation key, 238
Hotkey Mode
exiting, 46, 47
invoking, 46
Hotkey Port Control, 45
|
Installation
Daisy chaining, 19 Single Stage, 16 Invalid login, 55 Invoking Hotkey Mode, 46 IP Address determination, 219 Filtering, 142 IP Installer, 134, 219 IPv4 Settings, 135 IPv6 Settings, 136
J
Java Client AP Connecting, 63 Connection Screen, 62 Logging in, 61
K
Keyboard On-Screen, 89 Keyboard Emulation Mac, 187 Sun, 188 Keyboard port operation, 45 Keyboard Reset, 51 KVM configuration, 105
L
LCD Adjustment settings, 26 OSD configuration, 25 LDAP / LDAPS, 139 LIST, 35 List Panel, 185 Log, 155 filter, 156 Information page, 156 Log Server, 216 Configure, 179
Event Panel, 185 Events, 180 Installation, 177 List Panel, 185 Main Screen, 184 Menu Bar, 179 Options, 183 Starting Up, 178
Log server, 137, 177 Logging in Browser, 56 Java Client AP, 61 Windows Client AP, 57
Login Invalid login, 55
Login Failures, 141 Login String, 145 Logout, 43 Logout timeout, 38 LOUT, 43
M
MAC Filtering, 142 Main Firmware Upgrade, 160 Managing Users, 123 Manual port switching, 28 Message Board Windows Client, 86 Mode, 148 Modifying user accounts, 127 Mouse DynaSync Mode, 92 Synchronization, 92 Mouse pointer type, 91 Mouse Problems, 211 Mouse Reset, 51 Mouse synchronization Windows, 224
N
Network page, 133
Network Time, 153
Network Transfer Rate, 136
0
Online
Registration, iii
On-Screen Keyboard, 89
Opening the console, 21
Operating Mode, 132
Operating precautions, 23
Operating System set, 39
Optional rack mounting, 234
OSD
Factory Default Settings, 233
Functions, 34
Hotkey, 31, 36
Main Screen, 32
Main Screen headings, 33
Navigation, 33
Overview, 31
Password, 31
OSD invocation key, 238
Outlet Naming, 103
P
Panel array, 100
Panel Array Mode, 175, 216
Panel Array toolbar, 176
Password, 31
Port Access
Access, 113
filter log, 156
KVM devices, 97
Sessions, 112
Port Access Page
Recalling, 174
Port Configuration, 117
Port Forwarding, 223
Port ID
Display Duration, 36
Display Mode, 36
Display Position, 36
Port ID numbering, 28
Port Names edit, 38
Port Naming, 103
Port Operation, 167
Port Properties
Device Level, 117
Port Level, 118
Port Selection
Sidebar, 99
Port selection, 28
Port Toolbar, 170
Ports
connecting, 169
Powering Off, 24
Private Certificate, 149
Private Certificates, 231
Q
Quick View Ports, 39
R
Rack Mounting
standard, 14
Rack mounting
Easy installation, 234
Optional, 234
safety information, 197
RADIUS
settings, 138
Rear View
AC power, 11
refresh screen, 83
Requirements
Operating systems, 7
Reset on exit, 164
Reset Station IDs, 39
Restarting, 24
Restore, 161
Restore default values, 39
Restore Values, 164
RoHS, ii
S
Safety instructions
general, 195
rack mounting, 197
SCAN, 43
Scan, 100
Scan Duration, 36
Scan Mode, 43
SCAN/SKIP Mode, 37
Screen Blanker, 37
screen, refresh, 83
Security, 141
Login string, 145
Selecting the Active Port, 48
Self-signed certificates, 231
Sessions, 112
SET, 36
Logout Timeout, 38
Operating System, 39
Quick View Ports, 39
Sidebar
ports/outlets, 99
Sidebar Utilities, 102
Skip Mode, 41, 50, 173
SKP, 41
Specifications
CL5708D / CL5708E, 203
CL5708M / CL5708N, 203
CL5716M / CL5716N, 204
SPHD Connectors, 238
Standard rack mounting, 14
Station IDs
reset, 39
Switching station positions, 27
Synchronization
mouse, 92
T
Tab bar, 67
Technical Support, 202
Telephone support, iii
Time, 152
Toolbar
Hotkey port switching, 172
Icons, 171
port switching, 170
Troubleshooting
General Operation, 209
Java Applet, 214
Log Server, 216
Mac Systems, 215
Mouse problems, 211
Panel Array Mode, 216
Sun Systems, 215
Web Browser, 212
WinClient ActiveX Viewer, 213
WinClient AP, 213
Trusted Certificates, 227
U
Upgrade firmware, 159
User Interface, 65
Tab bar, 67
Web Browser Main Page, 65
User interface
Page components, 66
User Management, 121
User Notice, iii
Users
Adding, 123
Deleting, 127
Managing, 123
Modifying, 127
V
Video Resolution
additional procedures, 226
Video Settings, 81
W
Web Browser Main Page, 65
Windows Client
Auto Scanning, 172
Message Board, 86
Windows Client AP
Connecting, 59
Connection Screen, 58
File Menu, 60
Logging in, 57
- EMC Information
- FEDERAL COMMUNICATIONS COMMISSION INTERFERENCE
- FCC Caution:
- KCC Statement
- User Information
- Online Registration
- Telephone Support
- User Notice
- Package Contents
- Basic Package
- Optional Equipment
- Contents
- Chapter 1.
- Introduction
- Chapter 2.
- Hardware Setup
- Chapter 3.
- Basic Operation
- Chapter 4.
- OSD Operation
- Chapter 5.
- Keyboard Port Operation
- Chapter 6.
- Logging In
- Chapter 7.
- The User Interface
- Chapter 8.
- Port Access
- Chapter 9.
- User Management
- Chapter 10.
- Device Management
- Chapter 11.
- Log
- Chapter 12.
- Maintenance
- Chapter 13.
- Download
- Chapter 14.
- Port Operation
- Chapter 15.
- The Log Server
- Chapter 16.
- Keyboard Emulation
- Chapter 17.
- The Firmware Upgrade Utility
- Appendix
- About this Manual
- Conventions
- Terminology
- Product Information
- Overview
- Features
- Requirements
- Remote User Computers
- External Console
- Server
- Cables
- Operating Systems
- Components
- Front View
- Rear View
- Before you Begin
- Standard Rack Mounting
- Grounding
- Single Level Installation
- Cabling Diagrams
- Daisy Chain Installations
- Chapter 3
- Opening the Console
- Closing the Console
- Operating Precautions
- Powering Off and Restarting
- LCD OSD Configuration
- The LCD Buttons
- LCD Adjustment Settings
- Hot Plugging
- Changing Station Positions
- Hot Plugging KVM Ports
- Hot Plugging External Console Ports
- Port Selection
- Manual Port Switching
- Port ID Numbering
- USB Peripheral Devices
- OSD Overview
- Manufacturing Number
- OSD Login
- OSD Hotkey
- OSD Main Screen
- OSD Main Screen Headings
- OSD Navigation
- OSD Functions
- F1: GOTO
- F2: LIST
- F3: SET
- To change a setting:
- F4: ADM
- F5: SKP
- F6: BRC
- F7: SCAN
- F8: LOUT
- Chapter 5
- Hotkey Port Control
- Invoke Hotkey Mode
- Local Console
- Number Lock and Minus Keys
- Control and F12 Keys
- Remote Sessions
- Scroll Lock
- Control
- Select the Active Port
- Auto Scan Mode
- Invoking Auto Scan:
- Skip Mode
- Computer Keyboard / Mouse Reset
- Hotkey Beeper Control
- Quick Hotkey Control
- OSD Hotkey Control
- Port OS Control
- Restore Default Values
- Browser Login
- Windows Client AP Login
- The Windows Client AP Connection Screen
- Connecting – Windows Client AP
- The File Menu
- Java Client AP Login
- The Java Client AP Connection Screen
- Connecting – Java Client AP
- The Web Browser Main Page
- Page Components
- The Tab Bar
- The AP GUI Main Page
- The Control Panel
- WinClient Control Panel
- WinClient Control Panel Functions
- Macros
- Hotkeys
- User Macros
- Click Record.
- Search
- Video Settings
- Basic Video Settings
- Advanced Video Settings
- Gamma Adjustment
- The Message Board
- Button Bar
- Message Display Panel
- Compose Panel
- User List Panel
- Zoom
- The On-Screen Keyboard
- Changing Languages
- Selecting Platforms
- Expanded Keyboard
- Mouse Pointer Type
- Mouse DynaSync Mode
- Automatic Mouse Synchronization (DynaSync)
- Mac Considerations
- Manual Mouse Synchronization
- Control Panel Configuration
- The Java Control Panel
- Chapter 8
- Browser GUI
- AP GUI
- The Sidebar
- The Sidebar Tree Structure
- Scan
- Array
- Filter
- Sidebar Utilities
- Port/Outlet Naming
- KVM Devices and Ports – Connections Page
- Device Level
- Port Level
- Status
- Associated Links
- Favorites
- Adding a Favorite
- Modifying a Favorite
- User Preferences
- Sessions
- Access
- Port Level Browser GUI Interface
- Port Level AP GUI Interface
- Saving Changes
- Port Configuration
- Port Properties
- Chapter 9
- Users
- Adding Users
- Modifying User Accounts
- Deleting User Accounts
- Device Assignment
- Assigning Device Permissions From the User's Notebook
- Filters
- KVM Devices
- Device Information
- General
- Operating Mode
- Network
- IP Installer
- Service Ports
- Network Transfer Rate
- Finishing Up
- ANMS
- Event Destination
- Log Server
- Authentication
- ♦ RADIUS Settings
- ◆ LDAP / LDAPS Authentication and Authorization Settings
- CC Management Settings
- Security
- Login Failures
- - Adding Filters
- Login String
- Account Policy
- Encryption
- Mode
- Private Certificate
- Certificate Signing Request
- Date/Time
- Time Zone
- Date
- Network Time
- Log Information
- Firmware Upgrade
- Backup/Restore
- Backup
- Restore
- Ping Host
- System Operation
- Clear Port Names:
- Restore Default Values:
- Reset on exit:
- Chapter 13 Download
- Connecting to a Port
- The Port Toolbar
- The Toolbar Icons
- Toolbar Hotkey Port Switching
- Auto Scanning
- ♦ Pausing Auto Scan
- - Exiting Auto Scan
- Recalling the Port Access Page
- GUI Hotkey Summary Table
- Panel Array Mode
- Panel Array Toolbar
- Chapter 15
- Installation
- Starting Up
- The Menu Bar
- Configure
- Events
- Search:
- Maintenance:
- Options
- Help
- The Log Server Main Screen
- The List Panel
- The Event Panel
- Chapter 16
- Mac Keyboard
- Sun Keyboard
- Downloading the Firmware Upgrade Package
- Preparation
- Starting the Upgrade
- Click Next to perform the upgrade.
- Upgrade Succeeded
- Upgrade Failed
- Firmware Upgrade Recovery
- Safety Instructions
- Rack Mounting
- Technical Support
- International
- Connection Tables
- Supported KVM Switches
- Troubleshooting
- IP Address Determination
- The Local Console
- Browser
- IPv6
- Link Local IPv6 Address
- IPv6 Stateless Autoconfiguration
- Port Forwarding
- Additional Mouse Synchronization Procedures
- Windows:
- Sun / Linux
- Additional Video Resolution Procedures
- Trusted Certificates
- Installing the Certificate
- Certificate Trusted
- Mismatch Considerations
- Self-Signed Private Certificates
- Examples
- Importing the Files
- Clear Login Information
- OSD Factory Default Settings
- Optional Rack Mounting
- Standard - Long
- Easy Installation
- (Continued from previous page.)
- Keyboard Invocation Keys
- About SPHD Connectors
- LIMITED HARDWARE WARRANTY
- WHAT IS COVERED BY THE LIMITED HARDWARE
- WARRANTY
- Index
- A
- B
- C
- D
- E
- F
- G
- H
- |
- J
- K
- L
- M
- N
- 0
- P
- Q
- R
- S
- T
- U
- V
- W
Brand : ATEN
Model : CL5716IM
Category : KVM switch