IR 1800 - Thermometer PCE Instruments - Free user manual and instructions
Find the device manual for free IR 1800 PCE Instruments in PDF.


| Product Type | Non-contact Infrared Thermometer |
| Model | IR 1800 |
| Brand | PCE Instruments |
| Temperature Range | -50°C to 380°C (-58°F to 716°F) |
| Accuracy | ±1.5% of reading or ±1.5°C, whichever is greater |
| Resolution | 0.1°C / 0.1°F |
| Response Time | Less than 1 second |
| Distance to Spot Ratio (D:S) | 12:1 |
| Emissivity | Fixed at 0.95 |
| Laser Sighting | Dual laser pointers for target indication |
| Display | Backlit LCD with numeric reading and battery indicator |
| Measurement Functions | Max/Min, data hold, auto power off, °C/°F switchable |
| Power Source | 1 x 9V battery (NEDA 1604, 6F22, 6LR61) |
| Battery Life | Approximately 15 hours of continuous use |
| Dimensions (H x W x D) | 140 mm x 80 mm x 38 mm |
| Weight (including battery) | Approximately 160 g |
| Operating Temperature | 0°C to 50°C (32°F to 122°F) |
| Storage Temperature | -20°C to 60°C (-4°F to 140°F) |
| Material | ABS plastic housing with rubberized grip |
| Laser Class | Class II, output < 1 mW, wavelength 630-670 nm |
| Included Accessories | 9V battery, user manual |
| Maintenance | Clean lens with a soft, dry cloth; do not use solvents |
| Safety Precautions | Do not point laser at eyes; not for human body temperature measurement |
| Repairability | No user-serviceable parts; contact PCE Instruments for service |
Frequently Asked Questions - IR 1800 PCE Instruments
User questions about IR 1800 PCE Instruments
0 question about this device. Answer the ones you know or ask your own.
Ask a new question about this device
Download the instructions for your Thermometer in PDF format for free! Find your manual IR 1800 - PCE Instruments and take your electronic device back in hand. On this page are published all the documents necessary for the use of your device. IR 1800 by PCE Instruments.
USER MANUAL IR 1800 PCE Instruments
Southpoint Business Park
Ensign way
Hampshire / Southampton
United Kingdom, SO31 4RF
From outside UK: +44
Tel: (0) 2380 98703 0
Fax: (0) 2380 98703 9
info@pce-instruments.com
www.pce-instruments.com/english
www.pce-instruments.com
Manual
Temperature Meter
PCE-IR 1000 series
PCE-IR 1300 / 1600 / 1800
natural_image
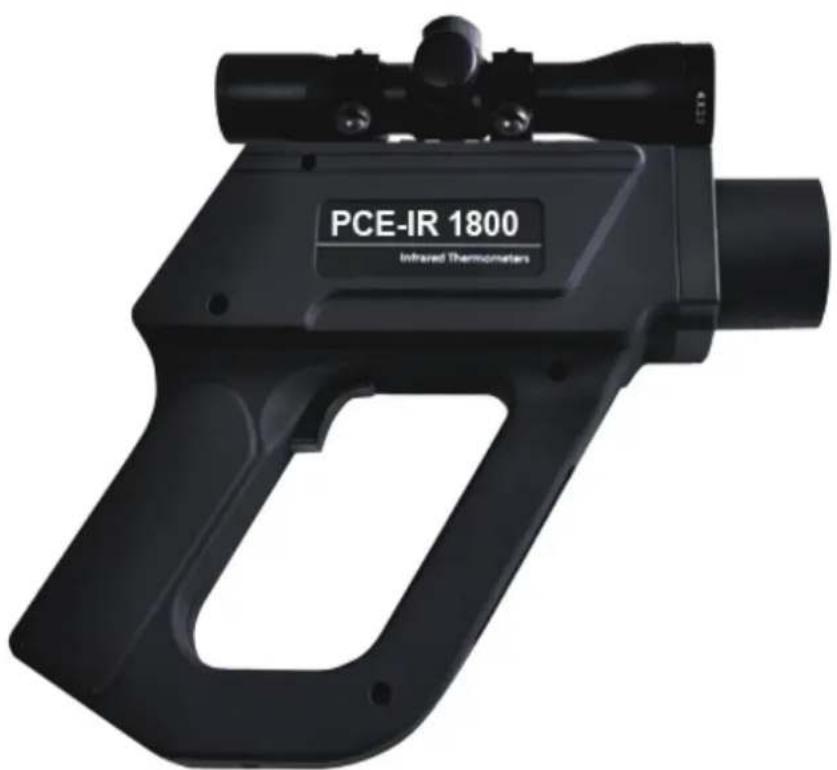
Black PCE-IR 1800 infrared thermometer device with no visible text or symbols on the device itself.Content
1. Introduction
1.1 User interface
1.2 Display
1.3 External function introduction
2. Operation
2.1 Starting the measurement
2.2 Hold-function
2.3 Switch off
2.4 Setup the laser
2.5 Setup the display backlight
2.6 Setup the parameters
2.7 Setup emissivity
2.8 Setup the Min/Max function
2.9 Setup high and low alarm
2.10 Setup the temperature unit
2.11 Setup offset
3. Data Logger
3.1 Storing data
3.2 Datalogger recall
3.3 Clear the memory
4. Software
4.1 System requirements
4.2 Installation and connection
4.3 Download the data
4.4 Software interface
5. Specifications
5.1 Optical specifications
5.2 General specifications
Appendix: Emissivity
1. Introduction
Welcome to select PCE-IR 1000 Series portable infrared thermometer.
Each single product passed through a quality process. Please read the operators manual carefully before you start to use the unit.
1.1 User interface
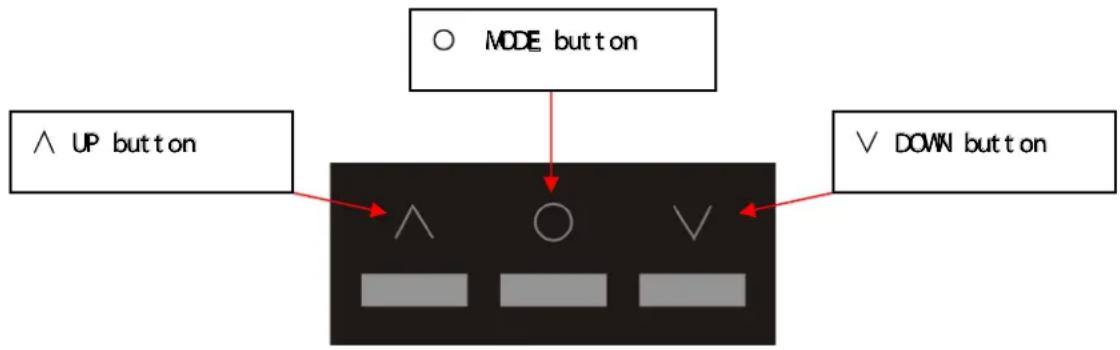
○ Mode-Button
The button in middle that marked with a circle is the mode button. In hold mode, each time you press it, you will enter to another function setup, e.g. press one time to enter to emissivity setup, press it again will save emissivity and enter to MIN/MAX setup and so on.
∧ Up/Laser
With this button you can setup the laser or increase the chosen value or read MAX/MIN result in HOLD mode.
∨ Down/Display backlight
With this button to you can setup the backlight or reduce the chosen value.
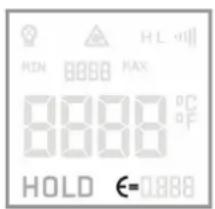
1.2 Display
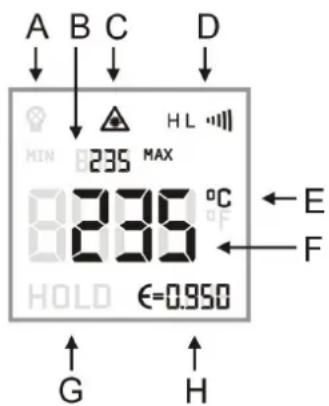
A. LCD backlight
B. MAX/MIN
C. Laser
D. Alarm activation
E. Temperature Unit
F. Infrared temperature
G. HOLD
H. Emissivity
1.3 External function introduction
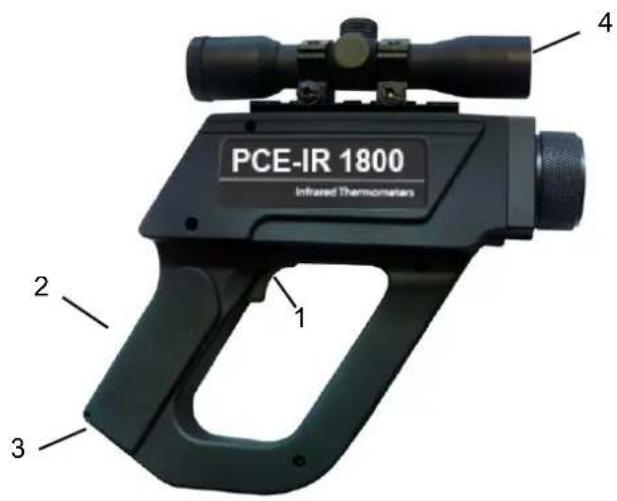
1) Trigger
2) Battery compartment cover
3) USB interface
4) Telescope
2. Operation
2.1 Starting the measurement
Turn on: Press the trigger to turn on the unit.
Measuring: Aim the thermometer at a target. Pull the trigger and keep it pressed. The display will show the current temperature value.
2.2 Hold-Function
If you release the trigger, the unit will enter to HOLD mode. The display shows HOLD.
2.3 Switch off
The unit automatically switches off after 7 seconds if no button is pressed..
2.4 Setup the laser
Pull the trigger(keep it pressed) and then press up button ( ) to activate or deactivate the laser. The laser symbol in the display(only if the trigger is pulled) indicates the active laser.
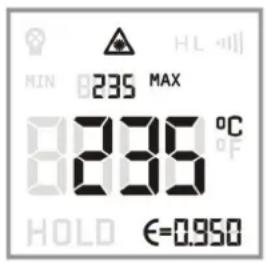
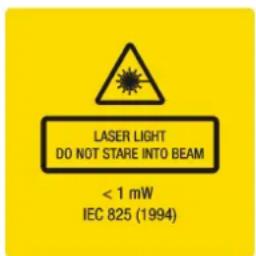
WARNING: Do not point the laser directly at the eyes of persons or animals! Do not stare into the laser beam. Avoid indirect exposure via reflective surfaces.
2.5 Setup the display backlight
Pull the Trigger(keep it pressed) and then press the down button to activate/deactivate the display backlight. The symbol in the display will indicate that.
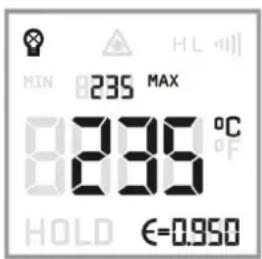
2.6 Setup the parameters
You can setup the emissivity, max/min display, high/low alarm, temperature unit, temperature offset as follows:
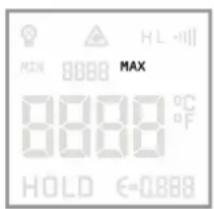
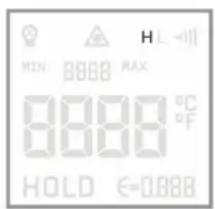
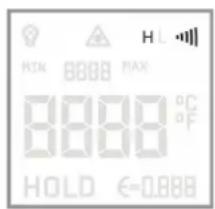
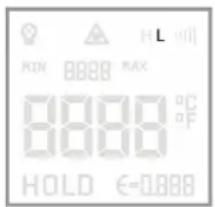
Release the trigger to enter to the Hold mode. Each time you press the mode button will enter to another function interface. The currently selected mode will show on the display by indicator flashes.
Now, you can choose or modify the requested value by pressing the up and down buttons. Press mode button to save the value and enter to next function. If you have not activated any button for 7 seconds, the unit will not save the current modification value and switches down automatically.
After enter the selecting mode, the following flashing signals will show on the display in turn.
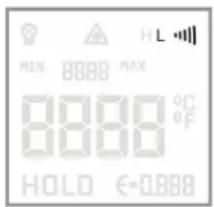
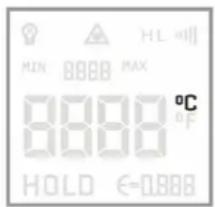
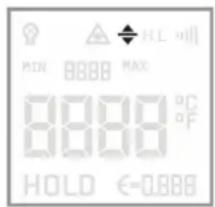
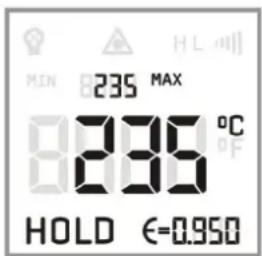
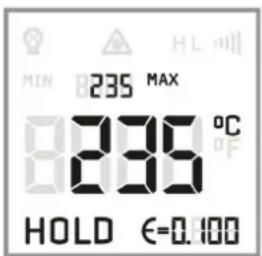
2.7 Setup emissivity
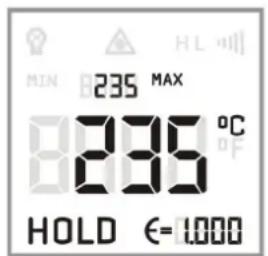
In HOLD mode, press the mode button (○) to set the emissivity.
1) Emissivity( = ) flashing
2) Press up button (∧ ) to increase the emissivity
3) Press down button ( v ) to reduce the emissivity
2.8 Setup the Min/Max function
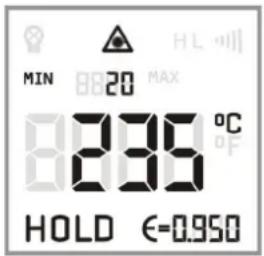
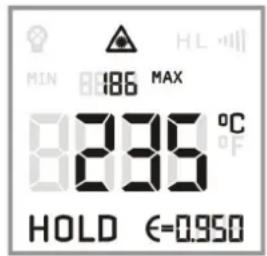
In HOLD mode, press the mode button repeatedly until enter into the Min/Max mode. Press the up/down button to setup which mode you want.
MIN indicates the minimum value of current measurement; MAX indicates the maximum temperature value of current measurement.
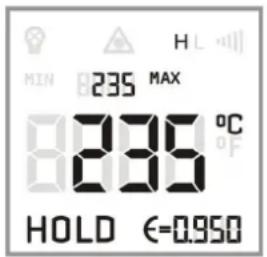
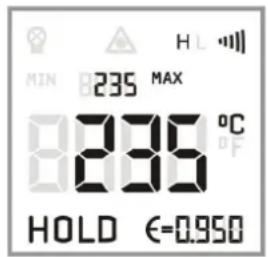
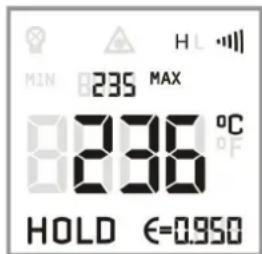
2.9 Setup high and low alarm
1) High alarm
In Hold mode, press the mode button (○) until enter the high alarm mode. Press the up/down button to set the alarm on or off.
When the signal of “)))” shows on the display, it means the high alarm is activated.
After set high alarm, you can press the mode button to set the temperature alarm value.
2) Low alarm
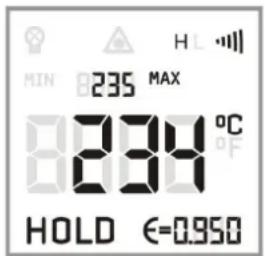
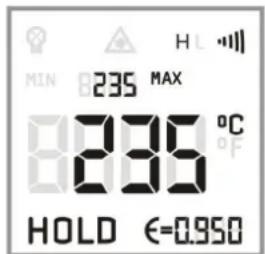
In Hold mode, press the mode button (○) utilt enter to the low alarm mode. Press the up/down button to set the alarm on or off.
When the signal “)))” shows on the display, it means the low alarm is activated.
After set low temperature alarm, you can press the mode button to set the temperature alarm value.
2.10 Setup the temperature unit
In Hold mode, press the mode button (○) until enter to the temperature unit selecting mode, and press the up/down button to select the requested temperature unit.
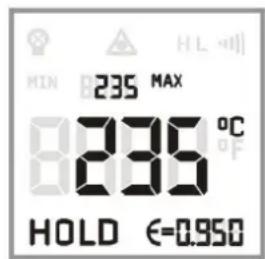
Centigrade scale°C
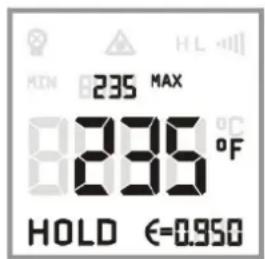
Fahrenheit scale°F
2.11 Setup offset
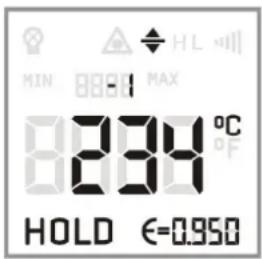
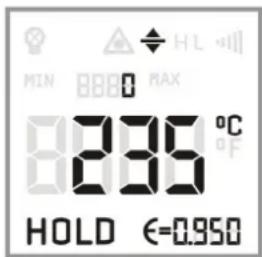
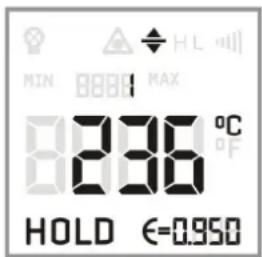
In Hold-mode, press the mode button repeatedly until enter into the temperature offset mode. Then, press the up/down button to setup the temperature offset value.
3. Data logger
PCE-IR 1000 series thermometer has the internal data
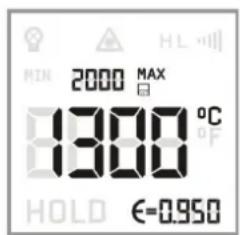
logger with a maximum capacity of 2000 measurement protocols.
3.1 Storing data
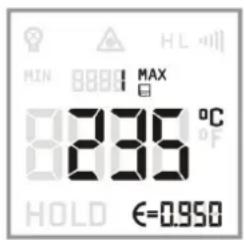
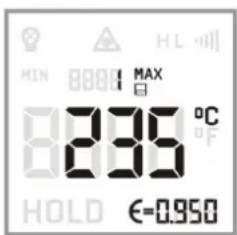
In measurement mode, release the trigger to enter to HOLD mode, and press the down button, there will be a line of small numbers; an icon showing a disk and an icon of "MAX" appear above the current temperature result.
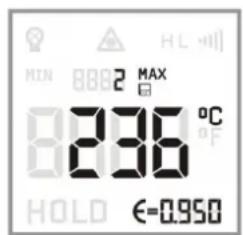
The small numbers indicate the memory position. You can choose the memory position from 1\~2000 with the up/down buttons Press the mode button can save the max temperature of this measurement to the current position.
3.2 Datalogger recall
In measuring mode, keep the trigger pressed and then press the mode button to recall the saved data.
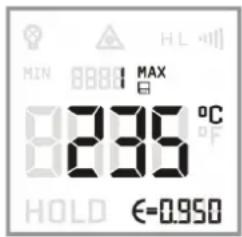
Users can choose the memory position by press the up/down buttons.
3.3 Clear the memory
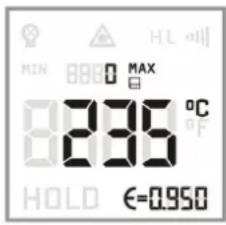
In the Storing Data mode, choose the memory position to “0” by pressing the down button. Press the mode button (○) will clear the memory. The three buzzer signals confirms the successful clearing.
4. Software
PCE-IR 1000 series portable infrared thermometer has special software and connecting cable. Users can set the unit, download the logged data and recording temperature curve and through the software.
4.1 System Requirements
Vista, XP or Windows 2000 operation system USB interfacet Hard disk with at least 30MByte free space At least 128MByte RAM CD-ROM Driver
4.2 Installation and connection
Please insert the CD to CD-ROM driver. Please start the SETUP.EXE on the CD-ROM, and install the software follow the instructions of the wizard.
USB interface driver installation
1) Insert USB Cable into computer's USB port. Computer will find the new hardware, and the following dialogue box appears:
2) Choose the option of "NO, not for the time being (T)", click "next" and the following dialogue box appear:
3) Choose "install from the list or the designate place (advanced) (S)" click "next", the following dialogue box appear.
4) Click "browse" to find the USB file in CD.
5) Click "confirm", the following dialogue box appear:
6) Click "next", sometimes the system will come up the following the prompt, then click "still continue".
7) After completing the driver installation, it will new hardware again, repeat the above operations until system prompt "New hardware has been installed successfully, you can use it now".
8) Right click "My computer" to see "attributes", choose → hardware → device manager → port as follows:
We can see there is a new port named "Infrared Thermometer Adapter" with the port number behind. By now, the USB Cable Driver installation is completed.
9) After the successful start of the software, the communication will be displayed in the status bar of the windows. Choose the correct COM-Port via: [MENU: Setup\ interface]. There will be a signal of [PCE-IR 1000 connected] show on the left bottom of the windows after connect successfully.
4.3 Download the data
To download the logged data from theinfrared thermometer, please press the download menu: [measure → download data], and all the logged data will be indicated on the screen.
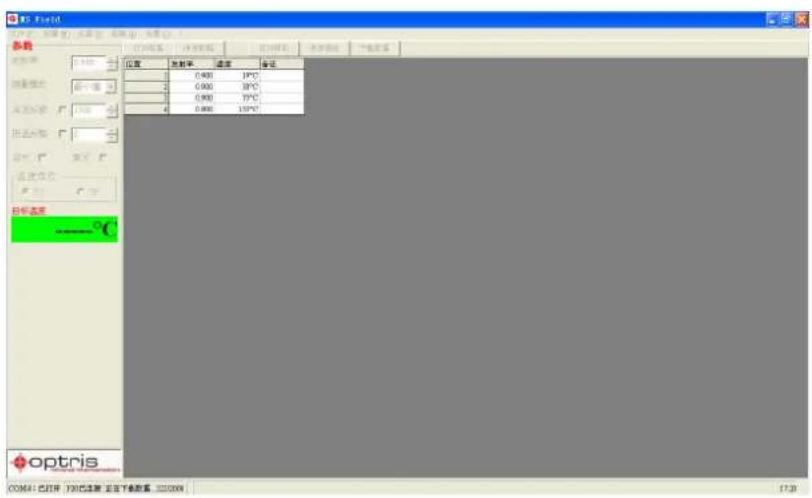
After PCE-IR 1000 portable infrared thermometer connected to your personal computer and the software is started successfully, the target temperature will show on the left in digital form.
2) Starting the measurement
Please press the measuring key: [Measure→ begin]
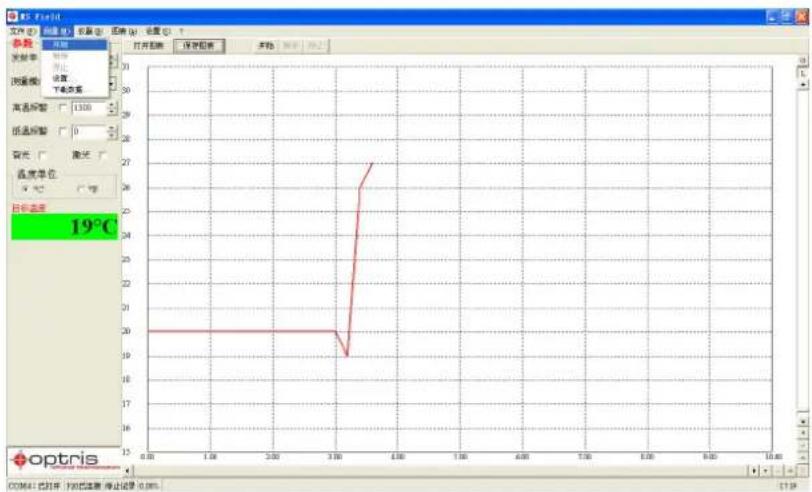
line
| Time (s) | Temperature (°C) | | -------- | ---------------- | | 0.00 | 20 | | 3.00 | 20 | | 3.50 | 27 |3) Scaling of the temperature axis
Global scaling: temperature range of the diagram is automatically adapted to the respective peak values.
Local scaling: temperature range of the diagram will be dynamically adapted to the respective peak values.
Manual scaling: can be done at any time using the control elements of the temperature axis.
4) Stop the measurement
To stop the current measurement, please press the stop key [Menu: measurement/stop]. The save key [Menu: File\save as] opens an explorer window to select destination and file name.
5) Diagram setting
The menu item settings [Menu: diagram\setting] enable the settings for data protection.
Color: temperature graph and digital display.
Initial time: time frame on x-axis at the beginning of measurement
5. Specifications
5.1 Optical Specifications
PCE-IR 1300
D:S=120:1
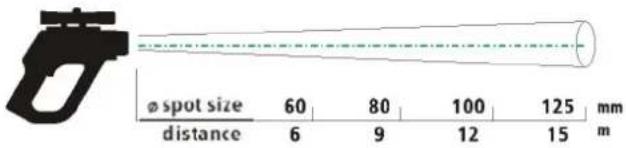
D:S=120:1
PCE-IR 1800 / PCE-IR 1600
D:S=300:1
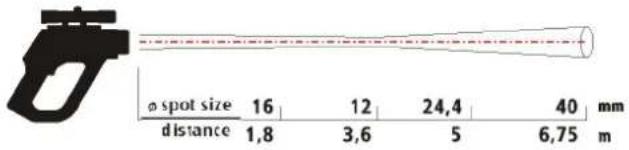
D:S=300:1
5.2 General specifications
Model: PCE-IR 1300
Temperature range 0\~1300 °C
System accuracy: ±2 (0\~200) ℃
±1% (200\~1300) ℃
Repeatability: ±1 (0\~200) ℃
±0.5%(200\~1300) ℃
Optical resolution 120:1
Response time 300ms (95%)
Emissivity : 0.100\~1.000adjustable
Aim mode: Laser、telescope aim
Signal processing MAX/MIN Scan/Hold Function
Alarm functions: Audible a nd visible HIGH/LOW alarm
Data storage 2000 point
Backlight: Three color
Outputs/digital USB cable and software
Storage temperature -20\~60°C (no battery)
Ambient temperature 0\~50°C (no green laser)
Relative humidity: 10\~95% non condensing
Power: Ni-MH rechargeable battery
Size: 264x203.5x60mm
General specifications
| Model: | PCE-IR 1600 |
| Temperature range | 385~1600 °C |
| System accuracy: | ±0.3% ±2°C (at ambient temperature 23±5°C) |
| Repeatability: | ±0.1% ±1°C (at ambient temperature 23±5°C) |
| Optical resolution: | 300:1 |
| Response time | 100ms (95%) |
| Emissivity : | 0.100~1.000 adjustable |
| Aim mode: | Laser 、telescope aim |
| Signal processing: | MAX/MIN Scan/Hold Function |
| Alarm functions: | Audible a nd visible HIGH/LOW alarm |
| Data storage | 2000 point |
| Backlight: | Three color |
| Outputs/digital | USB cable and software |
| Storage temperature | -20~60°C (no battery) |
| Ambient temperature | 0~50°C |
| Relative humidity: | 10~95%, non condensing |
| Power: | Ni-MH rechargeable battery |
| Size: | 264x203.5x60mm |
General specifications
| Model: | PCE-IR 1800 | |
| Temperature range | 650~1800 °C | |
| System accuracy: | 0.3% 2 (at ambient temperature 23 5) | ± °C |
| Repeatability: | 0.1% 1 (at ambient temperature 23 5°C) | ± |
| Optical resolution: | 300:1 | |
| Response time | 100ms (95%) | |
| Emissivity : | 0.100~1.000 adjustable | |
| Aim mode: | Laser telescope aim | |
| Signal processing: | MAX/MIN Scan/Hold Function | |
| Alarm functions: | Audible a nd visible HIGH/LOW alarm | |
| Data storage | 2000 point | |
| Backlight: | Three color | |
| Outputs/digital | USB cable and software | |
| Storage temperature | -20~60 °C (no battery) | |
| Ambient temperature | 0~50 °C | |
| Relative humidity: | 10~95%, non condensing | |
| Power: | Ni-MH rechargeable battery | |
| Size: | 264x203.5x60mm | |
Appendix: Emissivity
Emissivity: the radiant intensity launched from the object depends on the temperature of the target and the object surface material's radiation characteristic.
Emissivity table
| Material Emissivity | ||
| 8-14μm | ||
| Aluminum | oxidized | 0.2-0.4 |
| Asbestos | 0.95 | |
| Asphalt | 0.95 | |
| Basalt | 0.7 | |
| Ceramic | 0.95 | |
| Concrete | 0.95 | |
| Copper | oxidized | 0.4-0.8 |
| Fabric | 0.95 | |
| Glass | plate | 0.85 |
| Gold | 0.01-0.1 | |
| Gravel | 0.95 | |
| Ice | 0.98 | |
| Iron | oxidized | 0.5-0.9 |
| Karborundum | 0.9 | |
| Lead | Oxidized | 0.2-0.6 |
| Paper | Each color | 0.95 |
| Plastics | Transparent>0.5mm | 0.95 |
| Rubber | 0.95 | |
| Sand | 0.9 | |
| Snow | 0.9 | |
| Soil | 0.9-0.98 | |
| Steel | oxidized | 0.7-0.9 |
| Water | 0.93 | |
| wood | Natural | 0.9-0.95 |
- Manual
- Temperature Meter
- PCE-IR 1000 series
- PCE-IR 1300 / 1600 / 1800
- Content
- Introduction
- Operation
- Data Logger
- Software
- Specifications
- User interface
- ○ Mode-Button
- ∧ Up/Laser
- ∨ Down/Display backlight
- Display
- External function introduction
- Starting the measurement
- Hold-Function
- Switch off
- Setup the laser
- Setup the display backlight
- Setup the parameters
- Setup emissivity
- Setup the Min/Max function
- Setup high and low alarm
- 1) High alarm
- 2) Low alarm
- Setup the temperature unit
- Setup offset
- Storing data
- Datalogger recall
- Clear the memory
- System Requirements
- Installation and connection
- USB interface driver installation
- Download the data
- 2) Starting the measurement
- 3) Scaling of the temperature axis
- 4) Stop the measurement
- 5) Diagram setting
- Optical Specifications
- General specifications
- General specifications
- Appendix: Emissivity
Brand : PCE Instruments
Model : IR 1800
Category : Thermometer