
Classic - Guitar effects pedal Radial Engineering - Free user manual and instructions
Find the device manual for free Classic Radial Engineering in PDF.


| Product Type | Passive Direct Box |
| Brand | Radial Engineering |
| Model | Classic |
| Dimensions | 5.5 x 3.5 x 2 inches (140 x 89 x 51 mm) |
| Weight | 1.5 lbs (0.68 kg) |
| Power Source | Passive (no power required) |
| Input Connectors | 1/4 inch TS (unbalanced) |
| Output Connectors | XLR (balanced), 1/4 inch thru (unbalanced) |
| Input Impedance | 140 kΩ (unbalanced) |
| Output Impedance | 600 Ω (balanced) |
| Frequency Response | 20 Hz to 20 kHz ±0.5 dB |
| Transformer | Jensen JT-11P-1HPC |
| Maximum Input Level | +21 dBu @ 20 Hz |
| Chassis | Steel with baked enamel finish |
| Main Function | Convert unbalanced instrument signal to balanced microphone level |
| Additional Features | Ground lift switch, -15 dB pad |
| Care and Cleaning | Wipe with a dry, lint-free cloth. Avoid solvents. |
| Safety Precautions | Use shielded cables. Do not expose to moisture. |
| Spare Parts & Repairability | No user-serviceable parts. Contact Radial for service. |
| Compliance | FCC, CE, RoHS |
| Warranty | 3 years (limited) |
Frequently Asked Questions - Classic Radial Engineering
User questions about Classic Radial Engineering
0 question about this device. Answer the ones you know or ask your own.
Ask a new question about this device
Download the instructions for your Guitar effects pedal in PDF format for free! Find your manual Classic - Radial Engineering and take your electronic device back in hand. On this page are published all the documents necessary for the use of your device. Classic by Radial Engineering.
USER MANUAL Classic Radial Engineering
natural_image
Black electronic audio synthesizer device with labeled buttons and knobs (no readable text or symbols beyond branding)TONEBONE™
Owner's Manual
Index Page
- Introduction ...... 1
- Unpacking, powering & getting connected ....2
- Powering & getting connected ....2
- Using Tonebone – the starting point .....2
- Tonebone Classic function overview ....3
- Tonebone Hot British function overview .....4
- Changing the tube 5\~6
- Trouble shooting 6
Factory setups - Classic ....7\~10
Factory setups - Hot British 11\~14
User setting charts - Classic 15\~16
User setting charts - Hot British 17\~18
Warranty Back Cover
1. Introduction:
Congratulations on your purchase of the Radial Tonebone™ Tonebone pedals bring forth a level of quality and performance never before realized in a tube distortion pedal. Whether set for tones commonly described as 'edge', 'crunch', 'metal' or just plain 'scream' the Tonebone gives you rich harmonics and deep bass throughout a wide range of sounds.
This manual has been designed to show the user how to gain access to those sounds and more. Once you have read through, take time to experiment. You will find that the Tonebone is so well designed; it is practically impossible to make it sound bad!
Most of all, enjoy. If it isn't fun, it isn't music!
www.radialeng.com www.tonebone.com
Radial is a division of JP Cabletek Electronics Ltd. Specifications and appearance subject to change without notice. Radial Tonebone™ manual V1.3 - 05-19-05
2. Unpacking your Tonebone:
Your Radial Tonebone pedal has been thoroughly tested at the factory, and comes with a 15VDC power supply and this owner's manual. We recommend that you keep the box and original receipt in the unlikely event that you should need to send the unit back for servicing.
3. Powering up and getting connected:
Before you start, turn your guitar amp volume down to zero. Tonebone comes equipped with a special 15VAC power adapter with enough power to drive the 12AX7 tube inside. When the power supply is connected, the Tonebone will be in standby mode. Like all tube amps, for best tone let your Tonebone warm up for 5 minutes so that it achieves electrical and thermal stability. The LED on the unit lights up when the foot switch is depressed to indicate it is powered up and ready for use.
4. Using Tonebone - The starting point:
Start with all the controls at 12 o'clock and switches set to the off or flat position. Turn your amp up to a comfortable listening level and adjust the LEVEL output control for unity gain, i.e.: the level with Tonebone on (LED is on) matches the level with it off (LED off). Now start turning knobs!
You will find that most of the controls are intuitive and extremely sensitive to changes. In other words, small control changes will make big changes in the sound. Take your time and experiment.
It is important to note that both the Tonebone Classic and the Tonebone Hot British are ultra-high gain devices that have been designed to provide 'over-compensation' control on all functions. What this means is that each control when set to maximum is able to compensate for other controls that may be completely backed off. For instance, you may have your LEVEL wide open and your DRIVE almost fully off. This gives you maximum flexibility but also opens the door to over-saturation, which could lead to uncontrollable feedback. To safeguard against this, you should never drive all functions to maximum.
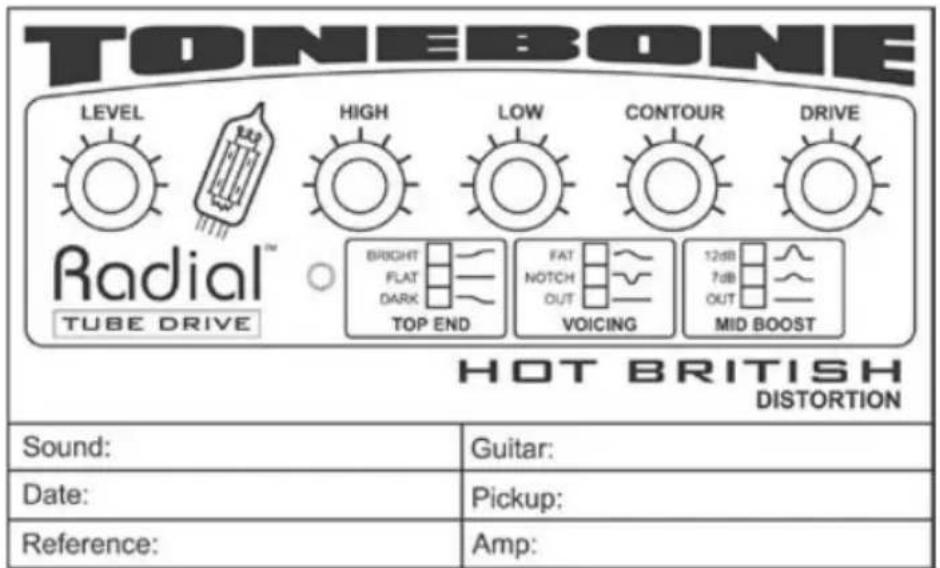
At the back of this manual are a number of setups for popular sounds for both Tonebone models. Note that you will have to tweak the settings shown on the setup chart to match your specific guitar and amp set up.
In addition to the factory sound charts, a number of blank user setting charts are included at the back of this manual. Photocopy these handy charts and use them to save your own 'found sounds'. Once you get a sound you like, chart the knob positions and guitar/amp/pickup setting. These setup charts will aid in you in getting familiar with the controls of your new Tonebone, and help in quickly recreating your exact sounds in the studio.
Now Go Play!
5. Tonebone Classic Function Overview

① DRIVE control: Used to adjust overall amount of input gain & distortion. For even more drive, use the GAIN switch.
② GAIN switch: Used to boost the gain at preamp input. LOW = 0dB MED = +9dB HIGH = +20dB. Hint: Start with GAIN in low position and DRIVE at 9:00 o'clock and LEVEL at 3:00. Then add DRIVE.
③ FILTER control: Used to balance the high frequency ratio between the amplifier and the ToneBone. Hint: start adjustments at the full clockwise position and work backwards.
④ MID BOOST switch: Gives you +7dB & +12dB boost @ 360Hz. Allows guitar to cut through the mix; especially useful for soloing.
⑤ LOW control: Active 'post-distortion' tone control. Boost or cut ±14.5 dB @ 100 Hz from 12 o'clock position.
⑥ TOP END switch: BRIGHT: +6dB @ 10KHz; FLAT is the recommended position when the amp's bright switch is on; DARK: -6dB @ 3.3KHz, normally used with super bright inputs.
⑦ HIGH control: Active 'post-distortion' tone control. Boost or cut ±10dB @ 4.3KHz from 12 o'clock position.
⑧ LEVEL control: This is used to adjust the output level without altering any of the tonal characteristics.
⑨ FOOTSWITCH: Toggles between effect and True-Bypass. i.e. when the Tonebone is off, the signal passes straight through without any effect. An on/off status indicator LED is provided.
6. Tonebone Hot British Function Overview

① DRIVE control: Used to adjust overall amount of input gain & distortion.
② MID BOOST switch: This gives you +7dB & +12dB @ 360Hz. This allows the guitar to cut through the mix and is especially useful for soloing.
③ CONTOUR control: Adjust balance of low & high frequencies in the "NOTCH" & "FAT" VOICING mode. Hint: start at 12 o'clock position.
④ VOICING switch: NOTCH position: passive boost coloration of low's & high's. FAT position: passive midrange tight filter.
⑤ LOW control: Active 'post-distortion' tone control. Boost or cut ±14.5dB @ 100 Hz from 12 o'clock position.
⑥ TOP END switch: BRIGHT: +6dB @ 10KHz; FLAT is the recommended position when the amp's bright switch is on; DARK: -6dB @ 3.3KHz, normally used with super bright inputs.
⑦ HIGH control: Active 'post-distortion' tone control. Boost or cut ±10dB @ 4.3KHz from 12 o'clock position.
LEVEL control: This is used to adjust the output level without altering any of the tonal characteristics.
⑨ FOOTSWITCH: Toggles between effect and True-Bypass. i.e. when the Tonebone is off, the signal passes straight through without any effect. An on/off status indicator LED is provided.
7. Changing the tube:
Your Tonebone has been designed to provide years of performance before changing the tube. In fact, it is unlikely that a tube change will be necessary for two to three years or more, depending on use. Change the tube only when a degradation of sound is noticeable.
Disassembly
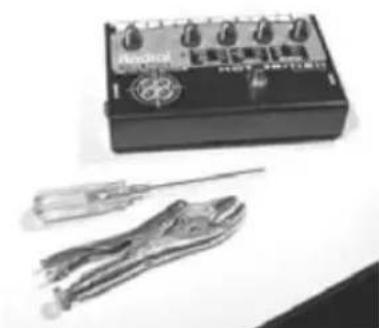
- Remove the rubber knobs by pulling them straight up. These pressure fitted knobs should be removed with care to avoid damage.
- Remove the nuts and washers securing the potentiometer, foot switch, and input/output using an open ended wrench or socket. Please use caution so as not to mar the exterior finish.
natural_image
Black-and-white photo of a handheld electronic device with three wires and a screwdriver, no visible text or symbols.Ready to change the tube? Ok, lets start here.

natural_image
Black-and-white photo of a small electronic device with a pipette inserted into a box, surrounded by small components and a feather-like object (no visible text or symbols)Knobs off, nuts & washers off, side jack nuts & washers off, now removing screws.
- Remove the 4 bottom screws that hold the top and bottom chassis halves together. Carefully separate them. Note that the chassis top and bottom fit snugly so a little careful force may be needed to clear the two side mounted 14 input and output connectors. Watch you don't loose the nylon washer between the footswitch and the chassis top!

natural_image
Black-and-white photo of electronic components including a circuit board, pliers, and a laptop on a white surface (no visible text or symbols)Ready to wiggle tube out of the socket.

natural_image
Close-up of a printed circuit board with electronic components and traces (no readable text or symbols)12AX7 tube replacement.
- Remove and replace the tube: Gently loosen the 12AX7 tube in the socket by wiggling it back and forth.
Reassembly
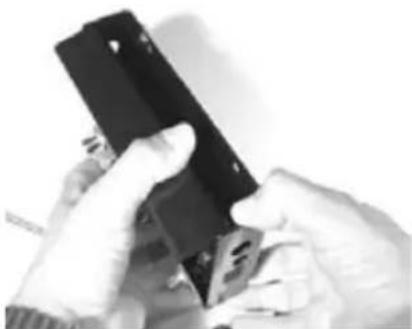
- Install the PC board to the Chassis top: Carefully align the potentiometers, LED and footswitch with the holes in the chassis and assemble through the top. Don't forget the nylon footswitch washer!
- Attach the pot and footswitch washers and nuts, just finger tight for now, to allow alignment of the jacks when the bottom is attached.
natural_image
Close-up of hands holding a black electronic device (no visible text or symbols)Spread chassis sides to clear input & output jacks.
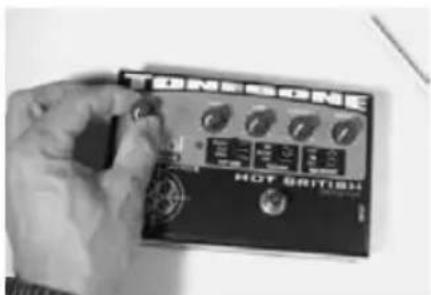
Press on knobs with shafts counterclockwise and pointers at 7 o'clock.
-
Carefully push the chassis bottom on, spreading the sides slightly so as not to stress the side mounted 14 " input and output jacks.
-
Attach the side 14 " jack washers and nuts: Do not over-tighten the plastic (for isolation) jacks as they strip easily! Attach the 4 chassis screws (don't over-tighten). Now you can tighten up the potentiometer shaft nuts.
-
Re-install the knobs... first rotate the potentiometer shafts fully counter-clockwise. Place the knobs over the shafts so they point to 7 o'clock and push straight down.
-
Test the pedal to make sure it works... plug in the power. The LED should light when you depress the footswitch and you will see the tube filament light up through the side vents.
8. Trouble shooting:
I am not getting any sound at all...
Start by connecting your guitar directly to your amplifier and checking each cable to make sure they work. Then, make sure that these are plugged in correctly.
I am getting sound but no distortion...
Make sure you have not connected the Tonebone backwards by reversing the input and output. If connections are correct, check the tube. If the problem persists, see your Tonebone dealer.
The LED does not go on...
Check the power adaptor to make sure it is plugged in. If the LED does not light up, check the outlet with another device to make sure power is present. If it still does not light up, check the power supply with a voltmeter or have your dealer check it.
The sound has changed, it sounds thin...
The tube may needs changing. Remove the tube and bring it to your dealer to have him test it. If low, replace with a 12AX7.
I am getting radio signals though my amplifier...
Poor quality cables and bad grounding are usually the cause. Check to make sure your amplifier is properly grounded with a 3-prong A/C cord and that the wall receptacle is standard 3-prong duplex and wired correctly. Make sure you are using high quality coaxial guitar cables with proper shielding. Radial Tonebone pedals are engineered and tested to ensure RF is eliminated as a source of noise.
Slow Hand Bluze

This sound was created using a Strat with a Duncan Stack and used in the neck position.
Joe Sat Solo

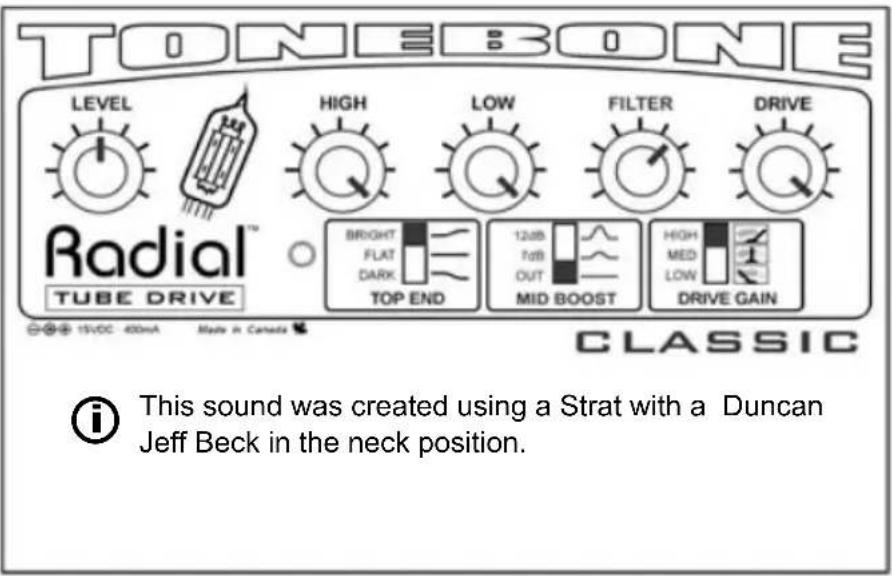
This sound was created using a Strat with a Duncan Jeff Beck humbucker in the neck position.
Adams Apple

This sound was created using a Fender Strat in the bridge position. Great for cutting through the mud.
ZZ Texas Riff
Chunky Rhythm

Water Smoke
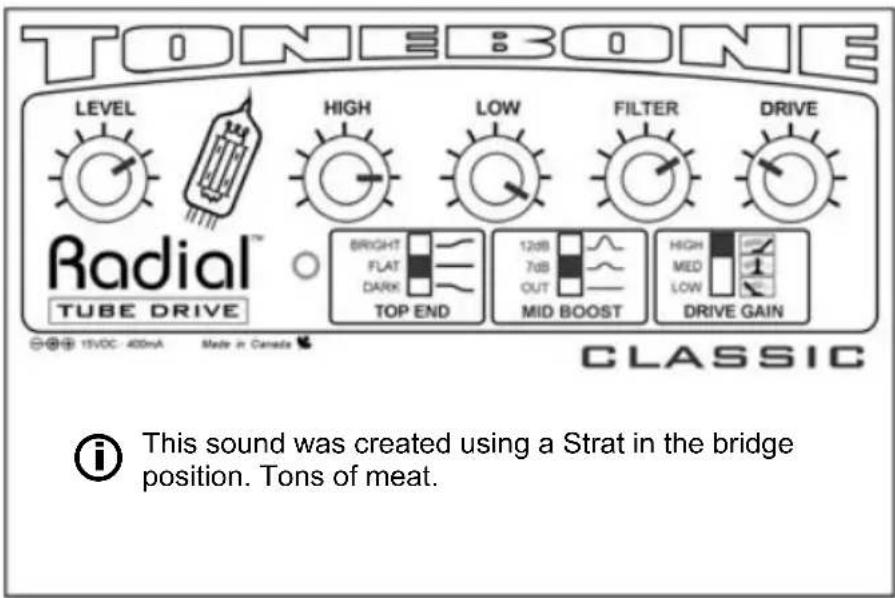
Deep Lazy
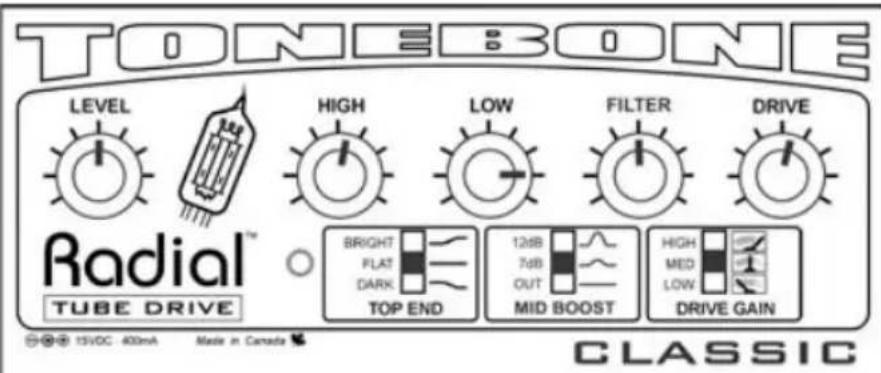
This sound was created using a stock Strat with a Twin using the middle pick-up. Move to the bridge pickup for more cut.
Dire Violin Singing Strat
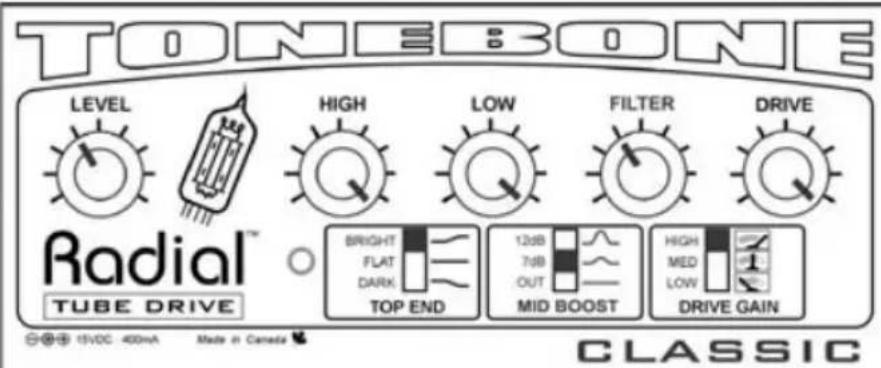
This sound was created using a Les Paul in the neck position. Used with a volume control for effect.
Metalic Shrine

This sound was created using a Strat in the bridge position. Big sound with small pick-up!
Johnny B. Goodness

This sound was created using a Strat inthe bridge position. Great for all kinds of rhythms when you want extra edge.
Clean Voodoo Child

This sound was created using a Strat in the neck position. Change the volume on the guitar to get maximum effect
Stone Age Sugar

This sound was created using a Strat and a Fender Twin reverb amp. Great dynamics for rhythm.
Texas Tornado

This sound was created using a Strat with a Duncan Stack in the bridge position. Try also single coil in the middle position.
Stevie R Neck

This sound was created using a Strat in the neck position. Try reducing the guitar volume and bring up for solos.
Acey Deacy Chunk
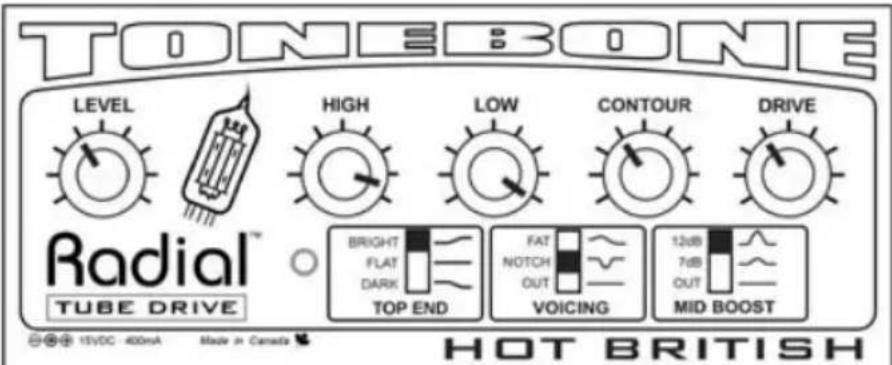
This sound was created using a Strat with a Duncan in the bridge position. Adjust the DRIVE to taste. Very chunky tone with lots of articulation.
Xtra Grind

This sound was created using a Strat with a Duncan in the bridge position. Great for drop tuning and fast muted playing. Adjust CONTURE to taste.
Eric's Buzz Solo

This sound was created using a Les Paul in the neck position. Try rolling off the tone and then bring up the level to offset.
Early Zeppelin

This sound was created using a Les Paul in the bridge position. Great vintage tone gives you tons of personality!
Big Mean Scoop

This sound was created using a Strat in the bridge position. Great for metal where you want total control over the stage... or the world for that matter.
Dark Solo
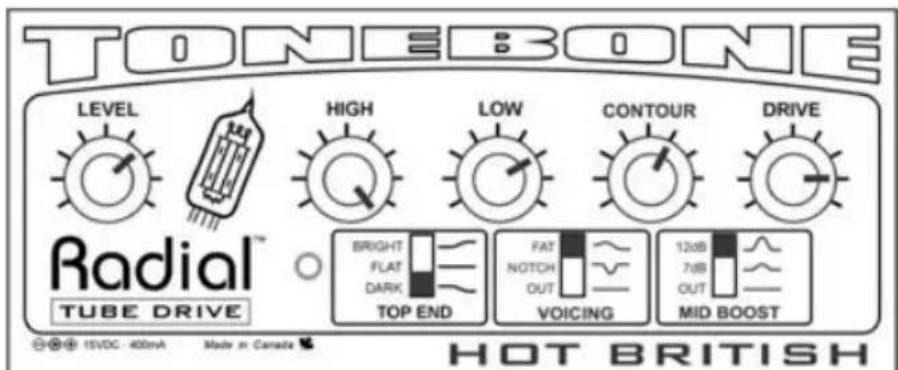
This sound was created using a Strat in the middle and the bridge position. Lots of sustain and mid to cut through without too many overtones.
Jethro's Snot

This sound was created using a Strat in the bridge position. Great overtones and dynamics.
Crimson Solo

King Kong
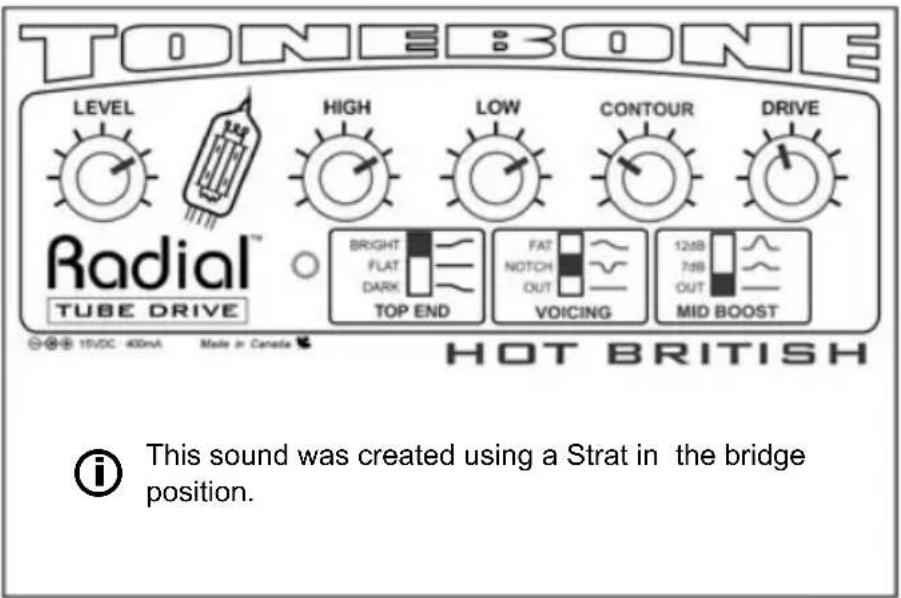
Smokin' China Grove

User settings - Tonebone Classic
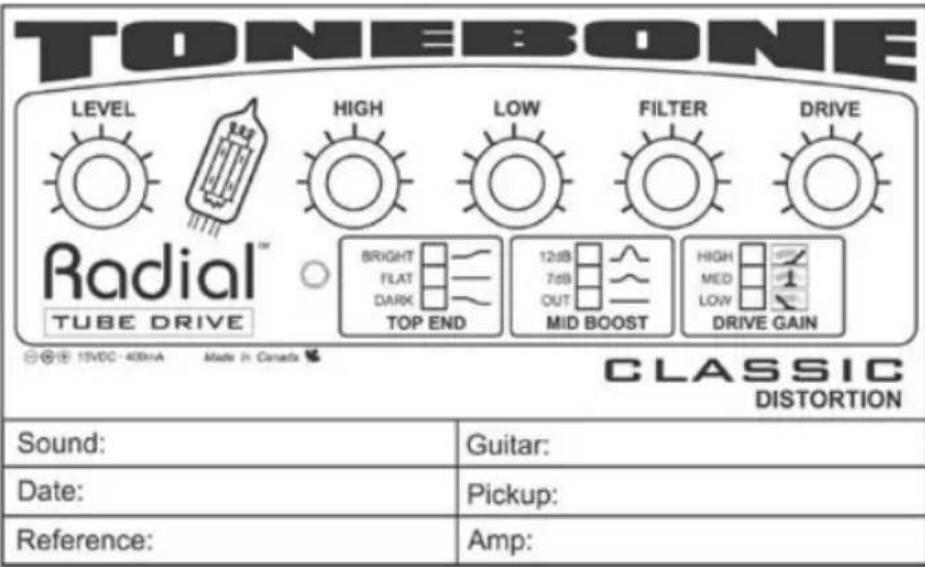


User settings - Tonebone Classic


User settings - Tonebone Hot British


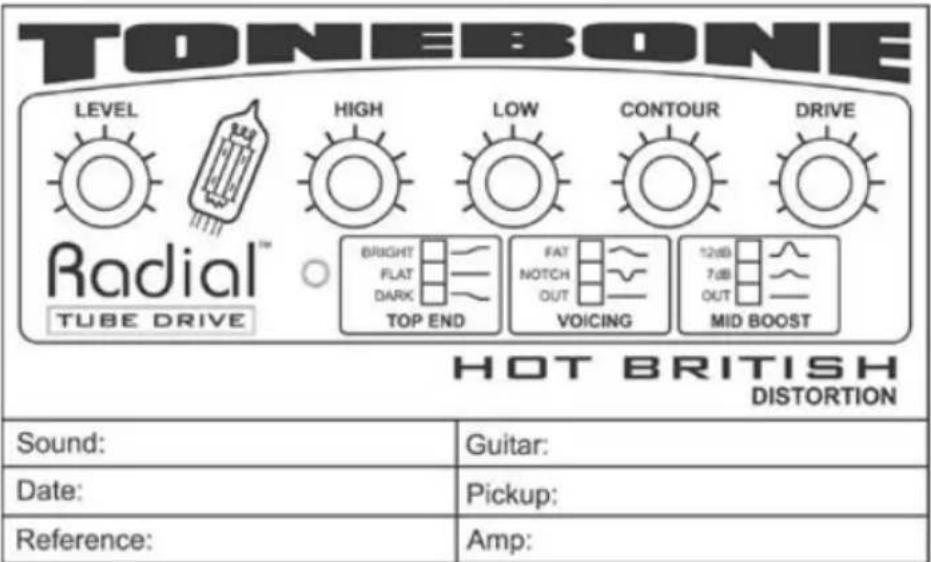
User settings - Tonebone Hot British


RADIAL LIMITED THREE YEAR WARRANTY
Radial Engineering - a division of JP Cabletek Electronics Ltd. warrants this product to be free from defects in material and workmanship to the original owner and will remedy any such defects free of charge according to the terms of this warranty. Radial Engineering will repair or replace at its option any defective component(s) of this product, excluding the finish, the tube, the footswitch (tube and footswitch are warranted for 90 days) and wear and tear from normal use, for a period of three (3) years from the original date of purchase. In the event that a particular product is no longer available, Radial Engineering reserves the right to replace the product with a similar product of equal or greater value. To make a request or claim under this limited warranty, the product must be returned prepaid in the original shipping container (or equivalent) to Radial Engineering or to an authorized repair centre and you must assume the risk of loss or damage. A copy of the original invoice showing date of purchase and the dealer name must accompany any request for work to be performed under this limited warranty. This limited warranty shall not apply if the product has been damaged due to abuse, misuse, misapplication, accident or as a result of service or modification by any other than an authorized repair centre.
THERE ARE NO EXPRESSED WARRANTIES OTHER THAN THOSE ON THE FACE HEREOF AND DESCRIBED ABOVE. NO WARRANTIES WHETHER EXPRESSED OR IMPLIED, INCLUDING BUT NOT LIMITED TO, ANY IMPLIED WARRANTIES OF MERCHANTABILITY OR FITNESS FOR A PARTICULAR PURPOSE SHALL EXTEND BEYOND THE RESPECTIVE WARRANTY PERIOD DESCRIBED ABOVE OF ONE YEAR.
RADIAL ENGINEERING SHALL NOT BE RESPONSIBLE OR LIABLE FOR ANY SPECIAL, INCIDENTAL OR CONSEQUENTIAL DAMAGES OR LOSS ARISING FROM THE USE OF THIS PRODUCT. THIS WARRANTY GIVES YOU SPECIFIC LEGAL RIGHTS, AND YOU MAY ALSO HAVE OTHER RIGHTS, WHICH MAY VARY FROM STATE/PROVINCE TO STATE/PROVINCE.

- TONEBONE™
- Owner's Manual
- Index Page
- Introduction:
- www.radialeng.com www.tonebone.com
- Unpacking your Tonebone:
- Powering up and getting connected:
- Using Tonebone - The starting point:
- Tonebone Classic Function Overview
- Tonebone Hot British Function Overview
- Changing the tube:
- Disassembly
- Reassembly
- Trouble shooting:
- I am not getting any sound at all...
- I am getting sound but no distortion...
- The LED does not go on...
- The sound has changed, it sounds thin...
- I am getting radio signals though my amplifier...
- ZZ Texas Riff
- Chunky Rhythm
- Water Smoke
- Deep Lazy
- Dire Violin Singing Strat
- Metalic Shrine
- Johnny B. Goodness
- Clean Voodoo Child
- Stone Age Sugar
- Texas Tornado
- Stevie R Neck
- Acey Deacy Chunk
- Xtra Grind
- Eric's Buzz Solo
- Early Zeppelin
- Big Mean Scoop
- Dark Solo
- Jethro's Snot
- Crimson Solo
- King Kong
- Smokin' China Grove
- User settings - Tonebone Classic
- User settings - Tonebone Hot British
- RADIAL LIMITED THREE YEAR WARRANTY
Brand : Radial Engineering
Model : Classic
Category : Guitar effects pedal