
SASMUNG NV24 HD - Camera SAMSUNG - Free user manual and instructions
Find the device manual for free SASMUNG NV24 HD SAMSUNG in PDF.


User questions about SASMUNG NV24 HD SAMSUNG
0 question about this device. Answer the ones you know or ask your own.
Ask a new question about this device
Download the instructions for your Camera in PDF format for free! Find your manual SASMUNG NV24 HD - SAMSUNG and take your electronic device back in hand. On this page are published all the documents necessary for the use of your device. SASMUNG NV24 HD by SAMSUNG.
USER MANUAL SASMUNG NV24 HD SAMSUNG
Getting to know your camera
- Microsoft, Windows and Windows logo are registered trademarks of Microsoft Corporation incorporated in the United States and/or other countries
- HDMI, HDMI logo, and High-Definition Multimedia Interface are registered trademarks of HDMI Licensing LLC.
- Apple, Mac and QuickTime logo are registered trademarks of Apple computer.
- All brand and product names appearing in this manual are registered trademarks of their respective companies.
- The contents and illustrations of this manual are subject to change without prior notice for upgrading the camera functions.
- Refer to the user manual included on the Software CD for more information.
- PDF documents of user manual are included in the Software CD-ROM supplied with this camera. Search the PDF files with Windows explorer. Before opening the PDF files, you must install the Adobe Reader included in the Software CD-ROM.
Contents
Getting to know your camera 1
Identification of features / Contents of camera 4
Battery life & Number of shot (Recording time) 6
When Using the Camera for the First Time : Smart button 7
When Using the Camera for the First Time :
Setting up the Date / Time and Language 8
AMOLED monitor indicator 9
Mode dial 10
Taking a picture 11
Playingback, Deleting and Protecting Images 12
Using the remote control 14
Connecting to the HDTV using the HDMI cable 15
Downloading images 17
Specifications 18
FCC notice
NOTE :
This equipment has been tested and found to comply with the limits for a Class B digital device, pursuant to part 15 of the FCC Rules. These limits are designed to provide reasonable protection against harmful interference in a residential installation. This equipment generates, uses and can radiate radio frequency energy and, if not installed and used in accordance with the instructions, may cause harmful interference to radio communications. However, there is no guarantee that interference will not occur in a particular installation. If this equipment does cause harmful interference to radio or television reception, which can be determined by turning the equipment off and on, the user is encouraged to try to correct the interference by one or more of the following measures:
– Reorient or relocate the receiving antenna.
– Increase the distance between the equipment and receiver.
- Connect the equipment into an outlet on a circuit different from that to which the receiver is connected.
- Consult the dealer or an experienced radio / TV technician for help.
■ CAUTION :
Changes or modifications not expressly approved by the manufacturer responsible for compliance could void the user's authority to operate the equipment.
■ Declaration of Conformity
Address : 105 Challenger Road Ridgefield Park NJ
Telephone No.: 1-800-SAMSUNG(726-7864)
This device complies with Part 15 of the FCC Rules. Operation is subject to the following two conditions: (1) This device may not cause harmful interference, and (2) this device must accept any interference received, including interference that may cause undesired operation.


Getting to know your camera
DANGER
DANGER indicates an imminently hazardous situation which, if not avoided, will result in death or serious injury.

Do not attempt to modify this camera in any way. To do so may result in fire, injury, electric shock or severe damage to you or your camera. Internal inspection, maintenance and repairs should only be carried out by your dealer or Samsung Camera Service centre.

Should any form of liquid or a foreign object enter the camera, do not use it. Switch off the camera, and then disconnect the power source. You must contact your dealer or Samsung Camera Service centre. Do not continue to use the camera as this may cause a fire or electric shock.

Please do not use this product in close proximity to flammable or explosive gases, as this could increase the risk of explosion.

Do not insert or drop metallic or inflammable foreign objects into the camera through access points e.g. the memory card slot and battery chamber. This may cause a fire or electric shock.

Do not operate this camera with wet hands. This could pose a risk of electric shock.
EN-2
WARNING
WARNING indicates a potentially hazardous situation which, if not avoided, could result in death or serious injury.

Do not use the flash in close proximity to people or animals. Positioning the flash too close to your subject's eyes may cause eyesight damage.

For safety reasons keep this product and accessories out of reach of children or animals to prevent accidents e.g.:
- Swallowing battery or small camera accessories. If an accident should occur, please consult a doctor immediately.
- There is the possibility of injury from the camera's moving parts.

Battery and camera may become hot during prolonged use and it may result in camera malfunction. Should this be the case, allow the camera to sit idle for a few minutes to allow it time to cool.

Do not leave this camera in places subject to extremely high temperatures, such as a sealed vehicle, direct sunlight or other places of extreme variances in temperature. Exposure to extreme temperatures may adversely affect the camera's internal components and could cause a fire.

When in use, do not cover the camera or Charger. This may cause heat to build up and distort the camera body or cause a fire. Always use the camera and its accessories in a well-ventilated area.


Getting to know your camera
CAUTION
CAUTION indicates a potentially hazardous situation which, if not avoided, may result in a minor or moderate injury.

Remove the battery when not planning to use the camera for a long period of time.
Otherwise the battery may leak corrosive electrolyte and permanently damage the camera's components.

Leaking, overheating, or damaged battery could result in fire or injury.
– Use battery with the correct specification for the camera.
- Do not short circuit, heat or dispose of battery in fire.
- Do not insert the battery with the polarities reversed.

Be sure to format the memory card if you are using a newly purchased memory for the first time, if it contains data that the camera cannot recognise, or if it contains images captured with a different camera.

Do not fire the flash while it is in contact with hands or objects. Do not touch the flash after using it continuously. It may cause burns.

Credit cards may be demagnetized if left near a camera case. Avoid leaving magnetic strip cards near the case.

Do not move the camera while it is switched on when you are using the AC Charger. After use, always switch off the camera before unplugging the cable from the wall socket. Then make sure that any connector cords or cables to other devices are disconnected before moving the camera. Failure to do so may damage the cords or cables and cause a fire or electric shock.

Take care not to touch the lens or lens cover to avoid taking an unclear image and possibly causing camera malfunction.

Avoid obstructing the lens or the flash when you capture an image.

Before inserting any cables or AC adapter, check the directions and do not insert by force. It may cause breakage of cable or camera.
It is highly likely to result in computer malfunctions when the 30 pin connector is connected to the USB port of a PC. Never connect the 30 pin connector to USB port of a PC.

Do not insert the memory card the wrong way round. Doing so may cause damage to the camera.

Before an important event or going on a trip, you should check the camera condition. Samsung cannot be held responsible for camera malfunctions.
Identification of features / Contents of camera
Front & Top
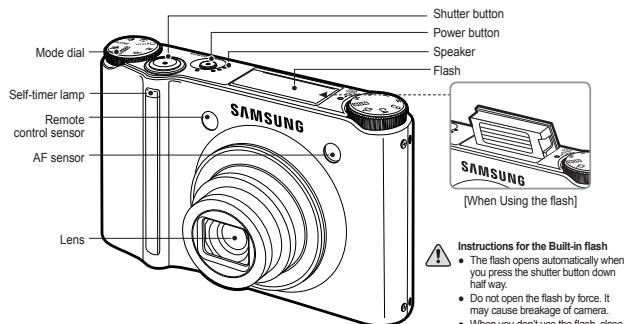
text_image
Shutter button Power button Speaker Flash Mode dial Self-timer lamp Remote control sensor AF sensor Lens SAMSUNG SAMSUNG [When Using the flash] Instructions for the Built-in flash • The flash opens automatically when you press the shutter button down half way. • Do not open the flash by force. It may cause breakage of camera. • When you don't use the flash closeRear
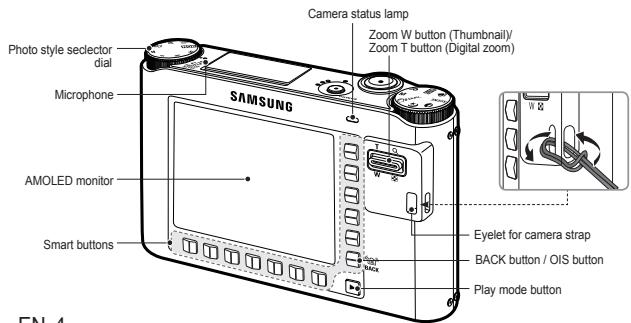
text_image
Photo style selector dial Microphone AMOLED monitor Smart buttons SAMSUNG Camera status lamp Zoom W button (Thumbnail)/ Zoom T button (Digital zoom) Eyelet for camera strap BACK button / OIS button Play mode buttonEN-4
Bottom
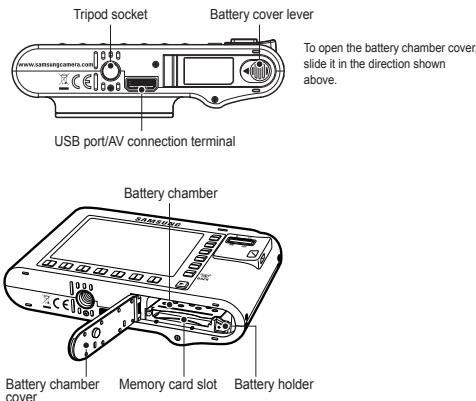
text_image
Tripod socket Battery cover lever To open the battery chamber cover, slide it in the direction shown above. USB port/AV connection terminal Battery chamber Battery chamber cover Memory card slot Battery holderCradle (Optional)
You can recharge your rechargeable battery, transfer a captured image to print, and download images with the cradle (optional).
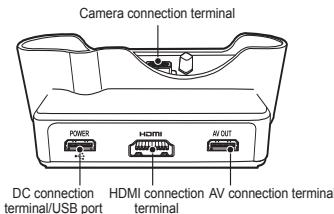
text_image
Camera connection terminal POWER HDMI AV OUT DC connection terminal/USB port HDMI connection AV connection terminal terminal
Identification of features / Contents of camera
Please check that you have the correct contents before using this product. The contents can vary depending on the sales region. To buy the optional equipment, contact your nearest Samsung dealer or Samsung service centre.
Included items
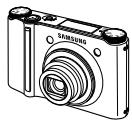
Camera
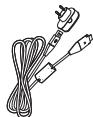
AC adapter (SAC-47) / USB cable (SUC-C4)
User manual,
Product warranty
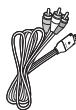
AV cable

Software CD
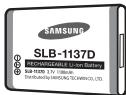
Rechargeable battery (SLB-1137D)
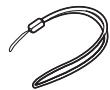
Camera strap
Optional items
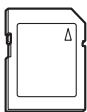
SD/SDHC/MMC
memory card
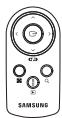
Remote control
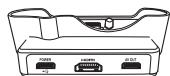
Cradle (SCC-NV4HD)
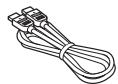
HDMI cable
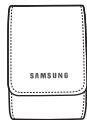
Camera case
EN-5


Battery life & Number of shot (Recording time)
■ Number of images and battery life: Using the SLB-1137D
| Battery life / Number of images | Based on the following shooting conditions | |
| Still image | Approx. 100 MIN / Approx. 200 | Using the fully charged battery, Auto mode, 10M image size, Fine image quality, Shot to shot interval : 30Sec. Changing the zoom position between the Wide and the Tele after every shot. Using the flash on every second shot. Using the camera for 5 minutes and then Powering it off for 1 minute. |
| Recording time | Based on the following shooting conditions | |
| Movie | Approx. 90 MIN | Using the fully charged battery 640x480 image size 30fps frame rate |
※ These figures are measured under Samsung's standard conditions and shooting conditions and may vary depending on the user's methods.
※ These figures are measured under OIS shooting condition.
When using a 256MB MMC memory, the specified shooting capacity will be as follows. These figures are approximate as image capacities can be affected by variables such as subject matter and memory card type.
| Recorded image size | SUPER FINE | FINE | NORMAL | 60FPS | 30FPS | 15FPS | |
| Still image | 10^M | 49 | 94 | 136 | - | - | - |
| 9^M | 55 | 105 | 151 | - | - | - | |
| 7^M | 68 | 129 | 183 | - | - | - | |
| 7^M | 64 | 122 | 174 | - | - | - | |
| 5^M | 93 | 173 | 242 | - | - | - | |
| 3^M | 143 | 255 | 345 | - | - | - | |
| 1^M | 418 | 617 | 732 | - | - | - | |
| * Movie | 1280 | - | - | - | - | about 5'23" | about 10'47" |
| 640 | - | - | - | - | about 16'14" | about 25' | |
| 320 | - | - | - | about 20'18" | about 25' | about 25' | |
* The recording times can be affected by the zoom operation.
The zoom button doesn't operate while recording movies.

When Using the Camera for the First Time : Smart button
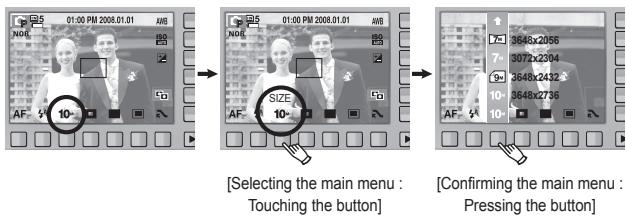
This button is used for shifting the menu cursor to select or for confirming the selected menu.
text_image
01:00 PM 2008.01.01 AWB NOB AF- 10- SIZE 10- [Selecting the main menu : Touching the button] 9648x2056 3077x2304 9648x2432 3648x2736 AF- 10- [Confirming the main menu : Pressing the button]To select a sub menu, in some menus, touch the button and slide your finger to the left / right.
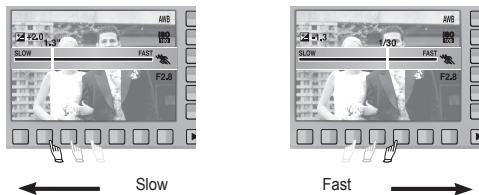
text_image
Slow F2.0 1/30 FAST F2.8 F2.8 1/30 Slow Fast[e.g.: Manual - Selecting the shutter speed]
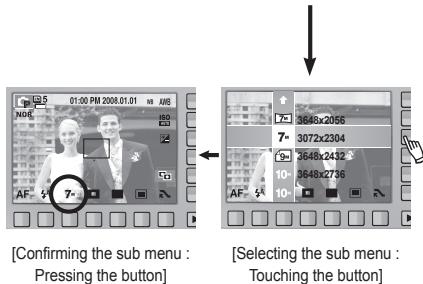
text_image
[Confirming the sub menu : Pressing the button] [Selecting the sub menu : Touching the button]Extending the menus : Press the extension menu button and more available menus will be displayed.
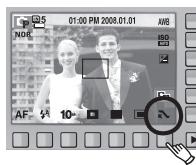
text_image
05 01:00 PM 2008.01.01 AVB NOR 180 AF 10Pressing the extension menu button
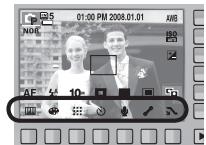
text_image
01:00 PM 2008.01.01 AM NOV AE 5 10-※The AMOLED monitor will be dark when some menus are selected. After selecting the menu, the AMOLED monitor returns to the brightness set as before.
When Using the Camera for the First Time : Setting up the Date / Time and Language
When the camera is turned on for the first time, a menu will be displayed in the AMOLED monitor to set date, time and language. This menu will not be displayed again after setting up the date, time and language. Set up the date, time and language before using this camera.
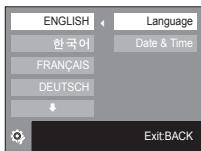
■ Setting up the language
- Press the [Language] menu button.
- Select a desired language by pressing the vertical smart button.
text_image
ENGLISH 한국어 FRANÇAIS DEUTSCH Language Date & Time Exit BACK■ Setting up the date, time and date type
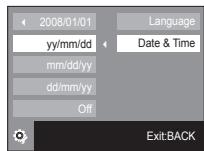
- Press the [Date & Time] menu button.
- Select a desired date type by pressing the vertical smart button.
text_image
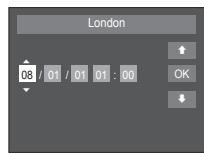
2008/01/01 yy/mm/dd mm/dd/yy dd/mm/yy Off Language Date & Time Exit:BACK- To change the date, select the [2008/01/01] menu and press the vertical smart button.
- To select Year / Month / Day and Hour : Minute, press the horizontal smart button. To change the numbers, press the vertical smart button.
text_image
London 08 / 01 / 01 01 : 00 ↑ OK ↓
- You can select any one of 23 languages. These are listed below:
- English, Korean, French, German, Spanish, Italian, S.Chinese, T.Chinese, Japanese, Russian, Portuguese, Dutch, Danish, Swedish, Finnish, Thai, Bahasa (Malay / Indonesian), Arabic, Persian, Polish, Hungarian, Czech and Turkish.
- Even if the camera is restarted, the language setting will be maintained.
※For more information on setting World Time, please refer to the documentation included with the software CD.


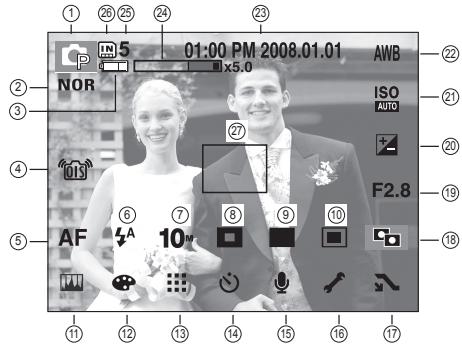
AMOLED monitor indicator
The AMOLED monitor displays information about the shooting functions and selections. Refer to the user manual included on the Software CD for more information.
text_image
1 26 25 24 23 01:00 PM 2008.01.01 AWB ② NOR ISO AUTO ③ 27 F2.8 ④ AF 10 ⑥ ⑦ ⑧ ⑨ ⑩ ⑪ ⑫ ⑬ ⑭ ⑮ ⑯ ⑰ ⑱ ⑲ ⑳ ㉑ ㉒ ㉓ ㉔ ㉕ ㉖ ㉗ ㉘ ㉙ ㉚ ㉛ ㉜ ㉝ ㉞ ㉟ ㉳ ㉴ ㉵ ㉶ ㉇ ㉈ ㉒ ㉓ ㉔ ㉕ ㉖ ㉗ ㉘ ㉙ ㉚ ㉛ ㉜ ㉝ ㉞ ㉟ ⑪ ⑫ ⑬ ⑭ ⑮ ⑯ ⑰ ⑱ ⑲ ⑳ ㉑ ㉒ ㉓ ㉔ ㉕ ㉖ ㉗ ㉘ ㉙ ㉚ ㉛ ㉜ ㉝ ㉞ ㉟ ⑪ ⑫ ⑬ ⑭ ⑮ ⑯ ⑰ ⑱ ⑲ ㉑ ㉒ ㉓ ㉔ ㉖ ㉗ ㉘ ㉙ ㉚ ㉛ ㉜ ㉝ ㉞ ㉟ ⑪ ⑫ ⑬ ⑭ ⑮ ⑯ ⑰ ⑱ ⑲ ㉑ ㉒ ㉓ ㉔ ㉖ ㉗ ㉘ ㉙ ㉚ ㉛ ㉜ ㉝ ㉞ ㉟[Image & Full Status]
| No. | Description | Icons |
| 1 | Recording mode | |
| 2 | Photo Style Selector | NOR /S /V /F /R /CO /CA /CL |
| 3 | Battery | |
| 4 | OIS (Optical Image Stabilization) | |
| 5 | Focus mode | AF |
| 6 | Flash | |
| 7 | Image size | 10- 9m 7- 7m 5- 3- 1- 1280 640 320 |
| 8 | Face detection / Self portrait / Focus Area |
| No. | Description | Icons |
| 9 | Shooting mode | |
| 10 | Metering | |
| 11 | Image adjust | |
| 12 | Effect | |
| 13 | Image quality / Frame rate | |
| 14 | Self-timer | OFF / 60 30 15 |
| 15 | Voice recording / Voice memo / Without Sound | OFF / 1/30 |
| 16 | Setup menu | |
| 17 | Extension menu | |
| 18 | ACB | |
| 19 | Aperture Value | F2.8 |
| 20 | Exposure compensation / Shutter Speed | |
| 21 | ISO | ISO ISO ISO ISO ISO ISO ISO ISO ISO ISO ISO ISO ISO ISO ISO ISO ISO ISO ISO ISO ISO ISO ISO ISO ISO ISO ISO ISO ISO ISO ISO ISO ISO ISO ISO ISO ISO ISO ISO ISO ISO ISO ISO ISO ISO ISO ISO ISO ISO ISO ISO ISO ISO ISO ISO ISO ISO ISO ISO ISO ISO ISO ISO ISO ISO ISO ISO ISO ISO ISO ISO ISO ISO ISO ISO ISO ISO ISO ISO ISO ISO ISO ISO ISO ISO ISO ISO ISO ISO ISO ISO ISO ISO ISO ISO ISO ISO ISO ISO ISO ISOISO ISO ISO ISO ISO ISO ISO ISO ISO ISO ISO ISO ISO ISO ISO ISO ISO ISO ISO ISO ISO ISO ISO ISO ISO ISO ISO ISO ISO ISO ISO ISO ISO ISO ISO ISO ISO ISO ISO ISO ISO ISO ISO ISO ISO ISO ISO ISO ISO ISO ISO ISO ISO ISO ISO ISO ISO ISO ISO ISO ISO ISO ISO ISO ISO ISO ISO ISO ISO ISO ISO ISO ISO ISO ISO ISO ISO ISO ISO ISO ISO ISO ISO ISO ISO ISO ISO ISO ISO ISO ISO ISO ISO ISO ISO ISO ISO ISO ISOISOISOISOISOISOISOISOISOISOISOISOISOISOISOISOISOISOISOISOISOISOISOISOISOISOISOISOISOISOISOISOISOISOISOISOISOISOISOISOISOISOISOISOISOISOISOISOISOISOISOISOISOISOISOISOISOISOISOISOISOISOISOISOISOISOISOISOISOISOISOISOISOISOISOISOISOISOISOISOISOISOISOISOISOISOISOISOISOISOISOISOISOISOISOISOISOISOISOISOISO ISOISOISOISOISOISOISOISOISOISOISOISOISOISOISOISOISOISOISOISOISOISOISOISOISOISOISOISOISOISOISOISOISOISOISOISOISOISOISOISOISOISOISOISOISOISOISOISOISOISOISOISOISOISOISOISOISOISOISOISOISOISOISOISOISOISOISOISOISOISOISOISOISOISOISOISOISOISOISOISOISOISOISOISOISOISOISOISOISOISOISOISOISOISOISOISOISOISOISO ISO ISO ISO ISO ISO ISO ISO ISO ISO ISO ISO ISO ISO ISO ISO ISO ISO ISO ISO ISO ISO ISO ISO ISO ISO ISO ISO ISO ISO ISO ISO ISO ISO ISO ISO ISO ISO ISO ISO ISO ISO ISO ISO ISO ISO ISO ISO ISO ISO ISO ISO ISO ISO ISO ISO ISO ISO ISO ISO ISO ISO ISO ISO ISO ISO ISO ISO ISO ISO ISO ISO ISO ISO ISO ISO ISO ISO ISO ISO ISO ISO ISO ISO ISO ISO ISO ISO ISO ISO ISO ISO ISO ISO ISO ISO ISO ISO ISO 150000000000000000000000000000000000000000000000000000000000000000000000000000000000000000000000000000 |
| 22 | White Balance/Scene mode | AWB / 1/30 |
| 23 | Date / Time | 01:00 PM 2008.01.01 |
| 24 | Optical / Digital Zoom bar / Digital Zoom rate | |
| 25 | Number of available shots remaining | 5 |
| Remaining time (Movie clip / Voice recording) | 00:01:00/01:00:00 | |
| 26 | Memory card icon / Internal memory icon | |
| 27 | Auto focus area |
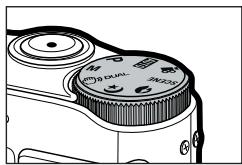
Mode dial
■ You can select the desired shooting mode by using the mode dial on the upper body of your camera.

AUTO
Selects this mode for quick and easy picture taking with minimal user interaction.
In this mode, you can select the basic menus.
To select an advanced menu, select the other camera mode.

PROGRAM
Selecting the automatic mode will configure the camera with optimal settings. You can still manually configure all functions except the aperture value and shutter speed.

MANUAL
The user can manually set both the aperture value and the shutter speed.

DUAL IS
This mode will reduce the effect of camera shake and help you get a well-exposed image in dim conditions.

NIGHT
Use this for shooting still images at night or in other dark conditions.

PORTRAIT
Selecting the portrait mode will configure the camera with optimal settings for portrait photography.
SCENE

Use the menu to easily configure optimal settings for a variety of shooting situations.

MOVIE
For taking a movie.
EN-10


Taking a picture
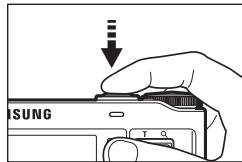
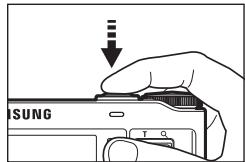
■ How to take a picture
- Turn on the POWER button and then select the desired shooting mode by using the mode dial on the upper body of your camera.
natural_image
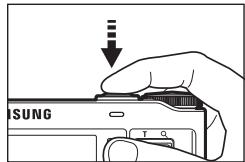
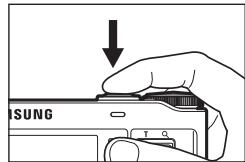
Line drawing of a camera module with no visible text or symbols- Take a picture
text_image
SUNG T QPressing halfway down Focus and Flash status are checked.
text_image
SUNG T CPressing fully Image is taken.
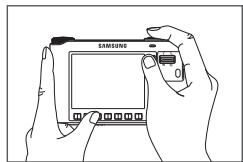
- Hold the camera as shown.
natural_image
Line drawing of two hands holding a Samsung smartphone (no text or symbols on the device screen)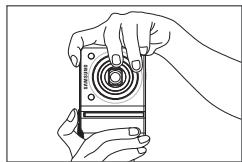
natural_image
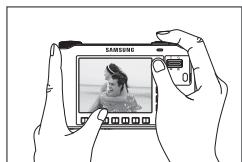
Line drawing of two hands holding a camera lens (no text or symbols)- Confirm the composition.
natural_image
Illustration of hands holding a Samsung digital camera with a photo frame (no text or symbols visible)■ How to record a movie
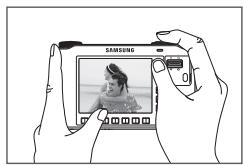
Select the Movie Clip mode by using the mode dial on the upper body of your camera.
- Confirm the composition.
natural_image
Illustration of hands holding a Samsung camera module with a photo frame (no text or symbols visible)- Start the recording.
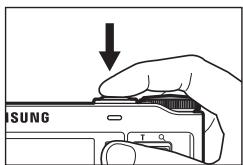
Press the Shutter button and the recording starts and press the Shutter button again to stop the recording
text_image
SUNG T QEN-11
Playingback, Deleting and Protecting Images
■ Playingback the images
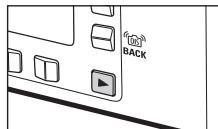
- Select the PLAY mode by pressing the play mode button ( ▶ ).
- The last image stored on the memory is displayed on the AMOLED monitor.
- Touch the button and slide your finger to the left or right to select an image.
※ If you press the ① or ② button, the image will be played back continuously.
text_image
105 BACK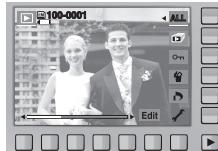
natural_image
G Trinidad and Tobago couple photo with editing interface (no readable text or symbols)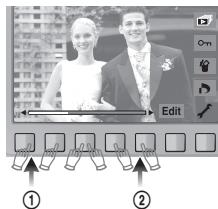
text_image
Edit ① ②■ Deleting images
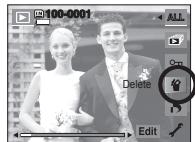
This is used to delete the displayed image.
[YES] : Deletes displayed or checked (√) image.
[NO] : Cancels deleting displayed image or checked (√) image.
- The protected images can't be deleted.
- If you wish to delete multi-image, check to delete the image by using the (√) button and the smart button (horizontal) and then press the [Yes] menu.
- The number of images will be displayed at the bottom right of the AMOLED monitor.
text_image
100-0001 All Delete Edit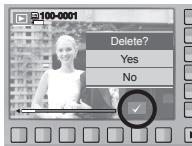
text_image
100-0001 Delete? Yes No
Playingback, Deleting and Protecting Images
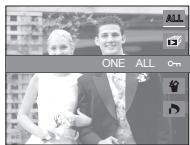
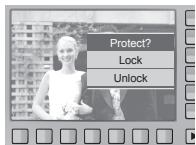
■ Protecting images
This is used to protect (Lock) specific shots from being accidentally erased. It also unprotects (Unlocks) images that have been previously protected.
[ONE] : Protect / release displayed image.
[ALL] : Protect / release all saved images.
text_image
ONE ALL On- If you protect an image, the protect icon will be displayed on the AMOLED monitor. (An unprotected image has no indicator)
- An image in LOCK mode will be protected from the delete function, but will NOT be protected from the format function.
text_image
Protect? Lock Unlock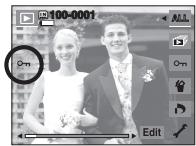
text_image
100-0001 0m EditUsing the remote control
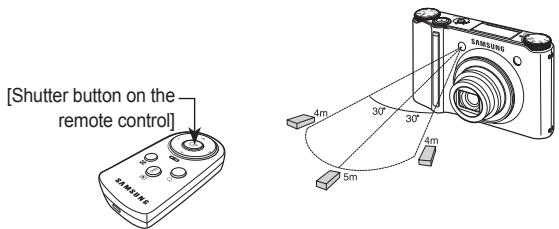
■ Remote control range
When you take a picture by using the remote control, refer to the illustrations shown alongside about the remote control range.
text_image
[Shutter button on the remote control]■ Replacing battery for the remote control
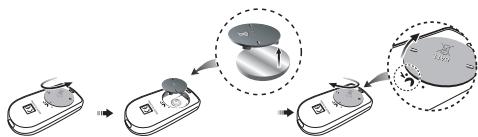
Make sure the + (positive) polarity is toward the top and the - (negative) polarity is toward the bottom while installing battery for the remote control. Replace battery for the remote control in the local service centre. Use the CR 2025 3V battery.
flowchart
graph TD
    A["Device Input"] --> B["Step 1"]
    B --> C["Step 2"]
    C --> D["Output"]
    D --> E["Magnified Area: Top Left, Bottom Right"]
EN-14
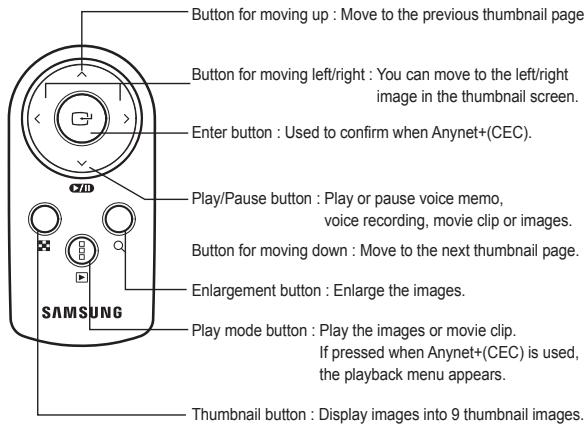
■ Using the remote control in play mode
You can play the movie clip and images by remote control.
text_image
Button for moving up : Move to the previous thumbnail page. Button for moving left/right : You can move to the left/right image in the thumbnail screen. Enter button : Used to confirm when Anynet+(CEC). Play/Pause button : Play or pause voice memo, voice recording, movie clip or images. Button for moving down : Move to the next thumbnail page. Enlargement button : Enlarge the images. Play mode button : Play the images or movie clip. If pressed when Anynet+(CEC) is used, the playback menu appears. Thumbnail button : Display images into 9 thumbnail images.
Connecting to the HDTV using the HDMI cable
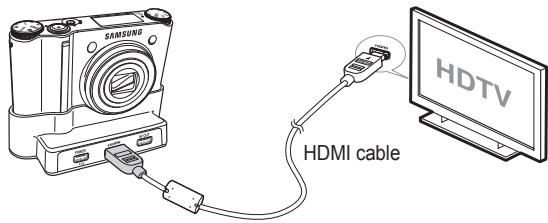
■ How to connect the camera with the HDTV
Connect the cradle with the HDTV by using the HDMI cable to the HDMI connection ports.
text_image
SAMSUNG HDMI cable HDTV■ Setting the HDMI resolution
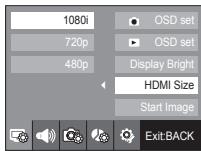
When the camera is connected with the HDTV, you can select image size that is compatible with the HDTV. The image size are [1080i], [720p], [480p] and [576p]. Only when [480p] is set to [NTSC] and [576p] is set to [PAL], those resolutions will be displayed in the menu.
text_image
1080i 720p 480p OSD set OSD set Display Bright HDMI Size Start Image ExitBACK
- HDMI (High Definition Multimedia Interface) is a function that allows transferring the recorded images without compression by using the HDMI cable. You can see the images in a high resolution in the HDTV.
- When Anynet+(CEC) is used and HDMI resolution is set to 480p or 576p, it is only available to play back the image, movie clip, voice.
- If the selected HDMI resolution is not supported by HDTV, the clear image can not be shown in the screen.
- If you try to select the HDMI resolution that is not supported by HDTV, the resolution is adjusted to the maximum resolution of the HDTV. For example, if you select “1080i” when the HDTV supports the “720p” by the maximum resolution, it is adjusted to “720p.”
- You can playback the normal resolution of the movie clip as well.
- You can not connect HDMI to HDTV which is not supported. Please check up the specification of HDTV before connecting it.
- For more information of the HDTV connection, see the user manual of the HDTV.

Connecting to the HDTV using the HDMI cable
■ Using the Anynet+(CEC)
Anynet+(CEC) is an AV network system which controls over all your connected SAMSUNG AV devices when using the TV remote control that supports Anynet+. When connected to the SAMSUNG HDTV, you can operate the playback functions by using the camera or the TV remote control.
- Connect the cradle with the HDTV by using the HDMI cable to the HDMI connection ports while the camera is connected to the cradle.
- TV turns on as soon as the power button is pressed on the camera.
- If there is no picture after turning on the TV, press the source button on the TV remote control to change to the HDMI mode.
- Depending on the TV, it might not change to the HDMI mode although you press the source button.
- Press the Anynet+ button on the TV remote control.
EN-16
- Playback menu appears in the TV screen when you press the menu button on the TV remote control. (Or the playback button on the camera's remote control).
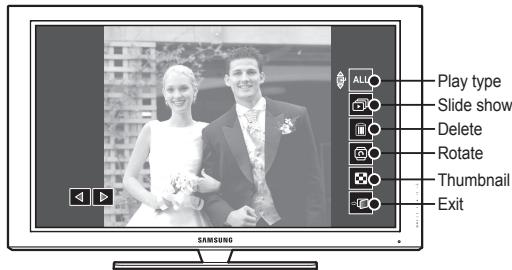
text_image
Play type Slide show Delete Rotate Thumbnail Exit※ The playback menu appearing on TV screen operates the same function of the camera.
6. Select the desired playback function by using the remote control of the TV or the camera.
※ To select the sub menus, move to the desired playback menu and then press the Enter button.

- Only available when using the TV that supports Anynet+(CEC). (Not available by using TV that supports Anynet)
- As soon as you connect the camera with the cradle(with the camera's power turned on), the playback menu appears in the TV screen. (Available when the cradle and the TV are already connected.)
- For more detailed information of the HDTV connection, see the user manual of HDTV.


Downloading images
■ System Requirements
| For Windows | For Macintosh |
| PC with processor better than Pentium III 450MHz (Pentium 800MHz recommended) | Power Mac G4 or later |
| Windows 98SE/2000/ME/XP/Vista | Mac OS 10.2 or later |
| 250MB of available hard-disk space (1GB recommended) | 250MB of available hard-disk space |
| Minimum 128MB RAM (512MB recommended) | Minimum 256MB RAM (256MB recommended) |
| USB port | USB port |
| CD-ROM drive | CD-ROM drive |
| 1024x768 pixels, 16-bit color display compatible monitor (24-bit color display recommended), Microsoft DirectX 9.0 or later |
■ QuickTime Player 7.4 : H.264(MPEG4.AVC) playback Requirements
| For Windows | For Macintosh |
| Intel Pentium 4, 3.2GHz or later / AMD Athlon 64FX, 2.6GHz or later | 1.8GHz Power Mac G5 or 1.83 GHz Intel Core Duo or later Macintosh |
| Windows XP service pack2/Vista | |
| Minimum 512MB RAM (1GB recommended) | Minimum 256MB RAM (1GB recommended) |
| nVIDIA Geforce 7600GT or later / ATI X1600 series or later | 64MB video card |
■ PC connection mode
- Install the supplied Software.
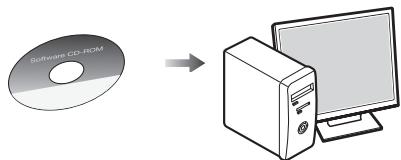
text_image
CD-ROM →- Download the images.
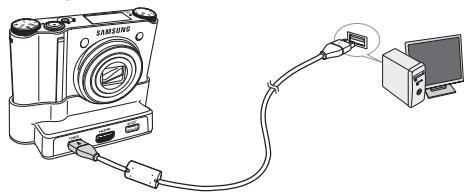
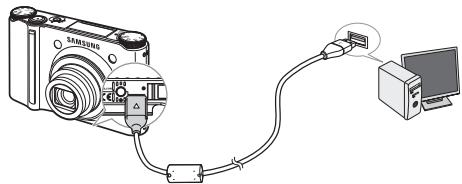
Connect the camera and Computer with supplied USB cable and download the image on your computer to save them.
When using the cradle
natural_image
Diagram of a Samsung camera connected to a computer via cable (no text or symbols present)When the cradle is not used
natural_image
Diagram of a digital camera connected to a computer via cable (no text or symbols present)Specifications
| Image Sensor | - Type : 1/2.3" CCD- Effective Pixel : Approx. 10.20 Mega-pixel- Total Pixel : Approx. 10.30 Mega-pixel |
| Lens | - Focal Length : Schneider Lens f = 4.3 ~ 15.5mm(35mm film equivalent : 24~86.5mm)- F No. : F2.8(W) ~ F5.9(T)- Digital Zoom : · Still Image mode : 1.0X ~ 5.0X· Play mode : 1.0X ~ 11.4X(depends on image size) |
| AMOLED Monitor | - 2.5" AMOLED (230,000 pixel) |
| Focusing | - Type : TTL auto focus (MULTI AF, CENTER AF, SELF PORTRAIT, FACE DETECTION )- Range |
| Focus Type | Normal | Macro | Auto Macro |
| Wide (W) | 40cm ~ Infinity | 5cm ~ 40cm | 5cm ~ Infinity |
| Tele (T) | 80cm ~ Infinity | 50cm ~ 80cm | 50cm ~ Infinity |
| Shutter | - Speed : AUTO : 1 ~ 1/2,000 sec.MANUAL : 16 ~ 1/2,000 sec.NIGHT : 8 ~ 1/2,000 sec.FIREWORKS : 4 sec. | ||
| Exposure | - Control : AE, Manual Exposure- Metering : CENTER, SPOT, MULTI, FACE DETECTION- Compensation : ±2EV (1/3EV steps)- ISO Equivalent : Auto, 80, 100, 200, 400, 800, 1600, 3200 (image size of 3200 is fixed as 3M) | ||
EN-18
| Flash | - Modes : RED EYE FIX, SLOW SYNC, FILL IN,RED EYE, AUTO, OFF- Range : Wide : 0.4m~5.6m, Tele : 0.5m~2.8m (ISO Auto)- Recharging Time : Approx. 5 sec. |
| Shake Reduction | - Dual IS (OIS + DIS)* OIS (Optical Image Stabilization), DIS (Digital Image Stabilization) |
| Effect | - Effect :· Photo Style Selector : NORMAL, CLASSIC, CALM,COOL, RETRO, FOREST, VIVID,SOFT· Color Effect : NEGATIVE, GREEN, RED, BLUE, SEPIA,B & W· Image Adjust : CONTRAST, SATURATION,SHARPNESS- Edit :· Image Edit : ROTATE, RESIZE, EFFECT· Color Effect : NEGATIVE, GREEN, RED, BLUE, SEPIA,B & W· Special Color : ADD NOISE, ELEGANT, SHADED,COLOR FILTER· Image Adjust : SATURATION, CONTRAST,BRIGHTNESS, ACB, RED EYE FIX |
| White Balance | - Auto, Daylight, Cloudy, Fluorescent_H, Fluorescent_L,Tungsten, Custom |
| Voice Recording | - Stereo- Voice Recording (Max 10 hour)- Voice Memo in Still Image (Max. 10 sec.) |


Specifications
Shooting
- Still Image :
· Modes : AUTO, PROGRAM, MANUAL, DUAL IS, NIGHT, PORTRAIT, SCENE
- Scene : SMILE SHOT, BLINK DETECTION, CHILDREN, LANDSCAPE, CLOSE-UP, TEXT, SUNSET, DAWN, BACKLIGHT, FIREWORKS, BEACH & SNOW, SELF-SHOT, FOOD, CAFÉ
· Continuous : AEB, M. CAPTURE, HIGH SPEED, CONTINUOUS, SINGLE
· Self-timer : REMOTE, DOUBLE, 2 SEC, 10 SEC
- Movie Clip :
· With Audio or without Audio (Max Recording time : 25min)
· Size : 1280x720, 640x480, 320x240
· Frame rate : 60 FPS, 30 FPS, 15 FPS
· 3.6X Optical Zoom and Mute in Zooming (Sound goes mute when operating the zoom function)
- Movie Editing (Embedded) :
Pause during recording, Still Image Capture, Time Trimming
Storage
- Media
· Internal Memory : About 16MB
· External Memory (Optional) :
SD (up to 4GB guaranteed)
SDHC Card (up to 8GB guaranteed)
MMC Plus (Up to 2GB, 4bit 20MHz)
* Internal Memory capacity is subject to change without prior notice.
- File Format :
· Still Image : JPEG (DCF), EXIF 2.21, DPOF 1.1, PictBridge 1.0
· Movie : MP4 (H.264(MPEG4.AVC))
· Audio : WAV
- Image Size and Capacity (256 MB Size)
| 10^M | 9^M | 7^M | 7^M | 5^M | 3^M | 1^M | |
| 3648x2736 | 3648x2432 | 3072X2304 | 3648x2056 | 2592x1944 | 2048x1536 | 1024x768 | |
| SUPER FINE | 49 | 55 | 68 | 64 | 93 | 143 | 418 |
| FINE | 94 | 105 | 129 | 122 | 173 | 255 | 617 |
| NORMAL | 136 | 151 | 183 | 174 | 242 | 345 | 732 |
※ These figures are measured under Samsung's standard conditions and may vary depending on shooting conditions and camera settings.
| Image Play | - Type : Single image, Thumbnails, Slide show* SLIDE SHOW: with selected Effect & Music by folders |
| Interface | - Digital output connector : USB 2.0 (30pin)- Audio output : Mono(Internal Speaker), Stereo(Microphone)- Video output : Stereo OutputAV: NTSC, PAL (user selectable), HDMI 1.2 : NTSC, PAL (user selectable)* Remarks: HDMI function is available when connected to the cradle(optional).- DC power input connector : New 30 pin Connector, 4.2V |
| Power Source | - Rechargeable battery : SLB-1137D (1,100mAh)- Adaptor : SAC-47, SUC-C4- Cradle : SCC-NV4HD (Optional)* Included battery may depending on sales region. |
Specifications
| Dimensions (WxHxD) | - 98.5 x 61 x 18.95mm |
| Weight | - 145.5g (without batteries and card) |
| Operating Temperature | - 0 ~ 40°C |
| Operating Humidity | - 5 ~ 85% |
| Software | - Samsung Master, QuickTime Player 7.4, Adobe Reader |
※ Specifications are subject to change without prior notice.
※ All trademarks are the property of their respective owners.
Correct Disposal of This Product
Correct Disposal of This Product (Waste Electrical & Electronic Equipment)
(Applicable in the European Union and other European countries with separate collection systems) This marking shown on the product or its literature, indicates that it should not be disposed of with other household wastes at the end of its working life.
To prevent possible harm to the environment or human health from uncontrolled waste disposal, please separate this from other types of wastes and recycle it responsibly to promote the sustainable reuse of material resources. Household users should contact either the retailer where they purchased this product, or their local government office, for details of where and how they can take this item for environmentally safe recycling. Business users should contact their supplier and check the terms and conditions of the purchase contract. This product should not be mixed with other commercial wastes for disposal.

text_image
eco RoHS compliantSamsung Techwin cares for the environment at all product manufacturing stages to preserve the environment, and is taking a number of steps to provide customers with more environment-friendly products. The Eco mark represents Samsung Techwin's will to create environment-friendly products, and indicates that the product satisfies the EU RoHS Directive.

Correct disposal of batteries in this product
(Applicable in the European Union and other European countries with separate battery return systems.)
This marking on the battery, manual or packaging indicates that the batteries in this product should not be disposed of with other household waste at the end of their working life. Where marked, the chemical symbols Hg, Cd or Pb indicate that the battery contains mercury, cadmium or lead above the reference levels in EC Directive 2006/66. If batteries are not properly disposed of, these substances can cause harm to human health or the environment.
To protect natural resources and to promote material reuse, please separate batteries from other types of waste and recycle them through your local, free battery return system.
The rechargeable battery incorporated in this product is not user replaceable. For information on its replacement, please contact your service provider.
MEMO
EN-22

text_image
eco RoHS compliantnatural_image
Close-up of a camera's dual-lens and dual-off caliper (no text or symbols visible)natural_image
Line drawing of two hands holding a Samsung smartphone (no text or symbols visible)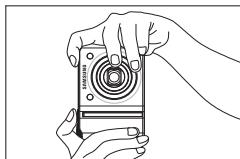
natural_image
Line drawing of two hands holding a camera lens (no text or symbols)natural_image
Illustration of hands holding a Samsung digital camera with a photo frame (no text or symbols visible)- Prenez la photo
text_image
T Q Tnatural_image
Illustration of hands holding a Samsung camera module with a photo frame (no text or symbols visible)text_image
Screenshot of a photo editing interface showing a couple photo with editing tools and selection handles below①
②
text_image
3MM2000 4m 30° 30° 4m 5mnatural_image
Diagram of a smartphone connected to a computer via cable (no text or symbols present)natural_image
Diagram of a digital camera connected to a computer via cable (no text or symbols present)Caractéristiques
text_image
eco RoHS compliantnatural_image
Line drawing of a camera module with no visible text or symbolsnatural_image
Line drawing of two hands holding a Samsung smartphone (no text or symbols visible)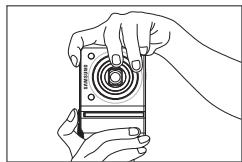
natural_image
Line drawing of two hands holding a camera module (no text or symbols)natural_image
Illustration of hands holding a Samsung digital camera with a photo frame (no text or symbols visible)- Tome una fotografía
text_image
SUNG T Qnatural_image
Illustration of hands holding a Samsung camera module with a photo frame (no text or symbols visible)natural_image
G Trinidad and Tobago couple photo with editing interface (no readable text or symbols)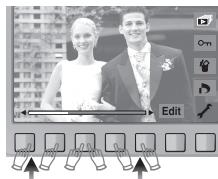
text_image
Screenshot of a photo editing interface showing a couple photo with editing tools and selection handles below①
②
text_image
100-0001 ELIMINAR Edit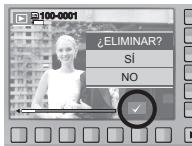
text_image
100-0001 ¿ELIMINAR? SI NO
flowchart
graph TD
    A["Device Insert"] --> B["Rotating"]
    B --> C["Close-up of Device"]
    C --> D["Close-up of Device"]
    D --> E["Final Close-up"]
natural_image
Diagram of a Samsung camera connected to a computer via cable (no text or symbols present)natural_image
Diagram of a digital camera connected to a computer via cable (no text or symbols present)
Especificaciones