IFM-955D - Household Fan Imarflex - Free user manual and instructions
Find the device manual for free IFM-955D Imarflex in PDF.


| Product Type | Domestic Pedestal Fan |
| Brand | Imarflex |
| Model | IFM-955D |
| Dimensions (H x W x D) | Approx. 130 cm x 45 cm x 45 cm |
| Weight | About 5 kg |
| Power Source | 220-240 V ~ 50 Hz |
| Power Consumption | 50 W |
| Speed Settings | 3 speeds (Low, Medium, High) |
| Oscillation | Yes, wide-angle oscillation |
| Timer Function | Yes, up to 7 hours |
| Remote Control | Included, battery-operated |
| Blade Diameter | 16 inches (approx. 40 cm) |
| Height Adjustable | Yes, telescopic pole |
| Safety Features | Overheat protection, anti-tip base |
| Cleaning & Maintenance | Wipe with damp cloth; do not immerse in water |
| Spare Parts | Available through authorized service centers |
| Reparability | Repairable by qualified technician; user-replaceable fuse |
| Certifications | CE, RoHS compliant |
Frequently Asked Questions - IFM-955D Imarflex
User questions about IFM-955D Imarflex
0 question about this device. Answer the ones you know or ask your own.
Ask a new question about this device
Download the instructions for your Household Fan in PDF format for free! Find your manual IFM-955D - Imarflex and take your electronic device back in hand. On this page are published all the documents necessary for the use of your device. IFM-955D by Imarflex.
USER MANUAL IFM-955D Imarflex
3YEAR MOTOR
WARRANTY

imarflex®
In Every Home.
www.imarflex.com
natural_image
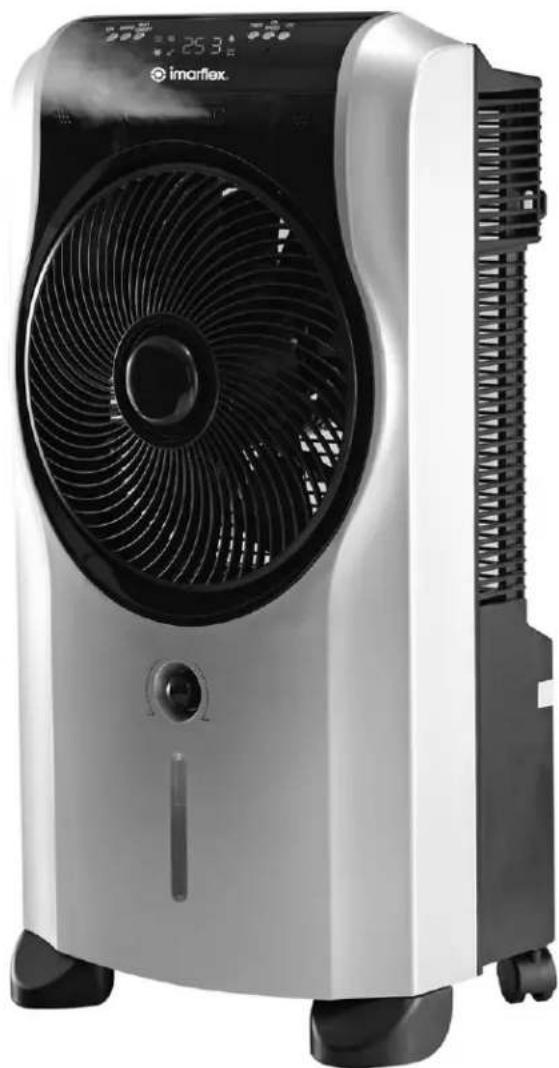
Exterior view of a modern office air conditioner unit (no signage)IFM-955D
SPECIFICATION
MODEL NO. : IFM-955D
RATED VOLTAGE : 230Va.c. 60Hz
POWER CONSUMPTION : 60watts
Important Safeguards
When using electrical appliances, basic safety precautions should always be followed, including the following:
- Read all instructions carefully before use.
- Check the condition of the unit after taking out from the box. Ensure that all parts are in good condition.
- Before using the unit, check if the voltage indicated corresponds with the convenience outlet (230Va.c.).
- Do not use any appliance with a damaged cord or plug. If the cord is damaged it should be replaced with the same type and size or bring the unit to the nearest authorized service center.
- Do not attempt to repair, adjust or replace parts in the unit. It must be checked and repaired by an authorized lmarflex technician or by similar qualified persons in order to avoid electric hazard.
- Do not place the unit near gas stove or electric stove.
- Children should be supervised to ensure that they do not play with the appliances.
- This appliance is not intended for use by person (including children) with reduced physical sensory or mental capacities or lack of experience and knowledge, unless that have given supervision or instruction concerning use of the appliances by person responsible for their safety.
- This unit must only be used for room ventilation. Do not use in bathrooms.
- Do not insert any object into the Fan Guard.
- Do not use the plug to stop or start the operation of the unit, it may damage the appliance.
- To prevent electric shock do not operate the unit by wet hands.
- For household use only, not intended for any business purposes.
- Save this instruction manual for future reference.
Introduction
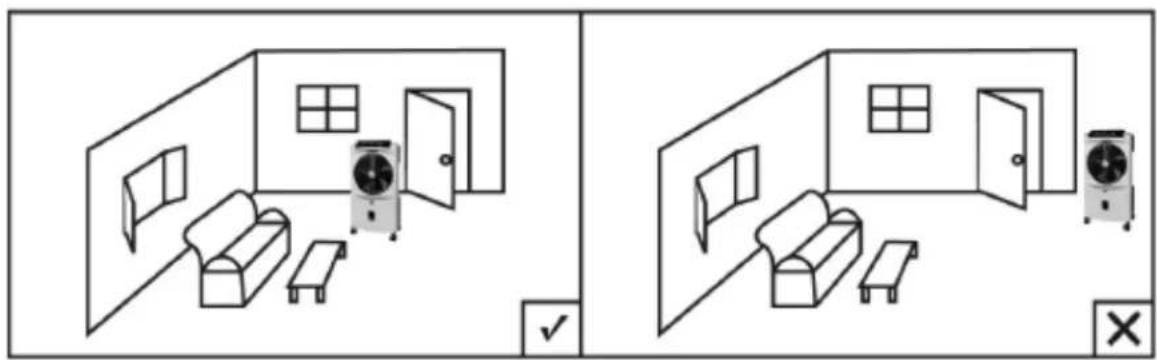
For the best performance of your Mist Fan, it should be filled with water, and ice if available, and positioned in a location that will create a ‘flow through’ air effect. The greatest cooling effect will be felt if the unit is operated in a partly opened doorway or window with the cooled air directed into the room. It is also important to have a door or window partly opened away from the air cooler, in order to create the flow through’ effect.
natural_image
Two-panel line drawing showing room layouts with furniture and appliances, no text or symbols present.DESCRIPTION OF PARTS
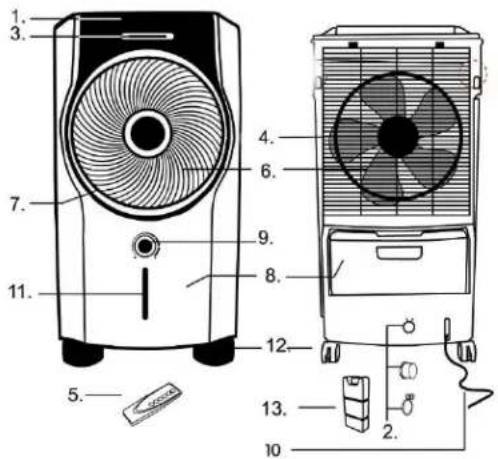
- Control Panel
- Drainage
- Mist Outlet/Vent
- Rear Fan Guard
- Remote Control
6.Blade
7.Front Fan Guard
8.Water Tank - Adjustable Mist Control
- Power Cord
- Water Level Indicator
- Stand/Wheels
- Ice Pack
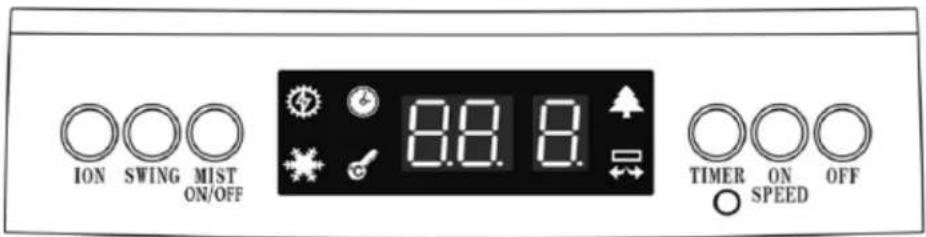
CONTROL PANEL
Remote Control
HOW TO USE
- Plug the unit into the convenience outlet.
Set the fan on a flat surface. The power indicator will appear on the display.
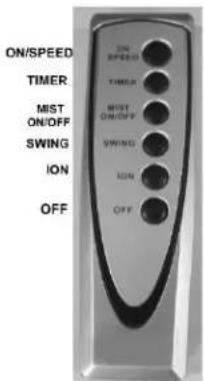
- Press ON/SPEED Button to turn ON. The Fan will automatically start in the medium speed.
NOTE: This button will only activate the fan, not the Mist Function.
- Press ON/SPEED BUTTON to set the desired speed.
Each time the button is pressed, the speed increases from low to medium, then medium to high. The desired Speed will appear on the display.
-
This icon will be lighted and the room temperature will appear on the display
-
TO SET THE TIMER: Press the TIMER BUTTON repeatedly to choose the desired number of hours. The timer can be set up to 10 hours; set time will appear on the display and timer indicator will be lighted. From the set time, it will count down until it turns OFF.
NOTE: The set time and room temperature will alternately appear on the display.
- Press the MIST Button to switch ON and OFF the Mist Function, once turned ON the

Icon will be lighted. Adjust the mist by turning the Mist Control to desired mist setting.
NOTE:
a. Even the fan is turned OFF, the Mist will still be working unless Mist Button is turned OFF.
b. The unit will not function without the water tank.
c. Make sure that the Water Tank is filled with water before using the Mist Function.
d. Never place any object that may block the mist vent.
e. Refill the Water Tank if there's no more mist coming out in the vent.
-
Press the ION BUTTON to activate the IONIZER function, this 📁 icon will be lighted when it is activated. The ionizer introduces negative ions into the air that works to purify the air in the room. Press this button again to turn OFF.
-
The SWING Button provides you the choices of fixed or swing airflow. The icon

will be lighted when the function is switched ON. Press this button again, to turn OFF.
How to Use the Mist Function
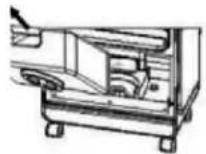
- Remove the Water Tank (see pic 1).
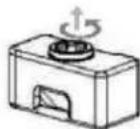
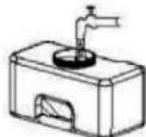
- Fill the Water Tank (8) up to the max level indicator (see pic.2 & 3).
- Return Water Tank into the unit and press the Mist Button (see pic.4).
Pic 1
Pic 2
Pic 3
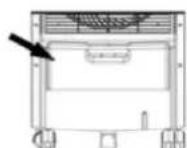
Pic 4
How to Use the Ice Pack
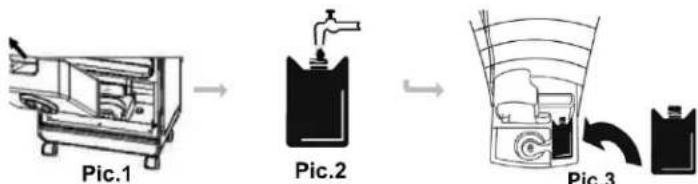
- Remove the Water Tank (see pic 1).
- For initial use Shake well to mix the gel and water. (See pic.2) Remove and fill the Ice Pack with water, then freeze for overnight.
- Return the frozen Ice Pack and the Water tank into the unit and press the mist (see pic.3).
NOTE:
- Once the Ice pack is filled with water reusable; do not change the water and contents of the pack.
- Do not consume the contents of the pack.
- Children should be supervised to ensure that they do not play with the Ice Pack.
TIP:
Make sure that the Ice Pack is completely frozen to enhance cooling effect.
CLEANING AND MAINTENANCE
- Always unplug the unit from the convenience outlet after every use.
- Do not use abrasive materials to avoid scratches, use only damp cloth.
- Use vacuum cleaner, if possible, for easy cleaning of the blade and back portion of the unit.
Drainage
- Remove the drainage cap to discard the remaining water in the basin. Make sure the Drainage plug (5) (rear side of the unit) is secured and locked tight before filling and after draining.
- Use only clean water in tank and drain away water which has been in the basin for more than 3 days.
Brand : Imarflex
Model : IFM-955D
Category : Household Fan