X200 - Hi-Fi System Vankyo - Free user manual and instructions
Find the device manual for free X200 Vankyo in PDF.


| Product Type | Hi-Fi System |
| Brand | Vankyo |
| Model | X200 |
| Dimensions (W x D x H) | Approx. 40 x 25 x 15 cm |
| Weight | Approx. 5 kg |
| Power Supply | AC 100-240V, 50/60 Hz |
| Power Consumption | 30 W (max) |
| Bluetooth Version | 5.0 |
| Supported Audio Inputs | Bluetooth, AUX, USB, FM Radio |
| Speaker Configuration | 2.0 Stereo |
| Output Power (RMS) | 20 W (2 x 10 W) |
| Frequency Response | 60 Hz - 20 kHz |
| Remote Control | Yes (included) |
| Radio Band | FM |
| USB Playback | MP3, WMA (max 32 GB) |
| Maintenance | Wipe with a soft, dry cloth |
| Safety | Keep away from water and heat sources |
| Repair / Spare Parts | Contact Vankyo customer support |
Frequently Asked Questions - X200 Vankyo
User questions about X200 Vankyo
0 question about this device. Answer the ones you know or ask your own.
Ask a new question about this device
Download the instructions for your Hi-Fi System in PDF format for free! Find your manual X200 - Vankyo and take your electronic device back in hand. On this page are published all the documents necessary for the use of your device. X200 by Vankyo.
USER MANUAL X200 Vankyo
natural_image
Line drawing of an open and closed device case with two circular components (no text or symbols)Please read this manual carefully before use and keep it well for future reference.
CONTENTS
IMPORTANT 01
CAUTIONS 01
PACKING LIST 02
OVERVIEW 03
CHARGE 05
POWER ON 07
TWO EARBUDS PAIRING 08
CONNECT AND DISCONNECT WITH A MOBILE DEVICE 09
FIT THE EARBUD INTO YOUR EAR 10
FUNCTIONS OF EARBUDS 11
POWER OFF 13
REPLACE THE EAR TIP 14
CHARGING CASE USED AS A POWER BANK 15
SPECIFICATIONS 16
IMPORTANT »
* For pairing steps with mobile device, please refer to page 09-10. If you need any further assistance, please contact us at support@ivankyo.com (US&CA)/support.uk @ivankyo.com (UK) according to your country.
CAUTIONS)
- Do not try to disassemble the product by yourself, please contact VANKYO for more help.
- Do not use the product in high temperature, and near heat or fire.
- Please use the USB cable provided to charge the product.
- Please keep the earbuds out of the reach of children to avoid choking hazard for the small parts contained in the product.
- Long exposure to loud volume may cause hearing damage. It's advised you adjust the volume to a proper level for use.
- For your safety, it's not recommended to wear the earbud(s) when driving as it may result in distractions.
- Please pay attention to the surroundings when you use the product in case of potential risks.
PACKING LIST »
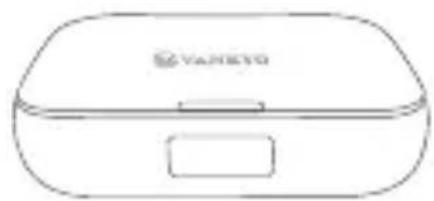
natural_image
Line drawing of a rectangular electronic device labeled 'YANETO' (no additional text or symbols)Charging Case

natural_image
Two identical abstract circular shapes with concentric rings and small dots at the bottom (no text or symbols)Wireless Earbuds

natural_image
Simple line drawing of a cable with two connectors (no text or symbols)USB Cable

Micro USB to USB Adapter

Spare Ear Tip Set (Sx2, Mx2, Lx2)

User Manual
Note:
If any part of your product is damaged or missing, please contact VANKYO customer service.
OVERVIEW)
Charging Case

1 Opening Slot
② Micro USB Charging Port
③ Charging Slot for the Left Earbud
4 Left Earbud
5 LED Display
6 Right Earbud
7 Charging Slot for the Right Earbud
LED Display
Battery Percentage of the Charging Case

Battery Level Indicator of the Left Earbud
Battery Level Indicator of the Right Earbud
* The LED Display will be off if there is no operation on the product. Just open or close the case to turn it on again.
Earbud

CHARGE)
Please charge the Charging Case and earbuds at your first use with the USB Cable provided.
Charge the Charging Case
- Connect the USB Cable into the Micro USB Charging Port on the Charging Case.
- Connect the other end into a USB wall charger or a compatible adapter with 5V/1A DC in. It takes around 4 hours to reach a full charge.

natural_image
Line drawing of a battery connected to a power outlet (no text or symbols)Charging:
The second number of the percentage keeps flashing.

Fully Charged:
The percentage reaches 100%.
Charge the Earbuds
The earbuds will be charged while they are in the Charging Case.
Step 1:
Align the Charging Pins on the earbud with the Charging Pins on the Charging Slot in the case.
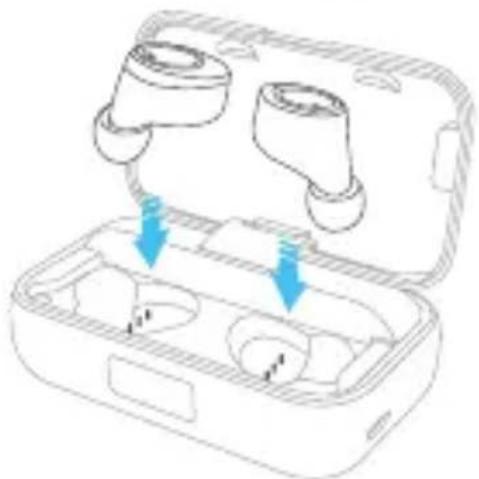
natural_image
Line drawing of a wireless earbuds with two charging case open, showing internal components and blue arrows indicating ports (no text or symbols)Step 2:
Place the earbud into the case until it magnetically snaps into the Charging Slot.
Step 3:
Close the Charging Case.
Charging:
The Battery Level Indicator will keep flashing.

Fully Charged:
The Battery Level Indicator reaches 4 levels.
(1 level indicates 25% power.)

POWER ON)
Option 1:
The earbuds will be powered on automatically once you open the cover of the Charging Case. The LED Indicator will flash blue for 3-5 times, indicating that the earbuds are powered on successfully.
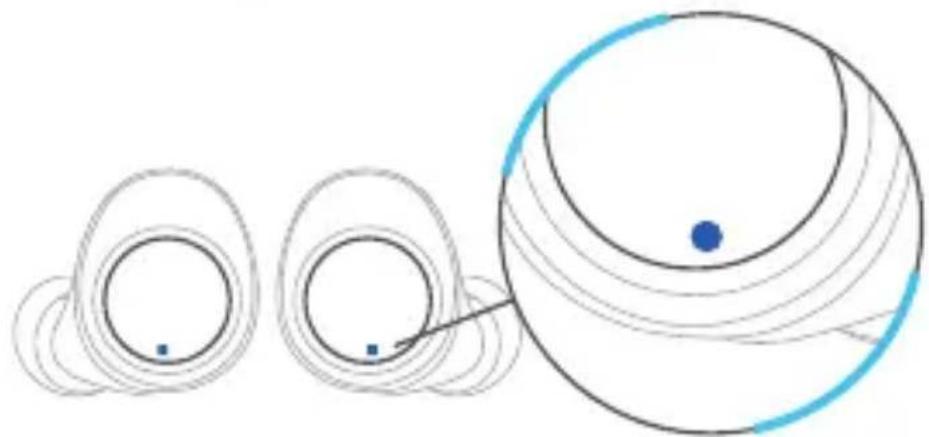
natural_image
Diagram showing three circular objects with a blue dot and a curved line, connected by a line (no text or symbols)Option 2:
When the earbud is in power-off status, please tap and hold the Touchpad for 5s to power on. You will hear a beep from the earbud.

natural_image
Hand interacting with a circular button (no text or symbols visible)Note:
To hear the beep, please make sure you are wearing the earbuds.
TWO EARBUDS PAIRING »
After the earbuds are powered on, the LED Indicators of earbuds will flash pink and blue quickly for 4 times to pair with each other automatically.
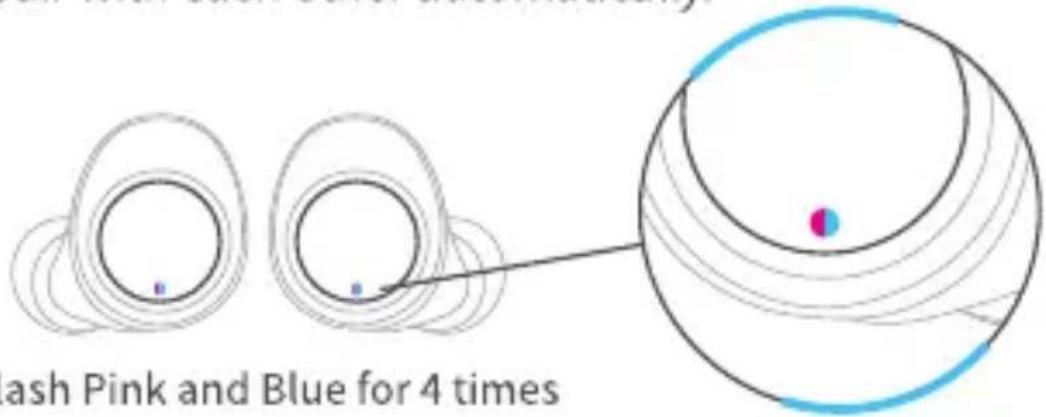
Wait for around 3s, the LED Indicator of either earbud will flash red and blue alternatively and slowly, which indicates that the earbuds have been paired successfully and are ready to connect to a mobile device.
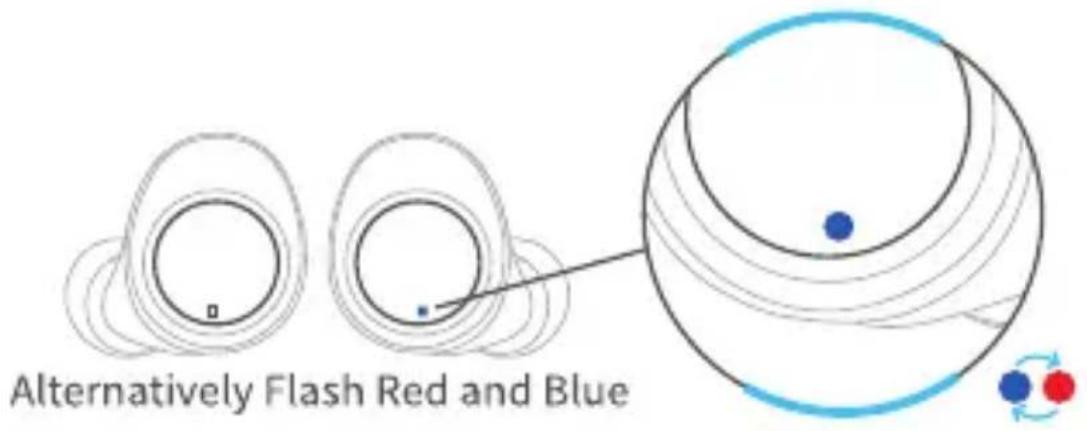

Tip:
If the earbuds' automatic pairing fails, please tap twice on both earbuds to manually pair the earbuds.
CONNECT AND DISCONNECT WITH A MOBILE DEVICE »
Connect
Turn on the Bluetooth on your device, search and connect to Alpha X200.
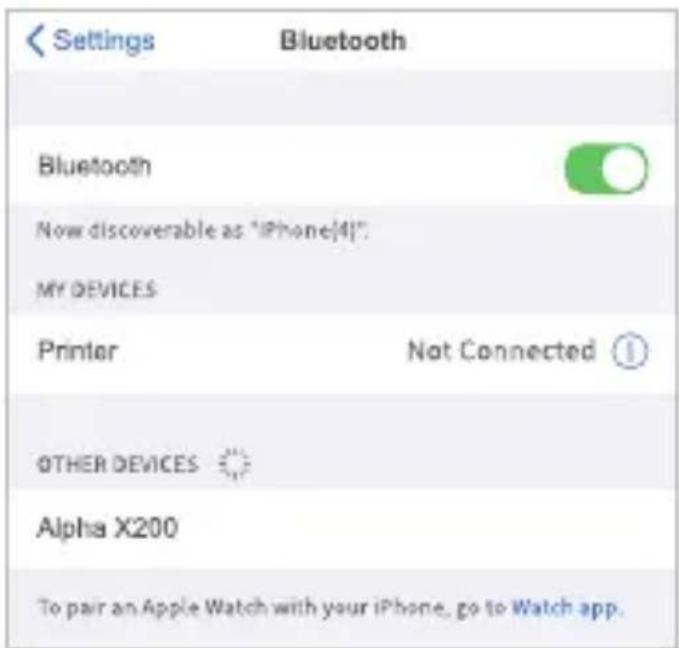
The LED Indicator on the earbud will be off and there is one beep from your earbuds if the connection is successful.
Notes:
1 The earbuds will be automatically powered off if they are not connected with any device within 3 mins.
2 If the bluetooth is disabled on your device or you turned off the earbuds, it will take around 10s to automatically reconnect the earbuds with the device after you enable the bluetooth or turn on the earbuds again.
Disconnect
Go to the Bluetooth interface of your mobile device, select Alpha X200 and Disconnect/Unpair to disconnect the earbuds.
-
Insert the earbud gently so the ear tip can rest in the opening of the ear canal.
-
Gently and slowly adjust the earbud until it securely and firmly fits in your ear.

FUNCTIONS OF EARBUDS)
Volume
 Volume+ Volume+ | Tap and hold the Touchpad of the Right Earbud until you get the desired volume |
 Volume- Volume- | Tap and hold the Touchpad of the Left Earbud until you get the desired volume |
Music
 Play/Pause Play/Pause | Tap the Touchpad of either earbud once |
 Next Next | Tap the Touchpad of the Right Earbud twice |
 Previous Previous | Tap the Touchpad of the Left Earbud twice |
Call
 Accept Accept | Tap the Touchpad of either earbud twice |
 End End | Tap the Touchpad of either earbud twice |
 Decline Decline | Tap and hold the Touchpad of either earbud for 3s |
 End & Accept End & Accept | Tap the Touchpad of either earbud once |
 Hold & Accept Hold & Accept | Tap and hold the Touchpad of either earbud for 5s |
 Swap Swap | Tap and hold the Touchpad of either earbud for 5s |
Activate Voice Control
Tap the Touchpad of either earbud for three times to wake up Siri or Google Assistant, then you can speak to your device.
Note:
Please use the earbuds near the device connected.
POWER OFF)
Option 1:
Place the earbuds into the Charging Case to power off.

natural_image
Line drawing of a wireless earbuds box with blue arrows indicating ports or connections (no text or symbols)Option 2:
Tap and hold the Touchpad for 6s to power off.
Tip:
In music mode, pause the music firstly, then tap and hold the Touchpad for 6s to turn off.

natural_image
Hand interacting with a circular button, no text or symbols presentOption 3:
The earbuds will be powered off if it is not connected to a device within 3mins after powering on.
REPLACE THE EAR TIP »
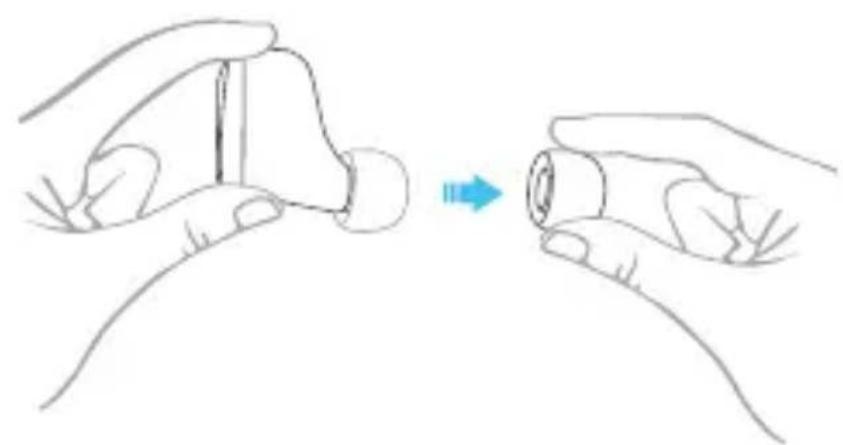
We have pre-assembled the ear tip on the earbuds. If the size doesn't fit you, please take off the original ear tip on the earbud, then replace it with the new one we provided in the package.
natural_image
Illustration of two hands holding a small object with a blue arrow indicating motion (no text or symbols)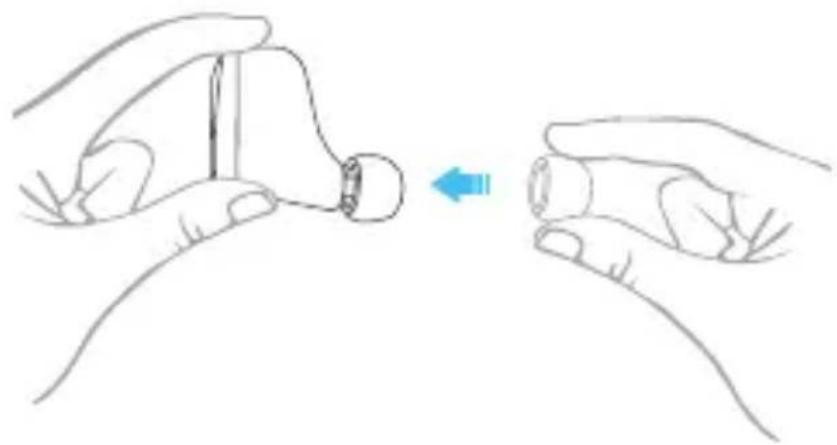
natural_image
Illustration of two hands performing a finger manipulation technique, showing a blue arrow indicating the process (no text or symbols present)CHARGING CASE USED AS A POWER BANK »
You can use the Charging Case to charge your mobile devices.
Step 1:
Connect the Micro USB to USB Adapter into the Micro USB Charging Port on the Charging Case.
Step 2:
Connect one end of the USB cable to the adapter and the other end to the charging port on your mobile device.

natural_image
Line drawing of a smartphone connected to a battery pack (no text or symbols)SPECIFICATIONS)
| Model No. | MI06 |
| Power Supply | DC 5V/1A |
| BT Version | V5.0 |
| Frequency Range | 2402~2480MHz |
| Transmit Power (EIRP) | <10dBm(for CE) |
| Battery Capacity of the Charging Case | 3500 mAh |
| Charging Time for the Earbud | 1H |
| Charging Time for the Charging Case | 4H |
| Call Time | 5H |
| Playtime | Around 7H(with 60% volume) |
| Standby Time for the Charging Case | 200H |
| Working Temperature | 0-40°C |
WARRANTY
VANKYO wireless earbuds have a 1-year free warranty. If you encounter any problems or have any questions while using the product, please send us an email to support@ivankyo.com (US&CA)/support.uk@ivankyo.com (UK) according to your country. We look forward to your comments and suggestions so that we can help you better.
FCC Caution
Any Changes or modifications not expressly approved by the party responsible for compliance could void the user's authority to operate the equipment.
This device complies with part 15 of the FCC Rules. Operation is subject to the following two conditions:
(1) This device may not cause harmful interference, and
(2) this device must accept any interference received, including interference that may cause undesired operation.
NOTE:
This equipment has been tested and found to comply with the limits for a Class B digital device, pursuant to part 15 of the FCC Rules.
These limits are designed to provide reasonable protection against harmful interference in a residential installation. This equipment generates, uses and can radiate radio frequency energy and, if not installed and used in accordance with the instructions, may cause harmful interference to radio communications. However, there is no guarantee that interference will not occur in a particular installation.
If this equipment does cause harmful interference to radio or television reception, which can be determined by turning the equipment off and on, the user is encouraged to try to correct the interference by one or more of the following measures:
—Reorient or relocate the receiving antenna.
—Increase the separation between the equipment and receiver.
—Connect the equipment into an outlet on a circuit different from that to which the receiver is connected.
—Consult the dealer or an experienced radio/TV technician for help.
This equipment complies with FCC radiation exposure limits set forth for an uncontrolled environment.
This transmitter must not be co-located or operating in conjunction with any other antenna or transmitter.
ISEDC Warning
This device complies with Industry Canada licence-exempt RSS standard(s). Operation is subject to the following two conditions:
(1) this device may not cause interference, and
(2) this device must accept any interference, including interference that may cause undesired operation of the device.
RISK OF EXPLOSION IF BATTERY IS REPLACED BY AN INCORRECT TYPE.
DISPOSE OF USED BATTERIES ACCORDING TO THE INSTRUCTIONS
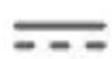
The symbol indicates DC voltage

RECYCLING
This product bears the selective sorting symbol for Waste electrical and electronic equipment (WEEE). This means that this product must be handled pursuant to European directive 2012/19/EU in order to be recycled or dismantled to minimize its impact on the environment.
NOTES:

- High Sound Pressure
- Hearing Damage Risk
- Do not listen at high volume levels for long periods.
IC:24268-BTMI06
FCC ID: 2AQ3A-BTM106

R
211-200332
Manufacturer
Shenzhen VanTop Technology & Innovation Co., Ltd. Manufacturer address:
502, 5th Flr. BLDG 4, MinQi Technology Park, No. 65 Lishan Road, Taoyuan Street, Nanshan District, Shenzhen, China
| EC | REP |
C&E Connection E-Commerce (DE) GmbH Zum Linnegraben 20, 65933, Frankfurt am Main, Germany Info@ce-connection.de
CUSTOMER SUPPORT
North America
support@ivankyo.com
United Kingdom
support.uk@ivankyo.com

www.ivankyo.com

@VankyoOfficial

VANKYO
- CONTENTS
- IMPORTANT »
- CAUTIONS)
- PACKING LIST »
- Note:
- OVERVIEW)
- Charging Case
- LED Display
- Earbud
- CHARGE)
- Charge the Charging Case
- Charging:
- Fully Charged:
- Charge the Earbuds
- Step 1:
- Step 2:
- Step 3:
- POWER ON)
- Option 1:
- Option 2:
- TWO EARBUDS PAIRING »
- Tip:
- CONNECT AND DISCONNECT WITH A MOBILE DEVICE »
- Connect
- Disconnect
- FUNCTIONS OF EARBUDS)
- Activate Voice Control
- POWER OFF)
- Option 3:
- REPLACE THE EAR TIP »
- CHARGING CASE USED AS A POWER BANK »
- WARRANTY
- FCC Caution
- ISEDC Warning
- NOTES:
- Manufacturer
- CUSTOMER SUPPORT
Brand : Vankyo
Model : X200
Category : Hi-Fi System