PG-1050 - Grooming Kit Izzy - Free user manual and instructions
Find the device manual for free PG-1050 Izzy in PDF.


| Product Type | Pet Grooming Kit |
| Brand | Izzy |
| Model | PG-1050 |
| Dimensions (L x W x H) | 22 x 16 x 6 cm |
| Weight | 0.55 kg |
| Power Source | Rechargeable battery (USB-C) |
| Battery Capacity | 1200 mAh |
| Charging Time | 2 hours |
| Operating Time | 45 minutes |
| Motor Type | Rotary, low noise |
| Blade Material | Ceramic and stainless steel |
| Included Accessories | Adjustable clipper, 4 guide combs (3-12mm), scissors, nail clipper, comb, brush |
| Storage Case | Yes, zippered case |
| Suitable for | Dogs and cats, all coat types |
| Noise Level | < 50 dB |
| Cleaning | Remove blade, brush, and rinse under water; dry and oil |
| Maintenance | Oil blades after each use; replace if dull |
| Safety Features | Blade guard, rounded tips, auto shut-off after 10 min idle |
| Spare Parts Available | Replacement blades, guide combs, batteries |
| Warranty | 2 years limited |
Frequently Asked Questions - PG-1050 Izzy
User questions about PG-1050 Izzy
0 question about this device. Answer the ones you know or ask your own.
Ask a new question about this device
Download the instructions for your Grooming Kit in PDF format for free! Find your manual PG-1050 - Izzy and take your electronic device back in hand. On this page are published all the documents necessary for the use of your device. PG-1050 by Izzy.
USER MANUAL PG-1050 Izzy
natural_image
Black and silver hair styling tool with comb, no visible text or symbolsΜΠΕΝΡΟΥΜΠΗ
9.
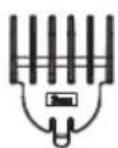
a
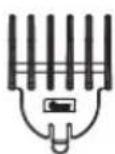
b
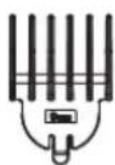
C
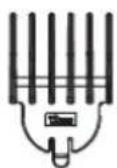
d
e
f
4.
5.
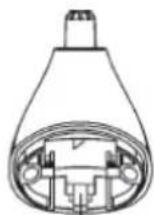
6.
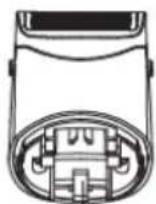
7.
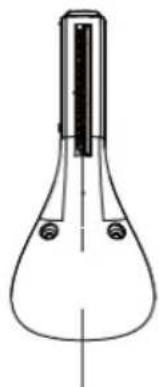
natural_image
Line drawing of a laboratory flask with a vertical rod and two circular ports (no text or labels)8.
natural_image
Illustration of a laptop connected to a power bank and cable, no text or symbols present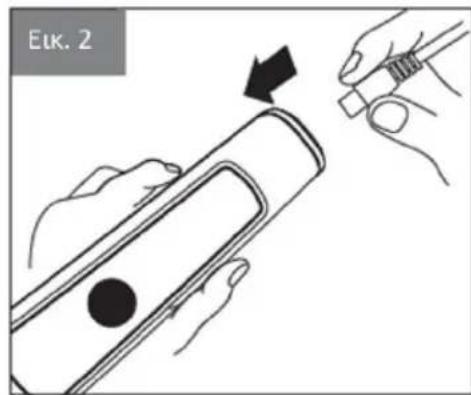
Σημειώσεις:
natural_image
Illustration of hands using a tool to cut or mark a surface, showing a curved arrow indicating rotation (no text or symbols)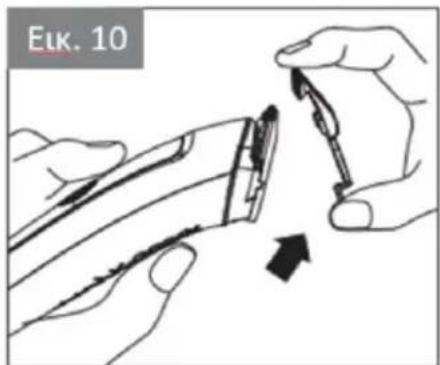
natural_image
Illustration of a hand holding a pen or stylus with a black dot and arrow, no text or symbols presentnatural_image
Line drawing of a hand holding a pen-like object with a black dot, labeled 'Elk. 14' in the top-left corner (no other text or symbols)natural_image
Side profile illustration of a person holding a small object, labeled 'Eik. 17' (no other text or symbols)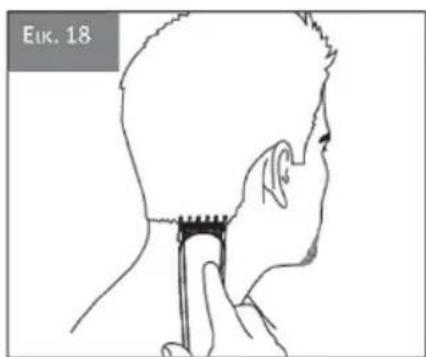
natural_image
Line drawing of a person's head and neck with a finger inserted, no text or symbols presentnatural_image
Line drawing of a person applying a toothbrush to their lower face (no text or symbols)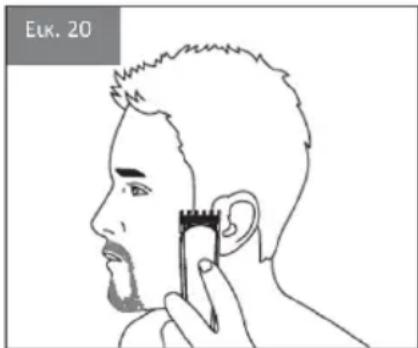
natural_image
Line drawing of a person applying makeup to their ear (no text or symbols)natural_image
Line drawing of a person with short hair and beard, holding a pen (no text or symbols)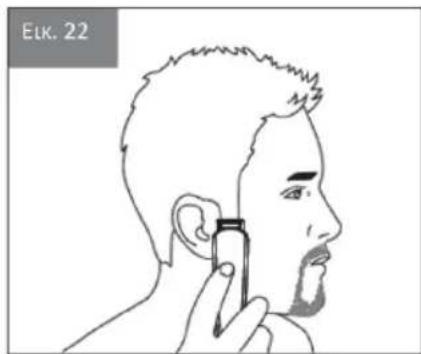
natural_image
Line drawing of a person applying makeup to their ear (no text or symbols)natural_image
Line drawing of a person applying makeup to their beak, with no text or symbols presentnatural_image
Line drawing of a person applying nasal or oral pressure to their mouth (no text or symbols)natural_image
Illustration of a hand using a pipette to lift a mechanical component (no text or symbols visible)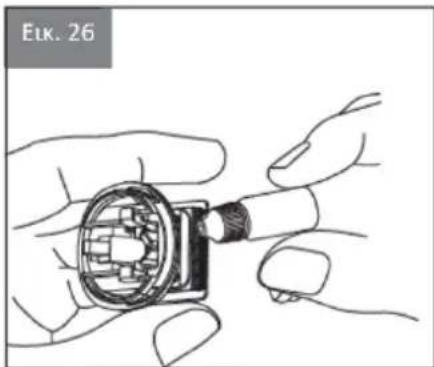
natural_image
Illustration of hands assembling a mechanical component (no text or symbols visible)Thank you for having chosen an appliance from the IZZY range.
Safety interlocks
Please read these instructions carefully before using the appliance ar save them for future reference. Please keep the sales receipt for guarantee purposes (pls see below “Guarantee and Customer Service”) Any use which does not conform to the instructions will absolve IZZ' from any liability.
- Make sure your electricity supply is the same as the one shown on the underside of the device.
• Always plug your device into an outlet that is earthed. Failure to comply with this requirement may result in electric shock and possible serious injury. - Close supervision is necessary when your device is being used near children or infirm people. Ensure that they do not play with the device.
-
This device is not intended for use by people with reduced physical, sensory or mental capabilities, children or those with lack of experience and knowledge, unless they have been given supervision or instruction concerning use of the device by a person responsible for their safety.
-
Switch off and unplug:
- If a disturbance occurs
- After use and if no recharge is needed
- If the device is out of use for a prolonged period of time
- Before removing or inserting accessories
- Before cleaning
- Never use the device for any other use than indicated.
- Do not use the device on animals. The device is intended for use only in humans.
- The device is intended only for domestic use. Any other use will cancel the warranty.
To avoid any risk of burns, fire, electric shock or injury, always follow the
instructions below:
- Do not use the device when you bathe.
- Do not install in a place from which the device can easily fall or be pulled into a tub.
- Do not immerse the device and the charger in water or any other liquid.
- Never leave the device unattended when the charger is plugged in except when charging.
• Always unplug the power cord before cleaning. - Never expose the device to direct sunlight or temperatures above 60^ .
- Keep the body of the device always dry.
- Check the power cord periodically for possible damages. If the power cord or the plug of the device has been damaged, do not use the device and contact an authorized BENRUBI Service Center.
IMPORTANT: Do not cut the power cord of the charger at any case
- Do not use / do not charge the device outdoors or in areas where it is carried out using various cleaning agents, insecticides, etc. in spray form or in places where they carried oxygen administration.
- To avoid injury, do not use the device with cut or damaged blades, or damaged parts. Ensure that the blades are properly aligned before use.
- Always turn off the device by pressing the power switch before unplugging the power cord.
- No liability is accepted for any damage resulting from use for other purposes than those indicated in the instructions for use, faulty operation and repairs made from unauthorized technicians. Guarantee services are excluded in such cases.
- Use only attachments recommended by the manufacturer. Otherwise may cause danger to the user and damage to the device.
- Do not move the device by pulling from the power cord. Make sure the power cord is not jammed in any way. Do not wrap the cord around the body of the device and do not tilt.
- Do not use an extension cord or voltage converter with this device.
- Never disconnect the device from the mains by pulling the cord. Disconnect always by pulling the plug.
- If the device falls into water or any other liquid:
- Take off the power cord.
- Do not put your hands into the liquid.
- Contact with one of the authorized BENRUBI repair centers and do not use the device.
- Do not use corrosive, abrasive detergents or hard brushes as they can scratch and cause damage to the device.
- In case of a possible damage, do not attempt to repair the device yourself. Please contact one of the authorized BENRUBI service centers. Any repair made by an unauthorized BENRUBI Service Center CANCELS THE GUARANTEE.
- Any misuse of the device cancels the warranty.
- Use only original spare parts.
- The device conforms to EU directive 2014/30/EU on Electromagnet Compatibility, the 2014/35/EU Low Voltage Directive, the 2011/65/EU RoHS Directive, and the directive 2009/125/EC for eco-design.
SAVE THESE INSTRUCTIONS
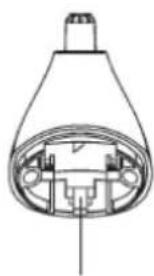
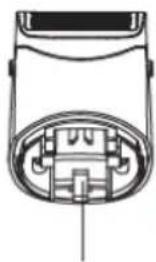
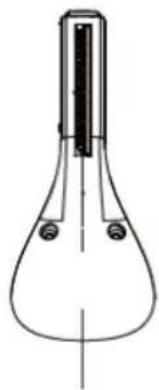
Parts of the Appliance
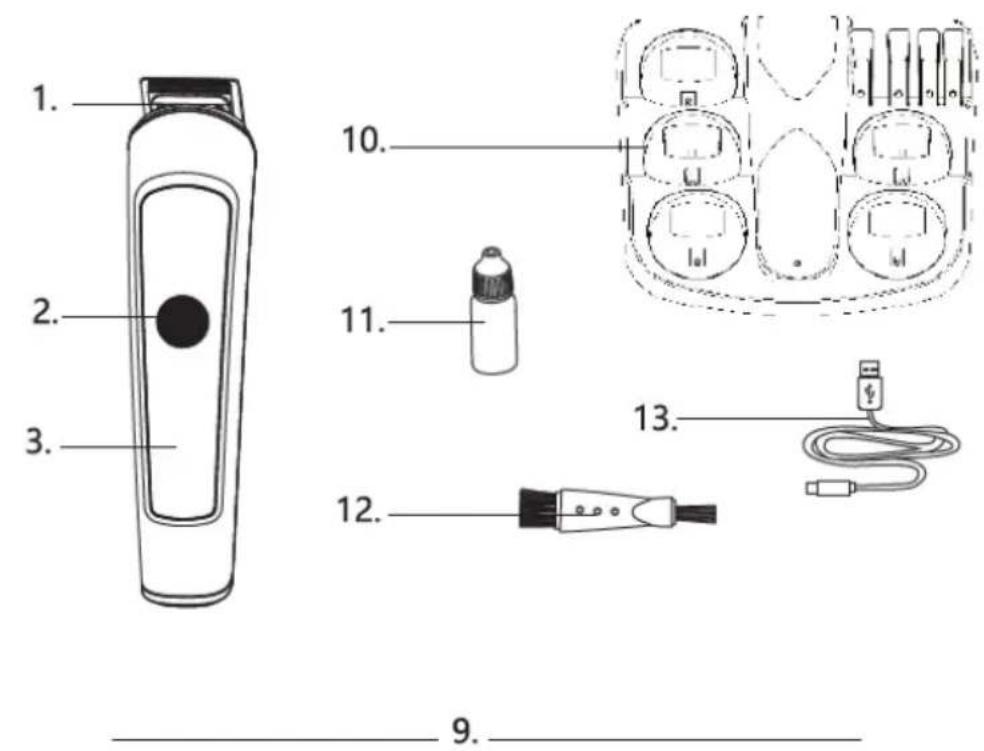
a
b
C
d
e
f
4.
5.
natural_image
Technical line drawing of a mechanical component with no visible text or symbols6.
natural_image
Technical line drawing of a mechanical component with internal cavities and mounting holes (no text or symbols)7.
natural_image
Line drawing of a laboratory flask with a cap and side screw (no text or labels)8.
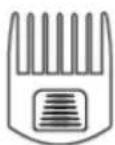
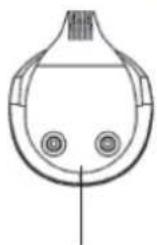
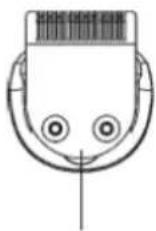
- Full size trimmer
- On-Off switch – speed selection
- Intelligent digital display screen
- Design trimmer
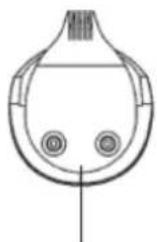
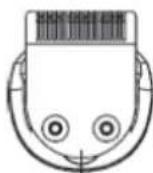
- Precision trimmer
- Nose/ear/eyebrow trimmer
- Micro-shaver
-
Body hair trimmer
-
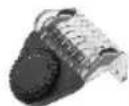
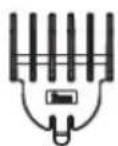
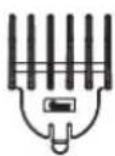
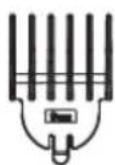
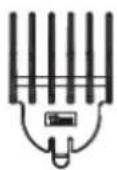
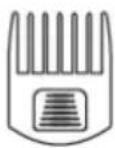
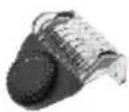
5 guide combs (a, b, c, d, e) for full size trimmer, comb with length level selection (f)
-
Stand base
- Lubricating oil
- Cleaning brush
- USB cable (5A 1A charger applicable)
Charging the Device
Caution: Do not charge the device outdoors where it comes into direct contact with the sun or in a very warm room.
Before using your personal groomer for the first time, charge for 2 hours.
Make sure the device is switched off during charging!
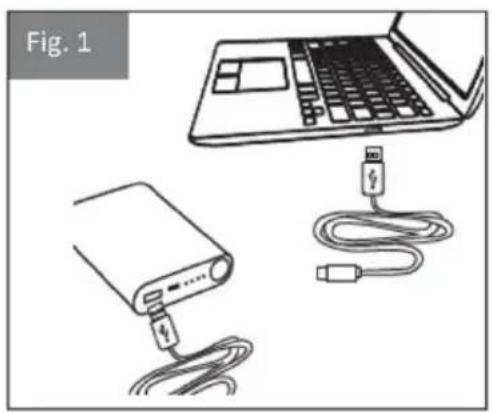
Connect the charging adaptor to the product and then to the USB port. Plug into the socket. The charging indicator will light up.
natural_image
Illustration of a laptop connected to a power bank and USB cable, labeled Fig. 1 (no text or symbols on devices)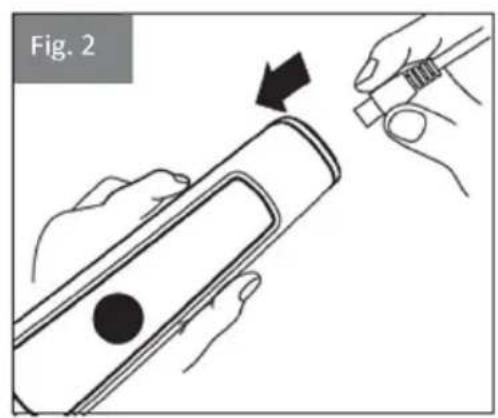
natural_image
Illustration of a hand holding a pen or tool, with an arrow indicating the process (no text or symbols present)Notes:
- Usage time is approximately 90 minutes, when fully charged.
• After the first charge, full charge time is 90 minutes. - Your personal groomer cannot be overcharged. However, if the product is not going to be used for an extended period of time (2-3 months), unplug it and store it. Fully recharge the device when you want to use it again.
- Fully discharge the battery twice a year by leaving the device running until it stops. Then recharge the battery fully for about 14-16 hours.
Attaching and Detaching Accessories
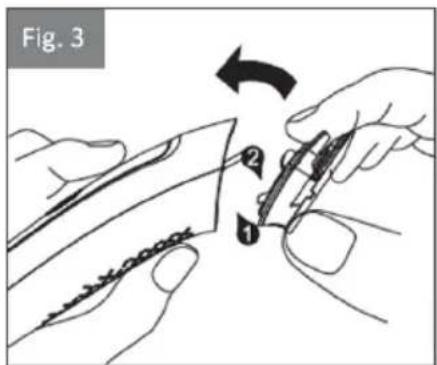
Attaching/detaching trimmers (1, 4, 5, 6, 7, 8)
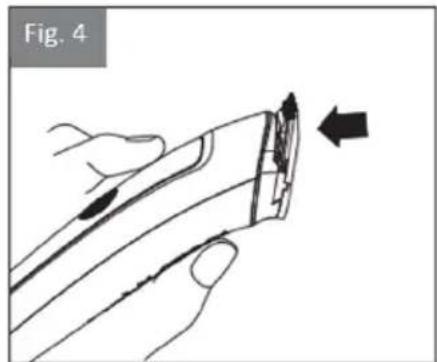
To place a head, first place the plastic finger in the head on the body of the device and then snap it until it clicks (Fig. 3-4).
natural_image
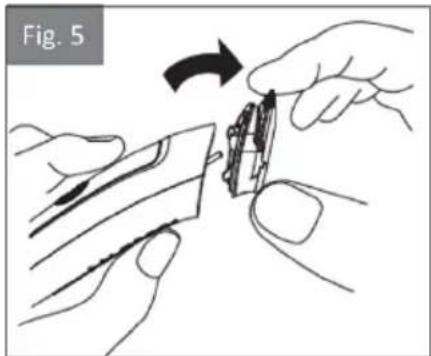
Line drawing of a hand holding a tool with an arrow indicating direction (no text or symbols)To detach a head, push upwards and remove the head from the body of the device (Fig.5-6).
natural_image
Illustration of hands using a tool to adjust or install a piece of paper, labeled 'Fig. 5' (no text or symbols on the diagram itself)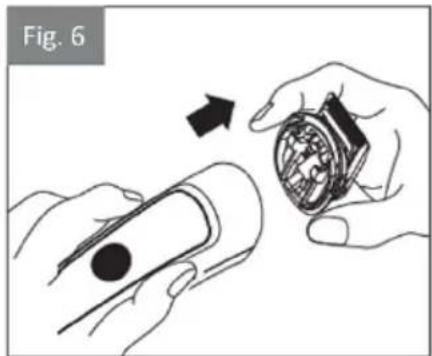
natural_image
Illustration of hands holding a device with an arrow indicating motion (no text or symbols)Attaching/detaching cutting guides (a, b, c, d, e) of full size trimmer (1)
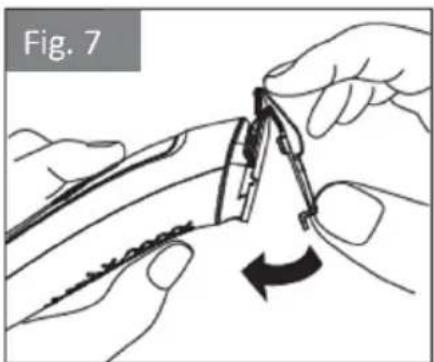
To attach one of the cutting guides of the full size trimmer, first position the front on the trimmer, and then snap the back (Fig.7-8)
natural_image
Illustration of hands using a tool to adjust or install a mechanical component, showing a curved arrow indicating rotation (no text or symbols present)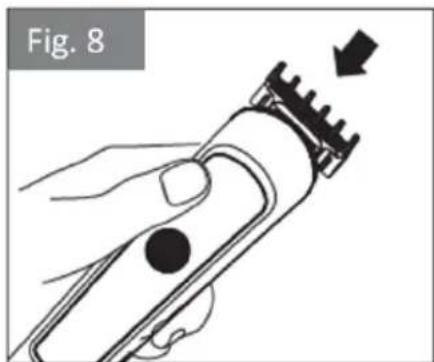
natural_image
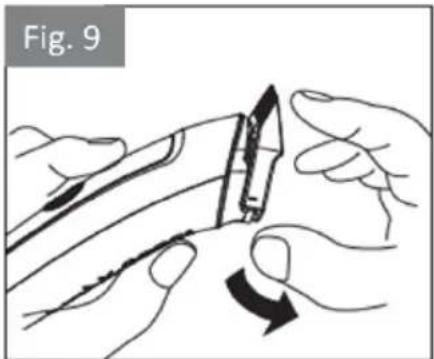
Illustration of a hand using a hairpin to press down a textured brush (no text or symbols)To remove the cutting guide, lift the rear of the guide and then remove the front head from the head (Fig. 9-10)
natural_image
Illustration of hands using a tool to cut or mark a surface, showing a curved arrow indicating rotation (no text or symbols)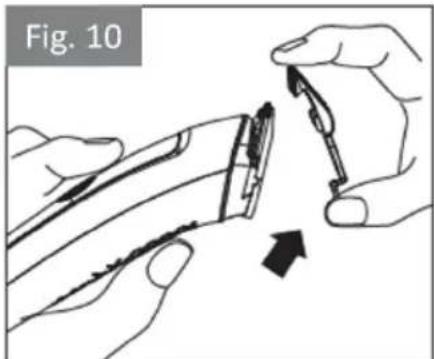
natural_image
Illustration of hands using a tool to cut or mark a mechanical component, with an arrow indicating motion (no text or symbols)Attaching/detaching the micro-shaver (8)
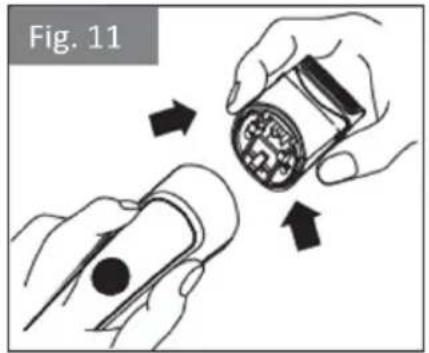
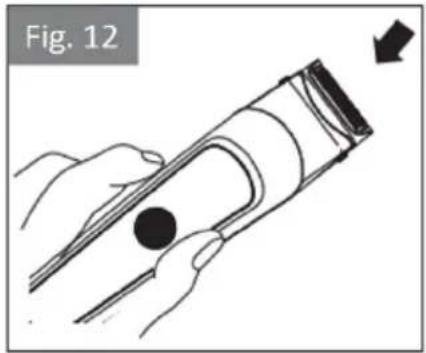
For better cleansing of the micro-shaver, you can remove the top of the head. Press both sides of the accessory and remove it from the head body (Fig. 11). Press both sides and snap back on the head body (Fig. 12).
natural_image
Illustration of a hand holding a pen or tube with a black dot and arrow indicating direction (no text or symbols)Attaching/detaching body hair trimmer (8)
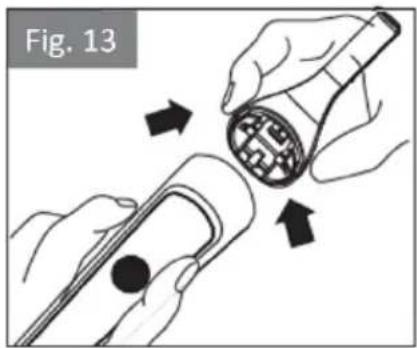
Place the cutting guide on the top of the body hair trimmer and slide down. Remove the cutting guide by dragging it from the bottom to the top until it comes out of the body hair trimmer.
natural_image
Illustration of hands holding a device with arrows indicating motion or assembly (no text or symbols)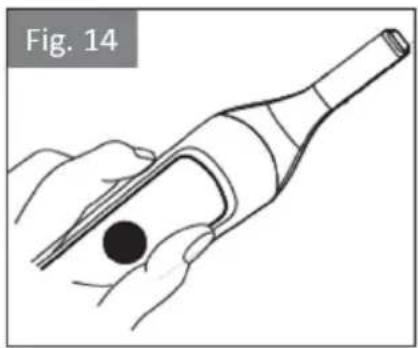
natural_image
Line drawing of a hand holding a pen-like object with a black dot, labeled 'Fig. 14' (no other text or symbols)Attaching/detaching the nose/ear/eyebrow trimmer (6)
Attach the nose/ear/eyebrow trimmer and press downwards. Remove the nose/ear/eyebrow trimmer, by lifting upwards.
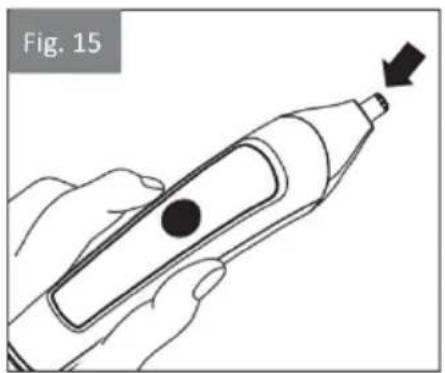
natural_image
Line drawing of a hand holding a pen-like device with a black dot and arrow pointing to the tip (no text or symbols)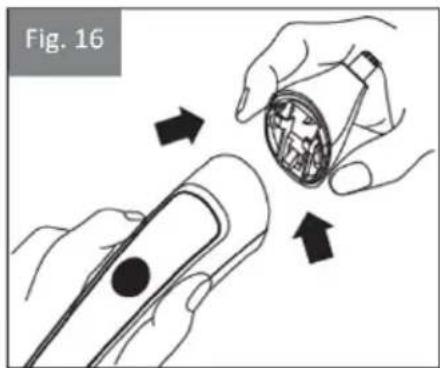
natural_image
Illustration of hands holding a device with arrows indicating motion or assembly (no text or symbols)Use of Cutting Guides
| Full size trimmer comb | Level | Length (mm) |
| No. 1 | 1 | 3 |
| No. 2 | 2 | 6 |
| No. 3 | 3 | 9 |
| No. 4 | 4 | 12 |
| Precision trimmer comb | Level | Length (mm) |
| No. 1 | 1 | 1 |
| No. 2 | 2 | 2 |
| No. 3 | 3 | 3 |
| No. 4 | 4 | 4 |
Use of the Device
- Clean the heads and the device after each use, so that it remains clean by bacteria that are created during use.
- Do not give the device to other people in order to avoid transmission of skin infections.
- Push the On/Off (2) switch once to turn on the device. The digital screen will show the charging remaining.
- Press the switch for a second time to select higher speed.
- Press the switch for a third time to turn off the device. The digital screen will show usage time.
Hair Clipping
Preparing for hair clipping:
- Ensure that the device is fully charged before you start the clipping process.
- Use the device only on clean, dry hair. Do not use it on freshly washed hair.
- Make sure that the head of the person whose hair you intend to cut is at the same level as your chest. This ensures that all parts of the head are visible and easily accessible.
Clipping with full size trimmer and cutting guide
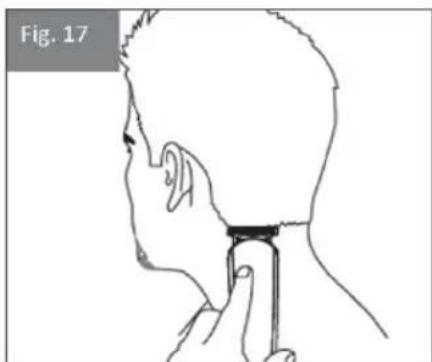
natural_image
Side profile illustration of a person's head and neck with a finger inserted, labeled 'Fig. 17' (no text or symbols on the diagram itself)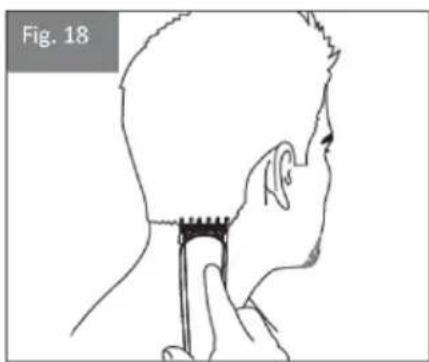
natural_image
Side profile illustration of a person's head and neck with a finger inserted, labeled Fig. 18 (no text or symbols on the diagram itself)-
Comb the hair in the direction of growth.
-
Attach the full size trimmer (1) to the body of the device.
- Attach the cutting guide of your choice on the trimmer (see section "Use of cutting guides").
- Turn on the device by pressing the On/Off switch (2).
- Move the device slowly through the hair.
- Remove the cut hair regularly from the cutting guide. If several hairs accumulate, remove the cutting guide from the device and blow and/or shake to clean it from the hairs.
- When you finish clipping, turn off the device by pressing the On/Off switch (2).
- Remove the cutting guide and the full size trimmer.
- Clean the cutting guide, the full size trimmer and the device before storing it (see "Cleaning and care").
Tips for better results:
- When you are trimming for the first time, set the cutting guide to 12mm until you become familiar with it.
- For very short cuts (stubble look), use the cutting guide 3mm.
- For best results, move the device against the direction of hair growth. Since all hair does grow in the same direction, you need to move the device in different directions (upward, downward or across).
- Ensure that the flat part of the cutting guide is in full contact with the scalp to achieve a consistent result.
- Make overlapping passes over the head to ensure that you cut all hair that needs to be cut.
- To achieve a good result on curly, sparse or long hair, use a comb to guide the hair towards the device.
Clipping with full size trimmer (without cutting guide)
You can use the device without a cutting guide to clip hair very short to the skin (0.6mm) or contour the neckline and the area round the ears.
CAUTION: Particular attention is needed when cutting without a cutting guide because the width trimmer attachment removes any hair it touches.
- Before you start to contour the hairline around the ears, comb the hair ends over the ears.
- Attach the full size trimmer (1) to the body of the device.
- Turn on the device by pressing the On/Off switch (2).
- Turn the device in such a way that only one end of the cutting head touches the hair ends when shaping the contours around the ears. Cut only hair ends. The hairline should be close to the ear.
- To shape the neckline and the sidebums, turn the device and make downward strokes. Move the device slowly and smoothly following the natural hairline.
- When you finish clipping, turn off the device by pressing the On/Off switch (2).
- Remove the full size trimmer.
- Clean the full size trimmer and the device before storing it (see "Cleaning and care").
Facial Trimming (Beard, Moustache, Sideburns)
Preparing for hair clipping:
- Ensure that the device is fully charged before you start the trimming process.
- Comb the hair to be trimmed with a fine comb.
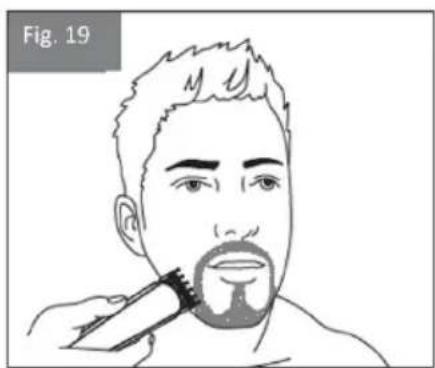
Facial trimming with precision trimmer & cutting guide
natural_image
Line drawing of a person applying a toothbrush to their lower face (no text or symbols)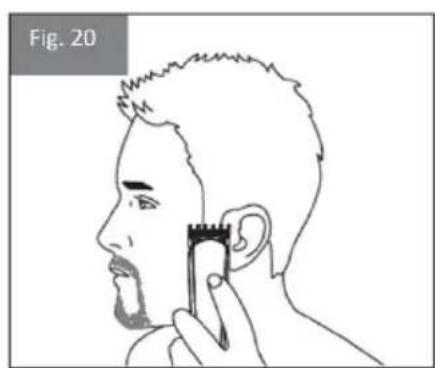
natural_image
Line drawing of a person's head with a hairpin, no text or symbols present- Attach the precision trimmer (5) to the body of the device.
- Attach the cutting guide (9) on the precision trimmer.
- Adjust the cutting guide to set the desired length (see "Using cutting guides" section).
- Turn on the device by pressing the On/Off switch (2).
- Move the device slowly through the hair.
- Remove the cut hair regularly from the cutting guide. If several hairs accumulate, remove the cutting guide from the device and blow and / or shake to clean it from the hairs.
- When you finish trimming, turn off the device by pressing the On/Off switch (2).
- Remove the cutting guide and the precision trimmer.
- Clean the cutting guide, the precision trimmer and the device before storing it (see "Cleaning & Care").
Tips for better results:
- For best results, move the device against the direction of hair growth. Since all hair does not grow in the same direction, you need to move the device in different directions (upward, downward or across).
- When you are trimming for the first time, set the cutting guide to the highest setting until become familiar with it.
- Ensure that the flat part of the cutting guide is in full contact with the scalp to achieve a consistent result.
- For very short cuts (stubble look), set the cutting guide to the lowest setting.
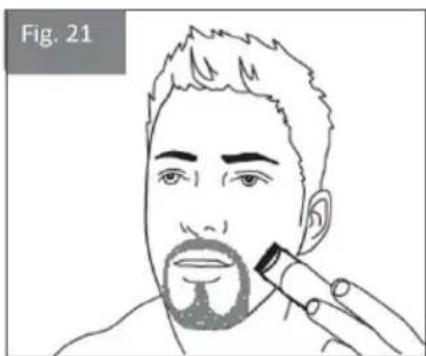
Facial trimming with precision trimmer (without cutting guide)
natural_image
Line drawing of a person applying makeup to their beak, labeled Fig. 21 (no text or symbols on the diagram itself)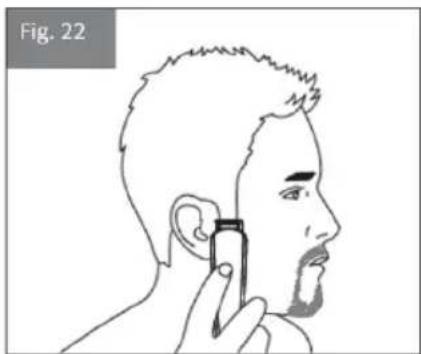
natural_image
Line drawing of a person applying a toothpaste to their ear (no text or symbols)- Use the precision trimmer without cutting guide to trim the beard, mustache, sideburns and remove individual hairs (fig. 21-22).
-
Facial care without cutting guide results in very short hair (0.6mm).
-
Attach the precision trimmer (5) to the body of the device.
- Turn on the device by pressing the On/Off switch (2).
- Gently touch the hair with the trimmer and take careful and controlled movements.
- When you finish trimming, turn off the device by pressing the On/Off switch (2).
- Remove the precision trimmer.
- Clean the precision trimmer and the device before storing it (see "Cleaning & Care").
Shaving with the micro-shaver
- Use the micro-shaver to crate smooth, well-defined contours.
- Before you use the micro-shaver, always check it for damage or wear. If the foil or cutter is damaged or worn, do not use the micro-shaver, as injury may occur. Replace the whole attachment before you use the micro-shaver again.
natural_image
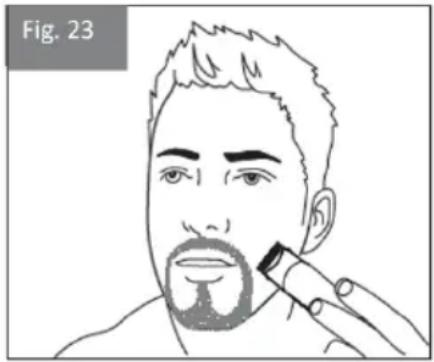
Line drawing of a person applying makeup to their beak, labeled Fig. 23 (no text or symbols on the diagram itself)- Pre-trim the contours you want to shave with the full size trimmer (1) (without cutting guide) or the precision trimmer (5).
- Attach the micro-shaver (7) on the body of the device.
- Press the On/Off switch (2) and gently press the micro-shaver onto the skin at a 45^ angle and shave along the contours to remove the hairs (Fig.23). Do not press too hard!
- When shaving is complete, press the On/Off switch (2) again.
- Remove the micro-shaver.
- Clean the micro-shaver and the device before storing it (see "Cleaning and care").
Tips for better results:
- Move the device with controlled movements to shave your beard or your mustache.
- Use your free hand to stretch your skin. This helps the hair stand up, making it easier to shave.
- The micro-shaver is designed to shave detail around beard/mustache/sideburns. It was not designed to shave the entire face.
Body trimming with body hair trimmer & vertical trimming comb
- Use the body hair trimmer to shave the back, chest area even to trim your beard or mustache and remove single hairs.
-
Trimming with body hair trimmer results in very short hair (0.6mm).
-
Attach the body hair trimmer (8) to the body of the device.
- Turn on the device by pressing the On/Off switch (2) and gently touch the hair with the body hair trimmer and take careful and controlled movements.
- When you have finished shaving, turn off the device by pressing the On/Off switch (2).
- Remove the body hair trimmer.
- Clean the body hair trimmer and the appliance before storing it (see "Cleaning and care").
Use the body trimmer with the cutting guide
- Attach the body hair trimmer (8) to the body of the device.
- Attach the cutting guide to the body hair trimmer and set the desired length (see section "Using Cutting Guide").
- Turn on the device by pressing the On/Off switch (2).
- Move the device slowly through the hair.
- Remove hair regularly from the vertical trimming comb. If several hairs accumulate, remove the vertical trimming comb from the appliance and blow and/or shake to clean it from the hairs.
- When you have finished shaving, turn off the device by pressing the On/Off switch (2).
- Remove the cutting guide and the body hair trimmer.
- Clean the cutting guide, the body hair trimmer and the appliance before storing it (see "Cleaning and care").
Tips for better results:
- For best results, move the device against the direction of hair growth. Since all hair does not grow in the same direction, you need to move the device in different directions (upward, downward or across).
- When you are trimming for the first time, set the cutting guide to the highest setting (9mm) until you become familiar with it.
- Ensure that the flat part of the cutting guide is in full contact with the scalp to achieve a consistent result.
- For very short cuts, set the cutting guide to the lowest setting or remove the cutting guide.
Facial treatment (nose, ears, eyebrows)
Nose treatment
natural_image
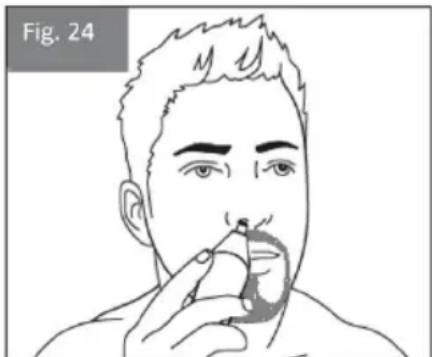
Line drawing of a person applying nasal or oral pressure to their mouth, labeled 'Fig. 24' (no other text or symbols)- Clean your nose before treatment.
- Attach the nose/ear/eyebrow trimmer (6) on the body of the device.
- Insert the tip of the tip of the trimmer into one of your nostrils (not more than 0.5 cm) (Fig.24).
- Turn on the device by pressing the On/Off switch (2).
- Slowly move the tip in and out while rotating it to remove unwanted hair. To reduce the tickling effect, make sure that you firmly press the tip of the head against the skin.
- When the nose treatment is complete, press the On/Off switch (2) again.
- Remove the nose/ear/eyebrow trimmer.
- Clean the nose/ear/eyebrow trimmer and the device before storing it (see "Cleaning and care").
Ears treatment
- Clean the outer ear channel.
- Attach the nose/ear/eyebrow trimmer (6) on the body of the device.
- Turn on the device by pressing the On/Off switch (2).
- Move the tip of the trimmer gently around the ear to remove the hairs. Carefully insert the tip of the trimmer on the outer ear channel.
CAUTION: Do not insert the trimmer more than 0.5cm into the ear canal as this could damage the drum. - When the nose treatment is complete, press the On/Off switch (2) again.
- Remove the nose/ear/eyebrow trimmer (6).
- Clean the nose/ear/eyebrow trimmer and the device before storing it (see "Cleaning and care").
Eyebrows treatment
- Use the device to cut individual eyebrow hairs.
- Do not use the device to define or trim the entire eyebrow.
- Never try to trim your eyelashes.
-
Do not use the device very close to your eyes!
-
Attach the nose/ear/eyebrow trimmer (6) on the body of the device.
- Turn on the device by pressing the On/Off switch (2).
- Move the tip of the trimmer along the edge of the eyebrow from the base of the nose towards the outer tip of the eyebrow.
- When the eyebrow treatment is complete, press the On/Off switch (2) again.
- Remove the nose/ear/eyebrow trimmer.
- Clean the nose/ear/eyebrow trimmer and the device before storing it (see "Cleaning and care").
Cleaning and Care
Make sure the appliance is switched off before cleaning.
After each use:
- Brush the residues from hair.
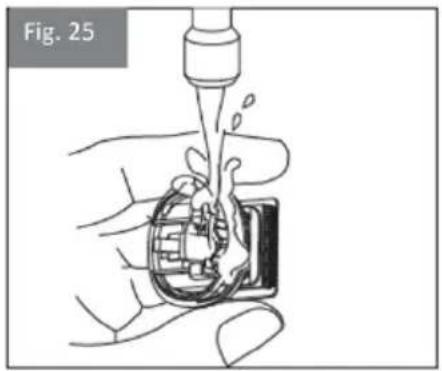
- The accessories can be removed from the device to be washed with warm water and liquid soap.
- Cleaning should be done only with a soft brush, such as the one is provided in the packaging of the device.
- Use the lubricating oil for the blades.
- Do not use abrasive or corrosive cleaners for cleaning the body of the device and accessories.
- Never use compressed air to clean the cutting heads and cutting guides.
natural_image
Illustration of a hand using a pipette to lift a mechanical component (no text or symbols visible)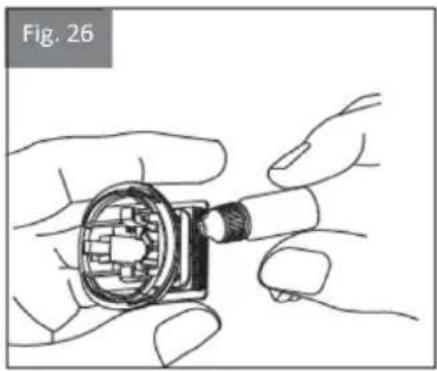
natural_image
Illustration of hands assembling a mechanical component (no text or symbols visible)Full size trimmer, precision trimmer, nose/ear/eyebrow trimmer, body hair trimmer
- Clean the head and the cutting guide with the brush.
- Keep them in the storage base (10) after each use.
Cutting guides, body cutting guide
- Clean the accessories and the cutting guides with the brush.
- Keep them in the storage base (10) after each use.
Micro-shaver
• The shaving foil is very delicate. Handle it carefully!
- Do not clean the shaving foil with the brush, as this may cause damage.
- Remove the upper part of micro-shaver.
• Using the brush clean the hair that has accumulated in the bottom part of micro-shaver. - Keep it in the storage base (10) after each use.
Device body, charger, charging/storage base
- Clean with a damp cloth. Dry thoroughly.
Technical Characteristics
Model: PG-1050
Motor voltage: 5V 1A D.C.
Charging time: 90 minutes
Runtime: 90 minutes
Battery Disposal
- Remove the back cover of the device with a screwdriver to locate the battery.
- Remove the battery from the product and recycle properly.
Important Information for Correct Disposal of the Product in Accordance with EC Directive 2002/96/EC
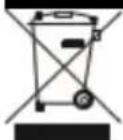
At the end of its working life, the product must not be disposed of as urban waste. It must be taken to a special local authority differentiated waste collection centre or to a dealer providing this service. Disposing of a household appliance separately avoids possible negative consequence for the environment and health deriving from inappropriate disposal and enables the constituent materials to be recovered to obtain significant savings in energy and resources.
As a reminder of the need to dispose of household appliances separately, the product is marked with a crossed-out wheeled dustbin.
Guarantee & Customer Service
- BENRUBI Company guarantees its products for any manufacturing defect or defective materials for a period of two (2) years from the date of purchase or delivery by presenting purchase receipt. If your product malfunctions or you find any defects, please revert to the retail location you have purchased it from or contact an authorized BENRUBI Service Centre. To find the nearest authorized BENRUBI Service Centre, visit our website www.benrubi.gr. It is in the discretion BENRUBI Company to replace or repair the defective product.
- The warranty does not cover damages resulting from normal wear, breakage, scaling, improper installation or maintenance of the product, mishandling, abnormal working conditions, failure implement the instructions, conversion or repair of the product by an unauthorized technician who does not belong to the BENRUBI Service Centers.
Also, the warranty does not cover the following indicative factors:
• Stains, discoloration or scratches.
• Burns due to exposure to heat or flame.
- Damage from thermal shock (sudden temperature change or change of voltage).
FOR MORE INFORMATION PLEASE CONTACT:
(NEW) H. BENRUBI & FILS SA
27 Aghiou Thoma str, GR15124, Maroussi – Athens,
Tel./Customer Support: +30210 6156400
e-mail: benrubi-sda@benrubi.gr

- ΜΠΕΝΡΟΥΜΠΗ
- Σημειώσεις:
- Safety interlocks
- instructions below:
- IMPORTANT: Do not cut the power cord of the charger at any case
- Parts of the Appliance
- Charging the Device
- Notes:
- Attaching and Detaching Accessories
- Attaching/detaching the micro-shaver (8)
- Attaching/detaching body hair trimmer (8)
- Attaching/detaching the nose/ear/eyebrow trimmer (6)
- Use of Cutting Guides
- Use of the Device
- Hair Clipping
- Preparing for hair clipping:
- Clipping with full size trimmer and cutting guide
- Tips for better results:
- Clipping with full size trimmer (without cutting guide)
- Facial Trimming (Beard, Moustache, Sideburns)
- Facial trimming with precision trimmer & cutting guide
- Facial trimming with precision trimmer (without cutting guide)
- Shaving with the micro-shaver
- Body trimming with body hair trimmer & vertical trimming comb
- Use the body trimmer with the cutting guide
- Facial treatment (nose, ears, eyebrows)
- Nose treatment
- Ears treatment
- Eyebrows treatment
- Cleaning and Care
- After each use:
- Micro-shaver
- Technical Characteristics
- Battery Disposal
- Guarantee & Customer Service
Brand : Izzy
Model : PG-1050
Category : Grooming Kit