RXP10PET - Vacuum Cleaner Tower - Free user manual and instructions
Find the device manual for free RXP10PET Tower in PDF.


| Product Type | Upright Vacuum Cleaner |
| Model | RXP10PET |
| Brand | Tower |
| Dimensions (L x W x H) | 12.5 x 11.5 x 43 inches |
| Weight | 16.5 lbs |
| Power Supply | 120 V, 60 Hz, 12 A |
| Cord Length | 25 feet |
| Dust Capacity | 1.5 liters |
| Filtration System | HEPA washable filter |
| Bagless | Yes |
| Suction Power | 200 air watts |
| Noise Level | 72 dB |
| Brush Roll | Motorized with ON/OFF switch |
| Attachments Included | Crevice tool, dusting brush, upholstery tool |
| Maintenance | Empty dust cup after each use; clean filter monthly |
| Special Features | Pet hair turbo tool, LED headlights |
| Warranty | 2 years limited warranty |
Frequently Asked Questions - RXP10PET Tower
User questions about RXP10PET Tower
0 question about this device. Answer the ones you know or ask your own.
Ask a new question about this device
Download the instructions for your Vacuum Cleaner in PDF format for free! Find your manual RXP10PET - Tower and take your electronic device back in hand. On this page are published all the documents necessary for the use of your device. RXP10PET by Tower.
USER MANUAL RXP10PET Tower
over 100 YEARS of quality
ПО2000PETS
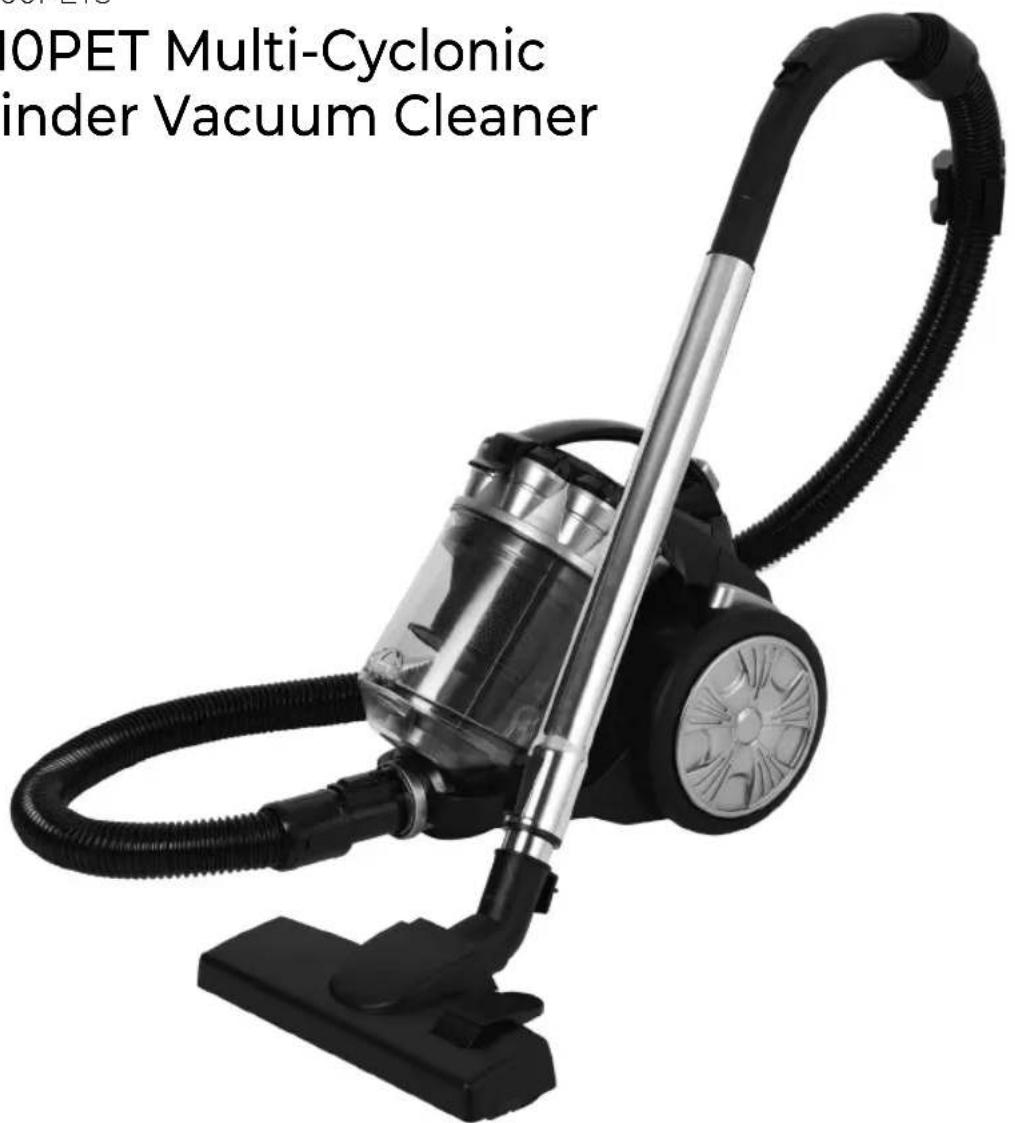
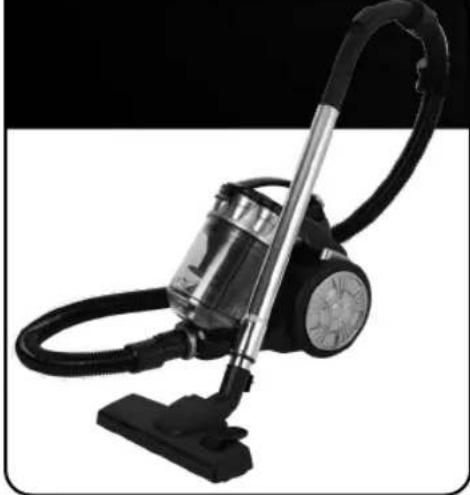
XP10PET Multi-Cyclonic Cylinder Vacuum Cleaner
3 ^*
YEAR
GUARANTEE

GREAT BRITISH
DESIGN SINCE 1912
SAFETY AND INSTRUCTION MANUAL
PLEASE READ CAREFULLY
*Subject to registering your Extended Guarantee online at www.towerhousewares.co.uk.
Towerbrand
GREAT BRITISH DESIGN, INNOVATION AND EXCELLENCE SINCE 1912
Since the turn of the 20th century, Tower has been designing, developing and manufacturing housewares and small appliances used by millions of households throughout the UK and beyond. During the 1960s, the rise in popularity of pressure cooking saw Tower become the UK's largest producer of pressure cookers, right through into the late 1980s. In recent years the Tower brand has been reborn with an exciting and varied range of housewares and electrical appliances that have quickly reinstated the brand's richly deserved status as a household name.
TOWER
Visit
www.towerhousewares.co.uk
for more fantastic products.
Contents:
Thank you for purchasing this appliance from the Tower range.
Please read this manual carefully BEFORE using the appliance for your own safety.
It has been designed to provide many years of trouble-free use.
There are many benefits to using a Tower 2 in 1 Cylinder Vacuum Cleaner:
• Powerful 700W 2 in 1 stick vacuum.
• 16Kpa suction power.
- 2L dust tank.
• Lightweight design.
• Cyclonic filtration system.
- 5 metre cable.
- Pet Brush
-
Specifications Components and structure
-
Technical Data
-
Important Safety Information
-
Before First Use
-
Using your Appliance
-
Troubleshooting
-
Recycling
-
Cleaning & Care
-
Wiring Safety
-
Warranty Information
See back page for Customer Service Information.
1 - Specifications:
This box contains:
Instruction Manual
Cylinder Vacuum Cleaner
Crevice Tool
Brush Tool
Pet Brush
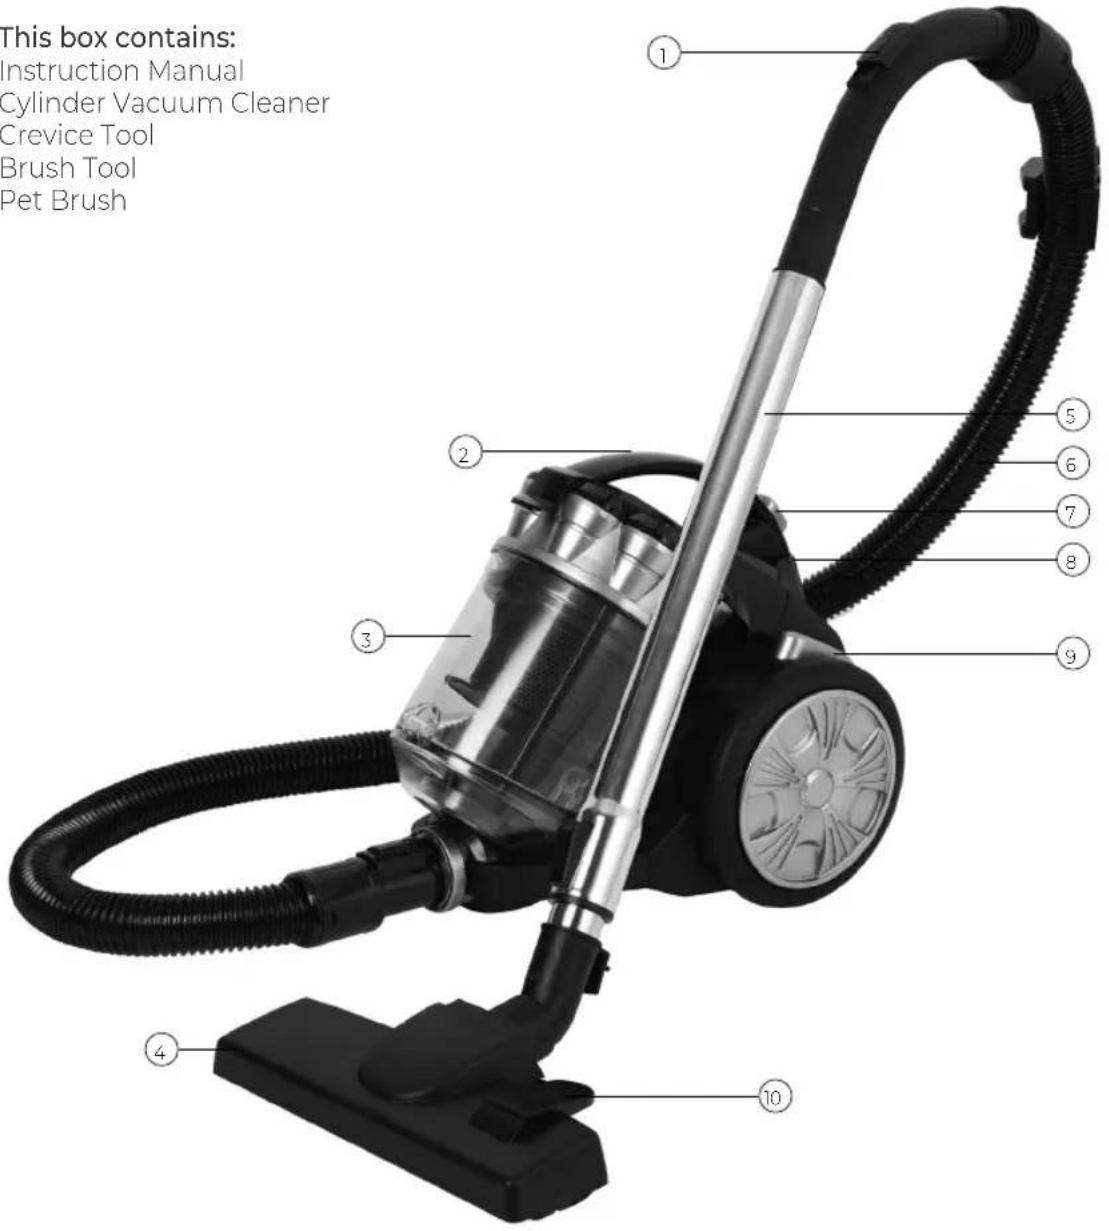
Structure of your appliance:
- Airflow control switch
- Dust tank handle
- Dust tank
- Floor brush
-
Pole
-
Hose
- Dust tank release button
- Cord retraction button
- Power ON/OFF button
- Retractable brush knob
2 - Technical Data:
Description: XP10PET Multi-Cyclonic Cylinder Vacuum Cleaner
Model: П02000PETS
Voltage: 220-240V
Frequency: 50/60Hz
Product Power: 700W
Documentation
We declare that this product conforms to the following product legislation in accordance with the following directive(s):
2014/30/EU Electromagnetic Compatibility Directive.
2014/35/EU Low Voltage Directive.
2011/65/EU Restriction of Hazardous Substances Directive.
2009/125/EC Eco-Design of Energy Related Products.
RK Wholesale LTD Quality Assurance, United Kingdom.
Should you encounter problems or require a replacement part, contact the Tower Customer Support Team: +44 (0) 333 220 6066.
Some spare parts may be ordered from the Tower website.
Your warranty becomes void should you decide to use non Tower spare parts.
Spare parts can be purchased from www.towerhousewares.co.uk
Guarantee for spare parts:
The spares and accessories are guaranteed for 1 year from date of purchase.
The main body and housing are guaranteed for the extended free warranty subject to registration.
If any defect arises due to faulty materials of workmanship, the faulty products must be returned to the place of purchase within 12 months from the date of purchase.
Refund or replacement is at the discretion of the retailer.
3 - Important Safety Information:
Please read these notes carefully BEFORE using your Tower appliance
- Check that the voltage of the main circuit corresponds with the rating of the appliance before operating.
- If the supply cord or appliance is damaged, stop using the appliance immediately and seek advice from the manufacturer, its service agent or a similarly qualified person.
- DO NOT let the cord hang over the edge of a table or counter or let it come into contact with any hot surfaces.
- DO NOT carry the appliance by the power cord.
- The use of accessory attachments is not recommended by the appliance manufacturer apart from those supplied with this product. DO NOT use extension cords with the appliance.
-
DO NOT pull the plug out by the cord as this may damage the plug and/or the cable.
-
Switch off at the wall socket then remove the plug from the socket when not in use or before cleaning.
- Switch off and unplug before fitting or removing tools/attachments, after use and before cleaning.
- Close supervision is necessary when any appliance is used by or near children.
• Children should not play with the appliance. - This appliance can be used by children aged from 8 years and above and persons with reduced physical, sensory or mental capabilities or lack of experience and knowledge if they have been given supervision or instruction concerning use of the appliance in a safe way and understand the hazards involved.
• Cleaning and user maintenance should not be undertaken by children without supervision.
• Take care when any appliance is used near pets.
- Not suitable for carpets with long fibres as the bristles will damage the fibres.
- Keep the vacuum cleaner moving over the carpet surface at all times to avoid damaging the carpet fibres.
• DO NOT use this product for anything other than its intended use.
- DO NOT immerse cords, plugs or any part of the appliance in water or any other liquid.
• This appliance is for household use only.
• DO NOT use the appliance outdoors.
- Keep hair, loose clothing, fingers and all body parts away from moving parts.
- DO NOT use to pick up flammable liquids such as gasoline or use in an area where they might be present.
- DO NOT use the appliance without the dust container filter in place.
• DO NOT pick up anything that is burning or smoking such as cigarettes, matches or hot ashes.
- Use extra care when cleaning on stairs.
- Use only manufacturer's recommended accessories.
- DO NOT pull cord, use cord as a handle, close a door on cord, or pull cord around sharp edges or corners.
- DO NOT run vacuum cleaner over the cord. Keep cord away from heated surfaces.
- This product is fitted with a thermal cut-out, which will activate if the motor overheats due to blocked air inlets. If the appliance cuts out, allow it to cool for 1 hour, then empty the dust container and clean all of the filters.
- In the unlikely event the appliance develops a fault, stop using it immediately and seek advice from the Customer Support Team:
+44 (0) 333 220 6066
4 - Before First Use
Read all instructions and safety information carefully before first use. Please retain this information for future reference.
- Remove the product from the box.
- Remove any packaging from the product.
- Please retain all packaging until you have checked and counted all the parts and the contents against the parts list.
- Dispose of the packaging in a responsible manner.
5 - Using Your Appliance
Connecting the Hose:
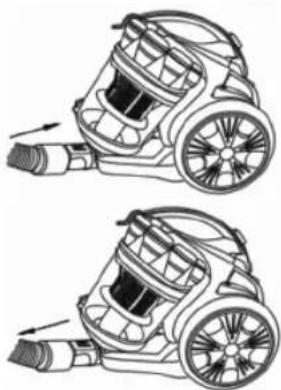
- To assemble the vacuum cleaner, start by connecting the hose.
- To connect the hose, press the locking tab at the base of the hose, then push it into the corresponding socket at the front of the unit until it locks into place.
- To remove the hose, press the locking tab while the hose is connected to the unit, then pull it away from the main body of the appliance.
natural_image
Technical line drawing of a two-part robotic vacuum cleaner with wheels and blades (no text or symbols)Connecting the Pole:
- To connect the pole, begin by attaching the larger end to the hose handle.
- When the pole and hose are connected, push the pole extension locking tab at the lower end of the pole downwards to release the locking mechanism. Once the lock has been released, pull the extension pole out and extend it to the desired height. When the pole is at the desired height, release the locking tab; it will automatically slide back into a locked position and secure the pole into place.
- Finally, connect the floorhead to the end of the extension pole, ensuring it is secured into place
- To remove the floorhead and poles, grip each of them firmly and pull them away from the main body of the appliance until they detach.
Connecting the Accessories:
This vacuum cleaner comes complete with the following accessories;
- A crevice tool to vacuum corners or narrow gaps.
- A brush tool to clean delicate surfaces.
· a pet brush, ideal for picking up animal hair. -
To connect and use the accessories included with this vacuum cleaner, attach each one to the end of the tube, as required. Ensure each accessory is firmly connected to the tube before turning on the vacuum cleaner, to prevent them from falling off whilst in use.
-
To remove each accessory, grip it firmly, then pull it away from the main body of the appliance.
Note: Keep the brushes free of fibres, hairs, and other objects that could impede proper functioning. Always remove the fibres or other objects when the brushes pick them up.
Using the Vacuum:
- To use your vacuum cleaner, start by plugging it into a mains socket.
- Once the vacuum is plugged in, unravel the power cord to your desired length. DO NOT extend the power cord beyond the red mark, as this is likely to damage it.
- When the power cable has been adjusted to the desired length, press the Power button on top of the appliance to turn it on. The motor will come on and air will start emitting from the floorhead to indicate the vacuum is in operation.
- Press the Power button again when the unit is in operation to turn it off. The motor will stop working and air will stop emitting from the floorhead to indicate the vacuum has been powered down.
Note: This vacuum cleaner works best on smooth surfaces such as wood, ceramic, tiles and marble. It will also perform well on hard, short-haired carpet. It should NOT be used on long-haired carpets as the fibres will damage the system.
Adjusting the Floor Brush:
- The unit's floorhead is equipped with a tab mechanism, which releases or retracts the bristles to suit carpet or hard floor vacuuming.
- Push the tab on the unit's floorhead upwards to set it to hard floor mode, or push it downwards from the hard floor setting to adjust it to carpet vacuuming.
Rewinding the Power Cord:
This unit is equipped with an automatic cord retraction system. Press the Cord Rewind button on the unit's main body to automatically retract the power cord.
Note: Always ensure the unit is disconnected from the mains before attempting to retract the power cord. DO NOT retract the power cord while the unit is plugged into a mains socket, as this could cause damage to the cable.
Note: The power cord can only be automatically retracted. To unwind the power cord, pull it manually out of its storage nook on the main body of the unit until it is at the desired length.
Note: The yellow and red markings on the power cord indicate the limits to which the cord should be stretched. The yellow marking represents the maximum recommended length for the cord, while the red marking indicates the maximum limit to which it can be unwound without damaging. If possible, only unwind the cord as far as the yellow marking. NEVER unwind the cord past the red marking, as this will cause damage to it.
6 - Troubleshooting
| Problem Possible Solution | |
| The vacuum will not work | Make sure the vacuum cleaner is plugged into an active mains socket and the socket switch is in the ON position. This vacuum cleaner is equipped with a motor protective thermostat. If for some reason your vacuum overheats, the thermostat will automatically turn the suction motor off. Should this occur, allow it to cool for 1 hour, then empty the dust container and clean all of the filters. |
| The vacuum will not pick-up or the suction power is weak | The dust container may be full, or the filters may require cleaning.Empty the dust container and clean the filters.Check to make sure the brush roller is clear of fibres. |
| Dust is escaping from the vacuum | The filter may not be installed correctly, or the dust container may be full. Empty the dust container and reassemble the filter system. |
7 - Recycling
DISPOSAL OF THE UNIT
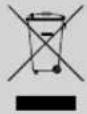
Appliances bearing the symbol shown here may not be disposed of in domestic rubbish. You are required to dispose of old electrical and electronic appliances like this separately.
Please visit www.recycle-more.co.uk or www.recyclenow.co.uk for access to information about the recycling of electrical items.
Please visit www.weeeireland.ie for access to information about the recycling of electrical items purchased in Ireland.
The WEEE directive, introduced in August 2006, states that all electrical items must be recycled, rather than taken to landfill.
Please arrange to take this appliance to your local Civic Amenity site for recycling, once it has reached the end of its life.
8 - Cleaning & Care
Emptying the Dust Tank:
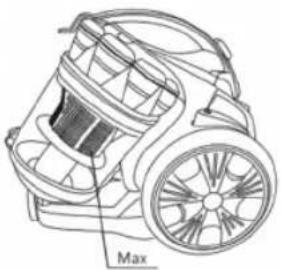
The dust tank should be emptied when dust reaches the MAX mark, as shown in the illustration.
Note: There is no MAX marking on the body of the dust tank. Refer to the adjacent illustration to ascertain maximum fill capacity for the dust tank.
natural_image
Line drawing of a car with a Max label, showing internal components and wheels (no text or symbols beyond the label)- Always remove the plug from the wall socket before you clean the unit.
- Push the dust tank release button to separate the tank from the body.
- Push the latch on the body of the dust tank downwards to open the chute door, then shake the contents into a dustbin. Close the dust tank door by pushing it upwards until it clicks into place.
Removing and Cleaning the Filter:
- To clean the filter, first remove it from the dust tank. To remove the tank from the main body of the appliance, press the tank release button and pull the tank firmly away from the body of the appliance until it detaches.
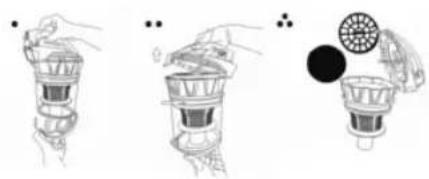
- Once the tank has been detached from the unit, turn the dust tank lid clockwise to release the latch and open the tank. Use the padlock symbols on the body of the dust tank as a guide.
- When the tank lid has been detached from the body, grip the small tab with the product branding printed on and pull it upwards to open the lid and access the inner filter.
- To clean the outer filter, tap it against a rubbish bin or similar surface to remove debris, then clean it with a soft cloth or a paper towel.
- Tap the inner filter against a rubbish bin or similar surface to remove debris, then rinse it under running water and leave it to dry thoroughly.
- Once the filter is dry, put it back into the dust tank and turn it clockwise to lock. The arrow on the filter unit should be aligned with the lock symbol on the dust tank; otherwise, the filter is not yet locked into place. Continue to turn it clockwise until the two symbols are aligned.
- Once the dust tank is locked, attach it back onto the main body of the appliance until it clicks into place.
WARNING! NEVER operate the appliance without the dust tank filter in place.
- Once the dust tank filter has been securely placed back inside the dust tank, slot the dust tank back into the unit until it clicks into place.
WARNING! DO NOT allow any liquids into the unit, as this could cause damage to the electrical components and cause it to malfunction.
Storing the Appliance:
When not using the vacuum for extended periods of time, store the unit in a cool, dry place, preferably inside its original packaging.
9 - Wiring Safety for UK Use Only
IMPORTANT
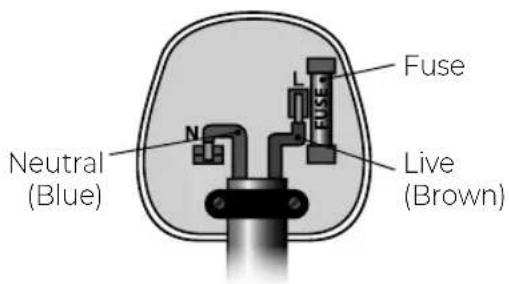
As the colours in the mains lead of this appliance may not correspond with the coloured markings identifying the terminals in your plug, please proceed as follows:
The wires in the mains lead are coloured in accordance with the following code:
Blue neutral [N] Brown live [L]
Plug Fitting Details (Where Applicable).
The wire coloured blue is the neutral and must be connected to the terminal marked [N] or coloured black. The wire coloured brown is the live wire and must be connected to the terminal marked [L] or coloured red. On no account must either the brown or the blue wire be connected to the [EARTH] terminal
Always ensure that the cord grip is fastened correctly.
The plug must be fitted with a fuse of the same rating already fitted and conforming to BS 1362 and be ASTA approved.
If in doubt consult a qualified electrician who will be pleased to do this for you.
Non-Rewireable Mains Plug.
If your appliance is supplied with a non-rewireable plug fitted to the mains lead and should the fuse need replacing, you must use an ASTA approved one (conforming to BS 1362 of the same rating).
If in doubt, consult a qualified electrician who will be pleased to do this for you.
If you need to remove the plug – disconnect it from the mains – and then cut it off of the mains lead and immediately dispose of it in a safe manner. Never attempt to reuse the plug or insert it into a socket outlet as there is a danger of an electric shock.
WARNING:
This appliance is double insulated.
Do not connect any wire to the earth terminal.
10 - Warranty

GREAT BRITISH DESIGN SINCE 1912
As a thank you for purchasing one of our fantastic products, we are offering you an extra 2 years peace of mind in addition to your 1 year guarantee.
To receive your extra 2 year guarantee, register your appliance online within 28 days of purchase by visiting www.towerhousewares.co.uk
natural_image
Black and white photo of a vacuum cleaner with black handle and metal casing (no visible text or symbols)This product is guaranteed for 12 months from the date of original purchase. If any defect arises due to faulty materials of workmanship, the faulty products must be returned to the place of purchase. Refund or replacement is at the discretion of the retailer.
The Following Conditions Apply:
• The product must be returned to the retailer with proof of purchase or a receipt.
• The product must be installed and used in accordance with the instructions contained in this instruction guide.
- It must be used only for domestic purposes.
- It does not cover wear and tear, damage, misuse or consumable parts.
- Tower has limited liability for incidental or consequential loss or damage. This guarantee is valid in the UK and Eire only.
The standard one year guarantee is only extended to the maximum available for each particular product upon registration of the product within 28 days of purchase. If you do not register the product with us within the 28 day period, your product is guaranteed for 1 year only.
To validate your extended warranty, please visit www.towerhousewares.co.uk and register with us online.
Please note that length of extended warranty offered is dependent on product type and that each qualifying product needs to be registered individually in order to extend its warranty past the standard 1 year.
Extended warranty is only valid with proof of purchase or receipt.
Notes:
Notes:
TOWER®
over 100 YEARS of quality
thank you!
We hope you enjoy your appliance for many years. As a thank you for purchasing one of our fantastic products, we are offering you an extra 2 years peace of mind.
*To receive your extra 2 years guarantee, register your appliance online within 28 days of purchase by visiting:
www.towerhousewares.co.uk
Should you have a problem with your appliance, or need any spare parts, please call our Customer Support Team on:
+44 (0) 333 220 6066
Your warranty becomes void should you decide to use non Tower spare parts.
Spare parts can be purchased from
www.towerhousewares.co.uk
3 ^* YEAR GUARANTEE

GREAT BRITISH
DESIGN SINCE 1912
0120.V2

- Towerbrand
- Contents:
- There are many benefits to using a Tower 2 in 1 Cylinder Vacuum Cleaner:
- - Specifications:
- Structure of your appliance:
- - Technical Data:
- Documentation
- Guarantee for spare parts:
- - Important Safety Information:
- - Before First Use
- - Using Your Appliance
- Connecting the Hose:
- Connecting the Pole:
- Connecting the Accessories:
- Using the Vacuum:
- Adjusting the Floor Brush:
- Rewinding the Power Cord:
- - Troubleshooting
- - Recycling
- DISPOSAL OF THE UNIT
- - Cleaning & Care
- Emptying the Dust Tank:
- Removing and Cleaning the Filter:
- Storing the Appliance:
- - Wiring Safety for UK Use Only
- IMPORTANT
- Plug Fitting Details (Where Applicable).
- Non-Rewireable Mains Plug.
- WARNING:
- - Warranty
- The Following Conditions Apply:
- TOWER®
- thank you!
- www.towerhousewares.co.uk
Brand : Tower
Model : RXP10PET
Category : Vacuum Cleaner