Sanskrit MKIII - Headphones S.M.S.L - Free user manual and instructions
Find the device manual for free Sanskrit MKIII S.M.S.L in PDF.


| Product Type | USB DAC / Headphone Amplifier |
| Model | Sanskrit MKIII |
| Brand | S.M.S.L |
| Dimensions (W x H x D) | 145 mm x 37 mm x 100 mm |
| Weight | 0.5 kg (1.1 lbs) |
| Power Supply | USB bus-powered (5V) or external 5V DC adapter |
| Input | USB Type-B |
| Outputs | 1 x RCA line out, 1 x 6.35mm (1/4") headphone out |
| DAC Chip | AK4490 |
| Supported Audio Formats | PCM up to 32-bit / 768 kHz, DSD up to DSD512 |
| Dynamic Range | 120 dB |
| Signal-to-Noise Ratio (SNR) | 115 dB |
| Total Harmonic Distortion + Noise (THD+N) | 0.001% |
| Headphone Impedance Range | 16 Ω – 300 Ω |
| Output Power (Headphone) | 180 mW @ 32 Ω, 30 mW @ 300 Ω |
| Output Impedance | 0.1 Ω |
| Frequency Response | 20 Hz – 50 kHz (±0.5 dB) |
| USB Controller | XU208 |
| Supported Operating Systems | Windows (driver required), macOS, Linux (UAC1/UAC2), iOS, Android (OTG) |
| Cleaning Instructions | Wipe with a soft, dry cloth. Do not use solvents. |
| Safety Precautions | Avoid liquid ingress; use only supplied or certified power adapter. |
| Replaceable Parts | No user-serviceable parts inside. Contact S.M.S.L for repairs. |
| Warranty | 1 year from date of purchase (check local regulations) |
Frequently Asked Questions - Sanskrit MKIII S.M.S.L
User questions about Sanskrit MKIII S.M.S.L
0 question about this device. Answer the ones you know or ask your own.
Ask a new question about this device
Download the instructions for your Headphones in PDF format for free! Find your manual Sanskrit MKIII - S.M.S.L and take your electronic device back in hand. On this page are published all the documents necessary for the use of your device. Sanskrit MKIII by S.M.S.L.
USER MANUAL Sanskrit MKIII S.M.S.L
natural_image
Illustration of two credit cards with one card partially visible (no text or symbols)- FL1 (Sharp Roll-off filter 陡峭滚降)
- FL2 (Slow Roll-off filter 缓慢滚降)
- FL3 (Short Delay Sharp Roll-off filter 短延时陡峭滚降)
- FL4 (Short Delay Slow Roll-off filter 短延时缓慢滚降)
- FL5 (Super Slow Roll-off filter 超低延时缓慢滚降)
FL6 (Low Dispersion Short Delay filter 短延时)
操作介绍
简介
natural_image
Line drawing of two credit cards with one card partially visible (no text or symbols)The contents of this manual may change with the version,
if there is any change without notice,
please go to https://www.smsl-audio.com/portal/product/support
Download the latest version of the manual.
Safety Notes
• Install this unit in a well ventilated, cool, dry, clean place-away from direct sunlight, heat sources, vibration, dust, moisture, or cold..
- Use the voltage specified on this unit Only. Using this unit with a higher voltage than specified is dangerous and may cause fire, damage to this unit, or personal injury. Our company will not be held responsible for any damage resulting from the use of this unit with a voltage other than that specified.
- Do not attempt to modify or fix this unit by yourself. Contact alesperson or customer service when any service is needed. The cabinet should never be opened for any reason.
- When not planning to use this unit for long periods of time (i.e. when going on vacation), disconnect the power cable from the AC wall outlet.
Important note:
The product specifications and information mentioned in this manual are for reference only. The content of this manual is subject to change without notice.
Warranty Terms
1. The Term of Service
Foshan Shuangmusanlin Technology Co., Ltd promises to offer good-quality products. If the product is broken in 7 days after purchasing when you use it normally, you can choose to send it back for return, replacement or repairing (only the product does not affect the second sales can be returned). Repairing for free in one year if you use it normally.
-
Date of purchase is in accordance with the date on invoice or receipt uesd by seller, and if you buy it on line, you can show the screenshot of trade.
-
If an inappropriate usage causes the unit damaged, the warranty will be void. As below.
-
All damages by inappropriate use, including using it under non-normal working environment or without following the instructions.
• Dismantling, refitting, repairing by user in private. - Causing damage by using some fittings instead of the designative or accredited ones.
-
Cannot provide credible proof of purchase.
-
Sending it back to our company for repairing.
-
Contact your S.M.S.L Audio reseller for a return or replacement.
Features
• Ultra-tiny shape design and supports a variety of placement ways ;
• The latest XMOS XU-316 solution supports sampling rate up to 32bit/768KHz and DSD512 ;
• The new self-developed CK-03 clock processing circuit greatly reduces clock jitter;
• One pieces of AKM's new AK4493S chip, and carefully adjusted it to an unprecedented 0.00013% ;
• Built-in gravity sensor, automatically switches the screen!
• Built-in high-performance power filtering system, so that it can achieve the best performance using only one USB interface for power supply!
• Anodized CNC aluminum alloy housing ;
• Japan Electronics Association Hi-Res Audio certification ;
• Full-featured remote control.
Specifications
Input ....USB / Optical / Coaxial
Output Level....2.0Vrms
THD+N 0.00013%(117dB)
Dynamic range 121dB
SNR 121dB
USB compatibility ....Windows 7 / 8 / 8.1 / 10 / 11
Mac OS X10.6 or Later / Linux
Bit depth
USB 1bit \~ 32bit
Optical/coaxial 16bit \~ 24bit
Sampling rate
USB PCM 44.1 \~ 768kHz
DSD 2.28224 \~ 22.5792MHz
Optical/coaxial 44.1kHz \~ 192kHz
Power Consumption ....../<5W
Standby power ....../<0.1W
Size 75x45x144 (WxHxD)
Weight 320g
SMSL reserves the right to make improvements which may result in specification or feature changes without notice.
Remote control
• Install 2 x AAA batteries as instructions.
- When using the remote control, point it toward the remote control signal receiver on the main unit from a distance of 5 ~m (16 ft) or less. Do not place obstructions between the main unit and the remote control.
- The remote control might not work if the remote control signal receiver on the unit is exposed to direct sunlight or bright light. If this occurs, try moving the unit.Beware that use of this remote control could cause the unin-tentional operation of other devices that can be controlled by infra.
Operating the remote control
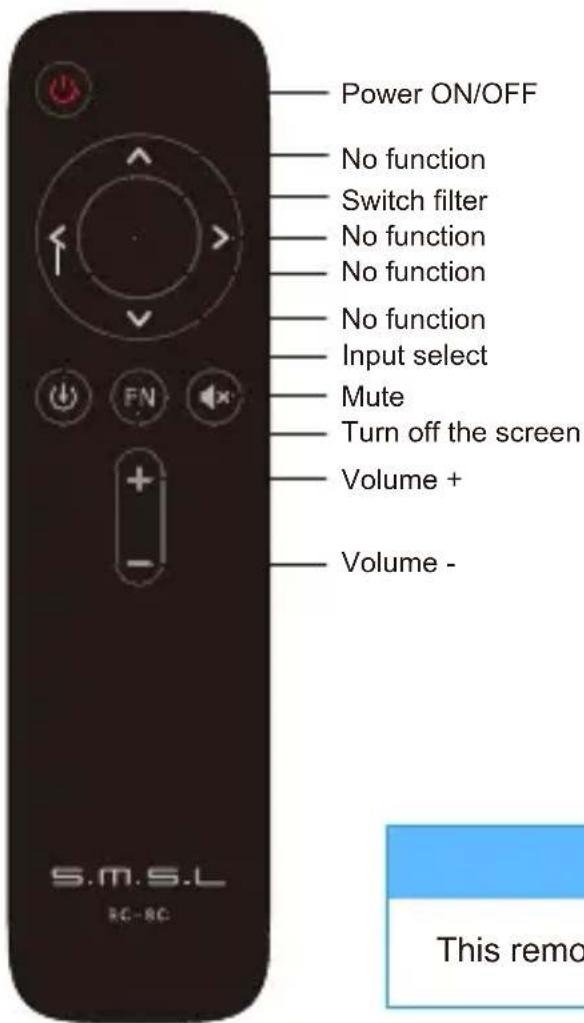
Note
This remote controller use 2 x R03/AAA batteries.
Display Interface and Instructions
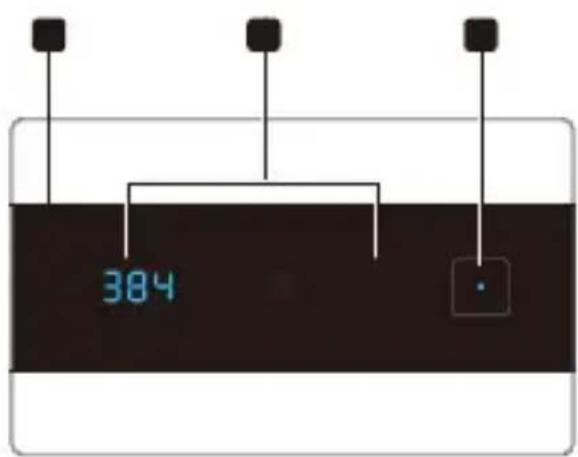
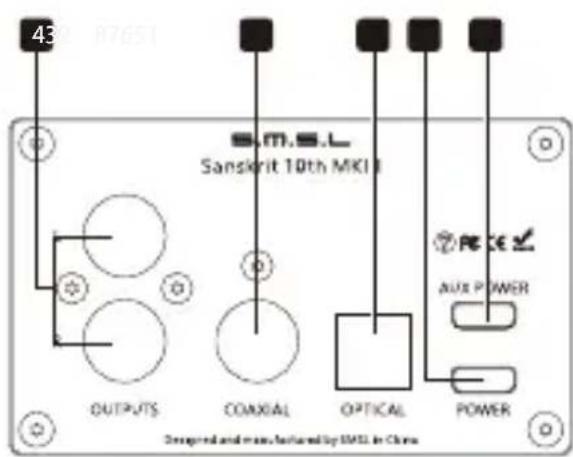
1 Remote Window Display POWER/INPUT KEY

4 Audio Outputs
5 Coaxial Input Optical Input 6
7
8 Aux Power Supply (see Note)USB Input
Note:
- This is the Aux power input, when you use phones to connect the USB, you need to connect a 5V DC power for avoiding the phone overcurrent;
- You cannot use the Quick-Charge power for this connector, because of the Quick-Charge power may output over 5V, which is dangerous for this unit!
Instructions
POWER / INPUT KEY
- Hold the key to switch power OFF, press the key to switch power ON.
- Press the key to switch INPUTS between "USB, COAXIAL, OPTICAL"
which display as

ROTATE THE UNIT
The Sanskrit MKIII is designed for minimized desktop usage, which has 3 setup modes showed as below-in these modes, the display will rotate by itself because the Sanskrit MKIII has built-in digital accelerometer, and it will sense the direction it is in.
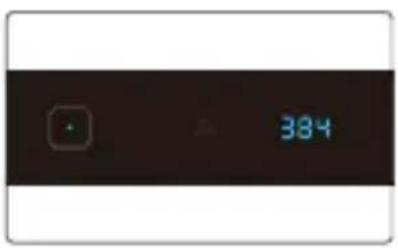
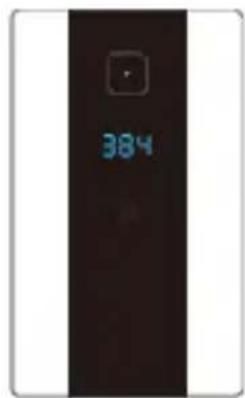
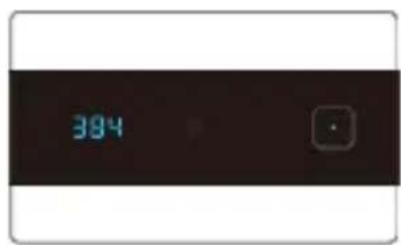
Note: Sanskrit MKIII must be placed horizontally, otherwise the display may not work properly!
TURN OFF THE DISPLAY
The Sanskrit MKIII can be turned off the display for you to enjoy the music without light interfere.
- Use the "FN" key of remote controller to switch on or off this function.
- When the display is off, a blue LED will lit indicating this mode.
- When in display-off mode, any operation will make display recovery for 5 seconds.
Instructions
DISPLAY INSTRUCTIONS
- When starting up the unit, it will display 510 , which stands for Sanskrit MKIII.
- When starting up the unit, it will display 2 seconds of 5.10, volume and current sampling rate in turn.
- When there is no input signal or the sampling rate exceeds the range of the unit, it will display as
- When switching inputs, USB, OPE, COA it will display.
- When adjusting the volume, the volume is displayed in the range of -00 (max) \~ -40 (min).
- When setting the filters, the displayed range is FL1 \~ FL6
- When playing the DSD file, 64 is DSD64, 128 is DSD128, 256 is DSD256, 5:2 is DSD512.
MUTING
- Press the MUTE key of the remote controller, the unit will mute the audio output, and if the display is not OFF it will flash the volume on the display.
- Press the MUTE key again or adjust volume will cancel muting.
PCM FILTER SETTING
Using the PCM filter switch button on the remote control to switch 6 filters.
• FL1 (Sharp Roll-off filter)
• FL2 (Slow Roll-off filter)
• FL3 (Short Delay Sharp Roll-off filter)
• FL4 (Short Delay Slow Roll-off filter)
• FL5 (Super Slow Roll-off filter)
• FL6 (Low Dispersion Short Delay filter)
Instructions
INSTRUCTION
The Sanskrit MKIII has a built-in gravity sensor, so this unit can realize the function of automatic screen rotation. Normally, the unit has been calibrated before leaving the factory, users do not need to calibrate themselves, but in some cases, it may be caused by transportation or other reasons. The parameters of the gravity sensor will be changed, so the following describes how to calibrate it by yourself.
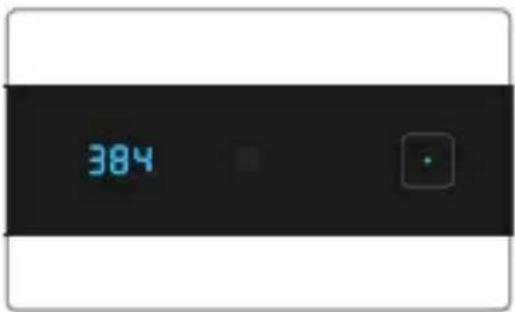
Placement during calibration (button on the right side)
Calibrating gravity sensor
- Put Sanskrit MKIII in the horizontal position, which means, the power button is on the right side, and the unit is in the standby state;
- Press and hold the power button for 5 seconds, the display will show "CAL", at this time, the system will start automatic calibration;
- Wait patiently for a few seconds. If the system is successfully calibrated, it will display "Suc", which means success. If "FAL" is displayed, the calibration was failed. Please ensure that the unit is in the horizontal position and has not being shaken in the calibration process.
- After the calibration is successful, it can be turned on and used normally. If the calibration fails, please repeat the steps 1 \~ 3 to retry, or unplug the power cord and let the unit cool down for a few minutes and try again!
Note
After the automatic screen rotation function is cancelled, the display state of this unit is limited to the display state of "button on the right side".
Disable automatic screen rotation and factory reset
• Make the unit in standby mode and unplug the unit;
- Press and hold the power button, then plug in the power cord;
- Hold the power button until the “---” appears; then the display will show “OFF”, and finally “010” will be displayed. “010” is the software version number of the unit, which is V1.0. At this time, the unit has reset.
• To enable this function again, repeat steps 1 \~ 3.
- Connect the power cord when pressing the power button, until screen shows text. Release the button, and the item returns to the factory setting at this time.
- 操作介绍
- 简介
- Safety Notes
- Important note:
- Warranty Terms
- The Term of Service
- Features
- Specifications
- Remote control
- Operating the remote control
- Note
- Display Interface and Instructions
- Note:
- Instructions
- POWER / INPUT KEY
- ROTATE THE UNIT
- TURN OFF THE DISPLAY
- DISPLAY INSTRUCTIONS
- MUTING
- PCM FILTER SETTING
- INSTRUCTION
- Calibrating gravity sensor
- Disable automatic screen rotation and factory reset
Brand : S.M.S.L
Model : Sanskrit MKIII
Category : Headphones