
PLCMDVR77 - Dash cam Pyle - Free user manual and instructions
Find the device manual for free PLCMDVR77 Pyle in PDF.


| Product Type | Dash Camera |
| Brand | Pyle |
| Model | PLCMDVR77 |
| Dimensions | Approx. 2.5 x 1.5 x 1.0 inches |
| Weight | Approx. 2.0 ounces |
| Power Supply | 12V car cigarette lighter adapter; built-in rechargeable battery |
| Display | 2.0 inch LCD screen |
| Camera Resolution | 1080p Full HD |
| Lens Angle | 170° wide angle |
| Night Vision | Infrared LED support |
| Loop Recording | Yes, overwrites old files automatically |
| G-Sensor | Built-in accelerometer for collision detection |
| Motion Detection | When parked, records events |
| Memory Card | MicroSD up to 32GB (not included) |
| Battery | Built-in lithium polymer, approx. 20 min standby |
| Mounting | Suction cup bracket for windshield |
| Connectivity | USB 2.0 for data transfer; AV out |
| Maintenance | Clean lens with dry microfiber cloth; avoid solvents |
| Safety | For in-car use only; do not expose to extreme temperatures |
| Spare Parts | USB cable, suction mount, car charger |
| Repairability | Not user-serviceable; contact Pyle support |
Frequently Asked Questions - PLCMDVR77 Pyle
User questions about PLCMDVR77 Pyle
0 question about this device. Answer the ones you know or ask your own.
Ask a new question about this device
Download the instructions for your Dash cam in PDF format for free! Find your manual PLCMDVR77 - Pyle and take your electronic device back in hand. On this page are published all the documents necessary for the use of your device. PLCMDVR77 by Pyle.
USER MANUAL PLCMDVR77 Pyle
natural_image
Close-up of a black rear mirror with attached sensor and control buttons (no text or symbols visible)PLCMDVR77

natural_image
Row of white star and star icons on black background (no text or symbols)HD Video Recording System
with Rearview Mirror Monitor,
7.4" -inch LCD Display,
Compact Dash Cam,
Rear-View Backup Camera
USER MANUAL
DESCRIPTION
Vehicle DVR Dash Cam Kit
HD Video Recording System with Rearview Mirror Monitor, 7.4" -inch LCD Display, Compact Dash Cam, Rear-View Backup Camera
MONITOR WIRING CONNECTION:

REAR VIEW BACKUP CAMERA:
Angle Adjustable Camera Lens
Located on the camera housing are 2 screws which lock the camera lens angle in position. The screws may be loosened to allow camera lens angle adjustment. Loosen the screws, adjust the camera lens into the desired angle, then tighten the screws securely. Be sure as to not overtighten the screws.

OPERATION INSTRUCTIONS:
- V1 connect the left optic camera signal; V2 camera signal connection (reverse priority display); V3 connection right camera signal.
- Trigger (rearview camera line) displays rear camera screen; trigger (left video line) shows the left optic camera; trigger (right video line) displays right depending on the camera screen; no automatic trigger machine after shutdown.
- Press the menu button to display the menu, then press (regulation) (or regulation) can adjust the size parameters.
- The environment sensing function, the screens brightness may change while the changing of ambient light, if ambient light is strong, the brightness of the screen will increase, in order to get a clearer image in the same light; when the ambient light is weak, the brightness of the screen can be reduced. Make sure the brightness is right, not too bright and irritating to the eyes.
Rearview Backup Camera Quick Installation:
Connect the camera to the using the included DC 12V power cable.
Connect the DC 12V power cable to the positive 12V reverse tail light in the rear of your vehicle. Then, connect the black wire, of the DC 12V power cable, and ground properly. This connected power and ground cable then connects to the camera, and will supply power to the camera directly. Next, use the included yellow RCA video connector cable, and run that cable from the yellow RCA video connector jack of the camera, to the yellow video connector of your compatible display monitor.
Yellow RCA cable when connected, automatically retrieves the video signal when activated (when your vehicle is switched into the reverse gear).
- Locate the reverse taillight wiring behind your vehicle's reverse light. You may need to remove an interior panel, or other cover, in order to locate the wiring. Connect the included power 12V DC power cable to the reverse light.
a. Connect the power cable's Red wire to your vehicle's reverse light positive wire.
b. Connect the power cable's Black wire to your vehicle's reverse light negative wire. - Connect the camera to this 'reverse light' connection installation, then mount the camera in the desired location.
- Run the RCA video cable from the camera to your compatible video display monitor.
SYSTEM FEATURES:
• Vehicle DVR Driving Video Recording System
- Rear-View Mirror Assembly with Built-in 7.4"-inch Display Screen
- Camera + Camcorder: Snap Pictures or Record Video
• Night Vision Illumination
• Built-in G-Sensor Auto-save Recording during Collision
• Built-in Microphone for Audio Recording
• True Color Reproduction and Image Adjustment
- Micro SD Memory Card Slot
- Easy File Saving & Sharing
• Universal Dashboard / Windshield Mountable
*Designed to Replace Your Existing Rear-View Mirror Assembly
WHAT'S IN THE BOX:
- Rearview Mirror Assembly
- DVR Dash Cam
- Backup Camera
• Power & Wiring Harness - RCA Video Cable
- Camera Power Supply Cable, 3.2' ft.
BACKUP CAMERA:
• Video System: PAL/NTSC Auto Switching
• Image Sensor: 1/4" Color CMD
• Effective Pixel: 656 x 492Pixels
• Resolution: 420 TV Lines
- Lens Angle: 170^ Degree
• Marine Grade Rating: IP-69
• Video Output: 1.0V PP-75 Ohm
- Camera Dimensions (W x H x D): 10.0" x 1.3" x 1.3" -inches
• Weight: 0.72 lbs
TECHNICAL SPECS:
• Video System: PAL/NTSC Auto Switching
• LCD Screen: 7.36" TFT LCD
• Monitor Resolution: 1280 x 420 Pixels
- Brightness: 1000cd/m2
- Aspect Ratio: 16:9
• Monitor And Camera Connector: RCA connector
• AV Inputs: 3CH- AV1- Left Camera, AV2-Back Camera, AV3-Right Camera
- Micro SD Card Support: Up to 32GB, Not Included
• Power Consumption: 7W (Working) 0.5W (Standby)
• Power Supply: DC 12-24V
- Monitor Dimensions (L x W x H): 10.0" x 1.3" x 1.26"-inches
BACKUP CAMERA WIRING:

Monitor
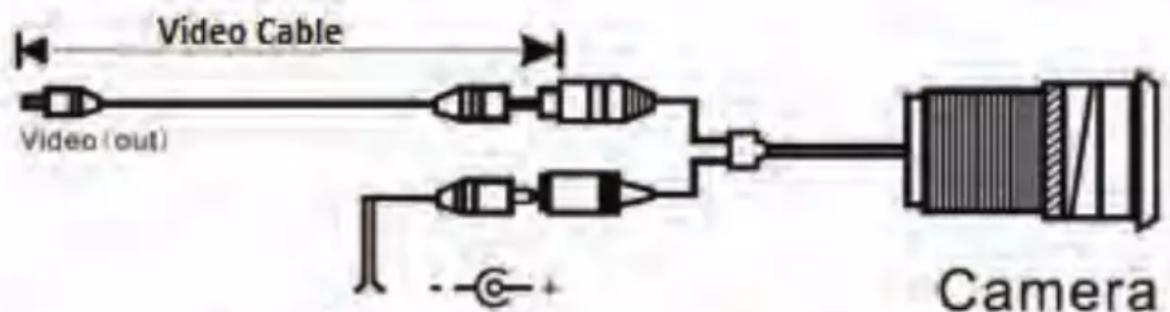
Backup light power
Red: 12V (in)
Black: GND (in)
Since the 7.36 inch mirror monitor with 3ch video input, users can connect the video camera input to the monitor V3 ch for backup.
EASY FILE SAVING & SHARING
To use the recording function, use the external dash camera mirror monitor. View the recorded video and playback output in the 7.36 inch mirror.
PYLE
PyleUSA.com

natural_image
Illustration of a laptop with a red checkmark on screen (no text or symbols)VISIT US ONLINE:
Have a question?
Need service or repair?
Want to leave a comment?
PyleUSA.com/ContactUs
PYLE
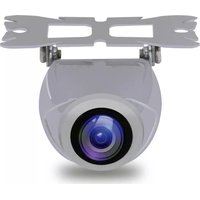
Brand : Pyle
Model : PLCMDVR77
Category : Dash cam