
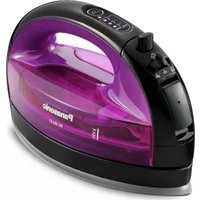
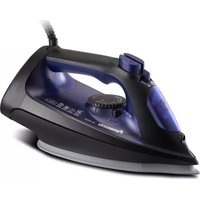
NI-JU700C - Iron PANASONIC - Free user manual and instructions
Find the device manual for free NI-JU700C PANASONIC in PDF.


| Product Type | Steam Iron |
| Brand | Panasonic |
| Model | NI-JU700C |
| Power Consumption | 2000 W |
| Voltage | 220-240 V |
| Frequency | 50/60 Hz |
| Water Tank Capacity | 300 ml |
| Soleplate Material | Ceramic |
| Continuous Steam Output | 35 g/min |
| Steam Boost | 120 g/min |
| Anti-Calc System | Yes |
| Auto Shut-Off | Yes |
| Spray Function | Yes |
| Vertical Steaming | Yes |
| Self-Cleaning | Yes |
| Cord Length | 2 m |
| Weight | 1.3 kg |
| Dimensions (H x W x D) | 150 x 280 x 120 mm |
| Color | White / Blue |
| Safety Features | Auto shut-off, heat-resistant soleplate |
| Maintenance | Descaling recommended every 3 months |
| Repairability | Spare parts available via Panasonic service |
Frequently Asked Questions - NI-JU700C PANASONIC
User questions about NI-JU700C PANASONIC
0 question about this device. Answer the ones you know or ask your own.
Ask a new question about this device
Download the instructions for your Iron in PDF format for free! Find your manual NI-JU700C - PANASONIC and take your electronic device back in hand. On this page are published all the documents necessary for the use of your device. NI-JU700C by PANASONIC.
USER MANUAL NI-JU700C PANASONIC
Operating Instructions
Steam Iron
Household Use Only
Model No. NI-JU700C

English
3-15
Panasonic
Operating Instructions
Steam Iron
Household Use Only
Model No. NI-JU700C
Contents
Safety precautions----04-07
Parts identification----07
Before use----08
How to use as an iron----08-09
Guide for Steam/Dry selector----10
Using the "power shot" 10
Using the "vertical shot" 11
Using the "spray" 11
How to care for and store your iron----11-14
Q&A 14
Trouble shooting----15
Specification----15
Thank you for purchasing this Panasonic product.
Before operating this unit, please read these instructions completely and save them for future use.
Safety precautions
To reduce the risk of injury, loss of life, electric shock, fire, and damage to equipment or property, always observe the following safety precautions.
Explanation of symbols
The following symbols are used to classify and describe the level of hazard, injury, and property damage caused when the denotation is disregarded and improper use is performed.

WARNING
Denotes a potential hazard that could result in serious injury or death.

CAUTION
Denotes a hazard that could result in minor injury or damage your belongings.
The following symbols are used to classify and describe the type of instructions to be observed.

This symbol is used to alert users to a specific operating procedure that must not be performed.

This symbol is used to alert users to a specific operating procedure that must be followed in order to operate the unit safely.

WARNING
To reduce the risk of personal injury, electric shock or fire, please observe the following:

Do not use when the power plug or power cord is damaged or hot. Never use the iron if the power plug fits loosely in a household outlet.

Do not leave the iron unattended while it is connected to the outlet.

Do not connect or disconnect the power plug to a household outlet with wet hands.

Do not damage, modify, forcibly bend, pull, or twist the power cord.
Do not place anything heavy on or pinch the power cord.

Do not wrap the power cord around the iron when storing.

Do not use with the power cord bundled.

Do not use the iron with wet hands.

Do not use in proximity of flammable materials (such as benzine or the like).

Never modify, disassemble, or repair.
- Doing so may cause ignition or injury due to abnormal operation. Contact an authorized service center for repair.

Do not immerse the iron in water or other liquids.
Do not supply water to the unit directly from the faucet.
- Doing so may cause burns, electric shock or fire due to a short circuit.

WARNING

The iron is not to be used if it has been dropped, and there are visible signs of damage or if it is leaking.
- Refer servicing to authorized service personnel.
To reduce the risk of personal injury, electric shock or fire, please observe the following:

Always ensure the appliance is operated on an electric power source matched to the rated voltage indicated on the iron. Fully insert the power plug.

The power plug must be unplugged before filling water to the water tank.

Regularly clean the power plug to prevent dust from accumulating.
- Disconnect the power plug and wipe with a dry cloth.

Immediately stop using and unplug the power plug if there is an abnormality or malfunction. Examples of abnormalities:
- The iron stops occasionally, the power cord or the power plug is abnormally hot or discolored.
· The iron is deformed or smells of burning. - Refer servicing to authorized service personnel.

This appliance is not intended for use by persons (including children) with reduced physical, sensory or mental capabilities, or lack of experience and knowledge, unless they have been given supervision or instruction concerning use of the appliance by a person responsible for their safety.
Children should be supervised to ensure that they do not play with the appliance.
- Failure to do so may cause an accident or injury.

The iron must be used and rested on a flat, stable surface. When placing the iron on its stand, ensure that the surface on which the stand is placed is stable.
- If placed on a shaggy rug or other unstable location, the iron may fall over and cause damage to the rug, injury or burns.

If the power cord is damaged, it must be replaced by the manufacturer, its service center, or similarly qualified persons in order to avoid a hazard.
- Failure to do so may cause an accident or injury.

CAUTION
To reduce the risk of personal injury, property damage, electric shock or fire, please observe the following:

Do not touch the hot surface (such as soleplate, and the hot surface around it).

CAUTION

Do not touch the steam or "power shot" during use.
- When using an ironing board through which steam can penetrate, do not put your hand, leg, etc., under the ironing board.
- Do not aim the steam towards your hand, knee, or any other part of the body.
- Do not use steam or "power shot" when the iron is partially sticking out from the ironing board.
- Do not iron the clothes that you are wearing.

Do not insert pins or needles into the iron or use it on clothes with sewing needles or the like inserted.

Do not put the soleplate too close to you or others since steam may unexpectedly erupt from it.

Do not use the iron with the exception of fabric.

Do not store the iron until it has fully cooled down.

Do not store the power cord coiled with sharp angles.
- This may damage the cord.

Do not repeatedly and quickly press the power shot button.
- If repeating operation over an interval of less than 2 seconds, burns due to hot water leaks may result.

Only use tap water in the iron. Do not add perfume, vinegar, starch, descaling agents, ironing aids or other chemicals in the water tank.
- Doing so may it will cause scalds or getting dirty due to the damage product.

If the shot intensity is low, do not operate the power shot button.
- Doing so may cause burns due to hot water leaks.

Do not tilt or violently move the iron back and forth.
- Doing so may cause burns due to hot water leaks.

Do not use any ironing accessories available on the market.
- Doing so may cause burns or damage to cloth due to incorrect operation.

Do not use the iron near walls or furniture that cannot withstand high temperature or humidity.
- Doing so may damage the wall or furniture.

Do not add hot water in the water tank.
- Doing so may cause burns due to hot water splashes.

CAUTION
To reduce the risk of personal injury, property damage, electric shock or fire, please observe the following:
Use a dry iron on moist clothing (spray misted).
! Disconnect the power plug by holding the wire instead of pulling on the power cord.
- Failure to do so may break the wire, and may cause burns, electric shock, or fire due to a short circuit.
Care should be taken when using the iron.
- Steam emission may cause personal injury.
When using with following fabric, test on an inconspicuous area, or place a cloth over the fabric to prevent the fabric from marking.
- Expensive or specially processed fabrics (velvet, acrylic, nylon, cashmere, etc.)
- Fabrics that are labeled as "low heat" or "medium heat", or dark colored fabrics.
Drain water from the water tank after use.
- Failure to do so may cause the water to leak out from the soleplate when the iron is used next time.
Always unplug the power plug during not in use.
- Failure to do so may cause fire, electric shock.
Parts identification

A Thermostat operating indicator light
B Handle
© Temperature selector
Power shot button
Spray mist button
Steam/Dry selector
G Water fill cover
Self-cleaning button
Spray nozzle
Maximum water level indicator
K Temperature select scale position
L Soleplate
Water tank
N Heel rest
Power cord
Power plug
※ Plug type may vary comply with respective country or region requirement.
Before use
The temperature selector of the iron has words, dots and steam symbols.
The dots are symbols for 3 temperature ranges:
- Low temperature
•• Medium temperature
... High temperature

Some fabrics are labeled with these dots as a guide for selecting the proper ironing temperature setting. Use a press cloth if necessary.
Notes:
- The thermostat operating indicator light goes on and off alternately to indicate the changing temperature of soleplate. If you turn the temperature selector from a high temperature to a lower temperature, wait until the indicator light goes on before using the iron.
- Do not place the hot iron on cloth for extended time or wrap cloth over the hot iron.
How to use as an iron
- Move the steam/dry selector to the dry position to avoid water leakage.

- Fill water in the water tank when using steam, power shot, vertical steam or spray.
① Open the water fill cover. Hold the iron as shown and fill the iron with water up to "MAX" (about 300 mL). Use a claen cup for filling.

② Place iron in vertical position to check water level.
③ Close water tank cover firmly to prevent spillage during ironing.
Note:
Do not overfill the water tank. The steam will release through the vents when the iron is positioned vertically.
- Position the iron in the heel rest position and make sure the temperature selector is set to "0".

- Plug the power plug into an outlet.

- Set the temperature selector. The thermostat operating indicator light goes on.
Refer to "Guide for Steam/Dry selector" on P10
- Please make sure the temperature select indicator setting is on "MAX" when using "high steam" and "power shot".
Note: If the temperature of soleplate is high, the light does not go on.
- Wait until the thermostat operating indicator light goes off. Hold the iron horizontally and move the steam/dry selector into the steam position when using the "power shot". (P10)
7. After each use
① Set the steam/dry selector to the dry position. If the steam/dry selector is not in the dry position after using, remaining water will move into the soleplate and can result in burns when the iron is used next time.


English
② Empty the water tank immediately after using. Do not store the iron with water in it. If you empty the water tank after it has cooled, heat the iron for about 5 minutes with the temperature selector set to "MAX".
- Do not wind the power cord around the iron. It may be damaged by the hot soleplate.
③ Wait until the iron has cooled before storing it, and always set it on the heel rest to protect the soleplate from scratches, corrosion or stains.


Guide for Steam/Dry selector
| Steam/Dry selector | Temperature zone | Recommendations | |
| Dry |  | Choose according to the type of fabrics | For polyester and other synthetic fiber material. |
| Low steam |  |  | For thin or delicate fabrics requiring a small amount of steam. |
| High steam |  |  | For fabrics requiring a lot of steam. (i.e. thick materials, items with stubborn wrinkles). |

Please make sure the temperature select indicator setting is on "MAX" when using "high steam".
CAUTION: Do not aim the steam at any parts of your body or others.
Notes:
- The anti-drip system will activate when the temperature of the soleplate's surface drops. The thermostat operating indicator light will go on and steam will stop. It is normal to hear clicking sound during this process. Resume usage only after the thermostat operating indicator light has turned off.
- Use an ironing board supports a steam iron.
Using the "power shot"
The "power shot" feature provides extra steam which goes deep into the garment and is helpful for removing stubborn wrinkles. It is necessary to clean the inside of the iron before using the "power shot" feature, if you have not used the "power shot" feature for a prolonged period. Simply test the "power shot" feature several times away from the ironing board and clothes to be ironed. This will prevent brown spotting or water spotting on the clothes.
Set the steam/dry selector to the dry position. Set the temperature selector to the "MAX" position.
Simply pump the power shot button

- Pump the power shot button several times at the beginning of each ironing session.
- Press the power shot button in intervals of at least 2 seconds between use to prevent water spotting.
- If the power shot weakens, wait until the thermostat operating Indicator light goes on, and then off.
- Use a press cloth if necessary.
Using the "vertical shot"
To get better results when using vertical steam, hang the garment on a hanger. Curtains and drapes may also be steamed once they are hung. Hold the iron away from your body, close to but not touching the fabric. Pull the fabric tightly and pump the power shot button at 2 seconds intervals as you press the iron over the wrinkled fabric.
- If the power shot weakens, wait until the thermostat operating indicator light goes on, and then off.

Using the "spray"
The spray feature is particularly helpful for removing stubborn wrinkles and where extra dampen is needed.
The spray may be used with steam or dry ironing. Simply push the spray mist button whenever spray is desired.
• If the spray does not work immediately, keep triggering until it does.

How to care for and store your iron
3-way cleaning
▶ METHOD(1) Using the self-cleaning feature
-
Fill the water tank with tap water as described in the "How to fill the water tank" on P8.
-
Set the temperature select indicator to "0".
-
Put the power plug into a household socket.
-
Stand the iron up and set the temperature select indicator to the "MAX" position.
-
After the thermostat operating indicator light goes off, set the temperature select indicator to "0" and unplug.
-
Hold the iron horizontally over the sink, press and hold the self-cleaning button and shake the iron back and forth. Impurities and scale (if any), together with steam and boiling water will be flushed out. Steam will flush out first, and boiling water will flush out after approx. 30 seconds. (Caution: water will be scalding hot)


- Once the water tank has been completely drained, hold the iron horizontally over the sink. Or, stand the iron up on a stable surface and place an old towel or similar under the soleplate.
- Plug the power plug into a household outlet and set the temperature select indicator to "MAX". Impurities together with steam and boiling water will be flushed out.
- Set the temperature selector to "0" and unplug. Then, turn to METHOD(2).
▶ METHOD(2) Using the "power shot" feature
- Fill the water tank with tap water as described in the "How to fill the water tank" on P8.
- Set the temperature select indicator to "0".
- Put the power plug into a household outlet.
- Stand the iron up and set the temperature select indicator to "MAX".
- Hold the iron horizontally over the sink after the thermostat operating indicator light has gone out.


- Pump the power shot button quickly (at least 2 times per second) for approx. 30 times continuously. While pumping, shake the iron back and forth.
- Set the temperature select indicator to "0".
- Unplug and dispose of any water remaining in the water tank.
- To prevent corrosion of the soleplate vents, plug the power plug into a household outlet, stand the iron up, set the temperature select indicator to "MAX" and preheat for about 5 minutes.
- Set the temperature select indicator to "0" and unplug.
-
Iron on a used cloth to remove any impurities on the soleplate.
-
Repeat METHOD(1) and METHOD(2) if venting of the steam does not improve.
- Use both methods once every two weeks. If the water is very hard (i.e. steam holes on the soleplate are easily blocked by impurities), both methods should be used more frequently.
- Let the iron cool down on its heel rest and follow the instructions in the "After each use" on P9.
▶ METHOD(3) Anti calc system (Stay clean vents)
The built-in anti calc system in the water tank continuously reduces scale build up in the vaporizing chamber of the iron. This system makes it possible to use the steam function for a long period of time and prevents steam vents from clogging.

Anti-drip system (automatic water seal)
This model has an anti-drip system. When the temperature of the soleplate's surface drops to low, the valve for the vaporizing chamber in the iron automatically closes and stops the water from flowing. This prevents hot unvaporized water from spewing out from the soleplate when the iron has cooled down. With this system, it is unnecessary for you to wait until the inside of the vaporizing chamber dries completely when you store the iron.
Note:
- It is not a sign of malfunction even a click sound is heard. This sound can be heard whenever this system is activated.
How to care for your iron
▶ Surface of the iron
- After unplugging and cooling the iron, simply wipe off with a damp cloth and if necessary, use a mild detergent.
- Never use any strong cleaners.
▶ Soleplate
- Starch and other residue may be easily removed from the soleplate with a damp cloth.
- To avoid scratching the surface, never use a metallic pad to clean the soleplate, and never place the iron on a rough surface.
- The best way to remove synthetic residue from the soleplate is to iron over an old cotton cloth rag after heating the iron.
Note:
- Never use cleaners in the iron, since they may damage the working parts of the iron. Some odor may be released during initial use of the iron, however, this is normal and the odor will not attach to your clothes. Never use steam iron detergent in the iron, detergent in the iron, since they may damage the working parts of the iron.
Q&A
| Question Answer | |
| Why click sound or metallic sound be heard while using or shaking the iron? | These sounds are made by the internal parts of the iron, spray mechanism, leakage prevention, etc., moving slightly. This is normal. |
| Why do the clothes sometimes become brown after being ironed? | If there is laundry detergent remaining on the fabric, the clothes may become brown after being ironed. |
| Why are there white powder/particles coming out of the steam vents while using the steam function (especially when using " power shot ")? | The powder/particles are hydrophilic treatment or impurities and minerals found in hard water etc. These are not harmful and can be brushed off clothing. |
Trouble shooting
| Problem Causes, Solution | |
| No heating | Make sure the power plug is plugged into a household outlet. |
| No steam | Fill the water tank with tap water up to "MAX" dot. |
| If there is no steam, set the steam/dry selector to the steam position, or set the temperature selector to "MAX". | |
| Poor steaming power | For poor steam, move the steam/dry selector several times, then reset to the steam position. |
| Press the power shot button several times when the "power shot" appears insufficient. | |
| Wait until the thermostat operating Indicator light goes off before using the iron. | |
| Set the temperature selector to "MAX". | |
| No spray | Push the spray mist trigger several times. |
| Fill the water tank with tap water up to "MAX" dot. | |
| Water leaks from steam vents | Press the power shot button in intervals of at least 2 seconds when using the "power shot". |
| Wait until the thermostat operating indicator light goes off before using the iron. | |
| Clothes are marked | Empty the water tank and fill it with clean water. There may be contaminants in the iron/cup. |
Specifications
| Model No. | NI-JU700C |
| Power source | 220-240 V ~ 50-60 Hz |
| Power consumption | 2 000-2 400 W |
| Weight (approx.) | 1.6 kg |
| Dimension (approx.) | 297 x 125 x 142 mm |
This iron is intended for household use only.
Printed in ChinaWebsit

مُنْصَات
| NI-JU700C | شماره مدل |
| 220-240 V~ 50-60 Hz | منبع تغذيه |
| 2 000-2 400 W | ميزان مصرف برق |
| 1.6 kg | ( Mozن ( تقريى) ) |
| 297 x 125 x 142 mm | ( ابعاد ( تقريى) ) |

.7. بعد كل استخدام
43-30 عربي
29-17 فارسی
- PANASONIC
- CONTENTS
- SAFETY PRECAUTIONS
- EXPLANATION OF SYMBOLS
- WARNING
- CAUTION
- BEFORE USE
- NOTES
- HOW TO USE AS AN IRON
- NOTE
- REFER TO "GUIDE FOR STEAM/DRY SELECTOR" ON P10
- AFTER EACH USE
- CAUTION: DO NOT AIM THE STEAM AT ANY PARTS OF YOUR BODY OR OTHERS
- USING THE "POWER SHOT
- USING THE "VERTICAL SHOT
- USING THE "SPRAY
- HOW TO CARE FOR AND STORE YOUR IRON
- 3-WAY CLEANING
- ANTI-DRIP SYSTEM (AUTOMATIC WATER SEAL)
- HOW TO CARE FOR YOUR IRON
- SURFACE OF THE IRON
- SOLEPLATE
Brand : PANASONIC
Model : NI-JU700C
Category : Iron