
Dirt Master SC30130N - Vacuum Cleaner SWAN - Free user manual and instructions
Find the device manual for free Dirt Master SC30130N SWAN in PDF.


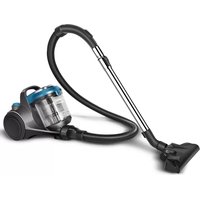
| Type | Canister vacuum cleaner |
| Brand | Swan |
| Model | Dirt Master SC30130N |
| Power | 1200 W |
| Dust capacity | 2.5 L bag |
| Filtration | HEPA filter |
| Cord length | 5 m |
| Noise level | 78 dB |
| Weight | 5.5 kg |
| Dimensions (L x W x H) | 40 x 28 x 35 cm |
| Attachments | Crevice tool, upholstery brush, floor nozzle |
| Vacuum type | Bagged |
| Suction control | Variable power slider on handle |
| Wheels | Swivel castors for maneuverability |
| Maintenance | Replace bag when full; clean filter every 3 months |
| Safety features | Thermal overload protection; auto shut-off on overheating |
| Repairability | Replaceable parts: bag, filter, brush roll, belt |
| Warranty | 2 years |
Frequently Asked Questions - Dirt Master SC30130N SWAN
User questions about Dirt Master SC30130N SWAN
0 question about this device. Answer the ones you know or ask your own.
Ask a new question about this device
Download the instructions for your Vacuum Cleaner in PDF format for free! Find your manual Dirt Master SC30130N - SWAN and take your electronic device back in hand. On this page are published all the documents necessary for the use of your device. Dirt Master SC30130N by SWAN.
USER MANUAL Dirt Master SC30130N SWAN
1300W Lightweight Steam Mop
Kills 99.9% of viruses, germs & bacteria
Extend your warranty by 1 year at:
www.swan-brand.co.uk/product-manuals/
User Manual
Please read all instructions before using this product, and keep it stored safely for future reference. Support: customerservice@swan-brand.co.uk


Contents
Safety Instructions 04
What's in the package? 07
Spares 07
Product View 08
Assembly 09
Removable water Tank 10
Steam Control 10
Before First use 10
Microfibre Mop Pads 11
Filling the Water Tank 12
How to Use 13
Cleaning Hard Floors 13
Carpet Glider 14
Descaling 14
Care and Maintenance 15
Specifications 15
Recycling/Warranty 16
Troubleshooting 17
www.swan-brand.co.uk
Helpline: 0333 220 6050
Safety Instructions
- Do not direct steam at people, animals, or at electrical outlets.
- Do not expose the appliance to rain.
- Only use and store the appliance indoors.
- Unplug from power outlet when not in use and before conducting maintenance or troubleshooting.
- Do not leave the appliance unattended when powered.
- Do not expose hair, loose clothing, fingers or body parts to openings or moving parts.
- Do not clean or service the appliance when it is plugged in.
- Do not handle the appliance with wet hands.
- Do not use appliance if it has been dropped, damaged, left outdoors or dropped into water contact Swan Customer Service: https://www.swan-brand.co.uk/support.
- Do not pull or carry the appliance by the power cord, use the cord as a handle, close a door on the cord, pull cord around sharp corners or edges, or expose cord to heated surfaces.
- Do not unplug the appliance by pulling on the cord.
- Do not use appliance in an enclosed space filled with vapour given off by oil-based paint thinner, some moth proofing sub-stances, flammable dust, or other explosive or toxic vapours.
- Do not allow the appliance to be used as a toy.
- Do not use on leather, wax polished furniture or floors, synthetic fabrics, wall coverings, velvet or other delicate, steam-sensitive materials.
- Do not immerse the appliance in water.
- Not for space heating purposes.
- Do not use for any purpose other than described in this User's Guide.
- NEVER put descaling, aromatic, alcohol or detergent products into the steam cleaner, as this may damage it or make it unsafe for use.
04
Safety Instructions
When using any electrical appliance, basic safety precautions should always be followed including the following:
• Always ensure that the voltage on the rating label corresponds to the mains voltage in your home.
- Incorrect operation and improper use can damage the appliance and cause injury to the user.
- This appliance can be used by children aged from 8 years and above if they have been given supervision or instruction concerning use of the appliance in a safe way and if they understand the hazards involved. Cleaning and user maintenance shall not be made by children unless they are older than 8 and supervised. Keep the appliance and its cord out of reach of children aged less than 8 years.
- Appliances can be used by persons with reduced physical, sensory or mental capabilities or lack of experience and knowledge if they have been given supervision or instruction concerning use of the appliance in a safe way and understand the hazards involved.
- Check the power cord and plug regularly for any damage. If the cord or the plug is damaged, it must be replaced by the manufacturer or qualified person in order to avoid an electrical hazard.
- Do not use the appliance if it has been dropped or damaged in any way. In case of damage, take the unit in for examination and/or repair by an authorised service agent.
- Never immerse the unit in water or any other liquid for cleaning purposes.
- Remove the plug from the socket by gripping the plug. Do not pull on the cord to disconnect the appliance from the mains. Always unplug the unit when not in use, before cleaning, when filling or emptying the tank or adding/ removing parts.
- The use of accessory attachments that are not recommended or supplied by the manufacturer may result in injuries, fire or electric shock.
- Do not let the cord hang over the edge of a table or counter. Ensure that the cord is not in a position where it can be pulled on inadvertently.
- Do not allow the cord to touch hot surfaces and do not place on or near a hot gas or electric burner or in a heated oven.
Safety Instructions
- Use of an extension cord with this appliance is not recommended. However, if it is necessary to use an extension lead, ensure that the lead is suited to the power consumption of the appliance to avoid overheating of the extension cord, appliance or plug point. Do not place the extension cord in a position where it can be pulled on by children or animals or tripped over.
• This appliance is not suitable for outdoor use. - Do not use the appliance for anything other than its intended use.
- Do not carry the appliance by the power cord.
- Do not leave the appliance unattended during use. Always unplug the unit when not in use or before cleaning.
• Always operate the appliance on a smooth, even, stable surface. Do not place the unit on a hot surface. - Ensure that the unit is switched off after use.
-
The manufacturer does not accept responsibility for any damage or injury caused by improper or incorrect use, or for repairs carried out by unauthorised personnel.
-
In case of technical problems, switch off the product and do not attempt to repair it yourself. Return the appliance to an authorised service facility for examination, adjustment or repair. Always insist on the use of original spare parts. Failure to comply with the above mentions, precautions and instructions, could affect the safe operation of this product.
- Don't use the appliance with incorrect voltage as this may result in damage or injury to the user. The correct voltage is listed on the rating label.
- Use only CE marked 13 amp extension cords, non-approved extension cords may overheat. Care should be taken to arrange the extension cord as it can be a trip hazard.
- Store the appliance in a cool, dry area.
- Your appliance must never be switched on through an external timer or any kind of separate remote-control system.
• Do not fill past the MAX level.
What's in the Package?

Handle
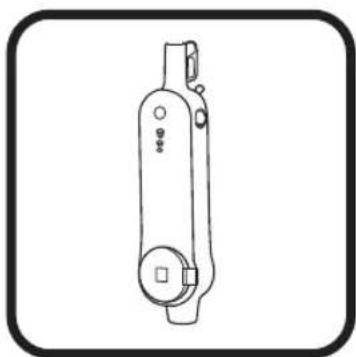
Main Body
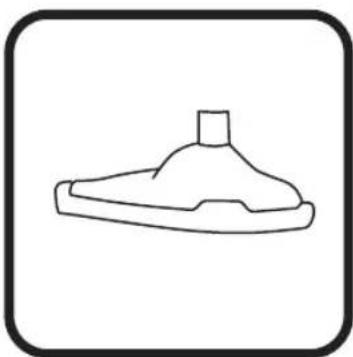
Mop Head
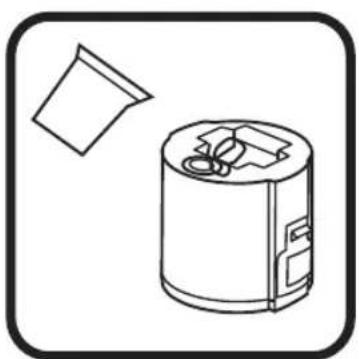
Water Tank & Cup
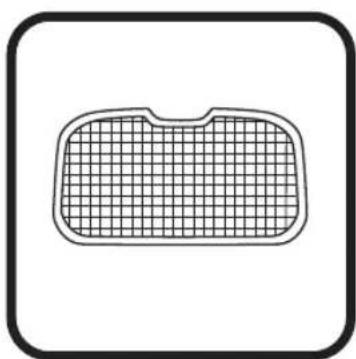
Mop Pad
Accessories may be slightly different, the pictures are for reference, subject to the received products or please confirm with the seller.
Spares
The following spare parts are available to purchase from www.swan-brand.co.uk
Carpet Glider SC30130N01
Mop Pad SC30130N02
Water Inlet SC30130N03
Filter SC30130N04
Water Tank SC30130N05
Product View

08
Assembly
1 Attach the lower body to the mop head by pushing onto the pipe and snapping it into place.
2. Insert the metal tube into the upper part of the main body pushing until it locks into place.
3 Install the water tank below the lower part of the main body.
4. Your Steam Mop body assembly is now complete.
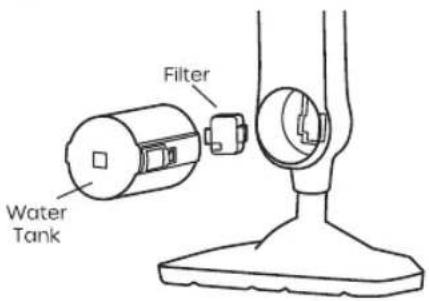
Removable Water Tank
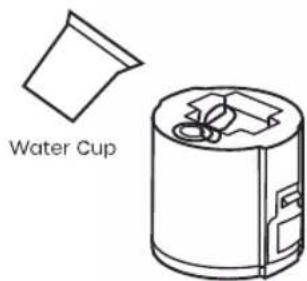
The water tank is located at the bottom of the main body. It is recommended to use distilled or de-mineralised water in place of tap water to help increase the lifespan of your steam mop. Make sure to observe the minimum / maximum level markers on any liquid container.
Press the tabs on either side of the tank and pull away to release from the main body.
Please Note:
- Make sure to turn off the steam mop when taking the water tank off the main body.
• Fill the water tank with the supplied water cup.
09
Steam Control
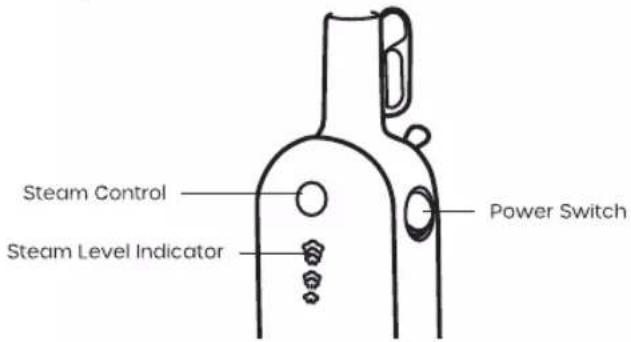
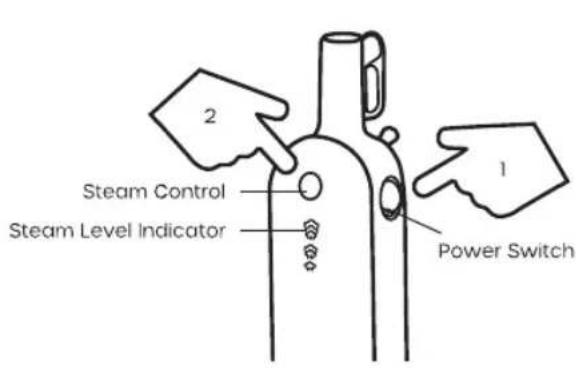
The Steam Control indicator light (2) will stop blinking when steam mop is ready to use. Once the light is solid, press the Steam Control Button (1) to choose the level of steam you desire.
Please Note:
Press the power switch first and then press the steam control. Also note, that when you first press the steam level button the steam power is at its maximum level. Adjust the steam to your desired level by pressing the button.
Before First use
Remove all stickers and protective covers from the appliance and unwind the power cord.
Inspect for damage and contact our help line if any is found.
Check with the floor-covering provider to ensure that steam cleaning is appropriate.
If in any doubt, then test on a small inconspicuous area first and let it dry before judging.
Thoroughly sweep or vacuum floor prior to cleaning with the steam mop.
10
Microfibre Mop Pads
The re-usable microfibre mop pads are machine washable and safe for virtually all hard floor surfaces.
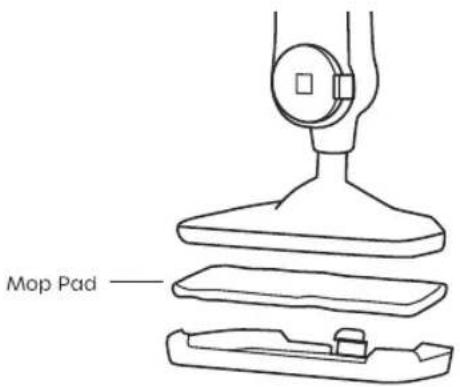
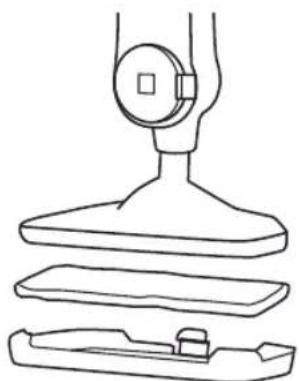
The mop pad has Velcro panels affixed which will allow you to easily place it into place. Once the pad is fitted, snap on the holding frame, this will keep the pad secure as you clean your surface. To remove the frame simply pull the quick-grip release tab, taking care not to use too much force, and push down.
The mop pad may have already come attached to the mop head.
Filling the Water Tank
- Set the mop head into mop pad, making sure quick-grip release tab is located at the back.
- Take the water tank out.
a. Press the tabs on both sides of the tank and carefully pull it out.
b. Pull out the rubber plug on the back of the tank.
c. Fill water tank with water and replace the plug. For best results the water should be at room temperature.
d. Replace the water tank by gently sliding it securely into place. The tank will click once docked correctly.
- Unwrap the power cord and insert the plug into the mains socket.
- The indicator will light up when the steam mop is ready to use. Press the steam level button to select the steam level you want.
Please Note:
Upon first use of the steam mop or first use after refilling the water tank, the pump may make a "knocking" sound. This is normal and should only last a few seconds.

12
How to Use
Cleaning Hard Floors
Your steam mop is designed to clean hard flooring such as ceramic tile, vinyl, laminate, marble, stone and sealed hard wood floors. Use of your steam mop on waxed or some unwaxed floors may result in a diminished glossiness.
- Plug the unit in and wait 30 seconds for it to heat up. Choose the level of steam to clean your floor: Low (delicate floors). Medium (regular cleaning). High (durable floors or sticky messes). Begin cleaning by slowly passing the unit over the floor surface.

High

Medium

Low
Please Note:
Press power switch before you press steam control. When you first press the steam level button, the steam is at its maximum level. Please adjust desired level by pressing the button.
• To turn off the steam mop press the power switch.
• Light is illuminated above the steam level button.
- When the steam mop stops emitting steam, unplug the unit. Simply remove the water tank, refill and continue steaming.
- Be sure to disinfect the floor, use a microfibre mat and wipe it back and clean it after each use.
How to Use
Carpet Glider
This accessory is attached to the steam mop to allow it to slide over the carpet with ease.
Please Note:
- Please make sure that carpet gilder has been fixed onto the floor head. If it is not in the correct position, it will cause carpet gilder to fall out during use.
- Move the steam mop in a continuous motion until you are finished. DO NOT leave the mop in a stationary position.
Descaling
As with all appliances using water there is a requirement to descale the Steam Mop. The period between descales will depend upon the water you choose to use. In a hard water area this could be after 2 - 3 uses and if using bottled or filtered water this could be multiple uses.
To descale: Mix 100 ml of white vinegar with 1 litre of bottled or filtered water and add to the tank. Leave to soak for 1 - 3 hours. Preheat the mop and select Maximum Steam setting. Hold the mop over a sink or other suitable area and allow the steam to emit until the tank is empty.
Unplug the mop and refill the tank with water and repeat the steps above.
14
Care and Maintenance
Any water remaining in the water tank should be fully emptied prior to storing the Steam Mop.
Replace the filter every three months (soft water can affect its quality and large particles of impurities may be filtered into the pump).
Make sure the water tank is empty when the appliance is not in use.
Specifications
| Product Model SC30130N | SC30130N |
| Size of Main Unit 319 x 210 x 1158mm | 319 x 210 x 1158mm |
| Net Weight 2.3KG | 2.3KG |
| Input 50-60Hz | 50-60Hz |
| Power Consumption 1300W | 1300W |
| Water Tank Capacity 330 ml | 330 ml |
| Steam Time 13-15 minutes | 13-15 minutes |
| Power Cable 7m | 7m |
Please Note:
- The data comes from the lab. It may be slightly different from the users' data due to different usage or working environment, the final product may appear different.
- For continuous product improvement, we reserve the right to any technical and design change without prior notice.
Recycling
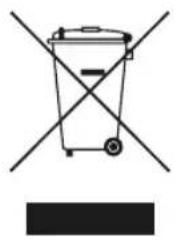
The symbol on the product or its packaging indicates that this product may not be treated as household waste. Instead, it should be taken to the appropriate collection point for the recycling of electrical and electronic equipment. By ensuring this product is disposed of correctly, you will help prevent potential negative consequences for the environment and human health, which could otherwise be caused by inappropriate waste handling of this product. For more detailed information about recycling of this product, please contact your local council, your household waste disposal service or the shop where you purchased the product.

The product meets all the requirements of the EU directives applicable to the specific product.

We reserve the right to changes in text, design, and technical specifications which are subject to change without prior notice.
Warranty
This product is guaranteed for 2 years from the date of original purchase. If any defect arises due to faulty materials of workmanship the faulty products must be returned to the place of purchase. Refunds or replacement is at the discretion of the store.
The following conditions apply:
- The product must be returned to the retailer with proof of purchase.
- The product must be installed and used in accordance with the instructions contained in this instruction guide.
- It must be used only for domestic purposes.
- It does not cover wear and tear, damage, misuse or consumable parts.
- Swan Products Ltd has limited liability for incidental or consequential loss or damage.
• This guarantee is valid in the UK and Eire Only.
For any enquiries, please call our helpline: 0333 220 6050
16
Troubleshooting
WARNING
To reduce the risk of electric shock, turn power switch off and disconnect the plug form electrical outlet before performing maintenance or troubleshooting checks.
| Problems | Possible Reasons | Solutions |
| Reduced steam or no steam. | Water tank empty.Incorrect Steam level selected.Limescale blockage. | Fill tank.Select steam level by pushing steam level button.Follow descale procedure. |
| Water leakage. | Loose red rubber plugTugn off the | Teameff and cleaner and pull out the water tank. Fit the rubber plug tightly. |
| Scale deposit. | Tap water chemicals used? | Use bottled or filtered water.Follow descale procedure. |
| Hard to use on the carpet. | Carpet glider not securely attached. | Make sure the carpet glider has been fixed onto the floor head correctly. |
| Water tank rusts. | Tank has been left with water inside when not in use. | Any water remaining in the water tank should be emptied prior to storing the Steam Mop. |
| Mop getting hot. | Wrong steam level. When you first press the stest press the steam level button, the steam is at its maximum level. Please adjust desired level by pressing the button. | |
Troubleshooting
| Problems | Possible Reasons | Solutions |
| Mop getting too wet. | Leaving the mop in a stationary position while in use. | Move the steam mop in a continuous motion until you are finished. |
| Stops working. | Improperoperation or product problem. | Contact SWAN at https://www.swan-brand.co.uk/support |



Notes


19

www.swan-brand.co.uk
Helpline: 0333 220 6050

DIRT MASTER

Scan this QR code to hear about our story

We love what we do

we're proud of our quality

Find us on Facebook
Copyright © 2022
Swan Products Ltd. PO Box 3117, Stoke-on-Trent ST4 9GD
- 1300W LIGHTWEIGHT STEAM MOP
- USER MANUAL
- CONTENTS
- SAFETY INSTRUCTIONS
- 04
- WHAT'S IN THE PACKAGE
- SPARES
- ASSEMBLY
- REMOVABLE WATER TANK
- PLEASE NOTE
- STEAM CONTROL
- BEFORE FIRST USE
- 10
- MICROFIBRE MOP PADS
- FILLING THE WATER TANK
- HOW TO USE
- CLEANING HARD FLOORS
- CARPET GLIDER
- DESCALING
- 14
- CARE AND MAINTENANCE
- RECYCLING
- WARRANTY
- TROUBLESHOOTING
- WARNING
- NOTES
Brand : SWAN
Model : Dirt Master SC30130N
Category : Vacuum Cleaner