
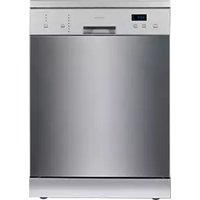
NP-6F2MUQNZ - Dishwasher PANASONIC - Free user manual and instructions
Find the device manual for free NP-6F2MUQNZ PANASONIC in PDF.


| Product Type | Built-in Dishwasher |
| Model | NP-6F2MUQNZ |
| Brand | Panasonic |
| Dimensions (H x W x D) | 845 x 598 x 598 mm |
| Net Weight | 40 kg |
| Energy Class | A+ |
| Annual Energy Consumption | 260 kWh |
| Water Consumption per Cycle | 9.5 L |
| Noise Level | 49 dB(A) |
| Number of Place Settings | 12 |
| Number of Programs | 6 |
| Programs | Normal, Eco, Heavy, Quick, Glass, Rinse |
| Additional Functions | Delay Start, Half Load, Sanitize |
| Power Supply | 220-240 V, 50 Hz, 10 A |
| Water Connection | Cold water only (0.05-1.0 MPa) |
| Child Lock | Yes |
| Door Lock | Electronic |
| Anti-Flood System | Yes |
| Filter Cleaning | After each use |
| Descaling Frequency | Monthly |
| Replacement Parts Available | Filter, Spray Arms, Salt Cap, Drain Pump |
Frequently Asked Questions - NP-6F2MUQNZ PANASONIC
User questions about NP-6F2MUQNZ PANASONIC
0 question about this device. Answer the ones you know or ask your own.
Ask a new question about this device
Download the instructions for your Dishwasher in PDF format for free! Find your manual NP-6F2MUQNZ - PANASONIC and take your electronic device back in hand. On this page are published all the documents necessary for the use of your device. NP-6F2MUQNZ by PANASONIC.
USER MANUAL NP-6F2MUQNZ PANASONIC
Operating and Installation Instructions
Household Use Stand-alone Dishwasher
Model No.: NP-6F2MUQNZ

Operating and Installation Instructions 2 - 35
Thank you for purchasing the Panasonic product.
- This machine is for household use only. Commercial usage of the Dishwasher will void Warranty.
- Please read these instructions carefully before attempting to install, operate or service this product.
- For optimum performance and safety, please read these instructions carefully and follow safety precautions when using this product.
- Before using this product please pay extra attention to "Safety Precautions" (Page 3 - 5).
Keep this Operating and Installation Instructions for future use.
Table of Contents
Safety Precautions 3 - 5
Parts Identification 6 - 8
- Parts Identification 6
- Accessories 7 • Control Panel 8
Using the Dishwasher 9 - 22
- Quick Operation Guide 9 - 10
- Function of Detergent 11 - 13
- Filling the Rinse Aid Dispenser 14 - 15
- Loading the Dishwasher Baskets 16 - 17 • The Method of Loading Normal Dishware 17 - 19
- Starting a Washing Programme 20 - 22
Cleaning and Maintenance 23 - 26
- Filtering System 23 - 24 • Caring for the Dishwasher 25
- Cleaning the Spray Arms 25 - 26
Troubleshooting....27 - 28
Error Codes....29
Specifications....30 - 32
- Loading the Baskets 31 - 32
For Installer
Installation Instructions 33 - 35
- Positioning the Dishwasher 33 • Electrical Connection....33 - 34 • Water Connection....34 - 35
- Checkpoints After Installation 35
In order to prevent accidents or injuries to the users, other people, and damage to property, please follow the instructions below.
■ The following charts indicate the degree of damage caused by wrong operation.

WARNING Indicate serious injury or death.

CAUTION Indicate risk of injury or property damage.
■ The symbols are classified and explained as follows.


These symbols indicate prohibition.

This symbol indicates requirement that must be followed.

WARNING

Stop using the product when any abnormality/failure occurs and disconnect the power plug. (Risk of smoke/fire/electric shock)
Example of abnormality/failure:
- Abnormal noise or heat.
- Abnormal emission of smoke, fire.
- The product sometimes does not start when turned on.
- The power is sometimes disconnected when the cord is moved.
- Burnt odor or abnormal noise is detected during operation.
- The body is deformed or abnormally hot. • Water leaking from the Dishwasher.
Contact a Panasonic Authorised Service Centre immediately for maintenance/repair.

The unit must be earthed. Plug the power cord to socket outlet with earthing continuity terminal.
Improper grounding could cause electric shock.

Be sure to disconnect the Power Plug from the wall outlet or switch OFF the breaker before maintenance, repair or service. Also, do not handle the Power Plug or breaker with wet hand.

When disconnecting the Power Plug, hold the plug itself. Do not pull the cord anyway. The cord may be damaged and may cause fire or electric shock.

This appliance is necessary to allow disconnection from the supply after installation. The disconnection may be achieved by having the plug accessible or by incorporating a switch in the fixed wiring in accordance with the wiring rules.

This appliance is not intended for use by persons (including children) with reduced physical, sensory or mental capabilities, or lack of experience and knowledge, unless they have been given supervision or instruction concerning use of the appliance by a person responsible for their safety. Children should be supervised to ensure that they do not play with the appliance.

WARNING

When loading items to be washed:
- Locate sharp items so that they are not likely to damage the door seal.
- Knives and other utensils with sharp points must be loaded in the basket with their points down or placed in a horizontal position.

If the supply cord is damaged, it must be replaced by the manufacturer, its service agent or similarly qualified persons in order to avoid a hazard.

Insert the power plug firmly, otherwise it may cause fire or electric shock.

Clean the power plug regularly with a dry cloth, otherwise, it may cause insufficient insulation due to moisture, and may cause fire.

Some dishwasher detergents are strongly alkaline. They can be extremely dangerous if swallowed. Avoid contact with the skin and eyes and keep children away from the dishwasher when the door is open. Check that the detergent receptacle is empty after completion of the wash cycle.

Do not open the door when washing, because the hot water may splash out.

The dishwasher door should not be left in the open position since this could present a tripping hazard.

Do not connect the power voltage other than 220 - 240 V AC, may cause fire or electric shock.

Do not use an extension cord or an adapter plug with this appliance.

Do not damage the power cord or power plug.

Do not cut or remove the earthing connection from the power cord under any circumstances.

Do not disassemble the dishwasher for reconstruction.

Do not discard the packaging or any part of it, or leave it unattended. It can constitute a suffocation hazard for children, especially the plastic bags.

CAUTION

Check that the detergent powder is empty after completion of the wash cycle.

Only use detergent and rinse aids designed for an automatic dishwasher.

Installation and servicing must be carried out by competent persons in accordance with the regulations in force.

Before the appliance is put into operation, all the protective films applied must be removed.

CAUTION

If overflow occurs, turn OFF the main water supply before calling a service.

The Dishwasher must never be used without the filters. Improper replacement of the filter may reduce the performance level of the appliance and damage the dishware and utensils.

Close the water tap after using.

The appliance is to be connected to the water mains by new detachable hose-sets supplied with the appliance. Old hose-sets should not be used.
- The maximum inlet water pressure is 1 MPa.
- The minimum inlet water pressure is 0.04 MPa.

The maximum number of place settings to be washed is 14 settings.

Please use caution when unpacking, installing or moving this product, as some exposed edges may be sharp to the touch and may cause injury if not handled with care.

Spray cleaner is not to be used for cleaning.

The Name Plate with the technical data, serial number and brand name has been visibly affixed to the appliance. DO NOT REMOVE THE NAME PLATE FOR ANY REASON.

Do not wash plastic items unless they are marked Dishwasher safe or the equivalent.

Do not modify this appliance.

Do not replace the parts of the appliance with spare parts other than authorised Panasonic parts.

Never use soap, laundry detergent or hand washing detergent in the Dishwasher.

Do not fill any basket above its capacity.

A steam cleaner is not to be used.

When cleaning the filters, do not knock or damage them, as the performance of the Dishwasher may decrease if they become distorted or broken.

Abrasive agents or cleaners and harsh cleaning cloths should not be used because of the risk of scratching or leaving spots on the stainless steel surfaces.
Note:
- For energy saving, remove coarse residues from the dishware before placing them into the Dishwasher. Fully load the appliance before starting the programme.
- Place hollow items such as bowls, glasses and pots into the appliance in such a way that they will face down.
- Contact a Panasonic Authorised Service Centre for maintenance and repair.
Parts Identification
Parts Identification
Front
Back

- Top Spray Arm
(Above the Cutlery Basket)
- Cutlery Basket
- Upper Basket
- Middle Spray Arm
(Below Upper Basket)
- Inner Pipe
- Lower Basket
- Detergent Dispenser
- Lower Spray Arm
(Below Lower Basket)
- Filter Assembly
- Rinse Aid Dispenser
- Name Plate
- Inlet Hose Connector
- Drain Hose
- Power Plug
Note:
- Name Plate (Item No.11) is for user to refer product info such as Model No. and technical data.
- Power Plug (Item No. 14) might be different from the illustration.
Parts Identification
Accessories

Warranty Card
Operating and Installation Instructions
Parts Identification
Control Panel

1. Main Display:
To show the remaining time and the status (running state, delay time, and such).

Programme indicators

Programme Time indicator

Time Delay indicator
Press the button to delay. User can delay the washing time from 1 hour to 24 hours.

Rinse Aid indicator
Indicates when the dispenser needs to be refilled.

Child Lock indicator

Delay Time, Remain Time, or Error Codes indicator

Water Supply indicator
Indicates when there is a shortage of water supply.

Wash Zone indicator


Washing Phase Display
2. OFF/ON button:
To turn OFF/ON the power supply.
3. Wash Zone button:
Dual zone wash function, press the button to select either Upper Basket or Lower Basket or both loaded, and the corresponding icon indicator will light up.
4. Function button:
(Only Intensive, Heavy, ECO, Glass have this function)
- Extra dry indicator

- Express wash indicator

5. Child Lock:
Press the two buttons (3 and 4) simultaneously to lock or unlock. All buttons are disabled while Child Lock is on.
6. Programme Selection button:
Press the button to select the appropriate programme.
7. Time Delay button:
Press the button to delay.
8. Pause/Start button:
To pause the washing programme when the Dishwasher is working or start the selected washing programme.
Quick Operation Guide
For detailed operating method, read the corresponding content at Page 11-22.
| Operation Function description | |
| 1. Switch ON the main switch. | Switch ON the main switch on the wall.Fully open the Dishwasher door. |
| 2. Fill the Detergent Dispenser. | Compartment A: With each wash cycle.Compartment B: For programmes with pre-wash only.(Refer to Page 13) |
| 3. Check the rinse aid level. | Rinse Aid indicator.Electric indicator on Control Panel. Follow to “When Refi lling the Rinse Aid Dispenser”. (Refer to Page 14) |
| 4. Load the baskets. | Scrape off any large amount of leftover food.Soften remnants of burnt food in pans, then load the basket.Follow to the loading instructions. (Refer to Page 16) |
| 5. Select a programme. | Fully close the Dishwasher door.Turn the Dishwasher to standby mode by pressing the OFF/ON button.Select desired programme by pressing the Programme Selection button until the selected programme lights up. |
| 6. Running the Dishwasher. | Turn ON the water tap and press the Pause/Start button.The Dishwasher will start running. |
| 7. Switch OFF the Dishwasher. | When the working cycle has fi nished, the buzzer will sound 8 times before stop. “END” will be displayed after the washing cycle has completed.Turn OFF the Dishwasher by pressing the OFF/ON button. |
| 8. Turn OFF the water tap, unload the basket. | Turn OFF the water tap.Start from the Lower Basket when unloading the dishes.Switch OFF the main switch on the wall. |

WARNING

Wait for approximately 15 minutes before unloading the dishes to avoid handling them while they are hot and susceptible to breakage.
Using the Dishwasher
| Operation Function description | |
| 9. Delay wash start time. | 1. Press the Time Delay button to select the desired delay time. Wash start time can be delayed from 1 hour to 24 hours.2. Select desired programme by pressing the Programme Selection button until the selected programme lights up.3. Press the Pause/Start button to start the time delay countdown. The washing programme will start automatically after the countdown is ended. |
| 10. Changing the programme. | 1. A running cycle can only be modifi ed if it has been running for a short time. Otherwise the detergent may have already been released and the water already drained. If this is the case, the detergent dispenser must be refi lled.2. Press the Pause/Start button then press the Programme Selection button for more than 3 seconds to cancel the running programme.3. Select a new programme.4. Restart the Dishwasher by pressing the Pause/Start button. |
| 11. Adding dishware during operation. | 1. Press the Pause/Start button to stop the Dishwasher.2. Open the door.3. Add dishes in the Dishwasher.4. Close the door, then press the Pause/Start button, the Dishwasher will start running again after approximately 10 seconds. |
| 12. If the Dishwasher is switched OFF during a wash cycle. | 1. Switch ON again and restart the washing by selecting the desired programme.2. The washing will start from the beginning.3. Detergent and rinse aid have to be refi lled if it is already drained out. |

WARNING

Do not open the door when washing, because the hot water may splash out.
Using the Dishwasher
Function of Detergent
Detergent with its chemical ingredients is necessary to remove dirt; it breaks down the dirt into smaller particles and removes them out of the dishwasher. Most of the commercial quality detergents are suitable for this purpose.
Note:
Proper Use of Detergent
- Use only detergent specifically made for use in dishwashers. Keep the detergent fresh and dry.
- Do not put powdered detergent into the dispenser until ready to wash the dishes.
Detergents
There are 3 types of detergents:
- With phosphate and chlorine.
- With phosphate but without chlorine.
- Without phosphate and chlorine.
- If detergents without phosphate are used and white spots appear on dishes and glasses, add more detergent to reach better results.
- Detergents without chlorine will only slightly bleach; strong and coloured spots will not be removed completely. In this case, choose a programme with a higher temperature.
Concentrated Detergent
Based on their chemical composition, detergents can be split into two basic types:
- Conventional, alkaline detergents with caustic components.
- Low alkaline concentrated detergents with natural enzymes.
Detergent Tablets
Detergent tablets of different brands dissolve at different speeds. For this reason, some detergent tablets cannot dissolve and develop their full cleaning power during short programmes. Therefore, use long programmes when using detergent tablets to ensure the detergent tablet is completely dissolved.
Using the Dishwasher
Detergent Dispenser
The dispenser must be refilled before the start of each wash cycle by following the instructions provided in the Wash Cycle Table (Page 20). This Dishwasher uses less detergent and rinse aid than Conventional Dishwashers. Generally, only one tablet of detergent is needed for a normal wash load. Heavily soiled items need more detergent. Always add the detergent before starting the Dishwasher, otherwise the detergent could get damp and will not dissolve properly.
Fill in Detergent
1
2
Note:
- If the lid is closed, press the Lid Release button. The lid will open. • Always add the detergent before starting each wash cycle.
- Only use branded detergent aid for Dishwasher.

WARNING

Dishwasher detergent is corrosive! Take care to keep it out of reach of children.
Using the Dishwasher
Illustration on the right shows:
A Main wash detergent compartment. B Pre-wash detergent compartment.
Refer to the detergent manufacturers for dosing and storage.
Recommendations as stated on the detergent packaging.
Close the lid and press until it locks in place.
If the dishes are heavily soiled, place an additional dosing of detergent in the pre-wash detergent compartment. This detergent will take effect during the pre-wash phase.

Filling the Rinse Aid Dispenser
Rinse Aid Dispenser
The rinse aid is released during the final rinse to prevent water from forming droplets on the dishware, which can leave spots and streaks. It also improves drying by allowing water to roll off the dishware. The Dishwasher is designed to use liquid rinse aids. The Rinse Aid Dispenser is located next to the Detergent Dispenser. To fill the rinse aid, open the Cap and pour the rinse aid into the dispenser until the level indicator turns completely black. The volume of the rinse aid container is about 110 mL.
Function of Rinse Aid
Rinse aid is automatically added during the last rinse, ensuring thorough rinsing, and spot and streak free drying.
Note:
Only use branded rinse aid for the dishwasher. Never fill the rinse aid dispenser with any other substances (for example, dishwasher cleaning agent, liquid detergent). This will damage the dishwasher.
When Refilling the Rinse Aid Dispenser
When the rinse aid container is full, the rinse aid indicator will be completely dark. As the rinse aid diminishes, the size of the black dot decreases.
Never let the rinse aid level fall below 1/4 full.
As the rinse aid diminishes, the size of the black dot on the rinse aid level indicator changes, as illustrated below.

Full

3/4 full

1/2 full

1/4 full
Refill to eliminate spotting

Empty

The rinse aid indicator, “” on the control panel will light up when the rinse aid is empty.
Using the Dishwasher
1
2
- To add rinse aid, remove the cap by turning it counterclockwise.
- Pour the rinse aid into the dispenser; be careful not to overfill.
- Refit the cap and close it by turning clockwise so that the arrows line up.
Note:
Clean up any rinse aid spilled during filling with an absorbent cloth to avoid excessive foaming during the next wash. Do not forget to replace the cap before closing the dishwasher door.
Adjusting Rinse Aid Dispenser
The rinse aid dispenser has six settings which can be viewed upon removing the cap. Always start with the dispenser set on "4". If still facing spots and poor drying problems, increase the amount of rinse aid dispensing by rotating the dial to "5". If the dishes are still not drying properly or spots remain, adjust the dial to the next higher level until the dishes are spot-free. The recommended setting is "4". (Default value is "4".)

Note:
Increase the dose if there are drops of water or lime spots on the dishware after washing. Reduce it if there are sticky whitish stains on dishware or a bluish film on glassware or knife blades.
Loading the Dishwasher Baskets
Recommendation
- Consider buying utensils which are identified as dishwasher-proof.
- Use a mild detergent that is described as 'for dishwasher use'. If necessary, seek further information from the detergent manufacturers.
- For particular items, select a programme with as low temperature as possible.
- To prevent damage, do not take glass and cutlery out of the Dishwasher immediately after the programme has ended.
- For washing in the Dishwasher the following cutlery/dishware:
| Are not suitable Are of limited suitability | |
| a. Cutlery with wooden, bone china or mother-of-pearl handlesb. Plastic items that are not heat resistantc. Cutlery consisting of glue that are not temperature resistantd. Bonded cutlery items or dishwaree. Pewter or copper itemsf. Crystal glassg. Steel items that are subject to rustingh. Wooden plattersi. Items made from synthetic fi bresj. Colour coated appearance items | a. Some types of glasses can become dull after a large number of washesb. Silver and aluminium parts have a tendency to discolour during washingc. Glazed patterns may fade if washed frequently |
Attention Before or After Loading the Dishwasher Baskets
Follow the loading guidelines for the best performance of the Dishwasher. Scrape off any large amounts of leftover food. Soften remnants of burnt food in pans.
Place objects in the Dishwasher in the following way:
- Items such as cups, glasses, pots and pans are faced downwards so that water cannot collect in the container or a deep base.
- Curved items, or ones with recesses, should be loaded aslant so that water can run off.
- All utensils are stacked securely and cannot tip over.
- All utensils are placed in the way that the spray arms can rotate freely during washing.
- Items of dishware and cutlery must not nest together, or cover over each other.
Using the Dishwasher
- To avoid damage to glasses, they must not touch.
- Load large items which are most difficult to clean in the Lower Basket.
- The Upper Basket is designed to hold more delicate and lighter dishware such as glasses, coffee and tea cups.
- Long knives stored in an upright position may cause injury or damage.
- Long or sharp items of cutlery such as carving knives must be positioned with the sharp edge facing downward and horizontally in the cutlery basket.
- Do not overload the dishwasher. This is important for good results and for reasonable energy consumption.
Note:
Very small items should not be washed in the dishwasher as they could easily fall out of the basket.
Removing the Dishware
To prevent water dripping from the upper basket into the lower basket, it is recommended to empty the lower basket before the upper basket.
The Method of Loading Normal Dishware
Loading the Upper Basket
The upper basket is designed to hold more delicate and lighter dishware such as glasses, coffee and tea cups and saucers, as well as plates, small bowls, and shallow pans (as long as they are not too dirty). Position the dishware and cookware so that they will not be moved by the spray of water.

Using the Dishwasher
Loading the Lower Basket
Large items and items that are difficult to clean such as pots, pans, lids, serving dishware, and bowls are placed into the lower basket as shown in Figure 1. It is preferable to place serving dishware and lids on the side of the racks in order to avoid blocking the rotation of the middle spray arm.
Figure 1
Adjusting the Upper Basket
The height of the Upper Basket can be adjusted in order to create more space for large utensils in the basket. The height of the Upper Basket can be adjusted as shown in Figure 2. Long items, serving cutlery, salad servers, and knives should be placed on the Cutlery Basket so that the utensils do not obstruct the rotation of the spray arms.
1. Pull the lever. 2. Pull up or push down the Upper Basket. 3. Release the lever.
Figure 2
Using the Dishwasher
Folding Back the Cup Shelves
For better stacking of pots and pans, the Cup Shelves can be folded as shown in Figure 3.


Figure 3
Folding Spikes of Lower Basket
For better stacking of pots and pans, the spikes can be folded as shown in Figure 4.

Figure 4
Cutlery Basket
Cutlery should be placed in the Cutlery Basket separately from each other in the appropriate positions, and make sure the utensils do not nest together, which may cause bad washing performance.
For optimum cleaning performance, place the cutlery in the Cutlery Basket. Make sure that:
• They do not nest together. - Cutlery is placed either sideways or with the back or the spine facing upwards.


CAUTION

Do not let any item extend through the bottom. It may hit and damage the Spray Arm below the basket.

Always load sharp utensils with the sharp part facing down.
Starting a Washing Programme
Wash Cycle Table
Note:
(★Means: need to fill rinse into the Rinse Aid Dispenser.)
| Programme | Cycle Selection Information | Description of Cycle | Detergent pre/main (tablet) pre/main (powder) | Running time (min) | Energy (kWh) | Water (L) | Rinse Aid |
Auto Auto  | sensing wash, crockery with light, normal or heavy soiling, with or without dried-on food. | Pre-wash (45 °C) Autowash (45-55 °C) Rinse Rinse (65 °C) Drying | -/1 pc 5/27.5 g | 150 | 0.90-1.30 | 11.0-15.0 | ★ |
Intensive For  | for heavily soiled crockery, pots and pans and moderately soiled dishware with dried on food. | Pre-wash (50 °C) Wash (60 °C) Rinse Rinse Rinse (65 °C) Drying | -/1 pc 5/27.5 g | 170 1.5 | 0 17.5 | ★ | |
Heavy For  | for pots, plates, glasses moderately soiled and lightly soiled pans. | Pre-wash (45 °C) Wash (55 °C) Rinse Rinse (65 °C) Drying | -/1 pc 5/27.5 g | 160 1.3 | 0 13.5 | ★ | |
ECO  (*AS/NZS 2007.1) (*AS/NZS 2007.1) | This is the standard programme; it is suitable to clean moderately soiled dishware and is the most effi cient programme in terms of its combined energy and water consumption for such dishware. | Pre-wash Wash (45 °C) Rinse (48 °C) Drying | -/1 pc 5/27.5 g | 170 0.7 | 3 12.7 | ★ | |
Glass For  | lightly soiled crockery and glasses. | Pre-wash Wash (42 °C) Rinse Rinse (60 °C) Drying | -/1 pc 5/27.5 g | 125 0.8 | 0 13.0 | ★ | |
90 min St  | standard daily cycle for normally soiled loads such as pots, plates, glasses and moderately soiled pans. | Wash (65 °C) Rinse Rinse (65 °C) Drying | -/1 pc -/25 g | 90 1.2 | 0 11.5 | ★ | |
Rapid A  | quick wash for lightly soiled loads that do not need drying. | Wash (40 °C) Rinse Rinse (45 °C) | -/25 g | 30 0.6 | 0 11.5 | ||
Soak  | To rinse dishware that user plan to wash later that day. | Pre-wash | 8 | 0.024 |
Using the Dishwasher
Note:
- *AS/NZS 2007.1: This program is the test cycle. The information for comparability test in accordance with AS/NZS 2007.1 is as follows:
Capacity: 14 place settings
Position of the upper basket: lower
Programme: ECO
Detergent (Pre/main): 5 g / 27.5 g
Rinse aid setting: 6
- The combination with the pre-wash detergent, and its quality of the effect may vary according to the detergent manufacturer. Consult the manufacturer upon purchase of the detergent.
Starting a Wash Cycle
- Insert the power plug into the mains socket. Switch ON the main switch on the wall. Fully open the dishwasher door.
- Fill in the detergent and rinse aid.
- Draw out the lower basket, upper basket, and cutlery basket. Load the dishware into the baskets and push them back.
- Fully close the dishwasher door. Turn ON the water supply.
- Turn ON the dishwasher by pressing the OFF/ON button, followed by the Programme Selection button. The default wash programme is ECO and the wash sequence will be:
Eco --> Glass --> 90 min --> Rapid --> Soak --> Auto --> Intensive --> Heavy If a programme is selected, the icon light will light up and the time needed to run the wash cycle will show on the control panel.
- Press the Pause/Start button to start the washing.
(“:” in the time display will blink if the washing is started, “:” in the time display will stop blinking when washing is stopped or paused.)
Changing the Programme
- A cycle that is underway can be modified only if it has been running for a short time. Otherwise, the detergent may have already been released, and the dishwasher may have already drained the wash water. In this case, the detergent dispenser must be refilled (see the section titled "Fill in Detergent").
- Press the Pause/Start button, then press the Programme Selection button for more than 3 seconds to cancel the running programme.
- Select a new programme.
- Restart the dishwasher by pressing the Pause/Start button.
Note:
If the door is opened during a wash cycle, the Dishwasher will pause. When the door is closed, the Dishwasher will resume working after approximately 10 seconds.
Using the Dishwasher
Adding Dishware during Operation
Dishware can be added at any time before the Detergent Dispenser opens.
- Press the Pause/Start button to stop the Dishwasher.
- Open the Dishwasher door and add the dishware.
- Close the Dishwasher door. Then, press the Pause/Start button. The Dishwasher will run after approximately 10 seconds.
At the End of the Wash Cycle
When the working cycle has finished, the buzzer of the Dishwasher will sound 8 times before stopping.
Switch OFF the Dishwasher
The Programme indicator turns OFF when the programme has ended.
- Switch OFF the Dishwasher by pressing the OFF/ON button.
- Turn OFF the water tap.
- Switch OFF the main switch on the wall.
Open the door carefully
- Hot dishware is sensitive to breakage. The dishware should therefore be allowed to cool down for approximately 15 minutes before removing from the Dishwasher.
- Slightly open the Dishwasher door and wait for approximately 15 minutes before removing the dishware. The dishware will be cooler and improve drying.
Unloading the Dishware
It is normal that the Dishwasher is wet inside. Empty the Lower Basket first and then the Upper Basket. This will avoid water dripping from the Upper Basket onto the dishware in the Lower Basket.

WARNING

Do not open the door when washing, hot water or steam may scald the user.

Wait for approximately 15 minutes before unloading the dishes to avoid handling them while they are hot and susceptible to breakage.
Cleaning and Maintenance
Filtering System
The filter prevents larger remnants of food or other objects from getting inside the pump. The residues that may block the filter must be removed.

The filter system consists of a Coarse Filter, a flat filter (Main Filter) and a microfilter (Fine Filter).
1. Coarse Filter:
Large items such as pieces of bones or glass, that could block the drain are trapped in the coarse filter. To remove the items caught by the filter, gently squeeze the tap on the top of this filter and lift it out.
2. Main Filter:
Food and dirt particles trapped in this filter are pulverized by a special jet on the Lower Spray Arm and washed down to drain.
3. Fine Filter:
This filter holds dirt and food residues in the sump area and prevents them from being re-deposited on the dishware during the wash cycle.
Filter Assembly
The filter efficiently removes food particles from the wash water, allowing water to be recycled during the cycle. For best performance and results, the filter must be cleaned regularly. For this reason, it is better to remove the larger food particles trapped in the filter after each wash cycle by rinsing the Filter Assembly under running water. To remove the filter device, pull the cup handle of the Coarse Filter in the upward direction.

CAUTION

The Dishwasher must never be used without the filters. Improper replacement of the filter may reduce the performance level of the Dishwasher and damage dishware and utensils.

- Turn the Filter Assembly in anti-clockwise direction.
Cleaning and Maintenance

- Lift the Filter Assembly up.
Note:
- To insert the Filter Assembly, reverse the above steps. Lock the Filter Assembly by turning in clockwise direction. Make sure there is nothing inside blocking it before every wash cycle.
Cleaning the Filter
To clean the Filter Assembly, it is recommended to use a brush and clean under running water. Reinsert the Filter Assembly in the Dishwasher, positioning it in its original place and lock the Filter Assembly by turning in clockwise direction.
Note:
- The entire Filter Assembly should be cleaned once a week.
CAUTION

When cleaning the Filter Assembly, do not knock or damage it, as the performance of the Dishwasher may decrease if the parts become distorted or broken.
Cleaning and Maintenance
Caring for the Dishwasher
The Control Panel can be cleaned by using a soft damp cloth. After cleaning, make sure to dry it thoroughly. For the exterior, use a good appliance polish wax.
Never use sharp objects, scouring pads or harsh cleaners on any part of the Dishwasher. It will damage the Dishwasher.
Cleaning the Door
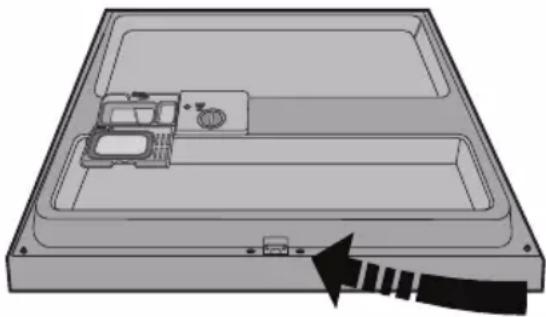
To clean the edge around the door, only use a soft warm, damp cloth.
To prevent ingress of water into the door lock and electrical components, do not use spray cleaners.

CAUTION

Never use a spray cleaner to clean the door panel as it may damage the door lock and electrical components.

Abrasive agents, cleaners or harsh cleaning cloths should not be used because of the risk of scratching or leaving spots on the stainless steel surface.
Cleaning the Spray Arms
It is necessary to clean the spray arms regularly, chemicals from water will clog the spray arm jets and bearings.
To remove the Middle Spray Arm, hold the nut and rotate the arm clockwise.
To remove the Lower Spray Arm, pull it upward.
Wash the spray arms in soapy warm water and use a soft brush to clean the jets. Replace them after rinsing thoroughly.

Cleaning and Maintenance
How to Keep the Dishwasher in Good Condition
■ After every wash
After every wash, turn OFF the water supply to the Dishwasher and leave the door slightly open so that moisture and odours are not trapped inside.
■ Remove the Power Plug
Before cleaning or performing maintenance, always either switch OFF at the isolating switch or remove the Power Plug from the socket.
■ No solvents or abrasive cleaning
a. To clean the exterior and rubber parts of the Dishwasher, do not use solvents or abrasive cleaning products. Only use a cloth with warm soapy water. b. To remove spots or stains from the surface of the interior, use a cloth dampened with water and a little vinegar, or a cleaning product made specifically for Dishwashers.
■ When not in use for a long time
It is recommended to run a wash cycle with the Dishwasher empty and then either switch it OFF at the isolating switch or remove the Power Plug from the socket, turn OFF the water supply and leave the door of the Dishwasher slightly open. This will help the door seals to last longer and prevent odours from forming within the Dishwasher.
■ Moving the Dishwasher
If the Dishwasher needs to be moved, try to keep it in the vertical position. If necessary, it can be positioned slightly inclined on its back.
Seals
One of the factors that cause unpleasant odours in the Dishwasher is the remains of food trapped in the seals. Cleaning the Dishwasher with a damp sponge periodically may prevent this.
Troubleshooting
Problem Possible Causes What To Do
| Technical problems | Dishwasher does not start | Fuse blown, or the circuit breaker may have tripped. | Replace fuse or reset circuit breaker. Remove any other appliances sharing the same circuit with the Dishwasher. |
| Power supply is not turned ON. | Make sure the Dishwasher is turned ON and the door is closed securely.Make sure the power cord is properly plugged into the wall socket. | ||
| Water pressure is low. Check that the water supply is connected properly and the water is turned ON. | |||
| Door of Dishwasher not properly closed. | Make sure to close the door properly and latch it. | ||
| Water not pumped from Dishwasher | Twist in Drain Hose. Check the Drain Hose. | ||
| Filter clogged. Check the Coarse Filter.(See section titled “Cleaning the Filter”). | |||
| Kitchen sink clogged. Check the kitchen sink to make sure it is draining well.If the problem is the kitchen sink not draining, a plumber may be needed rather than a serviceman for Dishwashers. | |||
| General problems | Suds in the tub | Improper detergent. Use only the special Dishwasher detergent to avoid suds. If this occurs, open the Dishwasher and let suds evaporate.Add approx 4.5 litres of cold water to the tub. Close and latch the Dishwasher, then select any cycle.Dishwasher will drain out the water at the fi rst step.Open the door after draining is stopped and check if the suds is disappeared.Repeat if necessary. | |
| Spilled rinse-aid. Always wipe up rinse-aid spills immediately. | |||
| Stained tub interior | Detergent with colourant was used. | Make sure that the detergent is the one without colourant. | |
| White fi lm on inside surface | Minerals from water was formed. | To clean the interior, use a damp sponge with Dishwasher detergent and wear rubber gloves.Never use any other cleaner than Dishwasher detergent for the risk of foaming or suds. | |
| Water supply indicator light up | Water pressure is low. Check that the water supply is connected properly and the water is turned ON. Check the inlet fi liter. If the inlet fi liter is clogged, clean it with a toothbrush in running water. | ||
| Water supply being blocked by frozen water. | Wrap warm towels around the joints of the Inlet Hose.Disconnect the Inlet Hose, and soak them in warm water (50 °C or lower) | ||
| Noise | Knocking noise in the wash cabinet | A spray arm is knocking against an item in a basket. | Interrupt the programme, and rearrange the items which are obstructing the spray arm. |
| Rattling noise in the wash cabinet | Items of crockery are loose in the wash cabinet. | Interrupt the programme, and rearrange the items of crockery. | |
| Noise in the Inlet Hose and Drain Hose | This may be caused by on-site installation or the cross-section of the piping. | This has no influence on the Dishwasher function.If in doubt, contact a suitably qualified plumber. | |
Troubleshooting
Problem Possible Causes What To Do
| Unsatisfactory washing result | The dishes are not clean | The dishes were not loaded correctly. | See notes in “Loading the Dishwasher Baskets”. |
| The programme was not powerful enough. | Select a more intensive programme.See “Wash Cycle Table”. | ||
| Not enough detergent was dispensed. | Use more detergent, or change detergent. | ||
| Items are blocking the path of spray arms. | Rearrange the items so that the spray can rotate freely. | ||
| The Filter Assembly in the base of wash cabinet is not clean or is not correctly fitted.This may cause the spray arm jets to get blocked. | Clean and/or fi t the fi iter combination correctly.Clean the spray arm jets. See “Cleaning the Spray Arms”. | ||
| Cloudiness on glassware | Detergent is too much Use | less detergent and select a shorter cycle to wash the glassware to get them clean. | |
| Black or grey marks on the dishware | Aluminium utensils have rubbed against the dishware. | Use a mild abrasive cleaner to eliminate those marks. | |
| Detergent left in dispenser | Dishes block Detergent Dispenser. | Re-load the dishes properly. | |
| Unsatisfactory drying result | The dishes are not drying | Improper loading. Load the | Dishwasher as suggested in the directions. |
| Too little rinse-aid. Increase | the amount of rinse-aid/refi ll the rinse-aid dispenser. | ||
| Dishes are removed too soon. | Do not empty the Dishwasher immediately after washing. Open the door slightly so that the steam can escape. Begin unloading the Dishwasher only once the dishes have suffi ciently cooled.Empty the low basket fi rst. This prevents water from dropping from the dishes in the Upper Basket. | ||
| Wrong programme has been selected. | In a short programme the washing temperature is lower. This also lowers cleaning performance. Choose a programme with a longer washing time. | ||
| Use of cutlery with a low-quality coating. | Water drainage is more diffi cult with these items.Cutlery or dishes of this type are not suitable for washing in the Dishwasher. |
Error Codes
If a malfunction occurs, the Dishwasher will display error codes as below:
| Display Error Code | Defi nition Possible Causes Solution | ||
| E 1 | Long water inlet time | Faucets not turned ON suffi ciently, water intake is restricted or water pressure is too low | Open the faucet / water supply or increase the water pressure of water supply. |
| E 3 | Heating Abnormal | Failure of heater | Contact a Panasonic Authorised Service Centre for assistance. |
| E 4 | Water overfl ow | Some Dishwasher components are leaking | Contact a Panasonic Authorised Service Centre for assistance. |
| E 6 | Failure of varistor | Open circuit of varistor | Contact a Panasonic Authorised Service Centre for assistance. |
| E 7 | Failure of varistor | Short circuit of varistor | Contact a Panasonic Authorised Service Centre for assistance. |
| E 8 | Failure of orientation of distributary valve | Open circuit or failure of distributary valve | Contact a Panasonic Authorised Service Centre for assistance. |
Note:
The above are the judgment and inspection of common failures.

WARNING

To avoid danger to user and damage to the Dishwasher, repairs should only be performed by a suitably qualified serviceman.

If overflow occurs, turn OFF the main water supply before contacting a Panasonic Authorised Service Centre. If there is water overflow or small leaks, the water should be drained before restarting the Dishwasher.
Specifications

| Model NP-6F2MUQNZ | |
| Power Source 220 - 240 V | ~ |
| Wattage 1760 - 2100 W | |
| Frequency 50 Hz | |
| Water Pressure 0.04 - 1.0 MPa | |
| Capacity 14 Settings | |
| Dimensions (L × W × H) Approx. 600 mm × 600 mm × 850 mm | |
| Nett Weight Approx. 48 kg | |
Loading the Baskets
Loading the baskets according to AS/NZS 2007.1:
- Upper Basket:

- Lower Basket:


Specifications
- Cutlery Basket:

1 Forks

4 Teaspoons

2 Soup spoons
5 Knives

3 Dessert spoons

Information for comparability tests in accordance with AS/NZS 2007.1
■ Capacity: 14 place settings ■ Position of the upper basket: lower Programme: ECO ■ Detergent (pre/main): 5 g/27.5 g ■ Rinse aid setting: 6
Positioning the Dishwasher
Position the Dishwasher in the desired location. The back should rest against the wall and the sides must align with the adjacent cabinets or walls. The Dishwasher is equipped with Inlet Hose and Drain Hose that can be positioned either to the right or the left sides to facilitate proper installation.
Levelling the Dishwasher

Once the Dishwasher is positioned for levelling, the height of the Dishwasher may be altered via adjustment of the screwing level of the feet. The Dishwasher may be inclined by turning left direction and may be declined by turning right direction. In any case, the Dishwasher should not be inclined more than 2 degrees.
Electrical Connection

WARNING

It is necessary to allow disconnection of this appliance from the mains supply after installation. This disconnection can be achieved by having the plug accessible or by incorporating a switch in the fixed wiring in accordance with the wiring rules.

Ensure proper ground exists for earth wire before installation.

Do not use an extension cord or an adapter plug with this Dishwasher.

Do not cut or remove the earthing connection from the power cord under any circumstances.
IMPORTANT:
Correct installation is the responsibility of the installer. Any malfunction or accident resulting from the failure to follow the Installation Instructions is not covered by the warranty.
Installation Instruction
Electrical Requirements
Look at the Name Plate to know the rating voltage and connect the Dishwasher to the appropriate power supply. Provide a separate circuit serving only for this Dishwasher.
Electrical Connection
Ensure the voltage and frequency of the power correspond to those on the Name Plate. Only insert the Power Plug into an electrical socket which is earthed properly. If the electrical socket to which the Dishwasher must be connected is not appropriate for the Power Plug, replace the socket, rather than using adapters or the like as they could cause overheating and fire.
Water Connection
Inlet Hose Connection

Connect the Inlet Hose to a threaded 3/4 (inch) connector and make sure that it is fastened tightly in place.
If the water pipes are new or have not been used for an extended period of time, let the water run to make sure that the water is clean. This precaution is needed to avoid the risk of the water inlet becoming blocked and damage the Dishwasher.
Please fasten the nut lightly by hand and tighten it. The proper tightening torque is 5-10 N.m (50-100 kgf.cm).
Note:
• The maximum inlet water pressure is 1 MPa. • The minimum inlet water pressure is 0.04 MPa.

CAUTION

The appliance is to be connected to the water mains by new detachable hose-sets supplied with the appliance. Old hose-sets should not be used.

Close the water tap after using.

CAUTION

Make sure the connected drain system is free from clogging or frozen water.
Drain Hose Connection
Connect the Drain Hose into the Water Outlet with a minimum diameter of 40 mm, or let it run into the sink. Ensure that the Drain Hose is not bent or squashed. The top of the hose must be less than 1000 mm.

How to Drain Excess Water From Hoses
If the sink is 1000 higher from the floor, the excess water in hoses cannot be drained directly into the sink. It will be necessary to drain excess water from hoses into a bowl or suitable container that is held outside and lower than the sink.
Water Outlet
Connect the Drain Hose into the Water Outlet. The Drain Hose must be correctly fitted to avoid water leaks.
Extension Hose
If the Drain Hose extension is needed, make sure to use a similar Drain Hose. It must not be longer than 4 metres; otherwise the cleaning effect of the Dishwasher could be reduced.
Syphon Connection
The waste connection must be at a height less than 1000 mm (maximum) from the bottom of the dish. The water drain hose should be fixed.
Checkpoints After Installation
Following points should be checked before starting the Dishwasher.
- The Dishwasher is level and fixed properly.
- The inlet water supply is open.
- Inlet Hose connections are fully tightened and not leaking.
- The Power Plug is tightly connected.
- The power is switched on.
- The Inlet Hose and Drain Hose are knotted.
- All packing materials and printings should be taken out from the Dishwasher.
Panasonic Manufacturing Malaysia Berhad
No. 3, Jalan Sesiku 15/2, Section 15, Shah Alam Industrial Site,
40200 Shah Alam, Selangor Darul Ehsan
Website: http://www.panasonic.com



- OPERATING AND INSTALLATION INSTRUCTIONS
- TABLE OF CONTENTS
- SAFETY PRECAUTIONS
- FOR INSTALLER
- WARNING
- CAUTION
- NOTE
- PARTS IDENTIFICATION
- ACCESSORIES
- CONTROL PANEL
- MAIN DISPLAY
- PROGRAMME INDICATORS
- PROGRAMME TIME INDICATOR
- TIME DELAY INDICATOR
- RINSE AID INDICATOR
- CHILD LOCK INDICATOR
- DELAY TIME, REMAIN TIME, OR ERROR CODES INDICATOR
- WATER SUPPLY INDICATOR
- WASH ZONE INDICATOR
- WASHING PHASE DISPLAY
- OFF/ON BUTTON
- WASH ZONE BUTTON
- FUNCTION BUTTON
- CHILD LOCK
- PROGRAMME SELECTION BUTTON
- TIME DELAY BUTTON
- PAUSE/START BUTTON
- QUICK OPERATION GUIDE
- USING THE DISHWASHER
- FUNCTION OF DETERGENT
- DETERGENTS
- CONCENTRATED DETERGENT
- DETERGENT TABLETS
- DETERGENT DISPENSER
- FILL IN DETERGENT
- FILLING THE RINSE AID DISPENSER
- RINSE AID DISPENSER
- FUNCTION OF RINSE AID
- WHEN REFILLING THE RINSE AID DISPENSER
- FULL
- EMPTY
- ADJUSTING RINSE AID DISPENSER
- LOADING THE DISHWASHER BASKETS
- RECOMMENDATION
- ATTENTION BEFORE OR AFTER LOADING THE DISHWASHER BASKETS
- REMOVING THE DISHWARE
- THE METHOD OF LOADING NORMAL DISHWARE
- LOADING THE UPPER BASKET
- LOADING THE LOWER BASKET
- ADJUSTING THE UPPER BASKET
- FOLDING BACK THE CUP SHELVES
- FOLDING SPIKES OF LOWER BASKET
- CUTLERY BASKET
- STARTING A WASHING PROGRAMME
- WASH CYCLE TABLE
- STARTING A WASH CYCLE
- CHANGING THE PROGRAMME
- ADDING DISHWARE DURING OPERATION
- AT THE END OF THE WASH CYCLE
- SWITCH OFF THE DISHWASHER
- OPEN THE DOOR CAREFULLY
- UNLOADING THE DISHWARE
- CLEANING AND MAINTENANCE
- FILTERING SYSTEM
- COARSE FILTER
- MAIN FILTER
- FINE FILTER
- FILTER ASSEMBLY
- CLEANING THE FILTER
- CARING FOR THE DISHWASHER
- CLEANING THE DOOR
- CLEANING THE SPRAY ARMS
- HOW TO KEEP THE DISHWASHER IN GOOD CONDITION
- AFTER EVERY WASH
- REMOVE THE POWER PLUG
- NO SOLVENTS OR ABRASIVE CLEANING
- WHEN NOT IN USE FOR A LONG TIME
- MOVING THE DISHWASHER
- SEALS
- TROUBLESHOOTING
- ERROR CODES
- SPECIFICATIONS
- LOADING THE BASKETS
- POSITIONING THE DISHWASHER
- LEVELLING THE DISHWASHER
- ELECTRICAL CONNECTION
- IMPORTANT
- INSTALLATION INSTRUCTION
- ELECTRICAL REQUIREMENTS
- WATER CONNECTION
- INLET HOSE CONNECTION
- DRAIN HOSE CONNECTION
- HOW TO DRAIN EXCESS WATER FROM HOSES
- WATER OUTLET
- EXTENSION HOSE
- SYPHON CONNECTION
- CHECKPOINTS AFTER INSTALLATION
- PANASONIC MANUFACTURING MALAYSIA BERHAD
Brand : PANASONIC
Model : NP-6F2MUQNZ
Category : Dishwasher