
BH-022VC - Vacuum Cleaner Vivax - Free user manual and instructions
Find the device manual for free BH-022VC Vivax in PDF.


| Product Type | Vacuum Cleaner |
| Brand | Vivax |
| Model | BH-022VC |
| Dimensions (approx.) | 30 x 30 x 110 cm |
| Weight (approx.) | 6.5 kg |
| Power Source | Mains-powered, 220-240 V ~ 50/60 Hz |
| Power Consumption | 1400 W |
| Dust Capacity | 1.5 L bag |
| Cord Length | 5 m |
| Filtration | HEPA filter |
| Suction Power Control | Electronic slide control |
| Floor Type | Hard floors and carpets |
| Accessories Included | Crevice tool, dusting brush, floor nozzle |
| Maintenance | Replace dust bag and clean HEPA filter regularly |
| Safety Features | Overheat protection, motor thermostat |
| Warranty | 2 years (subject to conditions) |
| Spare Parts Availability | Dust bags, HEPA filter set (model BH-022VC-ACC) |
| Repairability | User-replaceable dust bag and filter; other repairs by service center |
| Energy Class | A |
| Noise Level | 78 dB(A) |
Frequently Asked Questions - BH-022VC Vivax
User questions about BH-022VC Vivax
0 question about this device. Answer the ones you know or ask your own.
Ask a new question about this device
Download the instructions for your Vacuum Cleaner in PDF format for free! Find your manual BH-022VC - Vivax and take your electronic device back in hand. On this page are published all the documents necessary for the use of your device. BH-022VC by Vivax.
USER MANUAL BH-022VC Vivax
natural_image
Two white circular outlines on a dark background, resembling a stylized lamp or electrical panel (no text or symbols)Poštovani,
Pakiranje i ambalaža proizvoda (plastične vrećice, stiropor itd) ne smiju ostati unutar dosega djece, zato što su potencijalno opasni. Molimo odložite i pohranite pakiranje i ambalažu sukladno lokalnim propisima.
natural_image
Warning triangle with exclamation mark symbol (no text or numbers)SIGURNOSNA UPOZORENJA
• UPOZORENJE: Uređaj mora biti uzemljen!
- Molimo vas da provjerite snagu i napajanje vašeg električnog priključka i odgovara li podacima navedenim na naljepnici, koja se nalazi sa stražnje strane uređaja. Ako imate bilo kakve sumnje ili pitanja, kontaktirajte ovlašteni servis ili električara.
- Nemojte koristiti abrazivna sredstva ili oštre metalne nožiće ili slično za čišćenje, jer na taj način možete nepovratno oštetiti površinu.
hrana treba se ukloniti s površine uređaja ili poklopca prije otvaranja ili zatvaranja poklopca.
ODABIR ISPRAVNOG POSUĐA
- Nemojte koristiti posuđe s nazubljenim, neravnim rubovima ili zakrivljenim dnom.

natural_image
Three identical cooking pots with crossed-out X marks, shown in different orientations (no text or symbols)- Osigurajte da je dno posude glatko, da leži ravno uz staklo i da je iste veličine kao i zona za kuhanje. Posudu uvijek postavite u sredinu zone za kuhanje.
natural_image
Four identical cooking pots with crossed-out X marks, shown in sequence (no text or symbols)- Preporuka je da posude prilikom premještanja podignete vertikalno, nemojte ih vući po staklenoj ploči jer to može dovesti do ogrebotina i oštećenja stakla ploče.

natural_image
Diagram of a cooking pot with crossed arrows indicating pressure or flow direction (no text or symbols)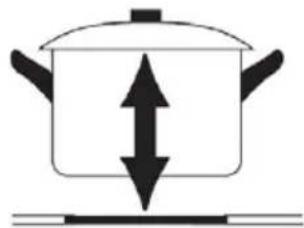
natural_image
Simple line drawing of a cooking pot with upward and downward arrows indicating direction (no text or symbols)POČETAK KUHANJA
| A (mm) B | (mm) C (mm) | D E | ||
| 760 50 | mini 30mini Ulaz | zraka Izlaz | zraka 10 mm |
natural_image
Technical line drawing of a rectangular electronic device with mounting holes and a close-up inset showing internal components (no text or symbols)Upozorenja
natural_image
Two white circular outlines on a dark background, resembling a stylized lamp or electrical panel (no text or symbols)Poštovani,
Pakovanje i ambalaža proizvoda (plastične kese, stiropor itd) držite van domašaja dece zato što su potencijalno opasni.
Odložite pakovanje i ambalažu u skladu sa lokalnim propisima.
natural_image
Warning triangle with exclamation mark symbol (no text or numbers)SIGURNOSNA UPOZORENJA
- UPOZORENJE: Uređaj mora da bude uzemljen!
- Molimo vas da proverite snagu i napajanje vašeg električnog priključka i odgovara li podacima navedenim na nalepnici, koja se nalazi sa zadnje strane uređaja. Ako imate bilo kakve sumnje ili pitanja, kontaktirajte ovlašćeni servis ili električara.
- Proverite i osigurajte da je električno napajanje na utičnici ili priključku isključeno pre početka instalacije uređaja.
- Proverite i osigurajte da je uređaj isključen sa napajanja pre početka održavanja, čišćenja ili zamene lampice, kako bi sprečili opasnost od električnog udara.
- Ukoliko primetite da je kabl napajanja ili utikač oštećen, kako se ne bi izložili opasnosti od električnog udara odmah prestanite koristiti uređaj i pozovite ovlašćeni servis ili električara koji će stručno da zameni kabl napajanja.
- Držite električni kabl vašeg uređaja podalje od vrućih površina. Ne dopustite da dodiruje uređaj. Držite kabl podalje od oštrih predmeta i vrućih površina.
- Za vreme upotrebe uređaja, u prostoriji se stvara vlaga i toplota. Prostor u kojem koristite uređaj mora biti stalno dobro provetravan.
- Dugotrajno intenzivno korišćenje uređaja može da zahteva dodatnu ventilaciju, naprimer češće provetravanje, ugradnju dodatnih otvora za ventilaciju ili ugradnju dodatnih mehaničkih uređaja (ventilatora).
- Ovaj uređaj služi samo za kuvanje, pečenje i pripremu hrane. Ne sme se koristiti u druge svrhe, naprimer u svrhu grejanja. Uređaj je namenjen samo za kućnu upotrebu. Nije namenjen za komercijalnu ili profesionalnu upotrebu.
- Nemojte koristiti abrazivna sredstva ili oštre metalne nožiće ili slično za čišćenje, jer na taj način možete nepovratno oštetiti površinu.
- Na el. ploču ne bi trebalo stavljati nestabilne ili deformisane posude kako ne bi došlo do njihovog prevrtanja, koje može prouzrokovati povrede.
- Ako je trenutni osigurač u vašoj električnoj instalaciji manji od 32A, kontaktirajte kvalifikovanog električara za promenu osigurača ili prilagođavanje električne instalacije (samo za modele s 4 grejne ploče).
treba se ukloniti s površine uređaja ili poklopca pre otvaranja ili zatvaranja poklopca.
- Nemojte stavljati ili odlagati zapaljive ili eksplozivne tećnosti u blizini uređaja. Usled zagrejavanja uređaja, može doći do
IZBOR ISPRAVNOG POSUĐA
- Nemojte koristiti posuđe s nazubljenim, neravnim rubovima ili zakrivljenim dnom.
natural_image
Three identical cooking pots with crossed-out X symbols, shown in sequence on a flat surface (no text or labels)- Osigurajte da je dno posude glatko, da leži ravno uz staklo i da je iste veličine kao i zona za kuvanje. Posudu uvijek postavite u sredinu zone za kuvanje.

natural_image
Four identical cooking pots with crossed-out X marks, shown in sequence (no text or symbols)- Preporuka je da poude prilikom premještanja podignete vertikalno, nemojte ih vući po staklenoj ploči jer to može dovesti do ogrebotina i oštećenja stakla ploče.

natural_image
Diagram of a cooking pot with crossed X-shaped arrows indicating pressure or flow (no text or symbols)
natural_image
Simple line drawing of a cooking pot with upward and downward arrows indicating direction (no text or symbols)POČETAK KUVANJA
| A (mm) B | (mm) C (mm) | D E | ||
| 760 50 | mini 30mini Ulaz | zraka Izlaz | zraka 10 mm |
natural_image
Technical line drawing of a rectangular electronic device with mounting holes and a close-up inset showing internal components (no text or symbols)Upozorenja
- Ploču za kuvanje mora instalirati kvalifikovana servisna osoba ili tehničar. Preporuka je da u slučaju da nemate dovoljno iskustva za instalaciju, kontaktirate ovlašćeni servis ili drugu stručnu osobu za ugradnju ploče.
- Ploča za kuvanje ne sme se montirati iznad rashladnog uređaja, mašine za pranje po suđa ili sušilice.
- Ploča za kuvanje mora biti postavljena tako da se može osigurati odvođenje toplote, čime se osigurava optimalan rad i duži radni vek uređaja.
- Zidovi, vertikalne stranice ormarića i površine iznad radne ploče moraju biti otporne na toplotu.
- Kako bi se izbegla oštećenja, radna ploča i zaptivke moraju biti otporni na toplotu.
- Za čišćenje ploče ne sme se koristiti parni čistač.
- Ova ploča za kuvanje sme se spojiti na električni priključak koji ima impendansu sistema koja nije veća od 0,427 ohma. Ako je potrebno, kontaktirajte vašeg distributera električne energije ili ovlašćenog električara za informacije o impedansi sistema.
natural_image
Two white circular outlines on a dark background, resembling a stylized lamp or electrical panel (no text or symbols)Почитувани,
natural_image
Warning symbol with exclamation mark inside a triangle (no text or numbers)ИЗБОР НА ИСПРАВЕН ТИП НА САДОВИ
natural_image
Three identical cooking pots with crossed-out X symbols on their bases, placed horizontally on a flat surface (no text or labels)natural_image
Four identical cooking pots with crossed-out X marks, shown in sequence (no text or symbols)natural_image
Diagram showing a container with crossed arrows indicating flow or movement, no text or symbols present
natural_image
Simple line drawing of a cooking pot with upward and downward arrows indicating direction (no text or symbols)| A (mm) B | (mm) C (mm) | D E | ||
| 760 50 | mini 30mini Ulaz | zraka lzlaz | zraka 10 mm |
natural_image
Technical line drawing of a rectangular electronic device with mounting holes and a magnified inset showing a small component (no text or symbols)natural_image
Two white circular outlines on a dark background, resembling a stylized lamp or electrical panel (no text or symbols)I nderuari konsumator,
natural_image
Warning symbol with exclamation mark inside a triangle (no text or numbers)ARALAJMËRIME TË RËNDËSISHMES
PËRZGJEDHJA E ENËS SË PËRSHTATSHME
natural_image
Three identical cooking pots with crossed-out X symbols on their bases, placed horizontally on a flat surface (no text or labels)natural_image
Four identical cooking pots with crossed-out X marks, shown in sequence (no text or symbols)natural_image
Diagram of a cooking pot with crossed arrows indicating pressure or flow direction (no text or symbols)
natural_image
Simple line drawing of a cooking pot with upward and downward arrows indicating direction (no text or symbols)FILLIMI PJEKJES/ GATIMIT
| A (mm) B | (mm) C (mm) | D E | ||
| 760 50 | mini 30mini Pra | nimi ajrit Dalja | e ajrit 10 mm |
natural_image
Technical line drawing of a rectangular electronic device with mounting holes and a magnified inset showing internal components (no text or symbols)Paralajmërime
natural_image
Two white circular outlines on a dark background, resembling a stylized lamp or electrical panel (no text or symbols)Spoštovani,
natural_image
Warning triangle with exclamation mark symbol (no text or numbers)SIGURNOSNA UPOZORENJA
• OPOZORILO: Naprava mora biti ozemljena.
IZBIRA PRAVILNE POSODE ZA KUHANJE
natural_image
Three identical cooking pots with crossed-out X marks, shown in different orientations (no text or symbols)natural_image
Four identical cooking pots with crossed-out X marks, shown in sequence (no text or symbols)natural_image
Diagram of a cooking pot with crossed arrows indicating pressure or flow direction (no text or symbols)
natural_image
Simple line drawing of a pot with an upward and downward arrow indicating pressure or direction (no text or symbols)PRIČETEK KUHANJA
| A (mm) B | (mm) C (mm) | D E | ||
| 760 50 | mini 30mini Dov | od zraka Odtok | zraka 10 mm |
Pred namestitvijo pritrdilnega nosilca
Napravo namestite na stabilno, gladko površino (uporabite embalažo, ki ste jo dobili s ploščo).
natural_image
Technical line drawing of a rectangular electronic device with mounting holes and a close-up inset showing internal components (no text or symbols)Opozorila
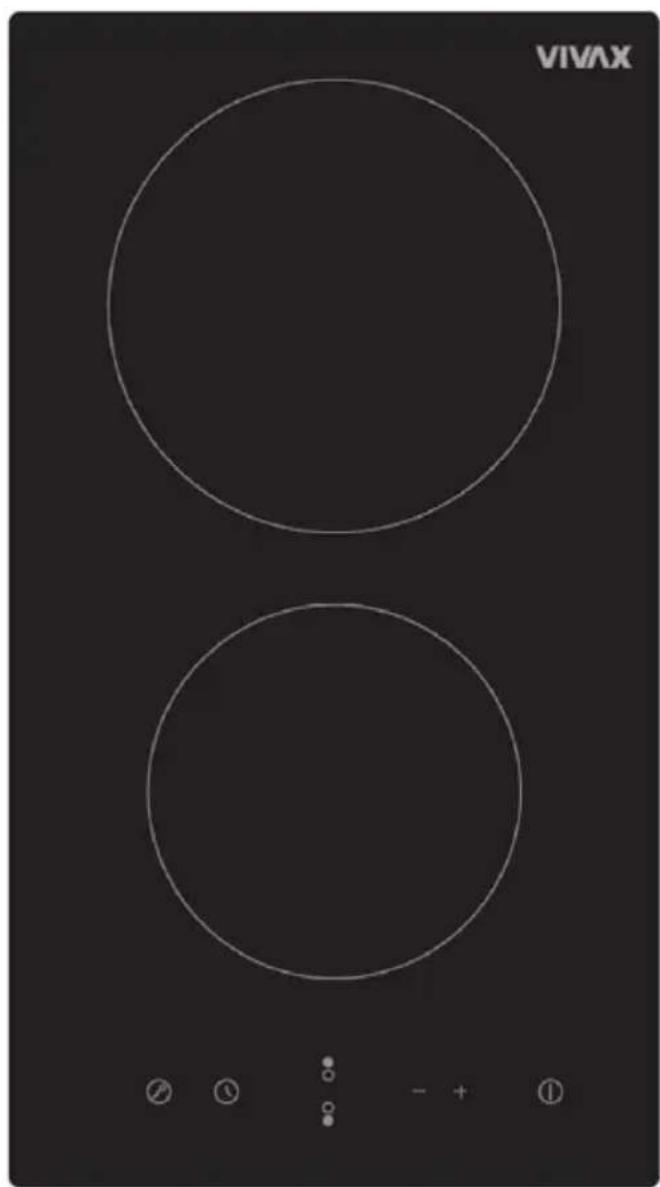
Ceramic Built-in Hob
BH-022VC
Product size: 288 x 520 x 55 mm
natural_image
Two white circular outlines on a dark background, resembling a stylized lamp or electrical panel (no text or symbols)Dear Customer,
Pieces of packaging (plastic bags, polystyrene etc.) must not be left within reach of children, as they are potentially dangerous.
Please dispose of packaging thoughtfully by the appropriate means.
To this effect, we recommend that you read the entire guide carefully before operating the product and keep it as a reference. If you transfer the device to a third party, please give them this manual, to the new owner familiar with the device functions and warnings relevant to the safe use of the device.
Warning: All our appliances are only for domestic use, not for commercial use.
THIS APPLIANCE SHALL BE INSTALLED IN ACCORDANCE WITH THE REGULATIONS IN FORCE AND ONLY USED IN A WELL VENTILATED SPACE. READ THE INSTRUCTIONS BEFORE INSTALLING OR USING THIS APPLIANCE
WARNING: MAINTENANCE
Do not allow sugar, sauces or juices to burn on the cooking plate.
This can DAMAGE the glass surface or even melt of the glass surface or make subsequent cleaning much more difficult!
The light color change on the plate are normal and don't have any influence on working performances.

natural_image
Warning symbol with exclamation mark inside a triangle (no text or numbers)IMPORTANT AND SAFETY
WARNINGS .
• WARNING: This appliance must be earthed!
- Please find required information as power and ratings for your cooker from rating label is which located behind of appliance.
- Ensure that the electricity supply is turned OFF before installing your appliance.
- Ensure that the appliance is switched off before replacing the lamp to avoid the possibility of electric shock.
- If the supply cord is damaged, it must be replaced by the manufacturer, its services agent or similar qualified persons in order to avoid hazard.
- Keep the electrical cable of your cooker away from the hot areas; do not let them touch the appliance. Keep them away from sharp sides and heated surfaces.
- Usage of your appliance creates moisture and heat in the room; make sure that your kitchen is well ventilated.
- Prolonged intensive use of the appliance may call for additional ventilation, for example opening increasing the level of mechanical ventilation where present.
- When the cooker is hot never touch the cooker glass by hand.
- This appliance is for cooking purposes only. It must not be used for other purposes, for example room heating. All our appliances are only for domestic use, not for commercial use.
- Before starting to use your appliance, keep curtains, paper or inflammable things away from your appliance. Do not keep combustible or inflammable things in or near the appliance.
- This appliance can be used by children aged from 8 years and above and persons with reduced physical, sensory or mental capabilities or lack of experience and knowledge if they have been given supervision or instruction concerning
use of the appliance in a safe way and understand the hazards involved.
• Children shall not play with the appliance.
- Cleaning and user maintenance shall not be made by children unless they are supervised.
- Use glove when using cooker. Do not touch on hot surfaces.
- Do not use cooker in potentially explosive atmospheres.
- If the current rate of the fuse in your installation is less than 16 Amp, have a qualified electrician fit a16 Amp fuse.
- When the oven is being used, some parts may become hot; children should be kept away and supervised at all times.
- Do not splash cool water in an oven tray or inside the oven when the surface of the appliance is still hot. Arising steam may cause burns and sudden temperature exchange may cause damages on the surface of the appliance
- WARNING: Accessible parts may become hot during use. Young children should be kept away.
- WARNING: The appliance and its accessible parts become hot during use. Care should be taken to avoid touching heating elements.
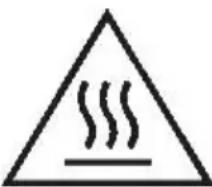
Children less than 8 years of age shall be kept away unless continuously supervised.
- Do not use harsh abrasive cleaners or sharp metal scrapers to clean the oven door glass since they can scratch the surface which may result in shattering of the glass.
- On burners or electric hot plates should not put unstable or deformed pots to prevent their roll over, which can cause injury.
- If the current rate of the fuse in your installation is less than 32 Ampere, have a qualified electrician fit a 32 A fuse. (only for models with 4 Hot plates)
- This appliance is produced in accordance with the safety regulations. Incorrect use will harm people and appliance.
- The cooker must be supplied via a suitable double pole isolating switch, having contact separation of at least 3 mm
in all poles placed in a readily accessible position adjacent to the unit.
- Children should be supervised to ensure that they do not play with the appliance. Never let them play with the appliance.
- The cooker may be located in a kitchen, a kitchen/diner or bed-sitting room but not in a room containing a bath or shower.
• CAUTION: glass lids may shatter when heated.
Turn off all the burners before shutting the lid. Hob surface should be allowed to cool before closing the lid!

Any spillage should be removed from the lid before opening.
- Do not put flammable, combustible, explosive liquid able or deformable by heat any material in the oven against possible risk of danger even if your appliance is not in use.
- Bread may catch fire if the toasting time is too long. Close supervision is necessary during toasting an dcooking.
- CAUTION: The cooking process has to be supervised. A short term cooking process has to be supervised continuously.
- WARNING: Before cleaning, servicing or obtaining access to terminals, all supply circuits must be disconnected.
- WARNING: Unattended cooking on a hob with fat or oil can be dangerous and may result in fire. NEVER try to extinguish a fire with water, but switch off the appliance and then cover flame e.g. with a lid or a fire blanket (wet kitchen cloth).
- WARNING: Danger of fire: do not store items on the cooking surfaces.
- WARNING: If the surface is cracked, switch off the appliance to avoid the possibility of electric shock
- The appliance is not intended to be operated by means of an external timer or separate remote-control system
- WARNING: This appliance is not intended for use by persons (including children) with reduced physical, sensory or mental capabilities, or lack of experience and knowledge, unless
they have been given supervision or instruction concerning use of the appliance by a person responsible for their safety.
- Children should be supervised to ensure that they do not play with the appliance.
- Never place an empty pan on the burner or electric. panel that works.
- Metallic objects such as knives, forks, spoons and lids should not be placed on the hob surface since they can get hot.
- The glass ceramic can be damaged by objects falling onto it.
- If the surface is cracked, switch off the appliance to avoid the possibility of electric shock, for hob surfaces of glass ceramic or similar material which protect live parts
- Do not attempt to repair the appliance yourself, please contact an authorized service center. Contact an authorized service center and insist on the use of original spare parts.
POSITION OF THE APPLIANCE
Before you start to use appliance, please carefully read "IMPORTANT AND SAFETY WARNINGS" chapter!
Before using hob plate, please remove all flammable tapes, styrofoam or any other ambalage materials on cooker. Also take out user manual and other flammable materials from appliance.
The appliance must not be installed close to the decorative doors or cabinets.
This device should use only after you installed into kitchen cabinet or base.
Allow disconnection of the appliance after installation, by accessible plug or switch in the fixed wiring.
MAIN PARTS
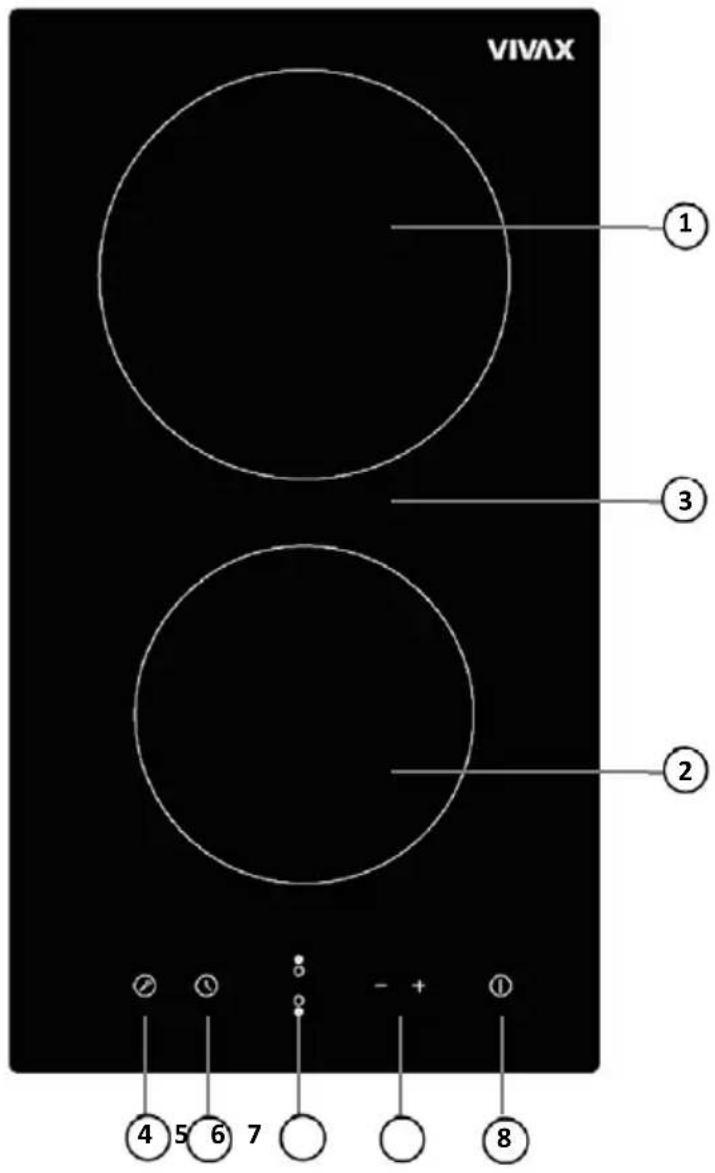
- 1800 W Zone
- 1200 W Zone
- Glass plate
- Key lock control
- Timer Control
- Heating zone selection controls
- Power / Timer regulating controls
- ON/OFF Control
COOKER USE
TOUCH CONTROLS
- The controls respond to touch, so you don't need to apply any pressure.
- Use the ball of your finger, not its tip.
- You will hear a beep each time a touch is registered.
- Make sure the controls are always clean, dry, and that there is no object (e.g. a utensil or a cloth) covering them. Even a thin film of water may make the controls difficult to operate.

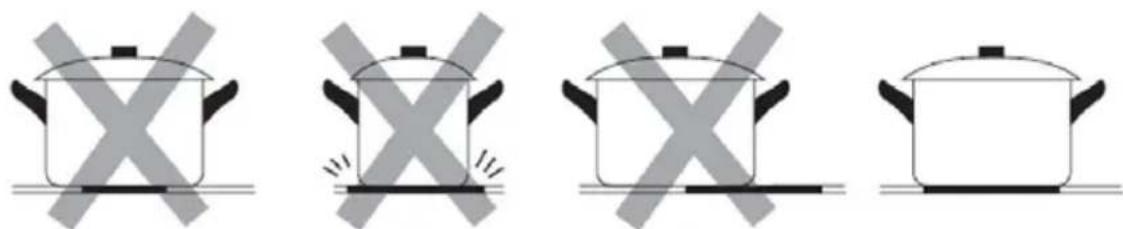
CHOOSING THE RIGHT COOKWARE
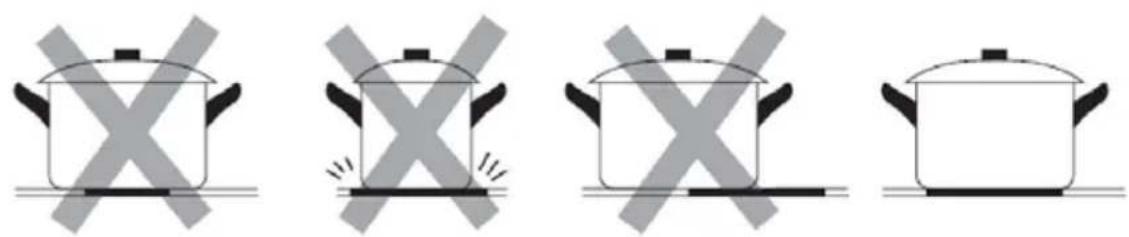
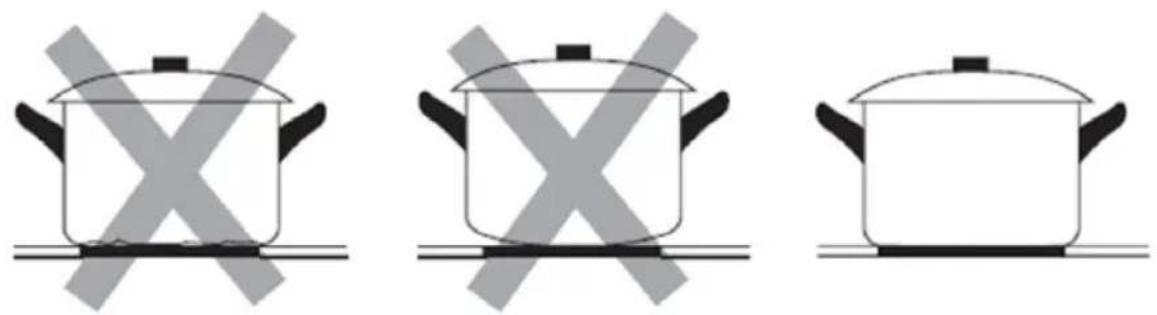
- Do not use cookware with jagged edges or a curved base.

natural_image
Three identical cooking pots with crossed-out X symbols, no text or labels present- Make sure that the base of your pan is smooth, sits flat against the glass, and is the same size as the cooking zone. Always centre your pan on the cooking zone.
natural_image
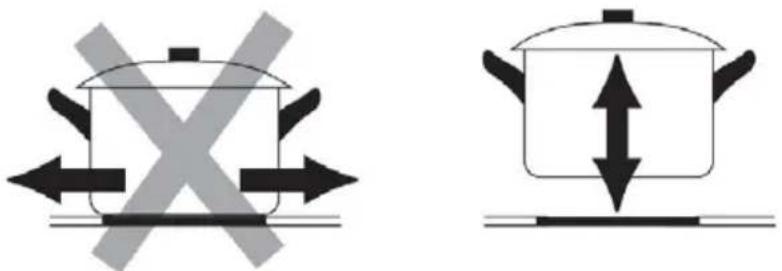
Four identical cooking pots with crossed-out X symbols, shown in sequence (no text or labels)• Always lift pans off the ceramic hob – do not slide, or they may scratch the glass.
natural_image
Two cooking pots with directional arrows indicating heating or cooking process (no text or symbols)START COOKING
After power on, the buzzer beeps once, all the indicators light up for 1 second then go out, indicating that the ceramic hob has entered the stat of standby mode.
| Touch the ON/OFF ⏻ control, all the indicators show “-” | 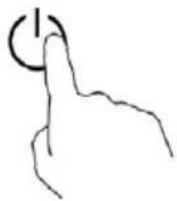 |
| Place a suitable pan on the cooking zone that you wish to use.Make sure the bottom of the pan and the surface of the cooking zone are clean and dry. |  |
| Touching the heating zone selection control. |  |
| Select a heat setting by touching the “-” or “+” control.• If you don’t choose a heat setting within 1 minute, the ceramic hob will automatically switch off. You will need to start again at step 1.• You can modify the heat setting at any time du ring cooking.• By holding down either of these buttons, the value will adjust up or down. |  |
FINISH COOKING
After power on, the buzzer beeps once, all the indicators light up for 1 second then go out, indicating that the ceramic hob has entered the stat of standby mode.
| Touching the heating zone selection control that you wish to switch off. |  |
| Turn the cooking zone off by scrolling down to “0” or touching “-” and ”+” control together. |  |
| Turn the whole cooktop off by touching the ON/OFF control. | 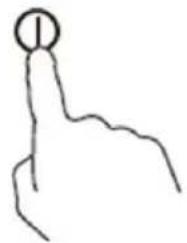 |

WARNING
"H" will show which cooking zone is hot to touch. It will disappear when the surface has cooled down to a safe temperature. It can also be used as an energy saving function if you want to heat further pans, use the hotplate that is still hot.

Locking the controls
You can lock the controls to prevent unintended use (for example children accidentally turning the cooking zones on).
When the controls are locked, all the controls except the ON/OFF control are disabled.
To lock the controls:
Touch the lock control: The timer indicator will show "Lo".
To unlock the controls:
Make sure the ceramic hob is turned on: Touch and hold the lock control for a while.

WARNING
When the hob is in the lock mode, all the controls are disable except the ON/OFF ☑ you can always turn the ceramic hob off with the ON/OFF control in an emergency, but you shall unlock the hob first in the next operation.
TIMER CONTROL
You can use the timer in two different ways:
-
You can use it as a minute minder. In this case, the timer will not turn any cooking zone off when the set time is up.
-
You can set it to turn one or more cooking zones off after the set time is up.
• The timer of maximum is 99 minutes
Using the Timer as a Minute Minder
If you are not selecting any cooking zone
| Make sure the cooktop is turned on.Note: you can use the minute minder even if you're not selecting any cooking zone.Touch the timer control, the timer indicator will flash; Adjust the timer setting by touch the “-” or “+” controls. The minute minder indicator will start flashing and will show in the timer display |  |
| Touching the ”-” and “+” together, the timer is cancelled, and the ”--“ will show in the minute display. |  |
| When the time is set, it will begin to count down immediately. The display will show the remaining time and the timer indicator will flash for 5 seconds. |  |
| Buzzer will bips for 30 seconds and the timer indicator shows “- - “ when the setting time finished. |  |
Hint:
a) Touch the “-” or “+” control of the timer once to decrease or increase by 1 minute.
b) Touch and hold the “-” or “+” control of the timer to decrease or increase by 10 minutes.
c) If the setting time exceeds 99 minutes, the timer will automatically return to 0 minute.
Setting the timer to turn one or more cooking zones off
| SET ONE ZONE | |
| Touch the zone you want to set |  |
| Touch the timer control, the timer indicator show “10”. |  |
| Set the time by touching the “-” or “+” control of the timer |  |
| Touching the “-” and “+” together, the timer is cancelled, and the will show ”--” in the minute display. |  |
| When the time is set, it will begin to count down immediately. The display will show the remaining time and the timer indicator flash for 5 seconds. |  |
| When cooking timer expires, the corresponding cooking zone will be switch off automatically. | 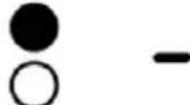 |
Hint:
a) The red dot next to power level indicator will illuminate indicating that zone is selected.
b) If you want to change the time after the timer is set, you have to start from step 1.
c) The method for setting two zones is the same as mentioned above.


Over-Temperature Protection
A temperature sensor equipped can monitor the temperature inside the ceramic hob. When an excessive temperature is monitored, the ceramic hob will stop operation automatically.
Residual Heat Warning
When the hob has been operating for some time, there will be some residual heat. The letter “H” appears to warn you to keep away from it.
Default working times
Another safety feature of the hob is automatic shutdown. This occurs whenever you forget to switch off a cooking zone. The default shutdown times are shown in the table below:
| Power level | 1 2 | 3 4 | 5 6 | 7 8 | 9 | ||||
| Default working timer (hour) | 8 8 | 8 4 | 4 4 | 2 2 | 2 |
COOKING GUIDELINES

Take care when frying as the oil and fat heat up very quickly, particularly if you're using PowerBoost. At extremely high temperatures oil and fat will ignite spontaneously and this presents a serious fire risk.
1. Cooking tips
- When food comes to the boil, reduce the temperature setting.
• Using a lid will reduce cooking times and save energy by retaining the heat. - Minimize the amount of liquid or fat to reduce cooking times.
- Start cooking on a high setting and reduce the setting when the food has heated through.

The settings below are guidelines only. The exact setting will depend on several factors, including your cookware and the amount you are cooking. Experiment with the Ceramic hob to find the settings that best suit you.
| Heat Setting Suitability | |
| 1-2 | ·delicate warming for small amounts of food·melting chocolate, butter, and foods that burn quickly·gentle simmering·slow warming |
| 3-4 | ·reheating·rapid simmering·cooking rice |
| 5-6 | ·pancakes |
| 7-8 | ·sautéing·cooking pasta |
| 9 | ·stir-frying·searing·bringing soup to the boil·boiling water |
CARE AND CLEANING
| What? How? Important! | ||
| Everyday soiling on glass (fingerprints, marks, stains left by food or non-sugary spillovers on the glass) | 1. Switch the power to the cooktop off.2. Apply a cooktop cleaner while the glass is still warm (but not hot!)3. Rinse and wipe dry with a clean cloth or paper towel.4. Switch the power to the cooktop back on. | ·When the power to the cooktop is switched off, there will be no ‘hot surface’ indication but the cooking zone may still be hot! Take extreme care.·Heavy-duty scourers, some nylon scourers and harsh/abrasive cleaning agents may scratch the glass. Always read the label to check if your cleaner or scourer is suitable.·Never leave cleaning residue on the cooktop: the glass may become stained. |
| Boilovers, melts, and hot sugary spills on the glass | Remove these immediately with a fish slice, palette knife or razor blade scraper suitable for Ceramic glass cooktops, but beware of hot cooking zone surfaces:1. Switch the power to the cooktop off at the wall.2. Hold the blade or utensil at a 30° angle and scrape the soiling or spill to a cool area of the cooktop.3. Clean the soiling or spill up with a dish cloth or paper towel.4. Follow steps 2 to 4 for ‘Everyday soiling on glass’ above. | ·Remove stains left by melts and sugary food or spillovers as soon as possible. If left to cool on the glass, they may be difficult to remove or even permanently damage the glass surface.·Cut hazard: when the safety cover is retracted, the blade in a scraper is razor-sharp. Use with extreme care and always store safely and out of reach of children. |
| Spillovers on the touch controls | 1. Switch the power to the cooktop off.2. Soak up the spill3. Wipe the touch control area with a clean damp sponge or cloth.4. Wipe the area completely dry with a paper towel.5. Switch the power to the cooktop back on. | The cooktop may beep and turn itself off, and the touch controls may not function while there is liquid on them. Make sure you wipe the touch control area dry before turning the cooktop back on. |
WARNING
Spilled sauce, fruit juice, etc. should be wiped off as soon as possible with a soft cloth soaked in warm water with a detergent.
Do not allow sauces or juices to burn on the cooking plate. This can DAMAGE the glass surface or even melt of the glass surface or make subsequent cleaning much more difficult! The light color change on the plate are normal and don't have any influence on working performances.
Do not use a steel wool or knives to clean dirt deposits. Grease the deposits with a cloth soaked with a very damp detergent, but be careful not to scratch glass top.
The light color change on the plate are normal and don't have any influence on working performances.
HINTS AND TIPS
| Problem Possible causes What to do | ||
| The cooktop cannot Be turned on. | No power. Make sure the ceramic hob is connected to the power supply and that it is switched on.Check whether there is a power outage in your home or area. If you've checked everything and the problem persists, call a qualified technician. | |
| The touch controls are unresponsive. | The controls are locked. Unlock the controls. See section ‘Using your ceramic cooktop’ for instructions. | |
| The touch controls are difficult to operate. | There may be a slight film of water over the controls or you may be using the tip of your finger when touching the controls. | Make sure the touch control area is dry and use the ball of your finger when touching the controls. |
| The glass is being scratched. | Rough-edged cookware. Use cookware with flat and smooth bases. See ‘Choosing the right cookware’.See ‘Care and cleaning’. | |
| Some pans make crackling or clicking noises. | This may be caused by the construction of your cookware (layers of different metals vibrating differently). | This is normal for cookware and does not indicate a fault. |
INSTALLATION
Selection of installation equipment
- Cut out the work surface according to the sizes shown in the drawing.
For the purpose of installation and use, a minimum of 50mm space shall be preserved around the hole. Be sure the thickness of the work surface is at least 30mm. Please select heat-resistant work surface material to avoid larger deformation caused by the heat radiation from the hotplate. As shown below:


- The ceramic cooker hob can be used on the table top of cabinet. The ceramic hob should be placed horizontally. As shown below:

Under any circumstances, make sure the ceramic cooker hob is well ventilated and the air inlet and outlet are not blocked. Ensure the ceramic cooker hob is in good work state. As shown below.
Note: The safety distance between the hotplate and the cupboard above the hotplate should be at least 760mm.

| A (mm) B | (mm) C (mm) | D E | ||
| 760 50 | mini 30mini Air | intake Air exit | 10 mm |
Before locating the fixing brackets
The unit should be placed on a stable, smooth surface (use the packaging). Do not apply force onto the controls protruding from the hob.
Fix the hob on the work surface by screw four brackets on the bottom of hob (see picture) after installation. Adjust the bracket position to suit for different work surface's thickness.

natural_image
Technical line drawing of a device chassis with an inset showing a close-up of its internal components (no text or symbols present)Cautions
- The ceramic cooker hob must be installed by qualified personnel or technicians. We have professionals at your service. Please never conduct the operation by yourself.
- The ceramic cooker hob shall not be mounted to cooling equipment, dishwashers and rotary dryers.
- The ceramic cooker hob shall be installed such that better heat radiation can be ensured to enhance its reliability.
- The wall and induced heating zone above the work surface shall withstand heat.
- To avoid any damage, the sandwich layer and adhesive must be resistant to heat.
- A steam cleaner is not to be used.
- This ceramic can be connected only to a supply with system impedance no more than 0.427 ohm. In case necessary, please consult your supply authority for system impedance information.
Connecting the hob to the mains power supply
The power supply should be connected in compliance with the relevant standard, or a single-pole circuit breaker. the method of connection is shown below.
- If the cable is damaged or needs replacing, this should be done by an after-sales technician using the proper tools, so as to avoid any accidents.
- If the appliance is being connected directly to thenains supply, an omnipolar circuit breaker must be installed with a minimum gap of 3mm between the contacts.
- The installer must ensure that the correct electrical connection has been made and that it complies with safety regulations.
- The cable must not be bent or compressed.
- The cable must be checked regularly and only replaced by a properly qualified person.

TECHNICAL SPECS
| Cooking Hob BH-022VC | |
| Cooking Zone 2 Zones | |
| Supply Voltage 220-240V~ 50Hz or 60Hz | |
| Installed Electric Power 2700-3300 W | |
| Product Size DxWxH (mm) 288 x 520 x 55 | |
| Building-in Dimensions AxB (mm) 268 x 490 |
Disposal of Electrical and Electronic Equipment
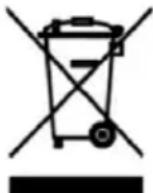
To protect our environment and to recycle the raw materials used as completely as possible, the consumer is asked to return unserviceable equipment to the public collection system for electrical and electronic.
The symbol of the crossed indicates that this product must be returned to the collection point for electronic waste to feed it by recycling the best possible raw
material recycling.
By ensuring this product you will prevent possible negative effects on the environment and human health, which could otherwise be caused due to improper disposal of that product. The recycling of materials from this product, you will help to preserve a healthy environment and natural resources.
For detailed information about the collection of EE products contact the dealer where you purchased the product.
EU Declaraton of Conformity
This device is manufactured in accordance with the applicable European standards and in accordance with all applicable Directives and Regulations.
EU declaration of conformity can be downloaded from the following link: www.msan.hr/dokumentacijaartikala
CE
JAMSTVENI LIST HR
VIVAX
MODEL UREĐAJA
SERIJSKI BROJ
DATUM PRODAJE
BROJ RAČUNA PRODAVATELJA
POTPIS I PEČAT PRODAVATELJA
POTPIS I PEČAT PRODAVATELJA
GARANCIJSKA IZJAVA
-
Ovom garancijom garantira proizvođač proizvoda, preko KIM TEC d.o.o., kao uvoznika i davatelja garancije u Bosni i Hercegovini besplatan popravak istog u skladu s važećim propisima i u skladu s uvjetima opisanim u ovom garantnom listu. Ovom garancijom garantiramo da će predmet ove garancije raditi bez greške uzrokovane eventualnom lošom izradom i lošim materijalom izrade. Svi eventualno nastali kvarovi biti će besplatno otklonjeni u ovlaštenom servisu u garantnom roku.
-
UVJETI GARANCIJE: Garantni rok počinje teći od dana kupnje proizvoda i traje:
| 60 MJESECI (5 godina) | HLADNJACI,VERTIKALNE I HORIZONTALNE ŠKRINJE |
| 36 MJESECI (3 godine) | ŠTEDNJACI, PERILICE I SUŠILICE RUBLJA, PERILICESUĐA, KUHINJSKE NAPE, UGRADBENE PEĆNICE IPLOČE, GRIJALICE VODE |
- U slučaju kvara na proizvodu koji je predmet ove garancije, obavezujemo se da ćemo isti popraviti u najkraćem mogućem roku, a najkasnije u roku od 45 dana. Ako se proizvod ne može popraviti ili se ne popravi u roku od 45 dana, biti će zamijenjen novim.
- Garancija se priznaje samo uz račun o kupnji, te uz ovaj garantni list koji mora biti ispravno popunjen odnosno mora sadržavati datum prodaje, pečat i potpis prodavatelja.
- Davalac garancije osigurava servis i rezervne dijelove 7 godina od datuma kupnje.
GARANCIJA NE OBUHVAĆA:
- SIGURNOSNA UPOZORENJA
- ODABIR ISPRAVNOG POSUĐA
- POČETAK KUHANJA
- Upozorenja
- IZBOR ISPRAVNOG POSUĐA
- POČETAK KUVANJA
- ИЗБОР НА ИСПРАВЕН ТИП НА САДОВИ
- I nderuari konsumator,
- ARALAJMËRIME TË RËNDËSISHMES
- PËRZGJEDHJA E ENËS SË PËRSHTATSHME
- FILLIMI PJEKJES/ GATIMIT
- Paralajmërime
- IZBIRA PRAVILNE POSODE ZA KUHANJE
- PRIČETEK KUHANJA
- Pred namestitvijo pritrdilnega nosilca
- Opozorila
- Ceramic Built-in Hob
- BH-022VC
- WARNING: MAINTENANCE
- IMPORTANT AND SAFETY
- WARNINGS .
- POSITION OF THE APPLIANCE
- MAIN PARTS
- COOKER USE
- TOUCH CONTROLS
- CHOOSING THE RIGHT COOKWARE
- START COOKING
- FINISH COOKING
- WARNING
- Locking the controls
- To lock the controls:
- To unlock the controls:
- TIMER CONTROL
- Using the Timer as a Minute Minder
- Hint:
- Setting the timer to turn one or more cooking zones off
- Over-Temperature Protection
- Residual Heat Warning
- Default working times
- COOKING GUIDELINES
- Cooking tips
- INSTALLATION
- Selection of installation equipment
- Before locating the fixing brackets
- Cautions
- Connecting the hob to the mains power supply
- TECHNICAL SPECS
- Disposal of Electrical and Electronic Equipment
- EU Declaraton of Conformity
- JAMSTVENI LIST HR
- VIVAX
- MODEL UREĐAJA
- SERIJSKI BROJ
- DATUM PRODAJE
- BROJ RAČUNA PRODAVATELJA
- POTPIS I PEČAT PRODAVATELJA
- GARANCIJSKA IZJAVA
- GARANCIJA NE OBUHVAĆA:
Brand : Vivax
Model : BH-022VC
Category : Vacuum Cleaner