
GH187 - Water heater BUFFALO - Free user manual and instructions
Find the device manual for free GH187 BUFFALO in PDF.


| Brand | Buffalo |
| Model | GH187 (GC719 for filtered version) |
| Product Type | Autofill Water Boiler (Water Heater) |
| Intended Use | Commercial |
| Capacity | 10 Litres |
| Height | 570 mm |
| Width | 344 mm |
| Depth (including drip tray) | 465 mm |
| Weight (GH187) | 10.3 kg |
| Weight (GC719) | 11.0 kg |
| Voltage | 220-240 V, 50/60 Hz |
| Power Rating | 2.52 - 3.00 kW |
| Water Inlet Pressure | 0.2 - 0.8 MPa |
| Ambient Temperature | 5 - 30 °C |
| Filtration | No (GH187) / Yes (GC719) |
| Filter Model (GC719) | GC719 |
| Tap Function | User operated flow or constant flow, with safety lock |
| Control | Screen control with LED indicators |
| Water Connection | 3/4" BSP inlet hose |
| Overflow / Drainage | Vented into drip tray |
| Electrical Connection | 13 amp plug, must be earthed |
| Warranty | 1 Year Parts, 1 Year Labour |
| Compliance | CE, WEEE directive |
| Materials | Stainless steel body |
| Accessories Included | Drip tray and insert, inlet hose, water filter (GC719 only) |
Frequently Asked Questions - GH187 BUFFALO
User questions about GH187 BUFFALO
0 question about this device. Answer the ones you know or ask your own.
Ask a new question about this device
Download the instructions for your Water heater in PDF format for free! Find your manual GH187 - BUFFALO and take your electronic device back in hand. On this page are published all the documents necessary for the use of your device. GH187 by BUFFALO.
USER MANUAL GH187 BUFFALO
USER INSTRUCTION MANUAL
BUFFALC
Autofill Water Boiler

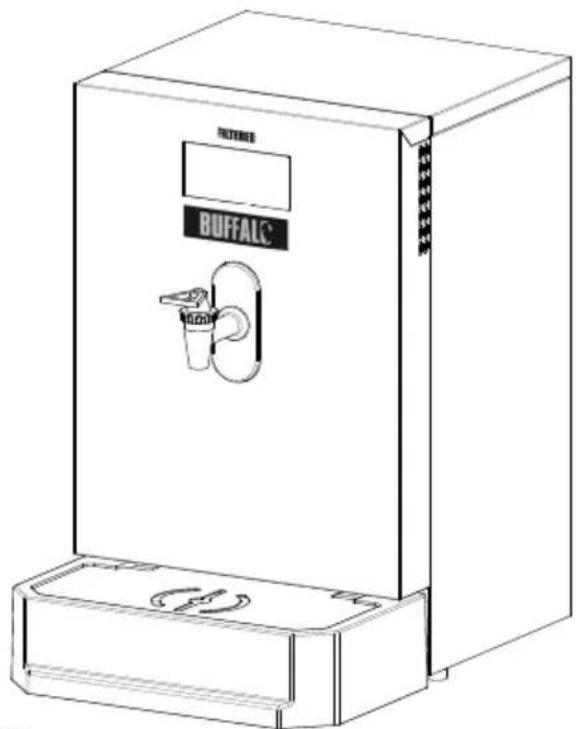
GH187 GC719
(FILTERED PRODUCT)

Please read and
keep these
instructions
Buffalo Warranty
1 Year Parts
1 Year Labour
Introduction
Thank you for purchasing this Buffalo appliance.
To ensure you obtain full benefits from your new appliance:
- Please read this instruction booklet carefully, and follow all instructions.
- If you are unsure of any aspect of the installation, use or performance of your appliance, please contact our After Sales team on (00 44) 0845 146 2887.
Contents
Important Information
Safety Information
Delivery Checklist
Technical Specification
Installation
User Guide
Cleaning
Maintenance
Troubleshooting
Service Information
Warranty
Disposal
Declaration of Conformity
Important Information
The use of an electrical appliance requires the following common sense safety rules. Primarily there is a danger of personal injury and secondly damage to the appliance and property.
These are indicated in the instructions by the following two conventions:
WARNING: Danger of personal injury.
Important: Damage to the appliance.
These appliances are intended for commercial use as detailed in these instructions. The company has a policy of continuous improvement in product quality and design. The Company, therefore, reserves the right to change the specification of its models at any time. These appliances are designed for continuous operation and should only be switched off for the purpose of maintenance or emergency.
Safety Information
To prevent injury to yourself or your staff, and to avoid damaging the appliance, please read and follow the safety precautions below before setting up and using the unit:
- Remove all packaging and plastic coatings from the appliance
• Clean the appliance before use - Check that the appliance has not been damaged in any way during transportation (If any damage is found, it MUST be reported to our After Sales department immediately by calling 00 44 (0)845 146 2887.
- Ensure that the electrical supply cord is not damaged. The supply cord on this appliance is of a special type. If replaced, only a Buffalo supply cord must be used.
• Always disconnect the appliance from the electricity supply before servicing
• The unit must be earthed
• Do nor try to modify this appliance - Never clean the appliance with a water jet or steam cleaner
• Inform staff that the surfaces will become hot - Keep these instructions in a safe place near the unit for future reference
Delivery Checklist
If an item is missing please contact your dealer immediately.
- Appliance
• Drip tray and insert
• Inlet hose with 3/4" BSP connections
• Water filter (GC719) - User instructions
Technical Specification
| Model GH187 GC719 | |||
| Filtration No Yes | |||
| Height mm 570 570 | |||
| Width mm 344 344 | |||
| Depth (inc. dtrip tray) mm | 465 465 | ||
| Capacity L 10 | |||
| Weight Kg 10.3 11.0 | |||
| Ambient Temperature | °C | 5 - 30 | |
| Water Inlet Pressure | MPa | 0.2 - 0.8 | |
| Voltage | 220 - 240V - 50/60Hz | ||
| Power Rating | kW | 2.52 - 3.00 | |
Installation
WARNING: The installation of the appliance must be performed by a competent person, taking into consideration:
• Health and Safety at Works Act
- IEE Regulations
• BS Codes of Practice
• Local and National Building Regulations
• Local and National Water regulations
Location:
• The appliance must be on a flat, horizontal surface
- Ensure that safe operational access to the appliance is unrestricted
- Do not site the appliance directly beneath wall cupboards, other wall mounted appliances and low ceilings that are susceptible to damage from water vapour
• Do not use your appliance outside
• The appliance must be installed 100mm from any walls
• Do not place on or near hot surfaces
- Do not allow your appliance to freeze. If this happens, do not operate the appliance and contact the manufacturer.
Important: Access to the service area is restricted to persons having knowledge and practical experience, in particular as far as safety and hygiene is concerned.
Electrical Connection:
The appliance must be earthed.
Check that the voltage on the rating plate of your appliance corresponds with your electricity supply.
The boiler is supplied with a 13 amp plug. If replacing the plug, connect the terminals as follows:
GREEN and YELLOW wire EARTH - E
BLUE wire NEUTRAL - N
BROWN wire LIVE - L
For safety regulations the plug or means of disconnection must always be accessible.
Water Connection:
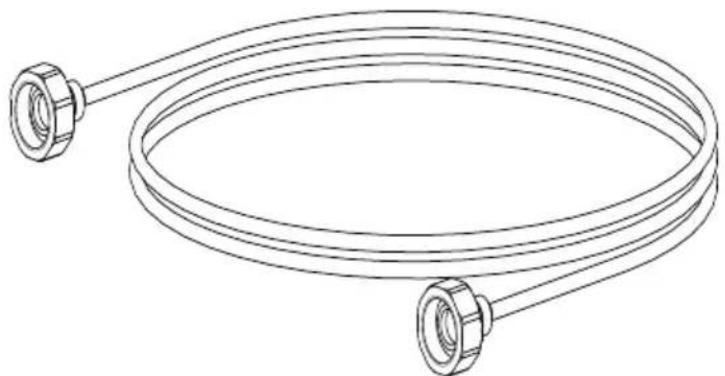
Connect the supplied inlet hose to the inlet connection point on the base of the appliance and the other end to the mains cold water supply.
Overflow & Drainage
Due to the electronic function of the appliance it is highly unlikely that an overflow would occur. The appliance is designed so that any overflow occurrence and condensation is directly vented into the drip tray.
Note: There will be some steam emissions from the vent at the base of the appliance during its initial fill stages. The steam emissions will lessen as the water volume increases in the tank.
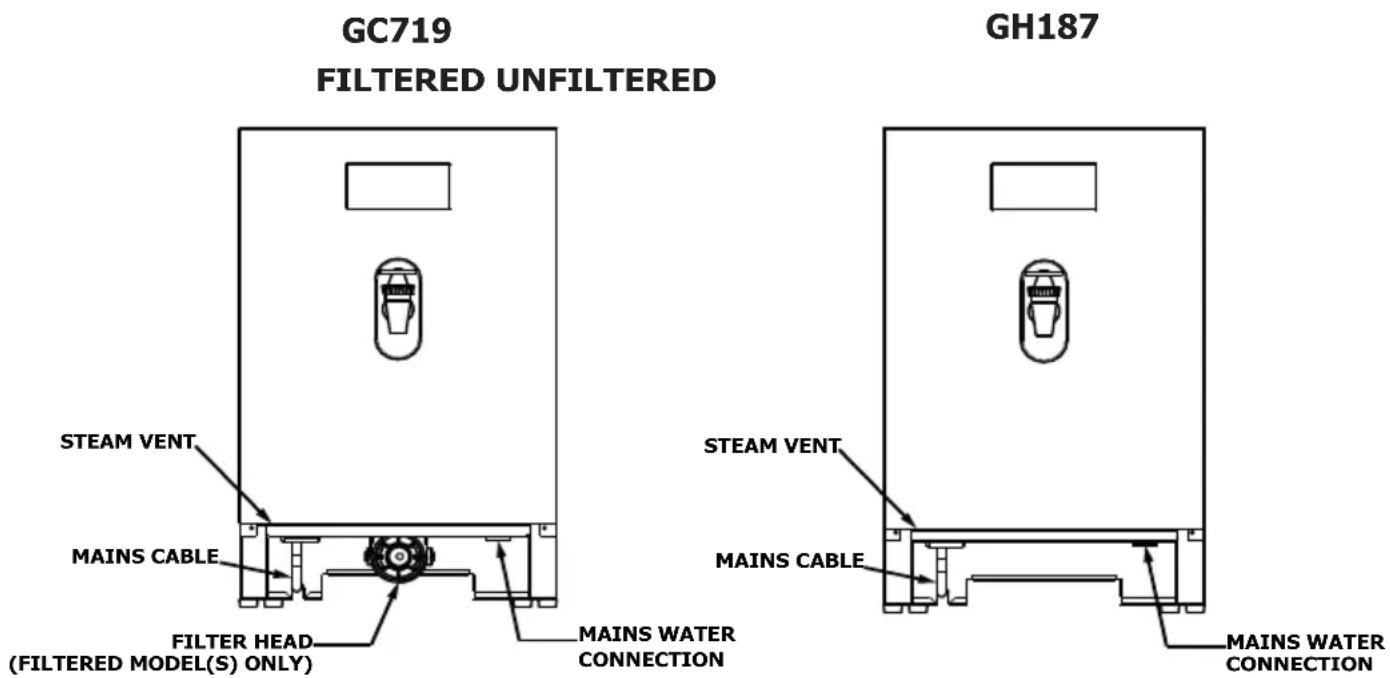
User Guide
Your Product

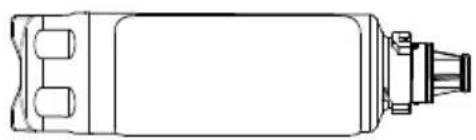
FILTER (FILTERED MODELS ONLY)
INSTALLATION
PIPE
Screen Control

Filter (filtered models only)
To fit the filter:
- Insert filter cartridge into filter head
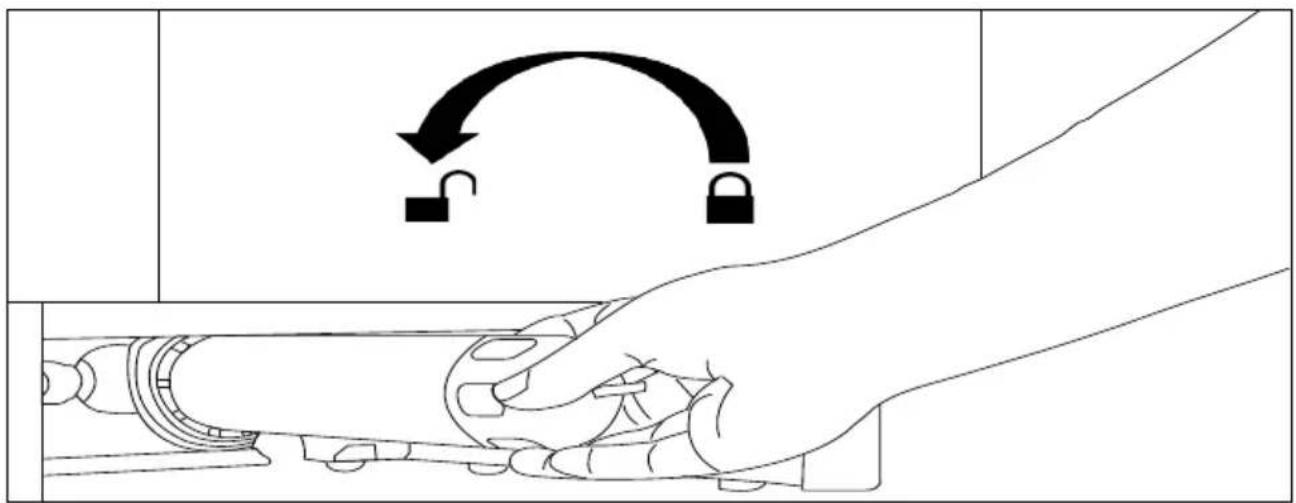
- Turn cartridge clockwise to lock
Operation
First Use
THE FOLLOWING PROCEDURE MUST BE DONE BEFORE USE
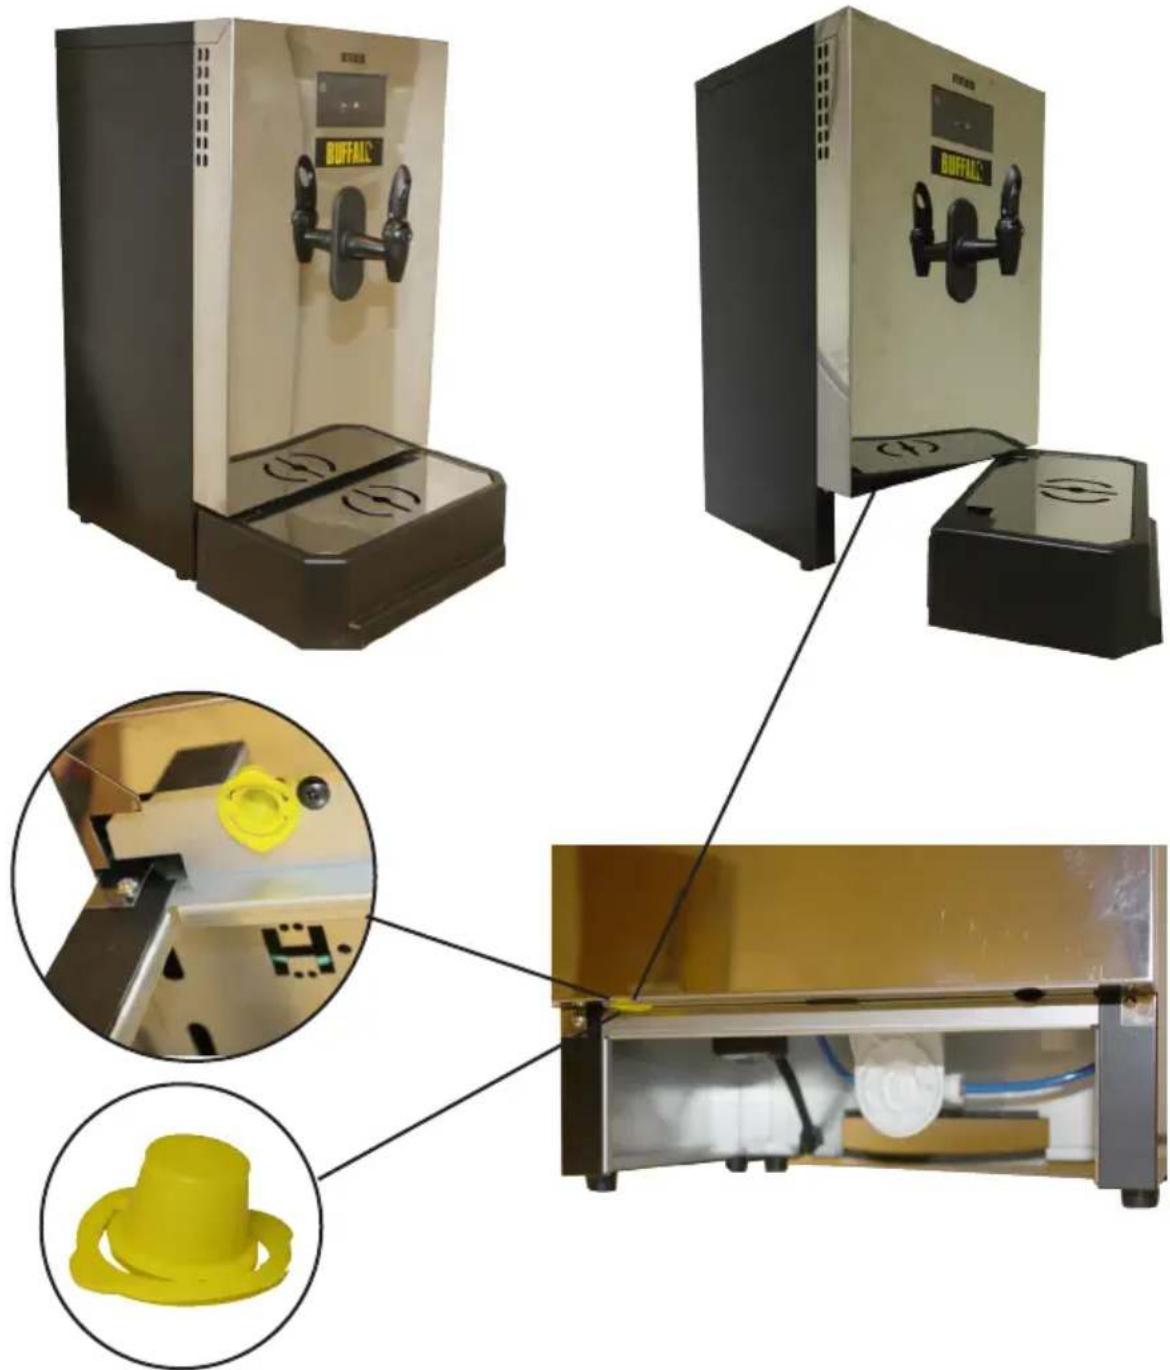
- Remove yellow steam cap from steam pipe (see steam label on front of product) FAILURE TO DO SO WILL CAUSE THE PRODUCT TO STOP OPERATING
- Remove warning label(s) covering controller
- Switch on the mains water supply and the electricity supply
-
Leave the appliance to fill and heat water for 15mins
-
Draw water from the tap until the flow of water stops
- Repeat instructions 4 and 5
- Leave product to fill and heat water
- Your appliance is now ready for use.
Regular Operation
This appliance is designed to be left permanently switched on, it is only necessary to turn it off for descaling or maintenance.
Tap Function
Tap function can be varied between:

(a) User operated flow (b) Constant flow
This can be achieved by twisting the handle through 180° . In addition, the safety lock can be activated by twisting it through 90° . When in this position, the tap cannot be operated accidentally.
As water is drawn off through the tap, small quantities of water are added to replenish and ensure that hot water is always available.
Filter Replacement (filtered models only)
Code: GC719
When the filter needs replacing the Red LED on the controller will flash. To replace the filter:
- Remove drip tray
- Twist the cartridge 90 0 (1/4 turn) counter clockwise to unlock (care should be taken when doing this as it will contain a small amount of water)
- Insert new filter cartridge into filter head
- Turn cartridge clockwise to lock
To reset the filter warning (flashing LED) the following procedure must take place:
- Place fingers on the controller screen as indicated in the image below:

Cleaning & Maintenance
WARNING: Disconnect unit from electrical supply before cleaning, descaling or replacing any parts.
Cleaning
We recommend cleaning your appliance on a regular basis. Failure to do this may result in the appliance not operating to its full potential and could invalidate your warranty.
Important: Do not immerse the appliance in water or any other liquids and take care to keep water away from the mains lead and connections.
- Clean the external surfaces of the unit regularly to maintain hygiene.
- Empty the drip tray regularly
- Wipe the dispensing tap daily to remove any lime-scale deposits and check that the water outlet is clear
- Wipe the unit down with a damp soft cloth
- Do not allow excess water to run into the unit
- Do not use abrasive creams or scoure
Descaling
The descaling procedure must be performed by trained personnel as it requires the removal of panels from the boiler and access to live electrical components. Always use a descaling agent suitable for stainless steel. Please note any relevant Personal Protective Equipment must be worn when undertaking any descaling.
- Isolate the boiler from electrical supply.
- Allow the water to cool to approximately 60 °C
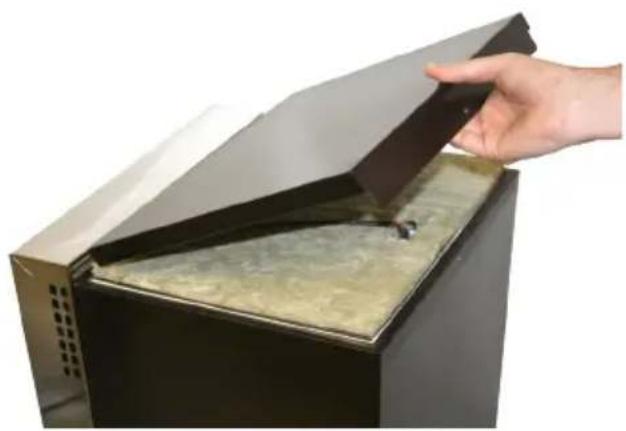
- Remove the screw from the back of the boiler and remove the top cover. (PICTURE 1 & 2)
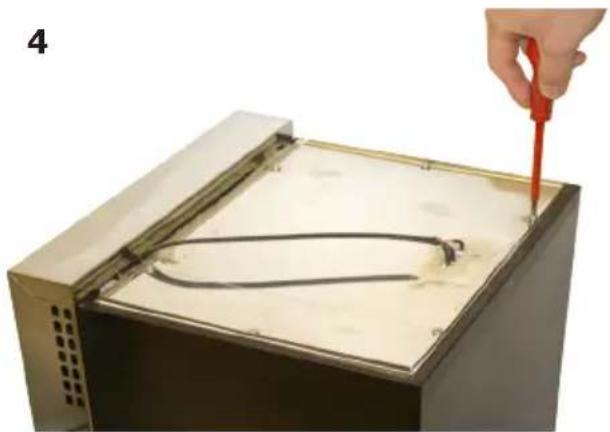
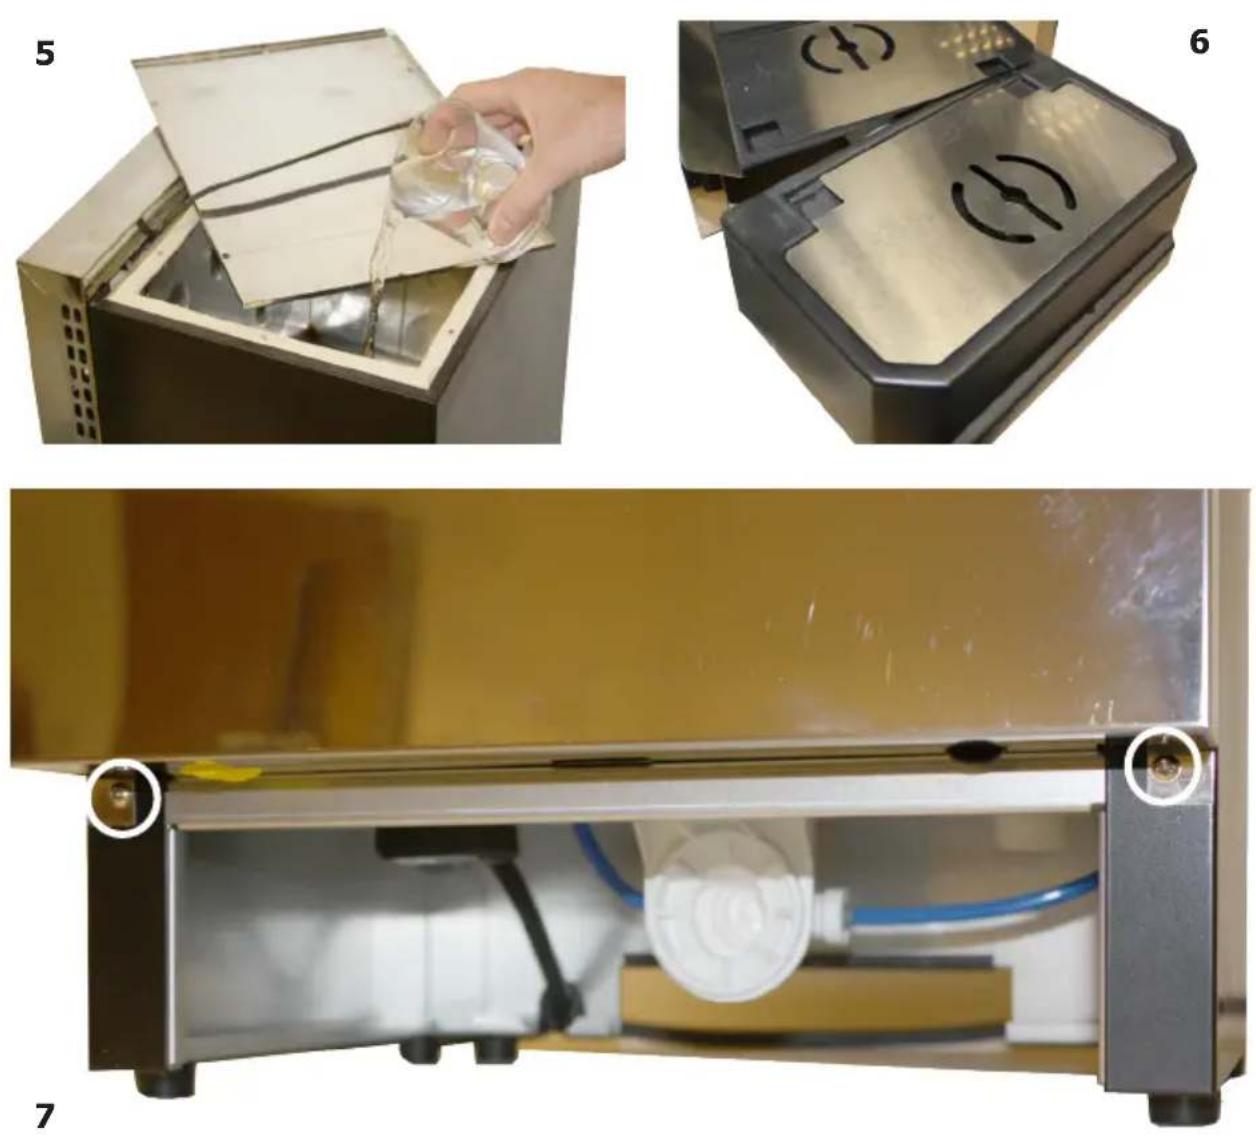
- Remove the insulation on top of the tank, unscrew and reposition the tank lid. (PICTURE 3, 4 & 5)
- Add descaling agent in accordance with manufactures instructions. (PICTURE 5)
- Replace the tank lid/insulation and top cover.
- Turn on the electricity and allow the boiler to operate normally for approximately 45 minutes.
- Isolate the boiler and allow to cool down.
- Remove the tank lid again, to inspect the tank and level detectors for scale deposits.
- Drain and flush the descaling agent from the tank, using tap on the front of the appliance.
- To drain the tank completely, remove the front panel by removing 2 screws behind the drip tray and lifting the panel up, over the tap. (PICTURE 6, 7 & 8)
- Position a bucket in front of the product and open the service valve to drain the water from the tank (PICTURE 9)
- When empty, close the valve and replace front panel.
- Replace tank lid, ensuring the gasket is sealing the top of the tank correctly.
- Fit top cover and turn on the boiler.
In hard water areas where a large build-up of scale has formed, you may need to physically scrape from the tank. If this is required, ensure care is taken and not to damage the level sensor probes.
FAILURE TO DESCALE ON A REGULAR BASIS WILL INVALIDATE YOUR WARRANTY

Front Back




Troubleshooting
Fault Codes
| Indicator Fault Actions | ||
| Red light(Always on) | Descale or maintenance required | Follow descale procedure.If red light stays illuminated after descale please contact the manufacturer |
| Red light(Flashing) | Filter needs replacing Follow | filter replacement procedure and replace filter |
Service Information
For help with the installation, maintenance and use of this appliance please contact our service department on 00 44 (0)845 146 2887.
To ensure that your service enquiry is handled as efficiently as possible, please tell us:
Brief details of the problem
Product code
Serial number
(Product code and Serial number can be found on front of this handbook or the rear of your appliance)
Warranty
This unit carries a comprehensive 12 month warranty (from date of purchase) against defective materials or faulty workmanship. The guarantee is in addition to, and does not diminish your statutory or legal rights.
The guarantee does not cover:
- Accidental damage, misuse or use not in accordance with the instructions in this handbook.
• Consumable items (filters, etc) - Damage due to incorrect installation, modification, unauthorised service work or damage due to scale.
The manufacturer disclaims any liability for incidental, or consequential damages.
Disposal

WEEE directive registration no. WEE/CK0046SY/PRO
At end of unit life, dispose of appliance and any replacement parts in a safe manner, via a licensed waste handler. Units are designed to be dismantled easily and recycling of all material is encouraged whenever practicable.
DECLARATION OF CONFORMITY
- Conformiteitsverklaring • Déclaration de conformité • Konformitätserklärung • Dichiarazione di conformità • - Declaración de conformidad • Declaração de conformidade
| Equipment Type • Uitrustingstype • Type d'équipement • Gerätetyp • Tipo di apparecchiatura • Tipo de equipo • Tipo de equipamento | Water Boiler |
| Model • Modèle • Modell • Modello • Modelo • Malli | GH187GC719 |
| Application of Council Directives(s)Toepassing van Europese Richtlijn(en) • Application de la/des directive(s) du Conseil • Anwendbare EU-Richtlinie(n) • Applicazione delle Direttive • Aplicación de la(s) directiva(s) del consejo • Aplicação de directiva(s) do Conselho | 2006/95/EC2004/108/EC2011/65/EU |
| StandardsStandaarden • Normes • Normen • Standard • Estándares • Normas | EN 60335-1EN 60335-2-75EN 62233EN 55014-1EN 55014-2EN 50581 |
| Producer Name • Naam fabrikant • Nom du producteur • Name des Herstellers• Nome del produttore • Nombre del fabricante • Nome do fabricante | Glen Dimplex ProfessionalAppliances |
| Producer Address • Adres fabrikant • Adresse du producteur • Anschrift des Herstellers • Indirizzo del produttore • Dirección del fabricante • Endereço do fabricante | Stoney LanePrescotMerseysideUKL35 2XW |
Product Approvals Manager
BUFFALC
Telephone Helpline:
00 44 (0)845 146 2887
Fourth Way, Avonmouth, Bristol, UK, BS11 8TB
- USER INSTRUCTION MANUAL
- BUFFALC
- AUTOFILL WATER BOILER
- INTRODUCTION
- CONTENTS
- IMPORTANT INFORMATION
- WARNING: DANGER OF PERSONAL INJURY
- SAFETY INFORMATION
- DELIVERY CHECKLIST
- INSTALLATION
- WARNING: THE INSTALLATION OF THE APPLIANCE MUST BE PERFORMED BY A COMPETENT PERSON, TAKING INTO CONSIDERATION
- LOCATION
- ELECTRICAL CONNECTION
- WATER CONNECTION
- OVERFLOW & DRAINAGE
- USER GUIDE
- SCREEN CONTROL
- FILTER (FILTERED MODELS ONLY)
- OPERATION
- FIRST USE
- THE FOLLOWING PROCEDURE MUST BE DONE BEFORE USE
- REGULAR OPERATION
- TAP FUNCTION
- FILTER REPLACEMENT (FILTERED MODELS ONLY)
- CODE: GC719
- CLEANING & MAINTENANCE
- WARNING: DISCONNECT UNIT FROM ELECTRICAL SUPPLY BEFORE CLEANING, DESCALING OR REPLACING ANY PARTS
- CLEANING
- DESCALING
- FAILURE TO DESCALE ON A REGULAR BASIS WILL INVALIDATE YOUR WARRANTY
- TROUBLESHOOTING
- FAULT CODES
- SERVICE INFORMATION
- WARRANTY
- DISPOSAL
- DECLARATION OF CONFORMITY
Brand : BUFFALO
Model : GH187
Category : Water heater