
GD279 - Oven BUFFALO - Free user manual and instructions
Find the device manual for free GD279 BUFFALO in PDF.


| Product Type | Electric Oven |
| Brand | Buffalo |
| Model | GD279 |
| Installation Type | Built-in |
| Energy Source | Electric |
| Power Consumption | 2000 W |
| Oven Capacity | 60 L |
| Display Type | Digital |
| Control Type | Touch & Knob |
| Temperature Range | 50°C - 250°C |
| Number of Functions | 8 (including convection, grill, defrost) |
| Cleaning Type | Manual (enamel interior) |
| Safety Features | Child lock, automatic shut-off, cool touch door |
| Dimensions (H x W x D) | 595 x 595 x 550 mm |
| Weight | 30 kg |
| Energy Efficiency Class | A |
| Spare Parts Availability | Heating elements, thermostat, door gasket |
| Repair Information | Authorized service centers; user manual includes troubleshooting |
Frequently Asked Questions - GD279 BUFFALO
User questions about GD279 BUFFALO
0 question about this device. Answer the ones you know or ask your own.
Ask a new question about this device
Download the instructions for your Oven in PDF format for free! Find your manual GD279 - BUFFALO and take your electronic device back in hand. On this page are published all the documents necessary for the use of your device. GD279 by BUFFALO.
USER MANUAL GD279 BUFFALO
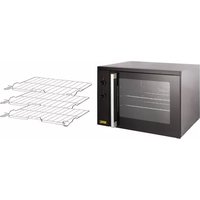
Counter Top Convection Oven

Please read and
keep these
instructions
These instructions cover the Buffalo Counter Top Convection Oven, SKU 444443178

SKU 444443178
WARRANTY
1 Year Parts
1 Year Labour
INTRODUCTION.
To ensure you obtain full benefits from your new oven:
- Please read this instruction booklet carefully, and follow all instructions.
- If you are unsure of any aspect of the installation, use or performance of your oven, please contact the after sales number shown on the back page.
SPECIFICATIONS
| Model BF CTCOC | ||
| SKU Number 4444 | 43178 | |
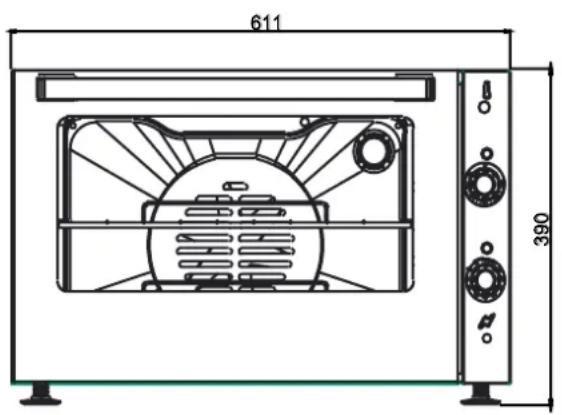
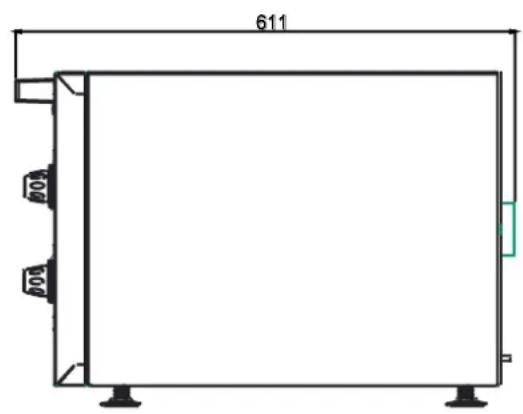
| Dimensions Height | 395mm | |
| Width 611mm | ||
| Depth 611mm | ||
| Weight 24kg | ||
| Voltage 230V ~50Hz | ||
| Power rating 2400W | ||
INSTALLATION
Installation Requirements
It is essential that this appliance is installed correctly. Installation should comply with all local electrical, and health and safety requirements.
WEEE directive registration no. WEE/DK0059TT
At end of unit life, dispose of appliance and any replacement parts in a safe manner, via a licenced waste handler. Units are designed to be dismantled easily and recycling of all material is encouraged whenever practicable.
Before Connection to Power Supply:
Remove all packaging.
Check the oven and parts for damage. Report any damage immediately to the carrier or supplier.
Remove any protective plastic coating from the outer panels.
Check the following parts have been supplied with your oven:
1 x Oven shelf
Check the available power supply corresponds to that shown on the oven rating label.
Location:
This oven is for indoor use only.
Do not install the oven in a cabinet, it is for counter top use only. Allow at least 200mm clearance above the oven (Please note this oven cannot be stacked).
The oven is only to be installed in locations where its use and maintenance is restricted to trained personnel.
The mains lead should reach from the mains socket without straining the connections.
Do not let the mains lead hang over the edge of the table or counter, and keep it away from any hot surfaces.
Do not let the mains lead run across an open space.
Do not place the oven where the mains lead could fall into a sink.
Do not place the oven near a hot gas or electric burner.
Ensure the oven is level both from side to side and front to back, to ensure even cooking.
There are adjustable feet on each corner, tighten the locknuts after adjustment.
The oven should be positioned such that it can be loaded and unloaded easily, and the controls can be operated conveniently.
Important:
DO NOT OBSTRUCT THE VENTILATION SLOTS IN THE BASE /SIDE AND REAR OF THE OVEN.
Electrical Connection:
Fitting a plug
The mains lead of this oven will already be fitted with a BS1363 13A plug. If the fuse has to be replaced, use a 13 amp fuse complying with BS 1362.
If the plug is not suitable for your socket then the plug must be cut off and disposed of safely. An appropriate plug should be fitted as follows:
IMPORTANT: The wires in the mains lead are coloured in accordance with the following code:
Green and Yellow - Earth
Blue - Neutral
Brown - Live
The wire which is coloured green and yellow must be connected to the terminal in the plug which is marked with the letter E or the earth symbol or coloured green or green and yellow. The wire which is coloured blue must be connected to the terminal which is marked with the letter N or coloured black or blue.
The wire which is coloured brown must be connected to the terminal which is marked with the letter L or coloured red or brown.
Make sure that the connections are tight and that there are no loose strands of wire and no insulation trapped under the terminals. Tighten the clamp in the plug making sure that it grips the outer covering of the cord. If fitting a BS 1363 13A fused plug then fit a 13A fuse. Tighten the plug cover securely. If you are in any doubt, consult a qualified electrician.
IMPORTANT: if the supply cord is damaged, it must be replaced by the manufacturer, service agent or similar qualified person in order to avoid a hazard. The supply cord may become warm when the appliance is in use.
WARNING - THIS APPLIANCE MUST BE EARTHED

In addition to the earth within the mains plug, connect the equipotential bonding terminal on the rear panel.
Electrical connection: 230V \~ 50Hz, 10.5A, 2400W
Before Use:
Operate the oven for approximately 30 minutes at the highest temperature, to remove any fumes or odour which may be emitted - this is due to oil used during manufacture, or from the oven insulation, but is not harmful.
USER GUIDE
DO NOT COVER THE OVEN ELEMENT OR OVEN SHELVES WITH METAL FOIL. DURING USE THE OVEN BECOMES HOT. BE CAREFUL NOT TO TOUCH HOT SURFACES.
TURN OFF THE POWER SUPPLY AND REMOVE THE PLUG WHEN NOT IN USE, BEFORE CLEANING, AND BEFORE REPLACING ANY PARTS.
Controls:
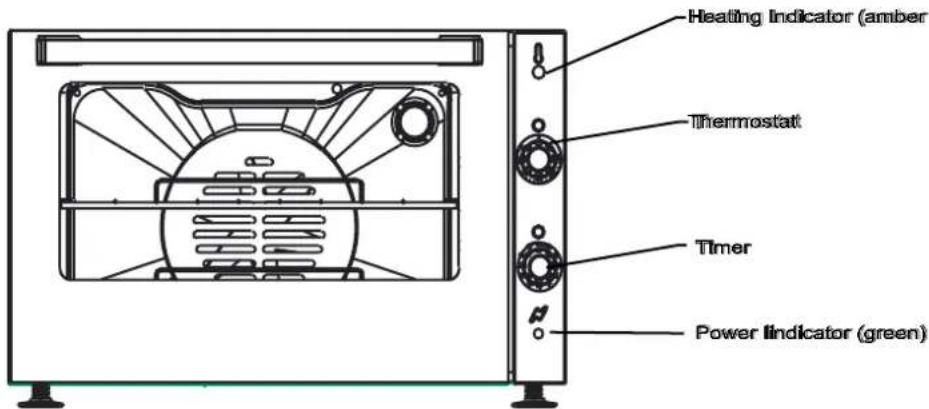
- The green power indicator will be illuminated whenever power is connected to the oven.
- Turn the thermostat to the desired oven temperature.
- The oven fan will start and the interior light will be illuminated. The amber heating indicator will be illuminated whenever the element is on
- Once the oven is up to temperature, shown by the amber heating indicator cycling on and off, open the door and load the oven with product. Avoid delays in loading the oven with the door open as this will delay the oven's temperature recovery.
- Set the timer to desired time. To set the timer, turn the knob clockwise to the required time. At any stage, the time can be adjusted in either direction.
Note: This 120 minute timer is completely independent of the oven control.
• Time up - when the timer reaches 0 minutes the bell will sound.
- Unload oven
WARNING: To avoid scalding, do not use loaded containers with liquids or cooking goods which becomes fluid by heating in higher levels than can be easily observed.
Cleaning:
ALWAYS TURN OFF THE POWER SUPPLY AND REMOVE THE PLUG BEFORE CLEANING THIS OVEN IS NOT WATERPROOF
DO NOT USE A WATER JET SPRAY TO CLEAN THE INTERIOR OR EXTERIOR OF THE OVEN, OR USE A WATER JET IN THE VICINITY OF THE OVEN
Exterior
Clean with a good quality stainless steel cleaning compound. Do not use harsh abrasive cleaners as this could damage the surface finish.
Interior
Ensure that the oven chamber is cool. Do not use wire brushes, steel wool or sharp utensils. Clean the oven regularly with a good quality oven cleaner. Take care not to damage the fan or the tube at the top of the oven which controls the thermostat.
Oven shelves
To remove, slide out to the stop position, raise the front edge up, and lift out. Clean with hot water and detergent.
Oven door glass
To remove, slide out of slots in door. Clean with a good quality glass cleaner.
Trouble-shooting:
| Fault Possible Cause | Remedy | |
| The oven does not operate. | No power to the oven. | Check supply socket is switched on. Check fuse and circuit breaker.Check green power indicator is illuminated. |
| Thermostat or element faulty. | Replace thermostat or element. | |
| Timer does not time down. | Timer faulty. Replace timer. | |
| Oven light not illuminated. | Blown bulb. | Replace bulb. |
THERMAL CUTOUT
This can be checked by a competent person.
WARNING: ALWAYS TURN OFF THE POWER SUPPLY AND REMOVE THE PLUG BEFORE REMOVING ANY PARTS.
Remove 14 screws from the back panel, and lift off the back panel by unhooking the supporting tabs from the side panels.
To reset, press button in the centre of the cut-out.
Replace the back in reverse order.

WARNING: IF THE THERMAL CUTOUT HAS TRIPPED, THE REASON FOR OVERHEATING MUST BE IDENTIFIED AND REMEDIED BEFORE PUTTING THE UNIT BACK INTO SERVICE.
WARRANTY
This convection oven is guaranteed against defective materials or faulty workmanship, for a period of 12 months on parts and labour.
This Warranty is given subject to the appliance being used in accordance with the instructions supplied, and on the supply voltage marked on the rating label. The Warranty is subject to fair wear and tear conditions.
The Warranty does not cover consequential damage arising out of any failure acceptable under guarantee, nor does it cover damage resulting from misuse, accident or unauthorised alterations to the oven.
Proof of purchase will be required.
In any communication with the supplier or manufacturer, quote the model and serial number marked on the oven rating label.
This guarantee does not affect your statutory rights.
The products are intended for commercial use as detailed in these instructions.
The Company has a policy of continuous improvement in product quality and design. The
Company therefore reserves the right to change the specification at any time.
FAQ's
- What is the temperature range of my appliance and how can I adjust the temperature?
The temperature range for this product is 50° C – 250° C. If you wish to change the temperature, this can be achieved by Rotating the thermostat control dial to the desired temperature.
2.What is the size of the oven cavity?
The oven cavity measures 435mm (w) x 310mm (d) x 300mm (h).
WIRING DIAGRAM
COUNTER TOP CONVECTION OVEN

INLET TERMINAL BLOCK
SPARES LIST
ALWAYS TURN OFF THE POWER SUPPLY AND REMOVE THE PLUG BEFORE REPLACING ANY PARTS
| Part Number Description Qty | ||
| 083055700 Thermal cutout L | 150C 1 | |
| 082971300 Element 1 | ||
| 083093400 Fan oven circulation | 1 | |
| 082956100 Switch main oven | 1 | |
| 082558001 Thermostat 1 | ||
| 926016900 Lamp assembly | 1 | |
| 083325300 Seal main oven | 1 | |
| 082896101 Timer minute minder 1 | ||
| 082930601 Neon green 1 | ||
| 082930602 Neon amber 1 | ||
| 082985702 Shelf | 1 | |
| 083129901 Glass inner 1 | ||
| 082579900 Knob control thermo | 1 | |
| 082579901 Knob control timer 1 | ||
| 013130901 Outer door assembly | 1 | |
| 563325000 Handle door | 1 | |
| 082985200 Handle end | 1 |
If you require any spare parts, please do not hesitate to contact one of advisors on 0844 815 3755 and they will be happy to assist
TELEPHONE HELPLINE:
: 00 44 (0)845 146 2887
Fourth Way, Avonmouth, Bristol, UK, BS11 8TB
- COUNTER TOP CONVECTION OVEN
- INTRODUCTION
- INSTALLATION
- INSTALLATION REQUIREMENTS
- BEFORE CONNECTION TO POWER SUPPLY
- LOCATION
- IMPORTANT
- DO NOT OBSTRUCT THE VENTILATION SLOTS IN THE BASE /SIDE AND REAR OF THE OVEN
- ELECTRICAL CONNECTION
- WARNING - THIS APPLIANCE MUST BE EARTHED
- BEFORE USE
- USER GUIDE
- CONTROLS
- CLEANING
- EXTERIOR
- INTERIOR
- OVEN SHELVES
- OVEN DOOR GLASS
- THERMAL CUTOUT
- WARNING: ALWAYS TURN OFF THE POWER SUPPLY AND REMOVE THE PLUG BEFORE REMOVING ANY PARTS
- WARNING: IF THE THERMAL CUTOUT HAS TRIPPED, THE REASON FOR OVERHEATING MUST BE IDENTIFIED AND REMEDIED BEFORE PUTTING THE UNIT BACK INTO SERVICE
- WARRANTY
- FAQ'S
- WIRING DIAGRAM
- SPARES LIST
- ALWAYS TURN OFF THE POWER SUPPLY AND REMOVE THE PLUG BEFORE REPLACING ANY PARTS
- TELEPHONE HELPLINE
Brand : BUFFALO
Model : GD279
Category : Oven