
001015 - Safe KIDDE - Free user manual and instructions
Find the device manual for free 001015 KIDDE in PDF.


| Product Type | Home Safe |
| Brand | Kidde |
| Model | 001015 |
| Outside Dimensions (H x W x D) | 10 x 8 x 8 inches (approx.) |
| Inside Dimensions (H x W x D) | 9 x 7 x 7 inches (approx.) |
| Weight | 12 lbs (approx.) |
| Material | Steel |
| Lock Type | Electronic Keypad |
| Power Source | 4 x AA batteries (not included) |
| Battery Life | Approximately 1 year with normal use |
| Low Battery Indicator | Red LED light |
| Number of User Codes | Up to 2 codes (master + user) |
| Code Length | 3-8 digits |
| Override Key | Yes, includes 2 emergency keys |
| Mounting Options | Floor or wall mountable (hardware included) |
| Security Features | Solid steel construction, pry-resistant door, relocker |
| Interior Features | Removable shelf, carpeted floor |
| Warranty | 1 year limited warranty |
| Maintenance | Wipe with dry cloth; avoid harsh chemicals |
| Spare Parts | Contact Kidde customer service for replacement keys or batteries |
| Intended Use | Secure storage of documents, jewelry, and small valuables |
Frequently Asked Questions - 001015 KIDDE
User questions about 001015 KIDDE
0 question about this device. Answer the ones you know or ask your own.
Ask a new question about this device
Download the instructions for your Safe in PDF format for free! Find your manual 001015 - KIDDE and take your electronic device back in hand. On this page are published all the documents necessary for the use of your device. 001015 by KIDDE.
USER MANUAL 001015 KIDDE
I. Opening your keybox
The preset factory combination is S.P.I. For security, please change your combination. See Sections III and IV.
-
Spin to the right 3 times to clear.
-
Step on S (first letter).


-
Turn left post S then directly to P (second letter) and stop.
-
Turn right directly in I (third letter) and stop.


- Push button down and pull lid out from vault.

II. Mounting and assembly First remove cemalation lid. See Section I for opening instructions.
Protective cover (sold separately)
-
Attach to Portable Model with the notches on top.
-
To remove, pull taps at top of cover.
Permanent/slimline model
Find a convenient flat surface. Mounts with screws provided or choose an appropriate fastener for your application.
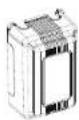
Protective power
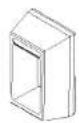
Ferranent keybox
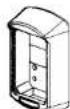
slimline
Portable model
-
Lift and hold the release tab Inrated inside keybox.
-
Pull shocke up to release.
-
To relatch, push shackle down.
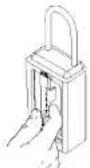
Portable <e:/box
Automotive model
- Fertally lower window of vehicle door
- Hang bracket of keybox over top of
the window.
- Roll up window to secure the keyboard
- Close and lock the vehicle door.
Automotive keybox
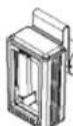
Door model
Hang bracket over the top or to the side of an entrance door at the hinge. Close and lock the door to secure the keybox
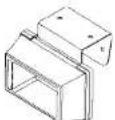
Door keybox
III. Choose your combination
Preset factory combination is S.P.L. Select an easy to remember three-letter combination on and record it below. Don't use three identical letters. Don't use the initials of anyone living at this address or letters from your vehicle license plate.
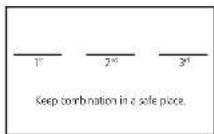
IV. Setting your combination
You must remove the combination lid from the keybox before proceeding. See Section 1 for instructions on opening the keybox.
1. If the keybox has a metal back, unscrew both screws on the back of the keybox. If it has a plastic back, push both tabs down.
2. Pull the back out.
3. Remove the back from the bottom slot.
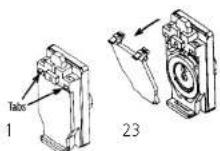
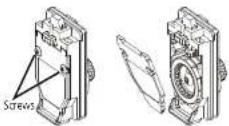
- Snap the black release button all the way UP
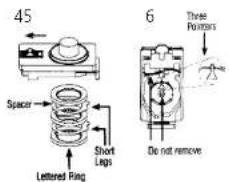
- Spin the dial in any direction. The 3 lettered rings and the 2 metal spacers will drop from the lock.
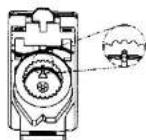
- Spin the dial to line up all three pointers. Keep them aligned during step #7.
- a. Place a lettered ring over the pointers at your first letter choice
b. Next, place a metal spacer with short leg on the right.
c. Place a lettered ring over the pointers at your second letter choice.
cl. Place the last spacer next with short leg on the right.
e. Place the last lettered ring over the pointer at your third letter choice.
- Slide the bottom of the back into slot.
-
If the keyboard has a plastic back, snap the lid closed by pressing between the tabs. If the keyboard has a metal back, replace the back and tighten the screws. The back must be fully in place and tightened to secure the combination.
-
Before replacing the 10, try your new combination and push the button down Important: The black button must remain down after dialing the combination. If not, repeat Section IV.
To lock the lid, you must push the button up and spin the dial.
See Section I for opening instructions. Warranty does not cover lost or incorrectly set combinations.
7
Limited warranty
Disclaimer of implied warranty
UTC Fire & Security Americas Corporation, Inc. "UTC15", 4001 Fairview Industrial Drive SE, Salem, Oregon 97302 (800.547 0752) is a licensee of kiddie, and the provider of this warranty. UTCFS warrants to the original buyer of its products for a period of one year after the date of purchase that the products are free from defects in workmanship and materials. This warranty does not cross foreclosure or apparently set combinations. UTCIS will, without charge to the buyer, repair or replace, at its option, any defective product returned by the original buyer to UTCIS (at the buyer's cost at its service and repair facilities located at the above address within one year of the date of purchase. The foregoing warranty does not cover damage caused by abuse or misuse and is the exclusive remedy for damage arising from deficits in its products. Except to the extent prohibited by any applicable federal law, all other warranties, express or implied, including warranties of merchantability and fitness for particular purpose, are excluded.
Limitation of liability
Except to the extent that such limitation may be prohibited or limited by federal or state law, the foregoing resir/Replacement remedy is the exclusive remedy for defects in products (this is an "as is" sale except for the foregoing warranty) and all other liability, whether based on contract, negligence, strict liability, or otherwise, and all other remedies, as well as all commercial, special incidental, and consequential damages, are hereby excluded.
AccessPoint™
Wallet Guide
Dial combination
Complete instructions for operating, mounting, and changing combinations

43363-04 Rev C • September 2012 © 2012 Kiddc
Brand : KIDDE
Model : 001015
Category : Safe