
INN-616 - Beard trimmer Innoliving - Free user manual and instructions
Find the device manual for free INN-616 Innoliving in PDF.


| Type of product | Beard trimmer |
| Brand | Innoliving |
| Model | INN-616 |
| Dimensions (approx.) | 15 x 4 x 4 cm |
| Weight (approx.) | 200 g |
| Power supply | Rechargeable battery (Li-Ion) |
| Charging time | Approx. 8 hours |
| Operating time | Approx. 60 minutes |
| Cutting length settings | Adjustable from 1 to 10 mm |
| Blade type | Stainless steel, self-sharpening |
| Accessories included | Precision trimmer head, cleaning brush, charging cable |
| Maintenance | Rinse blades under running water |
| Safety features | Low battery indicator, auto shut-off |
| Water resistance | IPX4 (splash proof) |
| Spare parts available | Replacement blades and combs |
| Warranty | 2 years |
Frequently Asked Questions - INN-616 Innoliving
User questions about INN-616 Innoliving
0 question about this device. Answer the ones you know or ask your own.
Ask a new question about this device
Download the instructions for your Beard trimmer in PDF format for free! Find your manual INN-616 - Innoliving and take your electronic device back in hand. On this page are published all the documents necessary for the use of your device. INN-616 by Innoliving.
USER MANUAL INN-616 Innoliving
INN-616
MANUALE D'USO
USER MANUAL
ISTRUZIONI PER L'USO
natural_image
Simple line drawing of a spring-loaded electrical component with two base and two springs (no text or symbols)|
NOTA BENE
natural_image
Simple line drawing of a droplet being poured into a spring-loaded pipe (no text or symbols)natural_image
Pure technical line drawing of a mechanical component with no text or symbols1
natural_image
Pure technical line drawing of a mechanical component with no text or symbols11
natural_image
Line drawing of an electronic component with multiple pins (no text or symbols)III
natural_image
Simple line drawing of three vertical rods placed horizontally within a rectangular frame (no text or symbols)IV
natural_image
Illustration of a person's head and neck with arrows indicating movement or force (no text or symbols)Fig.1
natural_image
Simple line drawing of a human head with a triangular pointer above the nose and a brush, no text or symbols present.Fig.2
PASSAGGIO 3 – PARTI LATERALI DELLA TESTA
natural_image
Side profile illustration of a person wearing a head covering and ear with a triangular object on the jaw (no text or symbols)Fig.3
PASSAGGIO 4 – PARTE ALTA DELLA TESTA
natural_image
Line drawing of a person's head in profile with a feather-like object attached (no text or symbols)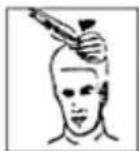
Fig. 5
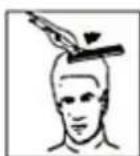
Fig. 6
PASSAGGIO 5 – IL TOCCO FINALE
natural_image
Side-view anatomical illustration of a human head and neck with hand placement (no text or labels)Fig.7
LOOK CORTI E SFUMATI
natural_image
Line drawing of a stylized human head in profile with feathered beak (no text or symbols)Fig.8
natural_image
Close-up of a black hairdryer with a circular brush and textured base (no visible text or symbols)Thank you for purchasing Innoliving grooming set INN-616 BEFORE USE READ CAREFULLY THIS MANUAL AND KEEP IT SAFE FOR FUTURE REFERENCES.
Read the instructions carefully and completely before using the appliance and keep this user manual safe for future references.
WARNINGS AND SAFETY NORMS
- Remove the packaging material before the use. The wrapping elements (plastic bags, paperboard, etc.) must not be kept near children because potentially dangerous and must be disposed according to the current regulations.
- This set was designed to cut hair and trim beard and sideburns and body hair. Don't use it for different purposes. Any other use has to be considered unproper and dangerous.
• This set is for domestic use only - Don't use the item if the sharpened parts are damaged or broken, stop immediately using it and contact the after sales service.
- Don't try to repair and replace the damaged parts. Every action must be done by authorized staff; otherwise the warranty is void.
- Store the set in a cold and dry place, far from the direct light of sun. Store the item far from heat sources.
- Turn the devices off after the use. It's suggested to use the product not longer than 30 minutes to avoid the
overheating. After every use, let the devices cool down some minutes.
- Use the item with the supplied accessories.
- Do not use on animals.
- This set can be used by children aged 8 and above or by people with reduced physical, sensor or mental capabilities, or lack of experience or knowledge, unless they are supervised or trained on how to use the product safely and they understand the related hazards. Children should be supervised to ensure that they do not play with the appliance. Cleaning and maintenance to be performed by the user should not be made by children without supervision.
- Children should not use the devices as a toy. This set is not a toy.
- In case of fall of the devices, check them carefully if there were any damage. In case of doubt, make them be checked by a qualified technician before use.
• Do not immerse the electronic devices in liquids and do not use them near the bathtub. Do not place them on flat surfaces or where they could fall into the sink or other container filled with water
- For hygienic reasons do not share your set with others.
- In case of infection or skin problems on the area where to use the set, it is necessary to use the unit with extreme caution, after consulting the physician.
- Remove the batteries from device, in case of prolonged no-use.
HAIR CLIPPER
COMPONENTS
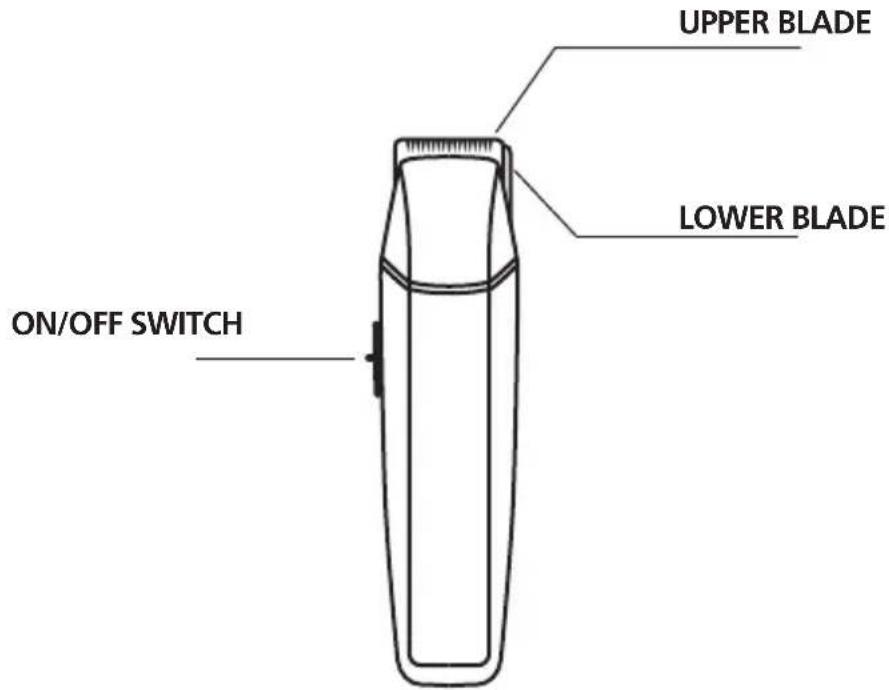
ACCESSORIES
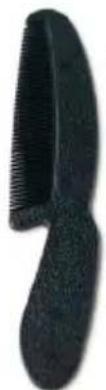
natural_image
Close-up of a black comb with textured handle and curved body (no text or symbols visible)COMB
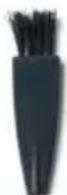
BRUSH
After removing the blades for cleaning or replacement, check that they are properly realigned during their replacement.
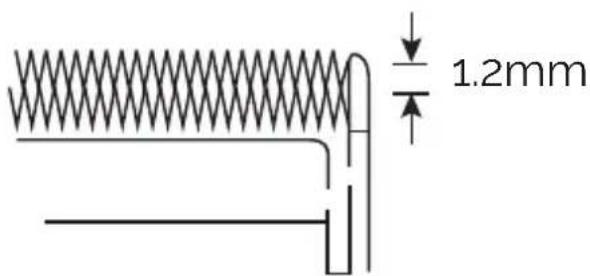
To do this, simply match the teeth of the upper and lower blades, tip by tip. The end of the teeth of the upper blade should be about 1.2 mm from those of the lower blade; please refer to the image.
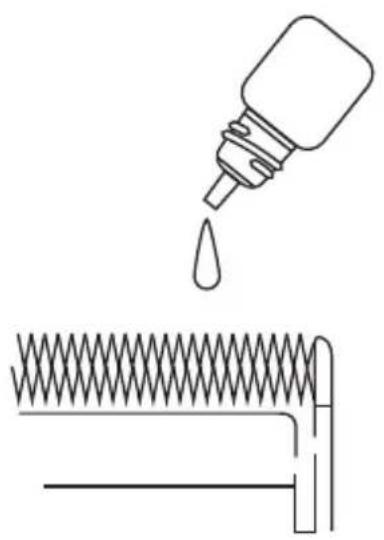
If you have problems realigning the blades, add a few drops of oil and turn the device on for a few seconds, then turn it off and unplug it.
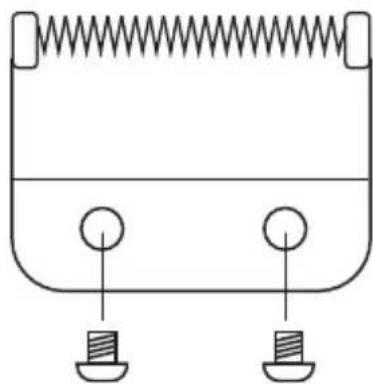
Slightly loosen the screws and reposition the blades. Tighten the screws again after this operation.
natural_image
Simple line drawing of a spring-loaded electrical component with two base and two springs at the bottom (no text or symbols)NOTES
To keep the device in top condition, add drops of oil periodically.
Do not use hair oils, grease, kerosene oil or other solvents. Solvents can evaporate and leave a layer of grease which may slow down normal blade operation.
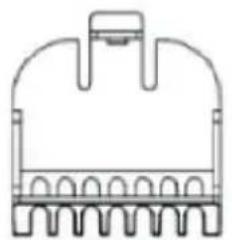
The supplied guide combs, once inserted, are positioned comfortably near the thumb grip, thus allowing you to adjust the length of the cut by sliding the comb with your finger.
The comb adds versatility to the product and allows you to gradually change the length of the cut without using a replacement head.
When the comb is positioned at the lowest level, you will have a fairly short haircut; pushing the comb higher, the length of the cut will grow in step.
If the comb is positioned at the minimum height, you will have approximately the same cutting length as comb I (refer to the instructions below).
natural_image
Simple line drawing of a bottle pouring liquid into a spring-loaded pipe (no text or symbols)The comb will also allow continuous use of the hair clipper, since it has various types of cuts possible with a single accessory.
In addition to this it is also useful if a lock of hair gets stuck because it is not necessary to remove the blades but only the comb.
While the clipper is working, it is advisable to change quickly the length of the cut, from short to long a couple of times: doing this after each use will remove any residual hair that could block the device.
If the blades do not work well, contact assistance for replacement.
HAIRCUT INSTRUCTIONS
BEFORE STARTING WITH THE CUT:
- Check the clipper, making sure there are no traces of oil between the teeth of the blades, then turn on the device and distribute a few drops to make the blades slide smoothly. This operation should be done at each use. Then clean off the excess oil. During the use, stretch the cable to prevent it from winding up on itself.
- If the cut is made to another person, make him/her sit so that the head is at eye level with the person who cuts, allowing an easier view during the cut and a control of the device.
- Before cutting, always comb the hair in order to avoid knots and have a natural look.
- Use a towel around neck and shoulders when cutting the hair.
- Slide the side switch on ON to use the hair clipper. Position it on OFF, after use.
BATTERY INSERTION
- Gently slide the battery compartment cover and remove it from the device body.
- Insert 2 AA batteries paying attention on polarities. Replace the battery compartment cover
TIPS
Cut the hair calmly and with a steady hand. Make short passes and gradually work on the entire head.
Cut by taking a single strand or area at a time, and in case go over it later. To get the desired cut, comb the hair often.
To make the best use of the hair clipper, the hair must be dry and not damp. With dry hair it is easier to control the cut and how much is to be cut.
Cutting hair requires practicality so it is always better to leave the hair longer for the first few times in order to become familiar with the use of the various combs.
natural_image
Pure technical line drawing of a mechanical component with no text or symbols1
natural_image
Pure technical line drawing of a mechanical component with no text or symbolsII
natural_image
Line drawing of a mechanical component with multiple pins and a central housing (no text or symbols)III
natural_image
Simple line drawing of a three vertical tube setup with no text or symbolsIV
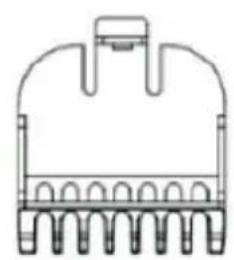
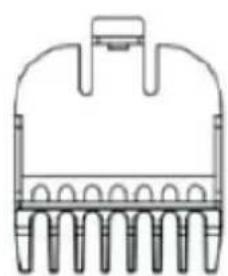
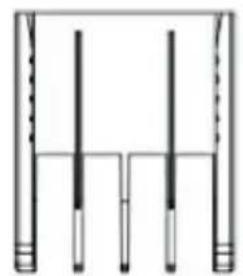
Combs supplied (refer to the main image)
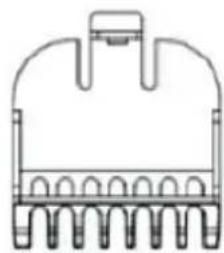
Comb I: suitable for hair up to 3mm in length
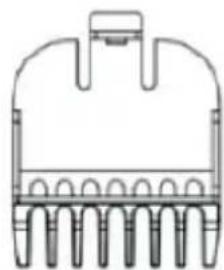
Comb II: suitable for hair up to 6mm in length
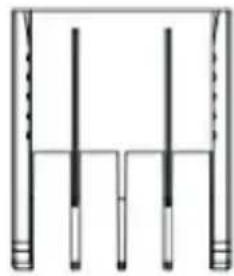
Comb III: suitable for hair at 9mm in length
Comb IV: suitable for hair at 12mm in length
The numbering of the comb is shown on the central part of the comb itself.
To insert the comb, place it with the teeth facing up and slide it along the blades.
To remove the comb, push up and remove it from the blades.
For an even cut, slide the comb and the blades of the hair clipper through the hair, without forcing and without moving too quickly. Remember to comb the hair often in order to remove residues and check that the cut is uniform.
STEP 1 - NAPE
-
Use the 3 or 6 mm comb
-
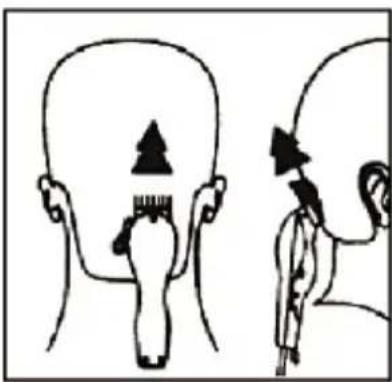
Hold the hair clipper in a vertical position with the blades facing upwards, and start cutting from the center of the head up to the nape of the neck. (picture 1)
natural_image
Illustration of a human head with a triangular object inserted into the neck, showing anatomical positioning (no text or symbols)Pic.1
- Grip the hair clipper comfortably and press lightly on the head, with the teeth of the comb facing up. Gradually and slowly move the hair clipper upwards and outwards to obtain a slight faded effect.
- As you cut, gradually lift the top of the clipper. Continue to cut the back above the ears.
STEP 2 - BACK OF THE HEAD
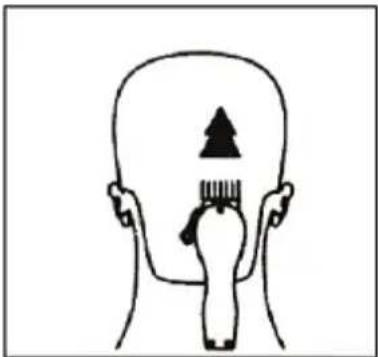
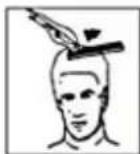
Use 9mm or 12mm comb (III or IV) and cut the hair on the back of the head (pic. 2
natural_image
Simple line drawing of a human head with a triangular pointer and toothbrush on the forehead (no text or symbols)Pic.2
STEP 3 - SIDE PARTS OF THE HEAD
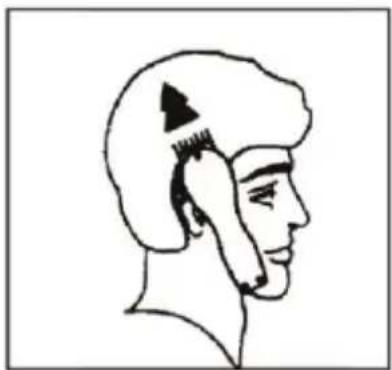
Use the shorter 3mm or 6mm cutting comb, suitable for sideburns and parts near the ears. Then switch to a comb for a longer cut, 9mm or 12mm, and continue cutting all the way to the top of the head. (picture 3).
natural_image
Side profile illustration of a person wearing a head covering and ear with surgical hardware (no text or symbols)Pic.3
STEP 4 - TOP OF THE HEAD
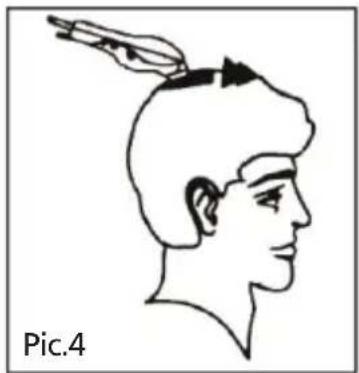
- Using the 9 mm or 12 mm comb, start cutting from the center of the hair to the forehead, on the opposite side of the hair growth (picture 4). In some cases, it may be useful to cut in the opposite direction, or cut from the forehead towards the center of the head.
- If you want a fairly short cut, use a 3mm or 6mm comb.
- To leave the hair longer at the top, hold the hair upwards using the comb provided, and pass the hair clipper over the comb to cut it, or hold the hair between your fingers and cut to the desired length (pictures 5 and 6). Always start from the back of the head. To obtain a more nuanced cut, the space between the fingers / guide comb and the head can be reduced. Comb your hair and check that the cut is even.
natural_image
Side profile illustration of a person wearing a headscarf with a feathered hair accessory (no text or symbols)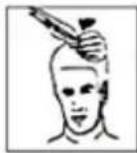
Pic.5
Pic.6
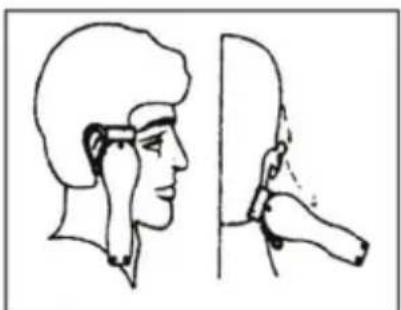
- Finally, use the clipper without applying the guide combs for the final cut, near the neck and ears.
- To get a clean cut around the sideburns, turn the clipper to the opposite side (image 7)
- Press the blades lightly onto the skin and cut down to finish some parts, resulting in a clean cut as with the razor.
natural_image
Side-by-side line drawing of a human head and neck with a hand gesture, no text or symbols presentPic.7
SHORT AND SHADED LOOKS
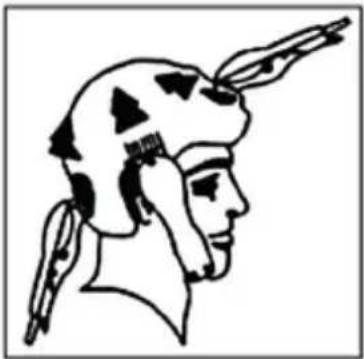
- Start with the 12mm comb, cutting from the back to the center. Keep the guide comb pressed parallel to the head and slowly move through the hair, as shown in picture 8.
natural_image
Line drawing of a stylized human head in profile with feathered beak (no text or symbols)Pic.8
- Use the same procedure from the lowest part of the head to the highest, as in the image. Then pass the hair clipper in the opposite direction to the growth of the hair, from the forehead to the central part and equalize the cut at the level of the lateral part.
- To achieve a "flat top" look the hair at the top should be cut using a flat comb and not the supplied guide comb.
- Use a short comb to blend the hair near the neck as desired. Comb the hair and check that the cut and the shading are uniform as described above.
CLEANING AND MAINTENANCE
Always turn off the appliance before cleaning the product. After using the product, remove the combs from the appliance, remove the residual hair with the brush and then wash under running water. Let it dry well before using the appliance again. Never immerse the product in water. Clean the product externally with a soft, slightly damp cloth. Never use solvents or abrasive products.
ATTENTION: never let water enter the motor body, always keep the part of the blades down when cleaning the head. Wait for the accessory to dry before putting the appliance back into operation.
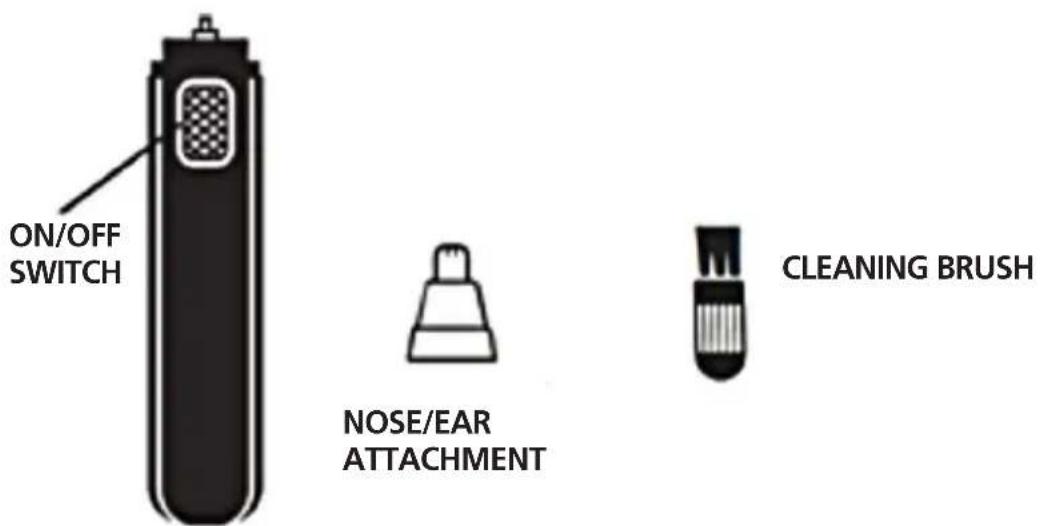
NOSE AND EAR TRIMMER
USAGE
This product is designed to remove unwanted nose and ear hair
Remove the transparent cap and set the button to "ON"
Carefully place the head inside the nostrils to remove the hair.
Do not forcefully insert the trimmer inside the ear or nose cavities to avoid damage.
BATTERY INSERTION AND REPLACEMENT
- Gently slide the battery compartment cover and remove it from the device body (C).
- Insert 1 AA battery with positive pole towards the inside of the device (+).
Replace the battery compartment cover
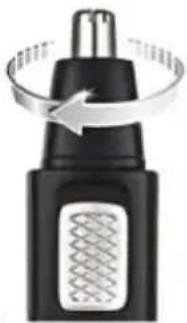
REMOVE THE HEAD
Gently rotate clockwise and pull.
natural_image
Close-up of a black hairdryer with a circular motion arrow indicating rotation (no text or symbols)CLEANING AND MAINTENANCE
- Clean the trimmer after each use
- Make sure the button is in the OFF position
- Use the brush to remove residual hair from the head.
- Never clean the trimmer body directly with water.
- The head material is stainless steel, so it can be removed and rinsed with water.
- Do not use aggressive or corrosive detergents to clean the device components.
RATING LABEL
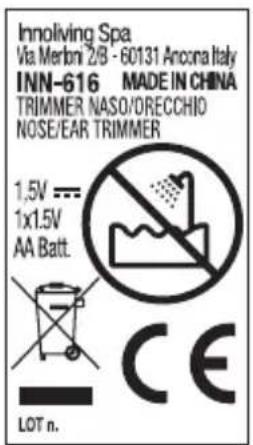
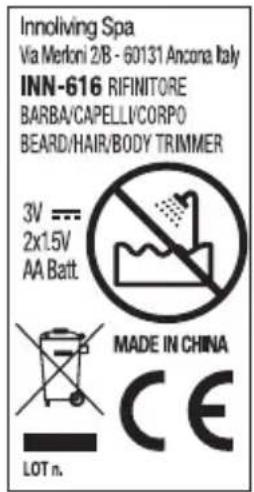
This product complies with all applicable European directives.
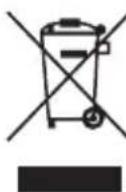
INFORMATION TO USERS according to Legislative Decree No. 49 of March 14, 2014 "2012/19/UE Implementation of the Directive on Waste Electrical and Electronic Equipment (WEEE)"
The crossed-out dustbin symbol indicates that the product at the end of its life must be collected separately from other waste.
The user should, therefore, take the equipment with the essential components at the end of its useful life to the separate collection center of electronic and electrical waste, or return it to the retailer when purchasing new equipment of equivalent type, in ratio of one to one, or one to zero for devices with larger side less than 25 CM. The separate collection for the decommissioned equipment for recycling, treatment and environmentally compatible disposal contributes to avoid possible negative effects on the environment and human health and promotes recycling of the materials. Improper disposal of the product by the user entails the application of administrative sanctions according to Legislative Decree No. 49 of 14 March 2014.
The batteries used in this device must be disposed of in the special bins at the end of their life.
Please inform yourself about the local rules on separate collection of batteries. The correct disposal of batteries helps preventing potentially negative consequences on the environment and human health.
innoliving
Innoliving Spa
Via Merloni, 2/B
60131 Ancona Italy
Tel 071.2133550
www.innoliving.it
CE
Rev. 01_06.2021
- ISTRUZIONI PER L'USO
- NOTA BENE
- 1
- 11
- III
- IV
- PASSAGGIO 3 – PARTI LATERALI DELLA TESTA
- PASSAGGIO 4 – PARTE ALTA DELLA TESTA
- PASSAGGIO 5 – IL TOCCO FINALE
- LOOK CORTI E SFUMATI
- WARNINGS AND SAFETY NORMS
- HAIR CLIPPER
- NOTES
- HAIRCUT INSTRUCTIONS
- BEFORE STARTING WITH THE CUT:
- BATTERY INSERTION
- TIPS
- II
- STEP 1 - NAPE
- STEP 2 - BACK OF THE HEAD
- STEP 3 - SIDE PARTS OF THE HEAD
- STEP 4 - TOP OF THE HEAD
- SHORT AND SHADED LOOKS
- CLEANING AND MAINTENANCE
- NOSE AND EAR TRIMMER
- USAGE
- BATTERY INSERTION AND REPLACEMENT
- REMOVE THE HEAD
- RATING LABEL
- innoliving
Brand : Innoliving
Model : INN-616
Category : Beard trimmer