
PowerWash 3 Complete P86-P4-T - Pressure washer VAX - Free user manual and instructions
Find the device manual for free PowerWash 3 Complete P86-P4-T VAX in PDF.


| Product Type | Pressure Washer |
| Brand | VAX |
| Model | PowerWash 3 Complete P86-P4-T |
| Power Supply | 230V ~ 50Hz |
| Motor Power | 2000 W |
| Max Pressure | 150 bar |
| Rated Pressure | 120 bar |
| Water Flow Rate | 6 L/min |
| Max Water Inlet Temperature | 40 °C |
| Hose Length | 8 m |
| Cable Length | 5 m |
| Dimensions (L x W x H) | 38 x 32 x 55 cm |
| Weight | 9.5 kg |
| Detergent Tank | 1 L, built-in |
| Nozzles Included | Adjustable, Turbo, Foam |
| Functions | Variable pressure, detergent injection, foam spray |
| Safety Features | Trigger lock, thermal cut-out, pressure relief valve |
| Maintenance | Clean inlet filter, winterize with antifreeze |
| Spare Parts Available | Hose, spray wand, nozzle kit, detergent bottle |
Frequently Asked Questions - PowerWash 3 Complete P86-P4-T VAX
User questions about PowerWash 3 Complete P86-P4-T VAX
0 question about this device. Answer the ones you know or ask your own.
Ask a new question about this device
Download the instructions for your Pressure washer in PDF format for free! Find your manual PowerWash 3 Complete P86-P4-T - VAX and take your electronic device back in hand. On this page are published all the documents necessary for the use of your device. PowerWash 3 Complete P86-P4-T by VAX.
USER MANUAL PowerWash 3 Complete P86-P4-T VAX
IDEAL FOR THE MOST CHALLENGING CLEANING TASKS
LET'S GET STARTED.
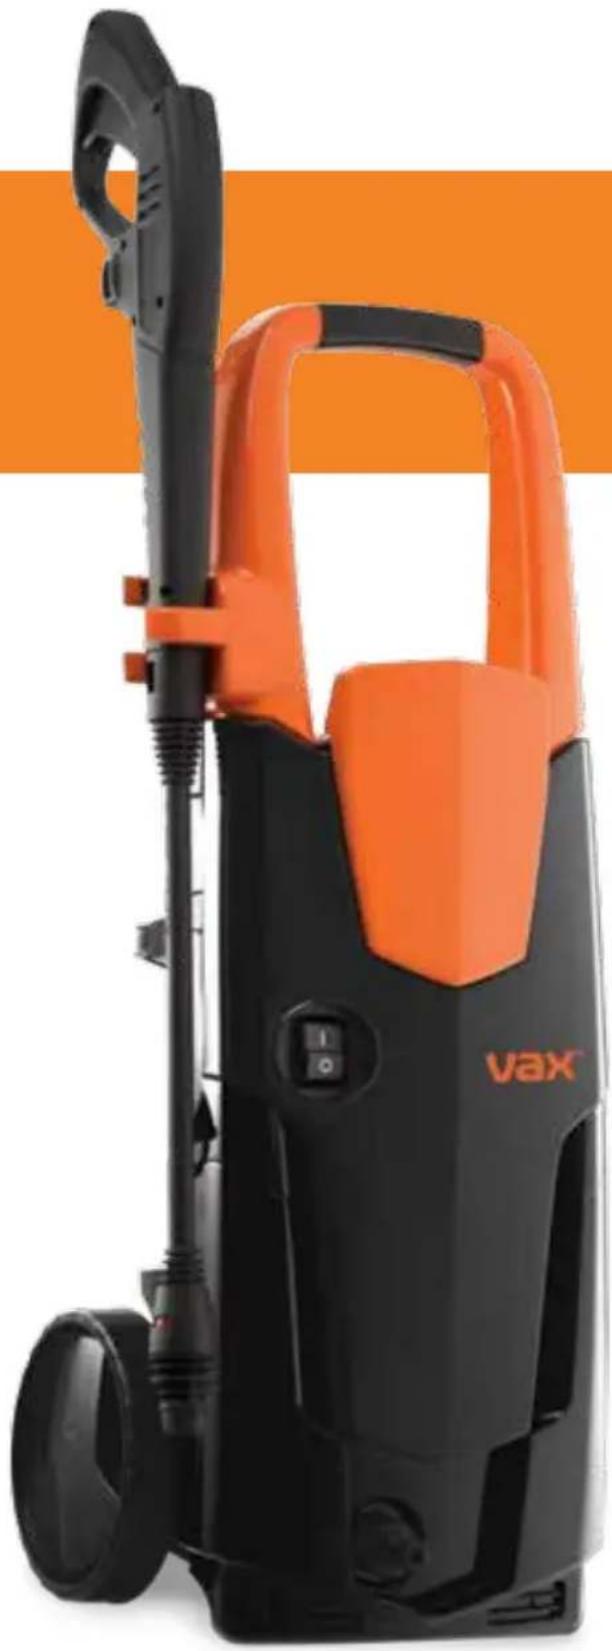
natural_image
Exterior view of a black and orange Vax® water heater (no text or symbols visible on body)
Basic safety precautions
This pressure washer is intended for household use only and NOT for commercial or industrial use.
- This pressure washer is for outdoor use only.
- It is your responsibility to check the suitability of the surface to be cleaned. Vax cannot be held responsible for damage caused.
- Keep fingers, hair and loose clothing from moving parts and openings whilst using the pressure washer.
- When using the pressure washer the recommended working distance between the nozzle and surface area or object to be cleaned is 30cm.

Don'ts
- Don't leave the pressure washer unattended or running when not in use for more than 5 minutes without depressing the trigger.
- Don't use the pressure washer if it has been dropped, damaged or immersed in water.
- Don't use the pressure washer if the power cord or plug is damaged.
- Don't handle the plug of the pressure washer with wet hands.
- Don't use the pressure washer without the supply hose (minimum length 7.5m) in place and unwind the hose fully from the reel.

Do's
- Always wear suitable clothing footwear and eye protection whilst using the pressure washer.
- Always connect the water supply, remove the lance and squeeze the trigger to run water through the machine before switching the power on.
- Always use a suitable hose connector to match the coupling on the pressure washer with a non-return valve at tap end of the supply hose.
- Always unplug the pressure washer before cleaning or carrying out any maintenance.
-
Always turn off and unplug the pressure washer before disconnecting or connecting the hose. After use always wrap the pressure hose and power cord around the storage clips provided.
-
This appliance can only be used by children aged from 8 years and above and persons with reduced physical, sensory or mental capabilities or lack of experience and knowledge if they have been given supervision or instruction concerning use of the appliance in a safe way and understand the hazards involved. Children should not play with the appliance. Cleaning and user maintenance shall not be made by children without supervision.
- Vax only recommend the use of Vax genuine accessories and detergent to be used with this pressure washer. The use of non-branded Vax accessories and detergent will invalidate your warranty.
-
For safe transportation, ensure that the pressure washer is unplugged and secure.
-
Don't use the pressure washer without the water filter in place.
- Don't pull or carry this pressure washer by the power cord.
- Don't use the power cord as a handle, pull the power cord around corners or sharp edges, or close a door over the power cord.
- Don't unplug the pressure washer by pulling on the power cord.
- Don't aim the pressure washer at people, animals, plants, electrical components, wires, or the pressure washer itself.
- Don't use the pressure washer on electrical components, damaged/delicate paint surfaces, tyres, engines/motors.
-
Don't use the pressure washer with incorrect voltage as this may result in damage or injury to the user. The correct voltage is listed on the rating label.
-
Always release any built up pressure in the handle prior to disconnecting the hose and ensure water inlet filter is clean prior to storage in a cool dry place.
- Always use only CE approved 13amp extension cords with RCD, non-approved extension cords may overheat. Care should be taken to arrange the extension cord as it could be a trip hazard.
- Always make sure the power/extension cord is fully unwound and prevent the power/extension cord from getting wet during use.
- Always replace the fuse in the plug with a British 13amp fuse. Always protect the power cable from heated surfaces or near open flames.
• Always carry the pressure washer by the handle. - Always check the water hose and accessories are not damaged, broken or worn before use.
Thank you for buying this Pressure Washer.
Taking care of your outdoor cleaning
This pressure washer is designed to make outdoor cleaning tasks as effective and efficient as possible and this user guide will help you get the most out of your machine.
Completing outdoor cleaning tasks using a Vax pressure washer will keep your outdoor items and surfaces cleaner for longer.
Taking care of your Pressure Washer
Also inside this guide are instructions on maintaining your new machine, so that it's always ready when you are to tackle your outdoor cleaning tasks.
We're here if you need us
Instead of taking me back to the shop, simply visit our online support:
vax.co.uk/support
vax™
Still need to get in touch?
Our UK based Customer Care Team are here to support you. For help with assembly, operational or performance problems, or buying and fitting new accessories, you can find all our contact details at vax.co.uk/contact
This user guide can be found online at: vax.co.uk/support
Contents
Let's talk safety
Getting to know your machine
Getting started
Using your machine
Taking care of your machine
Let's talk technical
What to do if it goes wrong
Getting in touch
Accessories
Power Wash
Included with your machine
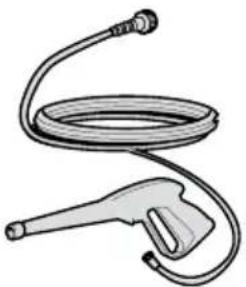
natural_image
Illustration of a coiled hose and mechanical device (no text or symbols)Pressure Hose
Trigger Handle
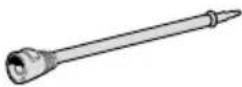
Lance
Jet Nozzle
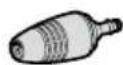
Turbo Nozzle
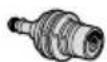
Detergent Nozzle
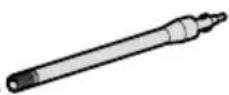
Nozzle Cleaning Tool

Water Inlet Connector
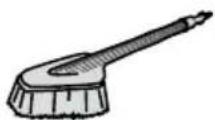
Car Brush
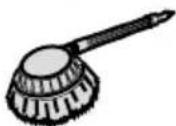
Rotary Brush
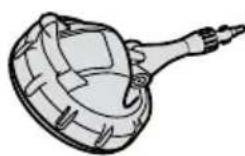
Patio Brush
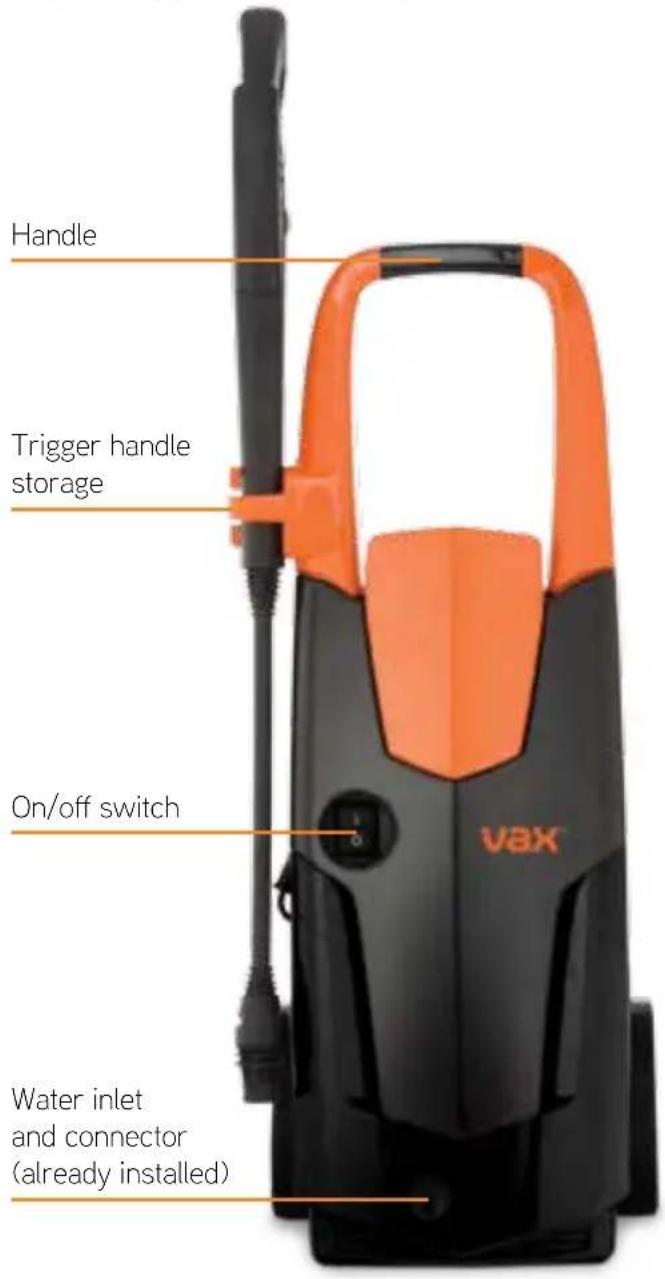
Getting to know your machine
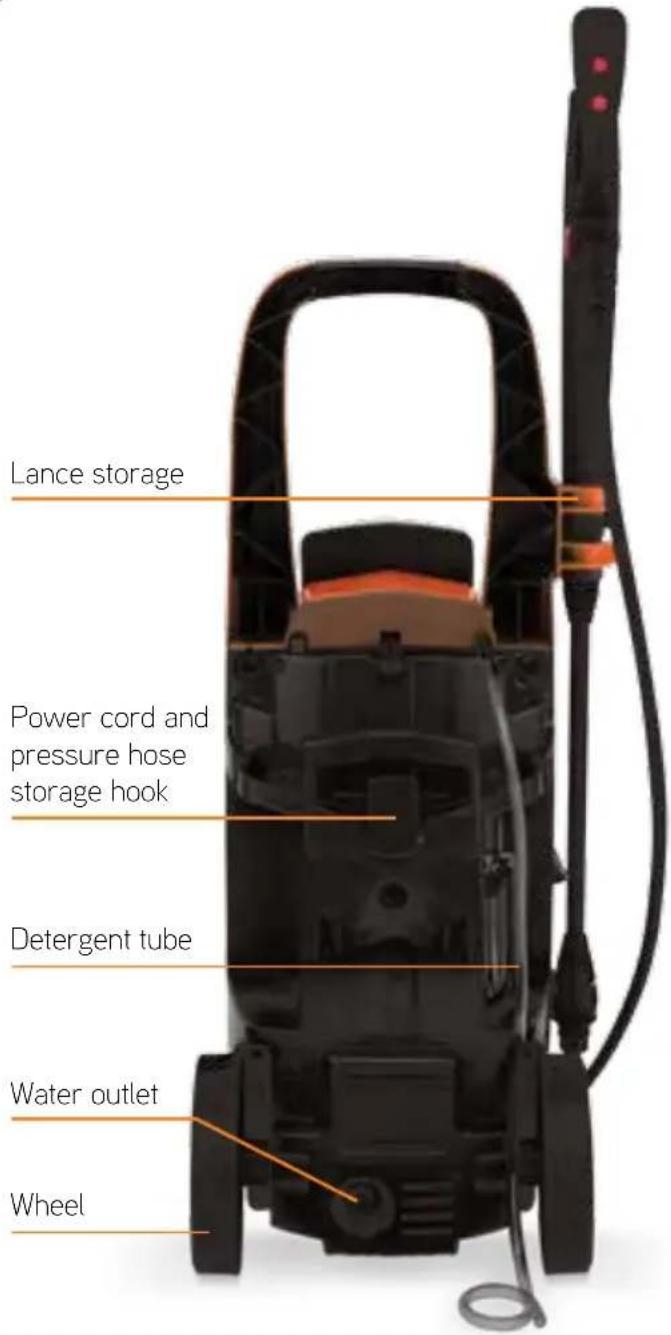
Technical Specification
Name PowerWash 2500W Complete
Model P86-P4-T
Voltage 220-240V\~50Hz
Wattage 2500W
Max Pressure 180 bar
Rated Pressure 120 bar
Max Flow Rate 510L/Hr
Sound pressure level:
LpA dB(A) 79
Sound power level:
LwA dB(A) 94
LwA dB(A) K (uncertainty) 91,6
Vibration (m/s ^2 ) K (uncertainty) 0,5 m/s ^2 1,5
Subject to technical change without notice.
Accessories & Consumables
Universal Detergent
1-9-133398-00
Patio & Decking Detergent
1-9-133401-00
Wash & Protect Vehicle Detergent
1-9-133400-00
To purchase consumables and accessories, please visit vax.co.uk
PLEASE READ 'LET'S TALK SAFETY' AT THE BEGINNING BEFORE USE.
Always make sure the pressure washer and water supply is off before connecting or disconnecting the hose and accessories.
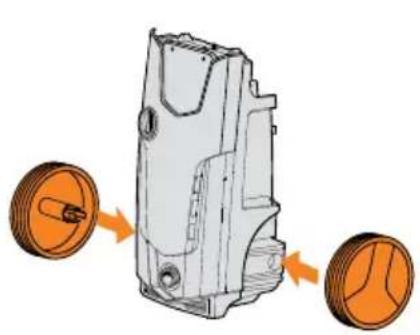
Assembling your pressure washer
natural_image
Diagram of a mechanical component with two orange circular parts connected by an arrow indicating direction (no text or symbols present)Attach both wheels and push until they click into place.
natural_image
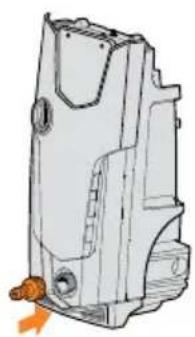
Technical line drawing of a mechanical component with no visible text or symbolsAttach the hose connector to water inlet by turning clockwise until tight.
natural_image
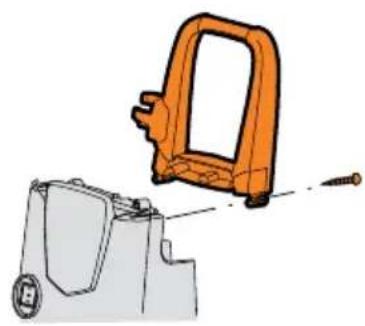
Illustration of a mechanical component with orange handle and gray base, showing assembly or assembly (no text or symbols)To attach the handle into the top of the pressure washer, align the handle with the screw holes making sure not to trap the solution tube. Slide together and insert 2 screws and turn clockwise to tighten.
Using your machine
IMPORTANT: Always remove the pressure hose fully from the reel when in use.
Always make sure the trigger safety lock is in the LOCKED position when not in use or connecting/disconnecting the pressure hose.
Always check water hose, pressure hose, lance and accessories are not damaged, broken or worn before use.
Preparing your pressure washer for use
natural_image
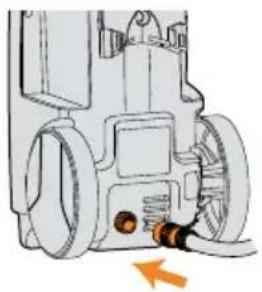
Diagram of a mechanical device with attached components and an orange arrow indicating direction (no text or symbols)Push the pressure hose firmly to the water outlet and turn the pressure hose collar clockwise to tighten.
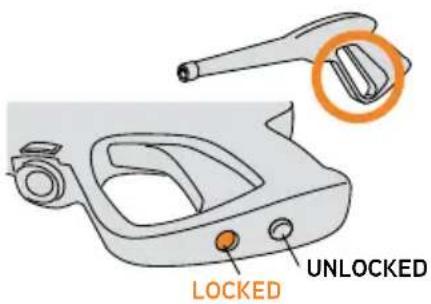
A trigger safety lock is located underneath the handle. The safety lock should always be in LOCKED position before connecting/disconnecting the pressure hose to the trigger handle.
natural_image
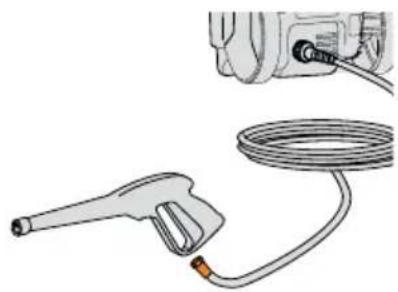
Illustration of a handheld electric shock absorber with coiled cable and handle, shown with hand insertion (no text or symbols)To connect the pressure hose to the trigger handle, press the pressure hose release button and push the pressure hose to lock into position. Gently pull the pressure hose to make sure it is locked securely.
natural_image
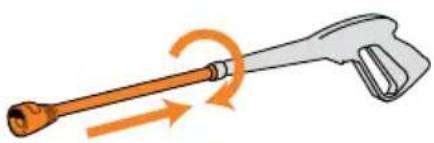
Illustration of a syringe with motion arrows indicating rotation (no text or symbols)Whilst firmly pushing the lance into the trigger handle turn clockwise to lock into position.
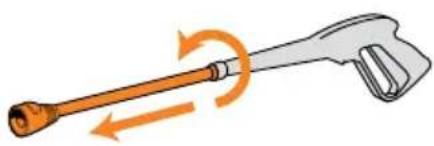
natural_image
Illustration of a syringe with motion arrows indicating rotation (no text or symbols)To remove the lance from the trigger handle firmly push and twist the lance anti-clockwise. When unlocked pull to remove.
Always make sure the pressure washer is switched OFF before connecting/disconnecting the pressure hose, lance, accessories or detergent bag.

IMPORTANT: Always use an RCD (Residual Current Device) adaptor when using this pressure washer.
CAUTION: Don't leave the pressure washer running when not in use, or more than 5 minutes to prevent overheating.
Before switching the pressure washer on, the trigger handle must be squeezed to release water and any airlocks in the machine or pressure hose. Always release any pressure build up in the handle prior to disconnecting the hose.
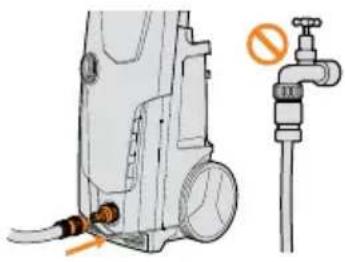
natural_image
Illustration of a pressure pump with attached tubing and a valve, alongside a pipe fitting (no text or symbols)Make sure the water supply is not connected. Firmly push the water hose pipe with suitable connector onto the water inlet to lock into position.
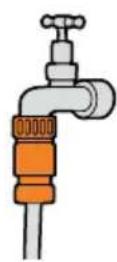
Connect the water hose pipe to a suitable water supply and turn the water on.
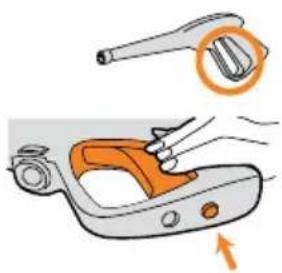
natural_image
Illustration of a hand holding a tool next to a device with an orange handle and a magnified inset showing the tool handle (no text or symbols present)Before plugging the machine in, press the unlock safety button on the trigger handle and squeeze the trigger until water starts to flow through the nozzle.
natural_image
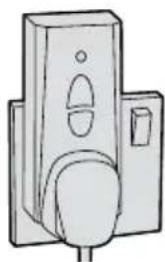
Line drawing of a door with toilet and seat (no text or symbols)Connect the power cord to the mains supply via an RCD adaptor.
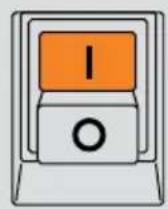
Push switch to 'I' position to turn on. The machine will run for a few seconds then stop but no water will be released.
natural_image
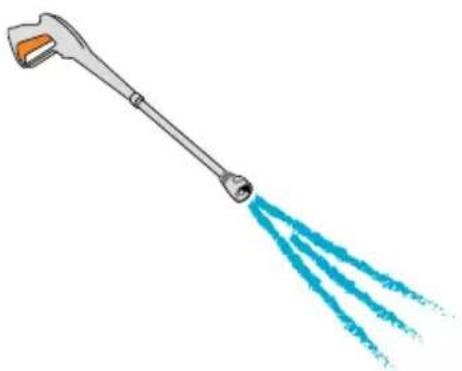
Illustration of a handheld tool emitting blue smoke or vapor (no text or symbols)Squeeze the trigger on the trigger handle to release a high pressured water jet, and start cleaning.
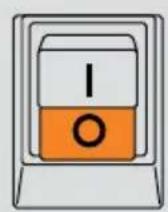
Push switch to 'O' position to turn off.
Don't aim the pressure washer directly at people, animals, plants, electrical components, wires or the pressure washer itself.
CAUTION

Using your machine
IMPORTANT: Always make sure the machine is switched off and the safety button on the trigger handle is LOCKED before connecting/disconnecting the lance, nozzle or accessories.
Using your accessories
The jet nozzle has a wider spray and is ideal for use on surfaces such as cars, garden furniture, decking and boats.

natural_image
Illustration of three different medical or laboratory tools with arrows indicating motion (no text or symbols)To attach the jet nozzle, fit the lance with a firm push and twist clockwise to lock into place.
Hold down the release button on the lance, push the jet nozzle and lance firmly together until you hear an audible CLICK. Release the button and gently pull the jet nozzle to make sure it is locked securely before use.
Squeeze the trigger on the trigger handle to release a high pressured water jet, and start cleaning.
The turbo nozzle has a more concentrated spray and is ideal for use on very dirty surfaces, patios or masonry. As it is not fitted with a pressure regulator it is not suitable for use on delicate or painted surfaces.

natural_image
Illustration of two types of medical or laboratory tools with orange arrows indicating motion (no text or symbols)To attach the turbo nozzle, fit the lance with a firm push and twist clockwise to lock into place.
Hold down the release button on the lance, push the turbo nozzle and lance firmly together until you hear an audible CLICK. Release the button and gently pull the turbo nozzle to make sure it is locked securely before use.
Never use the turbo nozzle on cars, tyres and engines.
CAUTION

natural_image
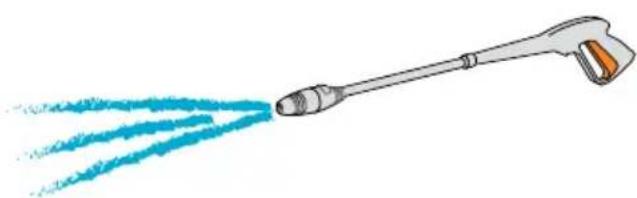
Illustration of a handheld water spray gun emitting blue liquid (no text or symbols)Squeeze the trigger on the trigger handle to release a high pressured water jet, and start cleaning.
IMPORTANT: When using your pressure washer the recommended working distance between the nozzle and surface area or object to be cleaned is 30cm.
After connecting the pressure hose, lance and accessories check they are securely fitted and locked in place before switching on.
Always release any pressure build up in the handle prior to disconnecting the hose and accessories.
Don't use if the lance and accessories are damaged, broken or worn.
Always check brushes are clean and free from grit/hard debris before use.
Using the patio brush (included in selected models only, see 'Included with your machine')
natural_image
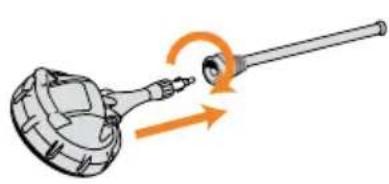
Diagram of a mechanical device with a lever and rotating arrow, showing motion (no text or symbols)Push the extension tube onto the patio brush head and turn clockwise to secure. Twist and push the patio head collar to lock the extension tube into position.
natural_image
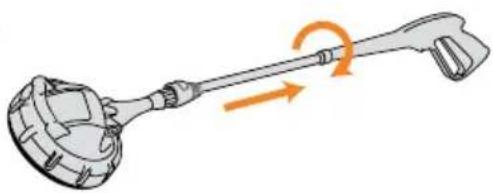
Illustration of a ladle with a handle and lever mechanism, showing rotational motion (no text or symbols)Attach the extension tube onto the trigger handle, push firmly and twist clockwise to lock into place.
natural_image
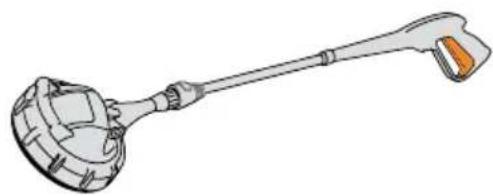
Line drawing of a ladle with handle and spout (no text or symbols)Switch on the pressure washer and squeeze the trigger to release water spray.
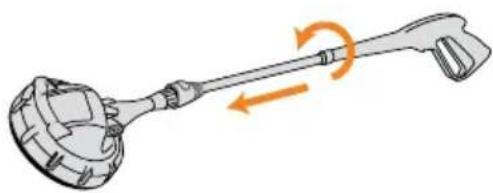
natural_image
Illustration of a ladle with an arrow indicating rotational motion (no text or symbols)To remove the extension tube from the trigger handle, firmly push and twist the extension tube anti-clockwise to unlock. Pull to remove.
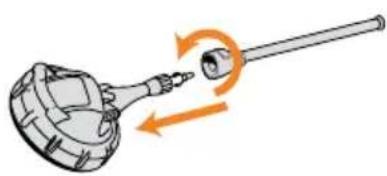
natural_image
Illustration of a mechanical device with a lever and rotating component (no text or symbols)To remove the patio brush from the extension tube, twist the patio head collar anti-clockwise. Push and twist the patio brush anti-clockwise to unlock, pull to remove.
The extension tube can be used to extend all accessories and ideal for hard to reach areas and surfaces.
The outdoor brush is a soft bristled brush ideal for making easy work of cleaning garden furniture.
The car brush is a soft bristled brush and perfect for tackling tough dirt on delicate surfaces ideal for wheels and car mirrors.

Using your machine
Using the car brush (included in selected models only, see 'Included with your machine')
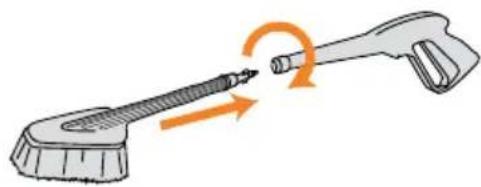
natural_image
Illustration of a hairdryer tool interacting with a brush, showing a curved arrow indicating rotation (no text or symbols)Attach the car brush to the trigger handle. Firmly push the car brush and trigger handle together, turn clockwise to lock into position.
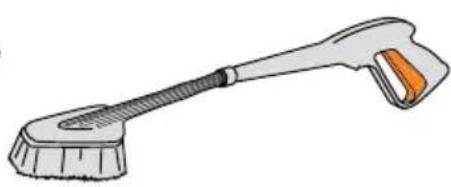
natural_image
Illustration of a cleaning brush with a handle and orange handle (no text or symbols)Switch on the pressure washer and squeeze the trigger to release water spray or water and detergent mix.
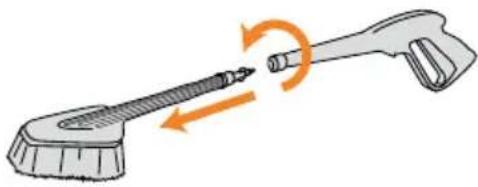
natural_image
Illustration of a cleaning tool with a brush and handle, showing motion arrows (no text or symbols)To remove the brush from the trigger handle firmly push and twist the lance anti-clockwise to unlock. Pull to remove.
Using the outdoor brush (included in selected models only, see 'Included with your machine')
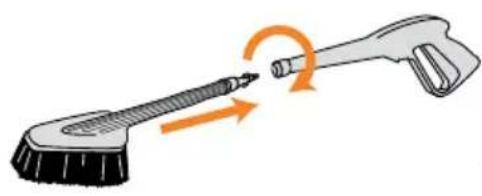
natural_image
Illustration of a cleaning brush and a tool with an orange arrow indicating rotation (no text or symbols)Attach the outdoor brush to the trigger handle. Firmly push the outdoor brush and trigger handle together, turn clockwise to lock into position.

natural_image
Illustration of a cleaning brush with a black brush and orange handle (no text or symbols)Switch on pressure washer and squeeze trigger to release water spray or water and detergent mix.
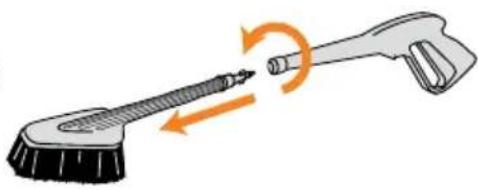
natural_image
Illustration of a cleaning brush and tool with an arrow indicating rotation (no text or symbols)To remove the outdoor brush from the trigger handle firmly push and twist the lance anti-clockwise to unlock. Pull to remove.
Using the rotary brush (included in selected models only, see 'Included with your machine')
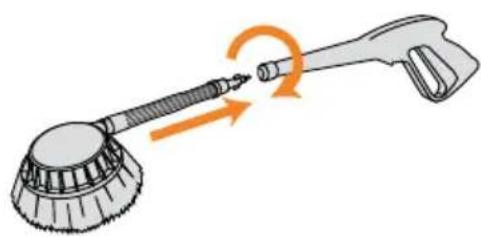
natural_image
Illustration of a cleaning brush with a handle and lever, showing a curved arrow indicating rotation (no text or symbols)Whilst firmly pushing the rotary brush into the trigger handle turn clockwise to lock into position.
natural_image
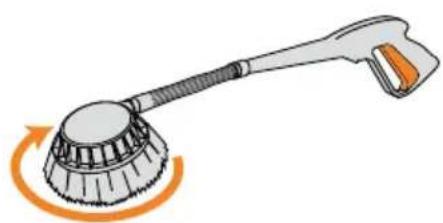
Illustration of a cleaning brush with a circular motion indicator (no text or symbols)Switch on the pressure washer and squeeze the trigger to release water spray or water and detergent mix.
natural_image
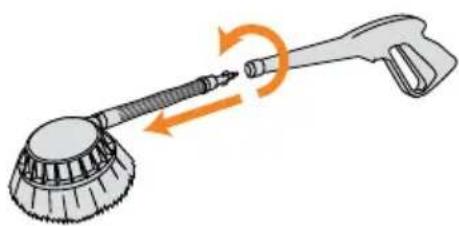
Illustration of a cleaning brush with a handle and lever, showing motion direction (no text or symbols)To remove the rotary brush from the trigger handle firmly push and twist the lance anti-clockwise to unlock. Pull to remove.
IMPORTANT: When using solution make sure you follow the dilution instructions and use Vax solution only. Solution can only be used with the trigger handle, lance and solution nozzle, or car/outdoor/rotary brush if supplied. Solution CANNOT be used with the jet and turbo nozzles.
Using solution with your pressure washer
natural_image
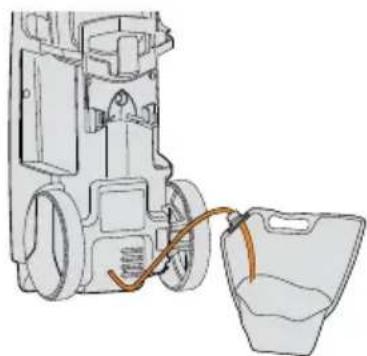
Diagram of a mechanical device connected to a bucket with an orange cable (no text or symbols)Unhook the solution tube and insert into the solution bag. Solution only dispensed with the trigger handle, lance and solution nozzle, or car/outdoor/ rotary brush if supplied.
natural_image
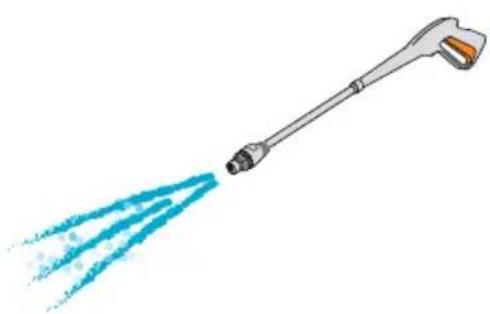
Illustration of a manual tool emitting blue spray lines (no text or symbols)Switch the pressure washer on and squeeze trigger to dispense the water and solution mix.
natural_image
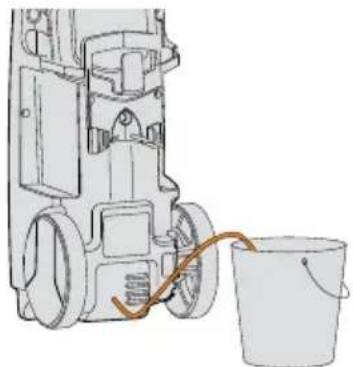
Line drawing of a mechanical device with a bucket and pipe connection (no text or symbols)After use rinse the pressure washer to prevent blockages. Inset the solution tube into a bucket of fresh water (Max 40°C), turn the machine on and squeeze the trigger for 1 minute.
Always make sure the pressure washer is switched OFF before connecting/disconnecting the pressure hose, lance, accessories or detergent bag.

Let's talk technical
IMPORTANT: Always rinse fresh water through your pressure washer and accessories for 1 minute after using detergent to prevent blockages.
Maintenance
natural_image
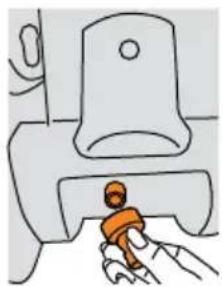
Simple line drawing of a person climbing a staircase with a toilet (no text or symbols)To access the water filter, unscrew water inlet connector and remove.
natural_image
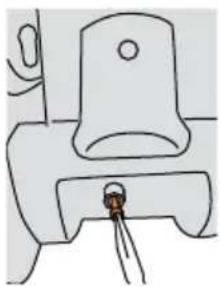
Simple line drawing of a toilet with a bulb inserted into the cup (no text or symbols)To remove the water filter, pinch the inner water filter tab with pliers and gently pull.
natural_image
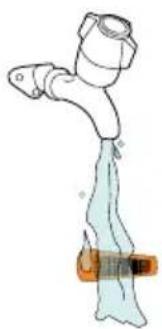
Simple line drawing of a pipe fitting with a handle and base (no text or symbols)The water filter can be rinsed under running water periodically.
IMPORTANT: Before storing your machine always make sure no water remains in the pressure washer or hose/accessories to prevent frost damage. Keep in a dry place above zero degrees and out of the reach of children.
Storage
natural_image
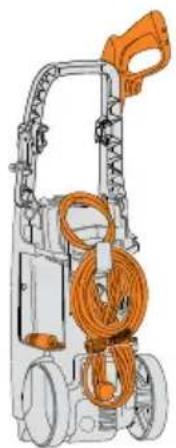
Illustration of a portable water heater with orange cables and a handle (no text or symbols)Always store tools and power cord into the allocated storage slots.
Leave the trigger handle attached when storing the pressure hose.

Removing a blockage in the lance and nozzles
natural_image
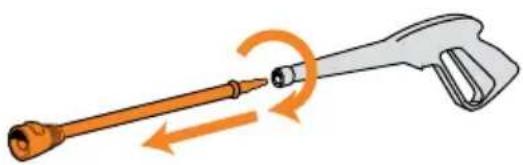
Illustration of a syringe with an orange tool inserted, showing motion direction (no text or symbols)To remove the lance from trigger handle firmly push and twist the lance anti-clockwise, when unlocked pull to remove.
natural_image
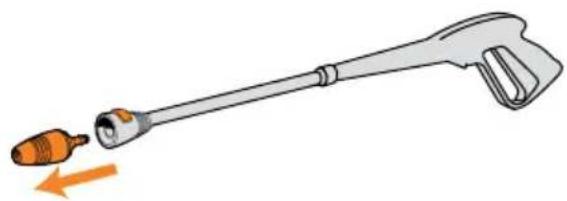
Illustration of a medical or laboratory tool with an orange arrow pointing to a small orange bulb (no text or symbols)To remove the nozzle press the nozzle release button and pull.
natural_image
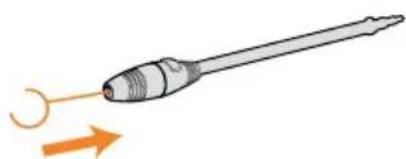
Illustration of a medical or laboratory probe with an arrow indicating direction (no text or symbols)Insert the nozzle cleaning tool into the end of lance and nozzles to remove any dirt or debris.
Before carrying out any maintenance make sure the machine is switched off and unplugged.
CAUTION

What to do if it goes wrong
SolutionProblem
There is an accessory missing
- Check the contents panel on the box to make sure the part is included with your machine.
Why won't the pressure washer turn on?
- Make sure the on/off switch is set to the 'I' position.
- The plug may not be fully pushed into the electrical socket.
- Check the fuse in the plug if this needs replacing, always replace with a British 13amp fuse.
- Check if your RCD has been tripped, if it has tripped, reset it.
• The power cord may be damaged.
Why won't the water/ detergent dispense?
- The pump may have stopped, make sure the on/off switch is set to the 'I' position and check the plug fuse.
- The pump may have stopped. This may be because of overheating due to poor water supply. Check the water flow rate to your water supply.
- Hose may be blocked or kinked, check for leaks in the hose and clear any blockages. Straighten out the hose to ensure no kinks and check the hose pipe connections to the tap and water inlet.
- There may be an air lock. To remove, unlock the trigger safety lock and squeeze the trigger to release water before the machine is switched on.
- Check assembly of detergent application bottle. Go to 'Using your machine.' Nozzle/accessory may be blocked, clear any blockages and clean nozzle. Go to 'Lets talk technical.'
Why won't the pressure washer reach operating pressure?
- Hose may be blocked or kinked, check for leaks in the hose and clear any blockages. Straighten out the hose to ensure no kinks and check the hose pipe connections to the tap and water inlet.
- Nozzle may be blocked, clear any blockages and clean nozzle. Go to 'Lets talk technical.'
- Remove and clean the water inlet filter. Go to 'Taking care of your machine.'
- Check the water flow rate to your water supply.
It's quick and easy to register for your FREE
2 year guarantee ^+
Online at: vax.co.uk/registration
Please retain your original receipt for proof of purchase.
we're here if you need us
vax.co.uk/support
Accessories
Don't forget your accessories!
Order at: www.vax.co.uk/spares-and-solutions
Universal detergent 1-9-133398-00
Universal detergent to aid the break down and removal of stubborn dirt, moss, and grime.

Patio & Decking detergent 1-9-133401-00
Patio & decking detergent to aid the break down and removal of stubborn dirt from patio and decked areas.
Wash & Protect vehicle detergent 1-9-133400-00
Wash & protect vehicle detergent to aid the removal of road dirt, oil and grease from vehicles, and provide short term protection against weathering conditions.
Standard lance 1-9-133749-00
Standard lance connection between your trigger handle and attachments.
natural_image
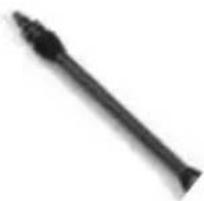
Black ornamental object with a pointed tip and elongated body, isolated on white background (no text or symbols)Detergent nozzle 1-9-133759-00
A detergent nozzle to directly apply detergent to surfaces to help loosen dirt, moss, and grime.
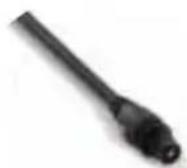
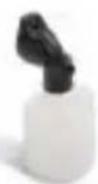
Attachable detergent bottle 1-2-133752-00
A detergent nozzle to directly apply detergent to surfaces to help loosen dirt, moss, and grime.
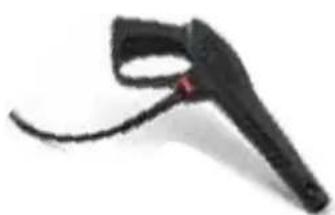
Trigger handle 1-2-133750-00
A smooth shape hand handle with an easy squeeze trigger and a built in safety lock for easy on/off trigger release.
natural_image
Black handheld medical device with curved handle and red accent (no visible text or symbols)Jet nozzle 1-9-133787-00
Jet nozzle to apply concentrated pressure to dislodge dirt and grime on all surface types.
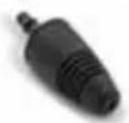
Turbo nozzle 1-9-133753-00
A high pressure turbo nozzle to blast away tough embedded dirt from high traffic areas.
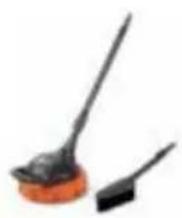
Patio cleaning set 1-9-133767-00
A large circular cased brush, supplied with an extension tube for cleaning concentrated areas quickly and efficiently. Ideal for: Patios, Decking, Driveways, Garage doors.
natural_image
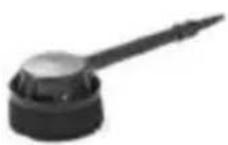
Two small cleaning tools, one with a brush and orange base, the other with a black handle (no text or symbols visible)Rotary brush 1-9-133766-00
A firm bristled brush with 360 degree rotation, providing extra scrub power for an extra clean. Ideal for: Car alloy wheels, Car grills.
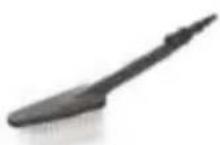
Car brush 1-9-133765-00
A soft bristled brush, perfect for agitating tough dirt from sensitive surfaces. Ideal for: Car mirrors, Car body.
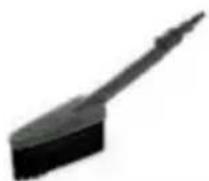
Outdoor brush 1-9-133769-00
A handy outdoor brush, perfect for gently removing dirt from various outdoor surfaces. Ideal for: Garden furniture, Conservatories.
Extension tube 1-9-133768-00
An additional connection tube providing you extra reach.
Replacement hose (10m) 1-9-133751-00
An additional high pressure hose, highly durable and resistant to weather conditions.
natural_image
Close-up of a black cable with orange connectors (no text or symbols visible)Notes
Notes
Notes
| Vax EU Declaration of Conformity (DoC) | |
| Date of Issue: 01.01.2017 | |
| Directives: | 2006/95/EC, 2006/42/EC, 2004/108/EC, 2000/14/EC (2005/88/EC), 2014/30/EU, 2011/65/EU |
| Conforming Apparatus: P86-P4-T | |
| Manufacturer: Vax Ltd | |
| Harmonised Standards Referenced or Applied: | EN60335-1; EN60335-2-79:2012; EN62233:2008; EN55014-1:2006+A1:2009+A2:2011 EN55014-2:1997+A1:2001+A2:2008; EN61000-3-2:2006+A1:2009+A2:2009; EN61000-3-3:2008; |
| 2000/14/CE (2005/88): The appliance is defined at n°27 of the annex I. Conformity evaluation procedure according to annex V. Measured acoustic power level LwA: 92 dB(A) Guaranteed acoustic power level LwA: 93 dB(A) | |
| Vax Ltd hereby declare that the equipment name has been designed (alternative:) tested and found to comply with the relevant sections of the above referenced specifications. The unit complies with all essential requirements of the Directives. This Declaration is issued under sole legal responsibility of Vax Ltd. | |
| Signed: |  |
| Name: Rob Atkins | |
| Position: Vice President of Operations | |
GET IN TOUCH
info@vax.co.uk vax.co.uk
EU Statement of Compliance: Manufacturer/EU importer: Vax Limited, hereby on our own responsibility, declare that the
P86-P4-T is manufactured in compliance with the following Directives: Safety: 2006/42/EC Machinery Directive.
EMC: 2014/30/EU Electromagnetic Compatibility Directive.
Waste electrical products should not be disposed of with household waste. Please recycle where facilities exist. Check with your Local Authority or retailer for recycling advice.
© 2017 Vax Limited. All rights reserved. The VAX trade mark and Vax lozenge are the property of Techtronic Floor Care Technology Ltd and are registered in the EU and may be pending or registered in other countries.
- This pressure washer is intended for household use only and NOT for commercial or industrial use.
- Thank you for buying this Pressure Washer.
- Taking care of your outdoor cleaning
- Taking care of your Pressure Washer
- We're here if you need us
- Contents
- Power Wash
- Included with your machine
- Technical Specification
- Accessories & Consumables
- PLEASE READ 'LET'S TALK SAFETY' AT THE BEGINNING BEFORE USE.
- Using your machine
- IMPORTANT: Always remove the pressure hose fully from the reel when in use.
- Preparing your pressure washer for use
- Using your accessories
- CAUTION
- Using the patio brush (included in selected models only, see 'Included with your machine')
- Using solution with your pressure washer
- Let's talk technical
- Maintenance
- Storage
- Removing a blockage in the lance and nozzles
- What to do if it goes wrong
- SolutionProblem
- Accessories
- Don't forget your accessories!
- Notes
Brand : VAX
Model : PowerWash 3 Complete P86-P4-T
Category : Pressure washer