
KA55SS - Kitchen sink CDA - Free user manual and instructions
Find the device manual for free KA55SS CDA in PDF.


| Product Type | Kitchen Sink |
| Brand | CDA |
| Model | KA55SS |
| Material | Stainless Steel 304 |
| Finish | Brushed Satin |
| Number of Bowls | 1.5 (large bowl + half bowl) |
| Installation Type | Undermount |
| Overall Dimensions (W x D) | 860 x 460 mm |
| Bowl Dimensions (main) | 400 x 400 x 200 mm |
| Bowl Dimensions (half) | 350 x 250 x 150 mm |
| Cut-out Dimensions (W x D) | 840 x 440 mm |
| Weight | 12 kg |
| Faucet Holes | 1 (center) |
| Drain Size | 90 mm |
| Soundproofing | Sound-absorbing pads on underside |
| Accessories Included | Drain strainer, mounting brackets, template |
| Warranty | 5 years |
| Maintenance | Clean with mild soap and water; avoid abrasive cleaners |
| Certification | CE, UKCA |
Frequently Asked Questions - KA55SS CDA
User questions about KA55SS CDA
0 question about this device. Answer the ones you know or ask your own.
Ask a new question about this device
Download the instructions for your Kitchen sink in PDF format for free! Find your manual KA55SS - CDA and take your electronic device back in hand. On this page are published all the documents necessary for the use of your device. KA55SS by CDA.
USER MANUAL KA55SS CDA
Offer up the sink to the worktop and/or the cabinets to confirm that the external dimensions of the bowls are compatible with the cabinets themselves.
Confirm that with the sink in position:
- There is adequate space to install any taps or other required accessories.
- There is adequate space to install the waste pipework and that any necessary modification to internal shelves to accommodate the waste (and trap) is acceptable.
- Access to any water stop-cock or other services will still be adequate after the installation.
Installation
- Use the template included with the sink to mark out where the worktop needs to be cut.
- After cutting out the worktop aperture, we recommend you seal the cut edges with silicone (or similar) sealant to help prevent ingress of water.
• Position the supplied gasket around the perimeter of the hole (Fig. 1).
- It is often easier to mount the taps, waste-fitting and overflow onto the sink prior to fitting the sink to the worktop.
- Ensure that the external edge of the sink is positioned on the gasket, to create a barrier to the ingress of water and other items between sink and worktop.

natural_image
Illustration of hands securing a cable or cable on a wall, labeled 'Fig. 1' (no text or symbols on the diagram itself)• After positioning the sink on the worktop, position the fixing brackets as shown in Fig. 2, then tighten their screws.
- Do not use a power tool to tighten the screws; by using a hand tool it is easier to ensure that they are tightened just enough to clamp down on the worktop and no more.

natural_image
Diagram of a mechanical or fluid system with internal components and wave patterns, labeled Fig. 2 (no text or symbols on the diagram itself)• After fixing, remove any excess gasket material with a suitable cutter.
• We recommend a thin bead of silicone sealer is applied around the perimeter as added protection against water ingress.
- The taps, waste-fitting and overflow can now be mounted onto the sink (if not already done) and fully connected to their respective services.
- To check the waste for leaks, close the plug/basket of the waste fitting, open the tap and fill the sink to the level of the overflow; turn off the tap and wait several minutes to verify that the water doesn't drain away.
• Empty the sink.
After fitting, ensure that the enclosed “Stainless Steel Sinks Use and Maintenance” guide is retained for the customer and/or user of the sink.
E & O E. All instructions, dimensions and illustrations are provided for guidance only. CDA reserve the right to change specifications without prior notice.
Please contact our Customer Care Department for Service on the details below
Customer Care Department
The CoUp Ltd. • Harby Road • Langar • Nottinghamshire • NG13 9HY
T:01949 862 012 F:01949 862 003 E: customer.care@cda.eu


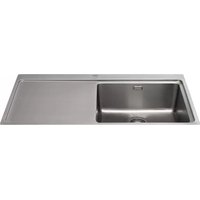
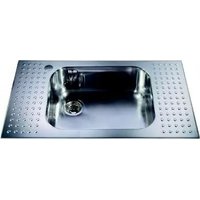
Brand : CDA
Model : KA55SS
Category : Kitchen sink