
MD22A - Filtre magnétique Salus - Free user manual and instructions
Find the device manual for free MD22A Salus in PDF.


| Product Type | Magnetic system filter for central heating |
| Brand | Salus |
| Model | MD22A |
| Main Function | Removes suspended iron oxide (magnetite) particles to protect boiler and system components |
| Canister Volume | 500 mL |
| Pipe Connection Size | 22 mm copper pipe |
| Dimensions (Approx.) | Height: 260 mm, Width: 130 mm (including valves) |
| Weight | 1.2 kg |
| Power Supply | None (passive magnetic filtration) |
| Maximum Operating Temperature | 95 °C (typical central heating) |
| Maximum Operating Pressure | 3 bar (typical domestic system) |
| Isolation Valves | 360° rotatable, with ON/OFF positions, spanner included |
| Drain Valve | Bottom mounted for easy discharge of contaminants |
| Air Vent | Top-mounted manual bleed screw |
| Magnet | Removable for cleaning and servicing |
| Chemical Compatibility | Can be used with any corrosion inhibitor; recommended Salus LX products |
| Installation Orientation | Upright (vertical) recommended for full air evacuation; pipes can be vertical, horizontal, or angled |
| Clearance Required | 250 mm above canister to allow lid removal |
| Bonding Requirement | Earth-bonding continuity required when fitted to metallic building structure; connection labelled |
| Maintenance Interval | Annually (with boiler service) – clean magnet and flush debris |
| Safety Warnings | Keep at least 300 mm from pacemakers; do not open valves or lid while pump is running |
| Warranty | 5 years from installation date |
| Accessories Included | Spanner for valves and lid, instruction manual with warranty form |
| Country of Origin | United Kingdom (Salus Controls plc) |
Frequently Asked Questions - MD22A Salus
User questions about MD22A Salus
0 question about this device. Answer the ones you know or ask your own.
Ask a new question about this device
Download the instructions for your Filtre magnétique in PDF format for free! Find your manual MD22A - Salus and take your electronic device back in hand. On this page are published all the documents necessary for the use of your device. MD22A by Salus.
USER MANUAL MD22A Salus
natural_image
Collection of various automotive components and parts including a gas cylinder, hose, valve, and defender package (no visible text or symbols)INTRODUCTION
Today, high efficiency boilers offer excellent performance for heating systems, however this performance can be eroded significantly if little attention is given to the cleanliness of the complete central heating system. Historically the majority of systems suffer from iron oxide contamination, which takes the form of sludge deposits which are caused by corrosion of the heating system.
The iron oxide particles vary in size and the sub-micron particles are present in the system fluid continuously during system operation. The oxide particles can cause premature failure of valves and pumps and boiler efficiency is reduced dramatically as the particles contaminate the boilers heat exchanger, and the complete system pipework.
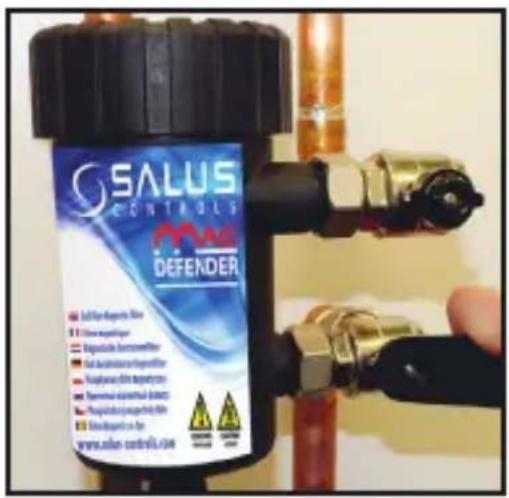
The SALUS Mag Defender offers system protection and increased efficiency, as it has been designed to remove the suspended iron oxide particles without reducing flow rate through the system.
Installation is simple; isolation valves rotate 360^ so a number of location options can be facilitated.
An added advantage to installers is the bottom mounted valve for servicing. Once isolated the bottom valve allows the easy discharge of contaminants. The main body is 500mL, which allows the installer to add the correct amount of corrosion inhibitor when the isolation valves are closed.
QUICK REFERENCE GUIDE
How to install
Filter fills with water.
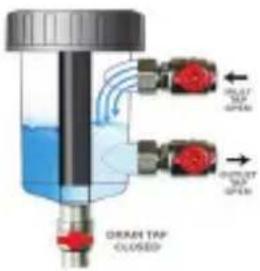
As filter fills with water air is forced to the top of the housing.

Bleed air using air vent.
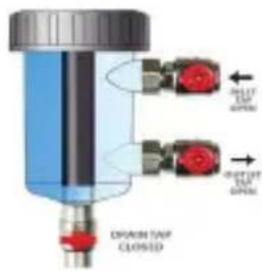

Running as filte, magnet attracts magnatite.
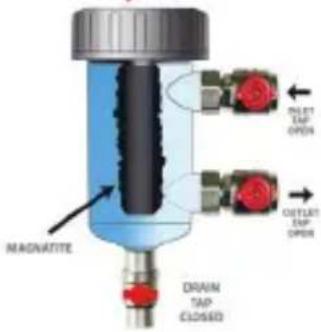
Switch off central heating.
Turn inlet & outlet taps off, then withdraw magnet. Magratite drops to base of body.
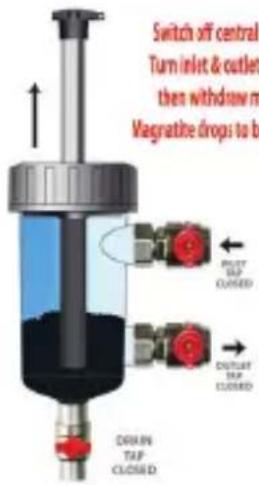
Open inlet and drain tap to drain magnatite and remaining water left in the filter housing.
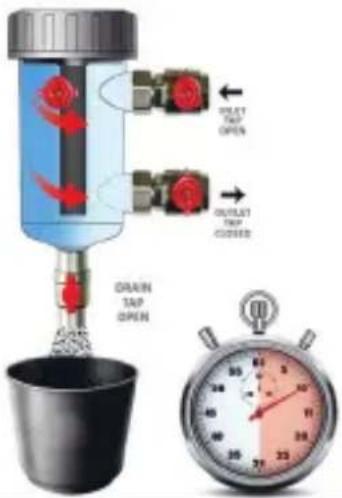
How to service and clean
INSTALLATION
In order to achieve the best protection for the boiler, it is recommended that the Mag Defender is fitted after the last radiator before the boiler.

flowchart
graph TD
    A["Boiler"] --> B["Valve"]
    B --> C["Valve"]
    C --> D["Valve"]
    D --> E["Return"]
    F["Valve"] --> G["Valve"]
    G --> H["Valve"]
    H --> I["Return"]
    J["Valve"] --> K["Valve"]
    K --> L["Valve"]
    L --> M["Return"]
    N["Header Tank"] --> O["Pump"]
    O --> P["Vent Pipe"]
    P --> Q["Return"]
    R["Boiler"] --> S["Valve"]
    S --> T["Valve"]
    T --> U["Return"]
    V["Return"] --> W["Return"]
In determining a suitable location for installation, it is important to ensure you allow adequate access for servicing.
The following instructions are designed to assist engineers in the safe and effective installation and servicing of the SALUS Mag Defender and should be followed at all times. Any queries arising from either installation or servicing, contact SALUS Controls direct on 01226 323961.
Dos:
- Install the filler upright to enable the device to be fully evacuated of air during commissioning. Pipe runs are vertical, horizontal or any angle in between. The inlet and outlet can also be swapped to suit.
- Where the device is fitted to the metallic building structure earth-bonding continuity is required around the device. All bonding connections must be accessible and labelled “Safety Electrical Connection - Do Not Remove”
Don'ts:
- Magnets may affect or interfere with sensitive mechanical and electronic instruments such as heart pacemakers, computers/magnetic media and watches. Always keep magnets at least 300mm (1ft) away from such equipment.
- NEVER close the INLET or OUTLET isolation valves, or UNDO the lid when the pump is running!
Release system pressure then drain the pipe run where the device is to be located (it may be necessary to drain the whole system). When installing below a boiler or other object, allow 250mm clearance from the top of the canister to beneath the object, to enable the lid assembly to be removed when servicing.
The device has been designed to facilitate various inlet and outlet configurations. Most configurations will require Elbows. For soldering we recommend 28x Yorkshire Solder Ring Elbow YP1222mm (code08290), or for compression we recommend 2 Yorkshire copper KS61522mm (code 61124K) and the fitting instructions (which follow) are based around dimensions of these elbows. For clarity the recommended solder and compression fittings require the same dimension of cutout.
Vertical pipe run: Measure and mark a 110mm section for a 22mm unit, as shown below. Remove this marked section using a pipe cutter as shown. Now create 64mm and 106mm of 22mm copper pipe to attach between the respective elbow and compression fitting on the inlet/outlet. Tip: Reuse the cut out section.
Horizontal pipe runs: Measure and mark 73mm section and remove the marked section with a rotary tube cutter. Create 64mm and 134mm lengths of 22mm copper pip to attach between the respective elbow and compression fitting on the inlet/outlet. Tip: Reuse the cut out section.
1 Prepare the pipe and fittings, lubricate the olives and connect the valves on the pipe work, only hand tighten the connections at first.
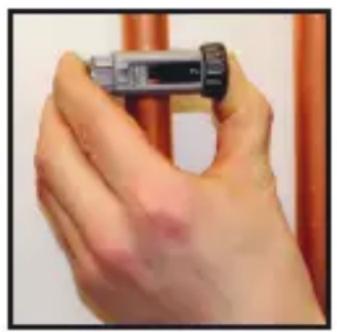
natural_image
Close-up of a hand holding a small mechanical component against a red pipe joint (no visible text or symbols)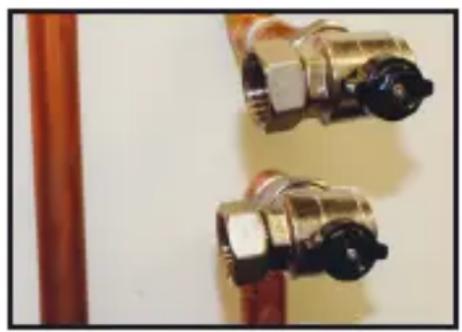
natural_image
Close-up of two metallic pressure regulator fittings with black connectors and a red rod (no text or symbols visible)
natural_image
Close-up of hands installing a pipe fitting into a metal pipe fitting (no text or symbols visible)2 Now Loosen off the valve flange nuts and insert the rubber washers provided. (There are 2 supplied with this product).

3 Fit the drain valve assembly to the bottom of the Mag Defender making sure the outlet is at the front of the assembly and being careful not to overtighten as this may cause damage.
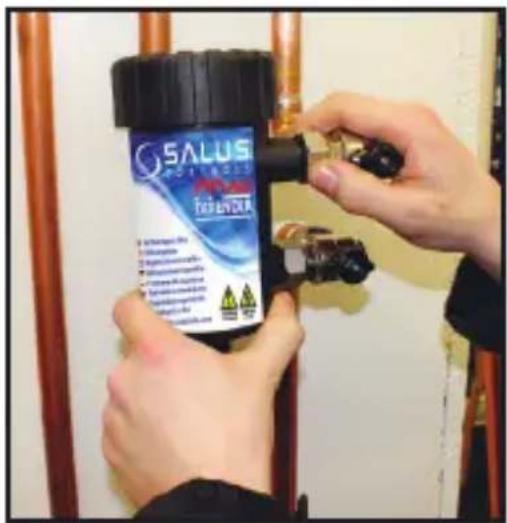
4 Loosely secure the Mag Defender to the valves.

5 Grip the Mag Defender and tighten the compression fittings being careful not to over tighten as this may cause damage.

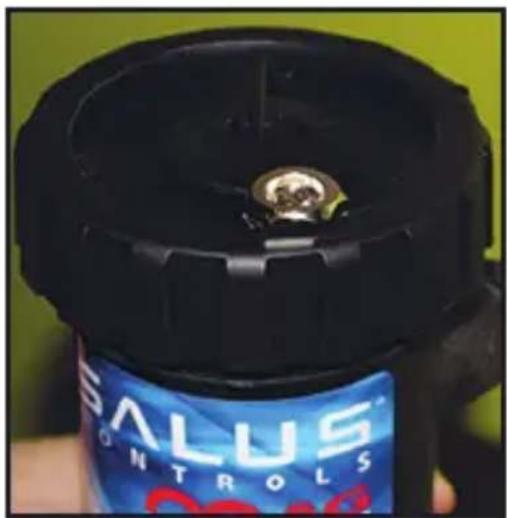
6 Now the heating system is ready to be filled, ensure the inlet and outlet valves are both in the open position, with the drain valve in the closed position, and then run the central heating system.
NOTE: Drain valve closed
natural_image
Close-up of a black and blue Balus Controls device with a metallic knob (no visible text or symbols on the device itself)7 Bleed through top air vent, bleed the MD22A again after the system has reached temperature. Take care as the water may be hot.
Always service (see page 8) the filter before leaving the premises. The Mag Defender spanner can be left with the customer.
SERVICING

1 Important – Before carrying out any servicing work, turn off electrical supply to the boiler and let the water cool down to a safe working temperature. Using the Mag Defender spanner provided turn both isolation valves to the OFF position.

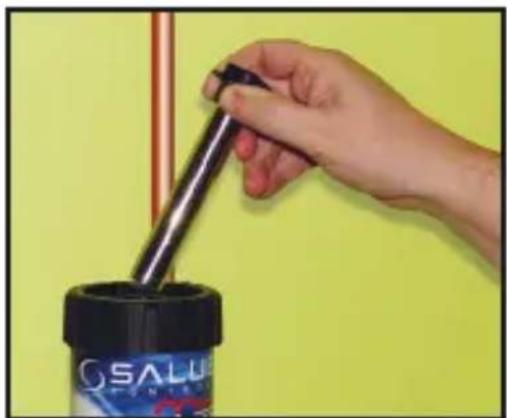
2 Remove magnet and put in a safe place.

natural_image
Close-up of hands using a tool to apply liquid into a bottle labeled 'OSALU CONCELLE DEFEND' against a yellow background (no text on bottle or background)
3 After approximately 30 seconds, remove drain valve cap and use to open drain valve. Have bucket or pipe connection ready to collect debris.


4 Open inlet to flush out debris.
natural_image
Hand using a tool to lift a cylindrical object into a container, against a plain yellow background (no text or symbols visible)5 Once all debris has been flushed re-insert the magnet.

6 Close drain valve using drain cap, ensure the cap is aligned correctly so the valve is fully closed.

7 Open outlet.
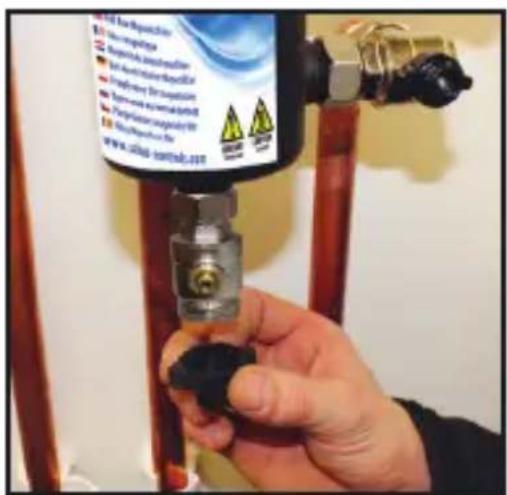
8 Replace cap on drain valve and run the central heating system. Bleed air through air vent if required.
CHEMICAL DOSING

1 After step 4 in servicing, close inlet valve.

2 Close drain valve using drain cap, ensure the cap is aligned correctly so the valve is fully closed.

3 Replace cap on drain valve.
natural_image
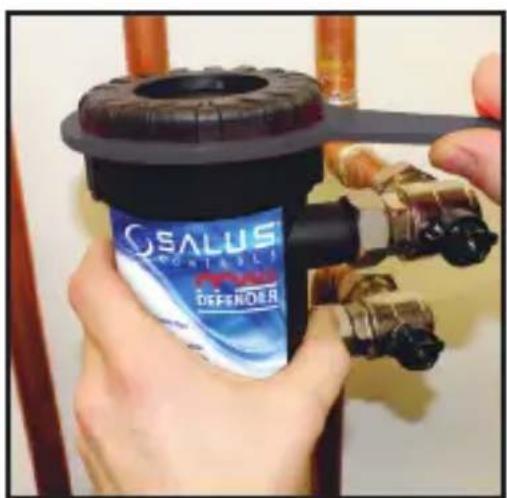
Hand holding a GasLUS Montable Offshore oil shaver with attached mechanical components (no visible text or symbols on the shaver itself)4 Using the MAG Defender spanner provided, carefully unscrew the lid.

natural_image
Close-up of hands using a black tool to lift a cylindrical object into a pipe against a yellow background (no text or symbols visible)5 Remove magnet cover and rinse under tap if required.

6 Pour a bottle of water treatment corrosion and scale inhibitor, we suggest SALUS Inhibitor. The canister will hold 500ml.

natural_image
Close-up of hands using a black tool to dispense liquid into a cylindrical container (no visible text or symbols)7 Re-insert magnet cover.

natural_image
Close-up of hands holding a black safety device with a blue 'OSALUS CONTROLS' label, next to a metallic tool (no readable text or symbols on the device itself)8 Now replace the lid onto the canister and tighten with the Mag Defender spanner. (Do not over tighten).

natural_image
Close-up of hands using a tool to apply material to a black cylindrical container labeled 'G SALU' against a yellow background (no text or symbols on the container itself)9 Re-insert magnet.

10 Open the isolation valves and start the heating system.

natural_image
Close-up of a black and blue Salus Controls device with a metallic connector (no visible text or symbols on the device itself)11 Bleed through top air vent, bleed the MD22A again after the system has reached temperature. Take care as the water will be hot.
Always service the filter before leaving the premises. The Mag Defender spanner can be left with the customer.
IMPORTANT
Ensure that the Standard Electrical Best Practice guidelines are followed when installing Mag Defender. A copy of these guidelines can be found at www.hse.gov.uk/electricity.
The inlet and outlet on the Mag Defender are reversible and there is no flow restriction.
Following installation, don't forget to complete the warranty card. Alternatively, complete the registration online at www.salus-tech.com.
Faulty components must be returned under the SALUS warranty process.
NOTES
QUESTIONS AND ANSWERS

Where can I fit the Mag Defender?

In order to achieve the best protection for the boiler, it is recommended that the Mag Defender is fitted between the last radiator and the boiler (see diagram on Page 3).

Which connection on the Mag Defender is the flow and which is the return?

The inlet and outlet on Mag Defender are reversible and there is no flow restriction.

How often do I service the Mag Defender?

Servicing is required once a year with the annual boiler service.

Can I use chemicals with the Mag Defender?

Yes, you can use any chemical on the market with Mag Defender, however
we recommend you use SALUS LX products with the Mag Defender.


How long will the Mag Defender last?

Mag Defender has been developed to last for the lifetime of the boiler, normally ten years. It provides continuous protection and comes with a five year warranty.

How do I isolate the valves?

Simply turn the valves to the marked OFF position using the spanner provided. Important: Remember to switch off the electrical supply to the boiler when servicing the Mag Defender.

Will the Mag Defender affect my pacemaker?

As with all magnetic products, if you have a pacemaker caution should be taken when handling the Mag Defender at all times. When the Mag Defender is installed, the magnetic field outside the canister is approximately one tenth of an average fridge magnet.
WARRANTY
SALUS Controls warrants that this product will be free from any defect in materials or workmanship, and shall perform in accordance with its specification, for a period of five years from the date of installation. SALUS Controls sole liability for breach of this warranty will be (at its option) to repair or replace the defective product.

Customer Name: ....
Customer Address: ....
Post Code:
Engineers Company: ....
For more products in the SALUS range visit...


www.salus-tech.com


natural_image
Close-up of a blue circular dial with measurement markings on a white surface against a blue background (no text or symbols visible)
natural_image
Close-up of a black industrial pump component with visible branding and mounting features (no readable text or symbols)Specification and contents

Also Supplied:
Mag Defender Spanner
Instruction manual including warranty form
www.salus-tech.com
Sales: Email: sales@salus-tech.com Tel: 01226 323961 Technical: Email: tech@salus-tech.com Tel: 01226 323961
SALUS Controls plc, SALUS House, Dodworth Business Park South, Whinby Road, Dodworth, Barnsley S75 3SP

Brand : Salus
Model : MD22A
Category : Filtre magnétique