43ePlay6100-F - Television Allview - Free user manual and instructions
Find the device manual for free 43ePlay6100-F Allview in PDF.


| Product Type | LED Television |
| Screen Size | 43 inches (109 cm) |
| Resolution | 1920 x 1080 (Full HD) |
| Display Technology | LED backlight |
| Refresh Rate | 60 Hz |
| Smart TV | Yes, built-in Wi-Fi |
| Operating System | Linux-based (Allview interface) |
| HDMI Ports | 3 x HDMI |
| USB Ports | 2 x USB 2.0 |
| Tuner | DVB-T2/C/S2 |
| Audio Output | 2 x 8W speakers |
| Power Consumption | 75W (typical) |
| Standby Power | <0.5W |
| Dimensions (without stand) | 96.5 cm (W) x 56.0 cm (H) x 8.5 cm (D) |
| Weight (without stand) | 6.8 kg |
| VESA Mount | 200 x 200 mm |
| Cleaning | Clean with soft, dry cloth |
| Safety Features | Auto power off after 4 hours inactivity |
Frequently Asked Questions - 43ePlay6100-F Allview
User questions about 43ePlay6100-F Allview
0 question about this device. Answer the ones you know or ask your own.
Ask a new question about this device
Download the instructions for your Television in PDF format for free! Find your manual 43ePlay6100-F - Allview and take your electronic device back in hand. On this page are published all the documents necessary for the use of your device. 43ePlay6100-F by Allview.
USER MANUAL 43ePlay6100-F Allview
Disassembly and Installation
Note: The pictures are only for reference.
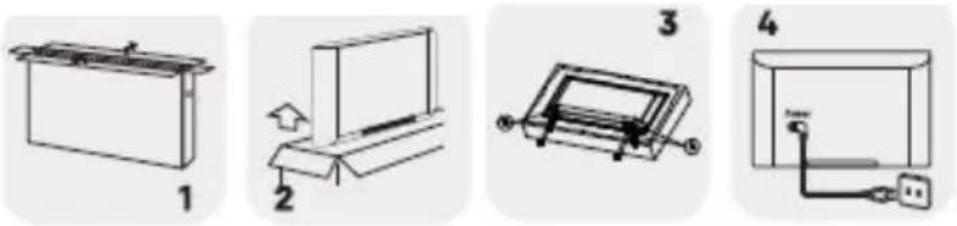
- Open the package.
- Take out the TV.
- Install the TV stands.
- Connect the power cord.
Accessories
Note: The pictures are only for reference.
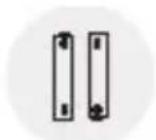
Batteries-2
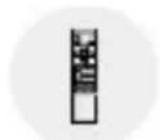
Remote Control
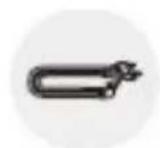
Power Cord
Warranty Card
Base Installation Manual
Quick Start Guide
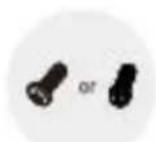
Screws-4
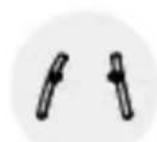
Base Stands-2
WARNING AND PRECAUTION
Read all of the instructions before operating the set. Keep these instructions well for later use.
Important Safety Instructions
- Read these instructions — All the safety and operating instructions should be read before this product is operated.
- Keep these instructions — The safety and operating instructions should be retained for future reference.
- Heed all warnings — All warnings on the appliance and in the operating instructions should be adhered to.
- Follow all instructions — All operating and usage instructions should be followed.
- Do not use this device near water — The appliance should not be used near water or in damp environments — for example, in a wet basement or near a swimming pool, and the like.
- Clean only with dry cloth.
- Do not block any ventilation openings. Install in accordance with the manufacturer's instructions.
- Do not install near any heat sources such as radiators, heat registers, stoves, or other apparatus (including amplifiers) that produce heat.
- Do not ignore the safety purpose of the polarized or grounding plug. A polarized plug has two blades with one wider than the other. A grounding plug has two blades and a third grounding prong. The wide blade or the third prong is provided for your safety. If the provided plug does not fit into your outlet, consult an electrician for replacement of the obsolete outlet.
- Protect the power cord from being walked on or pinched particularly at the plugs, convenience receptacles, and at the point where they exit from the apparatus.
- Only use attachments/accessories specified by the manufacturer.

- Use only with the cart, stand, tripod, bracket, or table specified by the manufacturer, or sold with the device. When a cart or rack is used, use caution when moving the cart/apparatus combination to avoid injury from tipping-over.
- Unplug the device during lightning storms or when unused for long periods of time.
- Refer all servicing to qualified personnel. Servicing is required when the device has been damaged in any way, such as the power supply cord or plug is damaged, liquid has been spilled or objects have fallen into the device, it has been exposed to rain or humidity, does not operate normally, or has been dropped.
- CAUTION: These servicing instructions are for use only by qualified service personnel. To reduce the risk of electric shock, do not perform any servicing other than that contained in the operating instructions, unless you are qualified to do so.
- Do not install this equipment in a confined or built-in space such as a book case or a similar unit, and keep proper ventilation conditions at open site. The ventilation should not be impeded by covering the ventilation openings with items such as newspaper, table-cloths, curtains etc.
- Please refer the information on rear enclosure for electrical and safety information before installing or operating the device.
• To reduce the risk of fire or electric shock, do not expose this device to rain or humidity.
- The device shall not be exposed to dripping or splashing and no objects filled with liquids, such as vases, shall be placed on it. Do not put near a dusty place.
- The terminals marked with the symbol “ 12 ” may be of sufficient magnitude to constitute a risk of electric shock. The external wiring connected to the terminals requires installation by an instructed person.
- To prevent injury, use the stand/wall-mount bracket to securely install this device on the table/wall in accordance with the installation instructions.
- Danger of explosion if the battery is incorrectly replaced. Replace only with the same or equivalent type.
- The battery (battery or batteries or battery pack) shall not be exposed to excessive heat such as sunshine, fire or the like.
- Excessive sound pressure from earphones and headphones can cause hearing loss. Listening to music at high volume levels and for extended durations can damage one's hearing. In order to reduce the risk of damage to hearing, one should lower the volume to a safe, comfortable level, and reduce the amount of time listening at high levels.
- The appliance coupler is used to disconnect the device. It shall remain readily operable.
- When not in use and during movement, please take care of the power cord set, e.g. tie up the power cord set with a cable tie or something similar. Protect it from sharp edges and the like that can cause abrasion to the power cord set. When put into use again, please make sure the power cord set is not damaged. If any damages are found, please contact the service person to replace the power cord set specified by the manufacturer or have the same characteristics as the original one.
- Pay attention to the environmental aspects of battery disposal.
- No naked flame sources, such as lit candles, should be placed on the device. To prevent the spreading of fire, keep candles or other open flames away from the device at all times.
- Warning: We take no responsibility for situations where the device is used other than as provided in the manual. Our company reserves the right to make changes in the content of the manual without making this public. These changes will be posted on the company website to the product it amends. The contents of this manual may be different from that in the product. In this case, the first one will be taken into consideration.
- If the device has the symbol ☐ in its rating label and the power cord has two pins, it means that the equipment is a Class II or double insulated electrical appliance. It has been designed in such a way that it does not require a safety connection to electrical grounding. (Only for Class II appliance)
- Warning for devices containing COIN/BUTTON CELL BATTERIES (The instructions below are only used for the apparatus containing a user-replaceable coin/button cell battery)
Do not ingest the battery, Chemical Burn Hazard
The remote control supplied with this product contains a coin/button cell battery. If the coin/button cell battery is swallowed, it can cause severe internal burns in just 2 hours and can lead to death. Keep new and used batteries away from children.
- If the battery compartment does not close securely, stop using the product and keep it away from children. If you think batteries might have been swallowed or placed inside any part of the body, seek immediate medical attention.
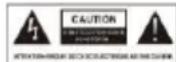
- This lightning flash with an arrowhead symbol within an equilateral triangle is intended to alert the user of the presence of a non-insulated “dangerous voltage” within the product’s enclosure that may be of sufficient magnitude to constitute a risk of electric shock.
- To reduce the risk of electric shock, do not remove cover (or back). No user serviceable parts inside. Refer to qualified service personnel.
- The exclamation point within an equilateral triangle is intended to alert the user to the presence of important operating and maintenance instructions in the literature accompanying the appliance.
• The following information is recommended to be included as far as applicable, where applicable:
\~ Refers to alternating current(AC).
Refers to direct current(DC).
☐ Refers to Class II equipment.
Refers to stand-by.
1 Refers to power ON.
§ Refers to dangerous voltage.
- WEEE Directive

Correct Disposal of this product. This marking indicates that this product should not be disposed in other household wastes throughout the EU. To prevent possible harm to the environment or human health from uncontrolled waste disposal, recycle it responsibly to promote the sustainable use of material resources. To return your used device, please use the return and collection items or contact the retailer from where the product was purchased. It can take this product for environmental safe recycling.
Positioning the TV
• Install the device on a solid, horizontal surface such as a table or desk. For ventilation, leave a space of at least 10cm all around the set. To prevent any injuries or unsafe situations, please do not place any objects on top of the set. This device can be used in tropical and/or moderate climates.
- Fix the rear enclosure to wall (only for some countries).
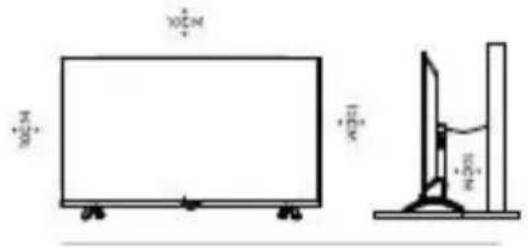
Note: The picture is only for reference.
- Warning: Never place a television set in an unstable location. A television set may fall, causing serious personal injury or death. Many injuries, particularly to children, can be avoided by taking simple precautions such as:
- Using cabinets or stands recommended by the manufacturer of the television.
- Only using furniture that can safely support the television.
- Ensuring the television is not overhanging the edge of the supporting furniture.
- Not placing the television on tall furniture (for example, cupboards or bookcases) without anchoring both the furniture and the television set to a suitable support.
- Not placing the television set on cloth or other materials that may be located between the television set and supporting furniture.
- Educating children about the dangers of climbing on furniture to reach the television or its remote control.
If your existing television set is being retained and relocated, the same considerations as above should be applied. (Only for the TV with mass exceed 7 kg)
Wall-hanging bracket
- An optional wall mount can be used with your television. Consult with your local retailer to purchase the recommended wall mount bracket. Carefully attach the wall mount bracket at the rear of the TV. Install the wall mount bracket on a solid wall perpendicular to the floor. If you are attaching the TV to other building materials, please contact qualified personnel to install the wall mount. Detailed instructions will be included with the wall mount. Please use a wall mount bracket where the device is adequately secured to the wall with enough space to allow connectivity to external devices.
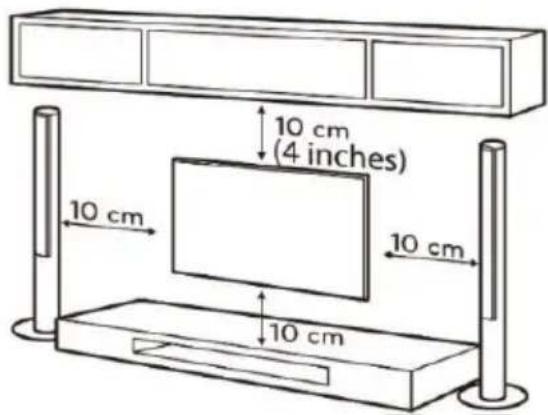
Note: The picture is only for reference.
- Disconnect the power before moving or installing the TV. Otherwise, electric shock may occur.
- Remove the stand before installing the TV on a wall mount by performing the stand attachment in reverse.
- If you install the TV on a ceiling or slanted wall, it may fall and result in severe injury. Use an authorized wall mount and contact the local retailer or qualified personnel. Otherwise it is not covered by the warranty.
- Do not over tighten the screws as this may cause damage to the TV and void your warranty.
- To prevent injury, this apparatus must be securely attached to the floor/wall in accordance with the installation instructions.
- Use the screws and wall mounts that meet the following specifications. Any damages or injuries buy misuse or using an improper accessory are not covered by the warranty.
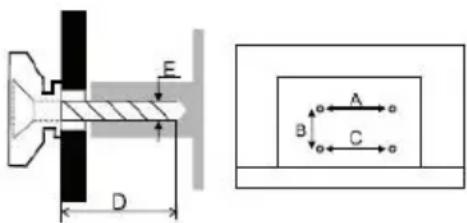
| Model Size: 43” | Top | Down | ||
| Screw | Diameter(mm) „E” | M6 | M6 | |
| Depth(mm) „D” | Max | 25 | 15 | |
| Min | 13 | 6 | ||
| Quantity | 2 | 2 | ||
| A*B*C | 200*200*200 | |||
Notes:
- The pictures are for reference only.
- For the TV sets with terminals towards the wall, in order to leave enough space to use the terminals, a gasket is needed together with each screw to fix the wall mount. It is a small hollow pillar whose internal diameter is 8mm, external diameter is 18mm and height is ≥ 30 mm.
Precautions for using Remote Control
- Use the remote control by pointing it towards the remote sensor. The items between the remote control and the remote sensor will interfere with its normal operation.
- Do not shake violently the remote control. Also, do not splash liquid on the remote control, and do not put the remote control in high humidity places.
- Do not place remote control under direct sunlight. It will cause deformation of the unit by heat.
- When the remote sensor is under direct sunlight or strong lighting, the remote control will not work. If so please change the lighting or the TV's position, or operate the remote control closer to the remote sensor.
Precautions for using battery
Improper use of the battery will cause leakage. So please follow the methods below and use carefully.
- Please note the batteries' polarity, to avoid short circuit.
- When the battery's voltage is insufficient and affects the use range, you should replace it with a new battery. Remove the batteries from the remote control unit if you do not intend to use it for a long time.
• Do not use different types of batteries (for example, Manganese and Alkaline batteries) together.
- Do not put the battery into fire and charge or decompose the battery.
- Please dispose batteries abiding by relevant environmental protection regulation.
- WARNING: The batteries (battery pack or batteries installed) shall not be exposed to excessive heat such as sunshine, fire or the like.
- Before Bluetooth searching, please make sure you have activated the pairing mode of the external Bluetooth devices. For the remote control you can press the ▶ and HOME buttons together to open its pairing mode. For other Bluetooth devices, please read their own instruction manuals for opening the pairing mode.
Basic settings
1. Connecting the remote with the TV.
For the models that require this step, before searching through Bluetooth, make sure you have activated the external Bluetooth devices in pairing mode.
In the case of the remote, simultaneously press the "LEFT" and "HOME" buttons to enter into pairing mode (the remote LED must flash when entering in pairing mode).
Select the name of the remote - TV BLE Remote - and press OK to pair.
For other Bluetooth devices, read their instruction manuals for the pairing.
2. Select menu language.
3. Select if you want or do not want to use an Android device to set up the TV.
Note: If you want to use an Android device to set up the TV, please proceed as indicated on the screen. If you do not want to use an Android device to set up the TV, continue with the following settings.
4. Select if you want or do not want to connect the TV to a WiFi network.
If you choose to connect the TV to the network, you must select the desired network – insert password – press OK and the TV is connected to the network.
Select if you want or not to connect to your Google account.
In order to connect to your Google account, select if you want to use "Phone/PC" or through "Using the remote" – Insert e-mail address and password – OK.
5. Read/scroll down the text to accept the Google Terms and Conditions and the Google Privacy Policy.
-
Choose if you want to allow Google or a third party the permission to use your TV location.
-
Choose if you want to allow Google to implicate you in improving the Android TV app. About the device features – press the right arrow from the remote to skip this step.
8. Select the country.
9. Turn on or off the LCN switch.
LCN (logic channel numbering according to the channel number given by the network provider):
- On (the channels will be arranged according to the cable provider);
- Off (the channels will be randomly arranged, in the order in which they are found);
- By default (the channels are arranged alphabetically).
10. Set the password – press OK – set desired password, with the exception of “0000”
Note: you can use the numbers from the remote
11. Select usage environment: Home or Shop.
Note: The Home mode is recommended for using at home, whereas the Shop mode is used for shop demonstrations, because it uses more power.
12. Chromecast: On/Off
13. Tuner mode:
- Select Antenna if you are using analogic programs or DVBT/T2
- Select Cable for CATV signal, given by your provider
- Select Satellite if you are using a satellite antenna.
14. Select cable operator:
DIGI: where scanning is done by predetermined rules and the channels are arranged by the provider's grid and cannot be rearranged.
OTHERS: where a complete scanning is done and the channels can be arranged by the user's preference.
Select if you wish or not to start the channel scanning. Connect a signal cable before starting the scan.
Note: If you do not want the channel scanning in this step, you can do it later, in the TV settings, from the global settings.
-
Set up is done. Have a pleasant use – Finish – press OK key from the remote.
-
Read the License Agreement for the end user – press right arrow from the remote to Accept.
Basic operation
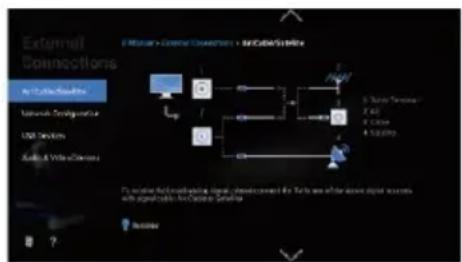
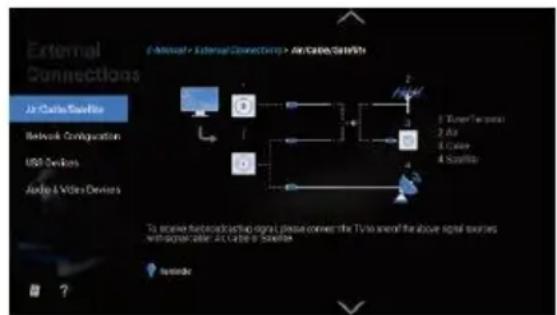
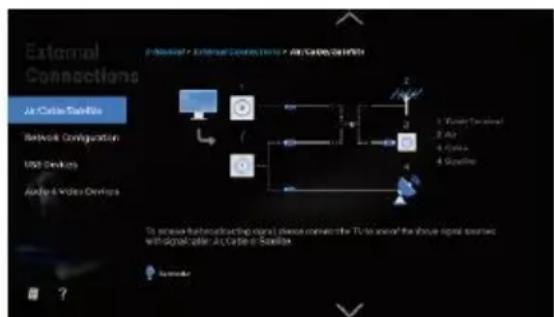
E-Manual
The E-manual is built into your TV and can be displayed on the screen.
To learn more about your TV features, access your E-Manual by referring to the following:
- Press the HOME button to access the home page.
- Press ◀ | ▶ | ▼ | ▲ and OK button to select "E-Manual" in "Apps".
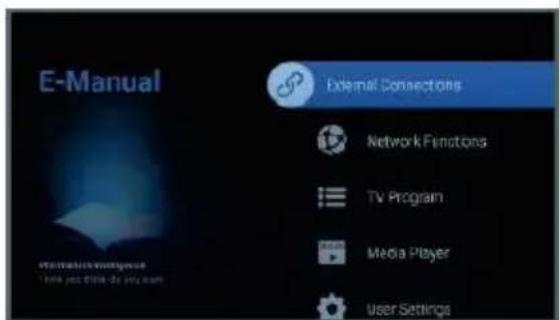
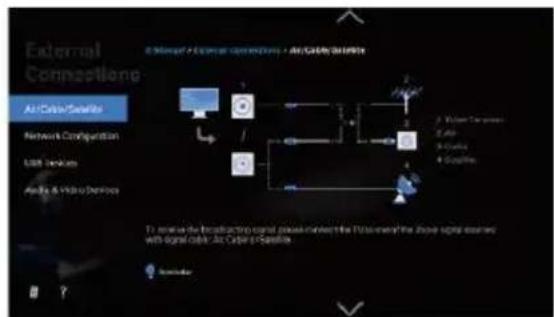
flowchart
graph TD
    A["External Connection"] --> B["AI/Color/Satellite"]
    B --> C["Network Configuration"]
    C --> D["USB Devices"]
    D --> E["Audio & Video Devices"]
    E --> F["Central Processing Node"]
    F --> G["Output"]
    style A fill:#f9f,stroke:#333
    style B fill:#ccf,stroke:#333
    style C fill:#cfc,stroke:#333
    style D fill:#fcc,stroke:#333
    style E fill:#cff,stroke:#333
    style F fill:#ffc,stroke:#333
    style G fill:#cfc,stroke:#333
Note: The picture is only for reference.
-
Remote Control: To check the detailed functions of the remote control, please select and enter
-
How to use E-Manual: Please select and enter, which can tell you how to check the E-Manual, the meanings of specific icons or contents shown in the E-Manual and so on.
Install Remote Control Battery
Place two AAA size batteries in the remote control's battery compartment, making sure to match the polarity markings inside the compartment.
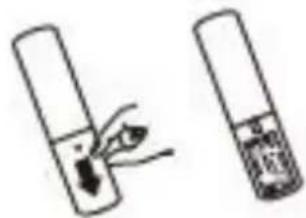
Note: The picture is only for reference.
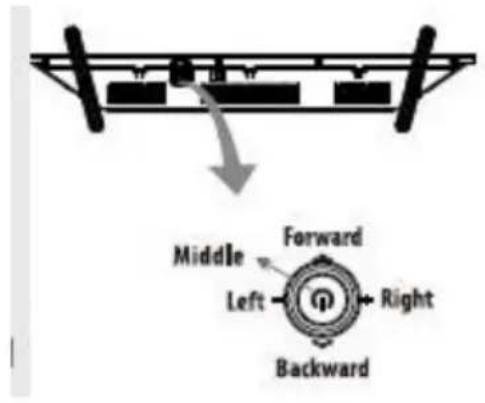
TV Control Button
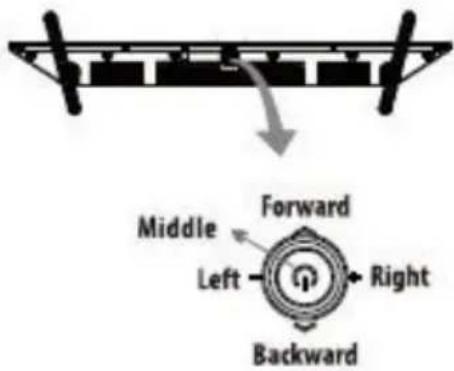
Note: The picture is only for reference.
Press Middle:
- In standby mode, press it to turn on the TV.
-
In working status,
-
Without any menu, short press it to access the quick menu shown in the following picture.
- With a menu, short press it to enter the selected item.
- Long press it to put the TV in standby mode.
Press Left/Right:
Adjust the TV sound volume or move left/right to select the desired item in the menu settings.
Press Backward/Forward:
Switch channels or move up/down to select the desired item in the menu settings.
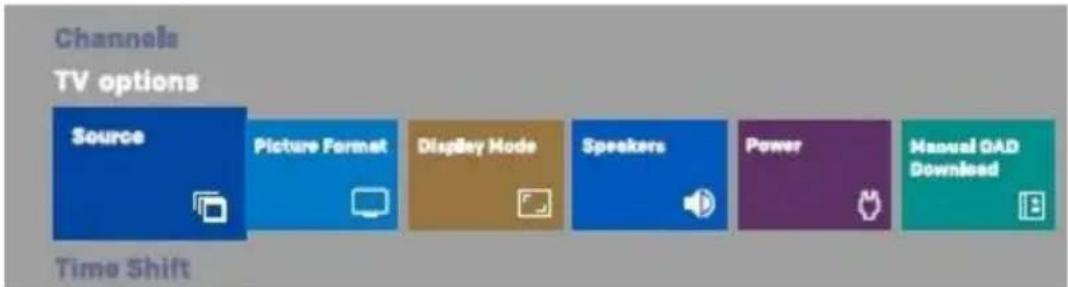
flowchart
graph LR
    A["Source"] --> B["Picture Format"]
    B --> C["Display Mode"]
    C --> D["Speakers"]
    D --> E["Power"]
    E --> F["Manual OAD Download"]
TROUBLESHOOTING
Before calling a service technician, please check the following for a possible cause of the symptom and some solutions.
General Problem/Solution
Remote control does not work
- Check the remote sensor on the remote control.
- Change the batteries.
- Batteries are not installed correctly.
- Main power is not connected.
Poor Signal
This is usually caused by interference from cell phones, walkie-talkie, automotive ignition system, neon, electric drill or other electronic equipment or radio interference sources.
Picture & Sound/Solution
No picture, no sound
- Check the signal source.
- Plug another electrical device into the outlet to make sure it is working or turned on.
- Power Plug is improperly connected to the outlet.
- Check the signal.
No sound, picture 0K
- If there is no sound, try to unmute or increase the sound volume.
- Open the sound menu and adjust 'Balance'.
- Check if a headphone has been inserted, and if so, disconnect the headphone.
Abnormal picture
No color or bad picture quality
- Adjust the color option in menu settings.
- Keep the TV at a sufficient distance from other electronic products.
- Try another channel, maybe it is an exit broadcasting signal problem.
Bad TV signal (Display mosaic or snowflakes)
- Check the signal cable and adjust the antenna.
- Fine tune the channel.
- Try another channel.
Multimedia Player/Solution
'This file is invalid' appears or audio is normal but video is abnormal
- The media file may be damaged, check if the file can be played on the PC.
- Check if video and audio codecs are supported.
'Unsupported audio' appears or video is normal but audio is abnormal - The media file may be damaged, check if the file can be played on the PC.
- Check if video and audio codecs are supported.
Network/ Solution (May not be available)
Network failure
- Check if the router works well.
- For models needing USB dongle to connect to internet, check if the USB dongle is inserted well.
- Make sure the TV has connected to the router successfully.
Browser/Solution (May not be available)
Web page cannot be displayed completely.
- Flash is not supported.
Browser is forced to be shut down.
- Web page includes too many large pictures, this leading to insufficient memory and closing the browser.
PREGĂTIRE
natural_image
Four circular icons showing different types of devices or tools: two vertical bars, one with a grid, one with a U-shaped tool, and one rectangular box (no text or symbols)natural_image
Four circular icons: rectangle, document with paper, flashlight with lens, and pen (no text or symbols)Manual Instal. Stand
Manual Utilizare
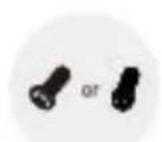
Şuruburi – 4
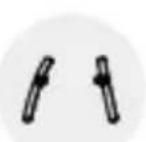
Standuri - 2
AVERTIZĂRI ȘI PRECAUȚII
| Dimensiune Model: 43” | Sus | Jos | ||
| Şurub | Diametru(mm) „E” | M6 | M6 | |
| Adâncime(mm) „D” | Max | 25 | 15 | |
| Min | 13 | 6 | ||
| Cantitate | 2 | 2 | ||
| A*B*C | 200*200*200 | |||
Notă:
flowchart
graph TD
    A["Network Configuration"] --> B["USB Devices"]
    B --> C["Audio & Write Devices"]
    C --> D["P100"]
    D --> E["4.52Gbps"]
    E --> F["Data transfer to network"]
    F --> G["Signal processing required by TCPs are further describing digital sources with signal-to-noise and control signals"]
    G --> H["Audio/Write Devices"]
flowchart
graph TD
    A["External Connections"] --> B["Air Cache Satellite"]
    B --> C["Network Configuration"]
    C --> D["USB Devices"]
    D --> E["Audio & Video Devices"]
    E --> F["To drive the wireless startup signal, please connect the TV to send the above digital sources with a Guide to Air Cache at Satellite"]
TV Gomb
flowchart
graph TD
    A["1. Network Terminal"] --> B["2. Air"]
    B --> C["3. System"]
    C --> D["4. System"]
    D --> E["5. System"]
    E --> F["6. System"]
    F --> G["7. System"]
    G --> H["8. System"]
    H --> I["9. System"]
    I --> J["10. System"]
    J --> K["11. System"]
    K --> L["12. System"]
    L --> M["13. System"]
    M --> N["14. System"]
    N --> O["15. System"]
    O --> P["16. System"]
    P --> Q["17. System"]
    Q --> R["18. System"]
    R --> S["19. System"]
    S --> T["20. System"]
- Disassembly and Installation
- Accessories
- WARNING AND PRECAUTION
- Important Safety Instructions
- Do not ingest the battery, Chemical Burn Hazard
- - WEEE Directive
- Positioning the TV
- Wall-hanging bracket
- Notes:
- Precautions for using Remote Control
- Precautions for using battery
- Basic settings
- Connecting the remote with the TV.
- Select menu language.
- Select if you want or do not want to use an Android device to set up the TV.
- Select if you want or do not want to connect the TV to a WiFi network.
- Read/scroll down the text to accept the Google Terms and Conditions and the Google Privacy Policy.
- Select the country.
- Turn on or off the LCN switch.
- Set the password – press OK – set desired password, with the exception of “0000”
- Select usage environment: Home or Shop.
- Chromecast: On/Off
- Tuner mode:
- Select cable operator:
- Basic operation
- E-Manual
- Install Remote Control Battery
- TV Control Button
- Press Middle:
- Press Left/Right:
- Press Backward/Forward:
- TROUBLESHOOTING
- General Problem/Solution
- Poor Signal
- Picture & Sound/Solution
- Abnormal picture
- Multimedia Player/Solution
- Network/ Solution (May not be available)
- Browser/Solution (May not be available)
- PREGĂTIRE
- AVERTIZĂRI ȘI PRECAUȚII
- Notă:
- TV Gomb
Brand : Allview
Model : 43ePlay6100-F
Category : Television