
EC271P - Video recorder LG - Free user manual and instructions
Find the device manual for free EC271P LG in PDF.
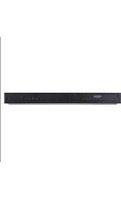


| Product Type | Video Cassette Recorder (VCR) |
| Model Numbers | EC271P, EC270P, EC290P |
| Dimensions (W x H x D) | 360 x 94.5 x 270 mm |
| Weight | 4.0 kg |
| Power Supply | 200-240V~, 50Hz |
| Power Consumption | Approx. 12 W (Energy saving mode: 3 W) |
| Video Head System | Rotary 2 heads, helical scanning |
| Tape Speed | 25.39 mm/sec (SP), 11.69 mm/sec (LP) |
| Tape Format | VHS, tape width 12.7 mm |
| Maximum Recording Time | 4 hours (SP, E-240), 8 hours (LP, E-240) |
| Rewind Time | Approx. 65 sec (E-180) |
| TV System | PAL/SECAM colour signal, CCIR standard (625 lines, 50 fields) |
| RF Output | UHF channels 22-68 (adjustable, default 36) |
| Connections | 2 SCART sockets (AV1, AV2 on LV2374), RF aerial input/output |
| Automatic Channel Memory System (ACMS) | Yes, with country selection |
| Timer Recording | 7 events, up to 1 month, daily/weekly options |
| Long Play (LP) Recording | Yes, up to double recording time |
| Child Lock | Yes, disables front panel buttons |
| Energy Saving Mode | Yes, clock display off, 3W consumption |
| On Screen Display (OSD) | Yes, with multiple languages |
| Auto Tracking | Yes, automatic and manual adjustment |
| NTSC Playback | Yes, on PAL TV |
| Self-Diagnosis (Video Doctor) | Yes |
| Operating Temperature | 5°C - 35°C |
Frequently Asked Questions - EC271P LG
User questions about EC271P LG
0 question about this device. Answer the ones you know or ask your own.
Ask a new question about this device
Download the instructions for your Video recorder in PDF format for free! Find your manual EC271P - LG and take your electronic device back in hand. On this page are published all the documents necessary for the use of your device. EC271P by LG.
USER MANUAL EC271P LG
Before connecting, operating or adjusting this product, please read this instruction booklet carefully and completely.
Model No. EC271P/EC270P/EC290P Part No. 3834RP0072C

Position your VCR so that no bright light or sunlight falls directly onto it.
Care should be taken not to expose your VCR to any unnecessary vibration, moisture, dust or heat.
During electrical storms it is advisable to unplug both the aerial cable and mains plug to prevent accidental damage to your VCR and TV.
Do not operate your VCR if it is damaged. Your VCR should not be repaired by anyone except qualified service personnel.
Never remove the back cover of your VCR as this can expose you to very high voltage and other hazards. If your VCR does not operate properly, please check the Troubleshooting Check List (see p.30). If your VCR still does not operate properly, unplug it and call your dealer.
The apparatus shall not be exposed to dripping or splashing and that no objects filled with liquids, such as vases, shall be placed on the apparatus.

This product is manufactured to comply with the radio interference requirements of EEC DIRECTIVE 89/336/EEC, 93/68/EEC and 73/23/EEC.

Just to name a few examples of the extraordinary features:
• ez (easy) operations (see p. 27) • Programmable 88 channel memory with Frequency synthesised tuner • ACMS (Automatic Channel Memory System) - 7 event/1 month programmable timer - Recording and playback for 16:9 Wide-screen format - LP - Long Play - recording & playback - Energy Saving function • ICON OSD (On Screen Display)
• NTSC playback on PAL TV • Logic & Picture Search - Child Lock • Auto Power on and Play • Real Time Counter - Quick Start function - Auto Tracking System

Welcome to LG
Thank you for buying this LG video cassette recorder Model LV2374/LV2373/LV2393.
| Description | 2 - 5 | Advanced Operations | 21 - 27 |
| Precaution & Features information | 2 | Timer Recording Using On Screen | |
| Remote Control Location & functions | 4 | Display | 21 - 22 |
| Your VCR's Controls | 5 | Energy Saving | 23 |
| Setting Up | 6 - 14 | On Screen Display | 23 |
| Connecting to your TV & Decoder (or Satellite) | 6 | Tape Counter Memory Stop | 24 |
| Child Lock | 24 | ||
| Tuning in a video channel On your TV | 7 - 8 | Wide Screen Compatibility (16:9) | 25 |
| How to Using the main menu | 9 | Memory Shut-Off | 26 |
| Tuning in TV Stations Automatically | 10 | Self-Diagnosis | 26 |
| Tuning in TV Stations Manually | 11 - 12 | ez (easy) operations | 27 |
| Changing the order of TV Stations | 13 | ||
| Deleting TV Stations | 14 | Helpful Hints | 28 - 30 |
| Basic Operations | 15 - 20 | Controlling the TV | 28 |
| Playback a tape | 15 - 16 | Tape Copying | 29 |
| Recording TV programmes | 17 - 18 | Specifications | 29 |
| To set the Colour System | 19 | Troubleshooting Check List | 30 |
| To set the Decoder (LV2374) | 19 | ||
| Setting the Clock Manually | 20 |
Remote Control Location & functions
To install batteries: Your REMOTE CONTROL HANDSET is powered by two AAA type batteries.
- To insert them, push the tab backwards and lift off the cover of the handset.
- Put the two batteries into the compartment making sure the + and - are correctly positioned.
- Replace the cover.


Your video recorder (VCR) is designed so that almost all of its features can be controlled from the REMOTE CONTROL HANDSET. Some features can also be controlled from the FRONT PANEL of the video recorder. The maximum operating distance that you may control your video recorder is about 7.5 metres (25 feet). It must also be within an angle of 30 degrees either side of the REMOTE SENSOR on the front of your video recorder.
To avoid damage from possible battery leakage, remove the batteries if you do not plan to use the remote control handset for an extended period of time. Do not use batteries of differing age or type. Always discard batteries safely.
POWER
To switch the VCR on or off
VCR
To control the video (see p. 28)
TV/VCR
VCR; to monitor, view playback or
view the VCR's tuner TV to watch TV or view another
TV; to watch TV or view another programme while recording
programme while recording another programme (see p. 18)
i(MENU)
Displays on screen menu
CURSORS/PROG./VOL
just tracking.
To control on screen display
information, channel up & down
ction and vertical tremble during
picture still. adjust the TV volume (see n. 28).
( p. 26 ). CLEAR
Reset tape counter to zero
LP
To select the recording speed of the
tape
REW
Rewinds the tape.
Reverse high speed picture play.
STOP
To stop the tape
Numbered buttons
To select channels.
Programme number information on
screen.

EJECT
Ejects tape
TV
To control the LG TV (see p. 28)
MUTE
To turn the TV sound on and off
(see p. 28)
AV/IV AV
Select input source for recording
& playback (see p.28)
OK/CLK/CNT Calls the on s
Calls the on screen display. (see p. 23 to 24)
(300 p. 25 to 24) CM SKIP
CM SKIP
To fast forward picture search
through 30 seconds of a
recording (see p. 16)
REC/ITR
Starts instant recording (see p. 17
to 18)
P/STILL
Switches to a still picture
FF
Winds the tape forwards
Forward high speed picture play
ez POWER OFF
(see p. 27)
PLAY
to play the tape
ez REPEAT
(see p. 2 CLOCK
C.LOCK Switches the Child Lock on and
Switches the Child Lock on and off (see p. 24)

Each button on your VCR has the same function as its corresponding button on the remote control handset.
MODEL : LV2374/LV2373
MODEL : LV2393
- Power (ON/OFF)
- Stop & Tape Eject
- Cassette Compartment
- VCR Display
- Remote Control Sensor
- REC/ITR (Instant Record)
- REW
- PLAY
- FF
- Pause/Still
- Channel Programme Selectors
Controls
Your VCR's
Connecting to your TV & Decoder (or Satellite)
Using your VCR very first time
The following picture will be displayed on the TV screen when you have just connected your video recorder for the very first time.
To tune TV stations, please follow steps 3 to 4 as shown in "ACMS" (see p. 10).


The guidance given on this page covers the most common forms of connection. However, please check your manufacturer's instruction books for specific information. Make sure all connections are made with both your VCR and additional appliance unplugged from the mains to avoid damaging your equipment. Connecting a VCR using a SCART lead is one of the best ways to achieve optimum sound and picture quality from video-tape playback.


Your TV receives signals from the video recorder (VCR) like another TV station.
You have to select a channel number on your TV and tune it in so that you may watch video
tapes. If you have used a SCART cable, then your TV should already have a dedicated video.
If you have used a SCART cable, then a channel built into it, usually called AV.
1
Make sure that you have correctly installed your VCR as described earlier in this book.
Press POWER to turn on your VCR.
Turn on your TV.

2
Insert a pre-recorded video tape into your VCR and press PLAY on the remote control.

Select a TV channel number on which you wish to watch videos.
Don't worry if you don't have a video-tape to play at this stage! If you switch your VCR on and continue stages 3 to 4, instead of seeing video playback, tune your TV until you see a bright blue screen.
3
Tune this channel until the video picture is sharp and the sound is clear.
If you have used a SCART cable you will not have to tune your TV, simply select the AV channel. The AV channel is already pre-tuned for optimum video playback on your TV.
4
Store this channel on your TV.
You will need to look at the TV instruction book if you do not know how to do this.
Video channel On your TV
Tuning in a
The output frequency of this video recorder (VCR) is set at UHF channel 36. If channel 36 is already used by another TV station, or if the picture is distorted, you can change the transmitter channel of your VCR. Stages 5 \~ 8 will show you how to change the output frequency of your VCR.
Make sure that you have correctly installed your VCR and successfully tuned in a dedicated video channel on your TV. If you do not tune in a dedicated video channel on your TV you will be unable to view and record video tapes!
5
Only carry out stages 5 \~ 8 if you cannot obtain clear video play-back as described in stages 1 \~ 4.
Select a TV channel number on which you wish to watch video's.
Make sure that your VCR is in standby by pressing POWER on the remote control. (only the clock will be displayed.)
6
Press PROG. ▲ or ▼ on the front of your VCR for more than 4 seconds.
RF36 will appear in the VCR display.
The following picture will be displayed on the TV screen.
7
Press PROG. ▲ or ▼ to select another video channel.
You can also set it to "OFF" if there is any interference when your TV is connected to the VCR with a SCART lead.
You may select any channel number between 22 and 68.
8
Select a TV channel number on which you wish to watch videos.
Tune this channel so that a bright blue screen appears.
Store this channel on your TV.
Press ⬇/1 on the front of your VCR when you have finished.


Using the main menu
How to
LANGUAGE
SELECTION
You can select the
language among English,
German, French,
Italian, Spanish, and
Dutch.
Tuning in TV stations automatically
Press POWER to turn on your VCR. Press i. The main menu will appear on the TV screen. Press ◀ or ▶ to select ACMS. Press OK. Press ◀ or ▶ to select COUNTRY. (A: Austria, B: Belgium, CH: Switzerland, D: Germany, DK: Denmark, E: Spain, F: France, I: Italy, N: Norway, NL: Netherlands, P: Portugal, S: Sweden, SF: Finland, Others) Press OK again to start the automatic tuning process. The TV station table will appear when tuning is complete. Press i to save your settings.

In certain areas of the country, broadcast signals may be too weak for your VCR's automatic tuning process to find or assign TV stations correctly.
You must tune in these weaker broadcast stations manually in order for your VCR to store them.

Press i.
The main menu will appear on the TV screen.
Press ◀ or ▶ to select PR SET.
Press OK.


Press i.
TV station table will appear.
Press ▲ or ▼ to select the programme number you want to tune. (for example, PR 09)
Press OK.


Press AV to select C (Standard stations) or S (Cable stations): C02 - C69, S01 - S41.

Enter the channel number of station that you want to tune with the numbered buttons or use ▲ or ▼ to find the required station.

Searching will stop when it locates a station.
Press ▶ to select MFT. Press ▲ or ▼ to adjust.


Manually
TV stations
Tuning in

Press ▶ to select STATION so that you may name your TV station.
Press OK.
The TV station name list will appear.


Press ▲ or ▼ to select a station name from the list.
Press OK to select it.


You can change a TV station name manually rather than using the "standard" names.
Press ▶.
Press ▲ or ▼ to select letters and numbers for the new station name.
Press ◀ or ▶ to move back and forth between characters.
Press OK.


Press I, confirm the station placement.
Press I again.
Your new TV station has now been tuned into your VCR.
If you wish to manually tune other stations repeat stages 1 - 8.


After tuning TV stations into your VCR you may wish to change the order in which they are stored without having to retune them again! The instructions given on this page will show you how you can simply move them into your desired order.

Press 1.
The main menu will appear on the TV screen. Press ◀ or ▶ to select the PR SET.
Press OK.


Press i.
Press ▲ or ▼ to select the programme number you want to move (for example, PR 03).
Press ▶


Press ▲ or ▼ to select the programme number you want to move to (for example, PR 05).


Press OK. The selected programme will be moved to the new programme number.
If you wish to move other TV stations repeat stages 1 - 4.
Press I to remove the menus from the TV screen.


TV stations
the order of
Changing
Deleting
TV Stations

How to select stored TV stations:
Stored TV stations can be selected in either of two ways. Press PROG. ▲ or ▼ to select different stations that are tuned into your VCR.

You may also directly select stations using the numbered buttons on the remote control.


After tuning TV stations into your VCR you may wish to delete a station.
The instructions given on this page will show you how to easily delete any unwanted TV stations.
1
Press i.
The main menu will appear on the TV screen. Press ◀ or ▶ to select the PR SET.
Press OK.


2
Press i.
Press ▲ or ▼ to select the programme number you want to delete.


3
Press
After a short while, the selected station will be deleted.
The following stations are resorted automatically.


4
Press i to remove the menus from the TV screen.
If you wish to delete other TV stations repeat stages 1 - 3.


You will only be able to load and eject video cassettes when your VCR is plugged into the mains. Your VCR may also playback recordings from NTSC tapes (on PAL TV).
Getting a better picture
When a cassette is inserted and playback started, the automatic tracking function works to get the best possible picture automatically. If the quality of the recording is poor, repeatedly press
▼ or ▲ on the remote control to manually adjust the tracking until any distortions have been removed. Press numbered 0 on the remote control to switch automatic tracking back on again.

Make sure that you have correctly connected your VCR as described earlier in this book.
Turn on your TV.
Press POWER to turn on your VCR.

Insert the video cassette into your VCR.
The video cassette should have the window side facing up and the arrow facing away from you.


Press PLAY to start playing your tape.

If you load a video cassette which has had its record protection tab removed playback of the cassette will start automatically.
AUTO TRACKING
Your VCR will automatically adjust the tracking to give the best picture quality.

Press P/STILL to still a picture.

Tapes can be paused for up to 5 minutes. After 5 minutes your VCR will stop the tape to prevent damaging the tape or your VCR.

Press PLAY to continue playing your tape.
Picture search:
During playback, press either FF or REW to rapidly wind the tape (7 times normal playback speed) and see where you are on the tape.
Logic search:
During fast forwarding or rewinding, press and hold FF or REW; the picture will be played back at 7 times normal playback speed.


Picture search will only continue for about 3 minutes, after which your VCR will return to normal playback. During picture search, logic search, and CM Skip, the sound is muted and there will be some noise streaks on the picture.

Press STOP to end playback.

Press EJECT.

If the end of the tape is reached, your VCR will stop playback automatically, rewind, stop, eject the tape, and place itself into power off mode.
CM (Commercial Message) Skip:
This feature enables you during playback of a tape to skip a commercial break in a few seconds, then resume normal playback.
While the tape is playing, press CM SKIP on the remote control to skip a commercial (or other programme material).

Repeatedly press CM SKIP to skip:
1 press: 30 seconds 2 presses: 60 seconds 3 presses: 90 seconds 4 presses: 120 seconds 5 presses: 150 seconds 6 presses: 180 seconds
OPR (Optimum Picture Response)
This feature automatically improves playback picture quality by adjusting your VCR to the condition of the tape.
Press i.
Press ◀ or ▶ to select OPR.
Press OK.

Press ▲ or ▼ repeatedly to select: OFF, SOFT or SHARP.
Please note you may only set OPR when playing a tape.

Your VCR allows you to make recordings using a variety of simple methods: Instant Timer Recording (ITR) start recording immediately for a set period of time or until the video cassette runs out.

Make sure that you have correctly connected your VCR as described earlier in this book.
Press POWER to turn on your VCR.


Insert a video cassette with protection tab into your VCR.
The video cassette should have the window side facing up and the arrow facing away from you.


Press ▲ or ▼ to select the programme number you wish to record.

You may also directly select programme number using the numbered buttons on the remote control.


If you wish to record directly from the SCART socket repeatedly press AV until the socket you wish to record from is displayed.

AV 1 Sound and Picture recording using the lower SCART socket on the back of your VCR.
AV 2 Sound and Picture recording using the upper SCART socket on the back of your VCR (LV2374).
TV programmes
Recording
If you do not wish to record on a tape (this can happen quite easily by accident!) remove the protection tab on the back edge of the video cassette.

It is possible to record on a video cassette with the record protection tab removed by covering the hole with self adhesive tape.

Remember you can record one programme while watching another by starting your instant recording, press TV/VCR to select TV mode and then selecting a different channel on your TV.


Your VCR incorporates Long Play (LP) which enables you to record up to twice the amount of time on a video cassette. For example an E-180 will record up to 180 minutes using Standard Play (SP); using LP you will be able to record up to 360 minutes. Please note there will be a slight loss in picture and sound quality when using LP.
5
Press LP if you wish to record in Long Play or Standard Play.
SP will produce improved picture and sound quality, however LP will provide twice as much recording time as SP. SP or LP will be displayed in your VCR display to let you know which you have selected.
6
Press REC/ITR to start recording.
RECORD will appear on the TV screen.
Press REC/ITR several times. Each successive press will increase the record time by 30 minutes until you reach a maximum of 9 hours.
7
Press P/STILL to avoid recording unwanted scenes.
Press P/STILL to continue recording.
Tapes can be paused for up to 5 minutes; RECP will be displayed when a tape is paused. After 5 minutes your VCR will stop recording to prevent damaging the tape or your VCR.
8
Press STOP to end recording.
Press EJECT.
EJECT will appear on the TV screen for a few seconds.


Your VCR is equipped with triple colour standard, you can play back a tape in PAL and MESECAM.
During playback your VCR detects the colour system automatically.
If there are colour problems, please select the colour system manually.

Press i.
The main menu will appear on the TV screen.
Press ◀ or ▶ to select the SYSTEM.
Press OK.


Press ▲ or ▼ to select according to the COLOUR system used.
AUTO: automatic colour selection.
PAL: PAL recordings MESECAM: MESECAM recordings.

Press i to remove the menus from the TV screen.


We have already described how to connect a decoder for pay-TV stations such as CANAL+ or PREMIERE on page 6. For recording an encoded station, you do not need to control anything. Just select the station and wait briefly until decoding starts.

Press i.
The main menu will appear on the TV screen.
Press ◀ or ▶ to select DECODER.
Press OK.


Press ▲ or ▼ to select.
ON: When the decoder is connected to the AV2 socket.
OFF: When another VCR is connected to the AV2 socket.
Press i to return to a TV picture.

To set the decoder (LV2374)
To set the colour system
Setting the clock
Manually
The clock in your VCR controls time and date settings for your VCR.
1
Press i.
Press ◀ or ▶ to select TIME DATE.
Press OK.
2
Use the numbered buttons on the remote control to alter the HOURS, MINUTES, DAY, MONTH and YEAR.
Please note your VCR uses a 24 hour clock. e.g. 1pm will be displayed as 13:00.
The day of the week will appear automatically when you enter the year.


3
If you make a mistake press ◀ or ▶ and enter the correct details.

4
Press i.
Your new clock settings are stored and will appear on your video recorder's display.


You may set up to seven timer record events within one month of the current date. PLEASE NOTE! Before setting the timer, make sure that you have set the VCR clock correctly and you know which stations you have tuned TV stations on your VCR.
1
Insert a video cassette with protection tab into your VCR.
The video cassette should have the window side facing up and the arrow facing away from you.

2
Press i.
Press ◀ or ▶ to select REC.
Press OK.


3
Press OK to start setting the timer record event.

Press the numbered buttons to enter the station that you wish to record.


4
When selecting stations 1 - 9, press 0 first, then the channel number (for example Stations 3).
You may also select Channels by pressing ▲ or ▼. Once selected press ▶.

If you want to record from either of the EURO SCART sockets on the back of VCR, press AV to select for correct display (AV1 or AV2 (LV2374)).


Timer record events Overlap...
Make sure that the preset times of the timer recording events do not overlap. If they do, the earlier programme will always be given priority.
Example:
Programme 1 is programmed to start at 16:00 and end at 17:00.
Programme 2 is programmed to start at 16:30 and end at 17:30.
(In this case, Programme 1 will be recorded in its entirety, but only the last 30 minutes of Programme 2 will be recorded.)
(This portion will not be recorded.)

If at a later date you wish to delete or change any of the settings in timer event memory you may do so without having to enter all the timer event information again. Simply display the timer event screen. Press ▲ or ▼ to select the event that you wish to delete or change.
Press ◀ to delete the event...or
Press OK to change; then press ◀ or ▶ to select; Station, Date, Start and End times and LP. Press ▲ or ▼ to enter the correct information.

Press the numbered buttons to enter the date of the programme.

If you press OK before entering the date you may select one of the following automated recording features. Press ◀ or ▶ to select, then press OK to confirm.
DLY To record every day (except Saturday and Sunday) at the same time. Weekly To record at the same time every week.


Press the numbered buttons to enter the recording start and end times of the programme that you wish to record.

Please note your VCR uses a 24 hour clock. e.g. 1pm will be displayed as 13:00. You may also select the the start and end times by pressing ▲ or ▼,


Press ▶ to select the recording speed.
Press ▲ or ▼ to select the desired tape speed (SP, IP, or LP).
IP mode determines how much tape is left and switches speed from SP to LP, if necessary, to complete recording the program.


Check that the timer event details are correct.
Press i twice.
If PLEASE CHECK is displayed, you have entered incorrect and will need to re-enter the data.
Press POWER to switch your VCR Standby.

TIMER will appear in the video recorder's display while your VCR waits to make the recording.

Your VCR has an Energy Save feature which if set will place your VCR into an economic power save where the clock display will disappear. If you have programmed a recording, this feature will not work.

Press ⏻/1 on the VCR.
The VCR and clock will appear on the video recorder's display.

Press ⏻/1 on the VCR again and your VCR will go into Energy Save.
All indicators will turn off in the video recorder's display.
Press ⏻/1 to switch off Energy Save.

You may easily display the current time or tape counter, amount of tape left, day, month, year, day of week, programme channel, and operational mode of your VCR will appear on the TV screen. If a recording is taking place these On Screen Displays will not be recorded onto the tape.

Press OK/CLK/CNT to display.


Press OK/CLK/CNT repeatedly to cycle through the display options. The tape counter and amount of tape left will appear if there is a tape loaded.

After 3 seconds, most of the On Screen Displays will clear, leaving only the clock or tape counter and the amount of tape left on the screen.

Press OK/CLK/CNT again to remove all displays from the TV screen.


1
Press OK/CLK/CNT. Press CLEAR to set the counter to 0:00:00.
Press PLAY or start recording.
The tape counter will display the actual play time in hours, minutes, and seconds.
2
Press STOP when playback or recording is complete.
Press REW.
The tape will rewind and automatically stop when the counter returns to 0:00:00.


The control buttons on the front of the VCR can be switched off so that your VCR can only be operated using the remote control.
1
Press C.LOCK.
SAFE will appear on the TV screen.
SAFE will flicker in your video recorder's display for a few seconds.
None of the buttons on the front of your VCR will work (except STOP/EJECT).
If any buttons on the front of your VCR are pressed, SAFE will appear in your video recorder's display and on the TV screen for a few seconds.
2
Press C.LOCK again to switch off the child lock.
OFF will flicker in your video recorder's display for a few seconds.

Your VCR can record and play back wide screen aspect ratio programmes (16:9). To record a wide screen format programme successfully, the correct type of wide screen signal must be broadcast by the TV station.

Switch on your VCR.
Press i.
Press ◀ or ▶ to select
16:9/4:3
Press OK.


Press ▲ or ▼ repeatedly
to select: AUTO, 4:3 or 16:9.

AUTO
Automatically plays back Wide-Screen
programmes as Wide-Screen and Normal
programmes as normal.
4:3
Only for playing back and recording Normal format recordings (4:3).
16:9:
Only for playing back and recording Wide-Screen format recordings (16:9).


Press i to remove the
menus from the TV screen.

To enjoy Wide-Screen
playback you must
connect your VCR to the TV using a SCART
TV using a SCART cable.


2 The tape will rewind to the beginning and your VCR will automatically switch itself off.


Self-Diagnosis (VIDEO DOCTOR) This feature informs you that there is a problem with your VCR. These error messages will appear on the TV screen and in your video recorder's display.
1 Switch on your VCR. Press i. Press ◀ or ▶ to select Dr. Press OK.


![graph TD A["1: Ez (easy) power off\nThe sequence of "Stop → Rewind → Eject → Power Off" is operated automatically by pressing ez POWER OFF."] --> B["2: Your VCR will be operated as the following;"] B --> C["STOP"] C --> D["REWIND"] D --> E["EJECT"] E --> F["POWER OFF"] G["1: Ez (easy) repe…](/content/2026/05/976662/images/02a9679df7391a2038f3de8010b1e68a5385080dd168f71768e9654f9d70a0f3.jpg)
Controlling
the TV

Your remote control is capable of your VCR as well as limited functions of LG TV. Follow the instructions below to operate for your LG TV.
1
Before using the remote control, press the VCR or TV button to select the device to be operated.
To switch the remote control mode (to operate a different device), be sure to press the VCR or TV button first.

2
The POWER, PROG.(▲/▼), VOL(◄/►), MUTE and TV AV buttons on remote control are activated for controlling LG TV.

3
Setting Remote Control Codes for LG TV
● This remote control supports two remote control codes for LG TV: Code 1 and Code 2. - When the unit is shipped from the factory, the remote control is set to Code 1. If your LG TV is not operated, set the remote control to Code 2. - To set the remote control to Code 2, hold down both the TV button and "2" number button on the remote control. (If the batteries in the remote control are replaced while the remote control is set to Code 2, the setting will revert Code 1.) - To set the remote control back to Code 1, hold down both the TV button and "1" number button on the remote control.

If the remote control does not operate your particular TV, try one of the other code or use the remote control originally supplied with the LG TV.
Due to the variety of codes used by manufacturer, OUR COMPANY cannot guarantee that the remote control will operate every model of the LG TV.

General
Power
Power consumption
Video Head System
Tape speed
Tape format
Maximum recording
time
Rewind time
Dimensions
Weight
Operating temperature
Operating in Timer
Video
Television system
Recording format
RF Reception
RF Output
Input level
Output level
Signal to noise ratio
RF Modulator
Audio
Input level
Output level
Track
Frequency response
Signal to noise ratio
200-240V~, 50Hz
Approx. 12 Watts (Energy saving
mode: 3 watts)
Rotary 2 heads, helical scanning
25.39 mm/sec (SP mode) 11.69 mm/sec (LP mode)
Tape width 12.7 mm (0.5 inch)
4 hours (SP mode, E-240 tape)
8 hours (LP mode, E-240 tape).
Approx. 65(±10) sec.(E-180 tape).
360 x 94.5 x 270 mm (W x H x D)
4.0 Kg
5°C - 35°C
24 hours display
CCIR standard (625 lines, 50 fields)
PAL/SECAM colour signal
PAL/MESECAM
PAL B/G, SECAM B/G
PALG
VIDEO IN (SCART type)
1.0 Vp-p, 75 Ohm, unbalanced
VIDEO OUT (SCART type) 1.0 Vp-p, 75 Ohm, unbalanced
1.0 Vp-p, 75 Ohm, unbalanced More than 43 dB
(1) January 1, 2017
UHF 22-68 (Adjustable).
AUDIO IN (SCART type)
-6.0 dBm, more than 10 kohms
AUDIO OUT (SCART type)
-6.0 dBm, less than 1 kohm
100 Hz - 10 kHz
100 Hz - 10 kHz (-6/+3 dB)
More than 45 dB (at or inside)
Specifications
Tape Copying

The design and specifications are subject to change without notice.

Video Head Cleaning
Dirt accumulating on the head after a long period of time can cause the playback picture to become blurred or broken up. High quality video cassette tapes will not normally deposit dirt onto the video head, but old or damaged tapes might.
Clean the video heads with a commercially available video heads cleaning tape.
| Symptom | Check points | Symptom | Check points |
| No picture & no sound | Is the mains plug plugged in and switched on?Is the TV switched on?Try another channel, maybe a weak signal.Check aerial is it plugged in? Check aerial, is the lead broken or damaged?Have you tuned in a dedicated channel on your TV to watch video on?If you have a Decoder (or Satellite) connected check Audio/Video sockets and connection cablesIf you have used a SCART lead to connect your VCR and TV have you selected the AV channel on your TV?Check tuning, carry out Automatic Tuning again | Videccassettecannot beinsertedRemotecontrol doesnot work | Is the cassette compartment empty?Are you trying to insert the cassette the right way round?Is the mains plug plugged in and switched on?Is the VCR switched onCheck the batteries in remote control. |
| The top ofthe playbackpicture isunstable | Is the video cassette damaged, have you tried using another one?Adjust the horizontal control on your TV.Check aerial is it plugged into VCR?Check aerial, is the lead broken or damaged?Check for local interferenceMake sure that you are using a dedicated TV channel on your TV. | ||
| No playback or poor picture | Are the TV channels tuned in properly?Have you tried using another cassette?Can you minimise the noise bars to an acceptable level with the 0 or ▲ or ▼ buttons? | ||
| TV programmes cannot be recorded | Can you get a picture on the TV?Are the aerial leads and special RF connector lead between your VCR and TV connected?Are the TV channels tuned in properly; are they tuned in order?Has the safety tab on the video cassette been removed to prevent recording?Try another station, maybe a weak signalCheck aerial is it plugged into TV? | Auto Playdoes notwork | Has the safety tab been removed from the video cassette? |

LG Electronics Inc.
P/N:3834RP0072C


- WELCOME TO LG
- REMOTE CONTROL LOCATION & FUNCTIONS
- CONNECTING TO YOUR TV & DECODER (OR SATELLITE)
- USING THE MAIN MENU
- HOW TO
- LANGUAGE
- SELECTION
- TUNING IN TV STATIONS AUTOMATICALLY
- DELETING
- TV STATIONS
- GETTING A BETTER PICTURE
- AUTO TRACKING
- PICTURE SEARCH
- LOGIC SEARCH
- CM (COMMERCIAL MESSAGE) SKIP
- OPR (OPTIMUM PICTURE RESPONSE)
- TV PROGRAMMES
- RECORDING
- TO SET THE DECODER (LV2374)
- TO SET THE COLOUR SYSTEM
- SETTING THE CLOCK
- MANUALLY
- TIMER RECORD EVENTS OVERLAP
- EXAMPLE
- CONTROLLING
- THE TV
- GENERAL
- VIDEO
- SPECIFICATIONS
- TAPE COPYING
- VIDEO HEAD CLEANING
Brand : LG
Model : EC271P
Category : Video recorder