
SR-JHS189 - Rice cooker PANASONIC - Free user manual and instructions
Find the device manual for free SR-JHS189 PANASONIC in PDF.


| Product Type | Rice Cooker |
| Brand | Panasonic |
| Model | SR-JHS189 |
| Capacity | Approx. 1.8 L (10 cups uncooked rice) |
| Power Supply | 220-240 V, 50/60 Hz |
| Power Consumption | Approx. 600 W |
| Dimensions (W x D x H) | Approx. 28 x 28 x 28 cm |
| Weight | Approx. 3.5 kg |
| Functions | Cook, Keep Warm, Reheat |
| Inner Pot Coating | Non-stick, removable bowl |
| Accessories | Measuring cup, rice paddle, inner lid |
| Cleaning & Maintenance | Wash inner pot with sponge; wipe outer body with damp cloth |
| Safety Features | Auto shut-off, overheat protection, lid lock |
| Spare Parts | Replacement inner pot, rice paddle, measuring cup available |
| Repairability | Easy access to components; service centers available |
Frequently Asked Questions - SR-JHS189 PANASONIC
User questions about SR-JHS189 PANASONIC
0 question about this device. Answer the ones you know or ask your own.
Ask a new question about this device
Download the instructions for your Rice cooker in PDF format for free! Find your manual SR-JHS189 - PANASONIC and take your electronic device back in hand. On this page are published all the documents necessary for the use of your device. SR-JHS189 by PANASONIC.
USER MANUAL SR-JHS189 PANASONIC
Operating Instructions
IH Electronic Rice Cooker / Warmer
Household Use
1.0 L model
Model No.
SR-JHS109
1.8 L model
Model No.
SR-JHS189

Illustrations of the SR-JHS109 are used throughout this Operating Instructions.
Contents
page
Safety Precautions 2
Notes on Use....6
Part Names/Accessories 7
Cooking Rice 8
Using the Programs Correctly....10
Using Different Programs 11
Cooking 12
Keeping Warm....13
- Keep Warm/Reheat
Using the Timer....14
●When the current time is incorrect
Recipes
●Congee/Casserole....15
●Brown Rice/Grains 16
●Cake/Steam. 17
Cleaning 18
●When using for the first time & on every use
● Regular checks
●When the cleanliness of the Rice Cooker is a concern
Thank you for purchasing this Panasonic product.
●This product is intended for household use only.
- Please read the operating instructions carefully to ensure safe and correct operation before use.
●Before use, be sure to read "Safety
Precautions" (Pages 2–5).
- Keep the operating instructions and the warranty for future use.
Warranty appended
Does my Rice Cooker have a fault? 20
What does this mean? 21
What to do when.... 22
Specifications 26
Safety Precautions
Please make sure to follow these instructions
In order to prevent accidents or injuries to the user, other people, and damage to property, please follow the instructions below.
■ The following charts indicate the degree of damage caused by wrong operation.

WARNING: Indicates serious injury or death.

CAUTION: Indicates risk of injury or property damage.
■ These symbols are classified and explained as follows:

This symbol indicates prohibition.

This symbol indicates requirement that must be followed.

WARNING

- Do not use the appliance if the power cord or power plug is damaged or the power plug is loosely connected to the power outlet.
(It may cause an electric shock, or fire caused by short circuit.)
→ If the supply cord is damaged, it must be replaced by a special cord or assembly available from the manufacturer or its service agent.
- Do not damage the power cord or power plug.
-
The following actions are strictly prohibited. Damaging, modifying, touching on or placing near heating elements, forcefully bending, twisting, pulling, pulled over sharp edges, putting heavy objects on top, bundling, pinching the power cord and carrying the appliance by the power cord.
(It may cause a fire or electric shock due to damage to the power cord or power plug.) -
Do not plug or unplug the power plug with wet hands.
• Always ensure that hands are dry before handling the power plug or switching on the appliance. (It may cause an electric shock or injury.)
- Do not insert any object in the Intake Vent, Exhaust Vent or gaps.
• Especially metal objects such as pins or wires.
(It may cause an electric shock, or injury caused by malfunction.)

-Exhaust Vent Intake Vent
- Do not wash the main body with water, immerse the appliance in water or splash it with water.
(It may cause an electric shock, or fire caused by short circuit.) → Please contact an authorized service center (as described in the Warranty) if water gets inside the appliance.

- Do not modify, disassemble, or repair the appliance.
(It may cause a fire, electric shock or injury.)
→ Please contact an authorized service center (as described in the Warranty) for a repair.

WARNING

- Do not use the appliance for any purpose other than those described in these instructions.
(It may cause a fire, burn, injury or electric shock.)
• Panasonic will not accept any liability if the appliance is subject to improper use, or failure to comply with these instructions.
● Do not expose your face close to the Steam Vent or the Steam
Cap or touch them with your hand while cooking or immediately after cooking.
- Pay extra attention to infants. (It may cause a burn.)

Steam Vent Steam Cap
- Do not put anything in the Inner Pan to block the hole in the Inner Lid.
(Steam may leak or cooking contents may jet out, causing a burn or injury.)
- Cooking with the ingredients or seasoning in a plastic bag.
• Cooking by using aluminum foil etc. to cover the ingredients directly.
- Do not carry the appliance while cooking.
(Steam may leak or cooking contents may jet out, causing a burn or injury.)

-Hole in the Inner Lid -Inner Pan
- Do not spill water or other liquid on the connector such as the instrument plug. (It may cause an electric shock, or fire caused by short circuit.)
- Do not let anyone lick the instrument plug.
- Pay extra attention to infants.
(It may cause an electric shock or injury.)

● This appliance is not intended for use by persons (including children) with reduced physical, sensory or mental capabilities, or lack of experience and knowledge, unless they have been given supervision or instruction concerning use of the appliance by a person responsible for their safety. Children should be supervised to ensure that they do not play with the appliance.
(It may cause a burn, injury or electric shock.)
● Use only a power outlet rated at 10 Amperes and alternating electric current at 220 Volts.
(Plugging other devices into the same outlet may cause electric overheating, which may cause a fire.) • Use only an extended cord rated at 10 Amperes at least.
- Insert the instrument plug and the power plug completely. (It may cause smoking, a fire or electric shock.)
● Clean the power plug regularly.
(A soiled power plug may cause insufficient insulation due to the moisture, and lint build-up, which may cause a fire.
→ Unplug the power plug, and wipe with a dry cloth.
Safety Precautions
Please make sure to follow these instructions
WARNING

- Close the Outer Lid slowly and firmly until it clicks.
( To prevent a bum or injury by steam leaking or the opening of) the Outer Lid.
• To ensure that the Outer Lid can be closed, remove foreign objects such as rice grains on the Clear Frame. Packing of the Inner Lid, Packing of the Outer Lid, the edge of the Inner Pan or around the Hook Button.
Packing of the Outer Lid
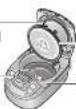
Packing of the Inner Lid
Clear Frame
- Keep the power cord out of reach of children.
- Do not let the power cord hang over the edge of the table or counterlop.
(Pulling on the power cord may result in the appliance falling from the table or countertop, causing an injury.)
● Always keep children away from the appliance.
(It may cause a burn, injury or electric shock.) • Children do not realize dangers that are likely to occur because of improper use of electrical appliances.
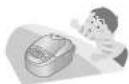
● Be careful not to trip over or become entangled with the power cord while in use. (Otherwise it may result in an injury, or the damaged power cord causing a fire or electric shock.)
● Use a power outlet which you are sure includes an earth.
- The power plug of this appliance is designed for a power outlet with an earth. (Use of a power outlet without an earth may result in a malfunction or electric shock due to electrical leakage.
- Stop using the appliance immediately and unplug when abnormality or breaking down occurs.
(It may cause smoking, a fire or electric shock.)
e.g. for abnormality or breaking down:
• The power plug and the power cord become abnormally hot.
• The power cord is damaged or power failure happens when the power cord is touched.
• The main body is deformed or is abnormally hot.
- Smoke emanates from the main body or a burning odor is detected.
• The main body is cracked, is loose or rattles.
• The fan in the bottom does not rotate while cooking.
→ Please contact an authorized service center (as described in the Warranty) for inspection or repair immediately.
CAUTION

● Do not expose the power plug to steam.
- Do not expose the power plug to steam when it is plugged in. (It may cause an electric shock, or fire caused by short circuit.)
(It may cause an electric shock, or fire caused by short circuit.) → When using a cabinet with sliding table, use the appliance where the power plug cannot be exposed to steam.
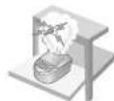
- Do not use a deformed Inner Pan or an unspecified pan. (It may cause a burn or injury due to overheat or malfunction.)
- Do not touch heating elements while the appliance is in use or after cooking.
• The Steam Cap, Inner Lid, metal parts, such as the Clear Frame, and Inner Pan.
(It may cause a burn.)
→ Use a dry cloth or oven mills when removing the Inner Pan while it is hot.

CAUTION

- Do not touch the Hook Button while moving the appliance.
(It may cause the Outer Lid to open, resulting in a burn.)
- Do not use the appliance on following places.
- Places where it may be splashed with water or near a heat source.
(It may cause an electric shock, electrical leakage or fire.)
- On an uneven surface of on non-ne
(It may cause an injury, Nice a well or furniture
- Near a wall of furniture. (It may cause discoloration, deformation or damage.)
→Open the Outer Lid in an area away from surrounding objects such as the wall or furniture.
- On aluminum sheet or electronic carpet.
(Aluminum materials may generate heat and cause smoking or a fire.)
- Do not turn on the appliance without rice and water inside.
(It may cause a bum.)
Hook Button

- Do not use the cord set (for an instrument plug and power plug) that is not specified for use with this appliance. Also do not transfer it. (It may cause an electric shock, electrical leakage or fire.)

- Be sure to hold the power plug or the instrument plug when unplugging the power plug or the instrument plug.
(Otherwise it may cause an electric shock, or fire caused by short circuit.)
● Always switch off and unplug the appliance from the power outlet when it is not in use or before removing the Inner Pan. (Otherwise it may cause a burn, injury, or electric shock or fire caused by short circuit due to the insulation deterioration.
● Unplug and allow the appliance to cool down fully before cleaning and storing it. • Do not move the appliance while it is hot. (Touching hot elements may cause a burn.)
- If using the appliance on a kitchen shelf etc., ensure that the steam is not confined within a closed space.
(It may cause discoloration or deformation.)
- If using a slide-out shelf, pull the shelf out fully to ensure that the shelf above is not exposed to steam.
- If using the appliance on a slide-out table etc., ensure that the shelf is capable of supporting 10 kg or more for the 1.0 L model, or 13 kg or more for the 1.8 L model. (It may cause a burn or injury due to the appliance falling.)
● Hold the Handle when moving the appliance. (Otherwise it may cause a burn or injury.)

-Handle
- Please consult a doctor if you are using an implanted pacemaker. - The operation of this appliance may affect your pacemaker.
If the power stops during use
Includes if the power plug is removed, or the power circuit breaker is tripped during use.
- If power is interrupted, the Rice Cooker will return to the state it was in before interruption.
- If the power stops for a long period of time, the Rice Cooker will return to the following state when power resumes.
Cooking: Continues cooking. Keeping warm: Continues keeping the rice warm.
The rice may be cooked in an unsatisfactory way.
*It will start cooking immediately if the set time of the timer has elapsed. The rice may not be cooked by the set time. For further details on 'Timer Setting Restriction', see P. 26.
Notes on Use Part Names/Accessories
To keep the product in good condition over the long term, please observe the following.
About the Rice Cooker
■Do not use the Rice Cooker on an IH hob.
(Doing so may damage the Rice Cooker or hob.)
■Do not use in a location subject to direct sunlight.
(Doing so may result in discoloration.)
■Do not use in a location (on a carpet, plastic bag,
aluminum foil, fabric etc.) where the bottom of the
Rice Cooker (the Intake and Exhaust Vents) is restricted.
(Doing so w
(Doing so may damage the Rice Cooker.)
■Periodically check the Intake and Exhaust Vents at the bottom of the Rice Cooker and then remove any
the bottom of the Rice Cooker and then remove any dust etc. (P. 19)
■Do not use the Rice Conker outdoors
Do not use the Rice Cooker outdoors. (An unstable power supply may cause the
( Air unstable power supply may cause the Rice Cooker to develop a fault
■Do not cover the top of the Rice
■ Do not cover the top of the Rice Cooker when it is in use.
●Dishcloths etc
/Steam may be confined near the Rice
Cooker and cause the Outer Lid or
buttons to deform or stop operating

■Do not use the Rice Cooker with foreign objects
such as rice grains or other dirt stuck to it
• Doing so may result in an error message being
displayed, and the rice being burnt or otherwise
• This may cause steam to look during cooking, and
This may cause steam to leak a cause damage to the appliance.
Brip part or holom. Parking of

(Inner Pan)
the Outer Ltd
around the
Around the Hook Button
Hook Bells

Packing of
the Inner Lid
-Pan Sensor
■Do not place the Rice Cooker near devices
vulnerable to magnetic fields.
●Radios, televisions, hearing aids etc.
(Noise may be heard or volume levels reduced.)
●IC cards/bank cards etc.
(Records held on the card may be lost or damaged.)
■Do not bring magnets close to the Rice Cooker.
(Doing so may result in faulty operation.)
■The Rice Cooker is not intended to be operated by
means of an external timer or separate
remote-control system.
About the Inner Pan
■Do not use the Inner Pan except in the Rice Cooker.

●Do not use on a gas hob or
IH hob, or in a microwave.

■Do not strike against hard objects.
( Doing so may scratch on )
dent the outer surface

■Observe the following to prevent peeling or scratching of the inner coating.
During preparation

●Do not use a whisk or
other tool when washing
the rice.

●Do not allow a metal
strainer etc. to contact
the inner coating.

When rice is cooked

●Do not mix salt or sprinkle etc. with
the rice while it is in the Inner Pan.
●Do not mix vinegar with the rice while
it is in the Inner Pan (for sushi etc.).
●Do not use a metal ladle
(for congee etc.).
●Do not tap or hit the Inner
Pan (when serving etc.).
When cleaning (P. 18–19)

not use as a washing-up bowl.
Do not put spoons or other
cutlery into the Inner Pan.
●After cooking with seasoning, do not
leave the food in the Inner Pan.
→After cooking casserole rice etc.
remove it from the Inner Pan as soon as possible and wash the Inner Pan.
do not use a dish dryer or
dishwasher/dryer.

●After washing, do not leave
on other crockery to dry.
●Do not wash or scrub with
an abrasive, a metal scourer,
a nylon scourer etc.
→ Wash using a soft sponge.

Do not wash using the scouring pad.
Note
-
●The following do not affect performance or human health.
[Outer surface] Shallow scratches, small dents or bumps.
[Inner surface] Peeling of inner coating.
→ A new Inner Pan can be purchased if the Inner Pan has changed shape or you are concerned
about the condition of the Inner Pan.
■Before using the Rice Cooker for the first time, please wash the accessories, Inner Pan, Inner Lid and Steam Cap. (P. 18–19)
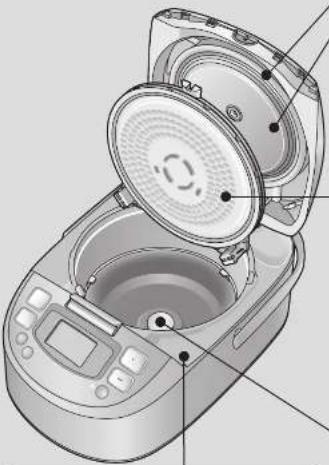
Inner Lid
●The Outer Lid cannot be closed if the
Inner Lid has not been attached.
Steam Cap (Taste Catcher)
Display

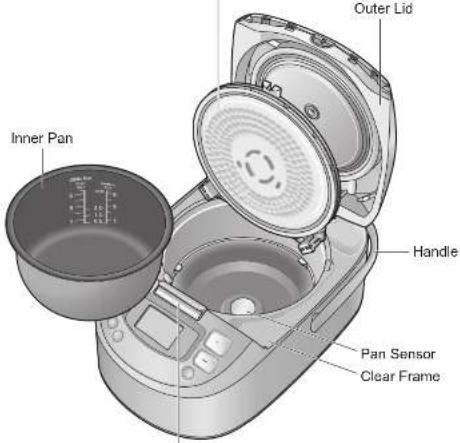
Hook Button
●Press the Hook Button to
open the Outer Lid.
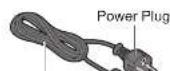
Power Cord
Instrument Plug
Cord Set
Accessories

Measuring Cup (1)
(Approx. 180 mL)
●Same for all rice.

Steaming Basket (1)


Rice Scoop (1) Ladle (1)
Note
● As an aid for the visually impaired, the "Start" and "Cancel/Off" buttons have raised parts * * and * ____.
Cooking Rice
Washing the rice and adding water Setting up Cooking
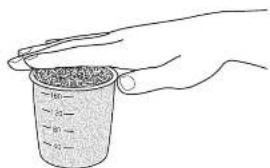
4 Measure the rice
●Measure by levelling off in the supplied measuring
(Approx. 180 mL/150 g per cup)
2 Wash the rice
① First, add plenty of water, stir, and quickly throw away the water.
② Repeat this process 2 to 5 times, stirring gently to wash the rice each time.
( It is acceptable if the cooking water is slightly cloudy.
③ Put the washed rice in the Inner Pan. (The rice can be washed in the Inner Pan.)
Precaution
●Do not leave the rice in a strainer for any length of time.
The rice grains may break, causing the rice to stick or burn when cooked.


Add water
- Add water up to the mark (Water Level) for the desired cooking program. (P. 10)
( Ensure that the Inner Pan is on a level surface and check the marks on both sides. - Add the correct amount of water for the number of cups of rice.
Adjust water by approximately 1 to 2 mm from the Water Level according to your preference.
(Adding too much water may cause liquid to spill out, increase the cooking time or adversely affect the flavor of the rice. - Use a little less water than indicated for new-crop rice.
• Use a little less water than indicated for harder rice and a little more than indicated for softer
rice.
●Ensure the rice is level.
●Soaking the rice is not required.
(When the "Start" button is pressed, the water will be absorbed automatically.
Using the "Jasmine Rice/Delicious"
program with 3 cups of rice
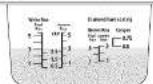
The Inner Pan in the illustration is the 1.0 L model.

4 Place the Inner Pan in the Rice Cooker
●Wipe away any water etc. on the outside of the Inner Pan.
5 Close the Outer Lid
- Check that the Inner Lid and Steam Cap are set in place. (P. 18–19)

6 Insert the Power Plug
- Please connect the Instrument Plug to the body first and then connect the Power Plug. Make sure that both plugs are firmly connected.
7 Check the program and press the "Start" button.
By default, the program is set as "Jasmine Rice/ Delicious" at the time of purchase.
When changing it. (P. 11)
Press

Cooking starts.

- When the buzzer sounds after cooking, the steaming stage has finished. Mix the rice immediately.
(This is to allow excess moisture to evaporate.)
●Automatically switches to the keep warm function (P. 13)

Measure out the water and rice correctly.

Wash the rice gently.
Heavy-handed washing of the rice can result in the grains splitting, causing the rice to stick or burn.

Use suitable water.
We recommend the use of tap water or filtered tap water.
●Use of alkaline water (with a pH higher than 9) may result in sticky or yellow-colored rice.
●Use of hard mineral water (with hardness of 100 or above) may result in dry or hard rice.

Things to look out!
●Where possible, choose recently processed rice.
●After opening a bag of rice, use it promptly.
- Keep rice in the fridge.

Using the Programs Correctly
![graph TD A["Program"] --> B["Pearl Rice\nJasmine Rice"] B --> C["Delicious\nThis is the default setting."] B --> D["Regular"] B --> E["Quick\nRice will be slightly harder.\nYou can soften the rice by\nsoaking it before cooking."] B --> F["1-2Person\n1.0 L model (0.5 to 1.5 cups)\n1.8 L model (1 to 2…](/content/2026/05/976391/images/14ff9ffb283a9c8a26a7541e73f8e4579b23c2201ba3128f432deeb783b51910.jpg)
*Adjust the amount of water to suit kinds of grains or your taste.
●There are two water levels for White Rice or Brown Rice: "Pearl Rice" and "Jasmine Rice." Select the correct water level to suit the type of rice being cooked.
●The actual cooking time will vary according to the amount of rice, amount of water, voltage, temperature, water temperature and rice quality.
●The cooking time for "Casserole", "Grains" will vary according to the ingredients used.
Using Different Programs
For "Cake" and "Steam" programs (P. 12)
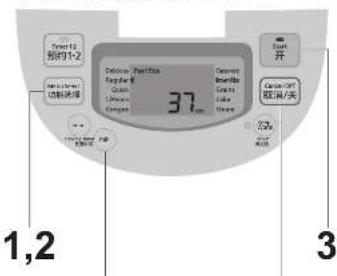
● To set the cooking time when selecting the "Congee" program in step 2
● To cancel an operation
2015年1月1日
Do I have to select a program every time?
●The "Delicious" and "Regular" settings under "Pearl Rice" or "Jasmine Rice" are stored.
For other programs, the following operation allows you to call up the most recently used program. (The "Cake" and "Steam" programs cannot be called up.)
Press and hold down

(for approximately 2 seconds)
●You will hear a "beep" as soon as you press the button, but continue to hold it down. You will hear a second "beep" and the most recently used program will appear.
2 Press

Notes

●"Clean" is displayed when it is selected.
- To make it easier to distinguish between decision points (for instance, the "Menu Select" button being at "Jasmine Rice/Delicious"), the beeping sound has been changed to "beep-beep".
●The display changes according the selected packing program. For the "Quick", "Brown Rice" and "Grains" programs, the Rice Cooker will display the current time until approximately 10 minutes before the rice is ready. It will then switch to show the time until the rice is ready.
●"Clean" is displayed when it is selected.
- To make it easier to distinguish between decision points (for instance, the "Menu Select" button being at "Jasmine Rice/Delicious"), the beeping sound has been changed to "beep-beep".
●The display changes according the selected packing program. For the "Quick", "Brown Rice" and "Grains" programs, the Rice Cooker will display the current time until approximately 10 minutes before the rice is ready. It will then switch to show the time until the rice is ready.
1 Select a type of rice
Press 功能选择
●The “◀” position moves each time the “Menu Select” button is pressed, and changes between “Jasmine Rice” and “Pearl Rice” after “◀” goes through one cycle.


2 Select a menu Press Menu Select and
Press 功能远程 and set "◀" to a menu.
- When the "Congee" program is selected, set the cooking time.

Allowable timer setting Unit
1 h-4 h 30 min
3 Press the "Start" button
Flashing
Press 开

Cooking starts.
- When the buzzer sounds after cooking, the steaming stage has finished. Mix the rice immediately.
(This is to allow excess moisture to evaporate.) ●Automatically switches to the keep warm function. (P. 13)
●To cook congee continuously, leave the Outer Lid opened and allow to cool the Rice Cooker without the Inner Pan for 5 minutes or more.
Notes


Cooking
Cook
1
Select a cooking menu
Press MeraSelect 功能选择,set “▶” to a cooking menu.
Flashing
Bake a cake : "Cake"
Steam : "Steam"
Flashing
2
Set the cooking time
| Menu Allowable timer setting Unit | ||
| Cake 40 min-50 min 1 min | ||
| Steam | 1 min-50 min | 1 min |
* Countdown of the steam setting time begins when the Rice Cooker starts releasing steam.
3
Press the "Start" button
Cooking starts.
- When cooking finishes, the Rice Cooker automatically switches to the keep warm function, so please turn off the Rice Cooker.
Note
Available capacity
| Menu | Model | |
| 1.0 L 1.8 L | ||
| Cake Dough Max 600 g Dough Max 900 g | ||
| Steam Quantity of water500 mL | Quantity of water600 mL | |
How to use the Steaming Basket
Steaming Basket
(五)本报告
Precautions
When steaming...
●Please do not block the hole in the Inner Lid with ingredients.
After cooking.
●Do not use the keep warm function.
(It may cause odor, rot or rusting the Inner Lid.)
●The inner surface of the Outer Lid and the vicinity of the Inner Pan will be hot after cooking, so please be careful when removing cooked food.
- When the Outer Lid is opened after cooking, water droplets may drop from the Inner Lid onto the Clear Frame.
→ Wipe these away with a well-wring cloth.
●Always wash the Inner Lid and the Steam Cap. Wipe the inner surface of the Outer Lid, the attaching portion of the Steam Cap and the Packing. When cooking recipes with a high meat content, the fats and proteins of the meat can contaminate the Inner Lid and inner surface of the Outer Lid.
(It may cause odor, rot or rusting the Inner Lid.)
Keeping Warm
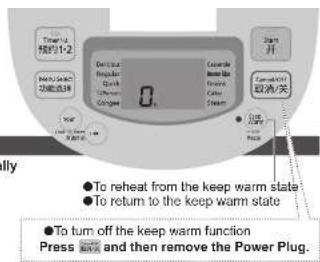
Keep Warm (Automatic)
- Once cooking is finished, all programs switch automatically to the keep warm function. (Please mix the rice immediately after cooking ends.)
| ●Delicious ●1-2Person | ●Regular | ●Quick | |
| The Rice Cooker will switch automatically to the keep warm function, but we do not recommend this. | ●CongeeIf congee is kept warm, it may become very sticky. | ||
| ●CasseroleUse of the keep warm function can also cause the Inner Lid to rust, and adversely affect the flavor of the rice. | |||
| ●Brown Rice ●GrainsFlavor can be adversely affected. | |||
| ●Cake ●SteamIt may cause odor, rot or rusting the Inner Lid. | |||
Precautions
●Do not use the keep warm function for more than 12 hours.
(To prevent odor or rice becoming yellow or dry.)
- Do not cancel the keep warm function or remove the Power Plug while leaving the rice in the Rice Cooker.
(To prevent odor and condensation.)
- Do not use the keep warm function with the Rice Scoop still in the Rice Cooker. (To prevent odor.)
Notes
- A keep warm time of up to 23 hours is displayed in 1 hour units ('0" is displayed for times of less than 1 hour). The keep warm function will continue for more than 24 hours, however the display will switch to the current time. - Removing the Power Plug without pressing the 'Cancel/Off' button will return to the keep warm function when the Power Plug is connected next.
Reheat (manual)
●Rice to be heated to high temperature from the keep warm state.
1
In the keep warm state Mix the rice
2
Press the "Keep Warm" (Reheat) button Lighting Press • Keep Warm

- When the buzzer sounds, mix the rice immediately. The rice is now ready to be eaten.
Notes
- Reheat cannot be used in the following situations. - When the rice is cold (buzzer beeps 4 times). - When the keep warm function is not in use. - Reheating two or more times will adversely affect the flavor of the rice.
Using the Timer Congee/Seerole
Timer
● Two timers can be set. (These are stored until changed.) You may find it convenient to store often used times, using for example, "Timer 1" for breakfast and "Timer 2" for your evening meal.
For example: Setting to 7:30 am
1 Check that the current time is correct ●If the time is incorrect, set it by following the procedure on the right.
2 Check the program (Set to desired program. Step 1–2 on P. 11) When using the timer for the "Congee" program, first set the cooking time and then press "Timer 1•2" button. Under timer mode, press "min" button to check the set cooking time.
3 Select "Timer 1" or "Timer 2" Press ● Each press of the button changes
●Each press of the button changes the selection. Timer 1 □ ↔ Timer
4 Set the time at which the rice is to be ready
Forward (units of 1 hour) Forward (units of 10 min)
●Hold down to cycle through time faster.
5 Press the "Start" button Flashing

When the buzzer sounds after cooking, the steaming stage has finished. Mix the rice immediately.
(This is to allow excess moisture to evaporate.) ●Automatically switches to the keep warm function. (P. 13)
34
●To redo an operation ●To cancel a setting 5
When the current time is incorrect
●The time is displayed in 24-hour clock format. 1 Insert the Power Plug
2 Hold down (for 1 second or more
● Release your finger when you hear a "beep".

3 Set the time End Forward

Forward (units of 1 min)
When the flashing stops, the time is set.
●Hold down to cycle through time faster.
●The time cannot be set in use such as cooking/the keep warm state/the timer and cleaning function settings.
- When the lithium battery runs down, removing the Power Plug will result in the loss of stored data such as the current time and timer settings. (P. 20) - The lithium battery is fixed inside the main body and cannot be replaced by the user.
For a replacement of lithium battery, please consult an authorized service center (as described in the Warranty).
■ To see the current time after setting the timer.
Lighting
Press Time-12 预约1.2 ●Press and hold to display.
Precaution
Notes
- Do not set the timer to 13 hours or longer (8 hours or longer when the water temperature is high). (Doing so may cause the rice to ferment and generate undesirable odor.)
- If there is insufficient time for the timer setting, the timer will not allow the setting, and cooking will start immediately. (See "Timer Setting Restriction" on P. 26.)
● The timer cannot be used with the "Quick", "Casserole", "Cake" or "Steam" program.
- When cooking with the timer, the time until the rice is ready is not displayed.
●When cooking with the timer, the rice may absorb excess water. This can result in the rice becoming soft or burnt.
→ Reduce the amount of water slightly if the rice is soft.
(Reduce water by approximately 1 to 2 mm from the Water Level.)
Pork and Century Egg Congee

Ingredients (Serves 2 to 3): White rice....½ cup Meat broth (cooled)....5 cups Century egg....1 pc Cooked lean pork....125 g
Seasoning: Salt ..... 1 tsp Pepper..... To taste Sesame oil..... To taste
Method:
① Marinate the cooked lean pork with the salt for 1 hour and then cut into thin strips. Dice the century egg and put aside for later use.
② Wash the white rice and then pour into the Inner Pan together with the meat broth and close the Outer Lid.
③Select the program and set cooking time to 1 hour and 30 minutes.
| Menu Select | Pearl Rice/Jasmine Rice |
| Congee |
①Press the "Start" button. ⑤When the buzzer sounds, press the "Cancel/Off" button, open the Outer Lid*, add the lean pork and century egg to the Inner Pan and close the Outer Lid. * When open the Outer Lid, please note that the cooked food gets hot
⑧Select the program and set cooking time to 1 hour.
| Menu Select | Pearl Rice/Jasmine Rice |
| Congue |
⑦Press the "Start" button. ⑧When the buzzer sounds, the congee may be served after it has been seasoned.
Chicken and Taro Casserole Rice

Important Information:
- When placing ingredients they cannot go above the maximum Water Level of "White Rice".
●Do not open the Outer Lid while cooking. (Cooking result may not be satisfactory.)
| Model | Amount of rice (Cup*) |
| 1.0 L | 1-3 |
| 1.8 L | 2-6 |
* Measuring Cup provided as an accessory.
Ingredients (Serves 4 to 6): White rice....3 cups Chicken meat (diced)....200 g Dried mushrooms (soaked & sliced)....5 pcs Taro (diced)....100 g Dried shrimps (soaked)....40 g Chinese black fungus (soaked & chopped)....Few pcs
Marinade: Light soy ....1 tsp Dark soy ....½ tsp Sugar ....1 tsp Salt ....½ tsp Starch ....1½ tsp
Sauce: B [Light soy....1 tbs Dark soy....1 tbs Sugar....½ tbs Sesame oil....½ tbs
Method:
① Season diced chicken meat with A. ② Deep fry diced taro root until
golden brown, drain and set aside.
③Wash the white rice and add water up to "Water Level: White Rice (Pearl Rice/Jasmine Rice) 3". Then place ①, ② and other ingredients evenly on the rice and close the Outer Lid. (Do not mix.)
4 Select the program.
| Menu Select | Pearl Rice/Jasmine RiceCasserole |
Press the "Start" button
When the buzzer sounds, add B and stir the rice immediately to loosen it.
Brown Rice/Grains
Brown Rice
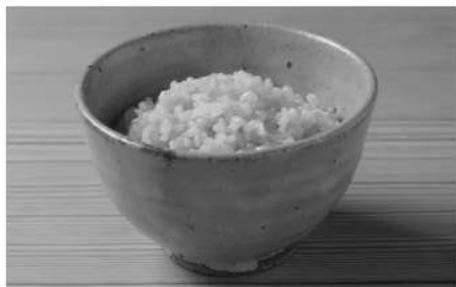
| Ingredients (Serves 4 to 6): | |
| Brown rice | 3 cups |
| White sesame | Small amount |
| Black sesame | Small amount |
Method:
① Gently wash the brown rice and remove debris and loose husk.
② Add water up to "Water Level: Brown Rice (Pearl Rice/Jasmine Rice) 3" and close the Outer Lid.
③Select the program
| Menu Select | Pearl Rice/Jasmine Rice |
| Brown Rice |
4Press the "Start" button.
⑤When the buzzer sounds, turn it over and mix to fluff.
⑧Put on a plate and sprinkle on some white and black sesame.
When cooking with other ingredients (meat, vegetables etc.)
●Measure the water level before adding the other ingredients.
●The rice takes a long time to cook so we recommend that you add firm ingredients such as beans etc.
If you wish to add dried ingredients, be sure to rehydrate them first.
●The quantity of other ingredients should not exceed 75 g per cup of rice.
(If too much other ingredients are added, the rice will not be cooked properly.)
- Cut the ingredients into small pieces and lay them on the rice without mixing. (If you mix the ingredients with the rice, the rice will not be cooked properly.)
Multigrain Rice
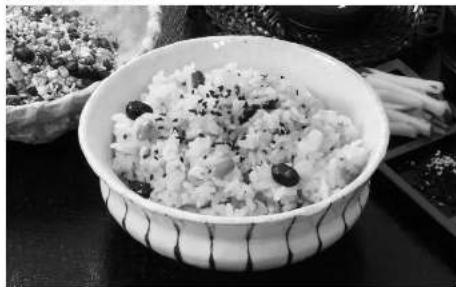
| Ingredients (Serves 4 to 6): | |
| White rice. | 3 cups |
| Multigrain. | 30 g |
Method:
①Wash the white rice and add water up to "Water Level: White Rice (Pearl Rice/Jasmine Rice) 3".
②Gently wash the multigrain and place on ①.
③Add another 30 mL of water and close the Outer Lid. * Adjust the amount of water to suit kinds of grains or your taste.
④Select the program
| Menu Select | Pearl Rice/Jasmine Rice |
| Grains |
⑤Press the "Start" button. ⑥When the buzzer sounds, turn it over and mix to fluff.
⑦ Arrange in a dish.
To cook multigrain rice..
- If you wish to add beans or dried ingredients such as cloud ear mushrooms, be sure to rehydrate them first.
●The proportion of the other grain in the rice is 10% or below.
(If too much other grain is added, the rice will not be cooked properly.) - If you wish to cook multigrain rice softer, you add some more water or soak it in water in advance.
Cake/Steam
Soy Milk Cake

③Pour ② into the Inner Pan and close the Outer Lid.
④ Select the program and set the cooking time to 40 minutes.
Menu Select Cake
⑤Press the "Start" button. ⑥When the buzzer sounds, remove the Inner Pan from the Rice Cooker and turn it upside down to remove the cake. Then allow to cool on plate or mesh.
Note: When using the 1.8 L model, increasing the quantity of ingredients 1.5-fold and setting the cooking time to 60 minutes is recommended for a nice, fluffy cake.
| Ingredients (Serves 4 to 6): | |
| Butter or salad oil.... Small amount | |
| Pancake mixture.... 200 g | |
| Eggs.... 2 pcs | |
| Soy milk.... 100 mL | |
| Salad oil.... 3 tbs | |
| Raisins.... 70 g | |
| (May be substituted for other dry fruit.) |
Method:
① Lightly smear the inside of the Inner Pan with butter or salad oil.
② Mix the ingredients until texture is smooth. (Do not mix in the Inner Pan.)
Salted Meat Steamed with Chinese Cabbage

Ingredients (Serves 4 to 6): Chinese cabbage....100 g Salted meat (Chinese ham)....35 g
Method:
① Break the Chinese cabbage into individual pieces and wash these pieces. Slice the salted meat and place aside.
② Arrange the individual pieces of cabbage in layers on the plate and layer the sliced salted meat at the very top (try to use the fatty parts of the meat). ③ Pour 2.5 cups of water in the Inner Pan.
④ Set the attached Steaming Basket, put "②" on it and close the Outer Lid
⑥Select the program and set the cooking time to 13 minutes.
Menu Select Steam
③Press the "Start" button.
Note:
When Chinese cabbage is unavailable, the heart of the bok choy may be used instead.
Precaution
●Please do not block the hole in the Inner Lid with ingredients.
Cleaning
For cleaning, remove the Power Plug and ensure that the main body has cooled down. The Packing attached to both the main body and the Inner Lid cannot be removed. Do not pull by using excessive force or puncture with sharp-pointed objects. (This may cause defects, delamination and damage.) After washing, wipe with a dry cloth.
(When using for the first time & on every use
● After removing, wash with a soft sponge.
*When using a washing-up liquid, check the precautions of it.

Inner Pan Inner LidRice StocklessingGap


Basket
● After using seasoning, such as casserole rice, wash promptly (Since this can cause odor, rot, or rust.)
Davon A. (1984)
Do not wash using the scouring pad.
the scouting pad.
Benzine, thinner,
polish, bleach.
antibacterial alcohol etc.
Dishwasher/
dryer or dish
dryer


Steam Cap
Remove and rinse.
Dw and dirt tend to remain
in the Steam Cap, so
wash it after each use
( This may cause )
{ood or no.
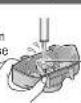

- Shaking makes
a noise because
of the ball inside.
- Do not disassemble.
Pull up to remove
②Remove the lever in the "→" direction to open.

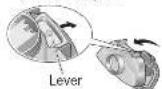
■ Attaching (In the reverse order to removing.)
①Insert the shaft and close
the lever securely until you have a "click".
you hear a "click".
@Attach on the Outer Lid
(2) Attach on the Outer Ltd. (Ensure that it has.)
been attached firmly.

Precautions
●Do not remove the Packing.
(This may cause steam to leak.)
●If the Packing came off, pleas
reattach along the groove.
Packing
inserts along
groove

Clear Frame
Wipe with a well-wrung cloth.
- Remove any dirt such as rice from the around the Hook Button.
Precaution
●Do not wash by pouring in water etc.
Inner Pan (P. 6) / Rice Scoop / Ladle / Steaming Basket
Wash with a mild washing-up liquid.
Precaution
●Do not use the Inner Pan as a
washing-up bowl.
/ Since this may result in
\peeling of the inner coating.

Inner Surface of Outer Lid / Packing
Wipe with a well-wrung cloth.
- Remove the Steam Cap and wipe the inner surface
of the Outer Lid, the attaching portion of the Steam
Cap and the Packing
Note
●May become dirty easily when increasing the amount
of water or cooking brown rice etc.
Inner Lid
Remove and wash with a mild washing-up
quid.
- Remove any dirt such as rice from
the packing
■Removing
old both Inner Lid knobs and pull
rward to remove the fixture

Inner Lid knobs
■ Attaching
Insert the Fixture into the groove at
the top.
Press on both Inner Lid knobs into
the Outer Lid until you hear a
"click

Precaution
●After cooking with seasoning (for casserole rice etc.
or baking a cake, please wash promptly.
(Since this may cause odor, rot, or rust.)
Pan Sensor
Wipe with a well-wrung cloth.
- If the dirt is hard to remove, dab a mild washing-up
liquid on a nylon scourer and wipe gently.
Note
Losing the Pan Sensor while they are dirty may result in
the rice being burnt or cooked in an unsatisfactory way.
Regular checks
●Check around once a month and clean if dirty!
Bottom of Rice Cooker
(Intake/Exhaust Vents)

Remove dust and foreign
objects using a vacuum
cleaner etc..
When the cleanliness of the Rice Cooker is a concern
Cleaning function
If odor is hard to remove or the dirt does not come off the Inner Lid or Steam Vent....
Preparation
① Pour water into the Inner Pan.
(1.0 L model, "Pearl Rice/Jasmine Rice" Water Level: 3-4) (1.8 L model, "Pearl Rice/Jasmine Rice" Water Level: 6-8)
② Put the Inner Pan in the main body and close the Outer Lid.
1 Display "Clean"
Press
055 功能选择
●'Clean" will be displayed
when selected.

2 Press the "Start" button

Press

Cleaning function starts.
2 When the buzzer sounds after
approximately 45 minutes, press the "Cancel/off" button
Press CancelOff 取消/关
●After the water in the Inner Pan has cooled, wash the Inner Pan, Inner Lid and Steam Cap.
Note
- It may not be possible to completely remove odor or dirt.
Does my Rice Cooker have a fault?
Check the following before asking for a service.
| Symptom | Check here! | Page | |
| Cooking | The remaining cooking time displayed stops.The cooking time is longer than expected. | ●If rice is cooked one after the other, the cooking time may lengthen (by up to around 45 minutes).●Is the quantity of water in the Inner Pan too much?If the quantity of water is increased, the cooking time may lengthen (by up to around 15 minutes). | — |
| Steam is emitted from a section other than the Steam Vent. | ●Is there rice stuck to the Packing of the Inner Lid, Packing of the Outer Lid or the edge of the Inner Pan?●Have you washed the Inner Lid each time and attached it correctly?●Is the Inner Pan deformed in some way?→ A new Inner Pan can be purchased if the Inner Pan has changed shape.●Is the Packing of the Inner Lid. Packing of the Outer Lid deformed, peeling, or torn?→ If steam leaks out, please contact an authorized service center (as described in the Warranty).●Did you close the Outer Lid slowly and firmly until it clicked? | —?19— | |
| Cooking/Keep Warm Sat | The Rice Cooker is making a noise. | ●Whirring noise Sound of fan that allows heat to escape operating.●High-pitched noiseSound of IH (induction heating).You may sometimes hear this when keeping warm.●Hissing noiseSound of steam jetting out.When opening/closing the Outer Lid●Clacking noise Sound of the ball in the Steam Cap rolling. | —— |
| Timer | Cooking begins immediately despite use of timer. | ●Is the current time correct?(The time is displayed in 24-hour clock format.)Has the timer been set to a time outside the "Timer Setting Restriction"? | 1426 |
| I have set the timer but cooking doesn't start. | ●When using the timer, the rice is soaked before cooking starts, and so the soaking time after cooking starts is shorter.Consequently, cooking starts slightly later than might be expected. | — | |
| The rice is not ready at the time set on the timer. | ●Is the current time correct?(The time is displayed in 24-hour clock format.)●Have you pressed the "Start" button?Has the timer been set to a time outside the "Timer Setting Restriction"? | 141426 | |
| Other | A button operation is not working. | ●Button operations will not work when e.g. cooking/the keep warm state/the timer and cleaning function settings are in use.·Press the "Cancel/Off" button. | — |
| The “Keep Warm” (Reheat) button does not respond. | ●Is the keep warm function switched off?●Is the rice cold? (Buzzer will sound 4 times.)Reheating is not possible if the temperature is 50 °C or lower. | — | |
| “7:30” always appears when inserting the Power Plug. | ●The lithium battery has run down.The current time or set time cannot be stored, however you can cook rice or use the keep warm function. The current time must be set on each occasion that you use the timer.The lithium battery is fixed inside the main body and cannot be replaced by the user.→ For a replacement of lithium battery, consult an authorized service center (as described in the Warranty). | — | |
| Sparks were visible at the Power Plug. | ●Sometimes small sparks can be seen when inserting or removing the Power Plug. This is a phenomenon particular to IH (induction heating) techniques and not indicative of a fault. | — |
■If you mistakenly add water or rice to the main body, please unplug and contact an authorized service center (as described in the Warranty).
What does this mean?
| Error message C | here! |
| U 10 | ●Is the Inner Pan set properly?1 Set the provided Inner Pan.2 Turn off the error message by pressing the "Cancel/Off" button.(After a while, the message turns off even without pressing the button.)3 Operate it again. |
| U 12 | ●Is the foreign object or dirt attached to the bottom part of the Inner Pan, Inner Lid or Pan Sensor? (P. 18-19)→ Remove the foreign object or dirt and press the "Cancel/Off" button.●Is there too much water in the Inner Pan?→ Press the "Cancel/Off" button.(Upon next cooking, reduce the amount of water slightly.) |
| U 14 | ●Has the keep warm function been in use for more than 96 hours?→ Press the "Cancel/Off" button. |
| U 15 | ●Is the Outer Lid open?●Is the Steam Cap fitted? (P. 18)→ If the Steam Cap has been lost, please purchase another one from an authorized service center (as described in the Warranty).Rice can be cooked or kept warm without the Steam Cap fitted, however• The rice may not taste good. (The rice will become dry if it is being kept warm.)• Congee may not cook properly.• Liquid may spill out.• "U15" may be displayed again after the rice has been cooked.●Is the foreign object or dirt attached to the inside of the Steam Cap?→ Remove the foreign object or dirt. (P. 18) |
| U25 | ●Is the Intake or Exhaust Vent on the bottom of the Rice Cooker blocked by dust etc.?→ Remove the dust using the following procedure.1Press the "Cancel/Off" button and then remove the Power Plug.2Once the body has cooled down, remove the Inner Pan.3 Remove the dust from the Intake/Exhaust Vents on the bottom of the Rice Cooker. (P. 19)●Is the Rice Cooker being used on a carpet etc.? (P. 6)→ Do not use the Rice Cooker in a location where the bottom of the Rice Cooker is restricted. |
If none of the methods described above brings an improvement, please consult an authorized service center (as described in the Warranty) for a repair.
| Hoo | ● Try removing the Power Plug and reinserting it. If "Hoo" appears again, this is a malfunction.→ Please consult an authorized service center (as described in the Warranty) and inform them of the error message (the two-digit number after the "H"). |
What to do when...
●The Rice Cooker does not have a fault.
Check the following before asking for a service.
Rice is too sticky (soft)
●Have you measured the quantities of rice and water correctly? (P. 8)
●Are there many broken grains in the rice?
●Have you been soaking the rice for long periods? (When using the timer, for example.)
→ When using the timer, try reducing the amount of water slightly.
(Reduce water by approximately 1 to 2 mm from the Water Level.)
- Are you using hot water to wash the rice?
- Are you using more than the specified amount of rice with the "1-2Person" program for small amounts? (1.0 L model: 0.5 to 1.5 cups, 1.8 L model: 1 to 2.5 cups)
- Are you using too much force to wash the rice?
(It may cause the rice grains to break, and the rice may be sticky when cooked.)
- When the rice is cooked, are you mixing it immediately? (To allow excess moisture to evaporate.)
- When cooking new-crop rice, are you using less water than normal?
(Reduce water by approximately 1 to 2 mm from the Water Level.)
- Are you leaving the rice in the strainer after washing?
(P. 8 This may cause the rice grains to break, and the rice may be sticky when cooked.)
- Do you prefer harder rice?
- Reduce the amount of water slightly.
(Reduce water by approximately 1 to 2 mm from the Water Level.)

Rice is too hard (dry)
●Have you measured the quantities of rice and water correctly? (P. 8)
●Are you using the "Quick" program?
- Do you prefer softer rice?
- Increase the amount of water slightly.
(Increase water by approximately 1 to 2 mm from the Water Level.)
- Try soaking the rice (for 30 minutes to 2 hours) before cooking.

Rice is burnt
●Has the rice been processed and washed properly?
●Is there dirt or foreign object stuck to the Pan Sensor, bottom of the Inner Pan or inside the main body?
●Are you using the timer? (Have you been soaking the rice for long periods?)
- Are you using too much force to wash the rice?
(It may cause the rice grains to break, and the rice may burn when cooked.)
- Are there many broken grains in the rice?
- Are you leaving the rice in the strainer after washing?
(P. 8 This may cause the rice grains to break, and the rice may burn when cooked.)
- Cooking rice with seasoning such as casserole rice may be easily burnt.
- A golden brown color on the rice at the bottom of the Inner Pan is not indicative of a fault.
→ If there is no improvement after following the above-described steps, see "If burning is
a concern". (P. 25)
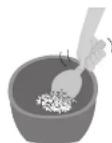
Symptom Check
Condensation appears.

- When the rice is cooked, are you mixing it immediately? (To allow excess moisture to evaporate.)
During the keep warm state, did you turn the keep warm function off with rice still in the Rice Cooker, or remove the Power Plug and leave the rice in the Rice Cooker?
●A layer of mist may form depending on the cooking method.
Rice smells odor.

● During the keep warm state, did you turn the keep warm function off with rice still in the Rice Cooker, or remove the Power Plug and leave the rice in the Rice Cooker? ● Has the keep warm function been in operation for 12 hours or more?
After cooking rice with seasoning such as casserole rice, an odor may remain.
- Did you add cold rice during the keep warm state? - Has the rice been processed and washed properly?
Are you using the keep warm function with the Rice Scopp still in the Rice Cooker?
Ave you using the Keep Warm Transition with the Rice Cooker in the Rice Cooker?
Failure to correctly clean and maintain your Rice Cooker may spoil the aroma
and flavor of your meals.
Continuing to use your Rice Cooker without cleaning it correctly will spoil your meals.
●After baking a cake, an odor may remain.
- When the smell becomes noticeable.
①Carefully wash the Inner Pan, Inner Lid and Steam Cap. (P. 18–19)
②If this does not remove the odor, use the cleaning function. (P. 19)
Rice has a yellow color.

●Has the keep warm function been in operation for 12 hours or more? ●Have you reheated repeatedly?
●Has the rice been processed and washed properly?
With certain types of rice, a yellow color will be left on the rice after cooking.
Rice is dry.

- Is the Steam Cap attached correctly? - Is there rice stuck to the Packing of the Inner Lid, Packing of the Outer Lid or edge of the Inner Pan?
●Is the Inner Pan deformed in some way?
→ A new Inner Pan can be purchased if the Inner Pan has changed shape.
Congee is sticky.

- Have you been soaking the rice for long periods? (When using the timer, for example.) - Have you used the keep warm function on the congee?
A thin film is formed.

- Are you washing the rice too much, causing the rice grains to break? - Has the rice been washed properly? ( Starch in the rice dissolves and reforms as a thin film on the surface. It is not harmful.
Rice sticks to the Inner Pan.

●Depending on the type of rice, soft rice or sticky rice may stick easily.
The surface of the cooked rice has a concave shape.

- Was the rice spread evenly before cooking? - This may be caused by the strong heating power that is characteristic of IH (Induction Heating). This is not a malfunction.
What to do when...

- If the suggestions on P. 22–23 do not bring about any improvement,
you can change the settings.
●Steps 2, 3 and 4 must each be completed within 16 seconds.
When no operation is performed for 16 seconds, the display returns
to the current time. (Setting cannot be made.)
→ Please restart the procedure.
●After the setting is completed, the display returns to the current time.
●To go back to the previous setting, follow the procedure again.
If you want to change the keep warm temperature.
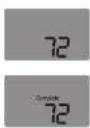
(74→76→72)

- Select "Quick" under "Pearl Rice" or "Jasmine Rice".


●The default setting is "74".
Set to '76'.
After 10 seconds (Setting ends automatically.)

When color has changed or it is dry

Set to '72'.
After 10 seconds (Setting ends automatically.)
If burning is a concern.
1 Press ▼ and set "◀" to "Quick".

- Select "Quick" under "Pearl Rice" or "Jasmine Rice".


After 10 seconds ( Setting ends automatically.)


To stop the buzzer sounding (end sound) during cooking, reheating and cleaning.
1 Press □️功能选择 and set “◀” to “Quick”.
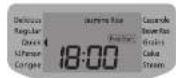
- Select "Quick" under "Pearl Rice" or "Jasmine Rice".
2 Press and hold down (for approximately 5 second

●This change does not switch off the button sounds.
Specifications
| Program | Approximate cooking time | Keep Warm Function* | Timer Setting Restriction | Cooking Capacity (Cup) () is for when other ingredients are added. | ||
| SR-JHS109 SR-JHS189 | ||||||
| Pearl Rice Jasmine Rice | Delicious 50 min | ○ | From 60 min before done | 0.5–5.5 1–10 | ||
| Regular 37 min | ○ | From 50 min before done | 0.5–5.5 1–10 | |||
| Quick 19 min–33 min | ○ | -0.5–5.5 1–10 | ||||
| 1-2Person 50 min | ○ | From 60 min before done 0 | 5–1.5 1–2.5 | |||
| Congee | Setting time 1 h–4 h | × | Cooking time + 1 min or more before done | 0.5–0.75 0.5–1.5 | ||
| Casserole 50 min | × | -1–3 2–6 | ||||
| Brown Rice | 1 h 35 min–1 h 55 min | × | From 130 min before done | 1–3 (1–2) 1–7 (1–5) | ||
| Grains | 45 min–55 min | × | From 60 min before done | 0.5–4 | 1–8 | |
| Cake | Setting time 40 min–60 min | × | - | Dough Max 600 g | Dough Max 900 g | |
| Steam | Setting time 1 min–60 min | × | - | Quantity of water 500 mL | Quantity of water 600 mL | |
* With “×”, the Rice Cooker will switch automatically to the keep warm function, but we do not recommend this. (P. 13)
| SR-JHS109 | SR-JHS189 | |
| Power source | 220 V ~ 50 Hz | |
| Rated power consumption | 1100 W | 1300 W |
| Rated capacity of the Inner Pan | 2.9 L | 4.8 L |
| Length of the Power Cord (approx.) | 1.5 m | |
| Weight (approx.) | 4.8 kg | 6.0 kg |
| Size (Width × Depth × Height) (approx.) | 25.5 cm × 36.6 cm × 21.0 cm (40.2 cm*) | 28.4 cm × 39.2 cm × 24.3 cm (45.6 cm*) |
* The height with the Outer Lid open.
- When the power is "Off", the Rice Cooker consumes approximately 1.9 W (plugged in state).
● This product is not suitable for use in countries or regions of differing mains frequency or voltage. Moreover, after sales service is not available.
| Checks | Check your well-usedIHElectronic Rice Cooker / Warmer! | |
 | Have you noticed any of the following?●The power plug and the power cord become abnormally hot.●The power cord is damaged or power failure happens when the power cord is touched.●The main body is deformed or is abnormally hot.●Smoke emanates from the main body or a burning odor is detected.●The main body is cracked, is loose or rattles.●The fan in the bottom does not rotate while cooking. | Stop using the Rice CookerTo prevent accidents, stop using the Rice Cooker, remove the power plug, and ask an authorized service center (as described in the Warranty) to perform inspection. |
Panasonic Corporation
Web Site: http://www.panasonic.com
© Panasonic Corporation 2019
EIG

方法:
上框罩板
用拧干的湿毛巾擦拭。
- 清除开盖按钮时+的饭碗等食物。
消防措施
请勿寄水倒入进行清洗。
内锅(第6页)/饭勺/粥勺/蒸笼
使用厨房专用中性洗涤剂清洗。
预防措施
© Panasonic Corporation 2019
日本印刷
RZ19YM10
F1119T0

Rice (Pearl Rice / Jasmine Rice)
材料(4-6人分量):
预防措施
- 清勿被食材阻塞盖加热板的孔
材料(4-6人份):
小宋菜....100g 肥肉(企中火、腊)...35g
方法:
上框
用榨乾水分的湿毛巾擦拭。
除開花按鈕周邊的米和等異物。
预防措施
勿將入進行問答。
內鍋(第6頁)/飯勺/粥勺/蒸篋
用溫和清潔劑清洗。
预防措施
© Panasonic Corporation 2019
日本印刷
RZ19YM10
F1119T0

1 お米をはかる
4 内釜を入れる
電源プラグを差す
2 調理時間をセットする
を押す。
材料(2\~3人分)
白米....½カップ
ポイント:
Rice (Pearl Rice / Jasmine Rice) 3
まで入れる。①、②と他の材料を平ち
にのせ、ふたを開める。(はぜない)
④コースを設定する。
Head Price(短米)
Fear Rice(饱和米) Learning Rice(普通米)
Menu Select Jasmine Rice(長木)
(コース選択) Casserole
(キャローレ)
⑤「Start(開始)」ボタンを担す。
一
无法识别
は下くにはりかさ油で、はくす。
© Panasonic Corporation 2019
Printed in Japan
RZ19YM10
F1119T0


- OPERATING INSTRUCTIONS
- CONTENTS
- SAFETY PRECAUTIONS
- WARNING
- CAUTION
- IF THE POWER STOPS DURING USE
- NOTES ON USE PART NAMES/ACCESSORIES
- ABOUT THE INNER PAN
- ACCESSORIES
- COOKING RICE
- WASHING THE RICE AND ADDING WATER SETTING UP COOKING
- 4 MEASURE THE RICE
- 2 WASH THE RICE
- PRECAUTION
- ADD WATER
- 4 PLACE THE INNER PAN IN THE RICE COOKER
- 5 CLOSE THE OUTER LID
- 6 INSERT THE POWER PLUG
- 7 CHECK THE PROGRAM AND PRESS THE "START" BUTTON
- USE SUITABLE WATER
- THINGS TO LOOK OUT
- USING THE PROGRAMS CORRECTLY
- USING DIFFERENT PROGRAMS
- DO I HAVE TO SELECT A PROGRAM EVERY TIME
- COOKING
- COOK
- 1
- 2
- 3
- NOTE
- PRECAUTIONS
- AFTER COOKING
- KEEPING WARM
- KEEP WARM (AUTOMATIC)
- NOTES
- REHEAT (MANUAL)
- USING THE TIMER CONGEE/SEEROLE
- TIMER
- WHEN THE CURRENT TIME IS INCORRECT
- METHOD
- IMPORTANT INFORMATION
- BROWN RICE/GRAINS
- WHEN COOKING WITH OTHER INGREDIENTS (MEAT, VEGETABLES ETC.)
- CAKE/STEAM
- MENU SELECT CAKE
- MENU SELECT STEAM
- CLEANING
- (WHEN USING FOR THE FIRST TIME & ON EVERY USE
- STEAM CAP
- CLEAR FRAME
- INNER PAN (P. 6) / RICE SCOOP / LADLE / STEAMING BASKET
- INNER SURFACE OF OUTER LID / PACKING
- INNER LID
- PAN SENSOR
- REGULAR CHECKS
- WHEN THE CLEANLINESS OF THE RICE COOKER IS A CONCERN
- CLEANING FUNCTION
- DOES MY RICE COOKER HAVE A FAULT
- WHAT DOES THIS MEAN
- WHAT TO DO WHEN
- RICE IS TOO STICKY (SOFT)
- RICE IS TOO HARD (DRY)
- RICE IS BURNT
- SYMPTOM CHECK
- SPECIFICATIONS
- PANASONIC CORPORATION
- 上框罩板
- 内锅(第6页)/饭勺/粥勺/蒸笼
- 材料(4-6人分量):
- 预防措施
- 材料(4-6人份):
- 方法:
- 上框
- 內鍋(第6頁)/飯勺/粥勺/蒸篋
- 1 お米をはかる
- 4 内釜を入れる
- 電源プラグを差す
- 2 調理時間をセットする
Brand : PANASONIC
Model : SR-JHS189
Category : Rice cooker