
RP1329AN7S - Washing machine LG - Free user manual and instructions
Find the device manual for free RP1329AN7S LG in PDF.


| Product Type | Freestanding Washing Machine |
| Model | RP1329AN7S |
| Brand | LG |
| Installation Type | Freestanding |
| Capacity (kg) | 9 kg |
| Maximum Spin Speed (rpm) | 1400 rpm |
| Dimensions (H x W x D) (mm) | 850 x 600 x 600 |
| Weight (kg) | 67 kg |
| Energy Efficiency Class | A+++ |
| Washing Performance Class | A |
| Spin Drying Efficiency Class | B |
| Noise Level Wash (dB) | 52 dB |
| Noise Level Spin (dB) | 74 dB |
| Annual Water Consumption (L) | 9900 L |
| Annual Energy Consumption (kWh) | 200 kWh |
| Motor Type | Inverter Direct Drive |
| Steam Function | Yes (TrueSteam) |
| AI DD (Artificial Intelligence Direct Drive) | Yes |
| Display | LED |
| Child Lock | Yes |
| Delay Start | Up to 19 hours |
| Self-Cleaning | Yes (Tub Clean) |
| Smart Diagnosis | Yes |
Frequently Asked Questions - RP1329AN7S LG
User questions about RP1329AN7S LG
0 question about this device. Answer the ones you know or ask your own.
Ask a new question about this device
Download the instructions for your Washing machine in PDF format for free! Find your manual RP1329AN7S - LG and take your electronic device back in hand. On this page are published all the documents necessary for the use of your device. RP1329AN7S by LG.
USER MANUAL RP1329AN7S LG
Before beginning installation, read these instructions carefully. this will simplify installation and ensure that the dryer is installed correctly and safely. leave these instructions near the dryer after installation for future reference.
MODEL
RP1329AD1S / RV1329AD1S
RP1329AD5S / RV1329AD5S
RP1329AD6S / RV1329AD6S
RP1329AN4S / RV1329AN4S
RP1329AN7S / RV1329AN7S
RP1329AN1S / RV1329AN1S
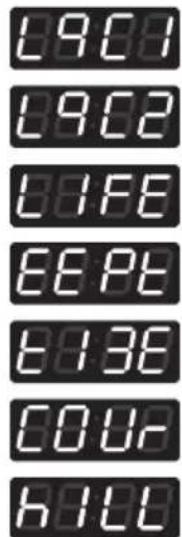
RP1329A4S / RV1329A4S
RP1329A7S / RV1329A7S
RP1329A1S / RV1329A1S
PRODUCT FEATURES
OUTSTANDING PERFORMANCE
The dryer features the largest capacity, quick drying times, quiet operation, and an energy-saving system.
ARTISTIC DESIGN
Modern front panel look and big clear glass door make your dryer look stylish
EASY OF USE
An entire selection of user-friendly functions makes operating the dryer easy.
ULTRA CAPACITY
The larger drum enables better tumbling and less tangling and wrinkling of the laundry.
IMPORTANT SAFETY INSTRUCTIONS
READ ALL INSTRUCTIONS BEFORE USE
WARNING
For your safety, the information in this manual must be followed to minimize the risk of fire or explosion, electric shock, or to prevent property damage, Injury to persons, or death.
Your Safety and the safety of others is very important.
We have provided many important safety messages in this manual and on your appliance.
Always read and obey all safety messages.

This is the safety alert symbol.
This symbol alerts you to potential hazards that can kill or hurt you and others.
All safety messages will follow the safety alert symbol and either the word DANGER, WARNING, or CAUTION.
These words mean:
DANGER
You will be killed or seriously injured if you don't immediately follow instructions.
WARNING
You can be killed or seriously injured if you don't follow instructions.
CAUTION
You may be slightly injured or cause damage to the product if you do not follow instructions.
All safety messages will tell you what the potential hazard is, tell you how to reduce the chance of injury, and tell you what can happen if the instructions are not followed.
This appliance can be used by children aged from 8 years and above and persons with reduced physical, sensory or mental capabilities or lack of experience and knowledge if they have been given supervision or instruction concerning use of the appliance in a safe way and understand the hazards involved. Children shall not play with the appliance. Cleaning and user maintenance shall not be made by children without supervision.
Children of less than 3 years should be kept away unless continuously supervised.
IMPORTANT SAFETY INSTRUCTIONS
READ ALL INSTRUCTIONS BEFORE USE
BASIC SAFETY PRECAUTIONS
WARNING
To reduce the risk of fire, electric shock, or injury to persons when using this appliance, follow basic precautions, including the following:
- Read all instructions before using the dryer.
- Before use, the dryer must be properly installed as described in this manual.
- Do not place items exposed to cooking oils in your dryer. Items contaminated with cooking oils may contribute to a chemical reaction that could cause a load to catch fire.
- Do not dry articles that have been previously cleaned in, washed in, soaked in, or spotted with gasoline, dry-cleaning solvents, or other flammable or explosive substances as they give off vapors that could ignite or explode.
- Do not reach into the dryer if the drum or any other part is moving.
- Do not repair or replace any part of the dryer or attempt any servicing unless specifically recommended in this Owner's Manual or in published user-repair instructions that you understand and have the skills to carry out.
- Do not tamper with controls.
- Before the dryer is removed from service or discarded, remove the door to the drying compartment.
- Do not allow children to play on or in the dryer. Close supervision of children is necessary when the dryer is used near children.
- Do not use fabric softeners or products to eliminate static unless recommended by the manufacturer of the fabric softener or product.
- Do not use heat to dry articles containing foam rubber or similarly textured rubber-like materials.
- Keep area around the exhaust opening and adjacent surrounding areas free from the accumulation of lint, dust, and dirt.
- The interior of the dryer and exhaust vent should be cleaned periodically by qualified service personnel.
- Do not install or store the dryer where it will be exposed to the weather.
- Always check the inside of the dryer for foreign objects.
- Clean lint screen before or after each load.
- Do not dry unwashed items in the tumble dryer.
- Items that have been soiled with substances such as cooking oil, acetone, alcohol,petrol,kerosene,spot removers, turpentine, waxes and wax removers should be washed in hot water with an extra amount of detergent before being dried in the tumble dryer.
- Items such as foam rubber(latex foam), shower caps, waterproof textiles, rubber backed articles and clothes or pillows fitted with foam rubber pads should not be dried in the tumble dryer.
- Fabric softeners, or similar products, should be used as specified by the fabric softener instructions.
- The final part of a tumble dryer cycle occurs without heat(cool down cycle) to ensure that the items are left at a temperature that ensures that the items will not be damaged.
- If the supply cord is damaged, it must be replaced by the manufacturer, its service agent or similarly qualified persons in order to avoid a hazard.
- Never operate the dryer without lint filter in place. Never operate the dryer with a wet lint filter.
WARNING
Never stop a tumble dryer before the end of the drying cycle unless all items are quickly removed and spread out so that the heat is dissipated.
- The lint trap has to be cleaned frequently.
- Lint must not to be allowed to accumulate around the tumble dryer.
- Adequate ventilation has to be provided to avoid the back flow of gases into the room from appliances burning other fuels, including open fires.
• Electric Dryer Max capacity is 10kg
• Gas Dryer Max capacity is 10,2kg
- This appliance is not intended for use by persons (including children) with reduced physical, sensory or mental capabilities, or lack of experience and knowledge, unless they have been given supervision or instruction concerning use of the appliance by a person responsible for their safety.
- Children should be supervised not to play with the appliance.
- The tumble dryer is not to be used if industrial chemicals have been used for cleaning
IMPORTANT SAFETY INSTRUCTIONS
READ ALL INSTRUCTIONS BEFORE USE
Disposal of your old appliance
natural_image
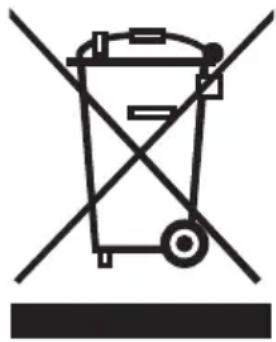
Symbol of a trash bin with crossed lines indicating no waste or discharge (no text or labels)- All electrical and electronic products should be disposed of separately from the municipal waste stream via designated collection facilities appointed by the government or the local authorities.
- The correct disposal of your old appliance will help prevent potential negative consequences for the environment and human health.
- For more detailed information about disposal of your old appliance, please contact your city office, waste disposal service or the shop where you purchased the product.
WHAT IS NOT COVERED.
Service trips to your home to instruct you on the product.
If the product is connected to any voltage other than that shown on the rating plate.
If the fault is caused by accidents, neglects, misuses of Acts of God.
If the fault is caused by reasons except for normal domestic use or use in accordance with the owner's manual.
If the fault is caused by pests, for example, rats or cockroaches etc..
Noise or vibration that is considered normal, for example, water drain sound, spin sound or warning beeps.
Correcting the installation for example, leveling the product, adjustment of drain.
Normal maintenance recommended by the owner's manual.
Removal of foreign objects/substances from the machine including the pump and inlet hose filter, for example, grit,nails, bra wires and buttons etc..
Replace fuses in or correct wiring or correct house plumbing.
Correction of unauthorized repairs.
Incidental or consequential damage to personal property caused by possible defects with this appliance.
If this product is used for commercial purposes, it is not warranted.
(Example: Public places such as public bathroom, lodging house, training center, dormitory)
If the product is installed outside the normal service area, any cost of transportation involved in the repair of the products, or the replacement of a defective part, shall be borne by the owner.
READ ALL INSTRUCTIONS BEFORE USE
WARNING
For your safety, the information in this manual must be followed to minimize the risk of fire or explosion, electric shock, or to prevent property damage, Injury to persons, or death.
- Do not store or use gasoline or other flammable vapors and liquids in the vicinity of this appliance or any other appliances.
- Installation and service must be performed by a qualified installer, service agency, or the gas supplier.
WHAT TO DO IF YOU SMELL GAS: (APPLICABLE FOR GAS MODELS)
- Do not try to light a match or cigarette, or turn on any gas or electrical appliance.
- Do not touch any electrical switches. Do not use any phone in your building.
-
Clear the room, building, or area of all occupants.
-
Immediately call your gas supplier from a neighbor's phone. Follow the gas supplier's instructions carefully.
- If you cannot reach your gas supplier, call the fire department.
IMPORTANT SAFETY INSTRUCTIONS
READ ALL INSTRUCTIONS BEFORE USE
WARNING
For your safety, the information in this manual must be followed to minimize the risk of fire or explosion, electric shock, or to prevent property damage, injury to persons, or death.
GROUNDING INSTRUCTIONS
This appliance must be grounded. In the event of malfunction or breakdown, grounding will reduce the risk of electric shock by providing a path of least resistance for electric current. This appliance must be equipped with a cord having an equipmentgrounding conductor and a grounding plug. The plug must be plugged into an appropriate outlet that is properly installed and grounded in accordance with all local codes and ordinances. Do not use an adapter or extension cord. Do not remove ground prong. If you don't have the proper outlet, consult an electrician. Do not modify the plug provided with the appliance. If it will not fit the outlet, have a proper outlet installed by a qualified electrician.
This appliance must be connected to a grounded metal, permanent wiring system or an equipmentgrounding conductor must be run with the circuit conductors and connected to the equipmentgrounding terminal or lead on the appliance. Electric shock can result if the dryer is not properly grounded. The appliance may only be installed in a room if the room meets the appropriate ventilation requirements specified in the national installation regulations. Minimum required spacing of 2,54cm to adjacent appliances, walls and furniture.
WARNING
Improper connection of the equipment-grounding conductor can result in a risk of electric shock. Check with a qualified electrician or service person if you are in doubt as to whether the appliance is properly grounded.
SAFETY INSTRUCTIONS FOR INSTALLATION
WARNING
To reduce the risk of fire, electric shock, or injury to persons when using this appliance, follow basic precautions, including the following:
- Properly ground dryer to conform with all governing codes and ordinances. Follow details in the installation instructions. Electric shock can result if the dryer is not properly grounded.
- Before use, the dryer must be properly installed as described in this manual. Electric shock can result if the dryer is not properly grounded.
- Install and store the dryer where it will not be exposed to temperatures below freezing or exposed to the weather.
- All repairs and servicing must be performed by an authorized servicer unless specifically recommended in this Owner's Manual. Use only authorized factory parts. Failure to follow this warning can cause serious injury, fire, electric shock, or death.
- To reduce the risk of electric shock, do not install the dryer in humid spaces. Failure to follow this warning can cause serious injury, fire, electric shock, or death.
-
Connect to a properly rated, protected, and sized power circuit to avoid electrical overload. Improper power circuit can melt, creating electric shock and/or fire hazard.
-
Remove all packing items and dispose of all shipping materials properly. Failure to do so can result in death, explosion, fire, or burns.
- Place dryer at least 18 in. above the floor for a garage installation. Failure to do so can result in death, explosion, fire, or burns.
- Keep all packaging from children. Packaging material can be dangerous for children. There is a risk of suffocation.
- Keep the area underneath and around your appliances free of combustible materials such as lint, paper, rags, chemicals, etc. Failure to do so can result in fire.
- Do not place candles, smoking materials, or other flammables on to top of the product. Dripping wax, smoke, or fire can result.
- Remove all protective vinyl film from the product. Failure to do so can cause product damage, smoke or fire.
- Means for disconnection with contact separation at least 3mm is that the means for disconnection must be incorporated in the fixed wiring according to the wiring rules.
IMPORTANT SAFETY INSTRUCTIONS
READ ALL INSTRUCTIONS BEFORE USE
WARNING
For your safety, the information in this manual must be followed to minimize the risk of fire or explosion, electric shock, or to prevent property damage, injury to persons, or death.
SAFETY INSTRUCTIONS FOR INSTALLATION
- The new hose-sets supplied with the appliance are to be used and that old hose-sets should not be reused.
- The appliance is not to be used by children or persons with reduced physical, sensory or mental capabilities, or lack of experience and knowledge, unless they have been given supervision or instruction. Children being supervised not to play with the appliance.
Exhaust/Ducting:
- Gas dryers MUST be exhausted to the outside. Failure to follow these instructions can result in fire or death.
- The dryer exhaust system must be exhausted to the outside of the dwelling. If the dryer is not exhausted outdoors, some fine lint and large amounts of moisture will be expelled into the laundry area. An accumulation of lint in any area of the home can create a health and fire hazard.
- Use only rigid metal or flexible metal 4-inch (10.2 cm) diameter ductwork inside the dryer cabinet or for exhausting to the outside. Use of plastic or other combustible ductwork can cause a fire. Punctured ductwork can cause a fire if it collapses or becomes otherwise restricted in use or during installation.
- Ductwork is not provided with the dryer, and you should obtain the necessary ductwork locally. The end cap should have hinged dampers to prevent backdraft when the dryer is not in use. Failure to follow these instructions can result in fire or death.
- A carpet must not obstruct the openings.
- Exhaust air must not be discharged into a flue which is used for exhausting fumes from appliances burning gas or other fuels.
- That the appliance must not be installed behind a lockable door, a sliding door or a door with a hinge on the opposite side to that of the tumble dryer, in such a way that a full opening of the tumble dryer door is restricted.
- The exhaust duct must be 4 inches (10.2 cm) in diameter with no obstructions. The exhaust duct should be kept as short as possible. Make sure to clean any old ducts before installing your new dryer. Failure to follow these instructions can result in fire or death.
- DO NOT use sheet metal screws or other fasteners which extend into the duct that could catch lint and reduce the efficiency of the exhaust system. Secure all joints with duct tape. For complete details, follow the Installation Instructions. Failure to follow these instructions can result in fire or death.
- In the appliance enclosure or in the built-in structure, keep ventilation opening clear of obstruction.
- Adequate ventilation has to be provided to avoid the back flow of gases into the room from appliances burning other fuels, including open fires Do not dry unwashed items in the tumble dryer.
IMPORTANT SAFETY INSTRUCTIONS
READ ALL INSTRUCTIONS BEFORE USE
WARNING
For your safety, the information in this manual must be followed to minimize the risk of fire or explosion, electric shock, or to prevent property damage, injury to persons, or death.
SAFETY INSTRUCTIONS FOR CONNECTING ELECTRICITY
WARNING
To reduce the risk of fire, electric shock, or injury to persons when using this appliance, follow basic precautions, including the following:
- Do not, under any circumstances, cut or remove the ground prong from the power cord. To prevent injury to persons or damage to the dryer, the electrical power cord must be plugged into a properly grounded outlet.
- For personal safety, this dryer must be properly grounded. Failure to do so can result in electric shock or injury.
- Refer to the installation instructions in this manual for specific electrical requirements for your model. Failure to follow these instructions can create an electric shock hazard and/or a fire hazard.
- This dryer must be plugged into a properly grounded outlet. Electric shock can result if the dryer is not properly grounded. Have the wall outlet and circuit checked by a qualified electrician to make sure the outlet is properly grounded. Failure to follow these instructions can create an electric shock hazard and/or a fire hazard.
-
The dryer should always be plugged into its own individual electrical outlet which has a voltage rating that matches the rating plate. This provides the best performance and also prevents overloading house wiring circuits which could cause a fire hazard from overheated wires.
-
Never unplug your dryer by pulling on the power cord. Always grip plug firmly and pull straight out from the outlet. The power cord can be damaged, resulting in a risk of fire and electric shock.
- Repair or replace immediately all power cords that have become frayed or otherwise damaged. Do not use a cord that shows cracks or abrasion damage along its length or at either end. The power cord can melt, creating electric shock and/or fire hazard.
- When installing or moving the dryer, be careful not to pinch, crush, or damage the power cord. This will prevent injury and prevent damage to the dryer from fire and electric shock.
- To reduce the risk of injury to persons, adhere to all industry recommended safety procedures including the use of long sleeved gloves and safety glasses. Failure to follow all of the safety warnings in this manual could result in property damage, injury to persons or death.
- The final part of the tumble dryer cycle occurs without heat (cool down cycle) to ensure that the items are left at a temperature that ensures that the items will not be damaged.
IMPORTANT SAFETY INSTRUCTIONS
READ ALL INSTRUCTIONS BEFORE USE
CAUTION
These instructions are only valid if the following country code is on the appliance. If this code is not present on the appliance, it is necessary to refer to the technical instructions which will provide the necessary information concerning the modification of the appliance to the condition of use for the country Before installation, check that the local distribution conditions, nature of gas and pressure, and the adjustment of the appliance are compatible.
- the method of connection and the installation regulations in the country where the appliance is to be installed (if such regulations exist); also the ventilation dimensions shall be given for the purposes of installation in those countries where there are no appropriate regulations.
WARNING
Never stop a tumble dryer before the end of the drying cycle unless all items are quickly removed and spread out so that the heat is dissipated.
CONTENTS
2 PRODUCT FEATURES
3 IMPORTANT SAFETY INSTRUCTIONS
4 BASIC SAFETY PRECAUTIONS
6 GROUNDING INSTRUCTIONS
6 SAFETY INSTRUCTIONS FOR INSTALLATION
8 SAFETY INSTRUCTIONS FOR CONNECTING ELECTRICITY
11 INTRODUCING YOUR DRYER
11 Specifications
12 Control panel features
19 1. How to change regular price.
20 2. How to change special price
21 3. How to enter the FEA1
25 4. How to enter the special price day setup
27 5. Special price beginning time setup
28 6. Special price ending time setup
29 7. Regular priced dryer cycle time
30 8. Special priced dryer cycle time
31 9. Value of coin 1
32 10. Value of coin 2 (Set up for top off price and e-suds coin pulse)
33 11. Penny increment pricing offset
34 12. Top off time
35 13. Beep volume
36 14. Time to keep the coin (Use only for coin type)
37 15. Product type setup - coin/card type or OPL setup
38 Programming Mode - Test Mode
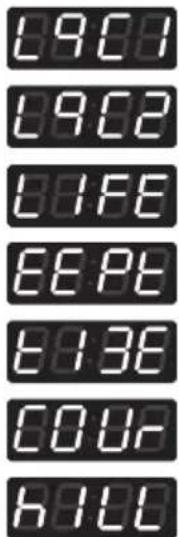
39 1. Lqc1
40 2. Factory reset - EEPt
41 3. Time Set Up
42 4. Courtesy cycle
43 5. Cycle Kill
44 Programming Mode - Collect Mode
46 MAINTENANCE
47 STACK MACHINE INSTALLATION INSTRUCTIONS
47 Suitable model for stacking
47 Sliding kit
47 Stacking kit
48 Stacking the machine
48 Stacking bracket installation
49 ERROR MODE
49 POWER FAIL RECOVERY
49 DEFAULT DRYER SETTINGS
50 Declaration of Conformity
INTRODUCING YOUR DRYER
Specifications
natural_image
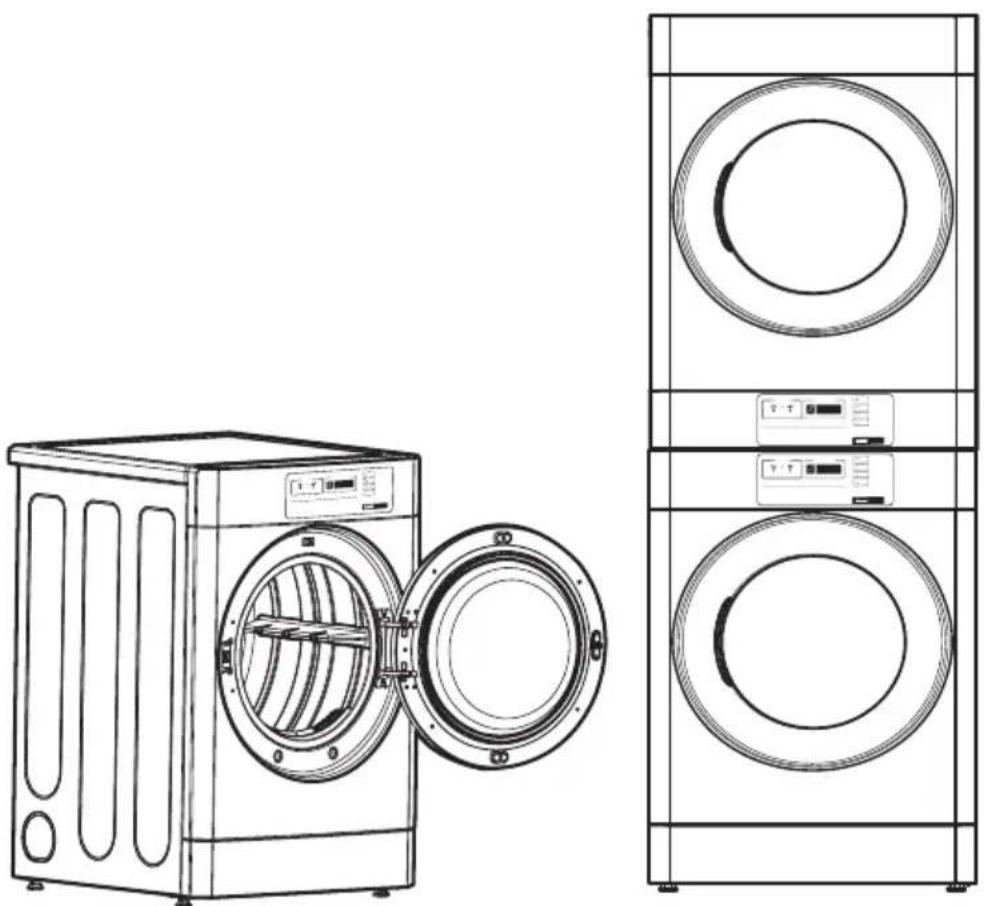
Line drawing of a washing machine with open door and two separate views of a large appliance (no text or symbols)■ Type : Electric and Gas Dryer
■ Rating : Please refer to the rating label regarding detailed information.
■ Single dryer size : 686mm(W) x 764mm(D) x 983mm(H)
■ Stack dryer size : 686mm(W) x 764mm(D) x 1954mm(H)
Electric Dryer Max capacity : 10kg
Gas Dryer Max capacity : 10,2kg
■ Weight : 59,4 kg
■ Specifications are subject to change by manufacturer.
NOTE
Specifications subject to change by manufacturer.
Control panel features
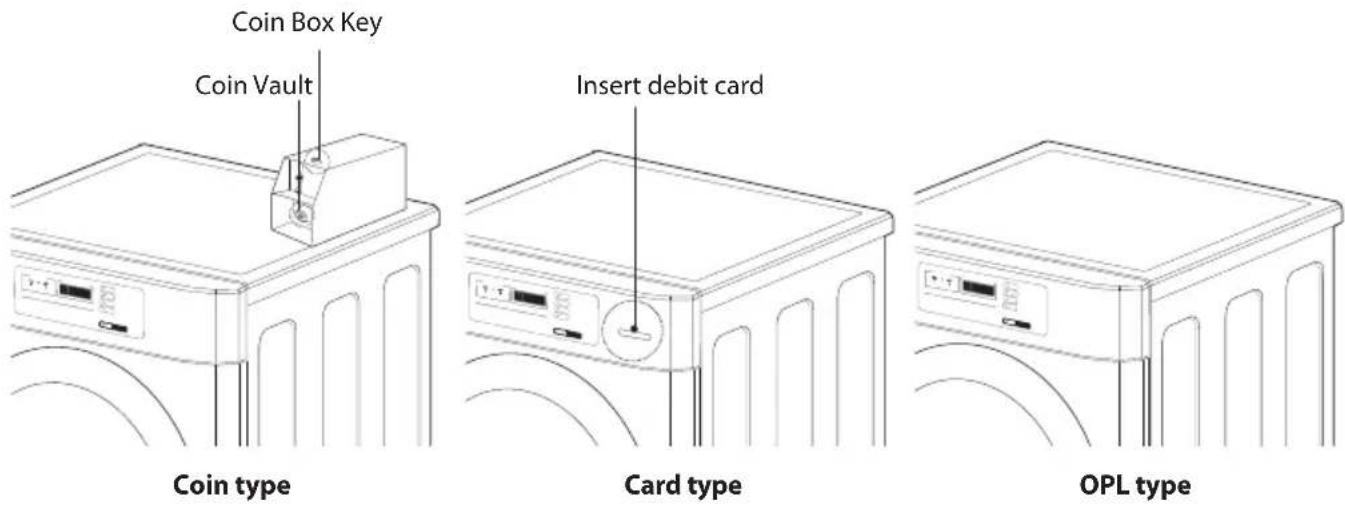
Card type
- Side by side(RP1329AD1S / RV1329AD1S)
- Stack upper(RP1329AD5S / RV1329AD5S)
- Stack lower(RP1329AD6S / RV1329AD6S)
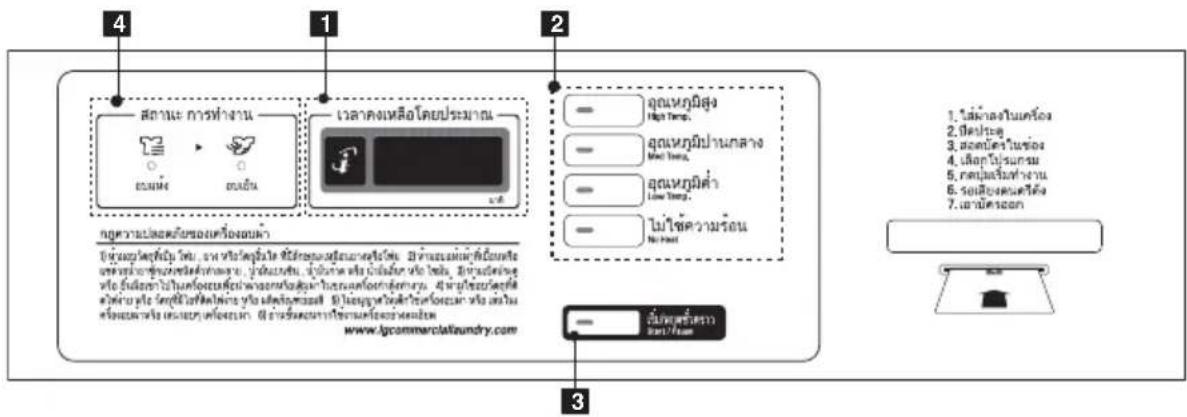
■ OPL type
- Side by side(RP1329A4S / RV1329A4S)
- Stack upper(RP1329A7S / RV1329A7S)
- Stack lower(RP1329A1S / RV1329A1S)
- Display LED
-
Cycle button
-
Start/Pause button
- Status LED
Control panel features
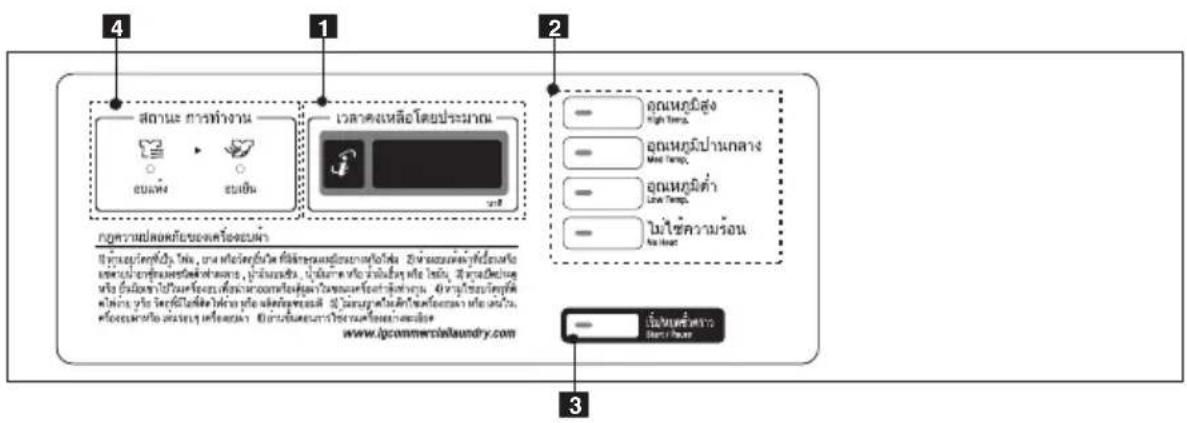
Coin type
- Side by side (RP1329AN4S / RV1329AN4S)
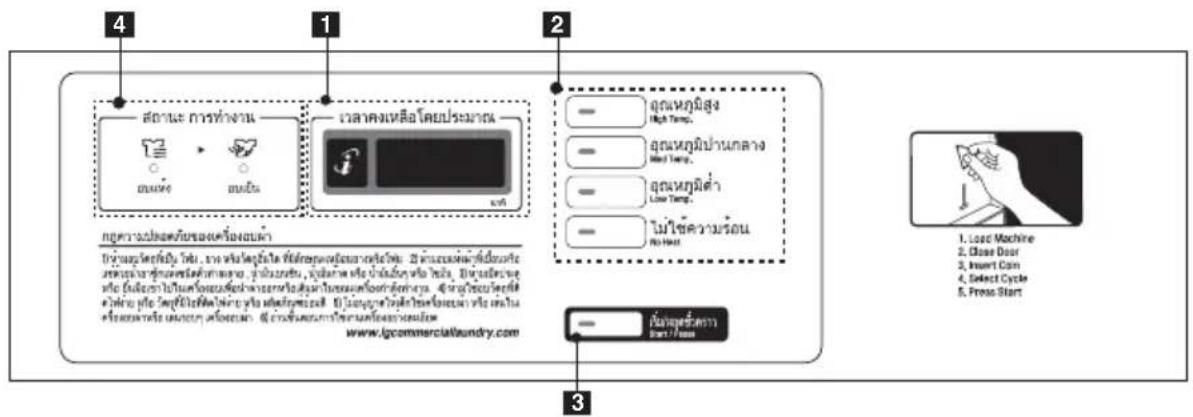
- Stack upper (RP1329AN7S / RV1329AN7S)
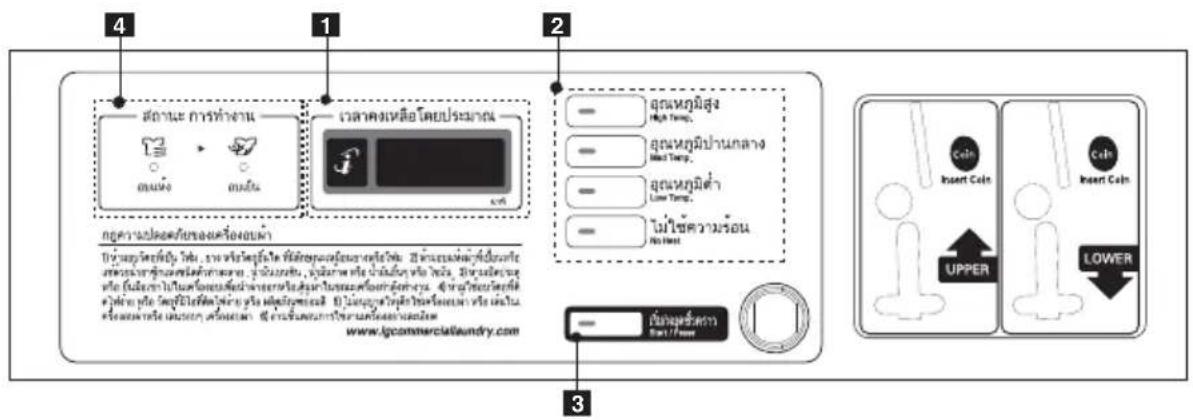
- Stack lower (RP1329AN1S / RV1329AN1S)
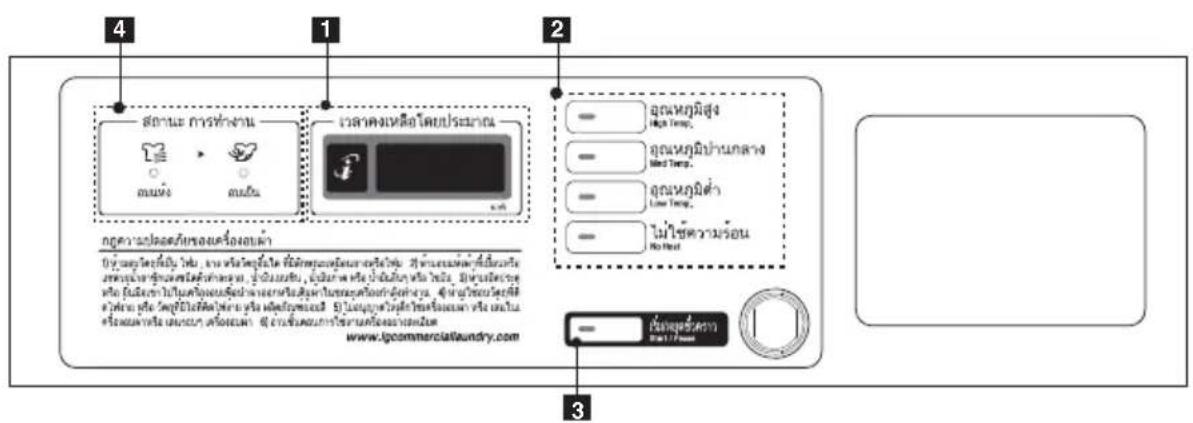
- Display LED
-
Cycle button
-
Start/Pause button
- Status LED
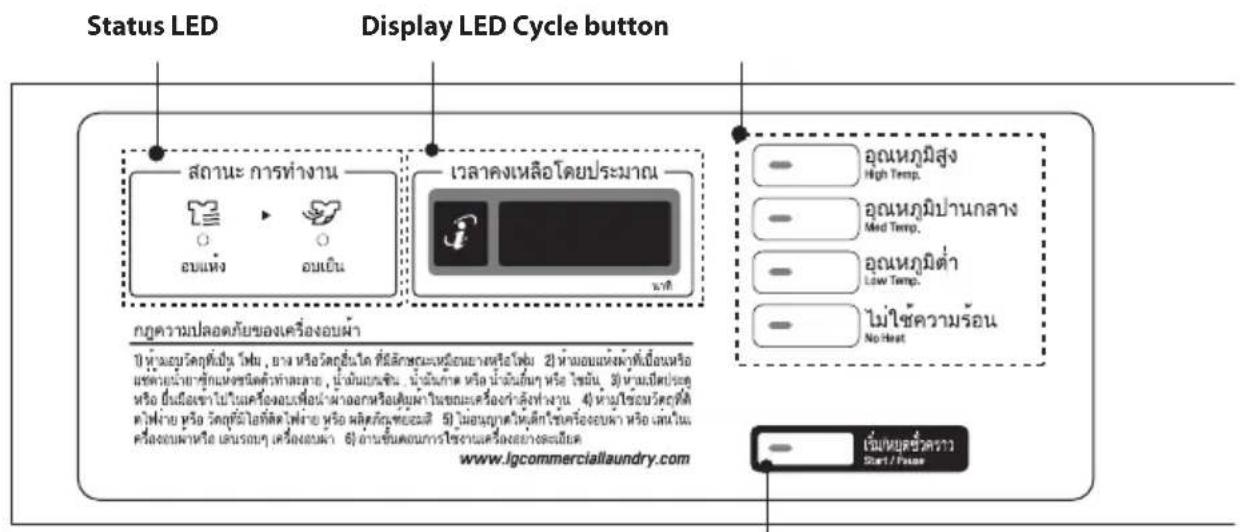
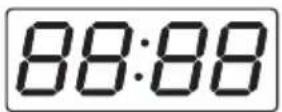
The Display shows the vend price, remaining time, and programming options.
Error codes are also displayed here.
Cycle button
Press the cycle button to Select the desired cycle based on laundry types and conditions.
High Temp.
Use this cycle to get high heat for heavy fabrics, such as jeans corduroys or work clothes (High heat).
Med Temp.
Use for drying sturdy fabrics such as work casual clothes (Medium heat).
Low Temp.
Use for drying synthetic fabrics, washable knit fabrics and noiron finishes (Low heat).
No Heat
Use for items that require heat-free drying such as plastics or rubber.
Start/Pause button
The Start LED flashes when the full vend price has been satisfied then the cycle has been chosen or the machine is paused.
The Start LED flashes when a card is inserted to add time to the current cycle.
If you press the Start/Pause button while dryer is working, machine will be paused.
Status LED
| LED Description | |
 | LED flashes whenever the heating cycle is in operation. |
| อปแห่ง | |
 | LED flashes whenever the cool down cycle is in operation. |
| อปเย็น | |
- The cycle LEDs flash at the same time, when the price of cycles are equal.
2) OPL type
- The cycle LEDs is lit at the same time, and displayed 'PUSH'.
2. Insert card/coin/Token (not for OPL type)
- Insert a cash card that has a sufficient balance.
The card balance should be more than the programmed vend price for a selected cycle.
NOTE
When the card balance is not enough, machine displays the balance for 5 seconds and then displays
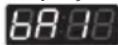
message repetitively
- Insert a sufficient amount of change that is a more than the programmed vend price for a selected cycle.
NOTE
When the coin amount is not enough, the machine will not start.
3. Select the cycle
Press the desired cycle and the start button. The display LED will show the remaining time and the selected cycle starts.
NOTE
The last 2 minutes of the remaining time are always for the cool down portion.
4. Top off (To add more time)
■ After a debit card is inserted, the operating time can be increased to 10 minutes/10p (default), when the Start button or the chosen course button has been pressed.
(The card should have enough balance to satisfy increasing time.)
The operating time can be increased to 10 minutes/10p (default) by adding more coins.
NOTE
Owner can control the additional time and money setting (top off price).
When the COOL DOWN has been working, if time is added, it goes back to the DRYING.
Time can be added up 99 minutes.
5. Change cycle
- You cannot change the cycle while the machine is running.
- But if the door is opened, the machine stops temporarily and the cycle can be changed.
■ Press the Pause button then you can change the cycle.
6. Cycle finish
■ After the COOL DOWN of cycle, the machine stops and LED display shows End.
If you press any key or open the door, the dryer defaults to the ready mode.
PROGRAMMING MODE
1. Programming mode
You can check machine information or change setting on Program setup or Diagnostic test.
There are two methods that you can enter programming mode.
■ How to enter "Programming mode"
You can enter programming mode only for Idle state and pause state.
- Card Type
1) Insert service card.
2) Display will show 89.00
- Coin Type
1) Dissemble upper coin box key.
2) Take out the coin drop from the coin box.
3) Turn on/off the toggle switch at the back of the coin box.
4) Display will show "8968".
- OPL/Coin Type
1) Push the High Temp. and Low Temp. button at the same time.
2) Push the Med Temp. button 3 times.
3) Push the Start button.
4) Display will show "19:00"
How to use button
You can change Dryer vend price, cycle time and Cycle parameters, etc.
| Press button Description | |
| High Temp. Move to upper level | |
| Med Temp. | Move to the mode in the same level (+) |
| Low Temp. | Move to the modes in the same level (-) |
| No Heat - | |
| Start Enter the selected mode | |
NOTE
- If you turn on the power without connecting the meter case for the first time, the machine will display 1968.
- When the machine comes from the factory, it is set in the coin type. You can change Card/Coin type by button. (For more information refer to SETUP mode's /
• The machine will display "PUSH" for OPL type
Card / Coin type
Algorithm Flow Chart shows how to control programming mode.
Before program set, check the structure of programming mode.
- Turn on/off toggle switch or Insert the service card to entering set up mode.
- Press High Temp. button to move the upper level.
- Press Med Temp.(+) or Low Temp.(-) button if you want to be at the same level.
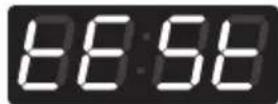
- Press Start button to enter the details of Set up, Diagnostic Tests mode.
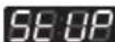
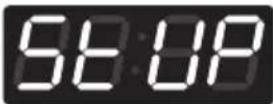
is to set price value, time value and vend type etc.
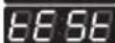
consists of line test, reset, free cycle and kill cycle.
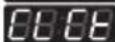
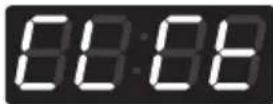
Is to collect the usage data.
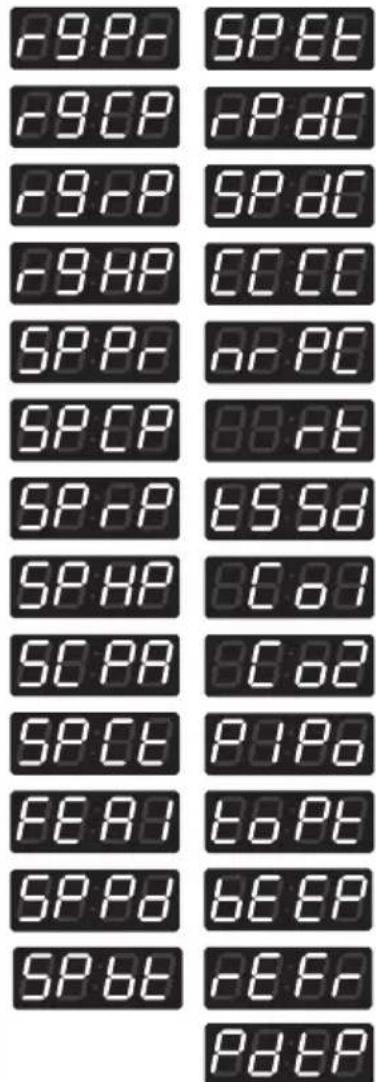
■ Structure of Programming mode
NOTE
- Do not use
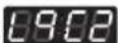
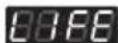
- It is only used in inspecting the machine.
OPL type
Algorithm Flow Chart shows how to control programming mode.
Before program set, check the structure of programming mode.
OPL/Coin Type
1) Push the High Temp. and Low Temp. button at the same time.
2) Push the Med Temp. button 3 times.
3) Push the Start button.
4) Display will show "8908"

is to set price value, time value and vend type etc.
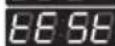
consists of line test, reset, free cycle and kill cycle.
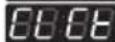
Is to collect the usage data.
■ Structure of Programming mode
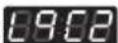
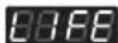
NOTE
- Do not use
- It is only used in inspecting the machine.
PROGRAMMING MODE - Setup Mode
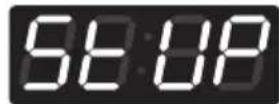
Setup Mode: EC 83 ay)
■ You can change dryer vend price, cycle time, and cycle parameters, etc.
■ Entering set up mode
- Coin type - Turn on/off toggle switch.
- Card type - Insert the service card.
- Stack type - Take off control panel, and turn on/off toggle switch.
- OPL/Coin Type – Push "High Temp." + "Low Temp." and the '3'.
- Then, dryer displays 1968.
1. How to change regular price.
Entering set up mode.You will see LqC1 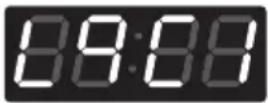 | Button Display | |
| Press the High Temp. button. | 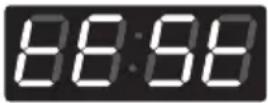 | |
| Press the Med Temp. or the Low Temp. button until appears in the display. | 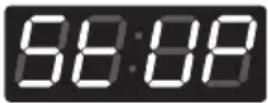 | |
| Press the Start button. | 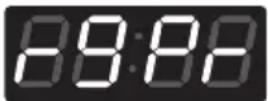 | |
| Press the Start button.Display previous regular price. | 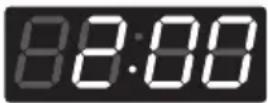 | |
| Press Med Temp.(+) or Low Temp.(-) button to set regular price.(The vend price can be set from 0 to 9,90 in 0.1 increments.) | 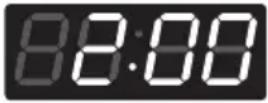 | |
| Press the Start button.The machine sets up the regular price, then advances to the next process automatically. | 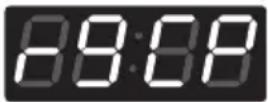 | |
| 1. Continue to set up the next price.2. Stop the change of setup value and go back to ready mode.• Coin type - Turn on/off toggle switch.• Card type - Pull the service card.• Stack type - 1. Control panel open.2. Turn on/off toggle switch.• OPL/Coin Type – Press “High Temp.” twice. |
NOTE
- rgCP (regular cold price) is not available in dryer.
- rgrP (regular warm price) is not available in dryer.
- rgHP (regular hot price) is not available in dryer.
2. How to change special price
Entering set up mode.You will see LqC1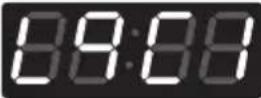 | Button Display | |
| Press theHigh Temp. button. | 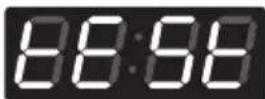 | |
| Press theMed Temp. or theLow Temp. button untilappears in the display. | 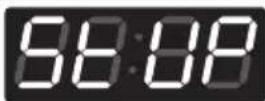 | |
| Press theStartbutton. | 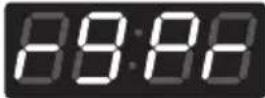 | |
| Press theMed Temp. or theLow Temp. button untilappears in the display. | 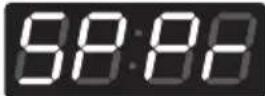 | |
| Press theStartbutton.Display previous special price. | 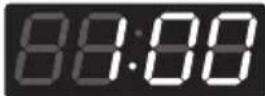 | |
| PressMed Temp.(+) orLow Temp.(-)button to set special price.(The vend price can be set from 0 to 9,90 in 0.1 increments.) | 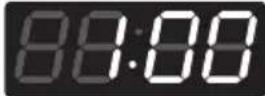 | |
| Press theStartbutton.The machine sets up the regular price, then advances to the next process automatically. | 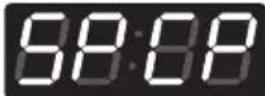 | |
| 1. Continue to set up the next price.2. Stop the change of setup value and go back to ready mode.• Coin type - Turn on/off toggle switch.• Card type - Pull the service card.• Stack type - 1. Control panel open.2. Turn on/off toggle switch.• OPL/Coin Type – Press “High Temp.” twice. |
NOTE
- SPCP (special cold price) is not available in dryer.
- SPrP (special warm price) is not available in dryer.
- SPHP (special hot price) is not available in dryer.
- SCPA (add super cycle price) is not available in dryer.
- SPCt (add super wash type) is not available in dryer.
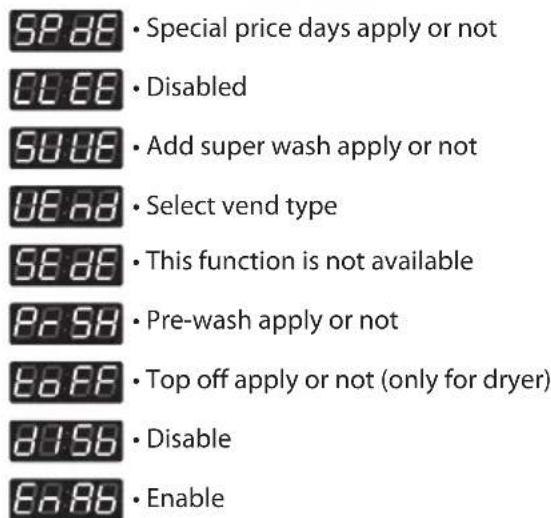
3. How to enter the FEBB
| Entering set up mode.You will see LqC1 | Button Display | |
| Press the High Temp. button. | 88:88 | |
| Press the Med Temp. or the Low Temp. button until appears in the display. | 98:88 | |
| Press the Start button. | 89:88 | |
| Press the Med Temp. or the Low Temp. button until appears in the display. | 88:88 |
■ Structure of FE89
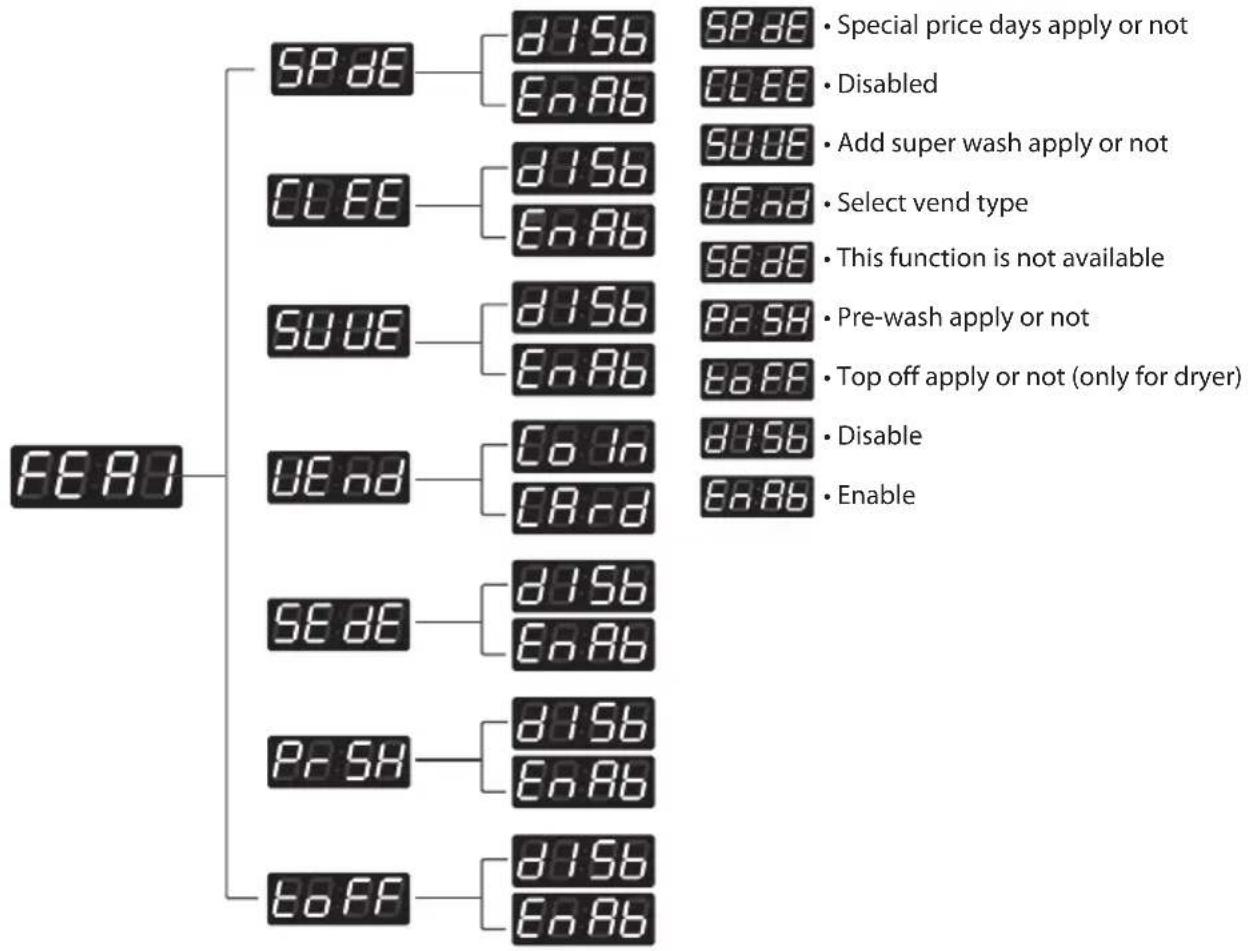
flowchart
graph TD
    A["FEAR"] --> B["SPDE"]
    A --> C["CLEE"]
    A --> D["SUVE"]
    A --> E["UEnd"]
    A --> F["SEDE"]
    A --> G["P-SH"]
    A --> H["TOFF"]

    B --> I["d15b"]
    B --> J["EnAb"]

    C --> K["d15b"]
    C --> L["EnAb"]

    D --> M["d15b"]
    D --> N["EnAb"]

    E --> O["CoIn"]
    E --> P["CArd"]

    F --> Q["d15b"]
    F --> R["EnAb"]

    G --> S["d15b"]
    G --> T["EnAb"]

    H --> U["d15b"]
    H --> V["EnAb"]

    I --> W["SPDE"]
    I --> X["Special price days apply or not"]
    I --> Y["Disabled"]
    I --> Z["Add super wash apply or not"]
    I --> AA["Select vend type"]
    I --> AB["This function is not available"]
    I --> AC["Pre-wash apply or not"]
    I --> AD["Top off apply or not (only for dryer)"]
    I --> AE["Disable"]
    I --> AF["Enable"]
Content of 8889
3-1. Special price day setup
Entering set up mode.You will see LqC1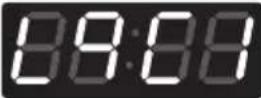 | Button Display | |
| Press theHigh Temp. button. | 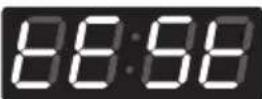 | |
| Press theMed Temp. or theLow Temp. button untilappears in the display. | 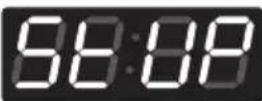 | |
| Press theStartbutton. | 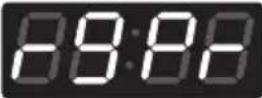 | |
| Press theMed Temp. or theLow Temp. button untilappears in the display. | 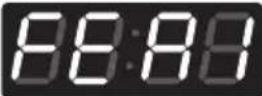 | |
| Press theStartbutton.Display5P86. | 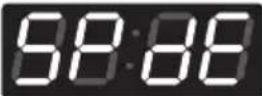 | |
| Press theStartbutton.PressMed Temp. orLow Temp. button and then selectorE886 coin typeE886Card type | 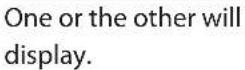 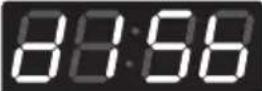 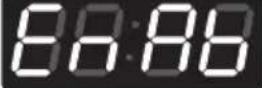 | |
| Press theStartbutton.The machine sets up the special price, then advances to the next process automatically. | 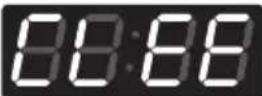 | |
| 1. Continue to set up the next mode.2. Stop the change of setup value and go back to ready mode.• Coin type - Turn on/off toggle switch.• Card type - Pull the service card.• Stack type - 1. Control panel open.2. Turn on/off toggle switch.• OPL/Coin Type - Press “High Temp.” twice. |
NOTE
- CLEE (clear escrow enable or not) is not available in dryer.
- SUUE (add super wash apply or not) is not available in dryer.
3-2. Vend type setup - card type or coin type setup
Entering set up mode.You will see LqC1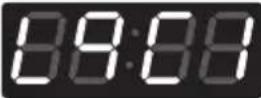 | Button Display | |
| Press theHigh Temp. button. | 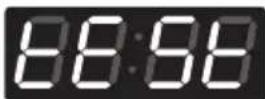 | |
| Press theMed Temp. or theLow Temp. button untilappears in the display. | 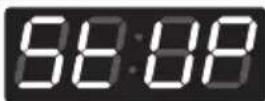 | |
| Press theStartbutton. | 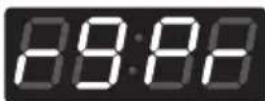 | |
| Press theMed Temp. or theLow Temp. button untilappears in the display. | 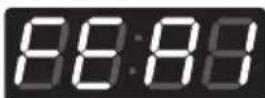 | |
| Press theStartbutton.DisplaySP88. | 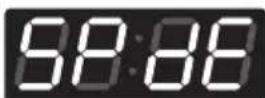 | |
| Press theMed Temp. or theLow Temp. button untilappears in the display. | 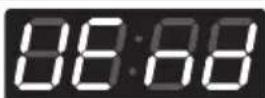 | |
| Press theStartbutton.PressMed Temp. or Low Temp. button and then selectorCArdDisableERndEnable |  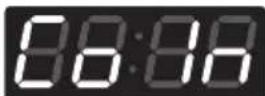 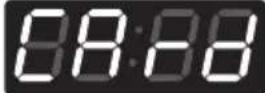 | |
| Press theStartbutton.The machine sets up the vend type, then go to the idle mode automatically. |
NOTE
- SEdE (sensor dry apply or not) is not available in dryer.
- PrSH (Pre-wash apply or not) is not available in dryer.
3-3. Top off apply or not setup
Entering set up mode.You will see LqC1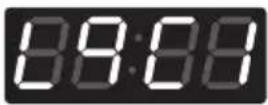 | Button Display | |
| Press theHigh Temp. button. | 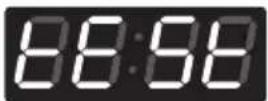 | |
| Press theMed Temp. or theLow Temp. button untilSEUPappears in the display. | 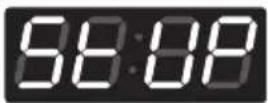 | |
| Press theStartbutton. | 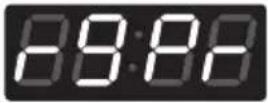 | |
| Press theMed Temp. or theLow Temp. button untilFEERappears in the display. | 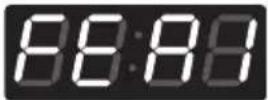 | |
| Press theStartbutton.DisplaySPDB. | 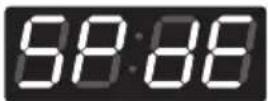 | |
| Press theMed Temp. or theLow Temp. button untilE0FFappears in the display. | 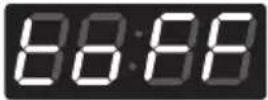 | |
| Press theStartbutton.PressMed Temp. or Low Temp. button and then selectD756orENAB8756DisableENABEnable |  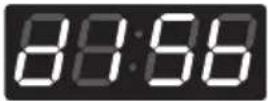 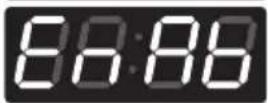 | |
| Press theStartbutton.The machine sets up the Vend type, then advances to the next process automatically. | 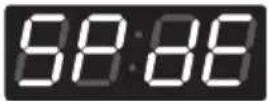 | |
| 1. Continue to set up the next mode.2. Stop the change of setup value and go back to ready mode.• Coin type - Turn on/off toggle switch.• Card type - Pull the service card.• Stack type - 1. Control panel open.2. Turn on/off toggle switch.• OPL/Coin Type - Press “High Temp.” twice. |
4. How to enter the special price day setup
Entering set up mode.You will see LqC1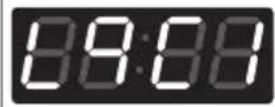 | Button Display | |
| Press theHigh Temp. button. | 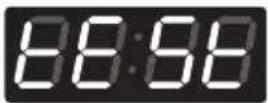 | |
| Press theMed Temp. or theLow Temp. button untilappears in the display. | 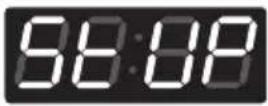 | |
| Press theStartbutton. | 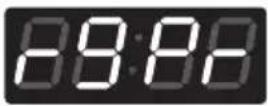 | |
| Press theMed Temp. or theLow Temp. button untilappears in the display. | 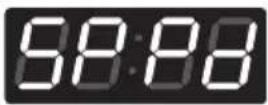 | |
| Press theStartbutton.Display | 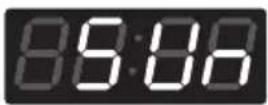 |
■ Structure of 5888
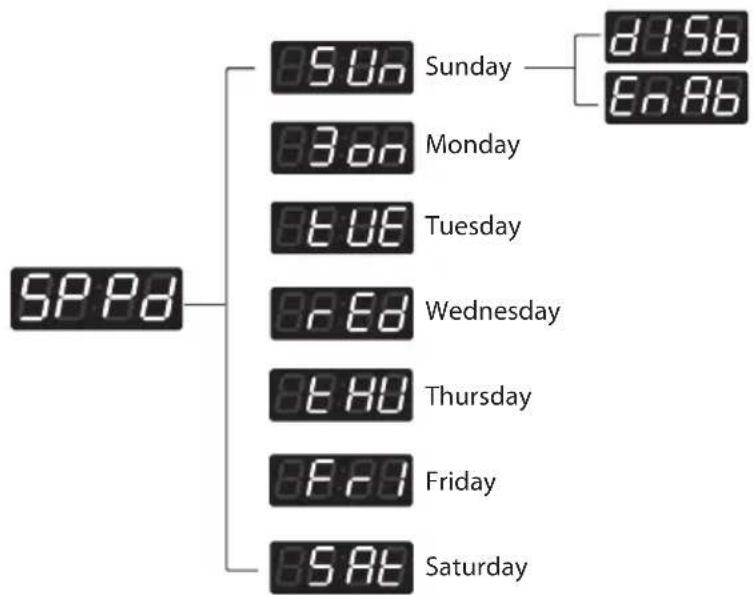
4-1. How to change sunday
Entering set up mode.You will see LqC1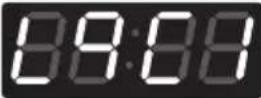 | Button Display | |
| Press theHigh Temp. button. | 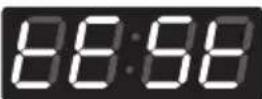 | |
| Press theMed Temp. or theLow Temp. button untilappears in the display. | 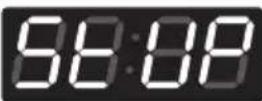 | |
| Press theStartbutton. | 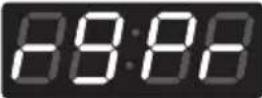 | |
| Press theMed Temp. or theLow Temp. button untilappears in the display. | 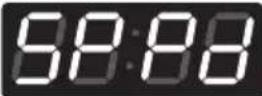 | |
| Press theStartbutton.Display | 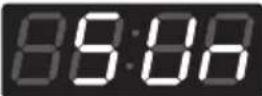 | |
| Press theStartbutton.PressMed Temp.(+) orLow Temp. button and then selectorDisableEnable |  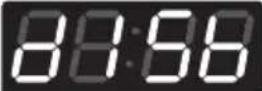 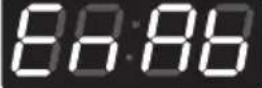 | |
| Press theStartbutton.The machine sets up the special price day (Sunday), then advances to the next process automatically. | 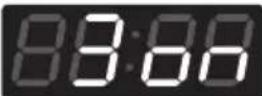 | |
| 1. Continue to set up the next mode.2. Stop the change of setup value and go back to ready mode.• Coin type - Turn on/off toggle switch.• Card type - Pull the service card.• Stack type - 1. Control panel open.2. Turn on/off toggle switch.• OPL/Coin Type - Press “High Temp.” twice. |
5. Special price beginning time setup
Entering set up mode.You will see LqC1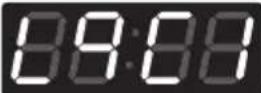 | Button Display | |
| Press theHigh Temp. button. | 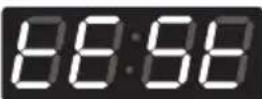 | |
| Press theMed Temp. or theLow Temp. button untilappears in the display. | 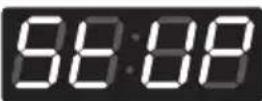 | |
| Press theStartbutton. | 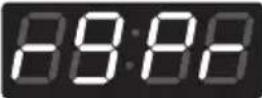 | |
| Press theMed Temp. or theLow Temp. button untilappears in the display. | 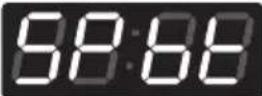 | |
| Press theStartbutton.Display previous special price beginning time. | 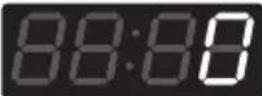 | |
| PressMed Temp.(+) or Low Temp.(-) button to select time between0and23. | ||
| Press theStartbutton.The machine sets up the special price beginning time, then advances to the next process automatically. | 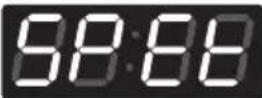 | |
| 1. Continue to set up the next mode.2. Stop the change of setup value and go back to ready mode.• Coin type - Turn on/off toggle switch.• Card type - Pull the service card.• Stack type - 1. Control panel open.2. Turn on/off toggle switch.• OPL/Coin Type - Press “High Temp.” twice. |
6. Special price ending time setup
Entering set up mode.You will see LqC1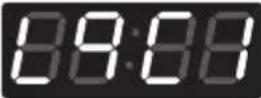 | Button Display | |
| Press theHigh Temp. button. | 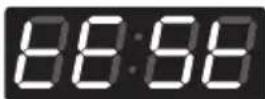 | |
| Press theMed Temp. or theLow Temp. button untilappears in the display. | 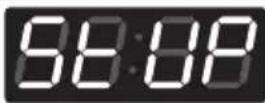 | |
| Press theStartbutton. | 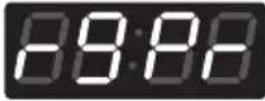 | |
| Press theMed Temp. or theLow Temp. button untilappears in the display. | 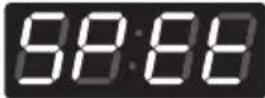 | |
| Press theStartbutton.Display previous special price ending time. | 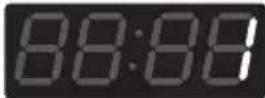 | |
| PressMed Temp.(+) orLow Temp.(-)button to select time between 1 and 24. | ||
| Press theStartbutton.The machine sets up the special price ending time, then advances to the next process automatically. | 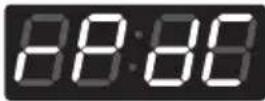 | |
| 1. Continue to set up the next mode.2. Stop the change of setup value and go back to ready mode.• Coin type - Turn on/off toggle switch.• Card type - Pull the service card.• Stack type - 1. Control panel open.2. Turn on/off toggle switch.• OPL/Coin Type - Press “High Temp.” twice. |
7. Regular priced dryer cycle time
Entering set up mode.You will see LqC1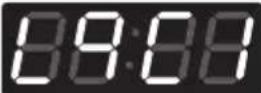 | Button Display | |
| Press the High Temp. button. | | |
| Press the Med Temp. or the Low Temp. button until appears in the display. | 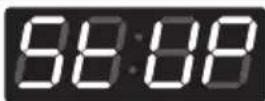 | |
| Press the Start button. | 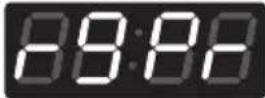 | |
| Press the Med Temp. or the Low Temp. button until appears in the display. | 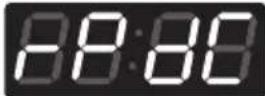 | |
| Press the Start button.Display previous regular priced dryer cycle time. | 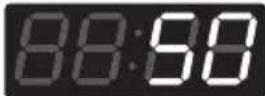 | |
| Press Med Temp.(+) or Low Temp.(-) button to select time between 10 and 99. | ||
| Press the Start button.The machine sets up the regular priced dryer cycle time, then advances to the next process automatically. | 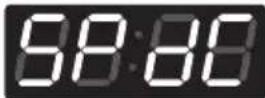 | |
| 1. Continue to set up the next mode.2. Stop the change of setup value and go back to ready mode.• Coin type - Turn on/off toggle switch.• Card type - Pull the service card.• Stack type - 1. Control panel open.2. Turn on/off toggle switch.• OPL/Coin Type - Press “High Temp.” twice. |
8. Special priced dryer cycle time
Entering set up mode.You will see LqC1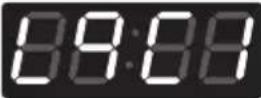 | Button Display | |
| Press theHigh Temp. button. | 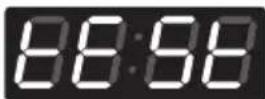 | |
| Press theMed Temp. or theLow Temp. button untilappears in the display. | 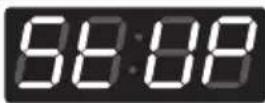 | |
| Press theStartbutton. | 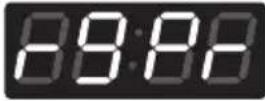 | |
| Press theMed Temp. or theLow Temp. button untilappears in the display. | 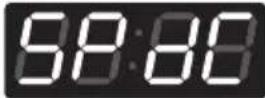 | |
| Press theStartbutton.Display previous special priced dryer cycle time. | 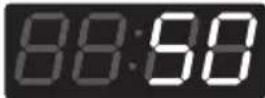 | |
| PressMed Temp.(+) orLow Temp.(-)button to select time between10and99. | ||
| Press theStartbutton.The machine sets up the special priced dryer cycle time, then advances to the next process automatically. | 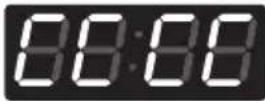 | |
| 1. Continue to set up the next mode.2. Stop the change of setup value and go back to ready mode.• Coin type - Turn on/off toggle switch.• Card type - Pull the service card.• Stack type - 1. Control panel open.2. Turn on/off toggle switch.• OPL/Coin Type - Press “High Temp.” twice. |
NOTE
- CCCC (washing time) is not available in dryer.
- nrPC (rinsing times per cycle) is not available in dryer.
- rt (rinsing time setup) is not available in dryer.
- tSSd (top spin speed) is not available in dryer.
9. Value of coin 1
Entering set up mode.You will see LqC1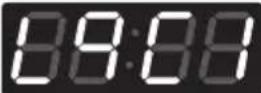 | Button Display | |
| Press the High Temp. button. | 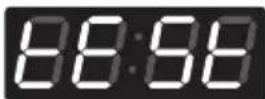 | |
| Press the Med Temp. or the Low Temp. button until appears in the display. | 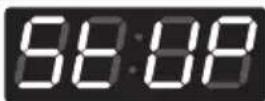 | |
| Press the Start button. | 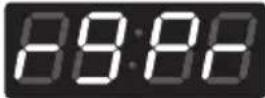 | |
| Press the Med Temp. or the Low Temp. button until appears in the display. | 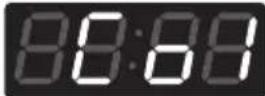 | |
| Press the Start button.Display previous coin 1 value. | 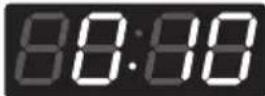 | |
| Press Med Temp.(+) or Low Temp.(-) button to select value of coin 1 (The value can be set from 0 to 9,90 in 0.1 increments.) | ||
| Press the Start button.The machine sets up the value of coin 1, then advances to the next process automatically. | 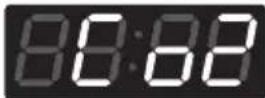 | |
| 1. Continue to set up the next mode.2. Stop the change of setup value and go back to ready mode.• Coin type - Turn on/off toggle switch.• Card type - Pull the service card.• Stack type - 1. Control panel open.2. Turn on/off toggle switch.• OPL/Coin Type - Press “High Temp.” twice. |
10. Value of coin 2 (Set up for top off price and e-suds coin pulse)
| Entering set up mode.You will see LqC1 | Button Display | |
| Press theHigh Temp. button. | 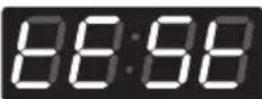 | |
| Press theMed Temp. or theLow Temp. button untilappears in the display. | 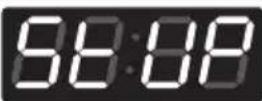 | |
| Press theStartbutton. | 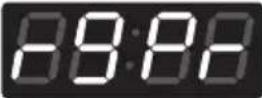 | |
| Press theMed Temp. or theLow Temp. button untilappears in the display. | 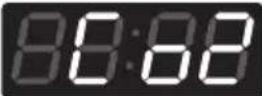 | |
| Press theStartbutton.Display previous coin 2 value. | 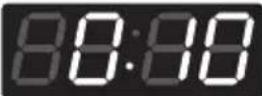 | |
| PressMed Temp.(+) orLow Temp.(-) button to select value of coin 2 (The value can be set fromm 0 to 9,90 in 0.1 increments.) | ||
| Press theStartbutton.The machine sets up the value of coin 2, then advances to the next process automatically. | 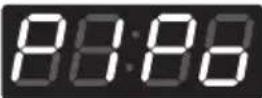 | |
| 1. Continue to set up the next mode.2. Stop the change of setup value and go back to ready mode.• Coin type - Turn on/off toggle switch.• Card type - Pull the service card.• Stack type - 1. Control panel open.2. Turn on/off toggle switch.• OPL/Coin Type - Press “High Temp.” twice. |
NOTE
- Coin type : Value of coin 2 is same function as setting for the e-Suds coin pulse.
- Card type: Value of coin 2 is same function as the top off price.
(As changing the value of coin 2, you can change the top off price and e-Suds coin pulse.)
11. Penny increment pricing offset
This represents the cent increment price offset used when debit card is setup.
Entering set up mode.You will see LqC1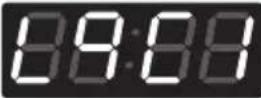 | Button Display | |
| Press theHigh Temp. button. | 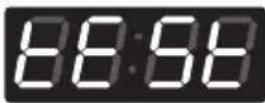 | |
| Press theMed Temp. or theLow Temp. button untilappears in the display. | 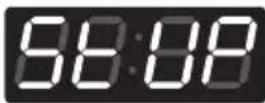 | |
| Press theStartbutton. | 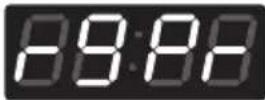 | |
| Press theMed Temp. or theLow Temp. button untilappears in the display. | 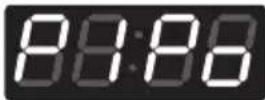 | |
| Press theStartbutton.Display previous penny increment pricing offset. | 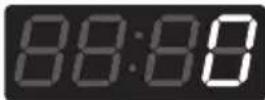 | |
| PressMed Temp.(+) orLow Temp.(-)button to select value of PIPo. (0~4) | ||
| Press theStartbutton.The machine sets up the PIPo, then advances to the next process automatically. | 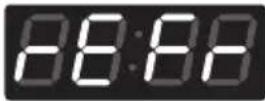 | |
| 1. Continue to set up the next mode.2. Stop the change of setup value and go back to ready mode.• Coin type - Turn on/off toggle switch.• Card type - Pull the service card.• Stack type - 1. Control panel open.2. Turn on/off toggle switch.• OPL/Coin Type - Press “High Temp.” twice. |
NOTE
- Pence increment pricing offset is available only in card type. (It hasn't affected on the coin type's price setting.)
12. Top off time
Entering set up mode.You will see LqC1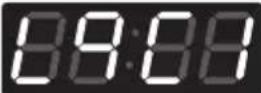 | Button Display | |
| Press theHigh Temp. button. | 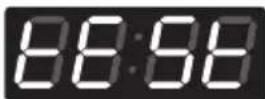 | |
| Press theMed Temp. or theLow Temp. button untilappears in the display. | 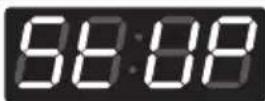 | |
| Press theStartbutton. | 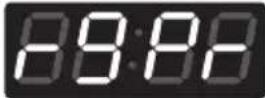 | |
| Press theMed Temp. or theLow Temp. button untilappears in the display. | 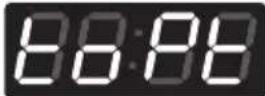 | |
| Press theStartbutton.Display previous top off time. | 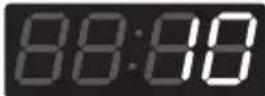 | |
| PressMed Temp.(+) or Low Temp.(-) button to select time between 1 and 30. | ||
| Press theStartbutton.The machine sets up the top off time, then advances to the next process automatically. | 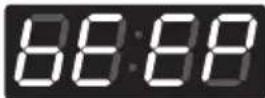 | |
| 1. Continue to set up the next mode.2. Stop the change of setup value and go back to ready mode.• Coin type - Turn on/off toggle switch.• Card type - Pull the service card.• Stack type - 1. Control panel open.2. Turn on/off toggle switch.• OPL/Coin Type - Press “High Temp.” twice. |
13. Beep volume
Entering set up mode.You will see LqC1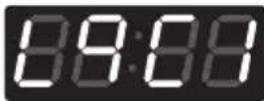 | Button Display | |
| Press the High Temp. button. | 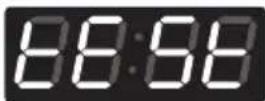 | |
| Press the Med Temp. or the Low Temp. button until appears in the display. | 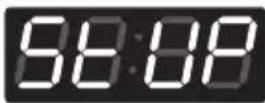 | |
| Press the Start button. | 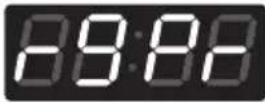 | |
| Press the Med Temp. or the Low Temp. button until appears in the display. | 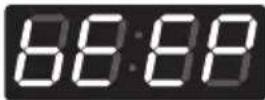 | |
| Press the Start button.Display previous value. | 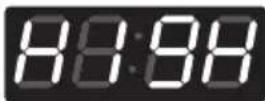 | |
| Press Med Temp.(+) or Low Temp.(-) button to select High or Low or Off. | ||
| Press the Start button.The machine sets up the beep volume, then advances to the next process automatically. | 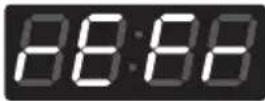 | |
| 1. Continue to set up the next mode.2. Stop the change of setup value and go back to ready mode.• Coin type - Turn on/off toggle switch.• Card type - Pull the service card.• Stack type - 1. Control panel open.2. Turn on/off toggle switch.• OPL/Coin Type - Press “High Temp.” twice. |
14. Time to keep the coin (Use only for coin type)
| Entering set up mode.You will see LqC1 | Button Display | |
| Press theHigh Temp. button. | | |
| Press theMed Temp. or theLow Temp. button untilappears in the display. | | |
| Press theStartbutton. | | |
| Press theMed Temp. or theLow Temp. button untilappears in the display. | 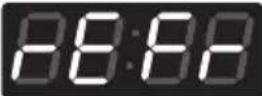 | |
| Press theStartbutton.Display previous value. | 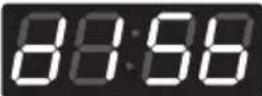 | |
| PressMed Temp.(+) orLow Temp.(-) button to select time between 1 ~ 180 or 'Disable'. | ||
| Press theStartbutton.The machine sets up the time to keep the coin, then advances to the next process automatically. | 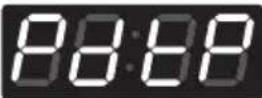 | |
| 1. Continue to set up the next mode.2. Stop the change of setup value and go back to ready mode.• Coin type - Turn on/off toggle switch.• Card type - Pull the service card.• Stack type - 1. Control panel open.2. Turn on/off toggle switch.• OPL/Coin Type - Press "High Temp." twice. |
15. Product type setup – coin/card type or OPL setup
Entering set up mode.You will see LqC1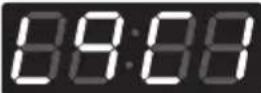 | Button Display | |
| Press theHigh Temp. button. | 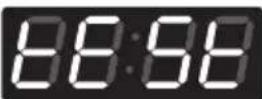 | |
| Press theMed Temp. or theLow Temp. button untilappears in the display. | 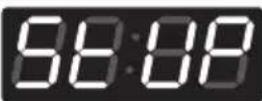 | |
| Press theStartbutton. | 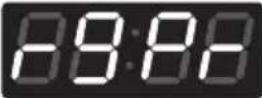 | |
| Press theMed Temp. or theLow Temp. button untilappears in the display. | 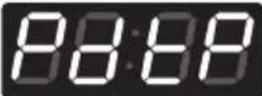 | |
| Press theStartbutton.Display previous value. | 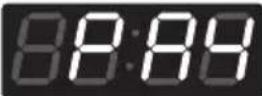 | |
| Press Med Temp. or Low Temp. button and then selectorQQCCoin/Card type settingQQEOPL type setting | 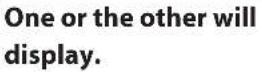 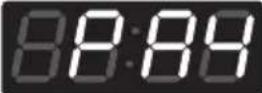 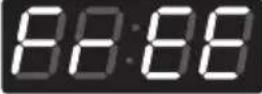 | |
| Press theStartbutton.The machine sets up the time to keep the coin, then advances to the next process automatically. | 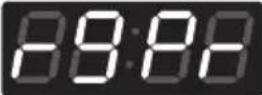 | |
| 1. Continue to set up the next mode.2. Stop the change of setup value and go back to ready mode.• Coin type - Turn on/off toggle switch.• Card type - Pull the service card.• Stack type - 1. Control panel open.2. Turn on/off toggle switch.• OPL/Coin Type - Press “High Temp.” twice. |
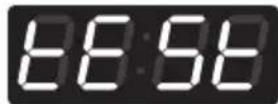
PROGRAMMING MODE - Test Mode
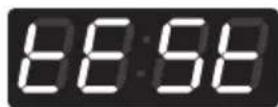
Diagnostic tests : tC 53 ay)
This program has been added for testing the dryer and detecting errors.
Entering the test mode
| Machine | Data Name | Button Display Description | ||
| CARD / COIN | Entering the test mode | 1. Entering programming mode | 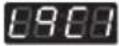 | Insert service card (card type), Turn on/off toggle switch (Coin type). |
| 2. High Temp. | 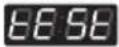 | Press the High Temp. button.Then 85B appears in the display. | ||
| 3. Start | 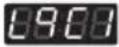 | Enter the diagnostic test mode. | ||
| OPL / Coin Type | 1. Entering programming mode. | 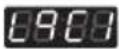 | Push and hold the High Temp. and Low Temp. at the same time. After that push Med Temp. button for 3 times. Push Start button. | |
| 2. High Temp. | 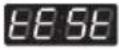 | Press the High Temp. button.Then 85B appears in the display. | ||
| 3. Start | 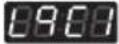 | Enter the diagnostic test mode. | ||
1. 89:00
Pressing the Start button cycles to the next test function.
| Number of times the Start button is pressed | Checking point Display | |
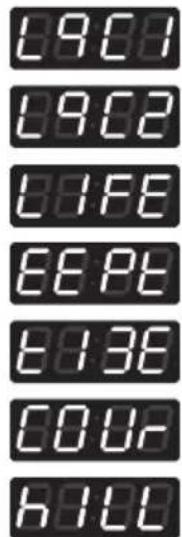
| None LqC 1 | ||
| 1 time | Check the version and code of machine.■ ELECTRIC TYPE: P3 OE■ GAS TYPE: P3 Og | Version and code of machine (All LED on)Display P3:OE or P3:Og and gU:XX alternately. XX is the version number. |
| 2 time PDA CHECK | Ir-- | |
| 3 time Motor runs. M | Measured moisture value (70~239) | |
| 4 time | ■ ELECTRIC TYPE: Heater runs.Motor + Heater 1 (2700W)■ GAS TYPE: GAS valve runs.Motor + Valve | Current temperature (5~70)(Displays the temperature inside the drum in ° Celsius.) |
| 5 time | ■ ELECTRIC TYPE: Heater runs.Motor + Heater 1 +Heater 2 (5400W)■ GAS TYPE: GAS valve runs.Motor+Valve | Current temperature (5~70)(Displays the temperature inside the drum in ° Celsius.) |
| 6 time | LED & KEY CHECKPress High Temp. button.Press Med Temp. button.Press Low Temp. button.Press No Heat button | Version and code of machine |
| 7 time Test ends. LqC1 | ||
| During check, if the door is open. | Door switch(Motor & Heater Off, Buzzer beeps seven times) | dE(The door is open. Please close the door completely) |
| During check, if the door is closed | Test goes back at step 2.(Motor on & Heater Off) | Measured moisture value (70~239) |
2. Factory reset - EEPt
After a factory reset, all values are reset to the default values.
Entering set up mode.You will see LqC1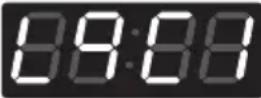 | Button Display | |
| Press the Med Temp. or the Low Temp. Button untilappears in the display. | 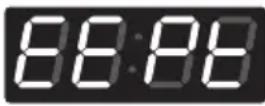 | |
| Press the Start button. | 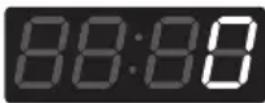 | |
| Press the Med Temp. button untilappears in the display. | 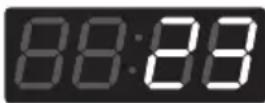 | |
| Press the Start button, then factory reset is done.is displayed. | 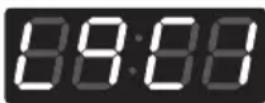 | |
| 1. Continue to set up the next mode.2. Stop the change of setup value and go back to ready mode.• Coin type - Turn on/off toggle switch.• Card type - Pull the service card.• Stack type - 1. Control panel open.2. Turn on/off toggle switch.• OPL/Coin Type - Push “High Temp.” + “Low Temp.” and the ‘3’. |
NOTE
- Dryer default value for CARD/COIN machine.
- Drying time 50 Minute
- Top off time 10 Minute
- Drying time in OPL machine can be changed from 10 to 100 Minutes by pressing the cycle button.
3. Time Set Up
Entering set up mode.You will see LqC1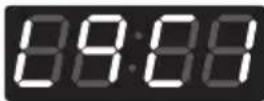 | Button Display | |
| Press the Med Temp. or the Low Temp. button until 8938appears in the display. | 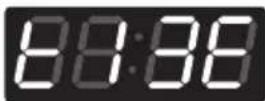 | |
| Press the Start button.The display cycles through 2000 --> 0101 --> Sat --> 0000. | ||
| Press the Start button. | ||
| Press Med Temp. (+) or Low Temp.(-) button to select year between 2000 and 2099. | 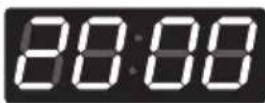 | |
| Press the Start button.The machine sets up the year, then advances to the next process automatically. | 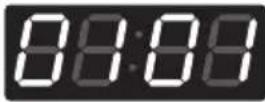 | |
| Press Med Temp. (+) or Low Temp.(-) button to select month between 01 and 12. | 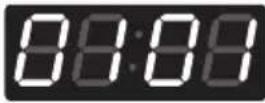 | |
| Press the Start button.The machine sets up the month, then advances to the next process automatically. | 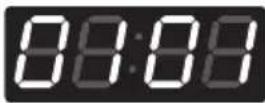 | |
| Press Med Temp. (+) or Low Temp.(-) button to select day between 01 and 31. | 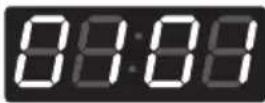 | |
| Press the Start button.The machine sets up the day, then advances to the next process automatically. | 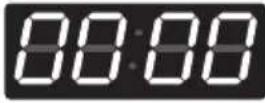 | |
| Press Med Temp. (+) or Low Temp.(-) button to select hour between 00 and 23. | 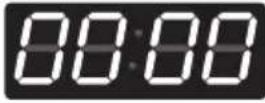 | |
| Press the Start button.The machine sets up the hour, then advances to the next process automatically. | 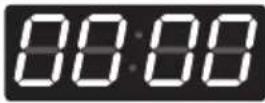 | |
| Press Med Temp. (+) or Low Temp.(-) button to select minute between 00 and 59. | 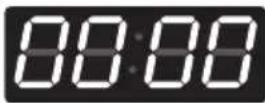 | |
| Press the Start button.The machine sets up the minute. | 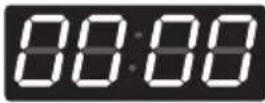 | |
| 1. Continue to set up the next mode.2. Stop the change of setup value and go back to ready mode.• Coin type - Turn on/off toggle switch.• Card type - Pull the service card.• Stack type - 1. Control panel open.2. Turn on/off toggle switch.• OPL/Coin Type - Press “High Temp.” twice. |
4. Courtesy cycle
Courtesy cycle is like a complimentary cycle given to the customer when the dryer goes out of order when the customer has made the payment to dry one's clothes.
Entering set up mode.You will see LqC1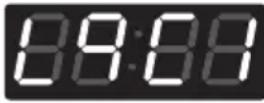 | Button Display | |
| Press theMed Temp. or theLow Temp. Button untilappears in the display. | 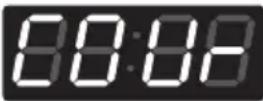 | |
| Press theStartbutton. | 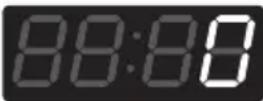 | |
| Press theMed Temp. button untilappears in the display. | 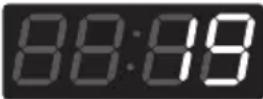 | |
| Press theStartbutton.Display will show | 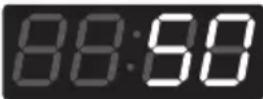 | |
| Select the course you desire.⚠NOTE• In case of dryer card type, it has to insert the cash card after removing the service card. Then press the cycle course and the start button. (It is only applicable to the dryer's card type specially and there is no subtraction in card balance at the Courtesy cycle.) | 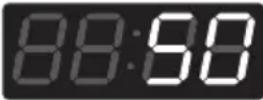 | |
| Press theStartbutton.Display will show the remaining time and start. |
5. Cycle Kill
Coin
| Entering set up mode.You will see LqC1 | Button Display | |
| Press theMed Temp. or theLow Temp. Button untilappears in the display. | 88:88 | |
| Press theStartbutton. | 88:88 | |
| Press theMed Temp. button untilappears in the display. | 88:88 | |
| Press theStartbutton. | ||
| Displaywith beeping. | 88:88 | |
| Go back to ready mode. |
Card type
| Insertcycle kill card. | Descriptions Display | |
| Display the current time and done. | 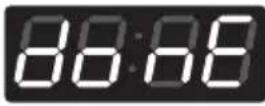 | |
| Display [ ] | 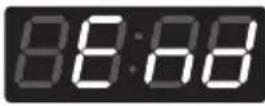 | |
| Go back to ready mode. |
NOTE
■ OPL type - Dryer machine will end the cycle by opening the door.
PROGRAMMING MODE - Collect Mode
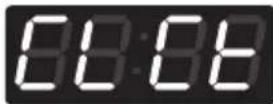
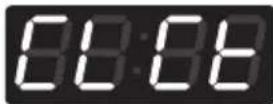
Collect Information Data : CLCt (display)
The dryer collects the usage data so that the owner can check various information like number of various cycles used, how many times card or coins used, etc.
Entering the collect mode
| Data Name | Button Display Description | ||
| Entering the collect mode | 1. Entering the programming mode. | 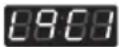 | Insert service card(card type), Turn on/off toggle switch (Coin type). |
| 2. High Temp. |  | Press the High Temp. button until “tESt” appears in the display. | |
| 3. Low Temp. | 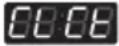 | Press the Med Temp. or Low Temp. button until “CLCt” appears in the display. | |
| 4. Start | 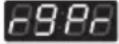 | Enter the Collect information data. | |
| 5. Med Temp. or Low Temp. | Move to each data list that you want to check by pressing with Med Temp. or Low Temp. button. | ||
| 6. Start Display the value of selected data list | |||
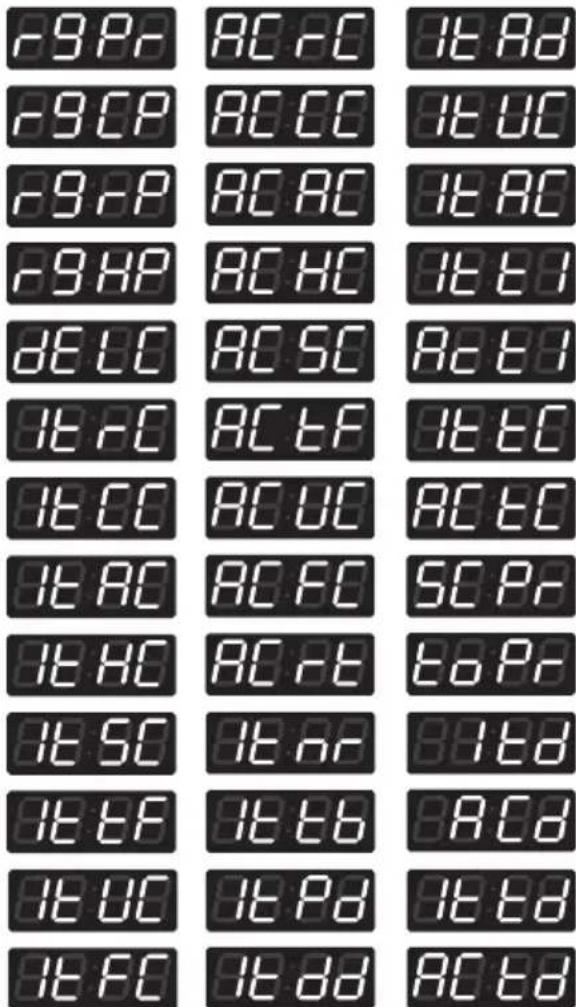
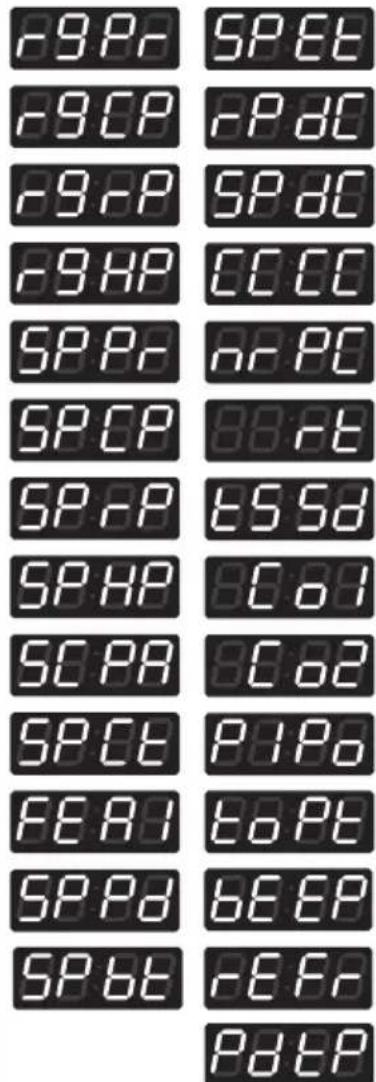
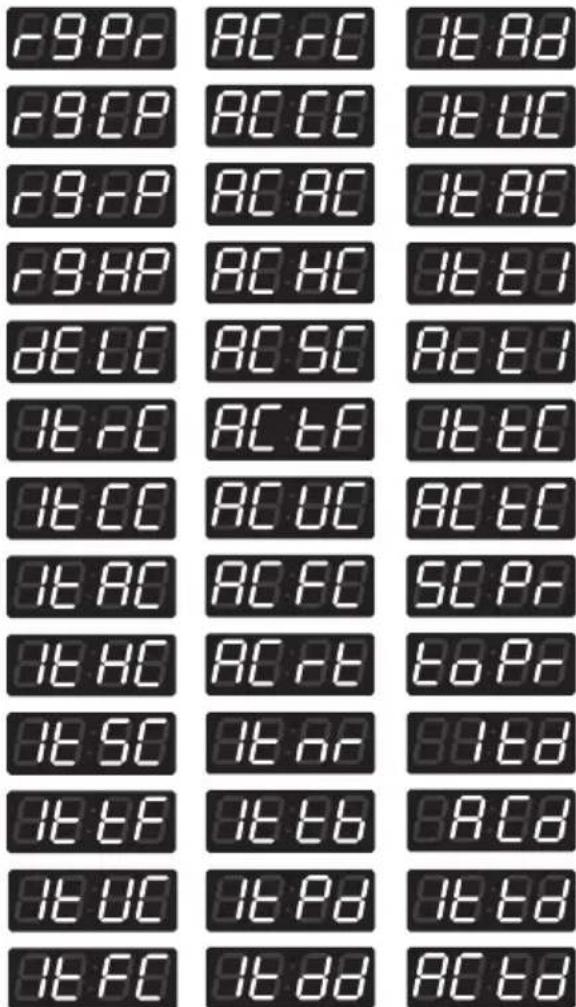
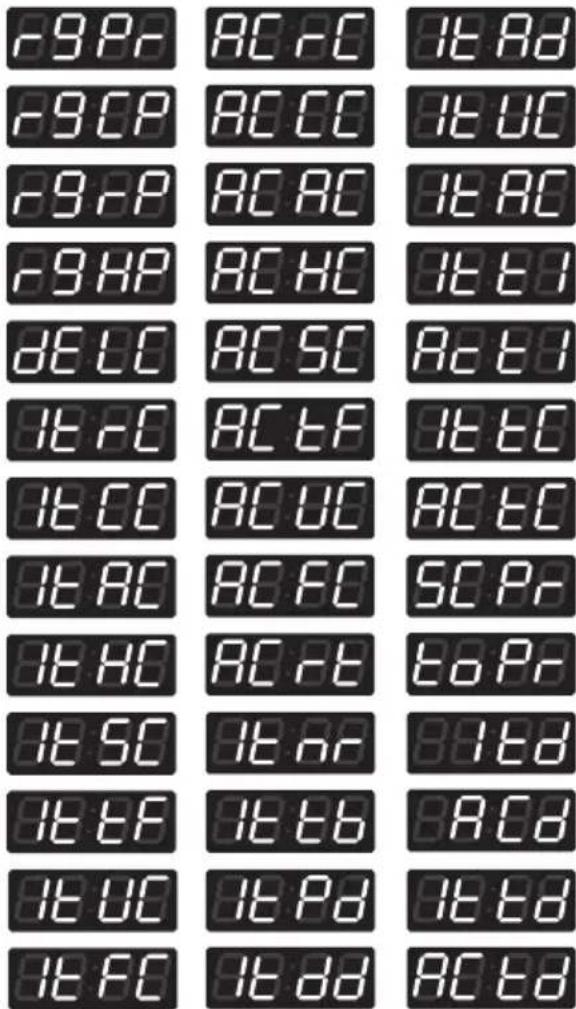
Check the collect information reference to the follow lists. The Lists are displayed by abbreviations.
■ Collect Mode Data lists
| No. | Abbreviation | Meaning Description | |
| 1 | rgPr Regular Price | 0,00~9,90 | |
| 2 | rgCP Regular Cold | Price rgCP is not available in dryer. (It can't enter.) | |
| 3 | rgrP Regular Warm | Price rgrP is not available in dryer. (It can't enter.) | |
| 4 | rgHP | Regular Hot Price | rgHP is not available in dryer. (It can't enter.) |
| 5 | dELC | Dryer Moisture Sense | dELC is not available in dryer. (It can't enter.) |
| 6 | ltrC | Interval Regular Cycles | Number of Regular cycles ( 0~65535 ) |
| 7 | ItCC Interval Regular | Cold Cycles | ItCC is not available in dryer. (It can't enter.) |
| 8 | ItAC Interval Regular | Warm Cycles | ItAC is not available in dryer. (It can't enter.) |
| 9 | ItHC | Interval Regular Hot Cycles | ItHC is not available in dryer. (It can't enter.) |
| 10 | ItSC | Interval Super Cycles | ItSC is not available in dryer. (It can't enter.) |
| 11 | IttF | Interval Topoff Cycles (Dryer Only) | Number of Topoff cycles ( 0~65535 ) |
| 12 | ItUC | Interval Service Cycles | Number of Service cycles (0~65535) |
| 13 | ItFC | Interval Token Cycles | Number of Token cycles (0~65535) |
| 14 | ACrC | Accumulated Regular Cycles | Number of Regular cycles ( 0~65535 ) |
| 15 | ACCC | Accumulated Regular Cold Cycles | ACCC is not available in dryer. (It can't enter.) |
| 16 | ACAC | Accumulated Regular Warm Cycles | ACAC is not available in dryer. (It can't enter.) |
| 17 | ACHC | Accumulated Regular Hot Cycles | ACHC is not available in dryer. (It can't enter.) |
| 18 | ACSC | Accumulated Super Cycles (Washer Only) | ACSC is not available in dryer. (It can't enter.) |
| 19 | ACtF | Accumulated Topoff Cycles (Dryer Only) | Number of Topoff cycles ( 0~65535 ) |
| 20 | ACUC | Accumulated Service Cycles | Number of Service cycles ( 0~65535 ) |
| 21 | ACFC | Accumulated Token Cycles | Number of Token cycles (0~65535) |
| 22 | ACrt | Accumulated Run Time | Number of Running minutes ( 0~65535) |
Collect Mode Data lists
| No. | Abbreviation | Meaning Description | |
| 23 | Itnr Interval No | Runs Itnr is not available in dryer. | |
| 24 | Ittb Interval Trouble Cycles Money inserted, but no run. | ||
| 25 | ItPd Interval Power Downs No money, but ran. | ||
| 26 | Itdd | Interval Unauthorized Service Door Openings | Number of Unauthorized Service Door Openings (0~255) |
| 27 | ItAd | Interval Authorized Service Door Openings | Number of Unauthorized Service Door Openings (0~255) |
| 28 | ItUC | Interval Unauthorized Coin Vault Openings | Number of Authorized Service Door Openings (0~255) |
| 29 | ItAC Interval Authorized Coin Vault Openings | Number of Authorized Service Door Openings (0~255) | |
| 30 | Ittl Interval Total Income | Amount of money for Total Income (0,00~65535) | |
| 31 | Actl Accumulated Total Income | Amount of money for Total Income (0,00~65535) | |
| 32 | IttC | Interval Total Cycles | Number of Total cycles (0~65535) |
| 33 | ACtC | Accumulated Total Cycles | Number of Total cycles (0~65535) |
| 34 | SCPr | Super Cycle Price | Scpr is not available in dryer. (It can't enter.) |
| 35 | toPr Top Off Price | 0,00~9,90 | |
| 36 | Ltd Interval Money | Amount of money for regular cycle (0~65535) | |
| 37 | ACd Accumulated Money | Amount of money for regular cycle (0~65535) | |
| 38 | Ittd Interval Topoff Money Amount of money for Topoff (0~65535) | ||
| 39 | ACtd | Accumulated Topoff Money | Amount of money for Topoff (0~65535) |
INTERVAL means collecting since last data collection.
ACCUMULATED means collecting over a period of time since last factory reset (EEPt).
✿ Authorized: Turning on/off the toggle switch with PDA Communication.
(Turning on/off the toggle switch within 30 minutes after Communicating with PDA)
* Unauthorized: Turning on/off the toggle switch without PDA Communication.
MAINTENANCE
■ Regular cleaning
WARNING
To reduce the risk of fire, electric shock, or injury to persons when using this appliance, follow basic precautions, including the following:
- Unplug the dryer before cleaning to avoid the risk of electric shock. Failure to follow this warning can cause serious injury, fire, electric shock, or death.
- Never use harsh chemicals, abrasive cleaners or solvents to clean the dryer. They will damage the finish.
Cleaning the Exterior
Proper care of your dryer can extend its life. The outside of the machine can be cleaned with warm water and a mild, nonabrasive household detergent. Immediately wipe off any spills with a soft, damp cloth.
NOTE
Do not use methylated spirits, solvents, or similar products. Never use steel wool or abrasive cleansers; they can damage the surface.
Cleaning the Interior
Wipe around the door opening and seal with a soft, damp cloth to prevent lint and dust buildup that could damage the door seal.
Clean the window with a soft cloth dampened with warm water and a mild, nonabrasive household detergent; then wipe dry.
The stainless steel drum can be cleaned with a conventional stainless steel cleaner, used according to the manufacturer's specifications.
Never use steel wool or abrasive cleansers; they can scratch or damage the surface.
Cleaning Around and Under the Dryer
Vacuum lint and dust from around the dryer and underneath it regularly. Vent ductwork should be checked for lint buildup and cleaned at least once per year. If any noticeable reduction in airflow or drying performance occurs, immediately check ductwork for obstructions and blockages.
Maintaining Ductwork
Vent ductwork should be checked for lint buildup and cleaned at least once per year. If any noticeable reduction in airflow or drying performance occurs, immediately check ductwork for obstructions and blockages. Contact a qualified technician or service provider.
Cleaning the Lint Filter
Always clean the lint filter after every cycle.
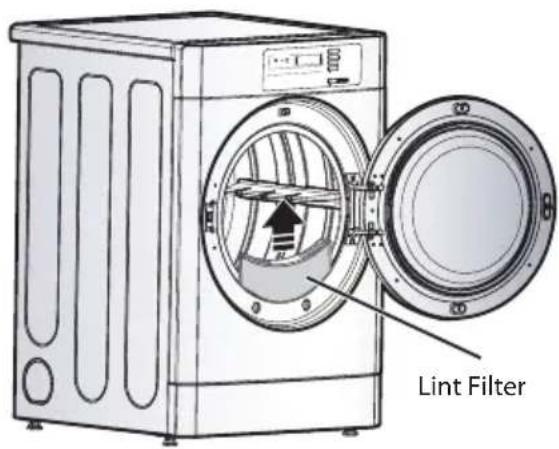
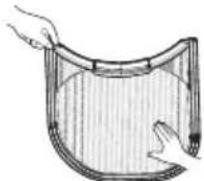
To clean, open the dryer door and pull the lint filter straight up. Then:
- Roll any lint off the filter with your fingers, or
- Vacuum the lint filter, or
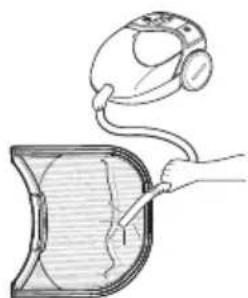
natural_image
Illustration of a hand holding a handheld device next to a meshed surface (no text or symbols)- If the lint filter has become very dirty or clogged with fabric softener, wash the lint filter in warm, soapy water and allow to dry thoroughly before reinstalling.
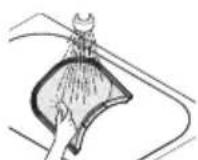
NOTE
NEVER operate the dryer without the lint filter in place. NEVER operate the dryer with a wet lint filter. Recommended frequency of periodic servicing is once a year
STACK MACHINE INSTALLATION INSTRUCTIONS
1. Suitable model for stacking
| Stack position | Upper Lower | ||
| Dryer Washer Dryer | |||
| Stack position | RP1329AD5S | F1069FDP | RP1329AD6S |
| RP1329AN7S | F1069FD2P | RP1329AN1S | |
| RP1329A7S | F1069FD6P | RP1329A1S | |
| RV1329AD5S | RV1329AD6S | ||
| RV1329AN7S | RV1329AN1S | ||
| RV1329A7S | RV1329A1S | ||
2. Sliding kit
- Sliding kit is provided in the upper dryer.
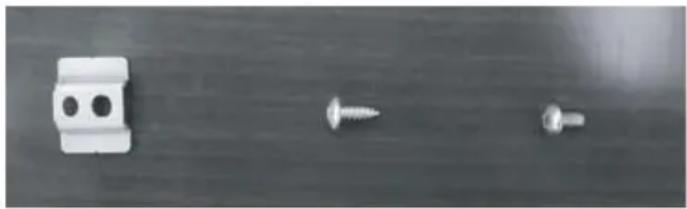
- Sliding kit includes the slide bracket(2), sliding pad(4), screw(10), machine screw(8).
1) Sliding bracket
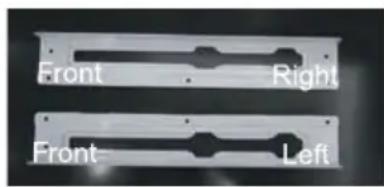
2) Sliding pad 3) Screw 4) Machine screw
natural_image
Three small metal screw fasteners on a dark surface (no text or symbols visible)3. Stacking kit
- Stacking kit is provided in the upper dryer.
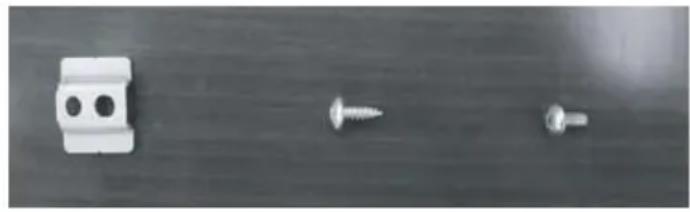
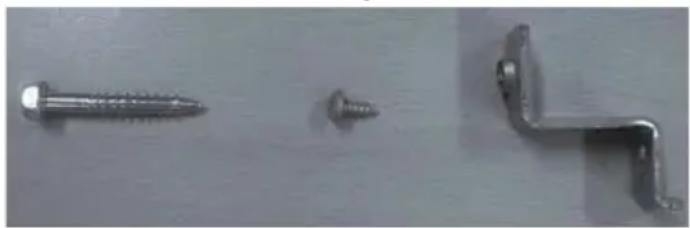
- Stacking kit includes the stacking bracket(1), security bracket(3), bolt(1), screw(6).
![STACKING KIT [For LG Washers & Dryers] DO NOT DISCARD LG Electronics Inc.](/content/2026/05/975591/images/4c5dabcd20c8640397b3913419d1d38fb3b24b6fb1f826bcd4d7b15f459348b1.jpg)
1) Stacking bracket 2) Bolt 3) Screw 4) Security bracket

natural_image
White rectangular electronic component with mounting holes and mounting brackets (no visible text or symbols)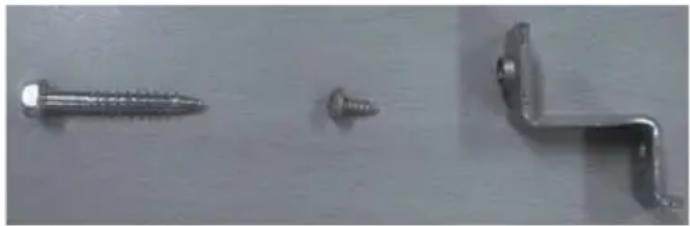
natural_image
Three metal fasteners on a surface: two with hexagonal bolts and one with a bent bracket (no text or symbols visible)NOTE
- The machine can be stacked only on the model designated as suitable by LGE.
- Do not stack the washer on the top.
- You can order the parts for stacking from Qualified dealer or Qualified SVC agent of LGE.
4. Stacking the machine
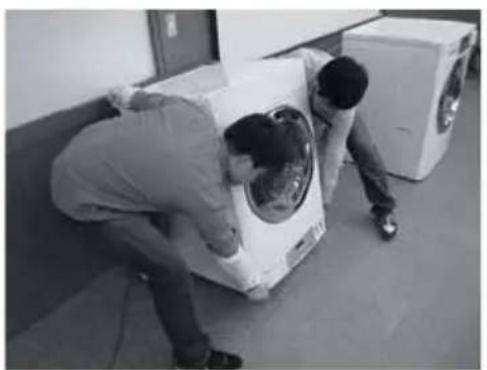
natural_image
Two people working on a large white washing machine in an indoor setting (no visible text or symbols)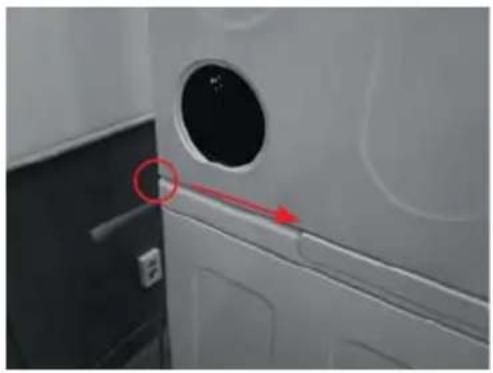
natural_image
Close-up of a door panel with a circular vent and red arrow pointing to a detail (no text or symbols visible)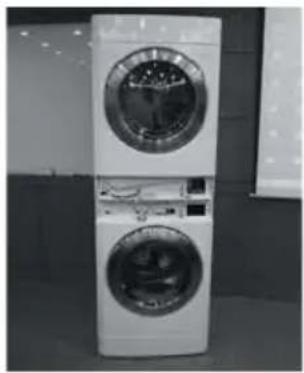
natural_image
Exterior view of a white washing machine with circular doors and front-mounted screens (no visible text or symbols)- Lift and stack the upper dryer on the lower washer.
- Set the rear of the upper dryer and the rear of the lower washer in the same position.
- Push the upper dryer matching the slide & stacking bracket to make upper and lower front parallel.
5. Stacking bracket installation
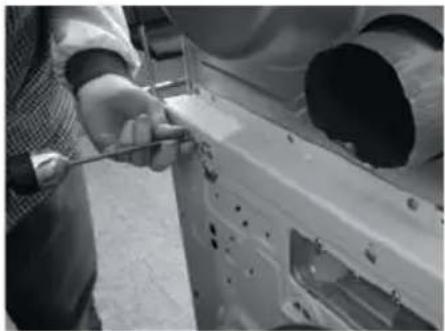
natural_image
Person using a tool to adjust or install a mechanical component, no visible text or symbols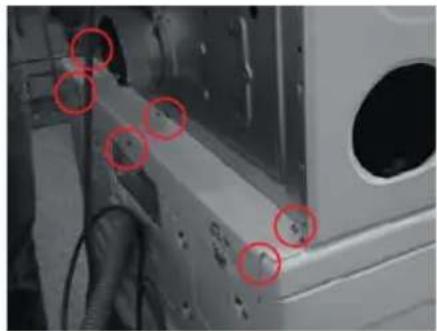
natural_image
Close-up of a mechanical component with red circles highlighting specific parts (no visible text or symbols)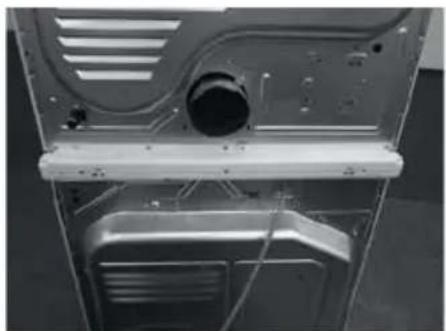
natural_image
Interior view of a stainless steel appliance frame with ventilation slots and internal components (no visible text or symbols)- Install the stacking bracket at the rear of the stacked dryer and washer.
- Assemble the six(6) screw to fix the lower washer and upper dryer.
ERROR MODE
■ Meaning of Error Codes that LED displays during occurrence or problem.
Dryer error code
| PROBLEM POSSIBLE CAUSE SOLUTION | ||
 | It is displayed when thermistor is opened or shorted | Thermistor should be replaced. |
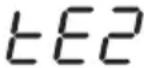 | It is displayed when thermistor temperature have increased about 17 degrees for 10 seconds | Thermistor should be replaced. |
 | Disconnection of card reader wire. Check the card reader wire. | |
POWER FAIL RECOVERY
In case of power failure the machine stops running but the time display remains on, showing the time just before power failure.
Press the Start button after the power is restored, then the machine will restart.
DEFAULT DRYER SETTINGS
| Default Settings Default | |
| Cycle Time (Minutes) 50 Minutes | |
| Cool Down Time Cycle 2 Minutes | |
| High Temperature 154,4^ ( 68^ ) | |
| Medium Temperature 140^ ( 60^ ) | |
| Low Temperature 125,6^ ( 52,5^ ) | |
| Top Off Time (Minutes per coin) 10 Minutes | |
| Coin #1 Value | 0.1 |
| Coin #2 Value | 0.1 |
| Minutes/Minutes and seconds | Minutes |
| Fahrenheit/Celsius | Fahrenheit |
| Error Mode | On |
RP1329AD1S / RV1329AD1S RP1329AN4S / RV1329AN4S RP1329A4S / RV1329A4S
RP1329AD5S / RV1329AD5S RP1329AN7S / RV1329AN7S RP1329A7S / RV1329A7S
RP1329AD6S / RV1329AD6S RP1329AN1S / RV1329AN1S RP1329A1S / RV1329A1S
คุณลักษณะเฉพาะ
natural_image
Symbol of a trash bin with crossed lines indicating no waste or discharge (no text or labels)natural_image
Line drawing of a washing machine with open door and side view of two large circular washing machines (no text or symbols)■ ประเภท OPL
natural_image
Line drawing of a front-loading washing machine (no text or symbols)ประเภทOPL
!หมายเหตุ
หมายเหตุ

natural_image
Illustration of a hand holding a handheld device next to a meshed surface (no text or symbols)2) แผ่นเลื่อน
natural_image
Three metallic screw fasteners on a dark surface, no text or symbols visible1) รางสำหรับวางช้อน

natural_image
White plastic electrical enclosure with mounting holes and circuit breakers (no visible text or symbols)2) สลักเกลียว
natural_image
Three metal fasteners on a plain surface: two with threaded screws and one with a bent bracket (no text or symbols visible)natural_image
Two people working on a large white washing machine in an indoor setting (no visible text or symbols)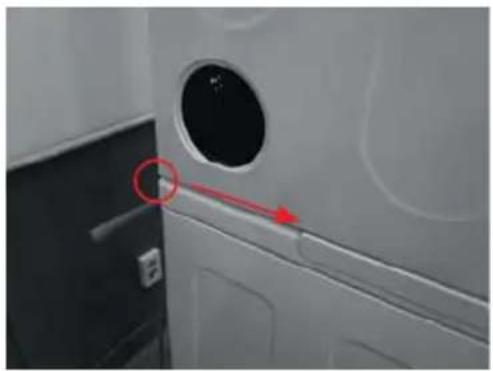
natural_image
Close-up of a door with a circular opening and a red arrow pointing to a detail (no text or symbols visible)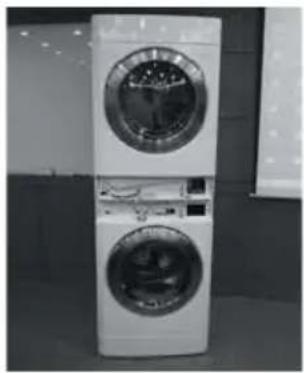
natural_image
Exterior view of a white washing machine with circular doors and front-mounted screens (no visible text or symbols)natural_image
Person using a tool to adjust or install a vehicle component (no visible text or symbols)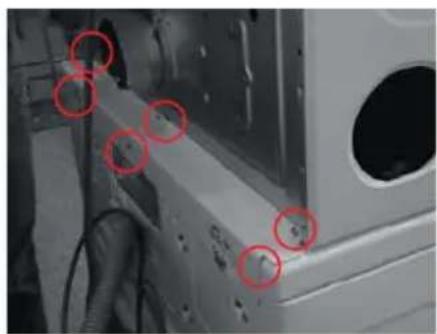
natural_image
Close-up of a mechanical component with red circles highlighting specific features (no visible text or symbols)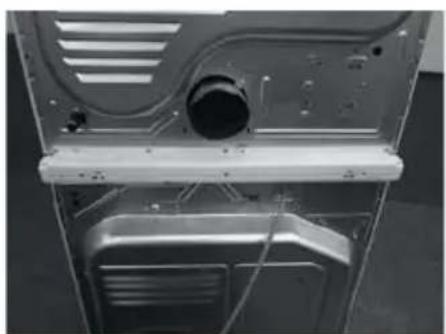
natural_image
Interior view of a refrigerator with visible door, ventilation slots, and internal compartments (no text or symbols)- MODEL
- PRODUCT FEATURES
- OUTSTANDING PERFORMANCE
- ARTISTIC DESIGN
- EASY OF USE
- ULTRA CAPACITY
- IMPORTANT SAFETY INSTRUCTIONS
- READ ALL INSTRUCTIONS BEFORE USE
- WARNING
- Your Safety and the safety of others is very important.
- DANGER
- CAUTION
- BASIC SAFETY PRECAUTIONS
- Never stop a tumble dryer before the end of the drying cycle unless all items are quickly removed and spread out so that the heat is dissipated.
- Disposal of your old appliance
- WHAT IS NOT COVERED.
- WHAT TO DO IF YOU SMELL GAS: (APPLICABLE FOR GAS MODELS)
- GROUNDING INSTRUCTIONS
- SAFETY INSTRUCTIONS FOR INSTALLATION
- Exhaust/Ducting:
- SAFETY INSTRUCTIONS FOR CONNECTING ELECTRICITY
- CONTENTS
- PRODUCT FEATURES
- IMPORTANT SAFETY INSTRUCTIONS
- INTRODUCING YOUR DRYER
- MAINTENANCE
- STACK MACHINE INSTALLATION INSTRUCTIONS
- ERROR MODE
- POWER FAIL RECOVERY
- DEFAULT DRYER SETTINGS
- Declaration of Conformity
- INTRODUCING YOUR DRYER
- Specifications
- NOTE
- Control panel features
- Card type
- ■ OPL type
- Coin type
- Cycle button
- High Temp.
- Med Temp.
- Low Temp.
- No Heat
- Start/Pause button
- Insert card/coin/Token (not for OPL type)
- Select the cycle
- Top off (To add more time)
- Change cycle
- Cycle finish
- PROGRAMMING MODE
- Programming mode
- ■ How to enter "Programming mode"
- - Card Type
- - Coin Type
- - OPL/Coin Type
- How to use button
- Card / Coin type
- Algorithm Flow Chart shows how to control programming mode.
- Before program set, check the structure of programming mode.
- ■ Structure of Programming mode
- OPL type
- PROGRAMMING MODE - Setup Mode
- Setup Mode: EC 83 ay)
- How to change regular price.
- How to change special price
- How to enter the FEBB
- ■ Structure of FE89
- Content of 8889
- 3-1. Special price day setup
- 3-2. Vend type setup - card type or coin type setup
- 3-3. Top off apply or not setup
- How to enter the special price day setup
- ■ Structure of 5888
- 4-1. How to change sunday
- Special price beginning time setup
- Special price ending time setup
- Regular priced dryer cycle time
- Special priced dryer cycle time
- Value of coin 1
- Value of coin 2 (Set up for top off price and e-suds coin pulse)
- Penny increment pricing offset
- Top off time
- Beep volume
- Time to keep the coin (Use only for coin type)
- Product type setup – coin/card type or OPL setup
- PROGRAMMING MODE - Test Mode
- Diagnostic tests : tC 53 ay)
- 89:00
- Factory reset - EEPt
- Time Set Up
- Courtesy cycle
- Cycle Kill
- Coin
- PROGRAMMING MODE - Collect Mode
- Collect Information Data : CLCt (display)
- MAINTENANCE
- ■ Regular cleaning
- Cleaning the Exterior
- Cleaning the Interior
- Cleaning Around and Under the Dryer
- Maintaining Ductwork
- Cleaning the Lint Filter
- STACK MACHINE INSTALLATION INSTRUCTIONS
- Suitable model for stacking
- Sliding kit
- Stacking kit
- Stacking the machine
- Stacking bracket installation
- ERROR MODE
- ■ Meaning of Error Codes that LED displays during occurrence or problem.
- POWER FAIL RECOVERY
- DEFAULT DRYER SETTINGS
- คุณลักษณะเฉพาะ
- ■ ประเภท OPL
- !หมายเหตุ
Brand : LG
Model : RP1329AN7S
Category : Washing machine