
VRS82740VF - Broom BEKO - Free user manual and instructions
Find the device manual for free VRS82740VF BEKO in PDF.


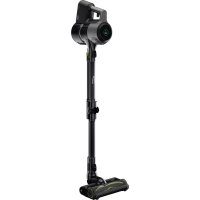
| Product Type | Stick Vacuum Cleaner (Cordless) |
| Brand | Beko |
| Model | VRS82740VF |
| Dimensions (L x W x H) | 250 mm x 200 mm x 1150 mm |
| Weight | 2.5 kg |
| Power Source | Rechargeable Lithium-Ion Battery |
| Battery Voltage | 25.2 V |
| Dust Capacity | 0.5 L |
| Filtration System | Washable HEPA-like Filter |
| Runtime (Eco Mode) | Up to 45 minutes |
| Charging Time | 4-5 hours |
| Functions | 2-in-1 Stick & Handheld, Wall-Mountable, LED Display |
| Attachments Included | Crevice Tool, Brush Tool, Wall Mount |
| Floor Types | Hard Floors, Low-Pile Carpets |
| Maintenance | Empty Dust Cup, Clean Filter, Replace Battery |
| Safety Features | Overheat Protection, Automatic Shut-Off |
| Spare Parts Available | Filter, Battery, Brush Roll, Charging Adapter |
| Warranty | 2 Years Standard |
Frequently Asked Questions - VRS82740VF BEKO
User questions about VRS82740VF BEKO
0 question about this device. Answer the ones you know or ask your own.
Ask a new question about this device
Download the instructions for your Broom in PDF format for free! Find your manual VRS82740VF - BEKO and take your electronic device back in hand. On this page are published all the documents necessary for the use of your device. VRS82740VF by BEKO.
USER MANUAL VRS82740VF BEKO
Cordless Stick Vacuum Cleaner
User Manual

VRS 82740 VF
EN
Please read this user manual first!
Dear Valued Customer,
Thank you for selecting this Beko appliance. We hope that you get the best results from your appliance which has been manufactured with high quality and state-of-the-art technology. Therefore, please read this entire user manual and all other accompanying documents carefully before using the appliance and keep it as a reference for future use. If you handover the appliance to someone else, give the user manual as well. Follow the instructions by paying attention to all the information and warnings in the user manual.
Remember that this user manual may also apply to other models. Differences between models are explicitly described in the manual.
Meanings of the Symbols
Following symbols are used in various sections of this manual:

Important information and useful hints about usage.

WARNING: Warnings against dangerous situations concerning the security of life and property.

Protection class for electric shock.

This product has been produced in environmentally friendly modern facilities.
1 Important safety and environmental instructions 4-6
1.1 General safety 4 1.2 Compliance with WEEE Directive and Disposing of the Waste Product 5 1.3 Compliance with RoHS Directive 5 1.4 Information on Waste Batteries 5 1.5 Package information 5 1.6 Plug Wiring 6
2 Your cordless stick vacuum cleaner 7-8
2.1 Overview 7 2.2 Technical data 8
3 Usage 9-11
3.1 Intended use 9 3.2 Installation 9 3.2.1 Installation of upper and lower bodies 9 3.2.2 Installation of the lower body and the brush 9 3.3 Charging the appliance 9 3.4 Operating the appliance 9 3.4.1 Adjusting the suction power 9 3.5 Accessories 10
4 Cleaning and care 12-13
4.1 Cleaning the dust container 12 4.2 Cleaning the cyclone 12 4.3 Cleaning the HEPA filter 12 4.4 Cleaning the foam filter 13 4.5 Cleaning the turbo brush 13 4.6 Storage 13 4.7 Moving and transportation 13
5 Guarantee 14
1 Important safety and environmental instructions
This section contains safety instructions that will help protect from risk of personal injury or property damage.
Failure to follow these instructions voids any granted warranty.
1.1 General safety
- This appliance complies with international safety standards. This appliance can be used by children aged from 8 years and above and persons with reduced physical, sensory or mental capabilities or lack of experience and knowledge if they have been given supervision or instruction concerning use of the appliance in a safe way and understand the hazards involved. Children shall not play with the appliance. Cleaning and user maintenance shall not be made by children without supervision.
- If the power cable or the appliance itself is damaged, do not use it. Contact an authorised service. - Your mains power supply should comply with the information supplied on the rating plate of the appliance.
- The mains plug is fitted with a 13A fuse. Ensure the same rating fuse is used should it need replacement.
- Do not use the appliance with an extension cable.
- Prevent damage to the power cable by not squeezing, bending, or rubbing it on sharp edges.
- Do not touch the appliance or its plug when it is plugged in if your hands are damp or wet.
- Do not pull the power cable when unplugging the appliance.
- Do not vacuum flammable materials and when vacuuming cigarette ash, make sure that it has cooled down.
- Do not vacuum water or other liquids.
- Protect the appliance from rain, humidity and heat sources.
- Never use the appliance in or near places where combustible or inflammable ambience or places are present. • Unplug the appliance before cleaning and maintenance.
- Do not immerse the appliance or its power cable in water for cleaning.
1 Important safety and environmental instructions
- Do not attempt to dismantle appliance in any way other than that shown in the Cleaning and Care section of this user manual.
- Only use the original parts recommended by the manufacturer.
- Do not clean particles such as cement, plaster, and compressed paper in order to prevent the filter from being clogged and the motor from being damaged.
- Only use the adapter supplied with the appliance.
- Do not use the appliance without filters; otherwise it can get damaged.
- If you keep the packaging materials, store them out of the reach of children.
1.2 Compliance with WEEE Directive and Disposing of the Waste Product

This product complies with EU WEEE Directive (2012/19/EU). This product bears a classification symbol for waste electrical and electronic equipment (WEEE). This product has been manufactured with high quality parts and materials which can be reused and are suitable for recycling. Do not dispose of the waste product with normal domestic and other wastes at the end of its service life. Take it to the collection center for the recycling of electrical and electronic equipment. Please
consult your local authorities to learn about these collection centers.
1.3 Compliance with RoHS Directive
The product you have purchased complies with EU RoHS Directive (2011/65/EU). It does not contain harmful and prohibited materials specified in the Directive.
1.4 Information on Waste Batteries

This symbol on rechargeable batteries/batteries or on the packaging indicates that the rechargeable battery/battery may not be disposed of with regular house hold rubbish. For certain rechargeable batteries/batteries, this symbol may be supplemented by a chemical symbol. Symbols for mercury (Hg) or lead (Pb) are provided if the rechargeable batteries/batteries contain more than 0,0005 % mercury or more than 0,004 % lead.
Rechargeable batteries/batteries, including those which do not contain heavy metal, may not be disposed of with household waste. Always dispose of used batteries in accordance with local environmental regulations. Make enquiries about the applicable disposal regulations where you live.
1.5 Package information

Packaging materials of the product are manufactured from recyclable materials in accordance with our National
Environment Regulations. Do not dispose of the packaging materials together with the domestic or other wastes. Take them to the packaging material collection points designated by the local authorities.
1 Important safety and environmental instructions
1.6 Plug Wiring
The moulded plug on this appliance incorporates a 13 A fuse. Should the fuse need to be replaced an ASTA approved BS1362 fuse of the same rating must be used. Do not forget to refit the fuse cover. In the event of losing the fuse cover, the plug must not be used until a replacement fuse cover has been fitted. Colour of the replacement fuse cover must be the same colour as that visible on the pin face of the plug Fuse covers are available from any good electrical store.
• Fitting a different plug
- As the colours of the wires in the mains lead of this appliance may not correspond with the coloured markings identifying the terminals on your plug, proceed as follows:
- Brown cable = L (Live)
- Blue cable = N (Neutral)
- Green/yellow cable must be connected to ground (E).
- With alternative plugs, a 13 A fuse must be fitted either in the plug or adaptor, or in the main fuse box. If in doubt, contact a qualified electrician.

2 Your cordless stick vacuum cleaner
2.1 Overview

2 Your cordless stick vacuum cleaner
- Handle
- Control button
- Control panel
- Upper body
- Lower body
- Charging indicator
- Dust container handle
- Dust container
- Suction nozzle
- Brush
- Brush removal button
- Dust container removal button
- Upper body connection screw
2.2 Technical data
Rated voltage: 36 V
Maximum voltage: 40 V
Adaptor input: 100-240V~ 50-60Hz
Adapter output: 42.2 V 350 mA
Protection class: II
3 Usage
3.1 Intended use
This appliance is intended for domestic use. It is not suitable for industrial use.
3.2 Installation
3.2.1 Installation of upper and lower bodies
- Fix the upper body onto the lower body.
- Rotate the upper body connection screw clockwise to fix it.

3.2.2 Installation of the lower body and the brush
- Attach the brush to the suction nozzle.

3.3 Charging the appliance
- Plug the adapter into the charging socket at the back of the appliance and connect the plug to the wall socket.
- The charging indicator will turn on and the appliance will switch to the charging mode. The charging indicator will flash.
- The charging indicator will remain on after charging is complete.

Charging level will be displayed in % on the indicator during charging.

It takes up to 8 hours for the appliance to be fully charged.

WARNING: Appliance cannot be operated during the charging process.
3.4 Operating the appliance
- Push the control button forward and move it to the desired level to operate the appliance (see 3.4.1).
- Pull back the control button and move it to "OFF" level to switch off the appliance.
3.4.1 Adjusting the suction power
You can adjust the suction power by using the control panel (3) on the appliance.
- Use the "ECO" level to clean curtains, table cloths and sofas.
- Use the "CARPET" level to clean carpets.
- Use the "TURBO" level to clean hard floors.

Icon of the selected level will be shown on the display during operation.
3 Usage

The appliance can be used up to 75 minutes with 100% charge at the minimum level.

The charging indicator will be shown in % during operation. % on the indicator display will decrease as the charging level goes down.
3.5 Accessories
- Remove the brush by pressing the brush removal button on the lower body to use accessories.
- Fit the lug on the hose to the slot in the suction nozzle (you will hear a click).

- Attach the desired accessory to the hose cap to use it.

- To remove the accessories, pull them from the hose cap.
- Remove the hose from the suction nozzle by pressing the accessory removal button.

Suitable for cleaning surfaces that are difficult to clean, such as areas under sofas and furniture.
Upholstery tool

Suitable for cleaning floorings, stair steps, inside of cars, sofas, armchairs, etc.
Dust brush

For cleaning curtains, and sensitive and fragile objects.
Shoulder hanger
The shoulder hanger allows you to move easily during cleaning.
Attach the hose cap to use the shoulder hanger (see 3.5).
- Fit the hook of the shoulder hanger to the slot on the hose cap.

- Attach the other end of the shoulder hanger to the handle.
Crevice tool
10 / EN
Cordless Stick Vacuum Cleaner / User Manual
3 Usage

- You can hang the appliance on your shoulder and start cleaning.

4 Cleaning and care
For replacement filters please visit www.beko.co.uk/appliances/small appliances.
Switch off and unplug the appliance before cleaning it.

WARNING: Never use gasoline, solvent, abrasive cleaning agents, metal objects or hard brushes to clean the appliance.
4.1 Cleaning the dust container
Empty the dust container (8) when the dust container full LED "under the charging indicator (6) turns red with the appliance switched on.

It is recommended to clean the dust container (8) after each use.
- Press the dust container removal button and pull the handle of the dust container to remove it.

- Hold and pull the cyclone from its handles and take it out from the dust container (8).

- Empty the dust container.
- Place the cyclone in its housing according to the arrow mark on it.
- Place the dust container into the body of the appliance.
4.2 Cleaning the cyclone
- Press the dust container removal button and pull the handle of the dust container to remove it.
- Hold and pull the cyclone from its handles and take it out from the dust container (8).
- Rotate the cyclone cap counterclockwise to remove it.

- Remove the HEPA filter on the cyclone.
- Clean the cyclone by washing it under running water.
- Follow the steps above in reverse order to assemble the parts together again.
4.2 Cleaning the HEPA filter
- Press the dust container removal button and pull the handle of the dust container to remove it.
- Hold and pull the cyclone from its handles and take it out from the dust container (8).
- Rotate the cyclone cap counterclockwise to remove it.
- Remove the HEPA filter on the cyclone.
- You can wash the filter under running water after shaking it off.
- If you wash the HEPA filter, dry it at room temperature (for at least 24 hours). Do not use it until it is completely dry.
4 Cleaning and care
- Install the HEPA filter into the cyclone housing and fit the cyclone into the dust container (8).
- Attach the dust container back to the body.
4.3 Cleaning the foam filter
- Press the dust container removal button and pull the handle of the dust container to remove it.
- Grab the cyclone by its handles and pull it out from the dust container (8).
- Rotate the cyclone cap counterclockwise to remove it.
- Remove the HEPA filter from the cyclone.
- Remove the foam filter located under the HEPA filter.
- You can wash the filter under running water after shaking it off.
- If you wash the HEPA filter, dry it at room temperature (for at least 24 hours). Do not use it until it is completely dry.
4.4 Cleaning the turbo brush
- Using a screwdriver or a coin, twist the removal buttons on the turbo brush cylinder locking plates (one on each side) to unlock the plates of the brush cylinder.

- Open the locking plates of the brush cylinder, remove and clean the brush.
- A small rubber drive belt is fixed to one side of the brush cylinder, therefore the brush cylinder must be detached from the drive belt on removal.


- Clean the brush roller with a damp cloth, attach it to its original position, ensuring one side of the brush cylinder is positioned within the drive belt and refasten the locking plates.
4.5 Storage
- If you do not intend to use the appliance for a long time, please store it carefully.
- Please make sure that the appliance is unplugged, cooled and totally dry. • Store the appliance in a cool and dry place.
- Keep the appliance out of the reach of children.
4.6 Moving and transportation
- During handling and transportation, carry the appliance in its original packaging. The packaging of the appliance protects it against physical damages.
- Do not place heavy loads on the appliance or on the packaging. The appliance may get damaged.
- Dropping the appliance may render it non-operational or cause permanent damage.
5 Guarantee
12 months breakdown and repair guarantee
Guarantor: Beko plc, 1 Greenhill Crescent, Watford, Hertfordshire. WD18 8UF
The guarantee does not in any way diminish your statutory or legal rights.
Your appliance has the benefit of our manufacturer's guarantee which covers the product for 12 months from the date of original purchase.
This gives you reassurance that if within that time, your appliance is proven to be defective because of either workmanship or materials, we will at our discretion either repair or replace your appliance.
The appliance must be correctly installed, located and operated in accordance with the instructions contained in the user manual. The guarantor disclaims any liability for accidental or consequential damage.
The Guarantee is subject to the following conditions:
• Documentary proof of the original purchase date is provided. • The appliance has been installed and operated correctly in accordance with our operating and maintenance instructions. • The appliance is used only on the electricity supply shown on the rating plate. • The appliance has only been used for normal domestic purposes. • The appliance has not been altered, serviced, dismantled or otherwise interfered with by any person. • The appliance is used in the United Kingdom or the Republic of Ireland. • Any parts removed during repair work or any product that has been replaced becomes our property. • The guarantee is not transferrable if the product is resold.
The Guarantee does not cover:
• Transit, installation or delivery damage. • Accidental damage. • Misuse or abuse. • Replacement of any consumable item or accessories. These include but are not limited to: plugs, cables, light bulbs, knobs, filters and flaps. • Repairs or replacements required as a result of unauthorised repairs or inexpert installation that fails to meet the requirements contained in the user guide or instruction book. • Repairs to products used in commercial or non-residential household premises.
How to obtain after sales service, help or general advice
Please keep your purchase receipt or other proof of purchase in a safe place as you will need to show us this document if your product requires attention within the guarantee period.
Please also record your product details below, which will allow you to access our services more quickly and help us identify your product. The model number is printed on the front of the user guide and the serial and model number is shown on your products rating plate.
| Model number | Serial number | Purchased from | Date of purchase |
Please call our UK based Customer Service department if you need urgent help or advice from us:
United Kingdom and Northern Ireland: 0333 207 9710
Republic of Ireland: 01 862 3411
You can also contact us through our website: www.beko.co.uk


- CORDLESS STICK VACUUM CLEANER
- PLEASE READ THIS USER MANUAL FIRST
- MEANINGS OF THE SYMBOLS
- IMPORTANT SAFETY AND ENVIRONMENTAL INSTRUCTIONS
- YOUR CORDLESS STICK VACUUM CLEANER
- USAGE
- CLEANING AND CARE
- GUARANTEE
- GENERAL SAFETY
- COMPLIANCE WITH WEEE DIRECTIVE AND DISPOSING OF THE WASTE PRODUCT
- COMPLIANCE WITH ROHS DIRECTIVE
- INFORMATION ON WASTE BATTERIES
- PACKAGE INFORMATION
- PLUG WIRING
- FITTING A DIFFERENT PLUG
- OVERVIEW
- TECHNICAL DATA
- INTENDED USE
- INSTALLATION
- INSTALLATION OF UPPER AND LOWER BODIES
- INSTALLATION OF THE LOWER BODY AND THE BRUSH
- CHARGING THE APPLIANCE
- OPERATING THE APPLIANCE
- ADJUSTING THE SUCTION POWER
- ACCESSORIES
- UPHOLSTERY TOOL
- DUST BRUSH
- SHOULDER HANGER
- CREVICE TOOL
- CLEANING THE DUST CONTAINER
- CLEANING THE CYCLONE
- CLEANING THE HEPA FILTER
- CLEANING THE FOAM FILTER
- CLEANING THE TURBO BRUSH
- STORAGE
- MOVING AND TRANSPORTATION
- MONTHS BREAKDOWN AND REPAIR GUARANTEE
- YOUR APPLIANCE HAS THE BENEFIT OF OUR MANUFACTURER'S GUARANTEE WHICH COVERS THE PRODUCT FOR 12 MONTHS FROM THE DATE OF ORIGINAL PURCHASE
- THE GUARANTEE IS SUBJECT TO THE FOLLOWING CONDITIONS
- THE GUARANTEE DOES NOT COVER
- HOW TO OBTAIN AFTER SALES SERVICE, HELP OR GENERAL ADVICE
Brand : BEKO
Model : VRS82740VF
Category : Broom