
CM4611D - Coffee maker Atag - Free user manual and instructions
Find the device manual for free CM4611D Atag in PDF.


| Product type | Built-in coffee machine |
| Dimensions (H x W x D) | 458 x 594 x 555 mm |
| Weight | 28 kg |
| Power supply | 220-240 V, 50-60 Hz |
| Power consumption | 1500 W |
| Water tank capacity | 2.5 L |
| Bean hopper capacity | 250 g |
| Coffee grounds container capacity | 15 portions |
| Adjustable coffee length | 20 - 220 ml |
| Milk system | Integrated EasyClean milk frother |
| Milk system cleaning | Automatic steam cleaning after each use |
| Beverages | Espresso, coffee, cappuccino, latte macchiato, hot water |
| Coffee strength adjustment | 5 levels |
| Temperature adjustment | 3 levels |
| Programmable water hardness | Yes |
| Auto descaling indicator | Yes |
| Cup warmer | Integrated on top |
| Energy saving mode | Programmable auto shut-off |
| Child lock | Yes |
| Spare parts availability | Brew unit, milk system parts, filters, descaler |
Frequently Asked Questions - CM4611D Atag
User questions about CM4611D Atag
0 question about this device. Answer the ones you know or ask your own.
Ask a new question about this device
Download the instructions for your Coffee maker in PDF format for free! Find your manual CM4611D - Atag and take your electronic device back in hand. On this page are published all the documents necessary for the use of your device. CM4611D by Atag.
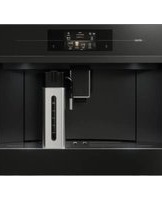
USER MANUAL CM4611D Atag
Instructions for use
Coffee machine
ATAG
natural_image
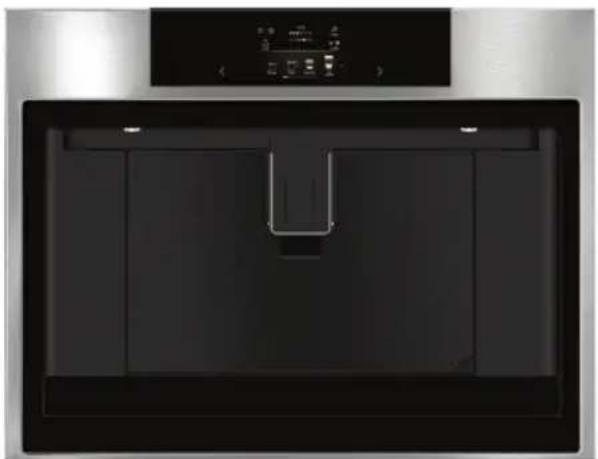
Front view of a modern kitchen appliance with a black tray and control panel (no visible text or symbols)CM46xxD
EN Instructions for use EN 3 - EN 38
Pictograms used

Important information

Tip
Your coffee machine
| Introduction | 4 | |
| Description of the appliance 5 | ||
| Touch keys and symbols 8 | ||
| Operation | ||
| Before first use 10 | ||
| Set your appliance to ‘On’ 12 | ||
| Set your appliance to ‘Standby’ and ‘Off’ 12 | ||
| Important tips and tricks when you make coffee 13 | ||
| Make coffee using coffee beans 13 | ||
| Make coffee using pre-ground coffee 14 | ||
| Adjust the grind level 14 | ||
| Make milk-based hot drinks 15 | ||
| Make two cups of coffee 15 | ||
| Customise beverages 16 | ||
| Supply a beverage that is customised 16 | ||
| Customise a user profile 17 | ||
| Supply hot water or steam | 17 | |
| Settings | ||
| Settings menu | 18 | |
| Maintenance | ||
| Clean your appliance | 20 | |
| Clean the hot water spout | 21 | |
| Clean the internal tubes of the milk container and the nozzle | 21 | |
| Clean all components of the milk container | 22 | |
| Clean the appliance’s internal circuit | 23 | |
| Clean the coffee grounds container | 23 | |
| Clean the drip tray | 24 | |
| Clean the inside of the coffee machine | 24 | |
| Clean the water tank | 25 | |
| Clean the coffee spouts | 25 | |
| Clean the pre-ground coffee funnel | 25 | |
| Descale the appliance | 26 | |
| Set the water hardness | 28 | |
| Install a water softener filter | 28 | |
| Replace a water softener filter | 29 | |
| Remove a water softener filter | 29 | |
| Clean the brewing unit / infuser once a month | 30 | |
| Clean the brewing unit / infuser twice a year | 31 | |
| Use the milk cleaner | 34 | |
| Trouble shooting | ||
| Trouble shooting | 36 | |
Environmental aspects
Disposal of packaging and appliance 38
Introduction
Congratulations on your choice of this Atag coffee machine. This product was designed with simple operation and optimum comfort in mind.
This manual describes the best way to use this coffee machine. In addition to information on operation, you will also find background information that may come in handy when using the appliance.

Please read the separate safety instructions carefully before using the appliance!
Read this manual before using the appliance and keep it in a safe place for future use.
Installation instructions are supplied separately.
Description of the appliance
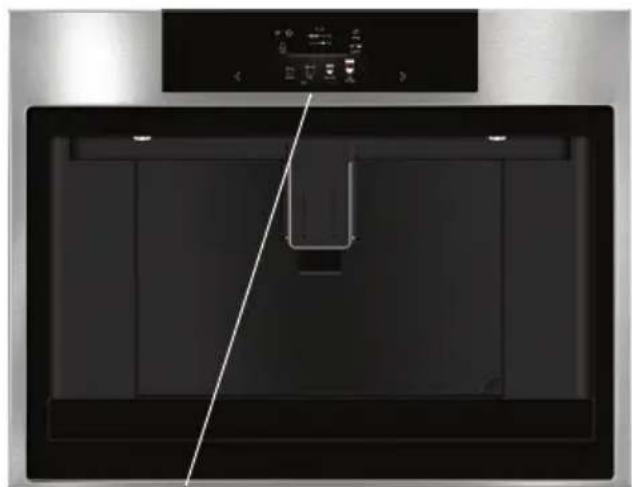
Control panel
A. My profile
B. Settings
C. User profile
D. Selected aroma
E. Time
F. Selected size
G. Aroma
H. Size
I. Scroll left/right
J. Beverages available to select
natural_image
Front view of a modern kitchen appliance with a digital control panel above (no visible text or symbols)

When this primary screen is shown, the appliance is ready to use.
Beverages available to select

natural_image
Sequence of glass glasses showing various types of coffee and beer (no text or symbols visible)
- Lid bean container
- Bean container
- Ground coffee funnel (with lid)
- Knob to adjust the grind level
- Power cord
- IEC connector
- Area for the measuring spoon
- Cup warming area
- Service door
- Brewing unit
- On/Standby button
- Control panel
- Lighting
- Main switch
- Area for accessories (left and right)
- Cup tray
- Coffee grounds container
- Drip tray with level indicator
- Coffee spouts (adjustable height)
- Cup lights
- Hot water connection nozzle
- Water tank
- Hot water spout
- Cover connection nozzle
- Lid with milk frother
- Frothed milk spout (adjustable)
- Milk froth adjustment knob
- Milk intake tube
- Release button
- Milk container
- Thermal casing
- Measuring spoon for pre-ground coffee
Maintenance set
• 'Total Hardness Test' indicator paper
- Descaler
• Water softener filter (certain models only)
• Cleaning brush / cleaning cloth
- Milk cleaner
- O-rings and lubricating grease


Touch keys and symbols
| Touch keys | |
 | My profileCustomise several beverage settings for the user profile that is shown in the primary screen.See chapter ‘Customise beverages’.You cannot use this touch key when the guest profile is shown on the display. |
 | SettingsSee chapter ‘Settings menu’. |
 | User profileTouch this key to select the correct user profile. Six different user profiles and a guest profile are available.If you select a beverage that has been customised for this profile, it will be supplied with the customised saved settings. See chapter ‘Supply a beverage that is customised’.If you select the guest profile, beverages will be supplied with the default settings. |
 | Customise a user profileSee chapter ‘Customise a user profile’. |
 | AromaTouch this key (several times) to select ‘Pre-ground’ or to select the aroma. |
 | SizeTouch this key (several times) to select the coffee quantity. |
 | Scroll left/rightTouch these keys until the correct variable is shown on the display. |
 | OK |
 | Stop |
 | EscapeCancel or go back one step.Values will not be saved. |
 | Next |
 | Minus (-) / Plus (+)Adapt the aroma when you customise a beverage. |
| [ZXZ2] | Start |
| [HZZS] | EnterEnter a menu. |
 | Double espressoThis touch key is shown on the display for a few seconds at the start of preparing one espresso. |
 Extra Extra | ExtraIncrease the quantity of water of the beverage that is being prepared. |
 | On/OffSetting is ‘off’. |
| [WDCC] | On/OffSetting is ‘on’. |
| Symbols | |
 | My aroma (if programmed) / Standard |
 | Pre-ground |
 | Extra light |
 | Light |
 | Medium |
 | Strong |
 | Extra strong |
 | My quantity (if programmed) / Standard |
 | Small |
 | Medium |
 | Large |
 | Extra large |
 | Settings saved |
 | Default value |
| [KBT6] | Auto start function enabled |
| ECO | Energy saving enabled |
| [TBX4] | Filter enabled |
Before first use
Remove the packaging. Make sure the product is complete and undamaged. Check if all accessories are present. Do not use the appliance if it is visibly damaged. Contact the service department if there are any problems.

Coffee has been used to test the appliance in the factory. Therefore it is completely normal that there are traces of coffee in the mill.

Customise the water hardness as soon as possible. Obey the instructions in chapter 'Set the water hardness'.

To improve the performance of your appliance, we recommend installing a water softener filter. If your model is not provided with a filter, you can purchase one from the service department.

Always use clean and cold tap water, bottled water without added minerals or distilled water suitable for consumption.

The first time you use the appliance, the water circuit is empty. The appliance could be very noisy. The noise becomes less when the circuit fills with water.

The first time you use the appliance, you need to make 4-5 cups of coffee before it starts to give results that are satisfactory.

When making the first 5-6 beverages, it is normal to hear the noise of boiling water. This noise becomes less during use.

Pull the appliance forward to get access to the main switch, the area for accessories and the lid of the bean container. Pull the coffee spouts forward to open the service door.

natural_image
Hand inserting a component into a device (no text or symbols visible)

natural_image
Diagram of a room interior with furniture and ventilation system (no text or symbols)
natural_image
Diagram of a mechanical or electrical assembly with no visible text, numbers, or symbols
Read and obey the instructions shown on the display. The display shows information and touch keys to use. Important information is accompanied by an audio signal.

natural_image
Hand inserting a plug into an electrical outlet (no text or symbols visible)

natural_image
Diagram of a door with an arrow indicating leftward movement, showing internal structure without any text or symbols.
natural_image
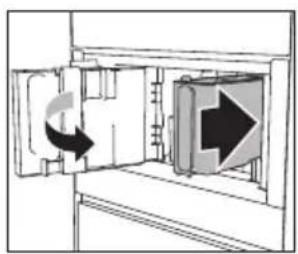
Diagram showing a door with an arrow indicating rotation and direction (no text or symbols)

natural_image
Simple line drawing of a cylindrical object inside a container with an arrow indicating direction (no text or symbols)
natural_image
Simple line drawing of a bucket pouring liquid into a container (no text or symbols)The appliance goes to standby automatically. It is now ready for normal use.

Danger of burns
During rinsing, a little hot water flows out of the coffee spouts. Avoid contact with splashes of water. Do not let the appliance stay unattended while hot water is being supplied.
Set your appliance to 'On'


natural_image
Simple line drawing of a mug inside a cabinet with an arrow pointing to it (no text or symbols)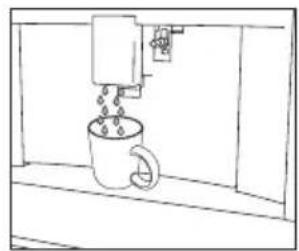
natural_image
Simple line drawing of a coffee cup with a coffee maker pouring liquid from it, enclosed in a container (no text or symbols)
The appliance is ready to use if it has reached the correct temperature.
The primary screen is shown.

Attention
Each time the appliance is set to 'On', it performs an automatic preheat and rinse cycle. This cycle cannot be interrupted. The appliance is ready for use only after completion of this cycle.

Tip
Put a cup under the spouts. Collect the hot water from the rinse cycle to warm the cup.

Important!
Do not push the main switch while the appliance is set to 'On'.
Set your appliance to 'Standby' and 'Off'


natural_image
Simple line drawing of a room with a wall-mounted device and a floor-mounted fixture (no text or symbols)

Attention
Each time the appliance is set to 'Standby' after being used to make coffee, it performs an automatic rinse cycle.

Please note
If you do not use the appliance for a long period, set the appliance to 'Off'.
Important tips and tricks when you make coffee
- The supply of coffee can be stopped at any moment.
- As soon as the supply has ended, you can increase the quantity of water.
- You can customise beverages.
- Adjust the grind level if the coffee is supplied a drop at a time or too weak and not creamy enough.
• Make a hotter coffee:
▶ Perform a rinse cycle and warm the cups with the hot water from the rinse cycle.
▶Supply hot water to warm the cups.
▶Use the cup warmer setting to warm the cups.
▶ Increase the coffee temperature.
- Lower the spouts to the cup as near as possible. This makes the coffee more creamy.
- After the coffee supply, the aroma setting and the quantity setting are reset to the ‘original recipe’.
- Once a beverage has been made, the appliance is ready to make the next beverage.
Make coffee using coffee beans

Important!
Do not use green, caramelised or candied coffee beans. They could make the coffee mill unusable.

natural_image
Diagram of a ship's interior layout showing hull, hull, and structural elements (no text or labels)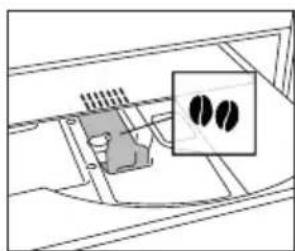
natural_image
Diagram of a mechanical or electrical component with internal components and a highlighted section showing two circular features (no text or symbols present)
natural_image
Simple line drawing of a mug inside a container with an arrow pointing to it (no text or symbols)
natural_image
Simple line drawing of a coffee mug being inserted into a container with a downward arrow indicating compression (no text or symbols)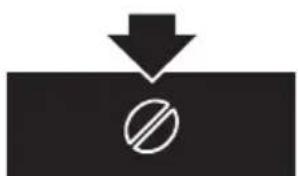
natural_image
Simple black-and-white diagram showing a downward arrow above a circle with a diagonal line, no text or symbols present.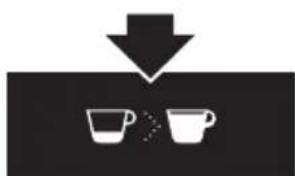
natural_image
Simple diagram showing a downward arrow pointing to two cups, no text or symbols present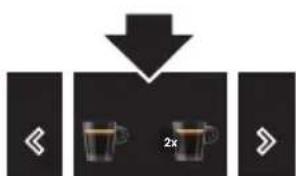
flowchart
graph TD
    A["Start"] --> B["2x Cup"]
    B --> C["Next Step"]
Make coffee using pre-ground coffee

Important!
- Only add pre-ground coffee when the appliance is set to 'On'. Otherwise, the coffee could spread through the inside of the appliance and damage it.
- Only make one cup of coffee at a time. Do not use more than 1 measuring spoon.
- Make sure the funnel is not blocked (see chapter ‘Maintenance’).

flowchart
graph TD
    A["No"] --> B["No mixing"]
    B --> C["Add 1x speed recovery"]
    C --> D["Add 2x speed recovery"]
    D --> E["Add 2x speed recovery"]
    style A fill:#000,stroke:#fff,color:#fff
    style B fill:#000,stroke:#fff,color:#fff
    style C fill:#000,stroke:#fff,color:#fff
    style D fill:#000,stroke:#fff,color:#fff
    style E fill:#000,stroke:#fff,color:#fff
Adjust the grind level
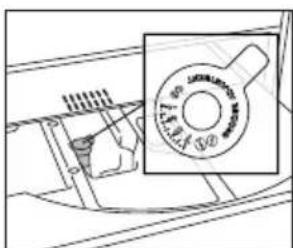
The coffee mill is set by default to prepare coffee correctly. It should not require regulating initially. However, you can adjust the grind level:
natural_image
Technical line drawing of a mechanical component with a circular inset showing a dial (no text or symbols)- if the coffee is supplied too slowly or not at all.
▶Turn the knob one click clockwise in the direction of 7.
• for a stronger, creamier coffee.
▶Turn the knob one click anti-clockwise in the direction of 1.

Please note!
- Only turn the knob when the coffee mill is operating (during the start of the coffee preparation). Turn the knob one click at a time. When you have made at least 2 cups of coffee, turn the knob another click if the adjustment did not give the desired result.
Make milk-based hot drinks

Tip
- Use skimmed or partially skimmed milk at refrigerator temperature (about 5 °C) to get a richer denser froth.
| Dial position | Description Recommended for... | |
 | No froth Caffe latte / Hot milk | |
 | Min. froth Latte macchiato | |
 | Max. froth Cappuccino / Frothed milk | |

natural_image
Diagram of a mechanical device with arrows indicating direction and an upward arrow, no text or symbols present.
natural_image
Diagram of a mechanical device with a downward arrow indicating force or direction (no text or symbols present)
natural_image
Pure electrical circuit lines without any symbols
natural_image
Diagram of a water filter unit with directional arrows indicating flow or movement (no text or symbols)
natural_image
Diagram of a mechanical valve or pump assembly with directional arrows indicating flow or movement (no text or symbols present)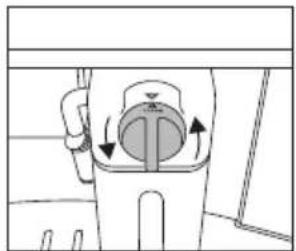
natural_image
Diagram of a showerhead with airflow indicators (no text or symbols)

Please note!
- After the supply of a milk-based hot drink, the display shows a CLEAN message (see chapter ‘Maintenance’).
Make two cups of coffee
With this appliance you can make a perfect espresso or coffee. To guarantee the quality for each cup, we have chosen not to offer the option for two cups of coffee at the same time.
Customise beverages
The appliance allows you to choose six different profiles, each associated with a different icon. For every beverage, the customized aroma and amount can be saved in a profile.

flowchart
graph TD
    A["User Profile"] --> B["User Icon"]
    B --> C["My Cup Icon"]
    C --> D["<< 2x >"]
    D --> E["Stop"]
    E --> F["Yes"]
    G["OK"] --> H["✓ OK"]
    I["+"] --> J["✓ OK"]
    K["✓"] --> L["✓ OK"]
Supply a beverage that is customised
Make sure the primary screen shows the correct user profile. If you select a beverage that has been customised for this profile, it will be supplied with the customised saved settings.

The order in which all the beverages for a user profile are displayed is based on the frequency of selection.

flowchart
graph TD
    A["User Profile Icon"] --> B["User Icon"]
    B --> C["Two coffee cups labeled 2x"]

If you select the guest profile, beverages will be supplied with the default settings.
Customise a user profile

natural_image
Two black icons showing a person with a downward arrow above it, and two stylized human figures below (no text or symbols)Supply hot water or steam

Danger of burns
Do not let the appliance stay unattended while hot water or steam is being supplied.

Important!
Avoid burns from splashes. Always stop the hot water or steam supply before removing the cup containing the liquid.

Use steam to heat or froth liquid. Immerse the hot water spout in the liquid. When the required temperature or level of froth is reached, stop the steam supply.

flowchart
graph TD
    A["Start"] --> B["Receiving Machine"]
    B --> C{Order}
    C -->|Downward Arrow| D["Product"]
    C -->|Upward Arrow| E["Shipping"]
    E --> F["Output"]
    style A fill:#f9f,stroke:#333
    style B fill:#ccf,stroke:#333
    style C fill:#cfc,stroke:#333
    style D fill:#fcc,stroke:#333
    style E fill:#cff,stroke:#333
    style F fill:#ffc,stroke:#333

Tips when you use steam to froth milk
- When choosing the size of the cup, bear in mind that the liquid doubles or triples in volume.
- For a creamier froth, rotate the cup with slow movements up and down.

Please note!
Clean the hot water spout each time you used it to froth milk (see chapter 'Maintenance').
Settings menu
 | RinsingClean and heat the appliance's internal circuit. Supply hot water from the coffee spouts and hot water spout (if inserted).Put a container with a minimum capacity of 100 ml under the coffee and hot water spouts. |
 | DescalingSee chapter ‘Maintenance’. |
 | Water filterSee chapter ‘Maintenance’. |
 | Drink settingsConsult your customised settings for each profile. Reset the default values for each beverage.See also ‘Default values’ for more information. |
 | Set timeAdjust the time shown on the display. |
 | Auto-startSet the auto-start time. At that time, the appliance is ready to make coffee immediately.To use this setting, make sure that the time of the day is correctly set.The corresponding symbol is displayed adjacent to the time to indicate that the setting is on. |
 | Auto-off (standby)Set the time for the appliance to go to standby. |
 | Cup warmerThe fan blows hot air into the cup warmer area.The residual heat of the appliance is used for heating up the cup. The heat result is depending on the time the machine is set to ‘On’. |
| ECO | Energy savingThe energy consumption is decreased in compliance with European regulations.The corresponding symbol is displayed adjacent to the time to indicate that the setting is on.You may have to wait a few seconds before the first coffee is supplied. |
 | Coffee temperatureAdjust the temperature of the water that is used to make coffee. |
  | Water hardnessSee chapter ‘Maintenance’.Set languageAdjust the language shown on the display. |
 | BeepSet the beep on or off.You hear a beep every time you touch a key and when you insert/remove an accessory. |
 | LightingSet the lighting on or off.The cup lighting comes on each time a beverage is supplied and during each rinse cycle. |
 | BackgroundSet the color of the display background. |
| DEMO | Demo modeStart the demo mode to show the main functions.To exit the demo mode, set your appliance to ‘Standby’. |
 | Default valuesReset all menu settings and programmed quantities back to the default values (with the exception of the language). |
 | StatisticsShow statistics relating to the appliance. |
Clean your appliance

Read and obey the instructions shown on the display. The display shows information and touch keys to use. Important information is accompanied by an audio signal.

Please note!
- Do not use solvents, abrasive detergents, alcohol or chemical products to clean the appliance!
- Do not use metal objects to remove encrustations or coffee deposits. They could scratch metal or plastic surfaces.
- Only the milk container is dishwasher safe. Do not clean the other components of the appliance in the dishwasher!
Regular cleaning
- The hot water spout (each time you used it to froth milk).
- The internal tubes of the milk container and the hot water connection nozzle (each time a milk-based hot drink is supplied).
- The milk container and all the components (about once a month).
- The appliance's internal circuit.
• The coffee grounds container. - The drip tray.
- The inside of the coffee machine (about once a month).
- The water tank (about once a month and when you replace the water softener filter).
- The coffee spouts.
- The pre-ground coffee funnel (about once a month).
- The brewing unit and the infuser (at least once a month).
Special cleaning

- Twice a year you must disassemble the brewing unit, clean the parts and lubricate the o-rings of the brewing unit and the infuser (see ‘Clean the brewing unit / infuser twice a year’).
- Each time the milk container is empty, we recommend to clean all components using the milk cleaner (see 'Use the milk cleaner').
Clean the hot water spout
Clean the hot water spout each time you used it to froth milk. This avoids the build-up of milk residues and prevents it from clogging.

flowchart
graph TD
    A["Material being handled"] --> B["Processing unit"]
    B --> C["Product discharge with downward arrow"]
    C --> D["Final product with downward arrow"]
Wait a few minutes for the hot water spout to cool down.
Wash all parts of the spout thoroughly with a sponge and warm water.

flowchart
graph TD
    A["Input Pump"] --> B["Injection Pump"]
    B --> C{Drain}
    C -->|Yes| D["Inserted Drill"]
    C -->|No| E["Transfer to Drain"]
    E --> F["Injection"]
    F --> G["Final Injection"]
Clean the internal tubes of the milk container and the nozzle
Each time a milk-based hot drink is supplied, the display shows a CLEAN message. Put an empty cup under the milk spout before you obey this instruction shown on the display. Let the milk container stay in the appliance (you do not need to empty it).
Danger of burns
When cleaning the internal tubes of the milk container, a little hot water and steam leak out of the frothed milk spout. Avoid contact with splashes of water.

The cleaning stops automatically.


natural_image
Simple line drawing of a kitchen sink with a bag, a water dispenser, and a wall-mounted cabinet (no text or symbols)
natural_image
Illustration of a hand cleaning a wall with a cloth, showing a black arrow pointing to a component (no text or symbols present)Any milk residues are removed now.

Please note!
To prepare a number of cappuccinos and milk based coffees, only confirm the CLEAN message after you have prepared the last beverage. To proceed with making the next beverages, touch the escape key.

If you touch the escape key, a symbol is shown on the display to remind you that the internal tubes of the milk container need cleaning.
Clean all components of the milk container

Important!
The thermal casing must not be filled with or immersed in water. Clean with a damp cloth only.
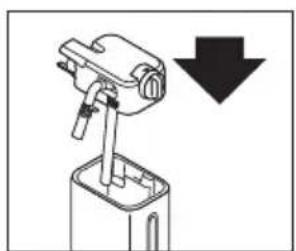
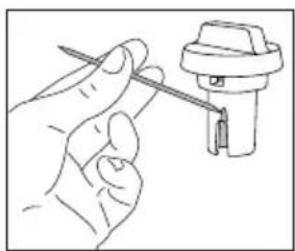
Wash all the components of the frother thoroughly with hot water and light washing-up liquid.

Only the milk container is dishwasher safe.

natural_image
Diagram of a mechanical device with directional arrows indicating movement or force (no text or symbols)
natural_image
Technical line drawing of a mechanical component with an upward arrow and a cross-sectional view (no text or symbols)
natural_image
Illustration of a hand holding a tool next to a mechanical component (no text or symbols visible)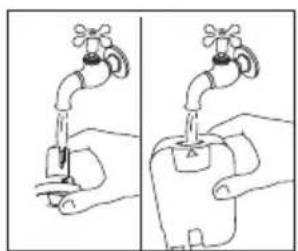
natural_image
Illustration of a hand holding a faucet with a switch, showing two different states (no text or symbols present)
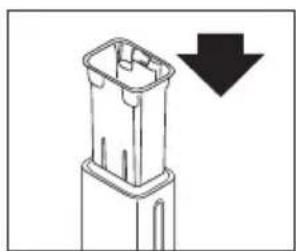
natural_image
Diagram of a plastic connector with a downward arrow indicating compression or disassembly (no text or symbols present)
natural_image
Simple line drawing of a mechanical device with a downward arrow indicating a decrease (no text or symbols)Clean the appliance's internal circuit
If the appliance is not used for more than 3 or 4 days, we strongly recommend to obey these steps before using it again.

flowchart
graph TD
    A["On"] --> B["Pressure Gauge"]
    B --> C["Click"]
    C --> D["Water Tank"]
    D --> E["2x - 3x Reduction"]
    E --> F["Gear Icon"]
    E --> G["Water Droplet Icon"]
Clean the coffee grounds container

Important!
A message to empty the grounds container is displayed 72 hours after the first coffee has been prepared. Do not set the appliance to 'Off' with the main switch. If you do so, the 72 hours cannot be calculated correctly.


Important!
When removing the drip tray, the grounds container must be emptied, even if it contains few grounds. If this is not done before you make the next coffees, the grounds container may fill up more than expected and clog the appliance.
Clean the drip tray

Important!
Clean and empty the drip tray before the indicator is above the cup tray. If you do not, water may overflow the edge and damage the appliance, the surface it rests on or the surrounding area.

natural_image
Diagram of an open refrigerator interior showing internal compartments and a circular component with arrows indicating rotation (no text or symbols)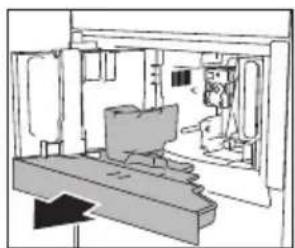
natural_image
Interior view of a room with furniture and a monitor, no visible text or symbols
natural_image
Diagram of a kitchen appliance with a stand and handle, showing no text or symbols
natural_image
Diagram of a room interior with furniture and a monitor, showing no text or symbolsClean the inside of the coffee machine

Important!
Before cleaning internal parts, set the appliance to 'Standby'. Do not immerse the coffee machine in water.

natural_image
Technical line drawing of an open industrial machine or control cabinet with internal components and a directional arrow indicating rotation (no text or labels)
natural_image
Interior view of a room with furniture and a directional arrow (no text or symbols)
natural_image
Illustration of hands using a tool to adjust or install electronic components (no text or symbols visible)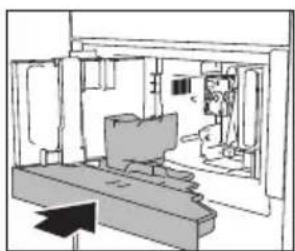
natural_image
Interior view of a room with furniture and a monitor, no visible text or symbolsClean the water tank

Clean the water tank with a damp cloth and a little mild washing up liquid. Rinse thoroughly before filling the tank and putting it back in the appliance.

natural_image
Diagram of a device with a handle and arrow indicating upward movement (no text or symbols)

natural_image
Diagram of a mechanical device with a downward arrow indicating force or movement (no text or symbols present)Clean the coffee spouts

natural_image
Simple line drawing of a hand pressing down on a mechanical component (no text or symbols)
natural_image
Line drawing of a hand using a sewing machine to adjust or install a piece of fabric (no text or symbols present)Clean the pre-ground coffee funnel

natural_image
Line drawing of a hand using a tool to clean or inspect a component inside a storage cabinet (no text or symbols)Descale the appliance
Descale the appliance when the related message is shown on the display.
- To descale immediately, read and obey the instructions shown on the display.
- To descale the appliance later, touch the escape key.
A symbol is shown on the display to remind you that the appliance needs descaling.

Important!
Before use, read the instructions and the labelling on the descaler pack. You should use descaler authorised by the manufacturer only. Using unsuitable descaler and/or performing descaling incorrectly may result in faults not covered by the manufacturer's warranty.

Danger of burns!
Hot water containing acid flows out of the hot water spout. Take care to avoid contact with splashes of this solution.

Please note
- A series of rinses and pauses is performed automatically to remove all the scale residues inside the coffee machine. Empty the container every time after it has collected the rinsing water.
- If a filter was removed previously, the display will show the message when to insert the filter into the housing. If no filter was present, you can skip this step.
- If the descaling cycle is not completed correctly (e.g. no electricity) we recommend repeating the cycle.
- If the water tank has not been filled to the MAX level, at the end of descaling, the appliance requests a third rinse to guarantee that the descaler solution has been completely eliminated from the appliance's internal circuits. Before starting rinsing, remember to empty the drip tray.
- The appliance may request descaling cycles at very short intervals. This is normal due to the appliance's advanced control system.

Set the water hardness

The appliance is set by default for a hardness level of 4. The appliance can also be programmed according to the hardness of the mains water in the various regions.
The appliance needs to be descaled less often if this hardness level is lower.
Immerse the ‘total hardness test’ indicator paper (attached to the instructions) in a glass of water for one second.
After about a minute, red squares can be seen.

natural_image
Abstract pattern of horizontal bands with varying shades of gray and black, no text or symbols presentLevel 1: soft water.
Level 2: moderately hard water.
Level 3: hard water.
Level 4: very hard water.

The appliance is now programmed with the new water hardness setting.
Install a water softener filter

Certain models are fitted with a water softener filter. If this is not the case with your model, you are recommended to purchase one from the service department.

Please note
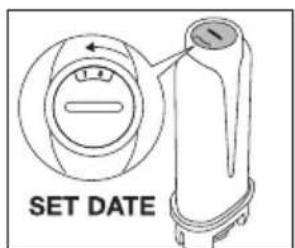
The filter lasts about two months if the appliance is used normally. If the coffee machine is left unused with the filter installed, it will last a maximum of 3 weeks.


natural_image
Simple line drawing of a faucet pouring liquid into a test tube (no text or symbols)
natural_image
Simple line drawing of a closed book with an inset showing a small icon (no text or symbols)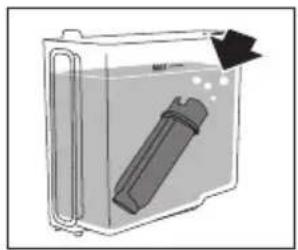
natural_image
Diagram of a container with a cylindrical object inside, showing liquid and an arrow indicating direction (no text or symbols)
natural_image
Diagram of a mechanical device with a downward arrow indicating force or change (no text or symbols present)
natural_image
Diagram of a door with directional arrows indicating movement or flow, no text or symbols present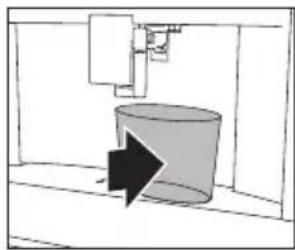
natural_image
Simple line drawing of a cylindrical object inside a container, with an arrow pointing to it (no text or symbols)The water filter symbol is shown on the display adjacent to the time. This indicates that the filter has been enabled.
Replace a water softener filter
Replace the filter when the related message is shown on the display.
- To replace the filter immediately, read and obey the instructions shown on the display.
• To replace the filter later, touch the escape key.
A symbol is shown on the display to remind you that the filter needs to be replaced.

Take a look at the pictures in the previous section how to install the filter.

Please note
After two months (see date indicator) or when the appliance has not been used for 3 weeks, you should replace the filter even if the message has not been displayed yet.
Remove a water softener filter
If you want to use the appliance without the filter, you must remove it and notify the appliance of its removal.

natural_image
Diagram of a refrigerator interior showing door, vent, and door with directional arrows indicating movement (no text or symbols)
natural_image
Diagram of a device with a lever and arrow indicating upward motion (no text or symbols)

Clean the brewing unit / infuser once a month

Important!
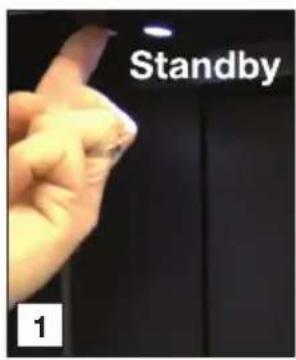
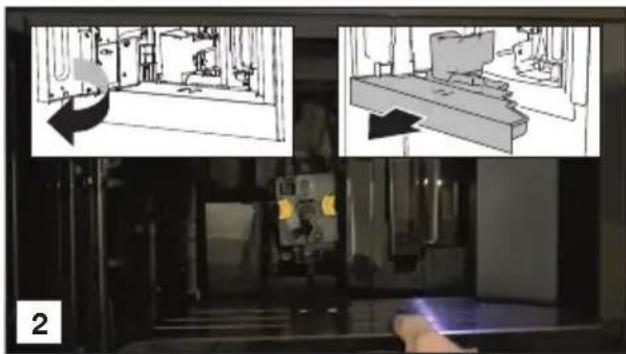
- Do not remove the brewing unit when the appliance is set to 'On'. Set the appliance to 'Standby'. Do not use force to remove the brewing unit.
- Do not use washing up liquid to clean the brewing unit. It would remove the lubricant applied to the inside of the piston.
natural_image
Two technical diagrams showing a 3D printing machine with internal components and a close-up of the final view (no text or symbols present)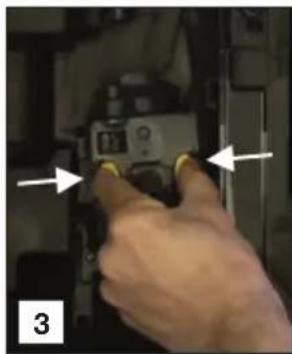
natural_image
Hand inserting a device into a folder, with arrows pointing to the component (no visible text or symbols)
natural_image
Hand holding a camera module with yellow buttons, no visible text or symbols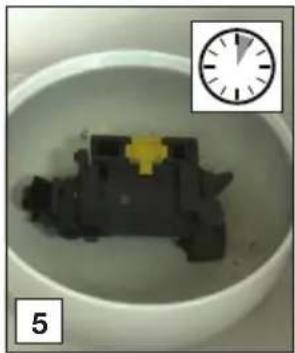
natural_image
Close-up of a small mechanical component inside a white bowl, with a wall clock inset showing time (no text or symbols on the object itself)
natural_image
Close-up of hands installing a black plastic component with yellow connectors, next to a sink (no text or symbols visible)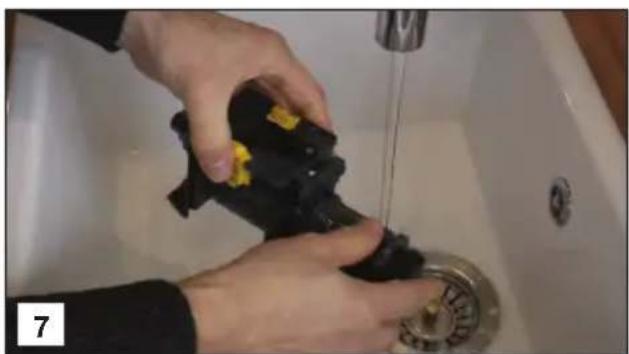
natural_image
Person cleaning a black cloth on a sink with a water tap (no text or symbols visible)
natural_image
Close-up of a hand holding a small electronic component with visible internal wires and components, no text or symbols present.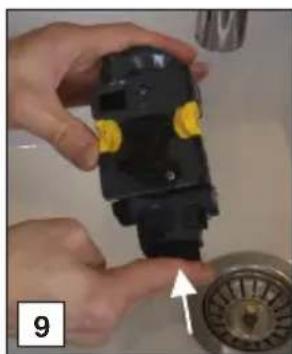
natural_image
Close-up of hands installing a black mechanical component with yellow connectors, next to a metallic faucet (no text or symbols visible)
natural_image
Close-up of mechanical components with highlighted parts, no visible text or symbols
natural_image
Close-up of a hand cleaning a wall with a cloth (no visible text or symbols)
natural_image
Illustration of a knife cutting down a surface with a close-up of the blade (no text or symbols visible)
natural_image
Hand holding yellow buttons inside a black mechanical device (no visible text or symbols)
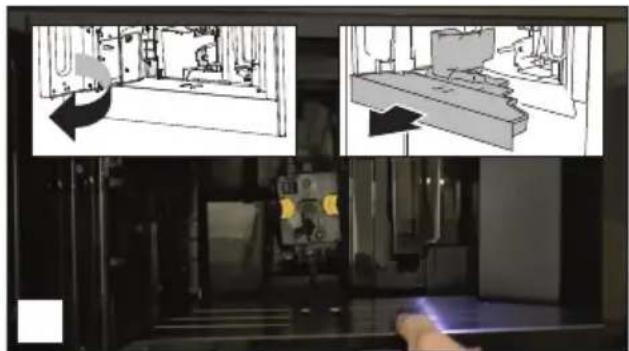
Clean the brewing unit / infuser twice a year

Important!
- Do not remove the brewing unit when the appliance is set to 'On'. Set the appliance to 'Standby'. Do not use force to remove the brewing unit.
- Do not use washing up liquid to clean the brewing unit. It would remove the lubricant applied to the inside of the piston.

natural_image
Interior view of a 3D printing press with two technical diagrams showing mechanical components and a hand operating the press (no visible text or symbols)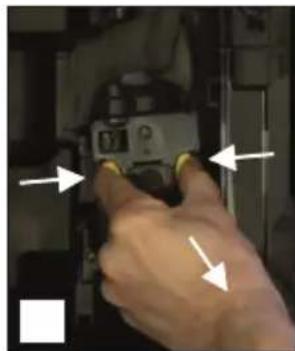
natural_image
Close-up of a hand pressing a button on a device (no visible text or symbols)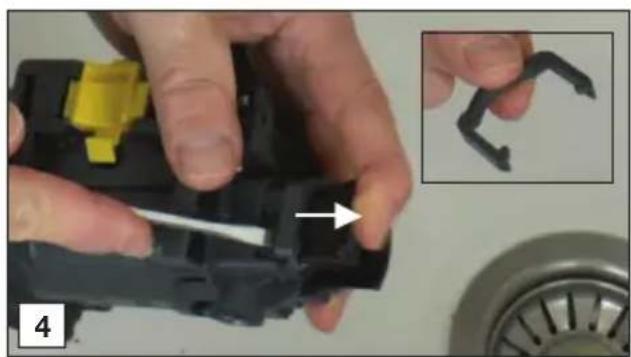
natural_image
Close-up of hands assembling a black plastic component with yellow connectors, alongside an inset showing a close-up of a dark plastic hook (no text or symbols visible)
natural_image
Close-up of hands holding a black plastic mechanical component with yellow connectors, no visible text or symbols
natural_image
Close-up of hands installing a black plastic component with a yellow label (no visible text or symbols)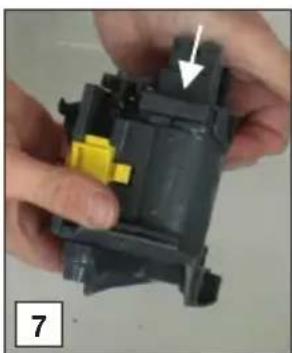
natural_image
Close-up of hands assembling a mechanical component with a yellow connector and arrow indicator (no text or symbols)
natural_image
Close-up of hands assembling a mechanical component with a white arrow indicating a detail (no text or symbols visible)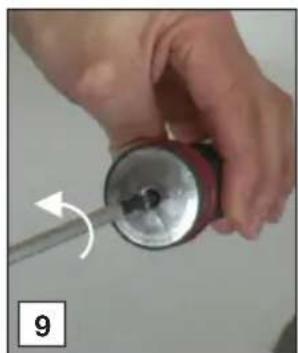
natural_image
Close-up of hands using a screwdriver to adjust a cylindrical object (no text or symbols visible)
natural_image
Close-up of hands holding a black electronic device next to a metallic disc (no visible text or symbols)
natural_image
Close-up of hands holding a black object with a white arrow pointing to a small dark object, no visible text or symbols
natural_image
Close-up of a dark, irregularly shaped object with a yellow flower in the center, placed inside a white bowl (no visible text or symbols)
natural_image
Close-up of hands folding a white fabric or paper with a red edge (no text or symbols visible)
natural_image
Close-up of hands holding a black object with red markings, no visible text or symbols

natural_image
Close-up of a hand holding a black cylindrical object with red stripe, possibly a device or sensor (no visible text or symbols)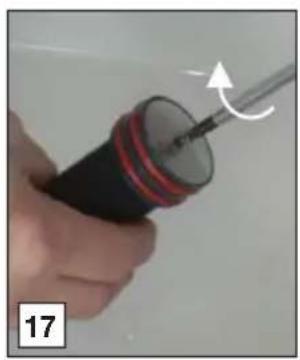
natural_image
Close-up of a hand holding a screwdriver with a curved arrow indicating motion (no text or symbols visible)
natural_image
Close-up of hands installing a black plastic component with a yellow patch, placed on a sink with a circular drain (no text or symbols visible)
natural_image
Close-up of hands assembling a black plastic mechanical component with a yellow connector (no text or symbols visible)
natural_image
Close-up of a hand inserting a plug into a black plastic component, with a white arrow pointing to the plug (no text or symbols visible)
natural_image
Close-up of a finger pressing a black plastic component with an arrow pointing to it, and a magnified inset showing a curved dark object (no text or symbols visible)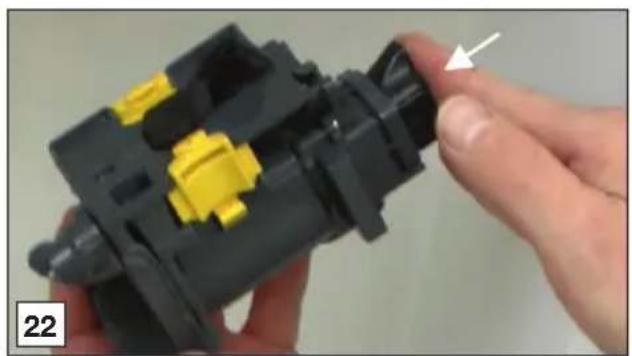
natural_image
Close-up of a hand holding a black plastic mechanical component with yellow connectors, no visible text or symbols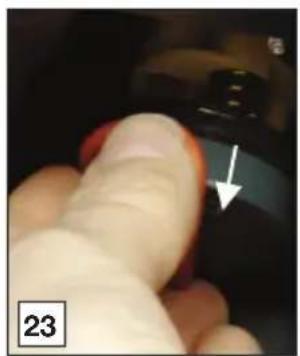
natural_image
Close-up of a finger pressing a black button with an arrow pointing to it, labeled '23' in the corner (no other text or symbols)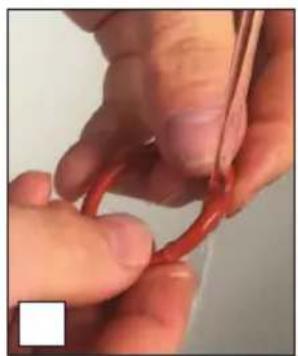
natural_image
Close-up of hands holding a red string, no visible text or symbols
natural_image
Close-up of hands holding a red ring with white foam, no visible text or symbols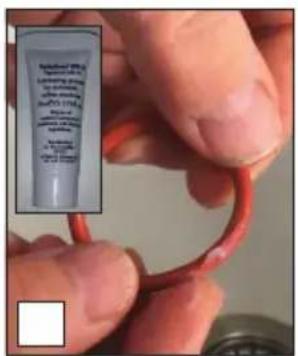

natural_image
Close-up of a hand cleaning a white cloth on a dark surface (no text or symbols visible)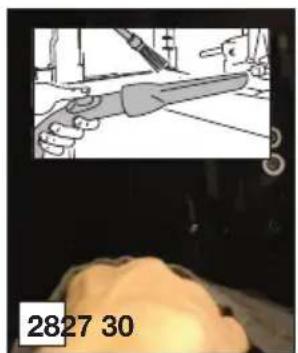
natural_image
Illustration of a hand holding a knife with a magnified view of the blade (no text or symbols)
natural_image
Close-up of a finger pressing a button with an arrow pointing to the button (no text or symbols visible)
Use the milk cleaner


natural_image
Glass mug being heated by a 3D printer, no visible text or symbols

natural_image
Glass mug being dispensed with a 3D printer, no visible text or symbols

Read and obey the instructions shown on the display. The display shows information and touch keys to use. Important information is accompanied by an audio signal.
If the given instruction shown on the display or the given remedy in the table below is not the solution to a problem, contact the Customer Services.
| Problem Possible cause Remedy | ||
 | The inside of the appliance is very dirty. | Clean the inside of the appliance thoroughly. |
| Disassemble and clean the brewing unit. | ||
 | Reminder that the appliance needs de-scaling and/or the filter must be replaced. | Replace or remove the water filter and/or descale the appliance as soon as possible. |
 | Reminder to clean the tubes inside the milk container. | Turn the milk froth adjustment knob to ‘CLEAN’. |
 | Reminder to replace the filter. | Replace or remove the water filter. |
 | Reminder to descale the appliance. | Descale the appliance as soon as possible. |
| The coffee is not hot. The cups were not preheated. Warm the cups by rinsing them with hot water (you can use the hot water function). | ||
| The coffee is weak or not creamy enough. | The coffee is ground too coarsely. | Adjust the grind level. |
| The coffee is not correct. Use coffee for espresso machines. | ||
| The coffee is supplied too slowly or a drop at a time. | The coffee is ground too finely. | Adjust the grind level. |
| The slices coffee grounds are soft and mushy. | The grind level is not correct. | Adjust the grind level (in the direction of 1). |
| Problem Possible cause Remedy | ||
| Coffee does not come out of one or both of the spouts. | The coffee spouts are blocked. | Clean the coffee spouts. |
| The appliance does not make coffee. | The appliance has detected impurities in its internal circuits. See the information shown on the display. | Wait for the appliance to be ready for use again and select the required beverage again. |
| The appliance does not come on. | The appliance is not set to ‘On’. | Push the main switch to set the appliance to ‘On’. |
| Push the On button to set the appliance to ‘On’. | ||
| The brewing unit cannot be removed. | The appliance has not been set to ‘Standby’ correctly. | Push the Standby button to set the appliance to ‘Standby’. |
| The drip tray has not been removed. | Remove the drip tray. | |
| The brewing unit is not in the correct position. | Close the door and set the appliance to ‘On’. The brewing unit automatically returns to the correct position. | |
| The appliance makes a weird sound (not as normal). | The brewing unit and the infuser are dirty. | Clean the infuser and all parts of the brewing unit. Lubricate the o-rings with the lubricating grease. |
| At the end of descaling, the appliance requests a third rinse. | During the two rinse cycles, the water tank has not been filled to the MAX level. | Obey the instructions shown on the display. |
| The milk does not come out of the milk spout. | The lid of the milk container is dirty. | Clean all components of the milk container. |
| The milk contains large bubbles and squirts out of the milk spout or there is little froth. | The milk is not cold enough or is not semi-skimmed or skimmed. | Use skimmed or partially skimmed milk at refrigerator temperature (about 5 °C). If the result is not as you wish, try changing brand of milk. |
| The milk froth adjustment knob is incorrectly adjusted. | Adjust the milk froth adjustment knob. | |
| The lid of the milk container or the milk froth adjustment knob is dirty. | Clean all components of the milk container. | |
| The hot water connection nozzle is dirty. | Clean the nozzle. | |
Disposal of packaging and appliance
Sustainable materials have been used during manufacture of this appliance. This appliance must be disposed of responsibly at the end of its service life. Ask your local authorities for more information about how to do this.
The appliance packaging is recyclable. The following materials may have been used:
- Cardboard.
• Polyethylene film (PE).
• CFC-free polystyrene (PS rigid foam).
Dispose of these materials in a responsible manner and in accordance with government regulations.

The product has been marked with a crossed-out dustbin symbol to remind you of the obligation to dispose of electrical household appliances separately. This means that the appliance may not be included with normal domestic refuse at the end of its service life. The appliance must be taken to a special municipal centre for separated waste collection or to a dealer providing this service.
Separate collection of household appliances helps to prevent any potential negative impact on the environment and on human health caused by improper disposal. It ensures that the materials of which the appliance is composed can be recovered to obtain significant savings in energy and raw materials.
CE
Declaration of Conformity
We hereby declare that our products satisfy the applicable European Directives, Orders and Regulations, as well as the requirements stated in the referenced standards.

natural_image
Warning symbol: gray triangle with exclamation mark (no text or numbers)The appliance rating label is located on the side of the appliance.
When contacting the service department, have the complete type number to hand.
You will find the addresses and phone numbers of the service organisation on the guarantee card.
ATAG
The instructions for use can also be found on our website:
www.atag.nl
www.atag.be


- Instructions for use
- Coffee machine
- ATAG
- Introduction
- Please read the separate safety instructions carefully before using the appliance!
- Description of the appliance
- Control panel
- Maintenance set
- Before first use
- Danger of burns
- Set your appliance to 'On'
- Attention
- Tip
- Important!
- Set your appliance to 'Standby' and 'Off'
- Please note
- Important tips and tricks when you make coffee
- Make coffee using coffee beans
- Make coffee using pre-ground coffee
- Adjust the grind level
- Please note!
- Make milk-based hot drinks
- Make two cups of coffee
- Customise beverages
- Supply a beverage that is customised
- Customise a user profile
- Supply hot water or steam
- Tips when you use steam to froth milk
- Clean your appliance
- Regular cleaning
- Special cleaning
- Clean the hot water spout
- Clean the internal tubes of the milk container and the nozzle
- Clean all components of the milk container
- Clean the appliance's internal circuit
- Clean the coffee grounds container
- Clean the drip tray
- Clean the inside of the coffee machine
- Clean the water tank
- Clean the coffee spouts
- Clean the pre-ground coffee funnel
- Descale the appliance
- Danger of burns!
- Set the water hardness
- Install a water softener filter
- Replace a water softener filter
- Remove a water softener filter
- Clean the brewing unit / infuser once a month
- Clean the brewing unit / infuser twice a year
- Disposal of packaging and appliance
- Declaration of Conformity
Brand : Atag
Model : CM4611D
Category : Coffee maker