
PRA60 - Range hood Premier - Free user manual and instructions
Find the device manual for free PRA60 Premier in PDF.


| Product Type | Range hood (built-in) |
| Model | PRA60 |
| Brand | Premier |
| Width | 60 cm |
| Depth | Typically 50 cm |
| Height (without chimney) | Approximately 15-20 cm |
| Net Weight | Approximately 12 kg |
| Power Supply | 220-240 V, 50 Hz |
| Motor Power | 150-200 W typical |
| Lighting | LED or halogen bulbs, 1-2 bulbs, 1-40 W each |
| Number of Speeds | 3 speeds |
| Maximum Airflow | Approximately 600 m³/h |
| Noise Level (max speed) | ~65 dB |
| Grease Filter Type | Aluminum mesh, washable |
| Carbon Filter Optional | Yes (for recirculation mode) |
| Installation Type | Under cabinet or wall-mounted |
| Exhaust Diameter | 120 mm or 150 mm |
| Control Type | Push buttons or slider |
| Minimum Distance from Gas Hob | 65 cm (recommended) |
| Minimum Distance from Electric Hob | 50 cm (recommended) |
| Cleaning Grease Filters | Every 2-3 months in dishwasher or by hand |
| Replacing Carbon Filters | Every 3-6 months depending on use |
| Repairability | Replacement parts available (filters, bulbs, motor) |
| Safety Features | Overheat protection, manual reset button |
Frequently Asked Questions - PRA60 Premier
User questions about PRA60 Premier
0 question about this device. Answer the ones you know or ask your own.
Ask a new question about this device
Download the instructions for your Range hood in PDF format for free! Find your manual PRA60 - Premier and take your electronic device back in hand. On this page are published all the documents necessary for the use of your device. PRA60 by Premier.
USER MANUAL PRA60 Premier
-
Thank you for choosing our cooker hood. Please read the instruction manual carefully before use.
-
The installation work must competent fitter.
-
The manufacturer disclaims injury caused as a result of not installation contained in the
The cooker hood is used on 22
(2)FEATURE
- The cooker hood uses high quality materials, and is made with a streamlined design.
- Equipped centrifugal with a large power grease filter leaf, it produces strong and easy to clean.
- With the isolated low voltage input, the lights are therefore sa
- Special wind tunnel construction dirt will be absorbed in a second.
(3). Installation
3.1 The cooker hood should be placed at a dis of 65-75cm (26-30inch) from the cooking surface the best effect. See Pic
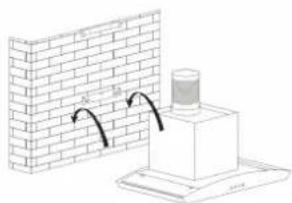
3.2 Install the hook installation height is
fixed position of the place of chimney.
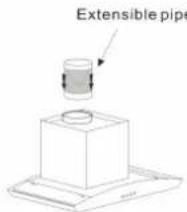
3.3 Fix the extensible direction and way, the hook. S ee pic 3.
- 4 Put the glass according to the way on the cooker hood, and then lead the extensible pipe outside of the inside chimney to the position fix on it by screw, here should be freely. See Pic 4.
- 5 Put the two chimneys together
adjust the height of the inside chimney
inside chimney
body with safety to the inside chimney
Note: The two safety screw. See Pic pos
1
[Non-Text]
[Non-Text]

natural_image
Diagram showing brick wall and chimney installation with curved arrows indicating direction (no text or symbols)Pic 3


Pic 4
Pic 5

k
(4) NOTICE OF INSTALLATION
- Before installation, please ensure the area is clean to avoid suction of the remaining bits
- It cannot share the same air appliance such as gas tube, w
- The above wall. bending the start of ventilation point and should
- After grease installation, collection make at one sure end.

Pic5
(5) SAFETYWARNING
✧ Keep your children from using the cooker hood.
✿ Your cooker hood is for domestic use and other commercial use.
✿ Any installation work must be carried person.
The cooker hood and its filter mesh in good working order.
Before cleaning, always ensure that
✿ Clean the cooker hood according to hood from the danger of burning.
✿ N o fire for drying your cooker hood.
If there is any fault with your cooker appointed by agent for servicing.
✧ Please keep the room draughty when
Do not exhaust the gas from cooker for the gas from gas hob and other kitchen
Before installation and usage, read a voltage (V) and the frequency (Hz) i same as the voltage (V) and the frequency
In order to get the most out of your cook manual before installing & using, and
✿ Ensure that you could get our guarantee warranty card and purchase receipt,
✿ CAUTION: Accessible parts may be appliances.
(6 6)SpeSpedbjutramntSSeqpjtatness
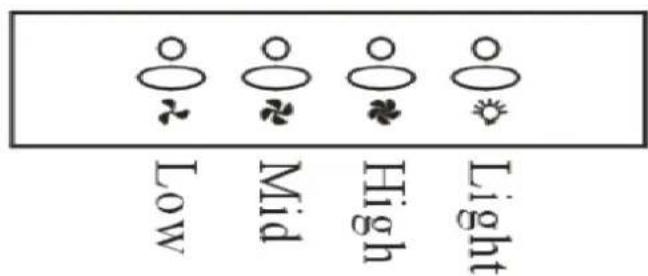
Electronic BButton
- Push runs at the low low speed. button, Push the it indica again
- Push the middle button, the motor runs at mid speed. Push
- Push the high button, the indi on high speed. Push it again
- Push the light button; the ind lighting lamps will come on. turn off.
Indicatorlight ① ② ③ ④
Pic6A
(7) MAINTENANCEE
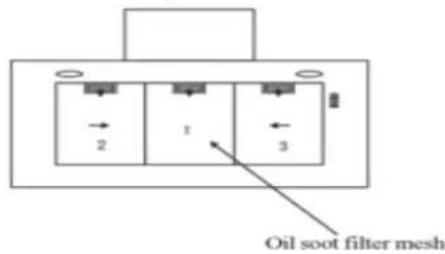
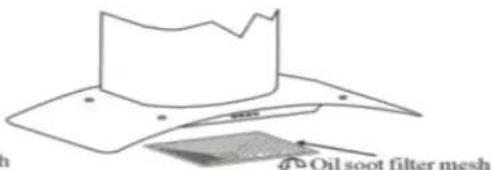
7.1 The cleaning of the carbon-grease filter mesh
The filter mesh is made of high-densit use the corrosive detergent on the appliance running correctly. below.
Method and soak 1: Put the mesh into 40-5 for 2-3 mins. Wear glov Please do not apply too much p will damage easy. Method 2: If instructed to do so, the temperature at around 60 de


7.2 Notice of cleaning geokkerhood
hood
A. To time, non protect the corrosive cooker the main hood detergent body should every fi
B. Please do not use abrasive body.
C. Keep the motor and other spare will cause damage to the appliance
D. Before cleaning the appliance power
E. The carbon filter shouldn't
F. Please don't tear open the
G. If the plug or cord is damaged, soft cord.
8.Abnormity anddSolution
| Fault | Cause | Solution | |
| Light on, but motor does not work | The leaf blocked | Get rid of the bloc | |
| The capacitor damaged | Replace capacitor | ||
| The motor jammed bearing damaged | Replace motor | ||
| The internal a bad smell from th | Replace motor | ||
| Light does not wor motor does not wor | Beside the above mentione | ||
| Light damaged | Replace lights | ||
| Power cord | Connect the electric | ||
| Oil leakage | One way valve ventilation tightly sealed | Take down valve and seal with | |
| Leakage from of U-shaped cover | Take U-shaped down and seal or paint | ||
| Shake of | The leaf damaged shaking | Replace the leaf | |
| The motor is not tightly hanged | Lock the motor | ||
| The body is not hanged | Fixed the body | ||
| Insufficient | The distance body and the gas | Readjust | |
| Too much open doors | Choose a resemble | ||
| The machine | The fixing screw enough | Tighten the screw and ma horizontal | |
| The hanging screw enough | Tighten the screw and ma horizontal | ||
Brand : Premier
Model : PRA60
Category : Range hood