C-DMM-2001 - Car accessory Havis - Free user manual and instructions
Find the device manual for free C-DMM-2001 Havis in PDF.


| Product Type | Vehicle Dashboard Mount |
| Brand | Havis |
| Model | C-DMM-2001 |
| Compatible Devices | Tablets, Smartphones, GPS units (up to 10 inch) |
| Mounting Type | Dashboard adhesive or screw mount |
| Material | High-strength ABS plastic and aluminum |
| Dimensions (W x H x D) | 6.3 x 4.9 x 3.5 inches |
| Weight | 14.5 oz (410 g) |
| Adjustability | 360° rotation, tilt and swivel |
| Power Supply | None (passive mount) |
| Installation | Adhesive pad or hardware included for permanent mount |
| Maintenance | Wipe with a soft, damp cloth; avoid abrasive cleaners |
| Safety Features | Anti-slip padding, secure locking mechanism |
| Spare Parts Available | Replacement adhesive pads and screws |
| Warranty | 1 year limited warranty |
| Country of Origin | USA |
Frequently Asked Questions - C-DMM-2001 Havis
User questions about C-DMM-2001 Havis
0 question about this device. Answer the ones you know or ask your own.
Ask a new question about this device
Download the instructions for your Car accessory in PDF format for free! Find your manual C-DMM-2001 - Havis and take your electronic device back in hand. On this page are published all the documents necessary for the use of your device. C-DMM-2001 by Havis.
USER MANUAL C-DMM-2001 Havis
INSTALL INSTRUCTIONS
C-DMM-2001 Dash Monitor Mount
2013-2019 Police Interceptor Utility (SUV) Standard Interior and
Interceptor with Interior Upgrade Package (Ford option code 65U)
Notes:
- The C-DMM-2000 series Dash Monitor Mount brackets are specifically designed to work with Havis, Inc, model # TSD-101 Touch Screen Display.
- The display mount bracket includes a VESA 75 hole pattern that can also be used for some light weight tablet docking station applications under 5 lbs. . Acceptable positioning must be determined by end user.
- The C-DMM-2001 will work with all Havis, Inc. consoles made for the Interceptor Utility.
- The C-DMM-2001 Does NOT work in the Retail Explorer because of OEM display options.
TOOLS REQUIRED: (some tools are not needed for all vehicle installations)
-
Socket set - metric & standard
• Phillips screwdriver -
Drill & drill bits
-
Trim removal tools
-
1.5" hole saw
- Pencil / Marker
- Tape measure
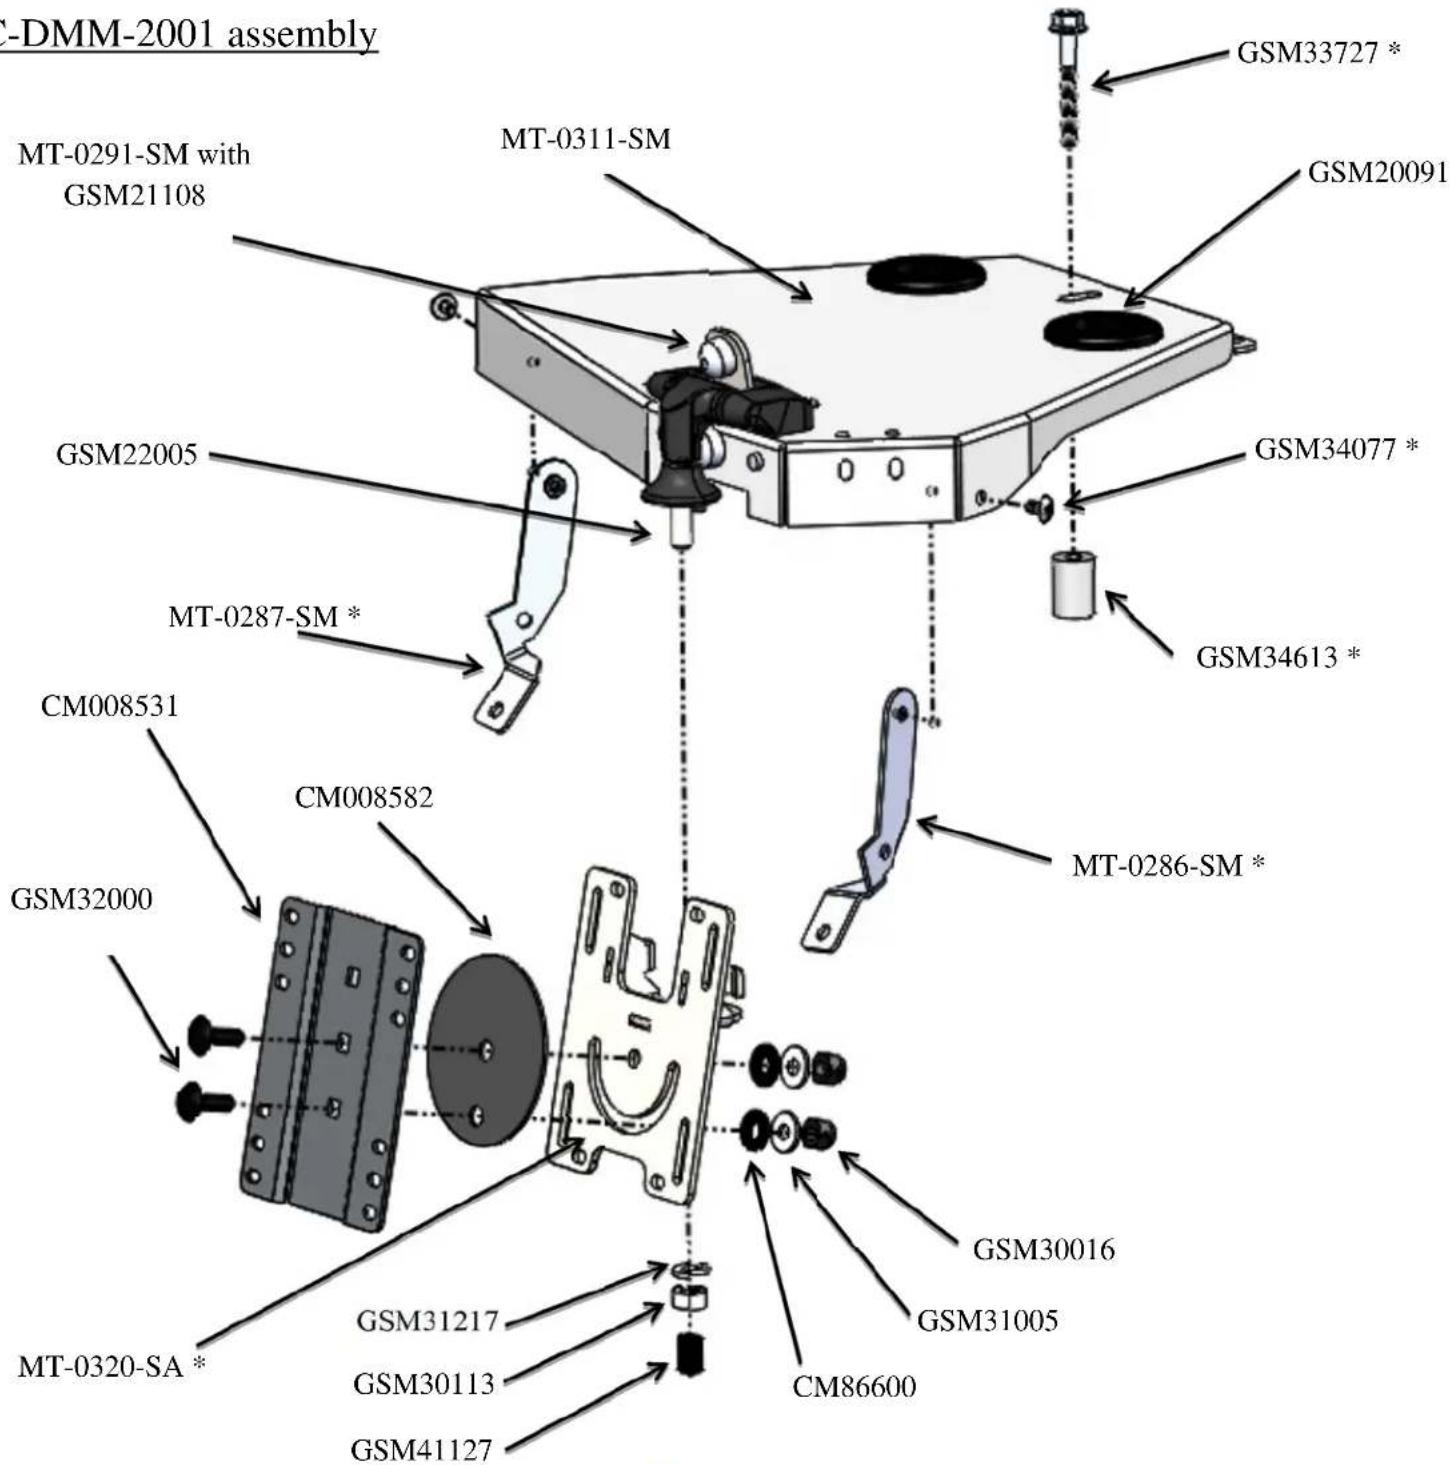
MOUNT BRACKET PARTS and HARDWARE:
Installation parts with \* come loose in hardware kit bag. Other parts are preassembled
QTY: DESCRIPTION:
| 1 | Main dash mount bracket | MT-0311-SM * |
| 1 | Driver side support bracket | MT-0287-SM * |
| 1 | Passenger side support bracket | MT-0286-SM * |
| 1 | Pivot / display mount bracket | MT-0320-SA * |
| 1 | Front VESA mounting plate | CM008531 |
| 1 | Nylon spacer | CM008582 |
| 2 | 1/4" x 3/4" Carriage bolts | GSM32000 |
| 1 | Tilt swivel hinge | GSM22005 |
| 2 | 1/4" Nylock nut | GSM30016 |
| 2 | 1/4" Flat washer | GSM31005 |
| 2 | Nylon 1/16" spacer washer | CM86600 |
| 1 | M8 hex nut SS | GSM30113 |
| 1 | M8 lock washer SS | GSM31217 |
| 1 | Vinyl cap (.50" high x .312 - .375 id) | GSM41127 |
| 1 | Aluminum spacer | GSM34613 * |
| 3 | 8-32 x .312" Phillips truss head machine screw | GSM34077 * |
| 1 | M6 x 45mm Hex head bolt | GSM33727 * |
| 2 | Pull through bumper (3mm head) | GSM21109 |
| 2 | Push in bumper (10mm head) | GSM21108 |
| 2 | Grommet (1.75" wide) | GSM20091 |
| 1 | Stop bracket | MT-0291-SM |
| 2 | M5 x 10mm Thread forming screw | GSM33774 |
PART #:
ALWAYS!
- Read all instructions before installing any Havis, Inc products.
- Use hardware provided with install kit
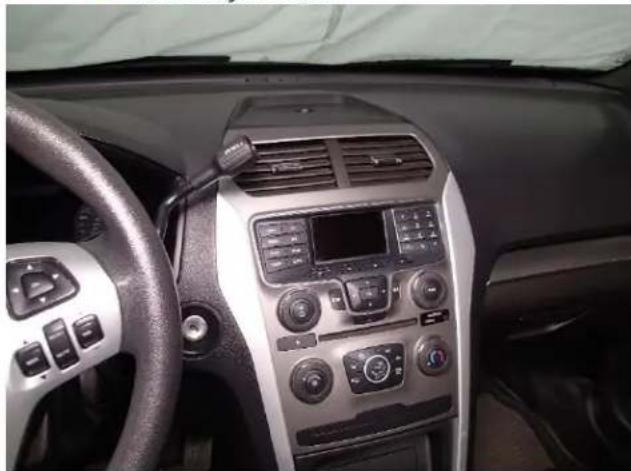
natural_image
Interior view of a car dashboard with air conditioners and steering wheel (no visible text or symbols)View of Interceptor Utility prior to installation.
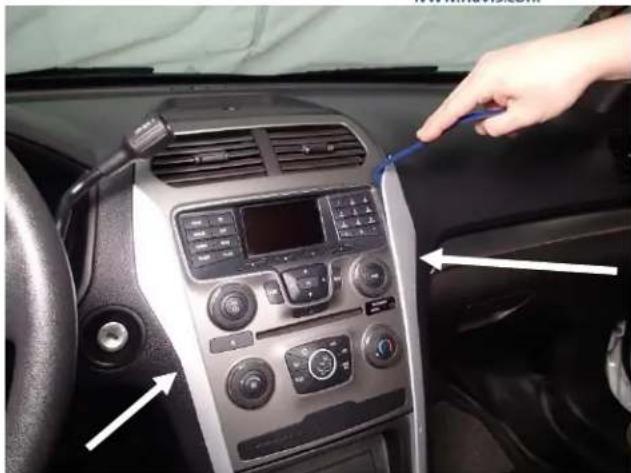
natural_image
Interior view of a car dashboard with a hand adjusting the steering wheel (no visible text or symbols)Carefully remove the center dash side trim panels.
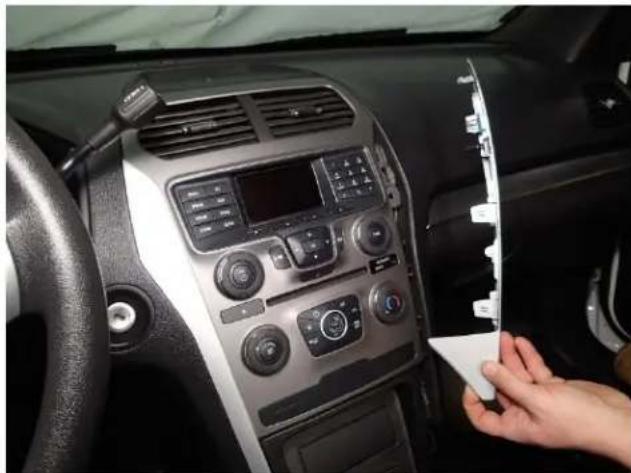
natural_image
Interior view of a car dashboard with a hand inserting a white plastic clip into the back panel (no visible text or symbols)Passenger side trim panel removed.
natural_image
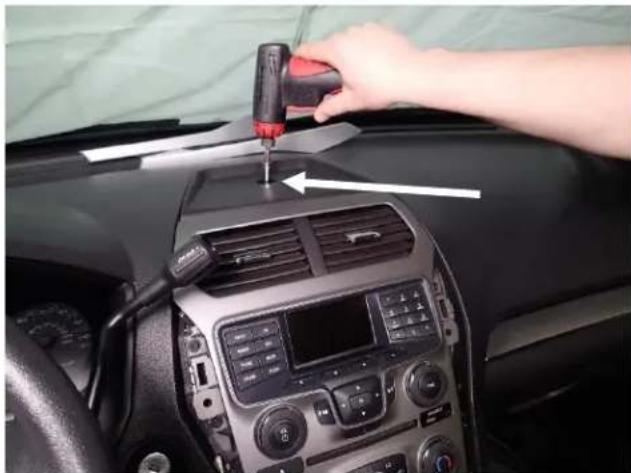
Interior view of a car dashboard with a hand using a screwdriver to adjust the steering wheel (no visible text or symbols)Remove bolt from top center dash panel.
Panel only needs to be removed for wiring needs.
(10mm socket)
natural_image
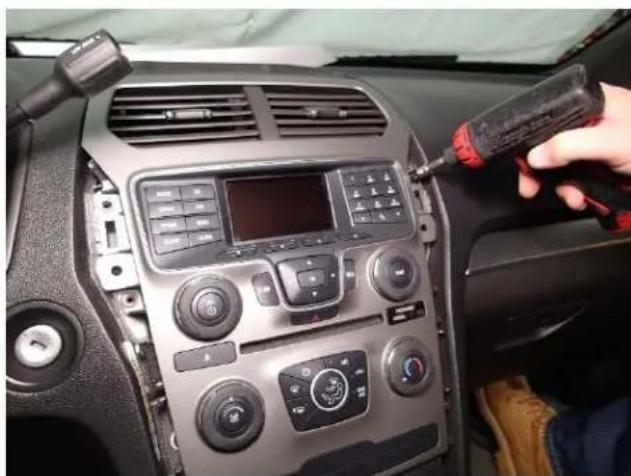
Interior view of a car dashboard with a handheld tool applying material to the air vent (no visible text or symbols)Unscrew center dash assembly.
(7mm socket)
natural_image
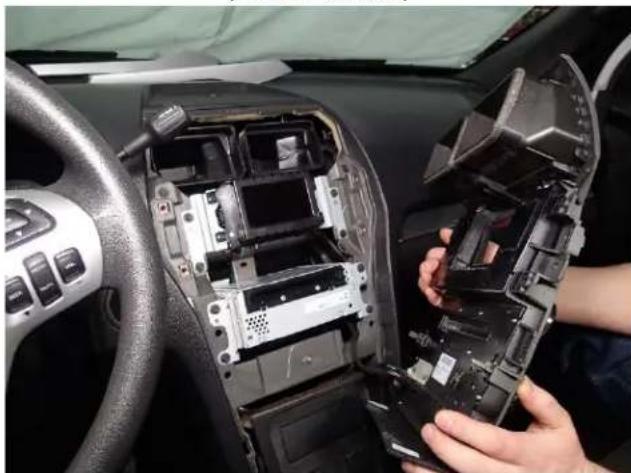
Interior view of a car showing a hand installing or adjusting an internal compartment with plastic components (no visible text or symbols)Remove and unplug center instrument panel
assembly.
natural_image
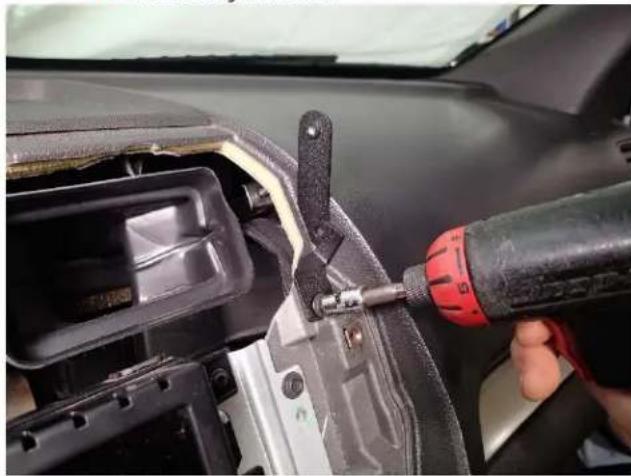
Close-up of a car's front bumper being adjusted using a power tool, no visible text or symbolsAttach passenger side upper support bracket to dash as shown with existing screw. (7mm socket)
Torque to 3 Nm (27 lb in)
natural_image
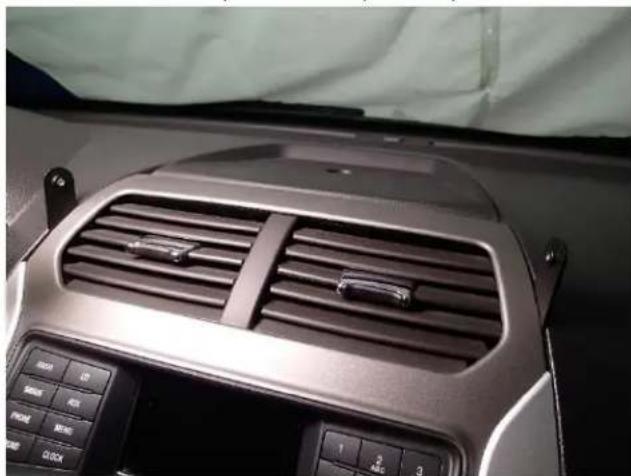
Interior view of a car dashboard with ventilation grilles and control buttons (no visible text or symbols)Plug in and remount center instrument panel assembly.
natural_image
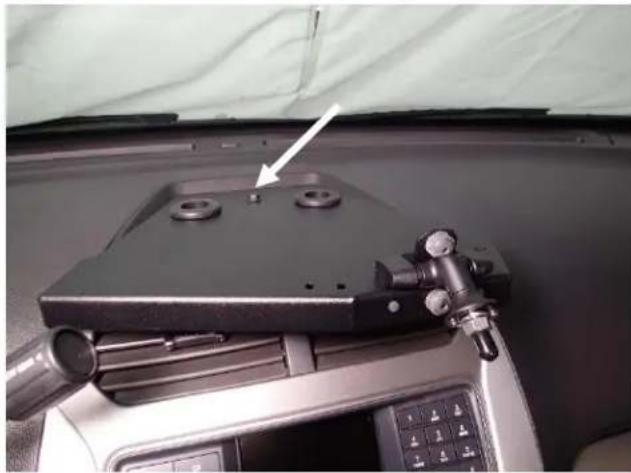
Interior view of a vehicle showing a mounted electronic device with a white arrow pointing to a component (no visible text or symbols)Place the aluminum spacers into pocket on top of OEM trim panel. Place main dash mount bracket on top and attach with M6 x 45mm Hex head bolt.
(10mm socket)
Torque to 3 Nm (27 lb in)
Routing harnesses prior to this step is recommended.
natural_image
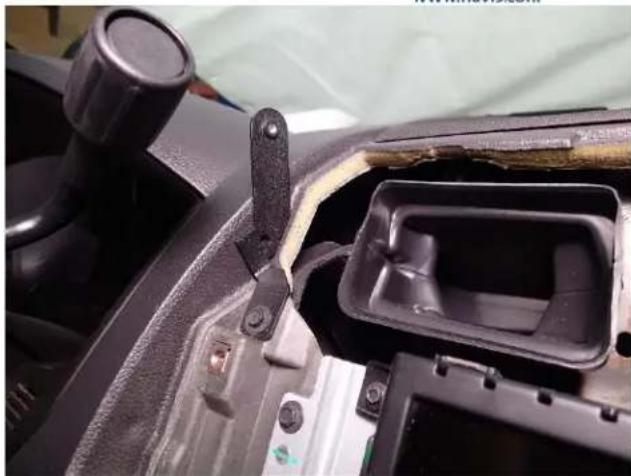
Close-up of a car's dashboard and steering wheel assembly (no visible text or symbols)Attach driver side upper support bracket to dash as shown with existing screw. (7mm socket)
Torque to 3 Nm (27 lb in)
natural_image
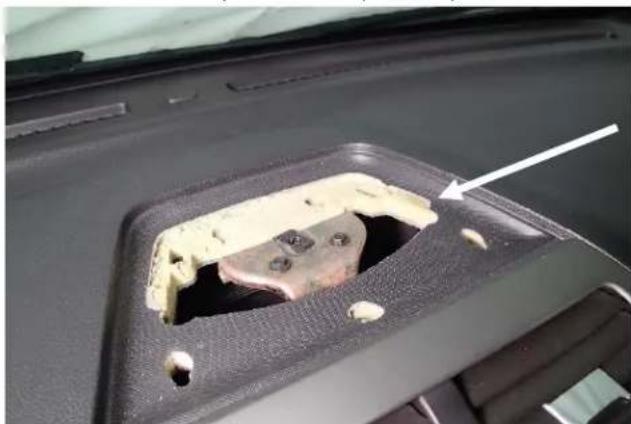
Close-up of a car interior showing a damaged panel with a hole and screw holes, no visible text or symbols.This photo is for reference only.
The OEM top center dash panel will remain in place, but will require a large hole to be cut above the open area shown for running wire harnesses. A 1.5" hole saw is recommended.
Installing harnesses prior to final bracket mounting is recommend for easier routing.
natural_image
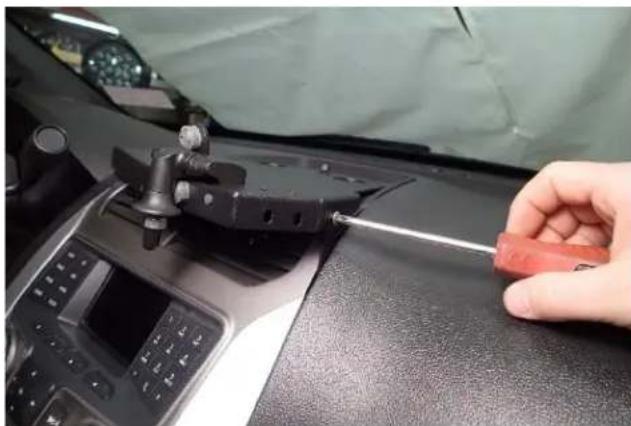
Close-up of a hand adjusting a screwdriver on a car dashboard (no visible text or symbols)Attach main dash mount bracket to side upper support brackets with 8-32 x .312" Phillips head machine screw and tighten all
mounting hardware.
(Phillips screwdriver)
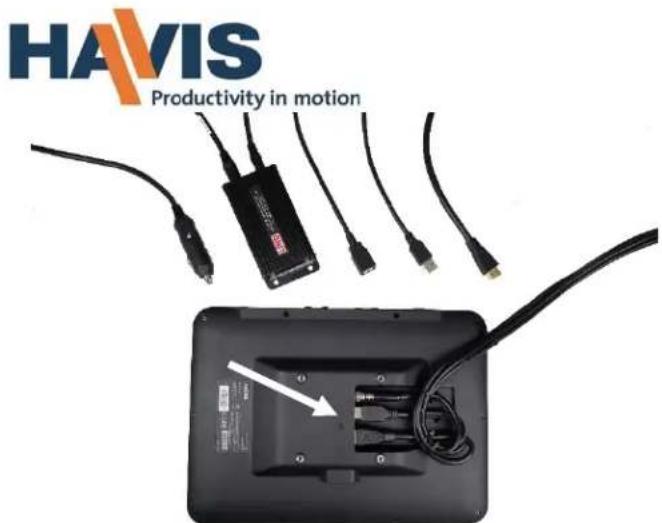
Connect harnesses to the back of the TSD-101 display. It is important to also double wire tie the harnesses to provide sturdy strain relief for the plugs.
USB connection from remote Docking station must plug into USB plug closest to front of display.
Refer to TSD-101 owner's manual for power and computer connection details.
natural_image
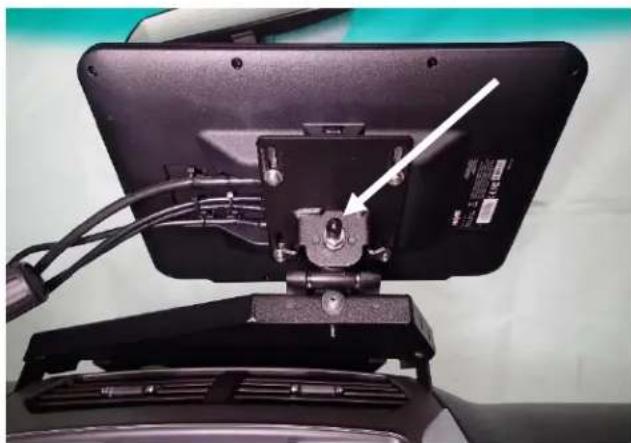
Close-up of a black electronic device with attached cable and connector, showing a white arrow pointing to a component (no text or symbols visible)Attach bracket with display to the tilt swivel hinge with M8 hex nut and lock washer. Tighten nut and attach vinyl cap on M8 bolt threads.
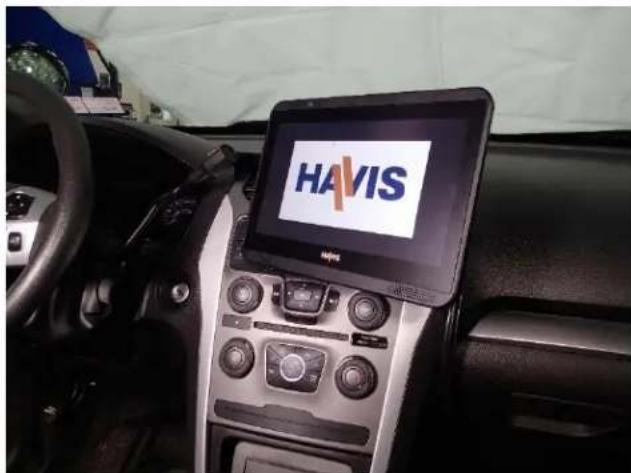
Refer to TSD-101 owner's manual for power and computer connection details.
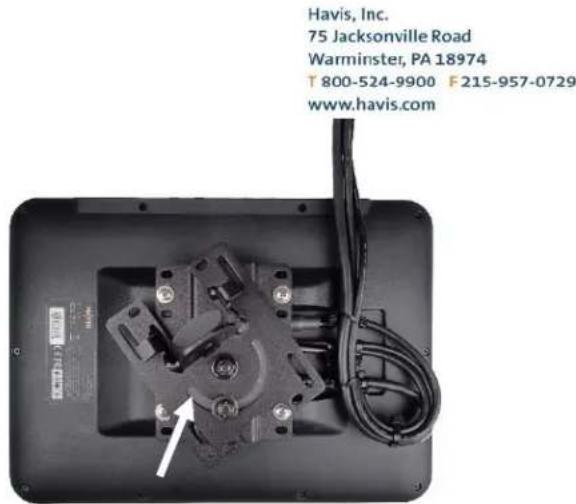
Attach pivot / display mount bracket to display with M4 x 0.7 x 10mm Phillips head machine screws, lock washers and flat washers.
Display mount hardware is included with TSD-101 hardware kit.
natural_image
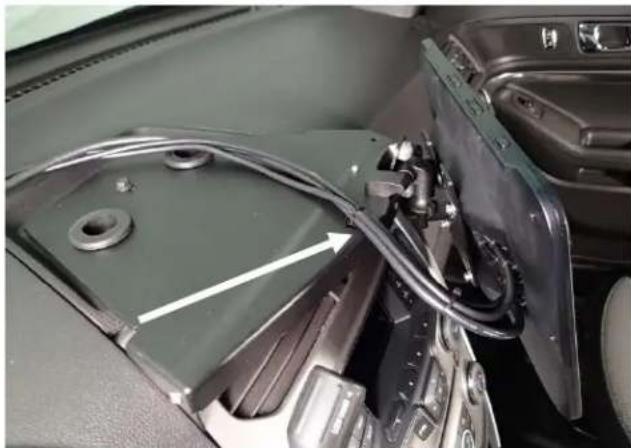
Interior view of a car showing a mounted electronic device with cables and connectors (no visible text or symbols)Run wire harnesses into dash (or as desired) and to necessary destinations. Wire tie / strain relief the harnesses to main mount bracket.
Leave slack for full display movement
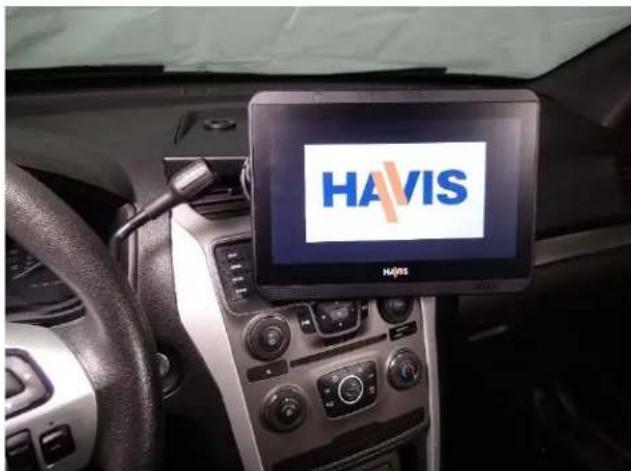
Installation of C-DMM-2001 with C-TSD-101 complete.
C-DMM-2001_INST_1-17
- INSTALL INSTRUCTIONS
- C-DMM-2001 Dash Monitor Mount
- 2013-2019 Police Interceptor Utility (SUV) Standard Interior and
- Interceptor with Interior Upgrade Package (Ford option code 65U)
- Notes:
- TOOLS REQUIRED: (some tools are not needed for all vehicle installations)
- MOUNT BRACKET PARTS and HARDWARE:
- Installation parts with \* come loose in hardware kit bag. Other parts are preassembled
- ALWAYS!
Brand : Havis
Model : C-DMM-2001
Category : Car accessory