C-DMM-2005 - Car accessory Havis - Free user manual and instructions
Find the device manual for free C-DMM-2005 Havis in PDF.

User questions about C-DMM-2005 Havis
0 question about this device. Answer the ones you know or ask your own.
Ask a new question about this device
Download the instructions for your Car accessory in PDF format for free! Find your manual C-DMM-2005 - Havis and take your electronic device back in hand. On this page are published all the documents necessary for the use of your device. C-DMM-2005 by Havis.
USER MANUAL C-DMM-2005 Havis
INSTALL INSTRUCTIONS
C-DMM-2005 Dash Monitor Mount
2015-2017 Ford Transit Van
with Radio code 58U or 58T
Notes:
-
The C-DMM-2000 series Dash Monitor Mount brackets are specifically designed to work with Havis, Inc, model # TSD-101 Touch Screen Display.
-
The display mount bracket includes a VESA 75 hole pattern that can also be used for some light weight tablet docking station applications. Acceptable positioning must be determined by end user.
-
The C-DMM-2005 will work with all Havis, Inc. consoles made for the Transit van.
-
The C-DMM-2005 Does NOT work with the 58V, 58W, 58X, 58Y, or 584 radio package.
TOOLS REQUIRED: (some tools not needed for all vehicle installations)
- Socket set - metric & standard
- Drill & drill bits
- Tape measure
• Phillips screwdriver
- Trim removal tools
- Pencil / Marker
MOUNT BRACKET PARTS and HARDWARE:
Installaon parts with * come loose in hardware kit bag. Other parts are preassembled
QTY: DESCRIPTION: PART #:
1 Main dash mount bracket MT-0294-SA
1 Main dash mount base MT-0295-SM *
1 Pivot / display mount bracket MT-0269-SA *
1 Tilt swivel hinge GSM22005
6 M5-18mm Thread forming screw GSM33778 *
1 M8 hex nut SS GSM30113
6 8-32 x 5/8" Machine screw GSM34117*
1 M8 lock washer SS GSM31217
1 8-32 x .312" Phillips truss head machine screw GSM34077 *
1 Vinyl cap (.50" high x .312 - .375 id) GSM41127
2 Pull through bumper (3mm head) GSM21109
2 Push in bumper (10mm head) GSM21108
1 Stop bracket MT-0291-SM
2 M5 x 10mm Thread forming screw GSM33774
ALWAYS!
- Read all instructions before installing any Havis, Inc products.
- Use hardware provided with install kit
C-DMM-2005 assembly

text_image
GSM34117 * MT-0294-SA MT-0291-SM-A with GSM21108 GSM22005 MT-0269-SA * GSM33778 * GSM33778 * GSM31217 GSM30113 GSM41127 MT-0295-SM*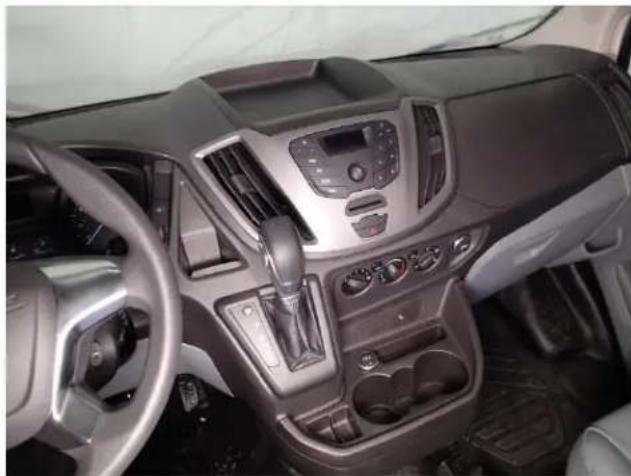
natural_image
Interior view of a modern car dashboard with steering wheel, dashboard controls, and steering wheel (no visible text or symbols)Veiw of Transit dash before install
natural_image
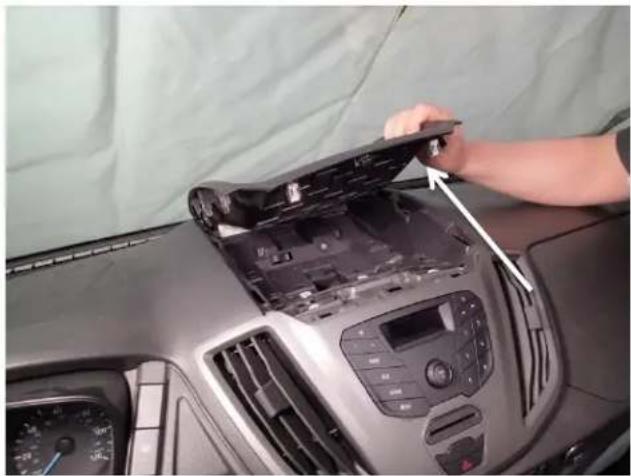
Person installing or adjusting a car dashboard panel on the dashboard, with no visible text or symbols.Carefully remove top pocket by gently prying along seams
natural_image
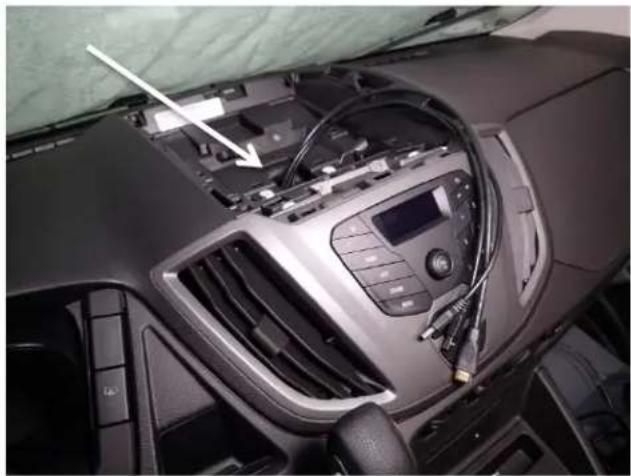
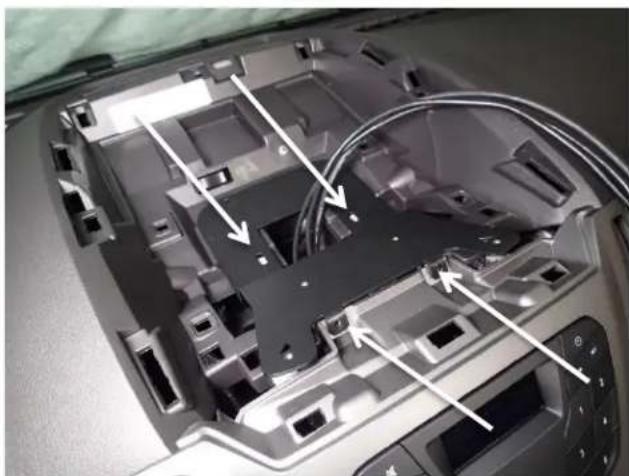
Interior view of a car dashboard with airbags and a digital display (no visible text or symbols)Running computer wires through the dash is recommended at this time

natural_image
Hand placing a black plastic tray component on a workbench (no text or symbols visible)Place the main dash mount base to the bottom of the previously removed tray
natural_image
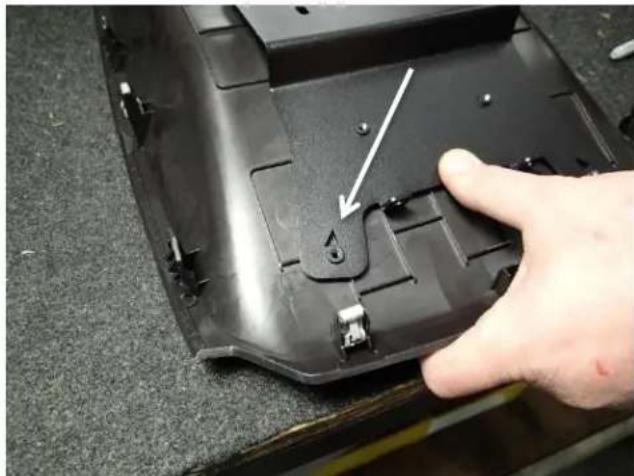
Close-up of a hand pressing a black plastic component with a white arrow pointing to a small hole (no text or symbols visible)Line up triangle cutouts in the bracket to the seams in the tray.
natural_image
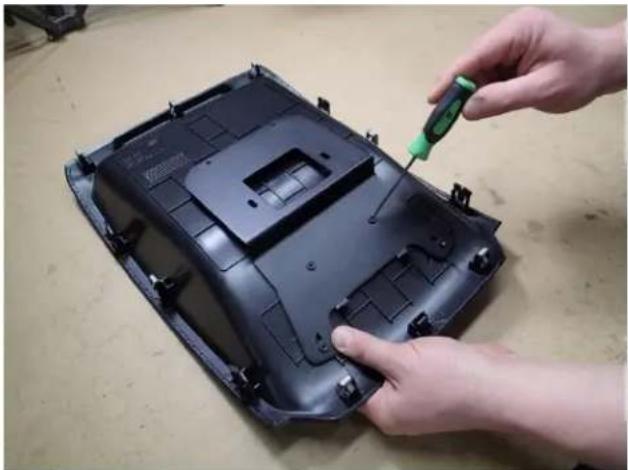
Close-up of hands installing a black plastic component with a green screwdriver (no visible text or symbols)Mark four (4) holes in the tray using a pick or an awl.
text_image
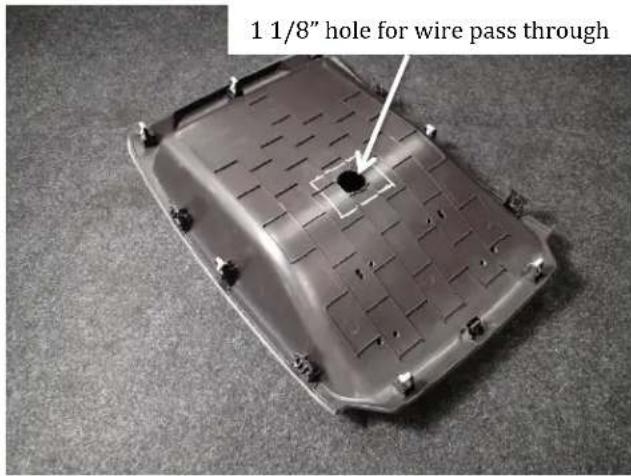
1 1/8" hole for wire pass throughHighlight marks with a paint marker and then drill out each hole to 1/4".

natural_image
Close-up of a car interior showing a device with a tool inserted, no visible text or symbolsRemove factory hardware from top of radio housing using. (7mm socket)
natural_image
Interior view of a computer case with visible internal components and cable routing (no text or symbols)Install the dash mount base using four (4) M5-18mm Thread forming screws supplied.
natural_image
Interior view of a car dashboard with a central sink and air conditioner unit (no visible text or symbols)Re-install upper tray assembly.

natural_image
Interior view of a car dashboard with a black plastic cover and cable, no visible text or symbolsInstall main mounting bracket onto the tray and secure to the lower mounting base using four (4) 8-32 x 5/8" machines screws.

natural_image
Interior view of a car dashboard with steering wheel, black plastic tray, and control panel (no visible text or symbols)Completed bracket install

text_image
HAVIS Productivity in motionConnect harnesses to the back of the TSD-101 display. It is important to also double wire tie the harnesses to provide sturdy strain relief for the plugs. USB connection from remote Docking station must plug into USB plug closest to front of display.

natural_image
Close-up of a robotic vacuum cleaner's back panel with attached-mounted control panel and cable, no visible text or symbolsAttach bracket with display to the tilt swivel hinge with M8 hex nut and lock washer. Tighten nut and attach vinyl cap on M8 bolt threads.
natural_image
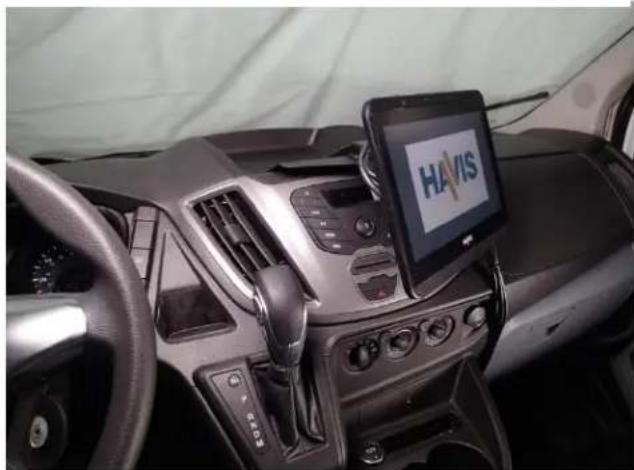
Interior view of a car dashboard with a Huawei Havis smartphone mounted on the steering wheel (no visible text or symbols on the device screen)Refer to TSD-101 owner's manual for power and computer connection details.
text_image
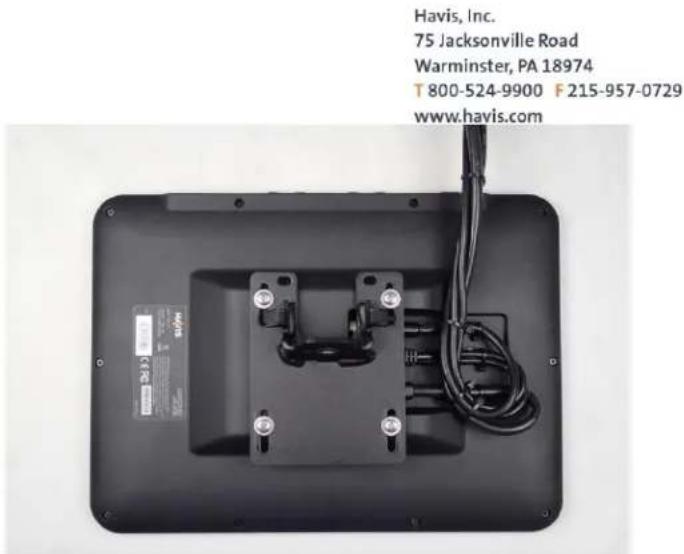
Havis, Inc. 75 Jacksonville Road Warminster, PA 18974 T 800-524-9900 F 215-957-0729 www.havis.comAttach pivot / display mount bracket to display with M4 x 0.7 x 10mm Phillips head machine screws, lock washers and lat washers. Display mount hardware is included with TSD-101 hardware kit

natural_image
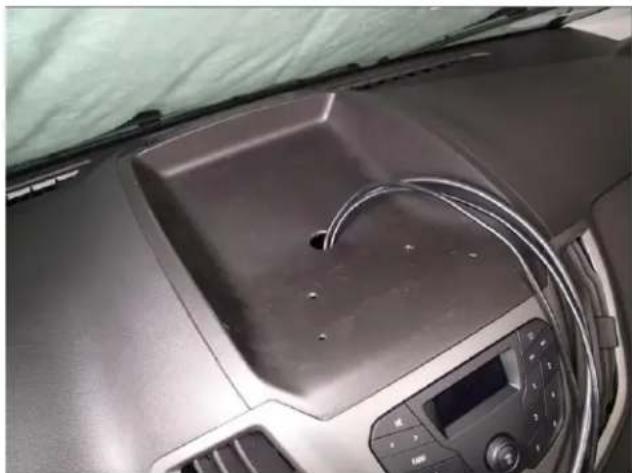
Interior view of a car dashboard with air filters and control panel (no visible text or symbols)Run wires through hole in tray or they can be run neatly along the outside of the dash.
natural_image
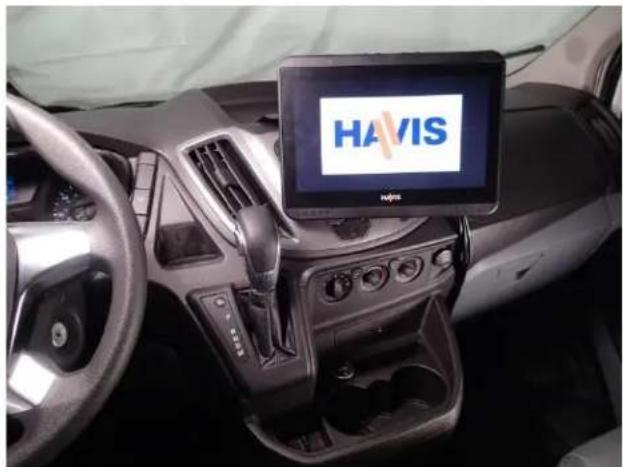
Interior view of a car dashboard with HAVIS branding on the touchscreen (no readable text beyond logo)Installation of C-DMM-2005 with TSD-101 complete.