C-DMM-119 - Car accessory Havis - Free user manual and instructions
Find the device manual for free C-DMM-119 Havis in PDF.

User questions about C-DMM-119 Havis
0 question about this device. Answer the ones you know or ask your own.
Ask a new question about this device
Download the instructions for your Car accessory in PDF format for free! Find your manual C-DMM-119 - Havis and take your electronic device back in hand. On this page are published all the documents necessary for the use of your device. C-DMM-119 by Havis.
USER MANUAL C-DMM-119 Havis
INSTALL INSTRUCTIONS
C-DMM-119
2011-2014 DODGE CHARGER SWING-OUT DASH MONITOR MOUNT
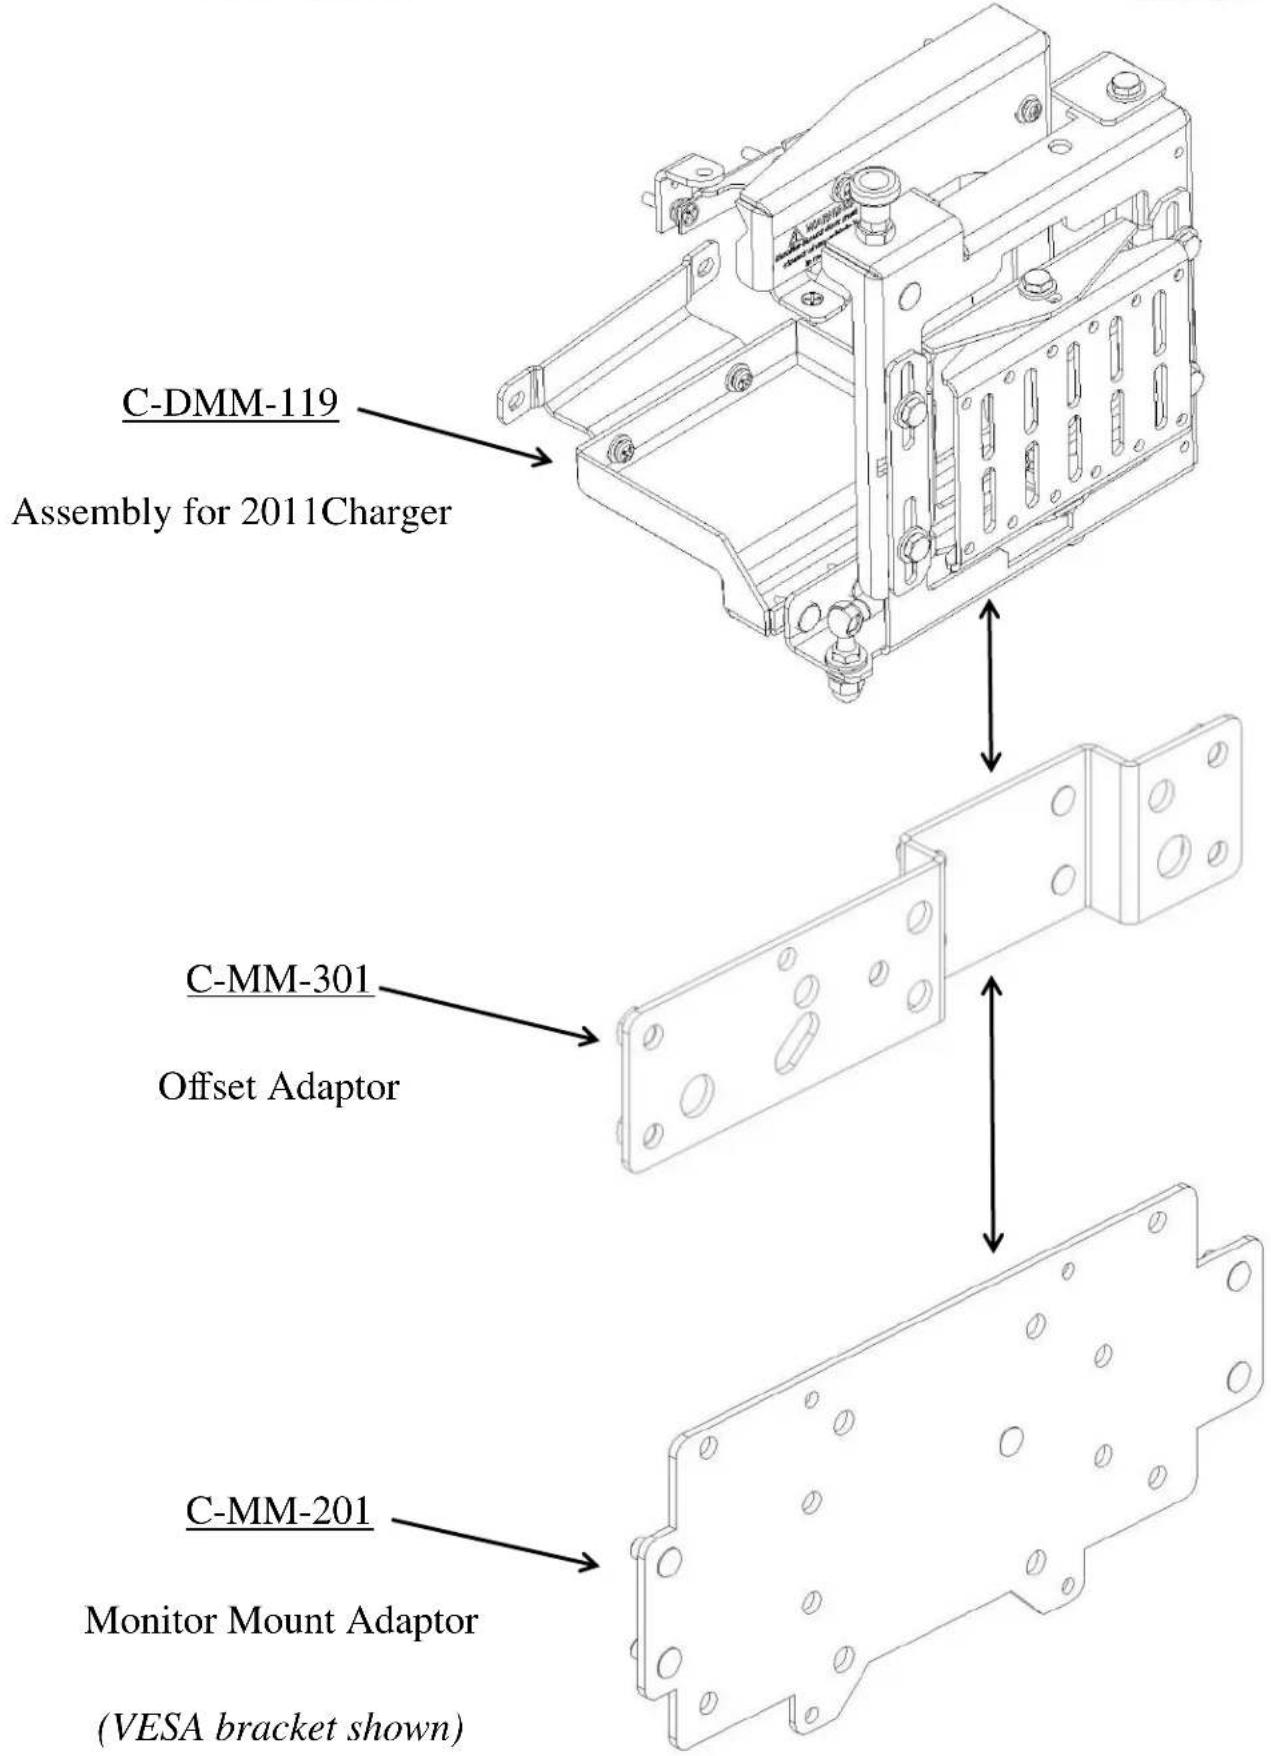
The Dash Monitor Mount bracket system requires two or three main parts that are Sold Separately. See web site Monitor Congurator for more detailed bracket informaon.
hp://www.havis.com/monitor_mounts.htm
• 1 - Vehicle Specific dash mount bracket. (C-DMM-119)
• 1 - Computer Specific Monitor adaptor bracket. (C-MM-200 series)
• 1 - Oset adaptor bracket. (C-MM-301)
The C-MM-301 oset adaptor goes between the C-DMM-119 and C-MM-2XX. It may not be required in some applications.
TOOLS REQUIRED:
- Ratchet Wrench
- Jig saw / Hack saw / other? (to cut plasc dash part)
- Socket Set
- Open End Wrench - 7/16"
• Phillips Screwdriver
HARDWARE:
QTY DESCRIPTION PART#
1 Lower Support Bracket CM004415
1 Upper Support Bracket CM004416
4 1/4 Hex Flange Serrated Nut GSM30023
4 10/32 x 1/2" Phillips Pan head machine screw GSM34097
4 # 10" Flat Washer SS GSM31046
4 # 10" Lock Washer SS GSM31065
2 10/32 x 1" Phillips Flat head machine screw GSM33073
2 10/32 Nylock nut GSM30015-1
2 # 10 Flat Washer GSM31003
1 # 10 x 1" Phillips Flat head sheet metal screw GSM33152
1 Small "L" bracket CM93094
1 Monitor Adapter Hardware Varies (monitor specic)
Always!
Read all instrucons before installing any Havis, Inc. products.
➢ Check for obstrucons (Wires, brake lines, fuel tank, etc.) before drilling any holes!
➢ Use hardware provided with install kit
text_image
C-DMM-119 Assembly for 2011Charger C-MM-301 Offset Adaptor C-MM-201 Monitor Mount Adaptor (VESA bracket shown)C-DMM-119_INST_7-11

natural_image
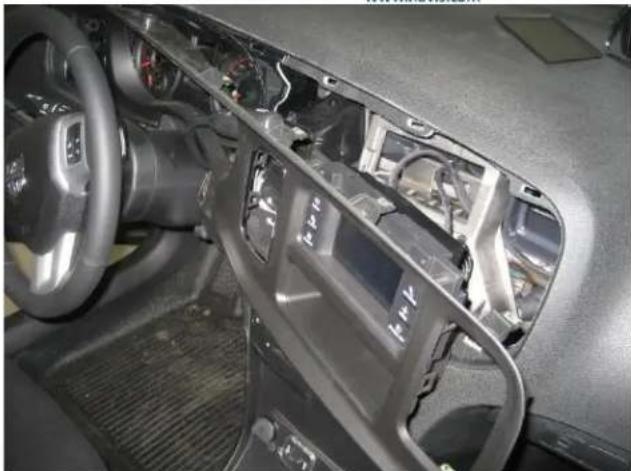
Interior view of a car dashboard with air conditioners and control panels (no visible text or symbols)2011 Dodge Charger Dash prior to installaon.

natural_image
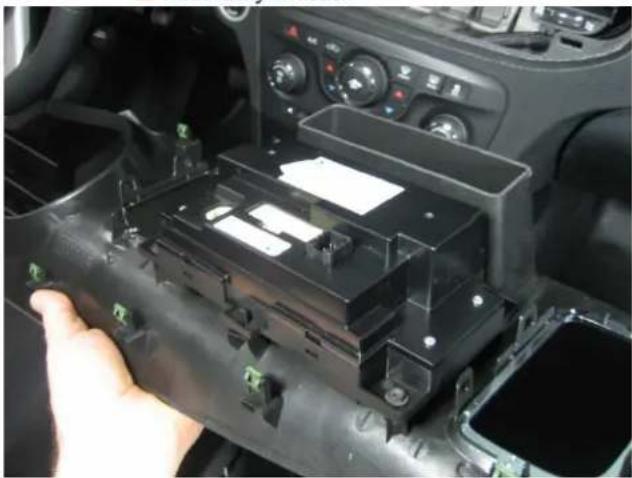
Interior view of a car showing the air intake console and dashboard (no visible text or symbols)Dash panel removed
natural_image
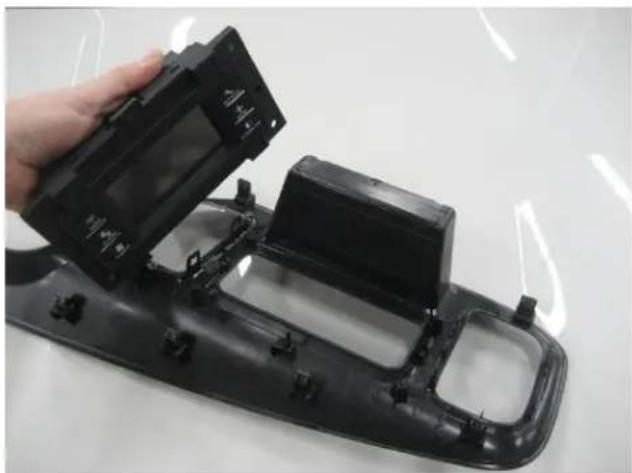
Hand holding a black plastic device with multiple ports and mounting brackets (no visible text or symbols)Touch screen removed
Havis, Inc.
75 Jacksonville Road
Warminster, PA 18974
T800-524-9900 F215-957-0729
www.havis.com
natural_image
Interior view of a car dashboard and infotainment system (no visible text or symbols)Remove one (1) screw above instrument panel. Carefully unsnap and remove dash trim bezel assembly. (Phillips or 1/4 socket)
natural_image
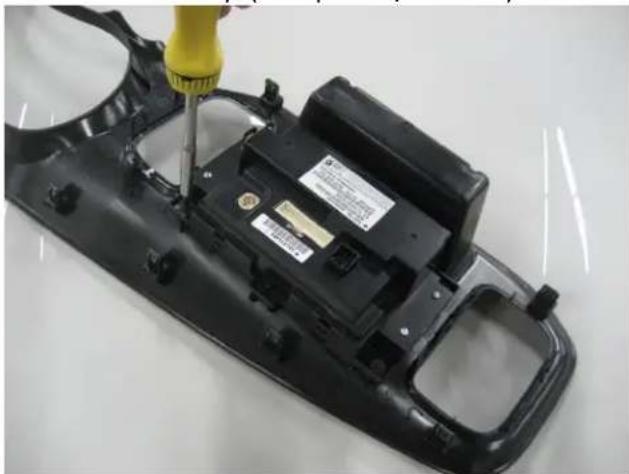
Close-up of a black plastic electronic device with a yellow screwdriver inserted, showing internal components and mounting brackets (no text or symbols visible)Temporarily remove OEM touch screen from dash panel. (Phillips)
natural_image
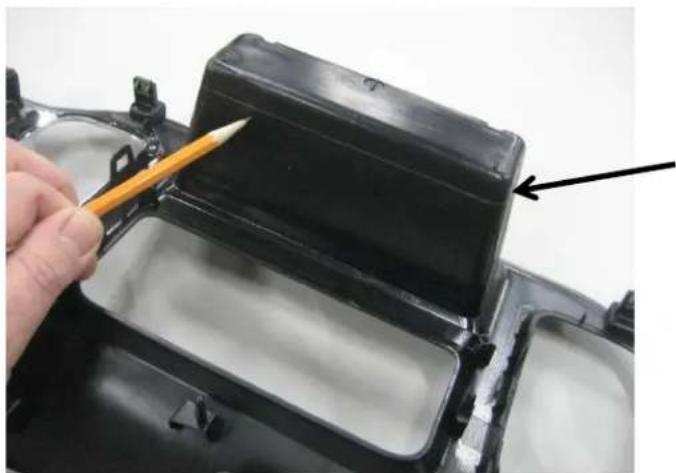
Close-up of a hand using a pencil to open a black plastic container (no text or symbols visible)Measure and cut 1/2" o the back of the dash storage pocket.
natural_image
Interior view of a car dashboard with a hand adjusting the internal components (no visible text or symbols)Deburr and clean cut storage pocket and re-install touch screen

natural_image
Close-up of a car interior showing a hand holding a screwdriver, with no visible text or symbols on the main components.Use previously removed OEM screws and each lower support bracket.
natural_image
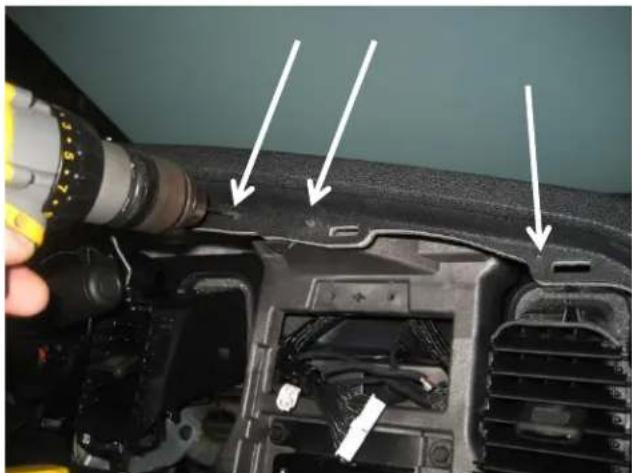
Close-up of a car dashboard with a tool and white arrows pointing to components (no visible text or symbols)Drill the two (2) outboard mount holes with 3/16" drill bit.
Drill center mount hole with 5/32 drill bit.
Havis, Inc.
75 Jacksonville Road
Warminster, PA 18974
T800-524-9900 F215-957-0729
www.havis.com

natural_image
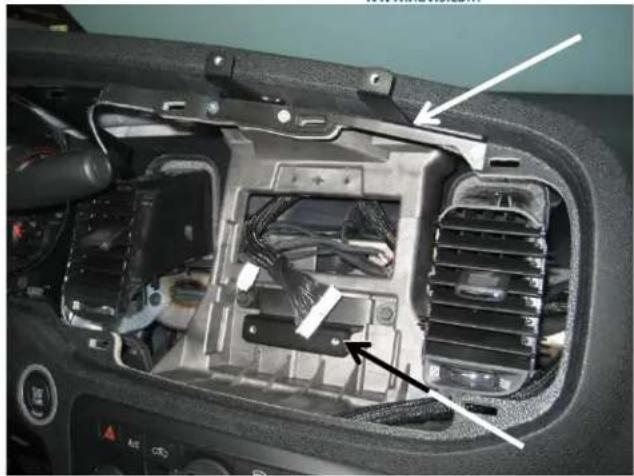
Close-up of a car interior showing a hand holding a tool, with visible wiring and a white arrow pointing to a component (no text or symbols)Temporarily remove two (2) OEM screws in front of storage pocket area.

natural_image
Close-up of a car interior panel with a finger pointing to a component, showing mounting hardware and wiring (no text or symbols visible)Posion the upper support bracket as shown.
The center oval hole must line up with the oval hole in the dash. Mark locaon of three mounng holes
natural_image
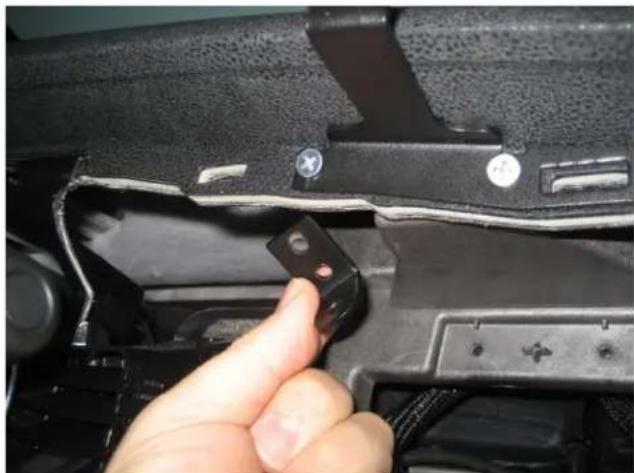
Close-up of a hand holding a black plastic component with a red dot, next to a damaged car body (no visible text or symbols)Aach upper support bracket "outboard holes" with 10/32 x 1" at head machine screws, washers and nuts.
** Driver side hole also uses small "L" bracket to hook over top of inner dash. (helps clamp to dash)

natural_image
Close-up of a car's front panel showing wiring and mounting bracket (no text or symbols visible)Use # 10 x 1" Phillips at head sheet metal screw for center mount hole.

natural_image
Close-up of a hand inserting a USB cable into a car's battery pack (no visible text or symbols)Plug OEM harnesses back into dash controls.

natural_image
Interior view of a car dashboard with air conditioners and control panel (no visible text or symbols)Dash panel is now back in place with Monitor Mount brackets.
Havis, Inc.
75 Jacksonville Road
Warminster, PA 18974
T800-524-9900 F215-957-0729
www.havis.com
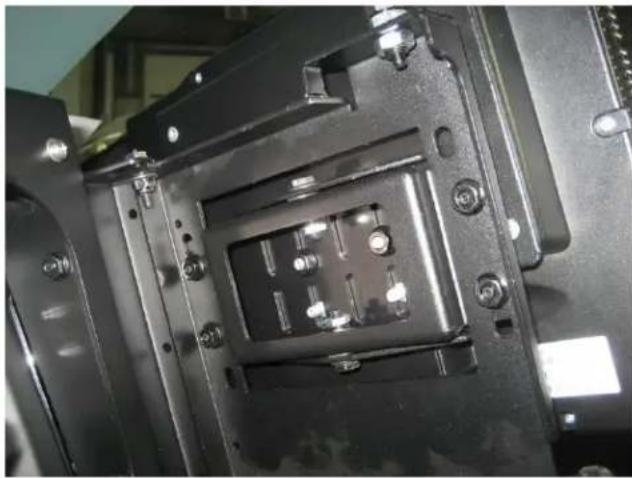
natural_image
Interior view of a car dashboard showing air vent, fan, and electrical panel (no text or symbols visible)Upper and lower support brackets are now in posion.

natural_image
Close-up of a car interior showing the air intake console and dashboard (no visible text or symbols)Make sure ductwork is posioned properly and carefully reinstall dash panel.

natural_image
Close-up of a car dashboard with a yellow screwdriver inserted, showing control panel and buttons (no visible text or symbols)Aach monitor mount frame assembly to the support brackets with four (4) 10/32 x 1/2" machine screws, lock washers and at washers.

natural_image
Interior view of a car dashboard with air conditioners, steering wheel, and camera (no visible text or symbols)Double check and ghten all hardware.

natural_image
Close-up of a black plastic electronic device casing with three bullet holes and mounting holes, held by a hand (no visible text or symbols)Aach monitor adaptor plates to the back of the monitor.

natural_image
Interior view of a car dashboard with air conditioners and control panel (no visible text or symbols)Havis, Inc.
75 Jacksonville Road
Warminster, PA 18974
T800-524-9900 F215-957-0729
www.havis.com

natural_image
Interior view of a car dashboard with air conditioners and control panel (no visible text or symbols)Determine how you want to run wire harnesses. You can run down next to the glove box door or inside the dash. Running harnesses inside the dash may require cung more parts of the dash.
natural_image
Close-up of a mechanical assembly with black components and screws (no visible text or symbols)Posion monitor assembly to the swing out door as desired. Aach with 1/4" serrated nuts.

natural_image
Interior view of a car dashboard and infotainment system (no visible text or symbols)C-DMM-119 Dash Monitor Mount and installaon complete.