
SW351-MD2 - Alarm system SWANN - Free user manual and instructions
Find the device manual for free SW351-MD2 SWANN in PDF.


| Product Type | Wireless Alarm System |
| Brand | Swann |
| Model | SW351-MD2 |
| Dimensions (H x W x D) | 15 cm x 10 cm x 5 cm |
| Weight | 200 g |
| Power Supply | 9V DC adapter (included) |
| Battery Backup | 6 x AA batteries (not included) |
| Wireless Range | Up to 100 m (open area) |
| Number of Zones | 8 zones |
| Detection Method | Passive Infrared (PIR) motion sensor |
| Siren Volume | 110 dB |
| Remote Controls Included | 2 units |
| Operating Temperature | -10°C to 50°C |
| Compatibility | Swann security sensors and accessories |
| Installation | DIY wall mount (screws included) |
| Maintenance | Wipe with a dry, soft cloth; avoid moisture |
| Safety Features | Low battery indicator, tamper alert |
| Spare Parts Availability | Contact Swann support for replacement parts |
Frequently Asked Questions - SW351-MD2 SWANN
User questions about SW351-MD2 SWANN
0 question about this device. Answer the ones you know or ask your own.
Ask a new question about this device
Download the instructions for your Alarm system in PDF format for free! Find your manual SW351-MD2 - SWANN and take your electronic device back in hand. On this page are published all the documents necessary for the use of your device. SW351-MD2 by SWANN.
USER MANUAL SW351-MD2 SWANN
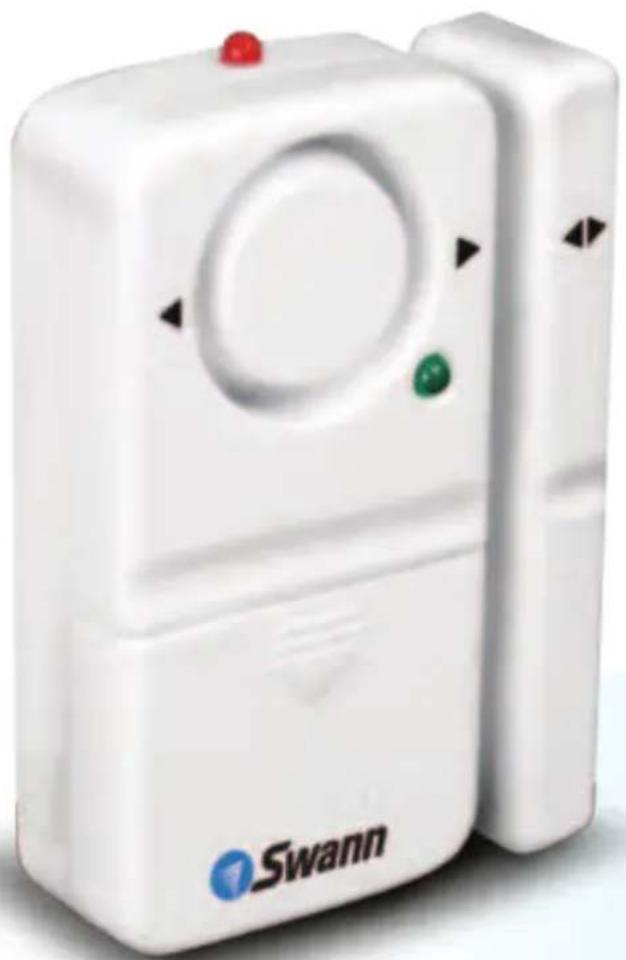
Magnetic Window Alarm SW351
SW351-MDA
natural_image
White Swann smart lock device with control panel and indicator lights (no visible text or symbols beyond brand name)Operating Instructions
Overview
Congratulations on your purchase of this stand-alone window alarm from Swann! This alarm unit is a simple, easy to install security device which will help you to protect one door or window from unwanted intrusion.
This magnetic window alarm unit can effectively protect a single window (or door) being opened, though it cannot prevent a window being broken. Thus, for more complete protection of a window, we suggest using either infrared alarm or a glass breakage alarm as a backup to the door alarm.
This package includes:
■ Magnetic Window Alarm
■ Double-Sided Mounting Tape
Operating Instructions
IMPORTANT - Read Before Installing
- Do not expose any part of the alarm unit to any sudden shocks (such as being dropped or struck).
- Do not install the alarm unit near devices which generate magnetic fields (such as microwaves).
- Do not install any the alarm unit in direct sunlight.
• Use only alkaline batteries.
• All components are for indoor use only. Do not install outdoors. - Replace the batteries in the unit every six months.
- Test the alarm periodically (every 1 - 2 months and each time you change the batteries) to ensure it is working properly.
- This alarm system is designed to be, and acts as, a theft deterrent. This system, like any other, cannot offer complete protection for your home or business - it is simply an alarm system. Like all practical systems, it has limitations and it could be disabled by a skilled intruder. We suggest that you avoid relying solely on this magnetic alarm unit to protect your property, but use it as part of a comprehensive security solution. You can increase your level of protection through the use of high-quality locks, stronger doors, guards for your windows and a CCTV system and recording devices.
How it works:
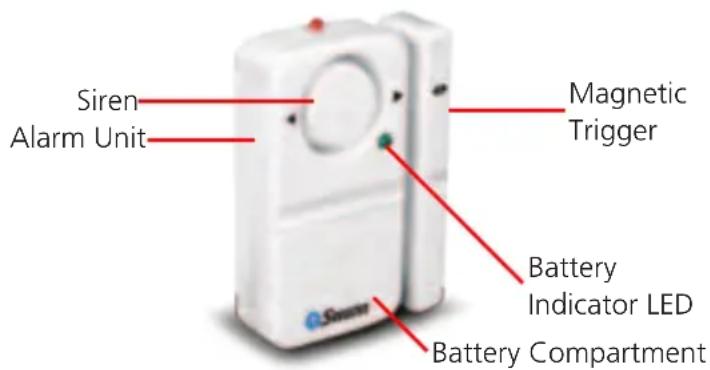
The sensor is composed of two separate, equally important parts: the alarm unit itself, and the trigger. The alarm unit is the larger of the two parts, and is responsible for sounding the alarm (hence the siren). Inside the transmitter is a magnetically sensitive switch, which is held in the OFF position by the magnetic trigger.
When the trigger is moved farther than approximately 1/2" (10-15mm) away from the door sensor, the switch closes to the ON position and the alarm is triggered.
Arming and Disarming
The arming/disarming switch is located underneath the battery compartment, just above the battery slot. There are only two settings, ON and OFF. Whilst ON, the alarm will sound whenever the two parts of the alarm are separated. Whilst OFF, the alarm will not sound under any circumstances.
• To arm the sensor, simply set this switch to ON.
• To disarm the unit or stop an alarm in progress, set the switch to OFF.
Mounting
Included are two portions of double-sided tape, one for both the alarm unit and the magnetic trigger.
- Remove the plastic cover from one side of the larger piece of double sided tape, and apply the tape to the rear side of the alarm unit.
- Remove the plastic cover from one side of the smaller piece of mounting tape, and apply to the rear of the magnetic sensor.
- Clean the surfaces you want to mount the alarm on using cleaning alcohol or similar. Ensure the surfaces are completely clean and dry before proceeding.
- Remove the plastic cover from the other side of the double-sided tape, and apply one part of the alarm to the door/window you want to monitor, and the other part to the frame. Ensure that when the door/window is shut, the small black arrows on the sensor and trigger line up. They don't need to physically touch, but they should be no more that 1/5"(5mm) apart when the door/window is shut for the sensor to work correctly.
Replacing Batteries
- Open the battery compartment on the front of the of the sensor.
- Remove any old batteries.
- Place four fresh alkaline LR44 batteries into the sensor. The correct orientation is shown on the base of the battery compartment.
- Use only alkaline batteries. Do not use rechargeable batteries.
- To test the current state of your batteries, press the TEST button, located in the battery compartment. If the Battery Indicator LED will lights up then the batteries have enough power to operate the alarm. If it does not light up or is dim, then you should replace the batteries as soon as possible.
Technical Specifications
Power Requirements 4 x LR44 Button Cell Batteries (6V DC)
Siren Duration 60s (approx.)
Siren Volume >110dB
Magnetic Switch Trigger Range 10mm \~ 26mm
Helpdesk / Technical Support Details
Swann Technical Support
All Countries E-mail: tech@swannsecurity.com
Telephone Helpdesk
USA toll free
1-800-627-2799
(Su, 2pm-10pm US PT)
(M-Th, 6am-10pm US PT)
(F 6am-2pm US PT)
USA Exchange & Repairs
I-800-627-2799 (Option I)
(M-F, 9am-5pm US PT)
AUSTRALIA toll free
1300 138 324
(M 9am-5pm AUS ET)
(Tu-F 1am-5pm AUS ET)
(Sa I am-9am AUS ET)
NEW ZEALAND toll free
0800 479 266
UK
0203 027 0979
See http://www.worldtimeserver.com for information on time zones and the current time in Melbourne, Australia compared to your local time.
Warranty Information
Swann Communications USA Inc.
12636 Clark Street
Santa Fe Springs CA 90670
USA
Swann Communications
Unit 13, 331 Ingles Street,
Port Melbourne Vic 3207
Swann Communications LTD.
Stag Gates House
63/64 The Avenue
SO171XS
United Kingdom
Swann Communications warrants this product against defects in workmanship and material for a period of one (1) year from it's original purchase date. You must present your receipt as proof of date of purchase for warranty validation. Any unit which proves defective during the stated period will be repaired without charge for parts or labour or replaced at the sole discretion of Swann. The end user is responsible for all freight charges incurred to send the product to Swann's repair centres. The end user is responsible for all shipping costs incurred when shipping from and to any country other than the country of origin.
The warranty does not cover any incidental, accidental or consequential damages arising from the use of or the inability to use this product. Any costs associated with the fitting or removal of this product by a tradesman or other person or any other costs associated with its use are the responsibility of the end user. This warranty applies to the original purchaser of the product only and is not transferable to any third party. Unauthorized end user or third party modifications to any component or evidence of misuse or abuse of the device will render all warranties void.
By law some countries do not allow limitations on certain exclusions in this warranty.
Where applicable by local laws, regulations and legal rights will take precedence.

Brand : SWANN
Model : SW351-MD2
Category : Alarm system