ESMB-9925S - Hand blender Elba - Free user manual and instructions
Find the device manual for free ESMB-9925S Elba in PDF.


| Product Type | Hand Blender (Immersion Blender) |
| Brand | Elba |
| Model | ESMB-9925S |
| Power Consumption | 600 W |
| Voltage / Frequency | 220-240 V ~ 50/60 Hz |
| Overall Length | Approx. 40 cm |
| Weight | Approx. 0.8 kg |
| Blending Shaft Material | Stainless Steel |
| Speed Settings | 2 Speeds + Turbo |
| Main Functions | Blending, Mixing, Pureeing, Emulsifying |
| Included Accessories | Blending Shaft, Whisk, Measuring Beaker (600 ml) |
| Safety Features | Overheat Protection, Non-slip Handle |
| Cleaning | Detachable shaft and whisk; dishwasher safe (top rack) |
| Spare Parts Availability | Replacement shafts and whisks available via service centers |
| Warranty | 2 years (upon registration) |
| Certifications | CE, RoHS |
Frequently Asked Questions - ESMB-9925S Elba
User questions about ESMB-9925S Elba
0 question about this device. Answer the ones you know or ask your own.
Ask a new question about this device
Download the instructions for your Hand blender in PDF format for free! Find your manual ESMB-9925S - Elba and take your electronic device back in hand. On this page are published all the documents necessary for the use of your device. ESMB-9925S by Elba.
USER MANUAL ESMB-9925S Elba
natural_image
Black and white photo of a modern kitchen mixer with a metal bowl (no text or symbols visible)Model: ESMB-9925S
IMPORTANT SAFEGUARDS
When using electrical appliances, basic safety precautions should always be followed including the following:
- Read all instructions and save it for future reference.
- Make sure that you outlet voltage corresponds to the stated on the rating label of the mixer.
- If the supply cord is damaged, it must be replaced by the manufacturer or its service agent or a similarly qualified person in order to avoid a shock hazard.
- Do not leave mixer unattended while it is operating.
- The appliance can not be operated by children.
- Unplug from outlet while not in use, before putting on or taking off parts and before cleaning.
- Avoid contacting with moving parts. Keep hands, clothing, as well as spatulas and other utensils away from beaters during operation to reduce the risk of injury to persons or damage to the mixer.
- To protect against risk of electrical shock, do not put mixer in water or other liquid. This may cause personal injury or damage to the product.
- Do not use mixer for other than intended use.
- Do not let cord hang over edge of table or counter or touch hot surfaces, including the stove.
- Do not use outdoors.
HOUSEHOLD USE ONLY
KNOW YOUR MIXER
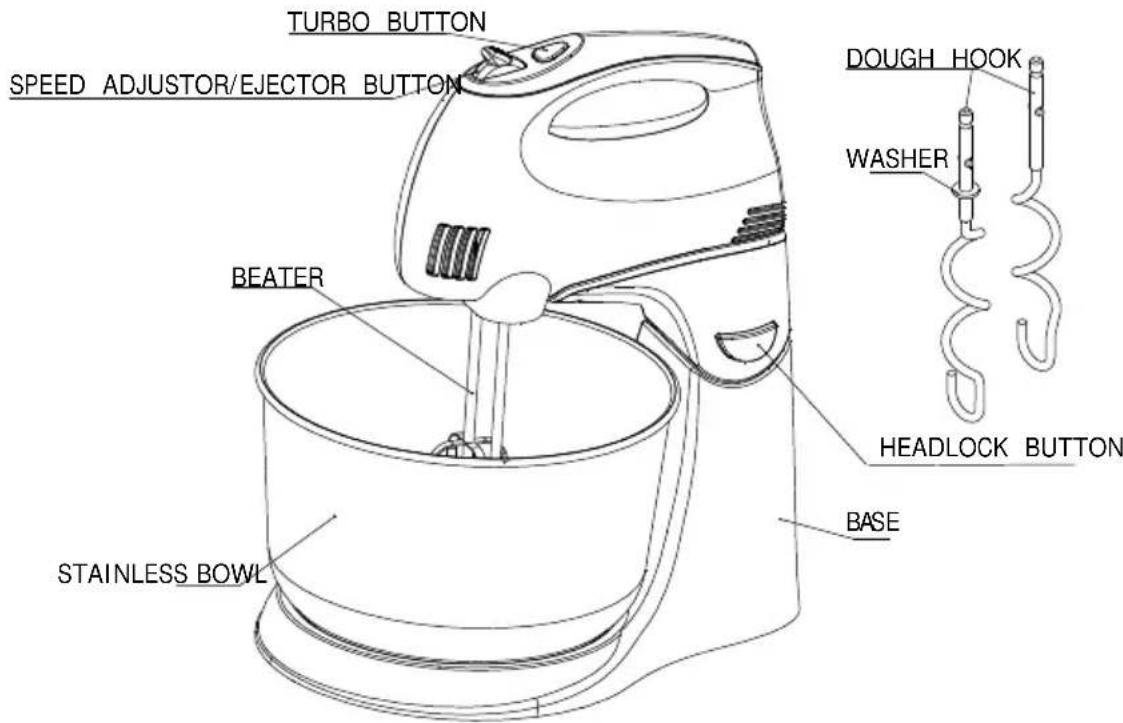
BEFORE USING MIXER
Before assembling the hand/stand mixer, be sure the power cord is unplugged from the power outlet and the speed selector is in the “0” position.
-
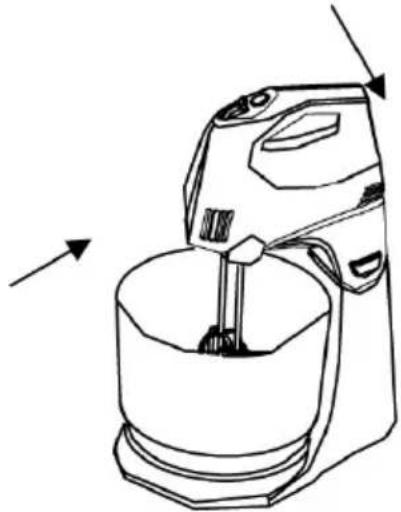
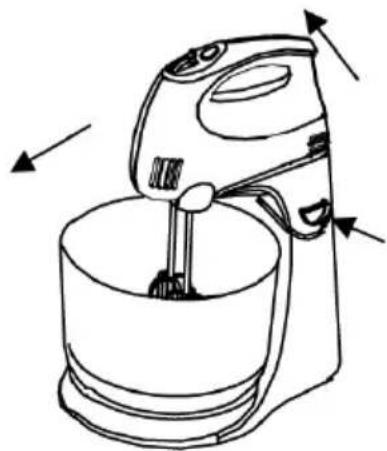
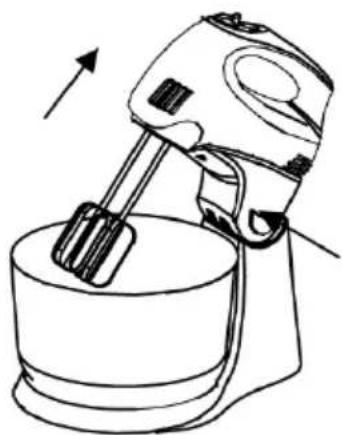
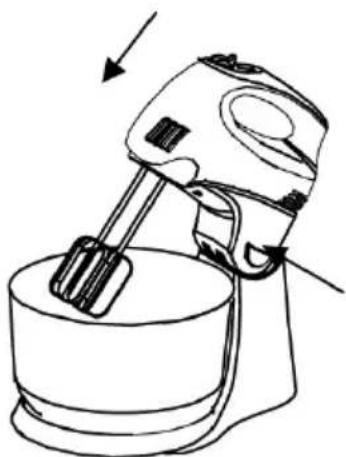
Attach the hand mixer to the stand as illustrate in Fig.1, for detaching the hand mixer, push the hand mixer in the arrow indicated direction (Fig.2), And hold the head of mixer to tilt position while pressing the headlock button (Fig.3).
-
Assemble proper beaters or dough hooks into mixer.
Note: Beaters can be inserted in either socket, as the beaters are identical. For dough hooks, the one with washer can only be inserted into the big socket and the other one can only be inserted into small socket. The two dough hooks cannot be inserted in reverse.
-
Place the plastic mixing bowl on position.
-
To lower the head and beaters/dough hooks into the mixing bowl, depress the headlock
button while holding the head with the other hand and ease the head down (Fig.4), A click sound will be heard when the head has reached the correct position.
natural_image
Line drawing of a hand mixer with directional arrows indicating motion (no text or symbols)Fig.1
natural_image
Line drawing of a hand mixer with directional arrows indicating motion (no text or symbols)Fig.2
natural_image
Line drawing of a hand mixer in a bowl, no text or symbols presentFig.3
natural_image
Line drawing of a hand mixer in a bowl, no text or symbols presentFig.4
USING YOUR MIXER
- Ensure that the unit is at the 0 setting, then plug in the power source.
- Turn the speed selector to your desired setting, There is 6 setting. the appliance will start working and the speed will increase 25 % if the Turbo Button depressed at any time.
Warning: Do not stick knife, metal spoons, fork and so on into bowl when operating.
-
The max operation time per time shall not exceed 5 minutes and minimum 10 minutes rest time must be maintained between two consecutive cycles. When kneading yeast dough, suggest the speed selector first use a low speed and then use high speed to achieve the best results.
-
When mixing is completed, turn the speed selector to 0 setting, unplug the cord from power outlet.
-
Hold down the headlock button and ease the head of the mixer back until the mixer head is locked into the tilt position.
-
If necessary you can scrape the excess food particles from the beaters or dough hooks by rubber or wooden spatula.
-
Hold the beaters/dough hooks with one hand and press the Ejector button firmly down with the other hand, remove the beater/dough hooks.
Caution: The speed selector must be at zero position before pressing down Ejector button to remove accessories. Never pressing the Ejector button when the appliance is operating.
- The hand mixer can be used separately without the stand in position.
Cleaning and Maintenance
- Unplug the appliance and wait it completely cool down before clean.
- Wipe over the outside surface of the head and base with a dampened cloth and polish with a soft dry cloth.
- Wipe any excess food particles from the power cord.
- Wash the mix bowl, beaters and dough hooks in warm soapy water and wipe dry. The beater, mix bowl and dough hooks may be washed in the dishwasher.
Caution: Never use abrasive cleaner to clean the stainless bowl.
COOKERY TIPS
- Refrigerated ingredients, ie. butter and eggs should be at room temperature
before mixing begins. Set these ingredients out ahead of time.
- Do not over-beat. Be careful that you only mix/blend mixtures until recommended in your recipe. Fold into dry ingredients only until just combined. Always use the low speed.
- To eliminate the possibility of shells or deteriorated-off eggs in your recipe, break eggs into separate container first, then add to the mixture.
- Always start mixing at slow speeds. Gradually increase to the recommended speed as stated in the recipe.
- Climatic conditions. Seasonal temperature changes, temperature of ingredients and their texture variation from area to area all play a part in the required mixing time and the results achieved.
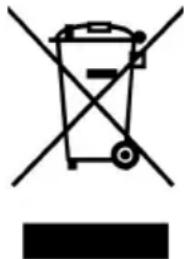
Environment friendly disposal
natural_image
Symbol of a trash bin crossed out by two crossed lines, with no text or labels present.You can help protect the environment!
Please remember to respect the local regulations: hand in the non-working electrical equipments to an appropriate waste disposal center
Brand : Elba
Model : ESMB-9925S
Category : Hand blender