EHM-D2520(WH) - Hand blender Elba - Free user manual and instructions
Find the device manual for free EHM-D2520(WH) Elba in PDF.


| Product Type | Hand Mixer |
| Brand | Elba |
| Model | EHM-D2520(WH) |
| Color | White |
| Speed Settings | 5 speeds (0-5) + Turbo button |
| Max Operation Time | 3 minutes |
| Cooling Down Time | 5 minutes |
| Accessories Included | 2 beaters, 2 dough hooks |
| Power Consumption | 250 W (estimated) |
| Voltage | 220-240 V (typical for Elba) |
| Frequency | 50/60 Hz |
| Weight | 0.8 kg (estimated) |
| Dimensions (approx.) | 20 x 10 x 12 cm (estimated) |
| Housing Material | Plastic |
| Beater Material | Stainless steel |
| Dough Hook Material | Stainless steel |
| Cleaning Method | Wipe body with damp cloth; wash attachments in warm soapy water |
| Safety Features | Auto shut-off after max operation time, eject button for safe removal |
| Warranty | Refer to warranty certificate included |
| Usage | Domestic use only |
Frequently Asked Questions - EHM-D2520(WH) Elba
User questions about EHM-D2520(WH) Elba
0 question about this device. Answer the ones you know or ask your own.
Ask a new question about this device
Download the instructions for your Hand blender in PDF format for free! Find your manual EHM-D2520(WH) - Elba and take your electronic device back in hand. On this page are published all the documents necessary for the use of your device. EHM-D2520(WH) by Elba.
USER MANUAL EHM-D2520(WH) Elba
natural_image
Line drawing of a hand mixer with two separate electrical connectors (no text or symbols)EHA HAND MIXER
MODEL: EHM-D2520(WH)
Owner's Manual
Please read this manual carefully before operating your set.
Retain it for future reference.
Record model number and serial number of the set.
See the label attached on the set and quote this information to your dealer when you require service.
For The Warranty Terms & Conditions, Please Refer To Warranty Certificate.
IMPORTANT SAFEGUARDS
Before using the appliance, basic precautions should always be followed including the following:
- Read all instructions before using.
- Do not operate the appliance with damaged power cord or plug, after the appliance malfunction, or if it is dropped or damaged in any manner. Return the appliance to the nearest authorized dealer or after-sales service center for examination, repair, electrical or mechanical adjustment.
- Do not leave the appliance unattended while operating.
- Do not let the power cord hang over edge of table or counter or hot surface.
- When removing the plug from wall outlet, grasp the plug to pull and not the cable.
- To protect against risk of electrical shock, do not immerse appliance in water or any other liquids. This may cause personal injury or damage to the product!
- Avoid contacting with moving parts. Keep hands, clothing, as well as spatulas and other utensils away from beaters or dough hooks during operation to reduce the risk of injury to persons, and/or damage to the appliance.
- Close supervision is necessary when your appliance is being used near children or infirm persons.
- Never use any accessories or parts from other manufacturers or that ELBA does not specifically recommended.
- Always make sure that the beaters or dough hooks are fully inserted into position before connect the plug to the wall outlet.
- Do not place the appliance on or near hot gas or on a heated oven.
- Never eject beaters and dough hooks while in use.
- Bowl must be in proper position before operating the appliance.
- Unplug the plug from wall outlet when not in use, before putting on or taking off parts, and before cleaning.
- Let the appliance to cool off before cleaning or storing.
- This appliance is for domestic use only.
- Do not operate the appliance for other than its intended use.
- Do not use this appliance outdoors.
- This appliance is not intended for used by persons (including children) with reduced physical, sensory or mental capabilities, or lack of experience and knowledge, unless they have been given supervision or instruction concerning use of the appliances by a person responsible for their safety.
- Children should be supervised to ensure that they do not play with the appliance.
- Save these instructions for future reference.
Important note:
- The max operation time shall not exceed 3 minutes. Let the appliance rest for approximate 5 minutes until the mixer has cooled off.
- Always power off the appliance before changing or removing the accessories.
PRODUCT DESCRIPTION
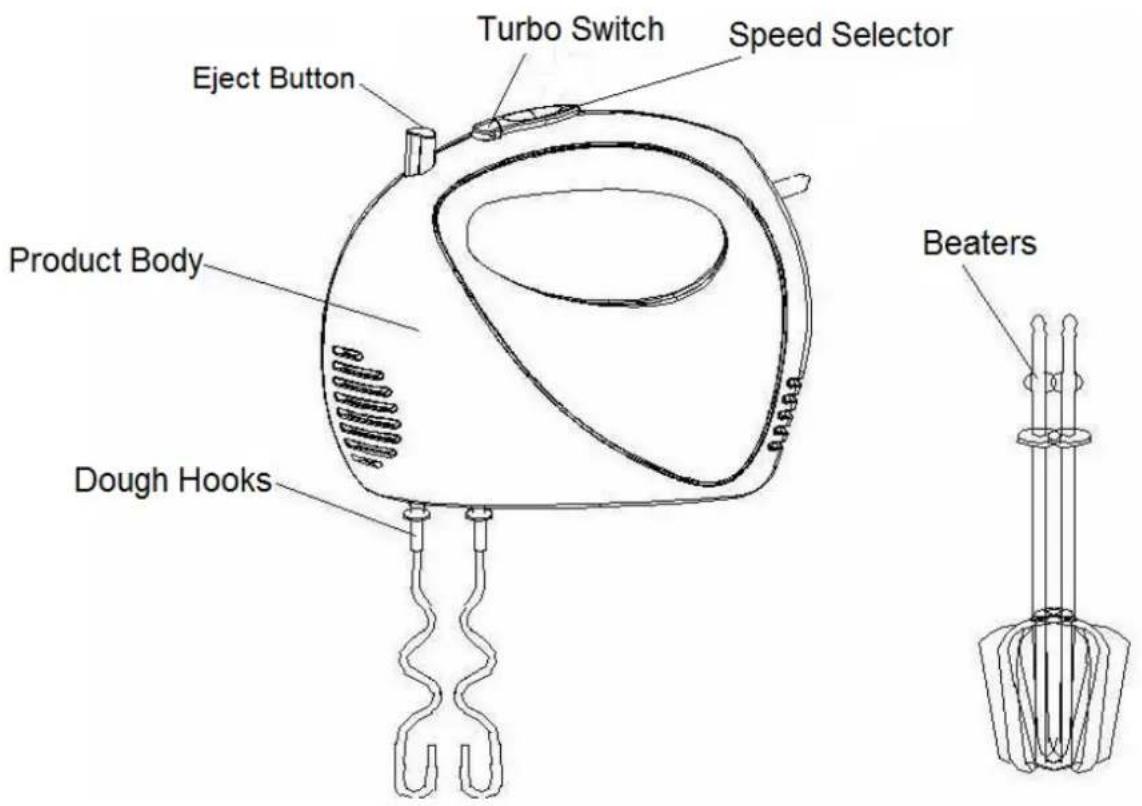
MIXING GUIDE
| Speed selector Descriptions | |
| 0 | No power at this stage. |
| 1 | This is a good starting speed for bulk and dry foods such as flour, butter and potatoes. |
| 2 | Best speed to start liquid ingredients for mixing salad dressings. |
| 3 | For mixing cakes, cookies and quick breads. |
| 4 | For creaming butter and sugar. |
| 5 | For beating eggs, cooked icings, whipping potatoes, whipping cream, etc. |
| TURBO Maximum speed. | |
OPERATING THE APPLIANCE
Install the accessories to the appliance.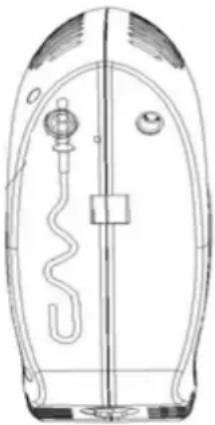 | Note: Using the appliance for the first time, clean the beaters and dough hooks. Before assembling the appliance, be sure the plug is unplugged from the wall outlet and the speed selector is on the “0” position.Install the beaters or dough hooksInstall the beaters or dough hooks to the hole at the bottom of the appliance.a) Insert the beaters at the bottom of the appliance.b) Insert the dough hook, the one with gear can only be inserted into the left side of the hole (with gear) and insert the one without gear to left side (without gear).Note:The two dough hooks cannot be inserted in reverse directions. |
| Operating the mixer | 1. Place the foods that need to be mixed into a bowl, and make sure the bowl is placed at a flat and stable surface.2. After that, hold the hand mixer with the beaters or dough hooks touching the ingredients.3. Connect the plug into the wall outlet and power on the mixer.4. Dial the speed selector according to your desired speed and the mixer will start working. There are 5 settings and the speed will achieve the highest if the turbo switch is pressed at any time (Refer to the mixing guide for the best mixing result).Warning: Do not place knife, metal spoon, fork and so on into the bowl during the process of mixing.5. The max operation time shall not exceed 3 minutes. Let the appliance rest for approximate 5 minutes until the mixer has cooled off before next blending. |
| Remove the appliance for cleaning. | 1. When mixing is completed, turn the speed selector to “0” position and power off the appliance.2. Lift the appliance and hold the beaters or dough hooks with one hand and press the eject button firmly down with another hand to remove the accessories.Note: Remove the beaters or dough hooks only when the speed is at “0” setting. |
CLEANING AND MAINTENANCE
- Unplug the appliance and wait until it completely cool off before cleaning.
Caution: the product body cannot be immersed in water or any other liquids. - Clean the product body and the base with a wet cloth and then wipe it with a soft dry cloth.
- Wipe any excessive food particles at the power cord (if any) with dry cloth.
- Immerse the beaters or dough hooks in warm soapy water for complete cleaning. Then rinse under running water and wipe dry.
ENVIRONMENT-FRIENDLY DISPOSAL
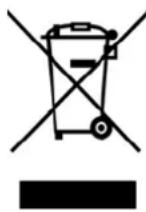
You can help to protect the environment!
Please remember to respect the local regulations: hand in the non-working electrical equipments to an appropriate waste disposal centre.
ELBA
Brand : Elba
Model : EHM-D2520(WH)
Category : Hand blender