
BFW46SS - Drink cooler BAUMATIC - Free user manual and instructions
Find the device manual for free BFW46SS BAUMATIC in PDF.


| Product Type | Freestanding Drink Cooler |
| Brand | Baumatic |
| Model | BFW46SS |
| Capacity | 46 bottles (standard 0.75L wine bottles) |
| Dimensions (H x W x D) | 84.0 x 59.5 x 57.5 cm |
| Weight | 35 kg (approx.) |
| Power Supply | 220-240 V ~ 50 Hz |
| Energy Consumption | 100 kWh/year (approx.) |
| Climate Class | ST (16-38°C ambient) |
| Temperature Range | 5 °C to 18 °C |
| Cooling Type | Compressor with fan-assisted circulation |
| Refrigerant | R600a (flammable, environmentally friendly) |
| Noise Level | 38 dB (approx.) |
| Number of Shelves | 5 chrome wire shelves (adjustable) |
| Door | Stainless steel, reversible, double-glazed glass with UV protection |
| Interior Lighting | LED, soft blue/white |
| Vibration Damping | Compressor mounted on anti-vibration pads |
| Defrost | Manual defrost required |
| Maintenance | Clean interior with damp cloth; vacuum condenser coils annually |
| Spare Parts | Shelves, door gasket, thermostat, light bulb (if applicable) |
| Safety Features | Electronic temperature control, automatic defrost cycle, overheating protection |
| Installation | Freestanding, leave 10 cm clearance around for ventilation |
Frequently Asked Questions - BFW46SS BAUMATIC
User questions about BFW46SS BAUMATIC
0 question about this device. Answer the ones you know or ask your own.
Ask a new question about this device
Download the instructions for your Drink cooler in PDF format for free! Find your manual BFW46SS - BAUMATIC and take your electronic device back in hand. On this page are published all the documents necessary for the use of your device. BFW46SS by BAUMATIC.
USER MANUAL BFW46SS BAUMATIC
BFW46SS 46 Bottle dual temperature electronic wine cooler
INSTRUCTION MANUAL

natural_image
Simple line drawing of a fish with fins and tail, no text or symbols presentBFW 46 SS
46 Bottle dual temperature electronic wine cooler
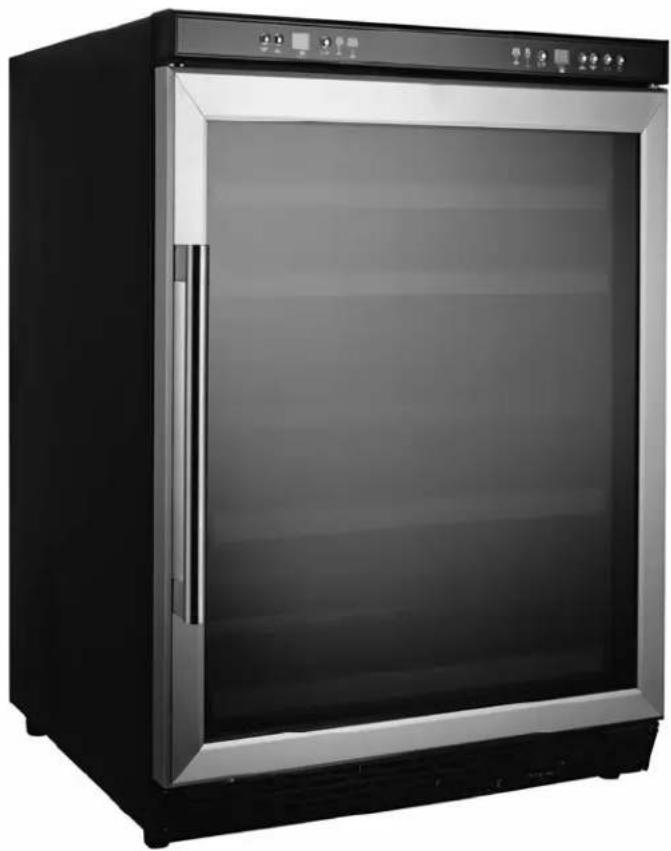
natural_image
Exterior view of a black and silver stainless steel refrigerator with open door (no visible text or symbols)
NOTE: This User Instruction Manual contains important information, including safety & installation points, which will enable you to get the most out of your appliance. Please keep it in a safe place so that it is easily available for future reference, for you or any person not familiar with the operation of the appliance.
GS 11/05/10
Contents
| E | n | v | i | r | o | n | m | e | n | t | a | l |
| Important safety information 5-6 | ||||||||||||
| Specifications of your wine cooler | ||||||||||||
| D | e | s | c | r | i | p | t | i | o | n | o | f |
| C | o | n | t | r | o | l | p | a | n | e | l | |
| Description of the product features | ||||||||||||
| Using your Baumatic wine cooler 9-11 | ||||||||||||
| B | e | f | o | r | e | s | w | i | t | c | h i | |
| D | u | r | i | n | g | f | i | r | s | t | u | |
| Switching on the appliance and setting the temperature 10 | ||||||||||||
| Changing between Fahrenheit and Celsius | ||||||||||||
| I | n | t | e | r | i | o | r | l | i | g | h t | |
| Storage temperature neons 11 | ||||||||||||
| Loading the wine cooler 1 1 | ||||||||||||
| S | t | o | r | i | n | g | y | o | u | r | w | |
| Wine storage problems 13-14 | ||||||||||||
| Cleaning and maintenance 14-15 | ||||||||||||
| D | e | f | r | o | s | t | i | n | g | |||
| I | n | s | t | a | l | l | a | t | i | o | n | |
| Electrical connection 16-17 | ||||||||||||
| P | o | s | i | t | i | o | n | i | n | g | ||
| Built-in installation 18 | ||||||||||||
| Reversing the door of your wine cooler 19-20 | ||||||||||||
| T | r | o | u | b | l | e | s | h | o | o | t | i n |
| C | o | n | t | a | c | t | d | e | t | a | i l | |
Environmental note
Note: Before discarding an old appliance, switch off and disconnect it from the power supply. Cut off and render any plug useless. Cut the cable off directly behind the appliance to prevent misuse. This should be undertaken by a competent person. Disable the door lock to make sure that children cannot get stuck inside the appliance.
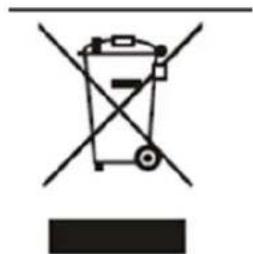
This appliance is marked according to the European directive 2002/96/EC on Waste electrical and Electronic Equipment (WEEE). By ensuring this product is disposed of correctly, you will help prevent potential negative consequences for the environment and human health, which could otherwise be caused by inappropriate waste handling of this product.
The symbol

accompanying the product, indicates that this appliance may not be treated as household waste. Instead it shall be handed over to the applicable collection point for the recycling of electrical and electronic equipment.
Disposal must be carried out in accordance with local environmental regulations for waste disposal.
For more detailed information about treatment, recovery and recycling of this product, please contact your local city office, your household waste disposal service or the shop where you purchased the product.
natural_image
Symbol of a trash bin crossed with diagonal lines, no text or labels present- The packaging materials that Baumatic uses are environmentally friendly and can be recycled.
- Please discard all packaging material with due regard for the environment.
Important safety information

natural_image
Illustration of an owl reading a book (no text or symbols present)Your safety is of the utmost importance to Baumatic Please make sure that you read this instruction booklet before attempting to install or use the appliance. If you are unsure of any of the information contained in this booklet, please contact the Baumatic Advice Line.
IMPORTANT: Any installation work must be carried out by a qualified electrician or competent person.
Use of the appliance
- Your appliance is only designed to be used in the home. It is suitable for storing and chilling wine. NO food stuffs must be stored in the appliance. If it is used for any other purpose or it is not used correctly, then Baumatic Ltd. will accept no liability for any damage that is caused.

- Altering the specification of the appliance must not be attempted for reasons of safety.
Before using your appliance
- Check the appliance for any signs of transport damage. If you notice any damage, then you should not connect your appliance to your mains supply and should contact your retailer.
Refrigerant
- Your appliance contains R600a refrigerant, which is a natural gas that does not contain CFCs that can damage the environment. However it is a flammable substance, therefore care should be taken:
- During the transportation and installation of the appliance, make sure that the refrigeration pipework does not get damaged.
- If it does become damaged then sources of ignition and open flames should be avoided. Also the room that the appliance is situated in should be thoroughly ventilated.
- Do not place any objects on top of the appliance, as this may damage the table top.

natural_image
Simple line drawing of a cartoon character holding a container with eyes and mouth, appearing to sweat or feel (no text or symbols)Child safety
- Packaging material should be kept away from children.
○ Children should not be allowed to touch the controls or play with the appliance.

General safety
- Do not pull on the power supply cable to remove the plug from your mains supply socket.
- Do not pull out or insert the plug with wet hands.
- Do not attempt to use your appliance outdoors or any place where it is likely to come into contact with the elements.

natural_image
Illustration of a cloudy cloud with raindrops falling (no text or symbols)Before cleaning the appliance or performing maintenance work, ensure that the appliance has been disconnected from your mains supply.
- Never allow the back coils of the appliance to come into contact with the wall surface.
○ Always ensure that the location where you are installing your appliance is free of stored items such as papers and other flammable materials.
- Never block the ventilation openings of the appliance, either on the inside or its exterior.
- It is vital to keep your appliance well ventilated, so that there is proper air flow between the bottom of the unit and the plinth/kick plate which it is sitting on.

natural_image
Abstract black-and-white circular pattern with six petal-like segments radiating from center (no text or symbols)- Do not place electrical devices inside of the appliance, such as mixers or ice cream makers.
Service
You should not attempt to repair the appliance yourself, as this could cause injury or a more serious malfunction. If you require a service call then please contact the Customer Care Department.
natural_image
Illustration of five different tools: pliers, wrench, screwdriver, and flatiron (no text or symbols)Specifications of your wine cooler
○ Gross capacity: 150 litres
- Net capacity: 145 litres
○ Bottle capacity: 46 x 0.75 litre wine bottles
- Electronic push button control operation
- LED display
- Celsius and Fahrenheit button
- 4 Wooden shelves with telescopic runners
○ Adjustable temperature
- Internal light
- Black interior and exterior
- Stainless steel door frame and handle
- Reversible door
- Adjustable feet
- Smoked glass door
- Designed to store wine at its optimum temperature between + 5°C - 18°C
- 2 individual temperature zones
○ Upper zone compartment: 10 - 18°C
- Lower zone compartment: 5 - 10°C
Optional extra\*
○ BFW46KIT- Additional wooden shelf
Dimensions of appliance\*\*
Height: 848 mm
Width: 595 mm
Depth: 595 mm
* There are 4 x wooden shelves supplied with the appliance, but 6 x telescopic runner levels. To have a wooden shelf on each telescopic runner level, you will need to order 2 x BFW46KIT's.
** Please refer to the installation instructions for more specific information on the size of aperture that you will require.
IMPORTANT: When you install your appliance it is important to bear in mind its climatic rating.
In order to find out the climatic rating of your appliance, you should check the rating plate. The rating plate is located on the rear of the appliance. The rating plate will indicate the ambient temperature range that your appliance will function correctly within.
It is also advisable to make a note of the model number and the serial number of the appliance before installing it.
Model number ....
Serial number ....
Date of purchase ....
Description of the appliance
Control panel
The control panel is located at the top of the appliance, above the glass door.

flowchart
graph TD
    A["A"] --> B["B"]
    B --> C["C"]
    C --> D["D"]
    D --> E["E"]
    E --> F["F"]
    F --> G["G"]
    G --> H["H"]
    I["I"] --> J["J"]
    K["K"] --> L["L"]
    M["M"] --> N["N"]
    O["O"] --> P["P"]
    Q["Q"] --> R["R"]
Lower compartment
A) Temperature decrease button
B) Temperature increase button
C) Temperature display
D) Fahrenheit temperature neon
E) Celsius temperature neon
F) Light ON/OFF button
G) Lights when temperature range is 10-14 °C
H) Lights when temperature range is 15–18 °C
Upper compartment
I) Lights when temperature range is 9-10 °C
J) Lights when temperature range is 5-8 °C
K) Light ON/OFF button
L) Temperature display
M) Fahrenheit temperature neon
N) Celsius temperature neon
O) Temperature increase button
P) Temperature decrease button
General
Q) Celsius/Fahrenheit selector button
R) ON/OFF
button
Description of the product features
1) Control panel
- The control panel is located at the top of the appliance, behind the glass door. This means it is easy to set the temperature of the appliance and see what temperature the appliance is set to.
2) Two cooling zones
- There are two cooling zones inside of your wine cooler; they are separated by a partition.
- Each cooling zone has an independent temperature control and temperature display.
3) Interior light
○ Each cooling zone has an interior light. The light can be switched on and off by using the light ON/OFF buttons (F) and (K).
4) The wine cooler shelves
- The full depth shelves will fit onto the telescopic runners.
Using your Baumatic wine cooler
Before switching on
- Make sure that it has been installed by a suitably qualified person, as per the information contained in Baumatic's installation instructions.
- After delivery, wait for eight hours before connecting the appliance to your mains supply. This will allow any refrigerant gasses that may have been disturbed during the transportation process to settle.
- The outside of the appliance and the removable accessories contained within it, should be cleaned with a solution of liquid detergent and water.
- The interior of the appliance should be cleaned with a solution of sodium bicarbonate dissolved in lukewarm water. The interior and accessories should be thoroughly dried, after the cleaning process has been completed.

natural_image
Cartoon illustration of a smiling refrigerator with thumbs up and a bowl of food nearby (no text or symbols)- There can be an odour when you first switch on the appliance. It will lessen as the appliance starts to cool.
During first use
- When you first switch on the appliance, the compressor will run continuously until the wine cooler reaches a cool enough temperature.
During this period of time, you should try not to open the door frequently or place bottles inside of the appliance.
- If the unit is switched off or unplugged, you must allow at least 5 minutes before restarting the appliance or reconnecting it to your mains supply.
Switching on the appliance and setting the temperature
o Press the ON/OFF button (R) to switch on the appliance.
o The temperature for each zone will need to be set individually.
- Use the temperature increase and temperature decrease buttons to set the temperature that you require. Each press of these buttons will adjust the temperature on the temperature displays by one degree.
- Whilst you are setting the temperature of the cooling zone, the relevant temperature display will flash. When you stop pressing the temperature buttons, after a few seconds the display will stop flashing and the temperature of the cooling zone will be set.
- For a few seconds, the temperature display will show the temperature that you have set, before returning to show the temperature that is currently being registered by the cooling zone.
Changing between Fahrenheit and Celsius
- You can select whether the temperature displays show Celsius or Fahrenheit. The Celsius/Fahrenheit temperature neons will light to show whether Celsius or Fahrenheit is currently shown on the temperature displays.
To alter what the temperature displays are showing, press the Celsius/Fahrenheit selector button (Q).
- You cannot change the display if you are in the process of adjusting the temperature of a cooling zone.
Interior light
To operate the interior light, you should press the light ON/OFF button (K) for the lower zone or the light ON/OFF button (F) for the upper zone.
Storage temperature neons
- The control panel has four storage temperature neons; these indicate which type of wine is most suited to being stored in the temperature zone at the current temperature setting.
○ If the neon (G) is lit, this means that the lower compartment is achieving a temperature of between 10 - 13°C. This is most suitable for dry / white wines.
- If the neon (H) is lit, this means that the lower compartment is achieving a temperature of between 14 - 18°C. This is most suitable for red wines.
- If the neon (I) is lit, this means that the upper compartment is achieving a temperature of between 8 - 10 °C. This is most suitable for dry / white wines.
○ If the neon (J) is lit, this means that the upper compartment is achieving a temperature of between 5 - 7°C. This is most suitable for sparkling wines.
Loading the wine cooler
- IMPORTANT: Your appliance is ideally suited to store 0.75 litre wine bottles. Whilst it can store larger bottles, you must make sure that they do not prevent the door from shutting properly.
○ Always check that you can close the door without it fouling on a wine bottle, before shutting it.
- When loading several bottles of wine at once, it will take longer for the appliance to cool the individual bottles.
On each wooden shelf, it is possible to stack bottles of wine on top of each other. This will allow you to fit 46 bottles of wine in the appliance, without purchasing additional wooden shelves.
Storing your wines
The chart below indicates the ideal storage temperatures for different types of wine:-
| Type of wine Temperature (Celsius) | Temperature (Fahrenheit) | |
| Red wine (*) 15.5 - 18.5°C 59.9 - 65.3°F | ||
| White wine (**) 10 - 15°C 50 - 59°F | ||
| Sparkling wines/champagne | 7.2 - 9.5°C 45 - 49.1°F | |
| Rose wine 9.5 - 10.5°C 49.1 - 50.9°F | ||
| Vintage wine 13°C 55°F | ||
* Light red wines, such as Beaujolais, Pinot Noir and Cabernet Franc benefit from being served slightly cooler than full-bodied reds.
** Chardonnay is often served too cold. You should chill it at a warmer temperature inside of your wine cooler. Or leave it to warm slightly when you remove it from your wine cooler.
o Temperature stability is the most important factor when it comes to storing wine.
- Exposure to light, vibrations or fluctuations in temperature and humidity can all cause wine to spoil. When properly stored, wines not only maintain their quality but many will actually improve in aroma, flavour and complexity as they mature.
- Wines kept at a higher temperature will age faster. Wine that is exposed to temperatures that are greater than 21°C (70°F) will suffer from poorer flavour and aroma.
- If wine is kept at too low a temperature, this can result in the development of harmful deposits. A humidity of 70% is ideal for keeping corks from shrinking.
- After a bottle of wine has been opened, the wine comes into contact with air. So it is best to store the remainder of the bottle upright, to minimize the surface area of the wine that is coming into contact with the air.
Once opened, wine will remain in a drinkable condition for two days for delicate whites or three days for rich reds, as long as the bottle as been resealed. You should make sure that the seal is firm by checking the stopper.
o Special stoppers that keep wine sparking and Champagne bubbling for one or two days after opening, can be bought at most good wine shops.
- When stored correctly, white wines can keep well for up to two years. Full bodied reds will age well for ten years and dessert wines will age well for up to twenty years.
- When you buy a bottle of wine, you should transfer it to a suitable storage location immediately (if you are not going to store it in your wine cooler).
- Cheaper bottles of wine will not age as well as more expensive ones.
To make the most of the bouquet and taste of your wine, never fill more than half a glass at a time. It will also help if the shape of your wine glass is appropriate for your wine. The size and shape of your wine glass's bowl will determine the intensity and complexity of the bouquet. The stem should be long enough to allow you to avoid hand contact with the bowl of the glass and should be tulip-shaped or tapered at the top.
Wine storage problems
Corking- a tiny percentage of bottled wine (about 1%) will suffer from this. The cork reacts with the wine and gives it a musty, unpleasant taste. It is the most common wine storage problem and is caused by harmless bacteria growing on the cork. As unfortunate as this is, there is nothing to do but to discard all of the wine in the affected bottle. This is not to be confused with small fragments of cork floating in the wine itself, which will not impair the flavour.
Oxidisation- when wine has been opened and left for longer than a day; it tends to lose its aroma and colour, giving an overall flat taste. The only way to avoid this, it to either drink the wine on the same day it was opened or to use a vacuum device specially designed for removing oxygen from opened wine bottles. If you use such a device, the wine should still be consumed shortly afterwards.
Ullage- this is loss of wine from the bottle by evaporation or leakage. Signs of ullage include wine seeping around the cork, a protruding cork or a stained label. It can happen if the bottle has been allowed to get too warm. The wine may still be drinkable, if the leakage was recent; however, you should be aware that if the wine cools down again, contraction can cause more air to be sucked into the bottle and result in further deterioration.
Slight effervescence in still wine- this isn't really a problem with the way the wine has been stored, but as a result of incomplete malolactic fermentation before the wine was bottled. A good way to get rid of the effervescence is to let the wine breathe. Alternatively you can use a bottle vacuum device, after about five minutes the effervescence will vanish.
Sediment- this is not normally a problem, however both red and white wines can produce sediment after a number of months in a bottle. The sediment consists of tartrate crystals and is totally harmless. If anything the building of sediment can be considered a good sign because it means that the wine was not subjected to much (if any) filtering, meaning that the flavours and aromas should be preserved better.
A good way to get around sediment (if it is a problem) is to stand the bottle upright, the day before opening, so that the sediment can settle to the bottom of the bottle.
You can also decant your wine; decanting will "open up" the flavour of both young and old wines, but younger wines in particular. To decant, pour the wine slowly and evenly into your decanter.
Cleaning and maintenance

WARNING: PLEASE ENSURE THAT YOUR APPLIANCE IS DISCONNECTED FROM YOUR MAINS SUPPLY BEFORE ATTEMPTING TO CLEAN IT.

- Do not clean the appliance by pouring water onto it or spraying water over it.

- The interior of the wine cooler should be cleaned periodically, using a solution of bicarbonate of soda and lukewarm water.
- Clean the accessories separately with soap and water. Do not clean them in a dishwasher.
- Do not use abrasive products, detergents or soaps.
- After washing the appliance, wipe over the area that you have cleaned with a damp cloth and then dry it thoroughly.
- When cleaning is complete, dry your hands and then reconnect the plug to your mains supply.
Defrosting
- Defrosting occurs automatically inside of the wine cooler during operation. The defrost water is collected by the evaporating tray and evaporates automatically.
- The evaporating tray and defrost water drain hole should be cleaned periodically. This will prevent water from collecting in the bottom of the wine cooler, instead of flowing down the defrost drainage channel and drain hole.
- You can also pour a small amount of water down the drain hole to clean inside of it.
- You should be careful to make sure that wine bottles touch the rear wall of the appliance, as this can interrupt the automatic defrosting process and deflect water into the base of your wine cooler.
Installation

IMPORTANT: Before installation and usage read all the instructions and make sure that the voltage (V) and the frequency (Hz) indicated on the rating plate are exactly the same as the voltage and frequency in your home. The rating plate can be found on the front left edge of the inside of the wine cooler.
The manufacturer declines all responsibility in the event of the installer failing to observe all the accident prevention regulations in force, which are necessary for normal use and the regular operation of the electric system.
Electrical connection
YOUR WINE COOLER IS INTENDED FOR FITTED AND PERMANENT INSTALLATION.
We recommend that the appliance is connected by a qualified electrician, who is a member of the N.I.C.E.I.C. and who will comply with the I.E.E. and local regulations.
- Your wine cooler comes supplied with a 13 amp plug fitted. If in future you need to change the fuse in this plug, then a 13 amp ASTA approved (BS 1362) fuse must be used.
- The wiring in the mains lead is coloured as follows:
Brown
Blue
Green and yellow
Live
Neutral
Earth
- As the colours of the wires in the appliance's mains lead may not correspond with the coloured markings identifying the terminals in your spur box, please proceed as follows:
The brown wire must be connected to the terminal marked "L" (live), or coloured red.
The blue wire must be connected to the terminal marked "N" (neutral), or coloured black.
The green and yellow wire must be connected to the terminal marked "E" (earth), or by the earth symbol, or coloured green and yellow.
- When the connection is completed, no stray strands or cut wire should be present. The cord clamp must be secured over the outer sheath.
Positioning
- It is advisable that your appliance is only installed in a location where the ambient temperature of the room, corresponds with the climate classification that is stated on the rating plate of your appliance. Your appliance may not function correctly if the ambient temperature falls outside of the following ranges.
| Climate classification | Appropriate ambient temperature |
| SN +10 to +32 degrees | centigrade |
| N +16 to +32 degrees | centigrade |
| ST +18 to +38 degrees | centigrade |
| T +18 to +43 degrees | centigrade |
○ Positioning the appliance requires two people in order to avoid injuries or damage to the appliance.
- Your appliance should not be located in direct sunlight or exposed to continuous heat or extremes of temperature (e.g. next to a radiator or boiler). If this is not feasible, then you should install an insulation plate between the appliance and the adjacent heat source.
- You should check whether there is an electrical socket available, which will be accessible after your appliance is installed.
- Place the appliance flatly and firmly on a solid base. The appliance is fitted with adjustable feet on the front side, which can be used to level the appliance.
- When the wine cooler is being used as a freestanding unit, anything positioned above the appliance must be at least 10 cm away to allow sufficient cooling of the condenser. You must allow a 5 cm gap to the rear and either side of the appliance.
- Be sure to leave enough space for the opening of the door, to avoid damage to the appliance or personal injury.
○ IMPORTANT: The vent at the base of the appliance is for ventilation. Nothing should be placed in front of this vent; otherwise your wine cooler may not operate properly.
Built-in installation

- Your wine cooler can be used as a freestanding or a built in unit. If you are going to use it as a built in unit, then the dimensions shown in the diagram above will need to be followed.
- In particular the depth dimension must be observed.
○ IMPORTANT: The vent at the base of the appliance is for ventilation. Nothing should be placed in front of this vent; otherwise your wine cooler may not operate properly.
Reversing the door of your wine cooler
This appliance has the capability of the door opening from either the left or right hand side.
The unit is delivered to you with the door opening from the left side. If you want to reverse the opening direction of the door, please follow the instructions below:

Any parts that you remove from the appliance whilst reversing the door, should be retained for later use.
1) Carefully lay the wine cellar on its back. Use cushioning to protect the floor and the rear of the appliance.
2) Whilst the door is shut, unscrew the two screws holding the bottom hinge to the door and then remove the bottom hinge.
3) Carefully remove the door from the main body of the appliance.
4) Return the appliance to an upright position and then unscrew the top hinge pin and cover, moving them to the opposite side of the appliance.
5) Locate the new bottom hinge provided in the plastic bag inside the wine cooler.
6) Place the door back onto the wine cooler, making sure that it lines up with the top hinge pin.
7) Connect the new bottom hinge to the door and cabinet, you should use the screws that you removed in step 2). These screws should be fully tightened.
8) Keep the original bottom hinge in a safe place, in case that you wish to reverse the door back to its original position.
IMPORTANT: Check that the door opens and shuts correctly, without fouling, after you have completed the door reversal process.

After the door has been reversed, you should check the door seal of the wine cooler. The seal should be creased or crushed; otherwise there will be a gap between it and the inside of the door.
- The seal must adhere properly all the way around the door.
- If the seal is not adhering to the cabinet properly, then you should either:-
a) Use a warm damp cloth and manipulate the seal until it does adhere to the cabinet properly, all the way around the door.
or
b) Use a hair dryer on its lowest heat setting and lightly heat the areas of the door seal that are not adhering correctly. The heat will make the seal more pliable and this will allow you to manipulate the seal into the correct position.
IMPORTANT: DO NOT HEAT THE DOOR SEAL ON ANYTHING BUT THE LOWEST HEAT SETTING, OR HEAT THE SEAL FOR A LONG PERIOD OF TIME. OTHERWISE DAMAGE MAY BE CAUSED TO THE DOOR SEAL, WHICH WOULD NOT BE RECTIFIED UNDER THE GUARANTEE FREE OF CHARGE.
IMPORTANT: WHEN YOU HAVE REVERSED THE DOOR OF THE APPLIANCE. AS YOU HAVE PLACED THE APPLIANCE ON ITS BACK, YOU MUST WAIT FOR 8 HOURS BEFORE SWITCHING THE APPLIANCE BACK ON.
Troubleshooting
IMPORTANT: If your wine cooler appears not to be operating properly, before contacting the Customer Care Department, please refer to the checklist below.
| PROBLEM | POSSIBLE |
| Appliance does not operate Not plugged in. | The circuit breaker has tripped or the fuse has blown. |
| Temperature inside the appliance is too warm. | The temperature controls are set too warm. Set the temperature controls to a cooler setting and allow several hours for the temperature to stabilise.The door is being kept open too long or is being opened too frequently, which is allowing warm air to enter the appliance.The door is not closed completely.The door gasket is not sealing correctly.The appliance has recently been disconnected from the mains supply; it will take at least four hours for it to get down to temperature again. |
| Temperature inside the appliance is too cold | The temperature controls are set too cold. Set the temperature controls to a warmer setting and allow several hours for the temperature to stabilise. |
| Vibration Check to ensure that the appliance is on a level surface.The appliance is touching the back wall behind it. Reposition the appliance and move it from the wall.If vibration continues to occur, then turn off the appliance and unplug it from your mains supply. Then contact the Customer Care Department for assistance. | |
| Moisture is forming on the inside of the appliance. | The door is slightly open.The door is being kept open too long or is being opened too frequently. Open the door less often.The door is not sealed properly. |
| Moisture is forming on the outside of the appliance. | The door is slightly open, causing cold air from inside the appliance to meet warm, moist air from the outside. |
CAUSE

IMPORTANT: If your appliance appears not to be operating correctly, then you should disconnect it from your mains supply and then contact the Customer Care Department on telephone number (0118) 933 6911.
DO NOT ATTEMPT TO REPAIR THE APPLIANCE YOURSELF.
Please note that if an engineer is asked to attend whilst the product is under guarantee and finds that the problem is not the result of an appliance fault, then you may be liable for the cost of the call out charge.
The appliance must be accessible for the engineer to perform any necessary repair. If your appliance is installed in such a way that an engineer is concerned that damage will be caused to the appliance or your kitchen, then he will not complete a repair.
This includes situations where appliances have been tiled in, sealed in with sealant, have wooden obstructions placed in front of the appliance, like plinths. Or any installation other than the one specified by Baumatic Ltd. has been completed.
Please refer to the conditions of guarantee that appear on the warranty card that you receive with the appliance.
Baumatic®
United Kingdom
Baumatic Ltd., Baumatic Buildings, 6 Bennet Road, Reading, Berkshire RG2 0QX United Kingdom
Sales Telephone
(0118) 933 6900
Sales Fax
(0118) 931 0035
Customer Care Telephone
(0118) 933 6911
Customer Care Fax
(0118) 986 9124
Spares Telephone
(01235) 437244
Advice Line Telephone
(0118) 933 6933
E-mail:
sales@baumatic.co.uk customercare@baumatic.co.uk spares@baumatic.co.uk technical@baumatic.co.uk
Website:
www.baumatic.co.uk
Republic of Ireland
Service Telephone
1-890 812 724
Spares Telephone
091 756 771
Czech Republic


- BFW46SS 46 Bottle dual temperature electronic wine cooler
- INSTRUCTION MANUAL
- BFW 46 SS
- Bottle dual temperature electronic wine cooler
- Environmental note
- Important safety information
- Use of the appliance
- Before using your appliance
- Refrigerant
- Child safety
- General safety
- Service
- Specifications of your wine cooler
- Optional extra\*
- Dimensions of appliance\*\*
- Description of the appliance
- Control panel
- Lower compartment
- Upper compartment
- General
- Description of the product features
- 1) Control panel
- 2) Two cooling zones
- 3) Interior light
- 4) The wine cooler shelves
- Using your Baumatic wine cooler
- Before switching on
- During first use
- Switching on the appliance and setting the temperature
- Changing between Fahrenheit and Celsius
- Interior light
- Storage temperature neons
- Loading the wine cooler
- Storing your wines
- Wine storage problems
- Cleaning and maintenance
- Defrosting
- Installation
- Electrical connection
- YOUR WINE COOLER IS INTENDED FOR FITTED AND PERMANENT INSTALLATION.
- Positioning
- Built-in installation
- Reversing the door of your wine cooler
- Troubleshooting
- Baumatic®
- United Kingdom
- Sales Telephone
- Sales Fax
- Customer Care Telephone
- Customer Care Fax
- Spares Telephone
- Advice Line Telephone
- E-mail:
- Website:
- Republic of Ireland
- Service Telephone
- Czech Republic
Brand : BAUMATIC
Model : BFW46SS
Category : Drink cooler