
Wireless-N - Router ZOOM - Free user manual and instructions
Find the device manual for free Wireless-N ZOOM in PDF.


| Product Type | Wireless Router |
| Brand | Zoom |
| Model | Wireless-N |
| Wireless Standard | IEEE 802.11n |
| Frequency Band | 2.4 GHz |
| Maximum Wireless Speed | 300 Mbps |
| LAN Ports | 4 x 10/100 Mbps Ethernet |
| WAN Port | 1 x 10/100 Mbps Ethernet |
| Antennas | 2 external antennas (detachable) |
| Security | WEP, WPA, WPA2 |
| Power Supply | 12V DC, 1A |
| Power Consumption | 10 Watts (max) |
| Dimensions (W x D x H) | 7.1 x 4.3 x 1.2 inches (180 x 109 x 30 mm) |
| Weight | 0.6 lbs (270 g) |
| Operating Temperature | 0°C to 40°C (32°F to 104°F) |
| Humidity | 10% to 85% non-condensing |
| LED Indicators | Power, Internet, LAN 1-4, WLAN |
| Reset Button | Yes, pin-hole reset |
| Package Contents | Router, power adapter, Ethernet cable, quick start guide |
Frequently Asked Questions - Wireless-N ZOOM
User questions about Wireless-N ZOOM
0 question about this device. Answer the ones you know or ask your own.
Ask a new question about this device
Download the instructions for your Router in PDF format for free! Find your manual Wireless-N - ZOOM and take your electronic device back in hand. On this page are published all the documents necessary for the use of your device. Wireless-N by ZOOM.
USER MANUAL Wireless-N ZOOM
Wireless-N Router USER MANUAL

NOTICE
This document contains proprietary information protected by copyright, and this Manual and all the accompanying hardware, software, and documentation are copyrighted. No part of this document may be photocopied or reproduced by mechanical, electronic, or other means in any form.
The manufacturer does not warrant that the hardware will work properly in all environments and applications, and makes no warranty or representation, either expressed or implied, with respect to the quality, performance, merchantability, or fitness for a particular purpose of the software or documentation. The manufacturer reserves the right to make changes to the hardware, software, and documentation without obligation to notify any person or organization of the revision or change.
All brand and product names are the trademarks of their respective owners.
© Copyright 2012
All rights reserved.
Contents
Contents 3
Installing the Wireless-N Router ....5
Package Contents....5
System Requirements....5
Connecting a DSL or Cable Modem to Your Router 5
Connecting a Smartphone or a Tablet to Your Router 6
Connecting an Android based Smartphone or Tablet to Your Router...... 6
Connecting a Modem or a non-Android based Smartphone or Tablet to Your Router....7
Resetting the Router to the Factory Configuration....9
Using the Configuration Manager....10
Launching the Router's Configuration Manager.... 10
Launching the Configuration Manager's Setup Wizard.... 12
Step 1. Setup Login.... 13
Step 2. Setup Time Zone .... 13
Step 3. WAN Type Setup .... 14
Selecting the WAN Type.... 14
Step 4. Wireless Settings.... 22
Step 5. Summary....26
Step 6. Finish ...... 27
Connecting Devices Wirelessly to the Wireless-N Router 28
Establishing your Wireless Network.... 28
Connecting a Windows 7 Computer with Built-in Wireless Capabilities... 29
Connecting a Windows Vista Computer with Built-in Wireless Capabilities 30
Connecting a Windows XP Computer with Built-in Wireless Capabilities 31
Connecting a Macintosh OS X Computer with Built-in Wireless Capabilities 31
Connecting a Wireless-enabled Computer or Device (including the iPhone or other cellular phones, the iPod Touch, etc.) to the Wireless-N Router... 32
Connecting a Computer with a Wireless adapter to the Wireless-N Router33
Setting up your Network using WPS 34
Configuration Methods 34
Method One 34
Method Two 35
Method Three....35
Configuring Wireless Security Manually ....36
WPA2/WPA Configuration 36
WEP Configuration.... 37
Using the Configuration Manager's Advanced Program....40
Changing Default Settings 40
Online Help....41
Launching the Configuration Manager's Advanced Program.... 41
Configuring Basic Settings 41
The Basic Setup Page.... 42
Using your 3G modem as a Backup 44
The DHCP Server Page.... 45
The Wireless Setting Page 45
The Change Password Page.... 48
Configuring Forwarding Rules 48
The Virtual Server Page 49
The Port Triggering Page....51
The Miscellaneous Page 53
Configuring Security Settings.... 54
Status Page 55
Packet Filtering Page 55
The Domain Filters Page 57
The URL Blocking Page 58
The MAC Address Control Page 59
The Miscellaneous Page 60
Configuring Advanced Settings....61
The System Log Page 62
The Dynamic DNS Page....63
The QoS Page 63
The SNMP Page....65
The Routing Table Page 66
The System Time Page....67
The Schedule Rule and Schedule Rule Setting Pages 68
Configuring Toolbox Settings.... 70
The System Information Page....70
The Firmware Upgrade Page 71
The Backup Setting Dialog....71
The Reset to Default Dialog 72
The Reboot Dialog....72
The Miscellaneous Page 73
Appendix A: Mobile Broadband Settings....74
Appendix B: How to Set Up Tethering on the iPhone 78
Appendix C: Registering Your Product and Getting Help....80
Limited Warranty 81
FCC Interference Statement....82
CE Declaration of Conformity....81
Declaration of Conformity 82
Package Contents
The package contains the Zoom Wireless-N Router, an RJ-45 Ethernet cable, a 5V 1.2A Power adapter, a Quick Start installation flyer, and a CD that contains additional documentation and warranty information.
If anything is missing or damaged, please contact Zoom Customer Support or whoever provided the Wireless-N Router.
System Requirements
Any DSL or cable modem or modem/router that has an Ethernet port should work with the Wireless-N Router. The Wireless-N Router also works with many but not all mobile broadband USB modems and tethering-enabled smartphones. For an up-to-date list of modems and smartphones known to be compatible with the Wireless-N Router and/or to download the latest firmware, please go to www.zoomtel.com/router/comp. We attempt to support all popular mobile broadband (such as LTE, 4G, 3G) USB modems and tethering-enable smartphones, but this is challenging because new ones are introduced almost every day. If you'd like to let us know about a mobile broadband modem or smartphone that is incompatible with the router, please send an email to 3Gcomp@zoomtel.com
Some Zoom Wireless-N Router users will choose to use their mobile broadband modem as a backup to their DSL or cable modem. If the DSL or cable Internet connection fails, the Router can be set up to automatically switch over to mobile broadband for Internet access.
Connecting a DSL or Cable Modem to Your Router
If you wish to use the router with a DSL or Cable connection, please go to Chapter 2: Using the Configuration Manager. If you wish to use the router with a mobile broadband modem or tethered phone, please continue below.
Connecting a Smartphone or a Tablet to Your Router
If you are using the router with a mobile broadband USB modem please go to Connecting a Modem or non-Android Smartphone or Tablet to Your Router. If instead you are using a smartphone or tablet with the router, please read the information below before continuing.
If you are considering using the router with a tethered phone or tablet, please consider the following:
Some service providers do not want you to connect your mobile phone or tablet to a computer or router unless you have signed up for a data plan that allows data tethering. These plans are commonly called Data Tethering, Mobile Broadband Connect, 3G Mobile Hotspot, Phone as a Modem, or Laptop Connect.
Your router only supports tethering with a USB cable. It does not support tethering over WiFi or Bluetooth®.
When using your Phone or Tablet as a modem, you can turn off WiFi and Bluetooth to conserve the phone's battery.
You may need to change the settings of the USB port on your phone or tablet to be used with tethering. Refer to your phone's or tablet's documentation on how to do this or go to www.zoomtel.com/tethering for some information for common phones or see Appendix B in the User Manual on the CD for instructions on Tethering on the iPhone®.
If you have difficulty connecting to the Internet when your phone or tablet is plugged into the Zoom router, verify that you can browse the Internet with your phone or tablet directly connected to a PC. If you can't browse with the phone or tablet connected directly to a PC, contact your wireless service provider for help. If you can connect through your PC but not when attached to the Zoom router, please contact Zoom Support. See Registering your Product and Getting Help at the end of this Quick Start.
Non-Android Smartphone or Tablet users should go to Connecting a Modem or non-Android Smartphone or Tablet to Your Router. Android users should continue below.
Connecting an Android based Smartphone or Tablet to Your Router
If you are using an Android based smartphone, you should check whether your phone is already supported; and if not, you should download the ZoomTether application. To check whether your Android phone is already supported, please go to http://www.zoomtel.com/router/comp and click on the Check Smartphone
Compatibility link. If your phone is listed on the compatibility list, you do not need to download the ZoomTether application. If you phone is not listed specifically on this page or if you have an Android based tablet with mobile broadband capability, please go to http://www.zoomtel.com/ztdownload to download ZoomTether into your Zoom Router. Then when you plug your Android smartphone or tablet into the router, the router will install an application on your phone or tablet that allows tethering to work. The website provides directions on how to install and configure your Router to use
this code.
If your Router is not working with your Android smartphone or tablet see Troubleshooting your Internet Connection, otherwise go to Chapter 2, Using the Configuration Manager to learn how to:
➢ Enable Wireless Security.
Change the router's password to prevent users on your network from changing the settings of the Wireless-N Router.
Change other wireless settings such as your Wireless Network Name (SSID) or you wish to disable WiFi access to your router.
Connecting a Modem or a non-Android based Smartphone or Tablet to Your Router
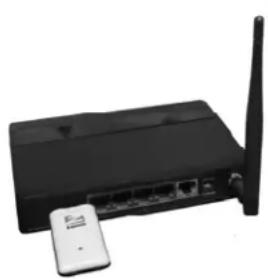
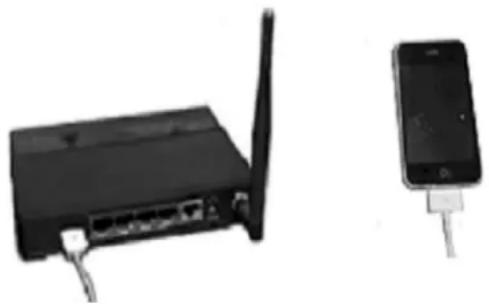
1 If you are using a mobile broadband USB modem to connect to the Internet, plug the USB modem into the router's USB port (see 1.1). If you are using a phone or tablet to connect to the Internet, plug one end of the USB cable that probably came with your phone or tablet into the router and the other end into your phone (see 1.2).
natural_image
Black wireless router with antenna and USB port, no visible text or symbols1.1
natural_image
Two electronic devices: a black wireless router with antenna and a smartphone connected to its right port (no visible text or symbols)1.2
2 Connect the power adapter to the receptor on the back panel of your router and plug the other end of the power adapter into a wall outlet or power strip.
3 After the router is powered up, the router's 4G/3G light should turn solid green within 2 minutes indicating that a mobile broadband connection has been made and that the router has gotten an IP address. If the 4G/3G light does not turn solid green, unplug the modem, phone, or tablet, plug it in again, and wait to see whether the 4G/3G light turns solid green within 2 minutes. If the 4G/3G light still does not turn and remain solid green, see Troubleshooting Your Internet Connection below.
4 A computer, mobile phone, game station, or other device with wireless 802.11n, g, or b capability can access the Internet wirelessly through the mobile broadband router. To make the WiFi-compatible wireless connection, you must first locate the wireless network connection setup on your device, and then select the Zoom network. For example, on Windows computers, click the wireless connection icon
on the Task Bar, click Available Wireless Networks, select Zoom from the list of available wireless networks, and then make the connection.
5 The router comes set up for wireless with no security. If you want wireless security, you need to set up the mobile broadband router and each device for the security that you want. To learn how to enable wireless security on your Router, please see Chapter 2, Using the Configuration Manager.
6 You may want to plug a computer or other device into one of the router's 4 Ethernet ports. This is recommended if you're changing the router's default values, and sometimes an Ethernet connection is more convenient or secure than connecting to the router wirelessly. To connect via Ethernet, simply plug the router's Ethernet cable between the router's Ethernet port and your computer or other device's Ethernet port, then re-boot the computer to make sure it knows that the Router is plugged in.
7 Open your browser on your computer or other device and verify that you are able to connect to the Internet. If you are unable to connect, refer to the Troubleshooting Your Internet Connection section below. Otherwise go to Chapter 2, Using the Configuration Manager to learn how to:
➢ Enable Wireless Security.
Change the router's password to prevent users on your network from changing the settings of the Wireless-N Router.
Change other wireless settings such as your Wireless Network Name (SSID) or you wish to disable WiFi access to your router.
Troubleshooting Your Internet Connection
If you are unable to connect to the Internet through your router, please check the following:
1 Verify that you are in a mobile broadband coverage area and that your phone, modem, or tablet can receive a signal at your location. You may want to try changing the location of your router - for example, by moving the router closer to a window.
2 If you are using a mobile phone or tablet, go over the points in the If you are considering using the router with a tethered phone or tablet, please consider the following box on page 6.
3 You may need to manually configure the router to recognize your phone or modem. Please see Chapter 2: Using the Configuration Manager in the full length User Manual on your CD for instructions on how to use the Setup Wizard to manually set up your modem.
4 If you are using the Wireless-N Router with a mobile broadband modem or phone, verify that your modem or phone is recognized by your router. To do this:
a. Login to the router as described in steps 1-3 of Launching the Router's Configuration Manager in Chapter 2: Using the Configuration Manager.
b. Click on Status.
c. Locate the Card Info field on the Status page to see if your card is recognized. If your card is not seen under Status, verify that your modem or phone is compatible with your router. See
www.zoomtel.com/router/comp for a list of compatible modems and phones. If your device is listed and you are still having trouble, please contact Zoom support as described in Appendix C: Registering Your Product and Getting Help.
Resetting the Router to the Factory Configuration
In the unlikely event that you need to reset the router to the factory default configuration, insert the blunt end of a paper clip into the RESET hole on the side panel of the router. Hold the clip in place for seven (7) seconds.
Please continue to Chapter 2.
2
Using the Configuration Manager
Your Wireless-N Router is preset with default values that meet the needs of most users. However, you can change these settings using the router's built-in Configuration Manager.
Here are some reasons why you might want to use the Configuration Manager:
- You are plugging the wireless-N router into a DSL or cable modem.
- You want to set or change some settings of your Router. For instance, you may want to change the login password or time zone, or to change wireless settings to, for instance, turn on WiFi®-compatible security.
- You want to set up some advanced features of the Wireless-N Router such as a virtual server or DMZ for use with online gaming. You can find a summary of those features in the Changing Default Settings section near the start of Chapter 5, on page 40.
Launching the Router's Configuration Manager
To launch the Configuration Manager, please follow these steps:
1 If you haven't already done so, connect the power adapter to the receptor on the back panel of your router and plug the other end of the power adapter into a wall outlet or power strip.
2 Plug the supplied Ethernet cable into an Ethernet port on the router's back panel and into your computer's Ethernet port.
3 Turn on your router first, then your computer. Once the computer is on, launch the computer's Web browser.
4 In the Web browser address bar, type the router's default IP address, http://192.168.2.1 and then press Enter.
When the MAIN MENU opens for the first time, it displays a System Status page that summarizes the current settings and values for your system.
| System Status [HELP] | ||
| Item | WAN Status | Sidenote |
| Remaining Lease Time | - | Renew |
| IP Address | 0.0.0.0 | |
| Subnet Mask | 0.0.0.0 | |
| Gateway | 0.0.0.0 | |
| Domain Name Server | 0.0.0.0, 0.0.0.0 | |
| Firmware Version | W1.0.0.1-1 | |
| Wireless Status | ||
| Item | WLAN Status | Sidenote |
| Wireless mode | Enable | (B/G/N Mixed) |
| SSID | Zoom | |
| Channel | 10 | |
| Security | Auto | (None) |
| MAC Address | 00:50:18:64:EB:6C | |
| Statistics Information | ||
| Statistics of WAN | Inbound | Outbound |
| Octets | 0 | 0 |
| Unicast packets | 0 | 0 |
| Multicast packets | 0 | 0 |
| WAN MAC Address | 00:50:18:64:EB:6B | |
| LAN MAC Address | 00:50:18:64:EB:6C | |
5 On the Toolbar, type admin (the default password) in the System Password field, then click Login.

6 By default the configuration manager is set to English. If you wish to change it to Spanish select Español from the drop down box on the Toolbar.
When you log in, the Configuration Manager opens its Main Menu.
- You should use the Configuration Manger's Setup Wizard if any of the following apply to you.
You wish to set up a Cable or ADSL modem to work with the Wireless-N Router.
- You wish to set up Wireless Security without using WPS.
You want to change the router's password to prevent users on your network from changing the settings of the Wireless-N Router.
You want to set up the correct Time Zone. Setting the Time Zone is important if you plan to use Scheduling usage rules to limit access to the
Internet during certain hours. See The Schedule Rule and Schedule Rule Setting Pages on page 67 for more information.
You wish to change other wireless settings such as your Wireless Network Name (SSID) or you wish to disable WiFi access to your router.
If any of these apply to you, see Launching the Configuration Manager's Setup Wizard below.
- If you are experienced with networking devices and their configuration, you may prefer to use the Advanced configuration program to tailor the router's configuration to your needs. Go to Using the Configuration Manager's Advanced Program on page 40.
Launching the Configuration Manager's Setup Wizard
When you start the Configuration Manager (http://192.168.2.1 on your Web browser) and log in, the ADMINISTRATOR'S MAIN MENU opens.
Click Wizard on the Toolbar to launch the Setup Wizard, which will guide you through the configuration process.

The Setup Wizard page opens.
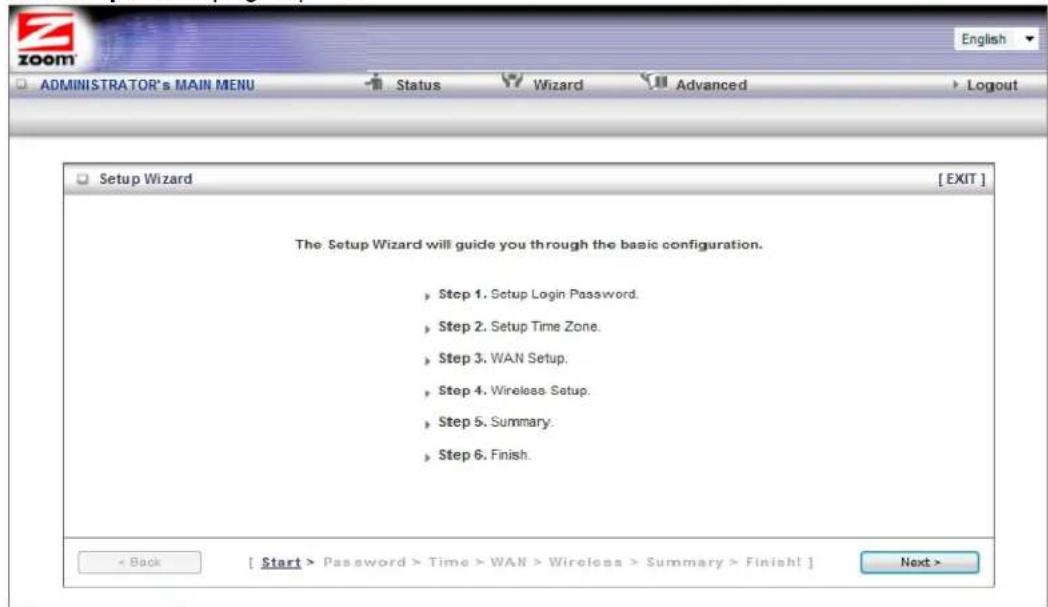
Each of the six Steps guides you in configuring a specific setting or group of settings. When you click Next or Back, you move from one step to another. If there is a setting that you don't want to change, simply click Next to go to the next setting.
Step 1. Setup Login
To view or change configuration settings, you must enter a password. Your router has a default password (admin) that was set by the factory and that you used to access the Configuration Manager initially. If you want to keep the default password, click Next to skip this step. Otherwise, to safeguard your configuration, particularly if you make changes, we recommend that you change the login password.
1 On the Setup Login Password page, type the old password in the Old Password field.
2 Type the new password in the New Password field.
3 Type the new password in the Reconfirm field, then click Next.
Note: If you forget the new password, you won't have access to the Configuration Manager and will need to restore the device to its factory settings, thus losing any changes you made to your router's configuration. To avoid this problem, we recommend that you write the new password here and on the bottom of your Wireless-N Router, and also save it elsewhere such as a settings document.
PASSWORD:
Please refer to Resetting the Router to the Default Configuration on page 9 or The Reset to Default Dialog on page 72 for more information in the unlikely event that you forgot your password and need to restore the router's default settings.
Step 2. Setup Time Zone
The Time Zone setting is only used for fairly sophisticated functions, such as changing router access rules depending on the time of day. However, we recommend that you set your time zone now.
![ADMINISTRATOR's MAIN MENU Status Wizard Advanced Logout Setup Wizard - Setup Time Zone [ EXIT ] * Not yet configured! The default is GMT+00:00 < Back [ Start > Password > Time > WAN > Wireless > Summary > Finish! ] Next >](/content/2026/05/959275/images/5e36c7bf9c2c4181afd441c517afdf3f8562a4b4272f00afc1b5333a5fdb2a33.jpg)
To set the time zone, select the time zone that applies to your location from the dropdown menu, then click Next.
Step 3. WAN Type Setup
The WAN Type refers to the protocol used by your Internet Service Provider in establishing your Internet connection. By default, WAN Type is set to your Mobile Broadband USB modem. If that is what you want, you can select Next to skip this section.
![ZOOM ADMINISTRATOR's MAIN MENU Status Wizard Advanced Logout Setup Wizard - Select WAN Type [ EXIT ] Your ISP has given you a static IP address. (Static IP Address) You obtain an IP address from your ISP automatically. (Dynamic IP Address) Your ISP uses PPPoE to connect to the Internet. (PPP over Ethernet) Your ISP uses PPTP to connect to the Internet. (PPTP) Your ISP uses L2TP to connect to the Internet. (L2TP) You want to use your Mobile Broadband modem to connect to the Internet. < Back [ Start > Password > Time > WAN > Wireless > Summary > Finish! ] Next >](/content/2026/05/959275/images/6158f562d8b4d89037b1f301fc00525ce3acbaf41e1ad62e22599a76f7d120d1.jpg)
Selecting the WAN Type
Please check with your service provider if you read the discussion below and are still unsure which WAN Type to choose.
- Static IP Address - Typically you have to request and pay extra for a static IP address, so this is not typically used.
- Dynamic IP Address – This is only used by Cable modem users and by DSL modem users who are not using PPPoE. (A DSL service provider will typically tell you whether you are using PPPoE, which requires you to enter an PPPoE-related password into the router. If you are using DSL with 1483 routed, bridged, or PPPoA modes, you are not using PPPoE.)
- PPPoE – Only use this if you are plugging an ADSL modem into the Wireless-N Router, and if your ADSL service provider uses PPPoE.
- PPTP - The Point to Point Tunneling Protocol is more common in corporate environments and most users will not use this setting.
- L2TP - The Layer 2 Tunneling Protocol is more common in corporate environments and most users will not use this setting.
- Mobile Broadband Modem - Select this if you are using a mobile broadband modem, or a tethering-enabled smartphone or tablet as the primary method of connecting the Wireless-N Router to the Internet. (If you are using the
mobile broadband modem as the backup to an ADSL or Cable modem, you'll need to use the Configuration Manager's Advanced program to configure this setup. Please refer to Using your 3G modem as a backup on page 44.) You should select your primary connection type using the Setup Wizard. (To access the Setup Wizard, refer to page 12 for instructions.)
The relevant section immediately below depends on the WAN Type you selected.
Configuring the Static IP Address
The page shown below will only appear in the unlikely event that you select the Static IP Address button on the Select WAN Type menu. Otherwise skip this section.
![Setup Wizard - Static IP Address LAN IP Address 192.168.2.1 Static IP Address Static Subnet Mask Static Gateway Static Primary DNS Static Secondary DNS < Back [ Start > Password > Time > WAN > Wireless > Summary > Finish! ] Next >](/content/2026/05/959275/images/2c9960cfda54627d4cd461205d46b72df0d6edbb01ff2b5c1c790f2a2b4a4497.jpg)
• LAN IP Address
This is the LAN IP Address of your router. Devices behind the router use this address as their default gateway. Most users will not need to change this address.
- Static IP Address
This is the IP address that is given to you by your service provider when you sign up for a Static IP address. This address identifies your Wireless-N Router when seen from the Internet.
- Static Subnet Mask
This is the router's subnet mask. Your service provider supplies this address.
- Static Gateway
This is the IP address of the ISP server. Your service provider supplies this address.
• Static Primary DNS
This is the Domain Name System (DNS) server's IP address. Your service provider supplies this address.
• Static Secondary DNS
This is the IP address of an alternate Domain Name System (DNS) server. Your service provider supplies this address.
Go t Step 4. Wireless Settings on page 22.
Configuring the Dynamic IP Address
The page shown below only appears if you select the Dynamic IP Address button on the Select WAN Type menu. Otherwise skip this section.
![ADMINISTRATOR's MAIN MENU Status Wizard Advanced Logout Setup Wizard - Dynamic IP Address [ EXIT ] LAN IP Address 192.168.2.1 Host Name (optional) ISP registered MAC Address Clone < Back [ Start > Password > Time > WAN > Wireless > Summary > Finish! ] Next >](/content/2026/05/959275/images/9834f2ae7803e117f877a7398f216c9b26a5dd4bee796dd390598c3bbbeb038e.jpg)
• LAN IP Address
This is the LAN IP Address of your router. Devices behind the router use this address as their default gateway. Most users will not need to change this address.
- Host Name
This is the name that identifies your Wireless-N Router. Some service providers require a host name. Your service provider supplies this name, if needed.
• ISP registered MAC Address
This is the 12-digit Media Access Control (MAC) address of your router. Cable modem users should click the Clone button to get the MAC address
that was registered with your service provider for your device.
Go to Step 4. Wireless Settings on page 22.
Configuring PPPoE
The page shown below only appears if you select the PPPoE button on the Select WAN Type menu. Otherwise skip this section.
![ADMINISTRATOR's MAIN MENU Status Wizard Advanced Logout Setup Wizard - PPP over Ethernet [ EXIT ] LAN IP Address 192.168.2.1 Username Password Primary DNS Secondary DNS Service Name (optional) Assigned IP Address (optional) < Back [ Start > Password > Time > WAN > Wireless > Summary > Finish! ] Next >](/content/2026/05/959275/images/605cdbd733e01ad8662ffb93fe23f21b280cc4b597b14c98b0ae4b007d3996fe.jpg)
• LAN IP Address
This is the LAN IP Address of your router. Devices behind your router use this address as their default gateway. Most users will not need to change this address.
- Username
This is the PPPoE username supplied by your service provider.
- Password
This is PPPoE password supplied by your service provider.
- Primary DNS
This is the Domain Name System (DNS) server's IP address. Your service provider supplies this address, if needed. Most users should not need to enter a DNS value.
- Secondary DNS
This is the IP address of an alternate Domain Name System (DNS) server.
Your service provider supplies this address, if needed.
- Service Name
This is the name assigned by your service provider to identify your service. The Service Name is optional.
- Assigned IP Address
This is the optional IP address assigned by your service provider. The Assigned IP Address is optional.
Go t Step 4. Wireless Settings on page 22.
Configuring PPTP
The page shown below only appears if you select the PPTP button on the Select WAN Type menu. Otherwise skip this section.
![ADMINISTRATOR's MAIN MENU Status Wizard Advanced Logout Setup Wizard - PPTP [ EXIT ] LAN IP Address 192.168.2.1 IP Mode Dynamic IP Address My IP Address My Subnet Mask Gateway IP Server IP Address/Name PPTP Account PPTP Password < Back [ Start > Password > Time > WAN > Wireless > Summary > Finish! ] Next >](/content/2026/05/959275/images/aeb011018b617687f8685aca011b15d99c077044512fec9f37e65b7253468685.jpg)
• LAN IP Address
This is the LAN IP Address of your router. Devices behind your router use this address as their default gateway. Most users will not need to change this address.
- IP Mode
This is the mode used to generate the IP address. Select an option from the dropdown menu, based on your service provider's requirements.
- My IP Address
This is the private IP address that your service provider assigned to your router.
- My Subnet Mask This is the private subnet mask that your service provider assigned to your router.
- Gateway IP
This is the IP address of the service provider's server. Your service provider supplies this address.
- Server IP Address/Name
This is the name and IP address of the PPTP server. Your service provider supplies this information, if needed.
- PPTP Account
This is the PPTP account name that your service provider assigned to you.
- PPTP Password
This is PPTP password that your service provider assigned to you.
Go to Go to Step 4. Wireless Settings on page 22.
Configuring L2TP
The page shown below only appears if you select the L2TP button on the Select WAN Type menu. Otherwise skip this section.
![Setup Wizard - L2TP 192.168.2.1 IP Mode Dynamic IP Address IP Address Subnet Mask WAN Gateway IP Server IP Address/Name L2TP Account L2TP Password < Back [ Start > Password > Time > WAN > Wireless > Summary > Finish! ] Next >](/content/2026/05/959275/images/5cdfa7300bf3bc29d20d037536d487d7aa796ab890cd530f167e5d98501a904d.jpg)
• LAN IP Address
This is the LAN IP Address of your router. Devices behind your router use this address as their default gateway. Most users will not need to change this address.
- IP Mode
This is the mode used to generate the IP address. Select an option from the
dropdown menu, based on your service provider's requirements.
- IP Address
This is the IP address that identifies the L2TP server. Your service provider supplies this address.
- Subnet Mask
This is the router's subnet mask. Your service provider supplies this address.
- WAN Gateway IP
This is the WAN Gateway IP address of the L2TP server. Your service provider supplies this address.
• Server IP Address/Name
This is the name and IP address of the L2TP server. Your service provider supplies this information, if needed.
- L2TP Account
This is the L2TP account name or user name supplied by your service provider.
- L2TP Password
This is L2TP password supplied by your service provider.
Go t Step 4. Wireless Settings on page 22.
Configuring for a Mobile Broadband Modem, or tethering-capable smartphone or tablet
The page shown below only appears if you select the Mobile Broadband button on the Select WAN Type menu. Otherwise skip this section.
![ZOOM ADMINISTRATOR's MAIN MENU Status Wizard Advanced Logout Setup Wizard - 3G/4G [ EXIT ] LAN IP Address 192.168.2.1 APN PIN Code Dialed Number Account Password < Back [ Start > Password > Time > WAN > Wireless > Summary > Finish! ] Next >](/content/2026/05/959275/images/58f1d34dad3208cd7e84447e47b8f5614b4e8d0b0dd55cc0633142fe3c2f0984.jpg)
If you do not know the APN, Dialed Number, Account, or Password of your service provider, you should contact them or refer to Appendix A: Mobile Broadband Settings for a list of many wireless service providers' settings. You may also want to refer to http://www.zoomtel.com/mbsettings. You may also be able to get the information from looking at your modem or phone's software. Please refer to the documentation that came with your modem or phone for more information.
• LAN IP Address
This is the LAN IP Address of your router. Devices behind your router use this address as their default gateway. Most users will not need to change this address.
• APN
This is the Access Point Name (APN) assigned by your service provider, if needed.
• PIN
This is the Personal Identification Number (PIN) code assigned by your service provider, if needed.
- Dialed Number
This number is assigned by your service provider, if needed.
- Account
This is the Account Name provided by your service provider, if needed.
- Password
This is the Password assigned by your service provider, if needed.
Go t Step 4. Wireless Settings.
Step 4. Wireless Settings
The Wireless Settings page lets you configure the wireless settings for your Router and devices. If you are happy to have no wireless security, click Next to go to Step 5. If all of your network's wireless devices are capable of WPS security setup and you want to use WPS, please go to Steps 5 and 6, then exit the Wizard and go to Chapter 3: Wireless and Wireless Security on page 28. Otherwise, continue below. EITHER WAY, after running the Setup Wizard you will need to make sure that wireless devices connecting to the Wireless-N Router (computers, phones, tablets, game stations, etc.) are set up properly as discussed in Chapter 3.
![Setup Wizard - Wireless settings [ EXIT ] ► Wireless Module ► Wireless Network Name (SSID) ► Channel Enable Disable Zoom 10 < Back [ Start > Password > Time > WAN > Wireless > Summary > Finish! ] Next >](/content/2026/05/959275/images/8e29a9a37fc3b1ba1aabefb1365c94983a82f1f88daf71a8b9641c26975a4981.jpg)
- Wireless Module Accept the default, Enable. Click the Disable checkbox only if you do not want wireless clients to access your network.
- Wireless Network Name (SSID) refers to the Service Set Identifier for your device. By default, the SSID for the Wireless-N Router is Zoom. You can change the SSID to a name of your choice. The SSID can be up to 32 alphanumeric characters. If you change the name, make sure that all devices on your Wireless-N Router's wireless network use the new SSID as the access point.
- Channel refers to the wireless network channel assigned to your LAN. By default, the Wireless-N Router uses channel 10. You would only change this setting if you were concerned about possible interference from another wireless access point using the same channel.
TIP: Other wireless networks might be within range of your network. Your neighbors, for instance, may be within range. If you are having trouble connecting, try setting a different channel to see if that improves performance. You should try setting a channel that is 5 more than what you are using. By default, the Wireless-N Router is set to 10. You may want to try channel 6 or 1, for instance, if you have trouble connecting with the default channel (10).
Wireless Security Settings
If you accepted the default to Enable the Wireless Module (on the Wireless Settings page at Step 4), the following page opens when you click Next.
![Setup Wizard - Wireless settings Authentication None Encryption None < Back [ $start > Password > Time > WAN > Wireless > Summary > Finish! ] Next >](/content/2026/05/959275/images/cf63bc17ad0a45671e9893669ae167b5574b416c225b8c05b4c2c50622e62349.jpg)
Configuring Authentication and Encryption
By default, Authentication and Encryption security services are not configured. You can configure both settings on the Wireless settings page.
1 To configure Authentication, select either Wired Equivalent Privacy (WEP) or WiFi Protected Access-Pre-Shared Key (WPA-PSK/WPA2-PSK) from the dropdown menu.
Important: Be aware that WEP is a basic authentication service and is not as secure as WPA-PSK/WPA2-PSK. If you have devices on your wireless network that support only WEP (for example, some gaming consoles), you will need to select WEP as your Authentication method.
WPA-PSK/WPA2-PSK Authentication
We recommend this setting if all devices on your network support either WPA or WPA2. Your router will automatically detect whether it should use WPA or WPA2.
When you select WPA-PSK/WPA2-PSK from the Authentication dropdown menu, the Encryption field expands, as shown in the following figure.
![Setup Wizard - Wireless settings Authentication Encryption Security Key WPA-PSK / WPA2-PSK TKIP / AES < Back [ start > Password > Time > WAN > Wireless >summary > Finish! ] Next >](/content/2026/05/959275/images/8482b5f47be56de916ff44d0dc4e854bbc17799d202c5c4c0ec8e4c893498c52.jpg)
| Field Entry | |
| Authentication | Accept WPA-PSK/WPA2 PSK as the default value. |
| Encryption | Accept the default, TKIP/AES, which supports dynamic encryption keys using TKIP or AES algorithms. Usually WPA uses TKIP and WPA2 uses AES. |
| Security Key | In the Security Key field, enter a value for the key. The maximum value is 64 characters. The minimum value is 8 characters.Write your key in the space below for future reference, and then enter it in the Security Key field:______ __ __ __ __ __ __ __ __ __ __ __ __ __ __ __ __ __ __ __ __ __ __ __ __ __ __ __ __ __ __ __ __ __ __ __ __ __ __ __ __ __ __ __ __ __ __ __ __ __ __ __ __ __ __ __ __ __ __ __ __ __ __ __ __ __ __ __ __ __ __ __ __ __ __ __ __ __ __ __ __ __ __ __ __ __ __ __ __ __ __ __ __ __ __ __ __ __ __ __ __ ____ |
WEP Authentication and Encryption
If you have devices on your wireless network that support only WEP (for example, some gaming consoles), you will need to select WEP as your Authentication method.
When you select WEP from the Authentication dropdown menu, the Encryption field
expands, as shown in the following figure.
![ZOOM ADMINISTRATOR's MAIN MENU Status Wizard Advanced Setup Wizard - Wireless settings [EXIT] ▶ Authentication ▶ Encryption ● WEP Key 1 ○ WEP Key 2 ○ WEP Key 3 ○ WEP Key 4 WEP WEP ▼ HEX ▼ HEX ▼ HEX ▼ HEX ▼ < Back [ Start > Password > Time > WALL > Wireless > Summary > Finish! ] Next >](/content/2026/05/959275/images/1c3da3510977e8646e5d75741c751af8133d152e685303cfa9eba3e823b0f61a.jpg)
| Field Entry | |
| Authentication | Select WEP |
| Encryption | Select WEP |
| Encryption WEP Key 1, 2, 3, 4 | We recommend selecting HEX as the key format as Ascii keys can have compatibility issues between different devices.. |
| Encryption WEP Key 1, 2, 3, 4 | You can choose to either use WEP 128 bit encryption or WEP 64 bit encryption. The difference is 128 bit is more secure and 64 bit is faster. We recommend selecting 64 bit.If you selected Hex format and you chose a 64-bit key length, 10 hexadecimal values are required. (Hexadecimal values include the numbers 0-9 and the letters A-F) Write the 10-hexadecimal key in the space below for future reference, and then enter it in the Key 1 box.____If you selected Hex format and you chose a 128-bit key length, 26 hexadecimal values are required. (Hexadecimal values include the numbers 0-9 and the letters A-F) Write the 26-hexadecimal key in the space below for future reference, and then enter it in the Key 1 box.____If you selected ASCII format, and you chose a 64-bit key length, 5 ASCII characters are required. Write the 5-ASCII-character |
key in the space below for future reference, and then enter it in the Key 1 box.
If you selected ASCII format, and you chose a 128-bit key length, 13 ASCII characters are required. Write the 13-ASCII-character key in the space below for future reference, and then enter it in the Key 1 box.
Step 5. Summary
The Summary page displays the updated configuration settings for your router and lets you accept, change, and test the configured values.
![Setup Wizard - Summary [ EXIT ] Please confirm the information below [ WAN Setting ] WAN Type 3G/4G APN wap.cingular.com PIN Code Dialed Number *99# Username cingular1 Password [ Wireless Setting ] Wireless Enable SSID Zoom Channel 10 Authentication WPA-PSK / WPA2-PSK Encryption TKIP/AES Do you want to proceed with the network testing? < Back [ Start > Password > Time > WAN > Wireless > Summary > Finish! ] Apply Settings](/content/2026/05/959275/images/f7f3d6b9462fdc4c1bc1428d885ec71d14a57e9e8bc7b1baf3afac3e5773a922.jpg)
1 To edit your entries, click Back as many times as needed to access the page for the field(s) to be edited, then click Next to continue with your edits or to return to the updated Summary page.
2 Mobile Broadband: To test the updated configuration on your network, click the checkbox next to Do you want to proceed with the network testing?
3 When you're satisfied with the configured settings, click Apply Settings to save the new configuration.
Step 6. Finish
If you are not using mobile broadband or you decided not to test your mobile broadband connection the Configuration is Completed page displays. Click Finish to restart the router and save the new configuration settings for your router.
If your Internet connection test was successful, the Congratulations!! screen will appear. Click Finish to restart the router and save the new configuration settings for your router.
![Setup Wizard - Finish [ EXIT ] Congratulations!! The Internet connection is established. Connection information is WAN Type 3G/4G IP Address 168.203.34.170 Subnet Mask 255.255.255.255 Gateway 10.64.64.64 DNS 209.183.33.23 ,209.183.35.23 < Back [ Start > Password > Time > WAN > Wireless > Summary > Finish! ] Finish](/content/2026/05/959275/images/78ec0ab482976b53ec59de352e695702f5f49e8433a2fa74edcb0ddfc713b1ac.jpg)
If your Internet connection test was not successful, try running the test again by clicking Connect Again. If the test still fails please see Troubleshooting your Internet Connection.
In the unlikely event that you want to use the Advanced configuration program to tailor the router's configuration to your needs, for example, to set up a Virtual Server or DMZ so that your games or gaming consoles can access the Internet through your router's firewall, please continue to Chapter 5: Using the Configuration Manager's Advanced Program. (Most users will not need to do this.)
Your router's setup is complete. Congratulations!
3
Connecting Devices Wirelessly to the Wireless-N Router
This chapter assumes that your Wireless-N Router has its wireless security settings set up the way you like them, either with the factory default of “no security” or with a particular type of security as discussed in Chapter 2. This chapter provides tips for connecting devices (computers, phones, tablets, game stations, etc.) wirelessly to the Wireless-N Router. If you are familiar with this already, or if you prefer to use the instructions associated with each device, you don’t need to read this chapter. You do need to make sure that each device connecting to the Wireless-N Router is set up for wireless security that is compatible with the Wireless-N Router’s wireless security settings.
Establishing your Wireless Network
Note that for each computer or other device added to your wireless network, you will need to take appropriate steps for setting up that computer or other device. To do that, select one of the possibilities for that computer or other device below:
Many newer Windows 7, Vista, and XP computers have built-in wireless networking capabilities and do not require the installation of a wireless component. If this is the case, you should set up that computer's wireless connection using the Windows 7, Vista, or XP connect utility. See the sections below on connecting Windows 7 (page 29), Vista (page 30), or XP (page 31) computers with built-in wireless capabilities.
Some computers may have built-in wireless networking capabilities, but do not use the Windows 7, Vista, or XP utility to configure their device. If this is so, set up your computer's wireless connection using the instructions on page 31 for Connecting a Wireless-enabled Computer or Device to the Wireless-N Router.
If you are using a Macintosh computer see the instructions on page 31 for Connecting a Macintosh OS X Computer with Built-in Wireless Capabilities
If you have a non-computer wireless device like an iPhone or other cellular phone, iPod Touch, etc., see the instructions on page 31 for Connecting a Wireless-enabled Computer or Device to the Wireless-N Router.
Some computers may need a wireless network adapter installed. This can be a USB adapter, PC Card adapter, or PCI adapter. When you install the adapter, make sure that it is set to infrastructure or access point mode (NOT ad-hoc or peer-to-peer mode). If you need help installing your wireless adapter or setting its mode, refer to the documentation that came with it. After you install the adapter, see the instructions on page 32 for Connecting a Computer with a wireless adapter to the Wireless-N Router.
Connecting a Windows 7 Computer with Built-in Wireless Capabilities
1 From the taskbar, click on the wireless symbol.
2 In the wireless network options box, highlight the Wireless Network Name (SSID) you gave your wireless network in Step 4 of the Setup Wizard. If you did not change the Wireless Network Name (SSID), select the default name Zoom. If you want to automatically connect to the Wireless-N Router, click the Connect Automatically box. Then click Connect.
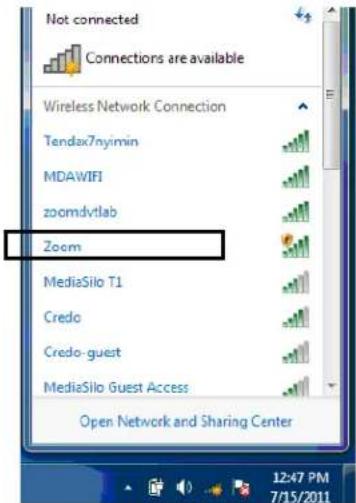
- If you enabled security in Step 4 of the Setup Wizard, enter the security key in the next dialog box and click Connect.
- Otherwise if your desired network is unsecured, in the message box select Connect Anyway.
When you click on the wireless network option box, Windows will scan for available networks. More than one wireless network may appear in the list. These are other wireless networks that are within range of your network. Your neighbors, for instance, may be within range of your network. Each wireless network has a channel associated with it. We recommend there be at least a five-channel difference between your network and those of your neighbors. Having less than a five-channel difference may result in interference with your connection. By default, the Wireless-N Router uses channel 10. If you need to change this channel, you must do so using the Wireless Setup page of the Zoom Configuration Manager. For instructions on how to log in to the Zoom Configuration Manager, see page 10. After logging in, select Wireless from the left-hand menu. On the Wireless page you can select a new channel from the drop-down menu.
To disconnect from the current network:
1 Right-click the wireless network icon in the notification area of the Windows taskbar.
2 Right-click your Wireless Network Name and select Disconnect.
Connecting a Windows Vista Computer with Built-in Wireless Capabilities
1 From the Start menu select Connect to.
2 In the Connect to a network dialog box, highlight the Wireless Network Name (SSID) you gave your wireless network in Step 4 of the Setup Wizard. If you did not change the Wireless Network Name (SSID) select the default name Zoom and click Connect.
- If your desired network is secured, in the next dialog box enter the security key or password and click Connect.
- If your desired network is unsecured, in the message box select Connect Anyway.
When you click on the wireless network option box, Windows will scan for available networks. More than one wireless network may appear in the list. These are other wireless networks that are within range of your network. Your neighbors, for instance, may be within range of your network. Each wireless network has a channel associated with it. We recommend there be at least a five-channel difference between your network and those of your neighbors. Having less than a five-channel difference may result in interference with your connection. By default, the Wireless-N Router uses channel 10. If you need to change this channel, you must do so using the Wireless Setup page of the Zoom Configuration Manager. For instructions on how to log in to the Zoom Configuration Manager, see page 10. After logging in, select Wireless from the left-hand menu. On the Wireless page you can select a new channel from the drop-down menu.
3 In the Successfully connected to [desired network] dialog box, you have three options. You can:
- Select Save the network and Start this connection automatically if you always want to connect to the same network. Then click Close. The next time you start your computer you will automatically connect to the selected network.
- Select Save the network and clear the Start this connection automatically check box if you don't want to automatically connect to this network every time you start your computer but you will want to connect in the future. Click Close to display the Select a location . . . dialog box where you choose a location. Windows Vista automatically applies the correct network security settings. If the User Account Control dialog box appears, click Continue.
- Click Close to complete the connection procedure. Select this option if you are connecting to this network only one time.
To disconnect from the current network:
1 From the Start menu, select Connect to.
2 In the Disconnect or Connect to another network dialog box, select the current network and click Disconnect.
3 In the Are You Sure? message box, click Disconnect again.
4 In the next dialog box, you can connect to another network or click Close to complete the disconnect procedure.
Connecting a Windows XP Computer with Built-in Wireless Capabilities
1 On your Windows desktop, click the Wireless Network Icon in the System Tray. 2 Windows will automatically scan for available wireless networks in your area. Any compatible networks within range will appear in the Available networks list. Double-click the Wireless Network Name (SSID) you gave your wireless network in Step 4 of the Setup Wizard. If you did not change the Wireless Network Name (SSID), select the default name Zoom.
- If you enabled security in Step 4 of the Setup Wizard, enter the security key in the next dialog box and click Connect.
- Otherwise if your desired network is unsecured, in the message box select Connect Anyway.
When you click on the wireless network option box, Windows will scan for available networks. More than one wireless network may appear in the list. These are other wireless networks that are within range of your network. Your neighbors, for instance, may be within range of your network. Each wireless network has a channel associated with it. We recommend there be at least a five-channel difference between your network and those of your neighbors. Having less than a five-channel difference may result in interference with your connection. By default, the Wireless-N Router uses channel 10. If you need to change this channel, you must do so using the Wireless Setup page of the Zoom Configuration Manager. For instructions on how to log in to the Zoom Configuration Manager, see page 10. After logging in, select Wireless from the left-hand menu. On the Wireless page you can select a new channel from the drop-down menu.
To disconnect from the current network:
1 On your Windows desktop, click the Wireless Network Icon in the System Tray.
2 Click View Wireless Networks button.
3 Select your Wireless Security Name. And click on Disconnect.
Connecting a Macintosh OS X Computer with Built-in Wireless Capabilities
1 Click the Wi-Fi icon in the menu bar. If the Wi-Fi icon does not appear on your menu bar, please refer to your built-in documentation on how to enable wireless.
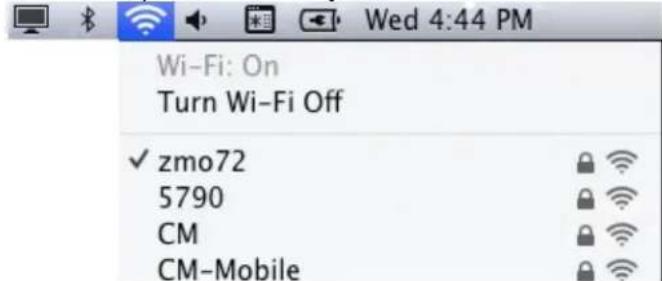
Note: On versions prior to OS 10.7 the Wi-Fi icon is called AirPort.
2 Select the Wireless Network Name (SSID) you gave your wireless network in Step 4 of the Setup Wizard. If you did not change the Wireless Network Name (SSID),
select the default name Zoom.
- If you enabled security in Step 4 of the Setup Wizard, enter the wireless security key you created in Step 4 when you are prompted for the password in the next dialog box. Click OK to connect to your router.
More than one wireless network may appear in the list. These are other wireless networks that are within range of your network. Your neighbors, for instance, may be within range of your network. Each wireless network has a channel associated with it. We recommend that if possible there be at least a five-channel difference between your network and those of your neighbors. Having less than a five-channel difference may result in some interference with your connection. By default, the Wireless-N Router uses channel 10. If you need to change this channel, you must do so using the Wireless Setup page of the Zoom Configuration Manager. For instructions on how to log in to the Zoom Configuration Manager, see page 10. After logging in, select Wireless from the left-hand menu. On the Wireless page you can select a new channel from the drop-down menu.
To disconnect from the current network:
1 Click the Wi-Fi icon on the menu bar.
2 Select Turn Wi-Fi Off (OS 10.7 or later) or Turn AirPort Off (OS versions prior to 10.7) to disconnect from the router.
Connecting a Wireless-enabled Computer or Device (including the iPhone or other cellular phones, the iPod Touch, etc.) to the Wireless-N Router
1 Go to the wireless-enabled computer or device that you want to add to the network. The device should have software that will let it perform a site search to scan for available wireless networks in your area. You may have to click on something like Settings and then Wi-Fi. When the Wireless Security Name (SSID) that you gave the Wireless-N Router Step 4 of the Setup Wizard. If you did not change the Wireless Network Name (SSID) select the default name Zoom. Select it as the network you want to use to connect to the Internet.
If you enable security in step 4 of the Setup Wizard enter the security key when prompted by your device.
Tip!
If you need help, refer to the documentation that came with your wireless device.
There are several site scan issues you should be aware of:
More than one wireless network may appear in the list. These are other wireless networks that are within range of your network. Your neighbors, for instance, may be within range of your network. Each wireless network has a channel associated with it. We recommend there be at least a five-channel difference between your network and those of your neighbors. Having less than a five-channel difference may result in interference with your connection. By default, the Wireless-N Router uses channel 10. If you need to change this channel, you must do so using the Wireless Setup page of the Zoom Configuration Manager. For instructions on
how to log in to the Zoom Configuration Manager, see page 10. After logging in, select Wireless from the left-hand menu. On the Wireless page you can select a new channel from the drop-down menu.
2 Test your wireless connections. From each computer or device that you set up, open your Web browser (for instance, Internet Explorer, Firefox, or Chrome) and try to connect to a familiar Web address.
If you connect successfully, you are ready to browse the Web!
To disconnect from the current network:
1 On your wireless device or computer, find the wireless network connection option (similar to the process of adding your device or computer to the network).
2 Click or highlight Zoom.
3 Select or click on Disconnect or similarly-named button.
Connecting a Computer with a Wireless adapter to the Wireless-N Router
1 Go to the computer that is set up with a wireless adapter that you want to add to the network. The computer should have software that will let it perform a site search to scan for available wireless networks in your area. When the Wireless Network Name (SSID) that you set in step 4 of the Setup Wizard of your Wireless-N Router's wireless network appears in the list select it as the network you want to use to connect to the Internet. If you did not change the Wireless Network Name (SSID) in step 4 select the default name Zoom.
Tip!
For most wireless adapters, you will use its wireless configuration manager software and click a Scan button or select a Site Scan, Scan Networks, or other similarly named tab to do a site search. If you need help, refer to the documentation that came with your wireless adapter.
There are several site scan issues you should be aware of:
If you are trying to connect to a wireless network that already has security enabled, your wireless adapter might not recognize what type of security is on the network. You may need to manually set up the security for your adapter. If you need help, refer to the documentation that came with your wireless adapter.
Windows 7, XP, and Vista users: If you installed a wireless adapter on a Windows 7, XP, or Vista computer, Windows may try to automatically configure the adapter (rather than let you use the software provided with the wireless adapter). You will know this is happening because you will be prompted with a message about one or more wireless networks being available. You will also be able to click a link to open the Wireless Network Connection Properties dialog box. If this happens, click the link, clear the Use Windows to configure my wireless network settings check box, and then click OK. You can then use the software provided with your wireless adapter without interruption from Windows.
➢ More than one wireless network may appear in the list. These are other wireless networks that are within range of your network. Your neighbors, for instance, may be within range of your network. Each wireless network has a channel associated
with it. We recommend there be at least a five-channel difference between your network and those of your neighbors. Having less than a five-channel difference may result in interference with your connection. By default, the Wireless-N Router uses channel 10. If you need to change this channel, you must do so using the Wireless Setup page of the Zoom Configuration Manager. For instructions on how to log in to the Zoom Configuration Manager, see page 10. After logging in, select Wireless from the left-hand menu. On the Wireless page you can select a new channel from the drop-down menu.
2 Test your wireless connections. From each desktop or notebook computer that you set up, open your Web browser (for instance, Internet Explorer or Firefox) and try to connect to a familiar Web address.
If you connect successfully, you are ready to browse the Web!
To disconnect from the current network:
1 On your computer that has a wireless adapter, find the wireless network connection option (similar to the process of adding your computer to the network).
2 Click or highlight the Wireless-N Router's Wireless Security Name.
3 Select or click on Disconnect or similarly-named button.
Setting up your Network using WPS
If all the wireless devices you plan to connect to your network support Wi-Fi Protected Setup (WPS), you can use WPS to connect and secure your devices in one step. To use WPS follow the instructions below.
Note: WPS configures one client device at a time. Please repeat the configuration method for each client on your wireless network that supports WPS security.
Configuration Methods
WPS offers three configuration methods. Choose the method that is compatible with the hardware and software options available on your “client device,” which is the device you’re connecting wirelessly to the Wireless-N Router.
Method One
Use this method if your client device has a WPS button. This button can be either a physical button on the unit or a software button in its application.
1 Press the WPS button on your Wireless-N Router and hold it in for six (6) seconds until the Wireless Light starts blinking rapidly.
Important! The Registrar (the device configuring the WLAN) goes into the WPS mode and the Enrollee (the device joining the WLAN) then looks for it. You should always start the Registrar first. By default your Wireless-N Router is configured as a Registrar.
2 Click or press the WPS button on the client device.
3 Refer to your client device's documentation for further instructions, if necessary.
Method Two
Use this method if your client device already has a WPS PIN number. The client is the Enrollee.
4 If you haven't already done so, open a Web browser and type http://192.168.2.1 in the address bar.
a When the Configuration Manager launches, log in as admin, then select Advanced > Basic Settings > Wireless to open the Wireless Setup page.
b Click the WPS Setup button to open the Wi-Fi Protected Setup page.
c Select PIN Code from the Config Method dropdown menu.
d Enter the PIN number from your client device.
e Click Trigger to start the connection process on the router.
Important! You must do this within two minutes after starting the router.
f On the Wireless-N Router, when the program displays a message that the process succeeded, click Save to save the configuration
Method Three
Use this method if your client device requests the router's PIN number. The client is the Registrar. Use this method if the client(s) are to connect to multiple access points so that a client will control the configuration instead of the router.
1 If you haven't already done so, open a Web browser and type http://192.168.2.1 in the address bar.
a When the Configuration Manager launches, log in as admin, then select Advanced > Basic Settings > Wireless to open the Wireless Setup page.
b Click the WPS Setup button.
c Select Enrollee from the Config Mode dropdown menu.
d Click Generate Pin to generate a new Pin number.
e Enter the router's Pin Number into your client device. Refer to your client's documentation for further details.
Important! You must do this within two minutes after starting the router.
f Click Trigger to start the connection process on the router.
g On the router, when the program displays a message that the process succeeded, click SET to keep the router from receiving new configuration parameters from another WPS Registrar.
h Click Save to save the configuration.
Configuring Wireless Security Manually
Note: Most users will not need to read this chapter. Most users either use the Wireless-N Router's default settings ("no wireless security") or use the Setup Wizard described in Chapter 2 to set wireless security.
We recommend you set WPA2/WPA security unless you know that you will be connecting devices to your network that support only WEP. If you know you have some devices that only support WEP, go to WEP Configuration on page 40. Otherwise continue to WPA2/WPA Configuration.
WPA2/ WPA Configuration
Wi-Fi Protected Access (WPA) is an encryption method that offers a stronger security standard than WEP.
Important! If you choose to configure your router using either WPA2 or WPA encryption, then you must configure all devices on your wireless network with the same WPA encryption method and shared key.
You can configure WPA2 or WPA encryption using the Wireless Setting Page of the Configuration Manager's Advanced program.
1 Turn on your computer and router, then launch the computer's Web browser.
2 In the Web browser address bar, type the router's default IP address, http://192.168.2.1 and then press Enter.
When the MAIN MENU opens for the first time, it displays a System Status page that summarizes the current settings and values for your system.
3 On the Toolbar, type admin (the default password) in the System Password field, then click Login.

4 When you log in, the Configuration Manager opens. Select Advanced from the Administrator's Main Menu bar then click Wireless on the left hand menu.
![ADMINISTRATOR's MAIN MENU Status Wizard Advanced Logout BASIC SETTINGS FORVARDING RULES SECURITY SETTINGS ADVANCED SETTINGS TOOLBOX Basic Setup DHCP Server Wireless Change Password Wireless Setting [ HELP ] Item Setting Wireless Module Enable Disable Wireless Network Name (SSID) Zoom SSID Broadcast Enable Disable Channel 10 Wireless Mode B/G/N mixed Authentication WPA-PSK / WPA2-PSK 802.1X Enable Disable Encryption TKIP / AES Security Key Save Undo WDS Setting... WPS Setup... Wireless Client List... Wireless Advanced Setting](/content/2026/05/959275/images/4d327a63eebd768ba0c4c1bef351fb6bf429f0d968a2f24ccd12537cb16bd131.jpg)
5 In the Authentication drop down bar select WPA – PSK/WPA2 – PSK. If you know all your devices support WPA2-PSK you can select it instead.
6 In the Security Key field enter a value for the key. The maximum value is 64 characters. The minimum value is 8 characters.
7 Write down the wireless security key and put it where you can find it – on the bottom of the Wireless-N Router case, for instance.
8 Click Save.
9 Now you need to set up each of your wireless devices with the Security Key that you entered. See Establishing your Wireless Network on page 28 for instructions on connecting devices to the Wireless-N Router.
WEP Configuration
Wired Equivalent Privacy (WEP) is a basic encryption method that does not offer the security strength of WPA or WPA2. Use this method only if some of your network's wireless devices, such as a gaming console, do not support WPA2/WPA.
Important! If you choose to configure your router using WEP encryption, then you must configure all devices on your wireless network with the same WEP encryption method and key.
You can configure WEP encryption using the Wireless Setting Page of the Configuration Manager's Advanced program.
1 Turn on your computer and router, then launch the computer's Web browser.
2 In the Web browser address bar, type the router's default IP address,
http://192.168.2.1 and then press Enter.
When the MAIN MENU opens for the first time, it displays a System Status page that summarizes the current settings and values for your system.
3 On the Toolbar, type admin (the default password) in the System Password field, then click Login.

4 When you log in, the Configuration Manager opens. Select Advanced from the Administrator's Main Menu bar then click Wireless on the left hand menu.
![ADMINISTRATOR'S MAIN MENU Status Wizard Advanced Logout BASIC SETTINGS FORWARDING RULES SECURITY SETTINGS ADVANCED SETTINGS TOOLBOX Basic Setup DHCP Server Wireless Change Password Wireless Setting [HELP] Item Setting ► Wireless Module Enable Disable ► Network ID(SSID) Zoom ► SSID Broadcast Enable Disable ► Channel 10 ► Wireless Mode B/G/N mixed ► Authentication WEP - Auto ► 802 1X Enable Disable ► Encryption WEP ● WEP Key 1 HEX ○ WEP Key 2 HEX ○ WEP Key 3 HEX ○ WEP Key 4 HEX Save Undo WDS Setting... WPS Setup... Wireless Client List...](/content/2026/05/959275/images/ddcd1c3bf93b02d2fdac10da24784c50b4e487a8fa5912c1ee7fce29f21ef452.jpg)
5 In the Encryption drop down bar select WEP.
6 In the WEP KEY 1 box you have the choice of entering either a 64-bit key or a 128-bit key. If you want to use a 64-bit key enter 10 hex characters. (Hex characters are the numbers 0-9, and the characters A-F.) If you want to use a 128-bit key enter 26 Hex characters. A 64-bit key provides slightly faster performance while a 128-bit key provides slightly better security. We recommend using a 64-bit key.
7 Write down this key and put it where you can find it – on the bottom of the Wireless-N Router case, for instance.
8 Click Save
9 Now you need to set up each of your wireless devices with the Key that you entered. See Establishing your Wireless Network on page 28 for instructions on connecting devices to the Wireless-N Router.
If you want to use the Advanced configuration program to tailor the router's configuration to your needs, for example, to set up a Virtual Server or DMZ so that your games or gaming consoles can access the Internet through your router's firewall, please continue to Chapter 5: Using the Configuration Manager's Advanced Program. (Most users will not need to do this).
Your router's setup is complete. Congratulations!
5
Using the Configuration Manager's Advanced Program
Most users will not need to manually set up their router. In the unlikely event that you do, you can use the Configuration Manager's Advanced program to change the router's default settings.
This chapter includes:
- Suggestions for settings that you might want to change
- A brief description of the online and context-sensitive help that is available
• Instructions for launching the Advanced program - An overview of the available configuration menus and settings
Changing Default Settings
Here are some reasons why you might want to use the Advanced program to change the router's default settings.
You want to connect the router to your ADSL or cable modem, using your Mobile Broadband modem as a backup Internet connection. See Using your 3G modem as a backup on page 44.
You want to block access to certain URLs or set up Scheduling usage rules. See The URL Blocking Page on page 57 and The Schedule Rule and Schedule Rule Setting Pages on page 67 for details.
You want to hide the SSID name so other network users cannot see your wireless network. See The Wireless Setting Page on page 45 for details.
You want to change router settings to establish a firewall to guard against unauthorized access to your network. See The MAC Address Control Page on page 59 for details.
You want to set up a Virtual Server or DMZ so that your games or gaming consoles can access the Internet through your router's firewall. See Configuring Forwarding Rules on page 48 for details.
You want your Mobile Broadband connection to be terminated by the router if you haven't used the Internet for a specified period of time. The default setting is Auto Reconnect (always on). See The Basic Setup Page (Connection Control) on page 42 for details.
You want to set up QoS on your router. See The QoS Page on page 63 for details.
You want to back up router settings that you made using the Configuration Manager. See The Backup Setting Dialog on page 71 for details.
Online Help
The Advanced program provides both online and context-sensitive help that guides you in changing the settings on each menu.
To access online help, click [HELP] on the menu's Toolbar. Each [HELP] page describes the fields on the active page and, when applicable, the required or recommended entries.
The context-sensitive help automatically displays a question mark to the right of the cursor, then opens a message box in the left pane of the page. The message box contains text that describes the active field and its required or recommended entry.
Launching the Configuration Manager's Advanced Program
1 If you haven't already done so, plug the supplied Ethernet cable into an Ethernet port on the router's back panel and into your computer's Ethernet port.
2 Turn on your computer and router, then launch your Web browser.
3 In the Web browser address bar, type the router's default IP address, http://192.168.2.1 and then press Enter to launch the Configuration Manager. When the Configuration Manager's MAIN MENU opens, it displays a Status page that summarizes the basic settings and current values for your setup.
4 On the Toolbar, type the login password -- admin is the default password -- in the System Password field, and then click Login.

5 Click Advanced on the Toolbar to launch the Advanced program.

6 On the Basic Settings page, click one of the Toolbar buttons (Basic Settings, Forwarding Rules, Security Settings, Advanced Settings, or Toolbox).
The corresponding window opens. Each window contains a description of the configuration options at center and a configuration menu on the left pane.
Configuring Basic Settings
The Basic Settings page lists the four configuration menus on the left pane and
provides a description of the configuration menus at center.
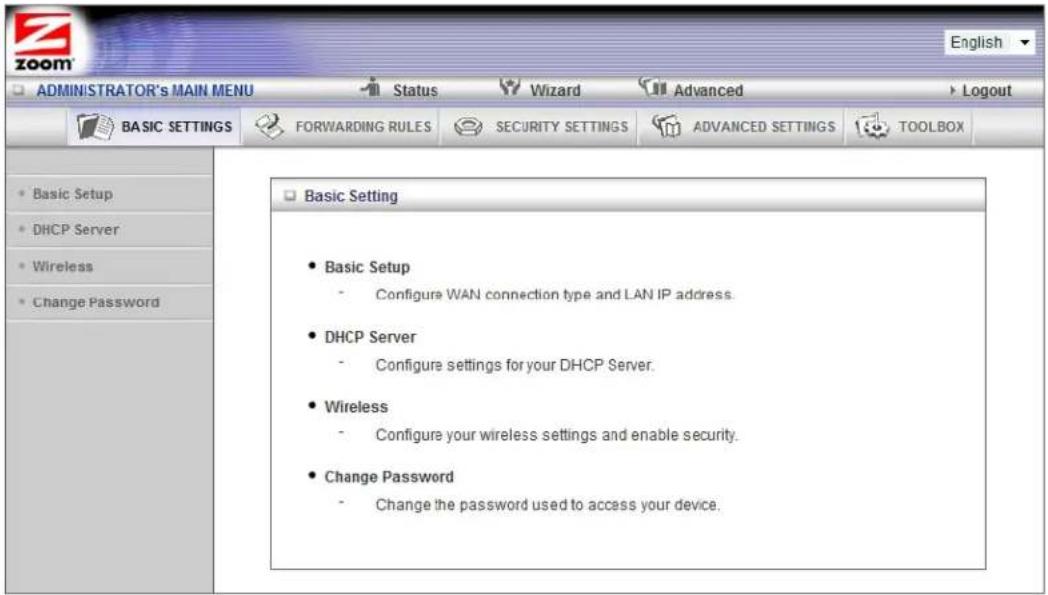
The Basic Setup Page
You can use the Basic Setup page to configure your LAN and WAN setup.
Note: The following image depicts the fields that the program displays when 3G is selected as the WAN Type. The fields will differ for each WAN Type. See the online help for a description of each WAN Type and its corresponding fields. If you want to use a 3G modem as a backup to your cable or ADSL modem, go to Using your 3G modem as a backup on page 44.
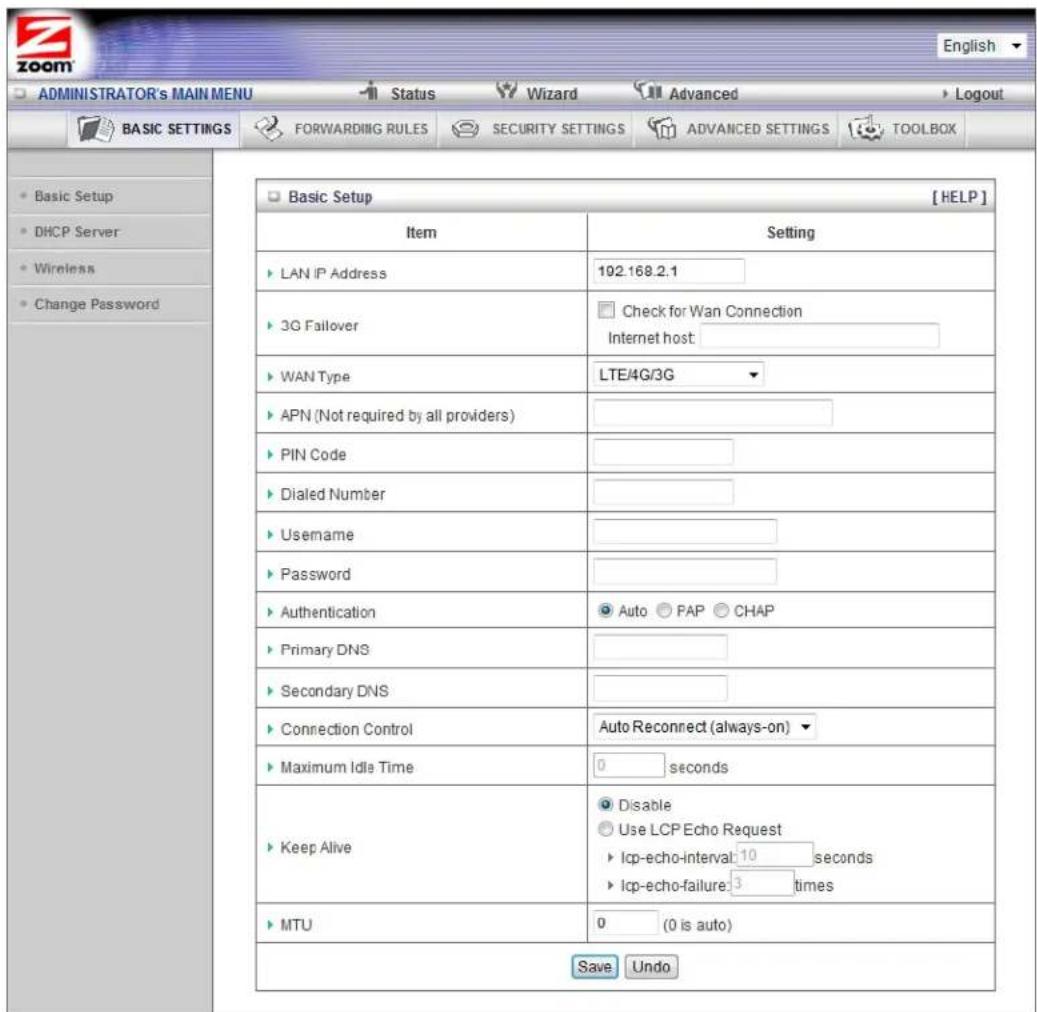
LAN IP Address
The local IP address of the router. 192.168.2.1, by default. All wireless or wired devices on your network must use the LAN IP address of your router as their default gateway.
3G Failover
See Using your 3G modem as a backup on page 44 for instructions on using 3G Failover.
WAN Type
Set to LTE/4G/3G, by default. You can choose another option from the dropdown menu, based on the WAN connection type that your service provider supports.
APN, PIN Code, Dialed Number, Username and Password
Identifiers assigned by some service providers, if needed. If you do not know these values, please refer to Appendix A: Mobile Broadband Settings for a list of many wireless service providers' settings. You may also want to refer
to http://www.zoomtel.com/mbsettings.
Authentication
Set to Auto, by default. Optionally, click Password Authentication Protocol (PAP), or Challenge Handshake Authentication Protocol (CHAP), if supported by your service provider.
Primary DNS and Secondary DNS
IP address of the Domain Name Servers. These addresses are provided by your service provider.
Connection Control
Specifies the method for connecting or disconnecting the WAN session based on network activity. Auto Reconnect (always on) is the default. Other options are Connection-on-Demand or Manually.
Maximum Idle Time
Specifies the duration (in seconds) of inactivity before the device disconnects. The default is 0, which disables this feature.
Keep Alive
Disabled by default. Select LCP Echo Request to keep the connection alive.
MTU
Sets the MTU (Maximum Transmission Unit). Most users should use the default value of 0. The router selects the MTU size when set to 0.
Using your 3G modem as a Backup
You can use the Wireless-N Router and your mobile broadband modem to provide Internet access if your DSL or Cable service stops working.
Note: To use this feature you must have a 3G modem installed.
To set up the 3G Failover, follow the instructions below:
1 You should have already set up your cable or DSL modem using the built in Setup Wizard. If not, see Launching the Configuration Manager's Setup Wizard on page 12.
2 Select Basic Settings from the Configuration Manager's Advanced Page. See Launching the Configuration Manager's Advanced Program on page 41 if you don't know how to access the Advanced setting page.
3 On the Basic Setup page click the Check for Wan Connection box.
4 Enter an IP address in the Internet host textbox. This is the IP address that the router will ping to verify that your DSL or Cable connection is active. (We recommend using your Domain Name Server for this purpose.) To get the IP address of your Domain Name server:
a Go to the Status page from the Zoom Configuration Manager. Locate the Domain Name Server.
b In the WAN Status column, copy one of the displayed IP addresses (either the primary or secondary DNS IP address).
c From the Configuration Manager, click on Advanced and then Basic Setup and paste the IP address into the Internet host textbox.
5 Click Save.
The DHCP Server Page
You can use the DHCP Server page to configure your DHCP server. If you want to change the default values, please click [HELP], which opens a page that describes each item and the recommended values.
![ADMINISTRATOR'S MAIN MENU Status Wizard Advanced Logout BASIC SETTINGS FORWARDING RULES SECURITY SETTINGS ADVANCED SETTINGS TOOLBOX DHCP Server [HELP] Item Setting DHCP Server Disable Enable IP Pool Starting Address 100 IP Pool Ending Address 200 Lease Time 86400 Seconds Domain Name Save Undo More>> Clients List Fixed Mapping](/content/2026/05/959275/images/fe006c43bc20ae223a455b4ead33ab4a60cf3de9134d638a90f4e2c8db37cdbd.jpg)
The Wireless Setting Page
You can use the Wireless Setting page to configure your wireless LAN setup. If you want to change the default values, please click [HELP], which opens a page that describes each item and the recommended values.
![ADMINISTRATOR'S MAIN MENU Status Wizard Advanced Logout BASIC SETTINGS FORWARDING RULES SECURITY SETTING ADVANCED SETTING TOOLBOX Basic Setup DHCP Server Wireless Change Password Wireless Setting [ HELP ] Item Setting Wireless Module Enable Disable Wireless Network Name (SSID) Zoom SSID Broadcast Enable Disable Channel 10 Wireless Mode B/G/N mixed Authentication WEP - Auto 802.1X Enable Disable Encryption None Save Undo WDS Setting... WPS Setup... Wireless Client List... Wireless Advanced Setting](/content/2026/05/959275/images/9e534103ba87fc97590d661bf176dc83350fd5c2b3c92f1fd73197e041eab5da.jpg)
Wireless Module
Accept the default, Enable. Click the Disable checkbox only if you do not want wireless clients to access your network.
Wireless Network Name(SSID)
Refers to the Service Set Identifier for your device. By default, the SSID for the Wireless-N Router is Zoom. You can change the SSID to a name of your choice. The SSID can be up to 32 alphanumeric characters. If you change the name, make sure that all devices on your network use the new SSID as the access point.
SSID Broadcast
To hide your network's SSID name, which disables automatic broadcasting of the SSID and makes the wireless access point (your router) invisible to wireless clients on the network, click the Disable radio button.
Channel
Refers to the wireless network channel used by your Router. By default, the Wireless-N Router uses channel 10.
Wireless Mode
Accept the default, B/G/N mixed if the client devices on your network use various wireless standards. Otherwise, select the wireless standard used by all wireless devices on your network. Having a single standard will speed up the wireless throughput.
Authentication
Select an Authentication method for all devices on your wireless network. If you are using gaming devices that require WEP, then you must configure all devices with this method.
For WEP Authentication:
You can accept the default, WEP-Auto or select one of the available options. Select WEP-Open to use Open System authentication. Select WEP-Shared to use Shared Key authentication.
For WPA-PSK/WPA2-PSK Authentication:
You can select WPA-PSK/WPA2 PSK if your devices support both authentication methods. Optionally, select WPA-PSK or WPA2-PSK if all devices on your network support only one of these authentication methods.
Encryption
Select an Encryption method that corresponds to the Authentication method that you chose.
If you chose a WPA-PSK/WPA2-PSK Authentication method:
Accept TKIP/AES encryption (the WPA-PSK/WPA2-PSK default), which supports dynamic encryption keys using TKIP or AES algorithms, or choose one of the other options.
Select AES if you chose WPA2-PSK for the authentication method.
Select TKIP if you chose WPA-PSK for the authentication method.
In the Security Key field, enter a 8 to 64 character key.
If you chose a WEP Authentication method:
S e l e c t WEP.
Key Format
We recommend using Hex because not all Ascii keys are compatible. Hex keys use the numbers 0-9 and the letters A-F.
Encryption WEP Key 1, 2, 3, 4
If you selected Hex format and you chose a 128-bit key length, 26 hexadecimal values are required. Write the 26-hexadecimal key in the space below for future reference, and then enter it in the Key 1 box.
If you selected Hex format and you chose a 64-bit key length, 10 hexadecimal values are required. Write the 10-hexadecimal key in the space below for future reference, and then enter it in the Key 1 box.
If you selected ASCII format, and you chose a 128-bit key length, 13 ASCII characters are required. Write the 13-ASCII-character key in the space below for future reference, and then enter it in the Key 1 box.
If you selected ASCII format, and you chose a 64-bit key length, 5 ASCII characters are required. Write the 5-ASCII-character key in the space below for future reference, and then enter it in the Key 1 box.
Click WPS Setup to launch the WiFi Protected Setup (WPS) Setup program. For instructions, please refer to WPS Configuration on page 34.
The Change Password Page
You can use this page to change your login password. To view or change configuration settings, you must enter a password. Your router has a default password (admin) that was set by the factory and that you used to access the Configuration Manager initially. To safeguard your configuration, particularly if you make changes, we recommend that you change the login password.
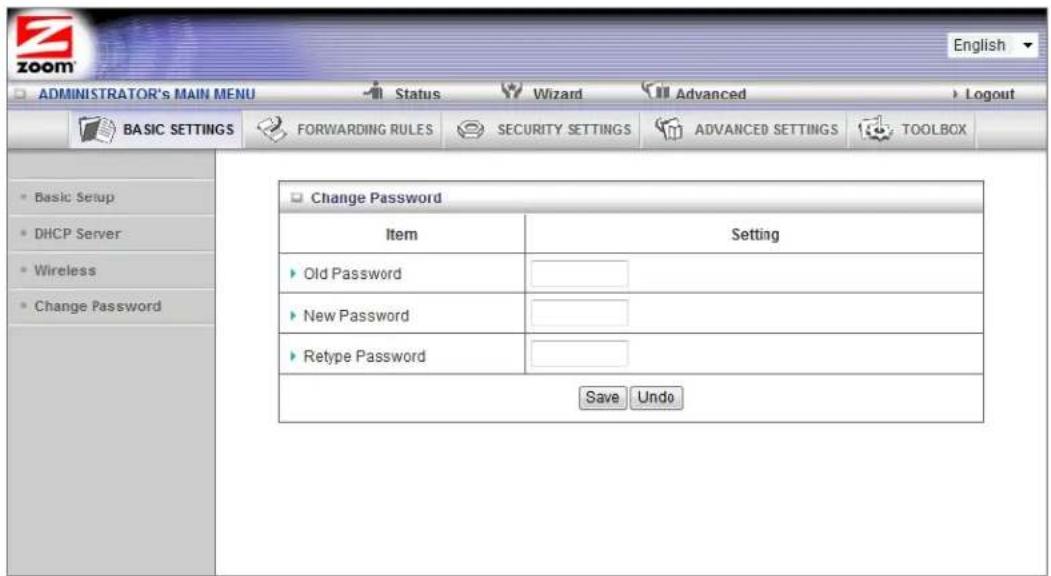
Note: If you forget the new password, you won't have access to the Configuration Manager and will need to restore the device to its factory settings thus losing any changes you made to your router's configuration. To avoid this problem, we recommend that you write the new password and save it in a convenient location.
Configuring Forwarding Rules
If you are using your router for gaming, you may need to make changes to the router's firewall setting for the game to work. This is done by setting up a DMZ or virtual server, or using port triggering so that the modem's firewall won't block the other players from your system during your gaming. The main difference between the three methods is the amount of access someone has to your system.
A virtual server will allow access to your computer or gaming station on certain ports. A port is a channel that is used by applications (such as games) for communication. For example, the directions for the game you want to play over the Internet might tell you to open up port 6000.
Port triggering works by sensing when data is sent out on the predetermined outgoing port and then automatically opening up the corresponding incoming port(s). It will automatically forward the traffic on the incoming port to the computer that accessed the outgoing port. If your game uses one port to send outgoing data and a different port (or ports) for incoming data, you may want to use port triggering. The advantage of port triggering is that it is more secure than setting up a virtual server since the incoming port is only open when you are using it, and since it tracks which computer sent the outgoing data. Port triggering can also be easier to set up because you do not need to know the IP address of your gaming station. The disadvantage of port triggering is that only 1 host can be accessing the port at one time, so if you have two computers or game stations playing the same game on your network you will need to use a virtual server or DMZ.
A DMZ differs from a virtual server in that it allows access on all ports of the computer. Because of this, DMZ's are less secure and should be used with caution on your computer. However DMZ's work well with your gaming stations since security is not as much of an issue for gaming stations as it is for computers.
Some games support UPnP. If your game supports UPnP then you do not need to set any forwarding rule since UPnP will automatically set up the router to work with the game.
You can use the Forwarding Rules page to configure the options mentioned above, for allowing access to devices behind your router.
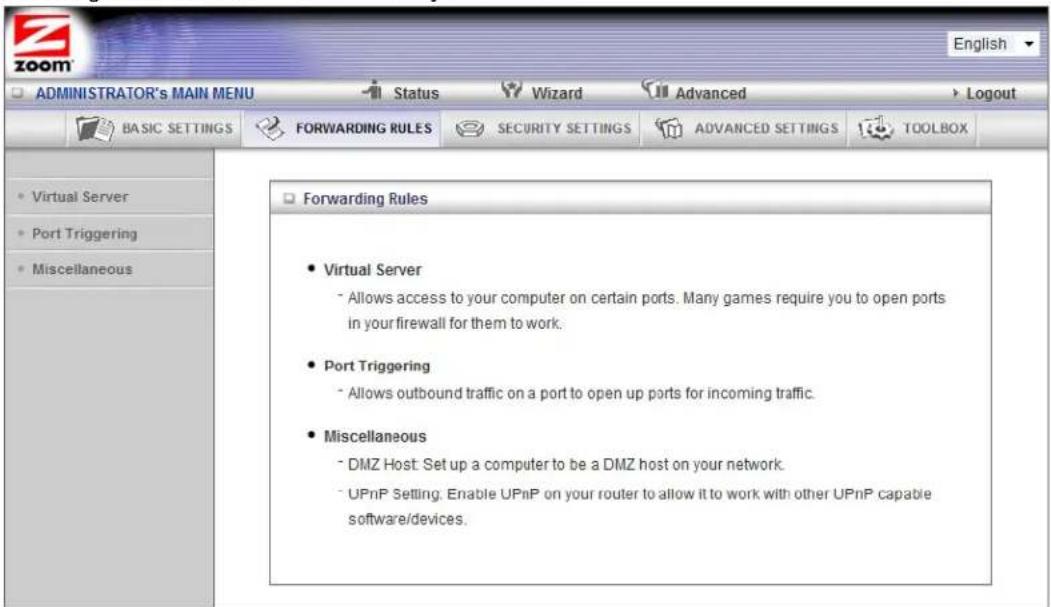
The Virtual Server Page
You can use the Virtual Server page to configure a virtual server.
Because your router's firewall filters out unrecognized packets to protect your network, all computers behind this product are invisible to the outside world. If you want, you can make some of them accessible by enabling Virtual Server mapping.
A virtual server will allow access to your computer on certain ports. A port is like a channel that is used by applications (such as games) to communicate on. For example, the directions for the game you want to play over the Internet might tell you to open port 6000.
![ADMINISTRATOR's MAIN MENU Status Wizard Advanced Logout BASIC SETTINGS FORWARDING RULES SECURITY SETTINGS ADVANCED SETTINGS TOOLBOX Virtual Server Port Triggering Miscellaneous Virtual Server [ HELP ] Common services --select one -- Copy to ID Service Ports Server IP Protocol Enable Use Rule# 1 Both (0) Always 2 Both (0) Always 3 Both (0) Always 4 Both (0) Always 5 Both (0) Always 6 Both (0) Always 7 Both (0) Always 8 Both (0) Always 9 Both (0) Always 10 Both (0) Always Save Undo](/content/2026/05/959275/images/7d8daddb4901a75d68bcda032d8f708e8d88e5b791e05c4c2ccc73e56e9f3653.jpg)
Common Services
This drop down menu lists some common games and applications. If your game or application is on the list select it as well as the next open ID. Click Copy to and the router will configure the Virtual Server settings for you.
Service Ports
This is the port number you want to allow access to your computer on. To enter multiple ports use the dash format; for example, 2004-2009.
Server IP
This is the IP Address of the computer or gaming device that you want to allow access to. If you do not know the IP address you can look it up by selecting Basic Settings > DHCP Server, then clicking on Client List. To make this virtual server permanent, then you should set up a fixed mapping to your computer or gaming device on the DHCP Server page. Doing this ensures that your computer will keep the same IP address.
Protocol
Select UDP, TCP, or Both depending on what type of protocol your game or application uses.
Enable
Click to enable the Virtual Server
Use Rule#
You can enable your virtual server for certain periods of time by assigning it a Rule #. You must first set up the appropriate Scheduling Rule. See The Schedule Rule and Schedule Rule Setting Pages on page 67 for more information.
For example, if you have an FTP server (port 21) at 192.168.1.5, a Web server (port 80) at 192.168.1.6, and a game that requires port 5000 to be open at 192.168.1.7, then you need, at minimum, to specify the following mapping.
| ID Service | Port Server IP | Enable | |
| 1 | 21 | 192.168.1.5 | Yes |
| 2 | 80 | 192.168.1.6 | Yes |
| 3 | 5000 | 192.168.1.7 | Yes |
The Port Triggering Page
Port triggering opens an incoming port when your computer is using a specified outgoing port for specific traffic. This provides a way for you to automate setting up a Virtual Server with some applications. You can use the Port Triggering page to configure which packets are allowed access.
![ADMINISTRATOR's MAIN MENU Status Wizard Advanced Logout BASIC SETTINGS FORWARDING RULES SECURITY SETTINGS ADVANCED SETTINGS TOOLBOX Virtual Server Port Triggering Miscellaneous Port Triggering [HELP] Popular applications -- select one -- Copy to ID -- ID Trigger Incoming Ports Enable 1 ______________________________ 2 ______________________________ 3 ______________________________ 4 ______________________________ 5 ______________________________ 6 ______________________________ 7 ______________________________ 8 ______________________________ Save Undo](/content/2026/05/959275/images/3595b388ec00c0982be6268973999ac284f8557365ebf019430a30e250ffc3a1.jpg)
Trigger
The outbound port number used by the application.
Incoming Ports
When the trigger packet is detected on the outbound port, the inbound packets sent to the specified port numbers are allowed to pass through the firewall.
Enable
Enables access for the specified application.
Popular applications
Provides a menu of applications from which to choose.
Select an application and click Copy to to add the application to your list.
Click Save to store your selection or Undo to remove the entry.
![ADMINISTRATOR'S MAIN MENU BASIC SETTINGS FORWARDING RULES Security SETTINGS ADVANCED SETTINGS TOOLBOX Virtual Server Port Triggering Miscellaneous Port Triggering [ HELP ] Popular applications -- select one -- -- select one -- ID Trigger Eattle.net Dialpad (ICU II MSN Gaming Zone FC-to-Phone Quick Time 4 ing Ports Enable 1 2 3 4 5 6 7 8 Save Undo](/content/2026/05/959275/images/1cf6adcb520a5c03e5b8a0a491aaf9e5eb7a9631cabea35f6e0174d3effce86d.jpg)
The Miscellaneous Page
The Miscellaneous Page lets you set up and enable a DMZ Host on your network, and enable UPnP settings for software and devices. In this way, specific ports can open for incoming traffic that must pass through your firewall. You can also enable IGMP on this page in the unlikely event that your service provider is using it.
![ADMINISTRATOR's MAIN MENU Status Wizard Advanced Logout BASIC SETTINGS FORWARDING RULES SECURITY SETTINGS ADVANCED SETTINGS TOOLBOX Virtual Server Port Triggering Miscellaneous Miscellaneous Items [HELP] Item Setting Enable Set IP Address of DMZ Host UPnP setting Save Undo](/content/2026/05/959275/images/7f636c47930933f585e3be2d612ccf5facb17b64bc15c798868145c5a16fe0dd.jpg)
Set IP Address of DMZ Host
A DMZ (Demilitarized Zone) Host is a host without the protection of the firewall. It allows a computer or gaming system to be exposed to unrestricted two-way communication for Internet games, video conferencing, Internet telephony and other special applications. Use caution when using a DMZ because your firewall no longer protects the computer that is set up as a DMZ.
If you do not know the IP address of the computer or gaming system you can look it up by selecting Basic Settings > DHCP Server, then clicking on Client List. To make this virtual server permanent, then you should set up a fixed mapping to your computer or gaming device on the DHCP Server page. Doing this ensures that your computer will keep the same IP address.
UPnP setting
This feature is enabled by default. Games and applications that are UPnP compatible will automatically open ports for you on your router.
Configuring Security Settings
The Security Setting page lists the configuration menus on the left pane and provides a description of the configuration menus at center.
Status Page
The Status page shows you the status of the inbound and outbound Packet Filters and the Domain Filters. Inbound, Outbound, and Domain filters are disabled, by default.
![ADMINISTRATOR's MAIN MENU Status Wizard Advanced Logout BASIC SETTINGS FORWARDING RULES SECURITY SETTINGS ADVANCED SETTINGS TOOLBOX Outbound Filter [Modify] Item Status Outbound Filter Disable Local Client Only Deny Remote Host Service Working Time Inbound Filter [Modify] Item Status Inbound Filter Disable Remote Host Deny Remote Host to access Service Working Time Domain Filter [Modify] Item Status Domain Filter Disable Domain Access All other Domains Yes Refresh](/content/2026/05/959275/images/65510cc22e7a23fdbd349a4714b9cb3f455bd728be6bd99a612912ae539bf845.jpg)
Packet Filtering Page
Packet Filtering allows you to control what packets are allowed to pass through the router. Outbound Packet filters control outbound packets and Inbound Filtering controls packets coming from the Internet. Inbound Filters applies only to packets going to a Virtual Server or DMZ. Most users will not need to setup Packet Filtering.
When you click on Packet Filters from the left-side menu, it takes you to the Outbound Packet Filtering page. If you need to set up an Inbound Filter, click on Inbound Filter button at the bottom of the page.
![ADMINISTRATOR'S MAIN MENU Status Wizard Advanced Logout BASIC SETTINGS FORWARDING RULES SECURITY SETTINGS ADVANCED SETTINGS TOOLBOX Outbound Packet Filter [HELP] Item Setting OutboundPacket Filter Enable Allow all traffic except those packets that match the following rules. Deny all traffic except those packets that match the following rules. ID Source IP Destination IP : Ports Enable Use rule# 1 [ ] [ ] [ ] (0) Always 2 [ ] [ ] [ ] (0) Always 3 [ ] [ ] [ ] (0) Always 4 [ ] [ ] [ ] (0) Always 5 [ ] [ ] [ ] (0) Always 6 [ ] [ ] [ ] (0) Always 7 [ ] [ ] [ ] (0) Always 8 [ ] [ ] [ ] (0) Always Save Undo Inbound Filter... MAC Level...](/content/2026/05/959275/images/74868d4934d3b5d750a572add3ef8d15f958833a8e4ef6f35b5a80eea1c7c7ab.jpg)
Filtering Policies
You can select one of the two filtering policies:
Allow all to pass except those that match the specified rules
Deny all to pass except those that match the specified rules
Filtering Rules
You can specify eight rules for each direction: inbound or outbound. For each rule, you can define the following:
Source IP address
Destination IP address
Destination Port
Use Rule#
For the Source or Destination IP address, you can define a single IP address (4.3.2.1). An empty field implies any IP address.
For Destination Port, you can define a single port (80) or a range of ports (1000-1999). No prefix indicates both TCP and UDP are defined. Leaving this empty implies that all port addresses apply.
Each Rule can be enabled or disabled individually.
You can use packet filters with scheduling rules for more access control flexibility.
The Domain Filters Page
You can use the Domain Filters page to enable or deny user access to specified URLs. Domain filtering and URL Blocking perform similar functions. The major difference between Domain Filtering and URL Blocking is that Domain Filtering requires the user to input a suffix whereas URL Blocking requires the user to input a keyword only. In other words, Domain Filtering can block a specific web site, whereas URL Blocking can block hundreds of web sites by specifying a keyword.
![ADMINISTRATOR'S MAIN MENU Status Wizard Advanced Logout BASIC SETTINGS FORWARDING RULES SECURITY SETTINGS ADVANCED SETTINGS TOOLBOX Status Packet Filters Domain Filters URL Blocking MAC Control VPN-L2TP Client VPN-PPTP Client Miscellaneous Domain Filter [HELP] Item Setting Domain Filter Enable Log attempted URL access Enable Privilege IP Addresses Range From To ID Domain Suffix Action Enable 1 ________ Drop Log 2 ________ Drop Log 3 ________ Drop Log 4 ________ Drop Log 5 ________ Drop Log 6 ________ Drop Log 7 ________ Drop Log 8 ________ Drop Log 9 ________ Drop Log 10 * (all others) Drop Log - Save Undo](/content/2026/05/959275/images/2768d5e938ffad18f4f0c621b9997d7db44f7d0f7d5dd85334cb88a0c25e6224.jpg)
Domain Filter
Use to prevent users behind this device from accessing specific URLs.
Log attempted URL Access
Check if you want to log the action when someone accesses the specific URLs.
Privilege IP Address Range
Domain filtering rules do not apply to IP addresses in this range.
Domain Suffix
The suffix of the restricted URL; for example, xxx.com.
Action
The action to be taken when a user accesses the restricted domain suffix URL. Check Drop to block access. Check log to record the attempted access.
Enable
Click the checkbox to enable a rule.
The URL Blocking Page
You can use the URL Blocking page to block LAN computers from connecting to pre-defined Web sites or to limit their access to specific websites. The major difference between Domain Filtering and URL Blocking is that Domain Filtering requires the user to input a suffix whereas URL Blocking requires the user to input a keyword only. In other words, Domain Filtering can block a specific web site, whereas URL Blocking can block hundreds of web sites by specifying a keyword.
![ADMINISTRATOR's MAIN MENU Status Wizard Advanced Logout BASIC SETTINGS FORWARDING RULES SECURITY SETTINGS ADVANCED SETTINGS TOOLBOX STATUS Packet Filters Domain Filters URL Blocking MAC Control VPN-LZTP Client VPN-PPTP Client Miscellaneous URL Blocking [HELP] Item Setting URL Blocking Enable Block Setting Blacklist Whitelist ID URL Enable 1 _________ 2 _________ 3 _________ 4 _________ 5 _________ 6 _________ 7 _________ 8 _________ 9 _________ 10 _________ Save Undo](/content/2026/05/959275/images/59177f15a97e247252b693da760c7a46c01eb467281ffede4ed7d8086d9ff718.jpg)
URL Blocking Enable
Check if you want to enable URL Blocking.
Block Setting
Select Blacklist to block access to any words or URLs that you specify. Select Whitelist to allow access only to the URLs that you specify.
URL
If any part of the Website's URL matches the pre-defined word, the connection will be blocked if Blacklist is set, or allowed if Whitelist is set. For
example, if you set up blacklisting, you can use the pre-defined word, sex, to block all website URLs that contain the pre-defined word, sex.
Enable
Click the checkbox to enable each rule.
The MAC Address Control Page
You can use the MAC Address Control page to provide an added layer of security to your Wireless-N Router. MAC Address control is used to define connection and association rights for clients whose IP and MAC addresses are specified. Click on the HELP button page for a detailed explanation including examples for setting up MAC address control.
![ADMINISTRATOR'S MAIN MENU Status Wizard Advanced Logout BASIC SETTINGS FORWARDING RULES SECURITY SETTINGS ADVANCED SETTINGS TOOLBOX Status Packet Filters Domain Filters URL Blocking MAC Control VPII-LZTP Client VPII-PPTP Client Miscellaneous MAC Address Control [HELP] Item Setting MAC Address Control Enable Connection control Wireless and wired clients with C checked can connect to this device; and allow unspecified MAC addresses to connect. Association control Wireless clients with A checked can associate to the wireless LAN; and allow unspecified MAC addresses to associate. DHCP clients -- select one -- Copy to ID -- ID MAC Address IP Address C A 1 ______ ______ ______ ______ ______ ______ 2 ______ ______ ______ ______ ______ ______ 3 ______ ______ ______ ______ ______ ______ 4 ______ ______ ______ ______ ______ ______ 5 ______ ______ ______ ______ ______ << Previous Next >> Save Undo](/content/2026/05/959275/images/feb7c0def08416217459bd9dc83b29f86b902faeeff7e57578f2115546246fbb.jpg)
MAC Address Control
Check Enable to enable MAC Address Control. All of the settings on this page will take effect only if Enable is checked.
Connection control
Check Connection control to specify which wired and wireless clients can connect to this device. If a client is denied a connection to this device, then that client is also defined Internet access. Choose allow or deny to indicate which clients can connect to this device.
Association control
Check Association control to specify which wireless clients can associate to the wireless LAN. If a client is not allowed to associate to the wireless LAN, then the client can't send or receive any data via this device. Choose allow or deny to indicate which clients can associate to the wireless LAN. If selected, the specified wireless client will obtain any radio connection to the access point.
DHCP clients
Displays a list of computers that are currently connected to the router. Select a client from the menu then copy to the selected ID. The client IP and MAC addresses are written in the fields below the menus.
The Miscellaneous Page
You can use the Miscellaneous Items page to enable additional security features.
![ADMINISTRATOR's MAIN MENU Status Wizard Advanced Logout BASIC SETTINGS FORWARDING RULES SECURITY SETTINGS ADVANCED SETTINGS TOOLBOX Status Packet Filters Domain Filters URL Blocking MAC Control VPN-LZTP Client VPN-PPTP Client Miscellaneous Miscellaneous Items [HELP] Item Setting Enable Administrator Time-out 0 seconds (0 to disable) Remote Administrator Host : Port / : Discard PING from WAN side DoS Attack Detection Non-Standard FTP Port Disable PPTP Passthrough Disable L2TP Passthrough Disable IPSec Passthrough NAT Loopback IGMP Proxy Stealth Mode Save Undo](/content/2026/05/959275/images/013700161d60d3b01f1944576d68f8b4c6bdb79fe24505749029db10c050e2f9.jpg)
Please refer to the online help for details about each of the menu items.
Configuring Advanced Settings
The Advanced Settings page lists eight menus on the left pane and provides a description of the configuration menus at center.
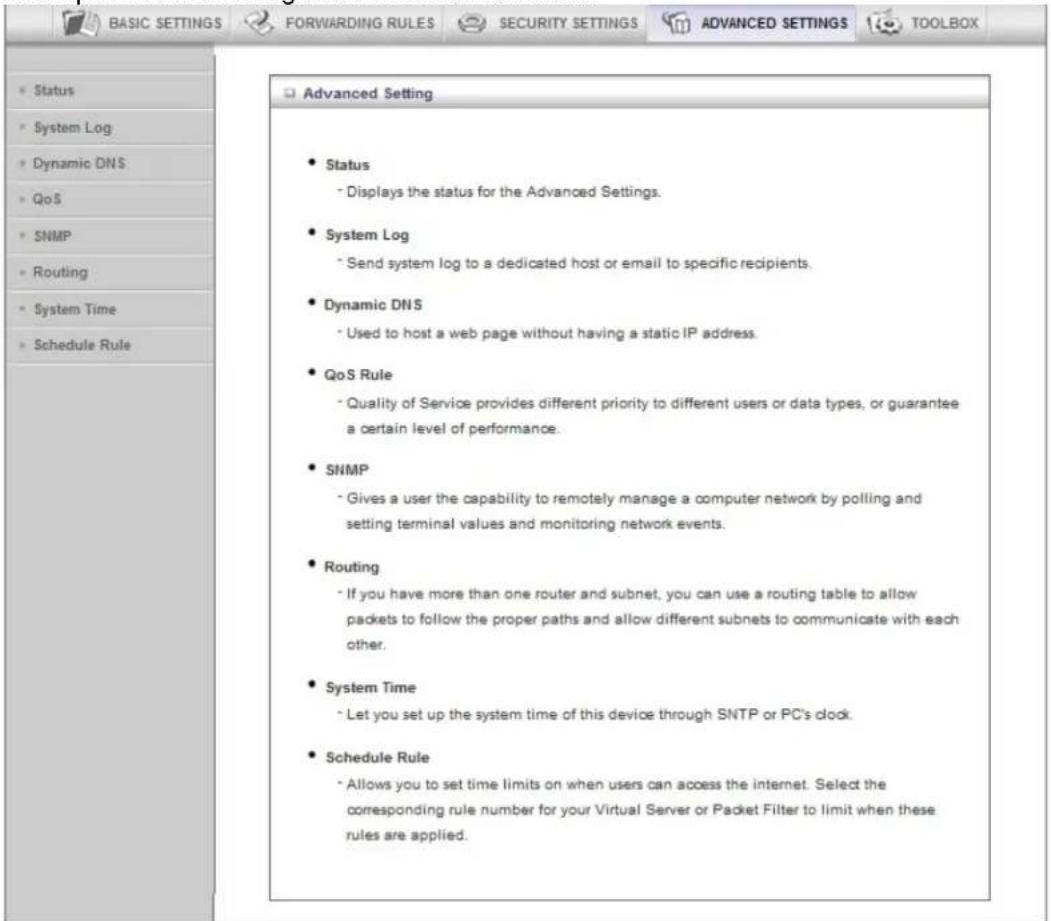
The System Log Page
You can use the System Log page to define how and where system logs will be exported via syslog (UDP) or SMTP(TCP).
![ADMINISTRATOR'S MAIN MENU Status Wizard Advanced Logout BASIC SETTINGS FORVARDING RULES SECURITY SETTINGS ADVANCED SETTINGS TOOLBOX System Log [HELP] Item Setting Enable IP address for syslogging Email alert SMTP Server : port : SMTP Username SMTP Password E-mail addresses E-mail subject Save Undo View Log... Email Log Now](/content/2026/05/959275/images/062ced556be4e85c80d33de0414bb953cec9572f676b68a4ec44a39168c9c50e.jpg)
IP Address for Syslogging
Host IP address of the destination where the Sys log will be sent. Click the Enable checkbox to set the IP Address as the destination.
E-mail alert settings
Check Enable if you want to send syslog via email.
SMTP Server IP and Port
Input the SMTP server IP and port; for example, mail.your_url.com or 192.168.2.100:26. If you do not specify a port number, the port value will be set to 25.
SMTP Username and Password
Input the SMTP Username and Password.
E-mail addresses
The email address of each syslog recipient.
E-mail Subject
The subject of the email alert. This setting is optional.
The Dynamic DNS Page
You can use the Dynamic DNS page to define the Dynamic Domain Name Service (DDNS) that will host your server. For example, the DDNS could host your server when you want to host a website on your network but you do not have a static IP. Your DDNS provider keeps track of changes to your IP address and automatically routes users trying to access your web site to the correct location
Note: Before you enable DDNS, you must register an account with one of the DDNS servers listed in the Provider field.
![ADMINISTRATOR'S MAIN MENU Status Wizard Advanced BASIC SETTINGS FORWARDING RULES SECURITY SETTINGS ADVANCED SETTINGS TOOLBOX Status System Log Dynamic DNS GoS SNMP Routing System Time Schedule Rule Dynamic DNS [ HELP ] Item Setting DDNS Disable Enable Provider DynDNS.org(Dynamic) Host Name Username / E-mail Password / Key Save Undo](/content/2026/05/959275/images/6b04f18c2bcf993e880e7a23816ea10a7630fc767f395b715b1a7882731c20df.jpg)
Your DDNS provider will provide the HostName, Username/E-mail, and Password/Key that you will enter into the fields on the Dynamic DNS page.
The QoS Page
You can use the Quality of Service (QoS) page to provide different priorities to different users or data flows, or to guarantee a certain level of performance.
![ADMINISTRATOR'S MAIN MENU Status Wizard Advanced Logout BASIC SETTINGS FORWARDING RULES SECURITY SETTING ADVANCED SETTINGS TOOLBOX Status System Log Dynamic DNS QoS SNMP Routing System Time Schedule Rule QoS Rule [ HELP ] Item Setting QoS Control Enable Available Upstream bandwidth kbps (Kilobits per second) ID Local IP : Ports Remote IP : Ports QoS Priority Enable Use Rule# 1 : : High (0) Always 2 : : High (0) Always 3 : : High (0) Always 4 : : High (0) Always 5 : : High (0) Always 6 : : High (0) Always 7 : : High (0) Always 8 : : High (0) Always Save Undo](/content/2026/05/959275/images/30f6346a232063f71ce6508bc8ca4c6cb234926c52fa74133c800bfd0523b9b3.jpg)
QoS Control
Click the Enable checkbox to enable QoS.
Available Upstream bandwidth
Set the upstream speed. The best way to find your throughput is to use one of the free speed tests widely available on the Web. Some examples of sites with good speed tests are www.speedtest.net and www.speakeasy.net/speedtest. When you now your actual upstream throughput, enter it in this field. The value should be in kilobits per second (Kbps).
Local: IP
Define the local IP address of packets.
Local: Ports
Define the local port of packets.
Remote: IP
Define the remote IP address of packets.
Remote: Ports
Define the remote port of packets.
QoS Priority
Select a value from the dropdown menu to define the priority level for the local and remote settings. Packets will be serviced based upon the priority
level set. For critical applications, select High or Normal. For non-critical applications, select Low. High is the default value.
Enable
Click the Enable checkbox to apply the settings.
User Rule#
Select a rule from the dropdown menu to indicate when the policy applies. (0) Always is the default value.
The SNMP Page
You can use the Simple Network Management Protocol (SNMP) page to set up the capability to remotely manage a computer network by polling and setting terminal values and monitoring network events. Most users do not need to set up SNMP.
![BASIC SETTINGS FORWARDING RULES SECURITY SETTINGS ADVANCED SETTINGS TOOLBOX Status System Log Dynamic DNS QoS SNMP Routing System Time Schedule Rule SNMP Setting [HELP] Item Setting Enable SNMP Local Remote Get Community Set Community Allow access IP 1 Allow access IP 2 Allow access IP 3 Allow access IP 4 SNMP Version V1 V2c WAN Access IP Address Save Undo](/content/2026/05/959275/images/a1c3bd8153e2773af20a865bee540ee4724fc906ed4d71c237c528988eeb7b28.jpg)
Enable SNMP
Click the Local, Remote, or both checkboxes to enable the SNMP function. Check Local if you want the router to respond to requests from the LAN. Check Remote if you want the router to respond to requests from the WAN.
Get Community
Set Get Community to the GetRequest to which your device will respond.
Set Community
Set Set Community to the SetRequest that your device will accept.
IP 1, IP 2, IP 3, IP 4
Enter the IP address of your SNMP Management PCs. You must specify where the router should send SNMP Trap messages.
SNMP Version
Select the SNMP Version that your SNMP Management software supports.
WAN Access IP Address
Enter the IP address for WAN access.
The Routing Table Page
You can use the Routing Table page to enable/disable both Dynamic and Static Routing. If routing is enabled, you can specify which physical interface address to use for outgoing IP data grams. If you have more than one router and subnet, you will need to define a routing table that lets packets find the proper routing path and allows different subnets to communicate with each other. Most users do not need to set up Dynamic or Static Routing.
![ADMINISTRATOR'S MAIN MENU Status Wizard Advanced Logout BASIC SETTINGS FORWARDING RULES SECURITY SETTINGS ADVANCED SETTINGS TOOLBOX Routing Table [HELP] Item Setting Dynamic Routing Disable RIPv1 RIPv2 Static Routing Disable Enable ID Destination Subnet Mask Gateway Hop Enable 1 2 3 4 5 6 7 8 Save Undo](/content/2026/05/959275/images/9659ceaa9b58a4e8ccfcb253e74e7420ee045338e3b1506c8a5372e8a9405df1.jpg)
Dynamic Routing
The Routing Information Protocol (RIP) will exchange information about destinations for computing routes throughout the network. Please select RIPv2 only if you have different subnet in your network. Otherwise, please select RIPv1 if you need this protocol.
Static Routing
For static routing, you can specify up to eight routing rules. You can enter the Destination IP address, Subnet Mask, Gateway, Hop for each routing rule. Click the Enable checkbox to activate the routing table entry.
The System Time Page
You can use the System Time page to set and synchronize your router with the local time zone, the Time Server and your PC.
![ADMINISTRATOR's MAIN MENU Status Wizard Advanced Logout BASIC SETTINGS FORWARDING RULES SECURITY SETTINGS ADVANCED SETTINGS TOOLBOX System Time [HELP] Item Setting Time Zone * Not yet configured! The default is GMT+00:00 Auto-Synchronization Enable Time Server : Auto Daylight saving time Save Undo Sync Result Sync with Time Server Sync with my PC (undefined July 20, 2012 16:25:05)](/content/2026/05/959275/images/bc24cf5eed4aabf2c27d7ba1f4440be3e84aa0a803d575c504ca6b09af6ac8b7.jpg)
Time Zone
Select the local time zone from the dropdown menu.
Click the Enable checkbox to enable this function.
Select an item from the Time Server dropdown menu to specify the server with which to synchronize. The default value is Auto.
Click Sync with Time Server to set Date and Time by NTP Protocol.
Click Sync with my PC to set Date and Time using your PC's Date and Time
Daylight Saving time
Select enable if you live in an area that uses daylight savings time. You need to enter the start and end dates for daylight savings time.
The Schedule Rule and Schedule Rule Setting Pages
You can use the Schedule Rule and Schedule Rule Setting pages to define when services will be turned on and off based on rules that you define.
1 On the Schedule Rule page, click the Enable checkbox to enable the scheduling rules, which are defined on the Schedule Rule Setting page.
![BASIC SETTINGS FORWARDING RULES SECURITY SETTINGS ADVANCED SETTINGS TOOLBOX Status System Log Dynamic DNS GoS SNMP Routing System Time Schedule Rule Schedule Rule [ HELP ] Item Setting Schedule Enable Rule# Rule Name Action 1 New Add 2 New Add 3 New Add 4 New Add 5 New Add 6 New Add 7 New Add 8 New Add 9 New Add 10 New Add << Previous Next >> Save Add New Rule...](/content/2026/05/959275/images/eea65536bdc858c94c917e348ed0cde2bd96fe73daa93c6f90cf65a5d197b16e.jpg)
a. Click New Add to open the Schedule Rule Setting page.
![BASIC SETTINGS FORWARDING RULES SECURITY SETTINGS ADVANCED SETTINGS TOOLBOX Status System Log Dynamic DNS GoS SNMP Routing System Time Schedule Rule Schedule Rule Setting [ HELP ] Item Setting Name of Rule 1 Policy Inactivate except the selected days and hours below. ID Week Day Start Time (hh:mm) End Time (hh:mm) 1 -- choose day -- ▼ 2 -- choose day -- ▼ 3 -- choose day -- ▼ 4 -- choose day -- ▼ 5 -- choose day -- ▼ 6 -- choose day -- ▼ 7 -- choose day -- ▼ 8 -- choose day -- ▼ Save Undo Back](/content/2026/05/959275/images/0ef002d598dc57a452c9ac43d9ec6729b7c28709f5f225fc8dd05902ff974a55.jpg)
b On the Schedule Rule Setting page, specify a Rule name, a Policy that defines whether the rule is Active or Inactive, Week Day and the Start Time and End Time for each rule that you are creating.
c Click Save for each rule that you create.
d Click Back to return to the Schedule Rule page.
e When the Schedule Rule page opens, the rule(s) that you created and saved appear in the Rule Name column.
You can click Edit to make changes to a scheduled rule or click Delete to remove a scheduled rule.
Configuring Toolbox Settings
The Toolbox Settings page lists six configuration menus on the left pane and provides a description of the configuration menus at center.
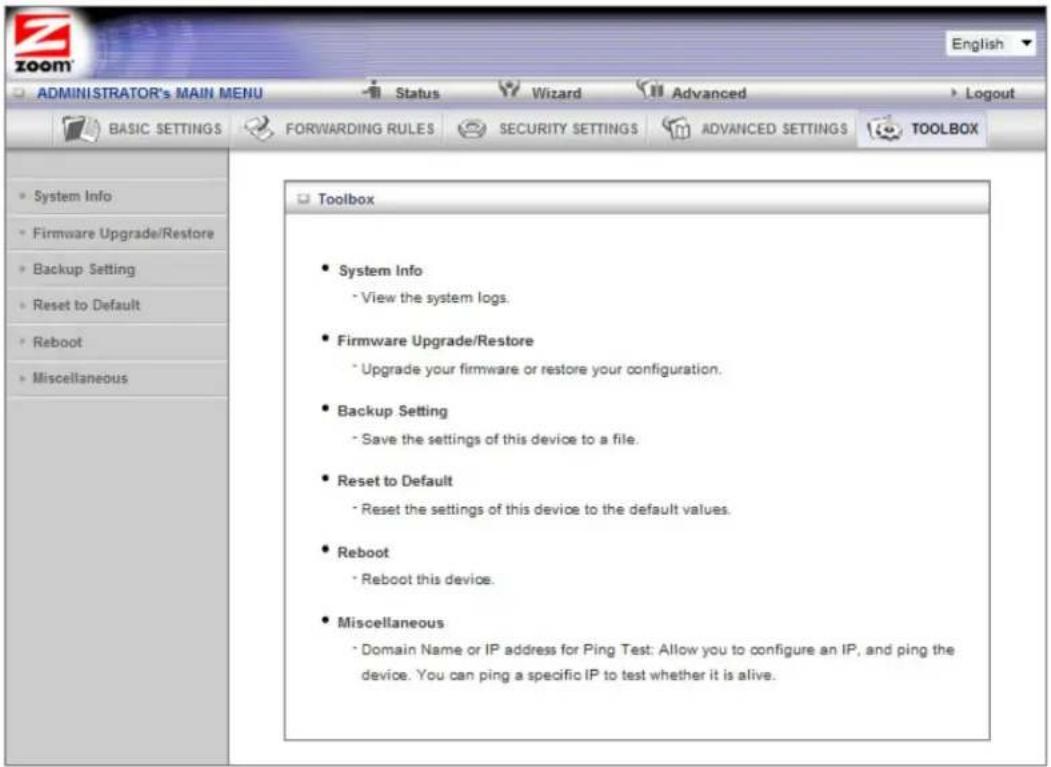
The System Information Page
You can use the System Information page to view information about your router, and to view download, and delete system logs.
The Firmware Upgrade Page
You can use the Firmware Upgrade page to get the most recent version of the router firmware, if available.
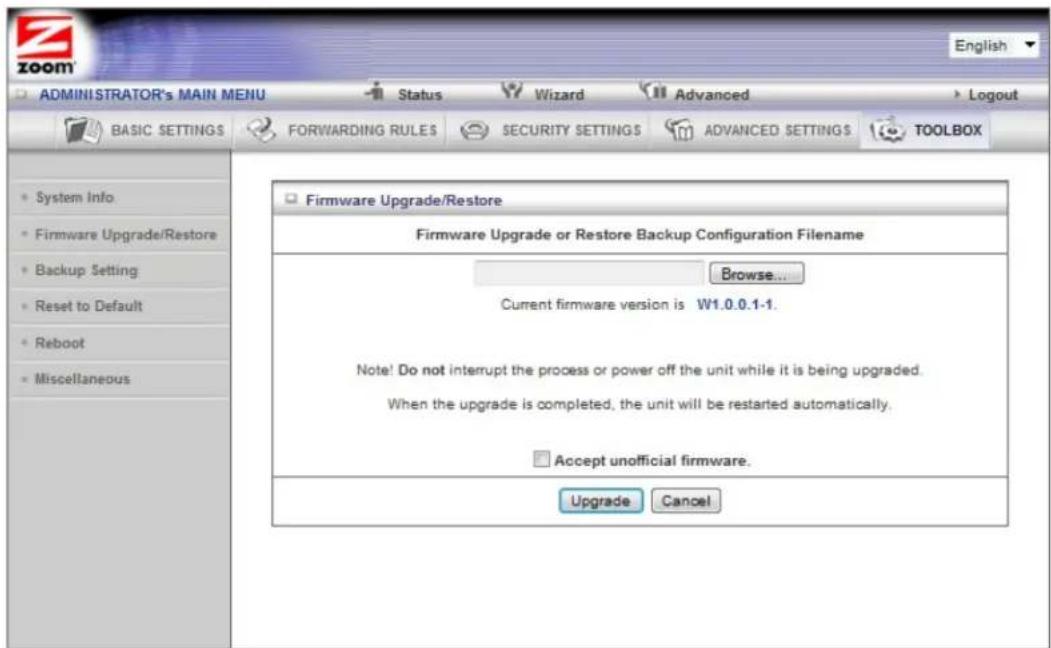
1 Click Browse to open the location where you saved the Firmware Update file that you downloaded from the Zoom web site or received via email. If you are restoring a saved configuration file, select the file that your configuration is saved in.
2 Click Upgrade.
The Backup Setting Dialog
You can back up your router settings by clicking the Backup Setting item from the left pane of the Toolbox menu. The following dialog opens.
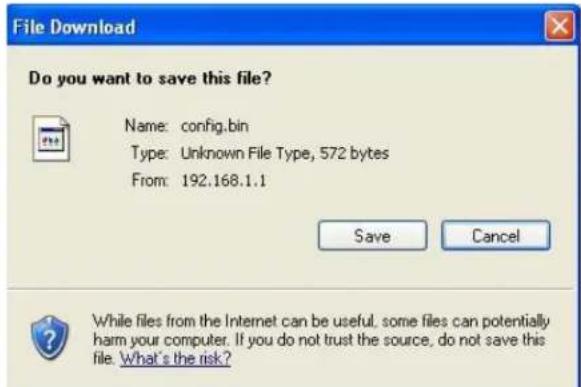
1 Click Save to write and save your router settings as a binary file.
The Reset to Default Dialog
You can reset the router to its factory settings by clicking the Reset to Default item from the left pane of the Toolbox menu. The following dialog opens.
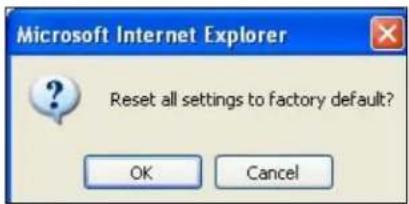
1 Click OK to reset the router.
We recommend that you back up and save your configuration first if you've made changes and want a record of that configuration
The Reboot Dialog
You can reboot the router by clicking the Reboot item from the left pane of the Toolbox menu. The following dialog opens.
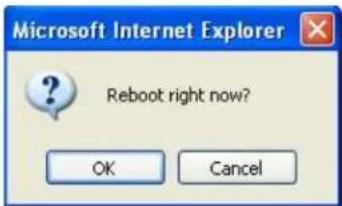
1 Click OK to reboot the router.
The Miscellaneous Page
You can use this page to Ping a remote device on your network or to wake up a PC on your network that is in sleep mode. The remote PC must be configured for Wake-on-LAN mode.
![ADMINISTRATOR's MAIN MENU Status Wizard Advanced Logout BASIC SETTINGS FORVARDING RULES SECURITY SETTINGS ADVANCED SETTINGS TOOLBOX System info Firmware Upgrade/Restore Backup setting Reset to Default Reboot Miscellaneous Miscellaneous Items [ HELP ] Item Setting Domain Name or IP address for Ping Test Ping MAC Address for Wake-on-LAN Wake up Save Undo](/content/2026/05/959275/images/62990534d54261b539c89814c75b5d153e3a14299c428380d1d4a3e090c21f72.jpg)
Appendix A: Mobile Broadband Settings
Your router works with a large number of different mobile broadband modem models. In most cases when you plug your mobile broadband modem or phone into the router, the proper APN (Access Point Name), Dialed Number, PIN Code, Username, and Password for the provider is automatically entered. In some cases, the modem does not know this information, and the router needs to be set up to include that information. For instructions on how to do this, please refer to Chapter 2: Using the Configuration Manager and use the Setup Wizard to enter these settings.
If you are unable to connect to the Internet using the Wireless-N Router, you should try entering the different settings for your service provider. Begin by entering the first setting for your provider. If that doesn't work, try entering the next setting. If a field is empty in the chart, then leave that setting blank in the Setup Wizard.
U.S. Mobile Broadband Service Providers
| Provider | APN | Dialed Number for 3G | Dialed Number for 4G | Username | Password | Other Settings |
| Aeris | #777 | |||||
| Alltel (1) | Check with provider | #777 | Check with provider | Check with provider | ||
| Alltel (2) | #777 | @all tel.net | alltel | |||
| AT&T (1) | ISP.CINGULAR | *99# | *99***3# OR *99***1# | |||
| AT&T (2) | ISP.CINGULAR | *99***1# | *99***3# OR *99***1# | |||
| AT&T (3) | ISP.CINGULAR | *99# | *99***3# OR *99***1# | ISP@ | CINGULAR1 | |
| AT&T (4) | ISP.CINGULAR | *99# | *99***3# OR *99***1# | WIXDC001@ W5.MYCING UAR.COM | CINGULAR1 | |
| AT&T voice/data or iPhone SIM card | WAP.CINGULAR | *99# | *99***3# OR *99***1# | WAP@CING UAR.COM | CINGULAR1 | |
| Cingular ex-AT&T | proxy | guest | guest | |||
| Cingular with acceleration | ISP.CINGULAR | ISPDA@ | CINGULAR1 | |||
| Cingular w/o acceleration | ISP.CINGULAR | ISP@CINGU LARGPRS.COM | CINGULAR1 | |||
| Cingular non-contract | WAP.CINGULAR | WAP@CING U LARGPRS. COM | CINGULAR1 | |||
| Cricket Communications | #777 | |||||
| Edge Wireless | ISP | *99# | guest | guest | ||
| Mid-Rivers Wireless | #777 | |||||
| Sprint | Not Required | #777 | Check with provider | Check with provider | ||
| T-Mobile | Check with provider | *99# | *99***3# OR *99***1# | |||
| T-Mobile US GPRS Internet | internet2.voicestre am.com | *99# | ||||
| T-Mobile Internet | internet2.voicestre am.com | *99# | guest | guest | ||
| T-Mobile VPN | internet3.voicestre am.com | *99# | guest | guest | ||
| T-Mobile non-contract | wap.voicestream.com | *99# | guest guest | |||
| Verizon (1) | #777 | *99***3# OR *99***1# | Check with provider | Check with provider | ||
| Verizon (2) | Leave blank OR check with provider | @vzw3g.com | vzw | |||
| Virgin Mobile | #777 | |||||
U.K. Mobile Broadband Service Providers
| Provider | APN | Dialed Number | Username | Password | Other Settings |
| 3 | three.co.uk *99# | guest | guest | ||
| 3 Mobile Broadband | 3internet | *99# | |||
| AirTel Vodafone (Jersey) | Airtel-ci-gprs.com | *99# | guest | guest | |
| Anvil Mobile (1) | m2m.sim4life.com | *99# | |||
| Anvil Mobile (2) | m2m.aql.net | *99# | |||
| ASDA | asdamobiles.co.uk | *99# | wap | wap | Gateway Address: 212.183.137.12 |
| BT Mobile Business | btmobile.bt.com | *99***1# | bt | bt | |
| BT Mobile Customer Value | btmobile2.bt.com | *99***1# | bt | bt | |
| Jersey Telecom | pepper | *99# | abc | abc | |
| Jersey Telecom | *99***1# | ||||
| Manx Telecom(1) | 3gpronto | *99# | |||
| Manx Telecom(2) | internet | *99# | |||
| O2 (1) with contract | mobile.o2.co.uk | *99# | web | password | |
| O2 (2) with contract | mobile.o2.co.uk | *99# OR *99***1# | o2web OR faster | password | DNS Address (if needed): 193.113.200.201 |
| O2 (1) faster, with contract | mobile.o2.co.uk | *99# | faster | password | |
| O2 pre-pay | payandgo.o2.co.uk | *99# | payandgo | payandgo | |
| O2 (VPN) | Vpn.o2.co.uk | *99# | |||
| O2 Mobile Broadband Pay&Go | m-bb.o2.co.uk | *99# | 02bb password | ||
| Orange | orangeinternet | *99# | |||
| Orange (contract) | orangeinternet | *99# | Orange | orange | |
| Orange Pay Monthly | orangeinternet *99# user user | ||||
| Orange Pay and Go | orangewap | *99# | Multimedia | Orange | |
| Sure (C&W Jersey) | Internet | *99# | |||
| T-Mobile (1) | general.t-mobile.co.uk | *99# User | mms | Primary: 149.254.201.126 Secondary: 149.254.192.126 | |
| T-Mobile | general.t-mobile.co.uk | *99# | user | pass | |
| Tesco Mobile | prepay.tesco-mobile.com | *99# | tescowap | password | |
| Virgin Mobile (1) | goto.virginmobile.com | *99# | user | ||
| Virgin Mobile (2) | goto.virginmobile.com | *99# | |||
| Vodafone | ppbundle.internet | *99# | web | web | |
| Vodafone contract | internet | *99# | web | webs | |
| Vodafone contract | wap.vodafone.co.uk | *99# | wap | wap | |
| Vodafone pre-pay | pp.vodafone.co.uk | *99# | wap | wap | |
| Vodafone pre-pay (2) | pp.vodafone.co.uk | *99# | web web | ||
| Three UK | three.co.uk | *99# | guest | guest | |
Appendix B: How to Set Up Tethering on the iPhone
These instructions are based on using the iPhone in the USA with Verizon and AT&T, and may vary slightly depending on the model of your iPhone, your firmware version, and service provider. These instructions assume that you have a service contract that supports tethering. Please consult your iPhone user manual for more information.
1 Connect one end of the USB cable to the Router and the other end to the iPhone.
2 Turn on tethering on the iPhone. For GSM models used by AT&T, select Settings → General → Network → Internet Tethering. For CDMA models used by Verizon, select Settings → General → Network → Personal Hotspot.
3 Note: If you see a choice between Bluetooth tethering or USB, you need to select USB.
For most carriers you will need to set up your APN information in the router. To do this first enter the router Configuration Manager, then select Basic Settings → Basic Setup. On the Basic Setup page, enter the APN settings for your provider. If you don't know the APN settings please contact your provider or see Appendix A, which contains the settings for many of the most popular wireless providers.
For example, if you are using your iPhone with AT&T, use the following settings for the items shown:
| Item | Setting |
| APN | WAP.CINGULAR |
| Username | WAP@CINGULAR.COM |
| Password | CINGULAR1 |
| Dial Number Leave blank | |
| Basic Setup [HELP] | |
| Item | Setting |
| Ethernet port configuration | LAN ▼ |
| LAN IP Address | 192.168.1.1 |
| 3G Failover | Check for Wan ConnectionInternet host |
| WAN Type | 3G ▼ |
| APN (Not required by all providers) | WAP.CINGULAR |
| PIN Code | |
| Dilated Number | |
| Username | WAP@CINGULAR.COM |
| Password | ●●●●● |
| Authentication | Auto PAP CHAP |
| Primary DNS | |
| Secondary DNS | |
| Connection Control | Auto Reconnect (always-on) ▼ |
| Maximum Idle Time | 0 seconds |
| Keep Alive | DisableUse LCP Echo RequestIcp-echo-interval 10 secondsIcp-echo-failure 3 times |
| Save Undo | |
Appendix C: Registering Your Product and Getting Help
Zoom supports this Router. If you need assistance, please contact Zoom directly. We encourage you to register your product and to notice the many support options available from Zoom. Please go to www.zoomtel.com and select Technical Support. From there you can register your new Modem/Router, contact our technical support experts, use our SmartFacts ^™ intelligent database, and get warranty information.
If you need to contact Zoom Customer Support, you can call us by dialing our main support center in the USA or our support center in the UK.
USA: (617) 753-0965
U.K.: London: +44 2033180660
Manchester: +44 1618840074
Limited Warranty
Zoom Telephonics, Inc. (hereinafter "Zoom") warrants this product against defects in material and workmanship for a warranty period of one year. The one year warranty may be extended only by Zoom as required by local law in the country where this modem is sold by Zoom. This warranty applies to the original end-user purchaser.
For all Zoom products other than software, Zoom will, solely at its option, repair or replace this product with a functionally equivalent new or factory-reconditioned product during the warranty period. The consumer will deliver the product to Zoom. All transportation risks and costs in connection with this warranty service are the responsibility of the consumer.
Zoom will replace software at no charge if there is a defect in materials or workmanship for a period of 30 days from date of original retail purchase, provided the defective software is returned to Zoom. Shipments from Zoom will normally be via U.S. Mail. Software products supplied by Zoom are sold “as is,” without warranty, either expressed or implied, as to function, application, merchantability, performance, and quality.
Zoom is not responsible for incidental or consequential damages, and is not responsible for damages resulting from the breach of any expressed or implied warranty. Zoom is not responsible for any costs of recovering, reprogramming, or reproducing any programs or data stored or used with the Zoom products, damage to property, and to the extent permitted by law, damages for personal injury.
This warranty is in lieu of all other warranties, expressed or implied. We do not assume or authorize assumption for us of any other warranty expressed or implied. Some states and countries do not allow the exclusion or limitation of incidental or consequential damages, so the above limitation or exclusions may not apply to you.
This warranty does not apply if the Zoom product has been damaged by accident, abuse, lightning or other natural disasters, misuse or misapplication, or if it has been modified without the written permission of Zoom, or if any serial number has been removed or defaced.
This warranty shall not be applicable to the extent that any provisions of this warranty are prohibited by any federal, state, or municipal law that cannot be preempted. This warranty gives you specific legal rights, and you may also have other rights that vary from state to state or country to country.
CE Declaration of Conformity
This equipment complies with the requirements relating to electromagnetic compatibility, EN 55022/A1 Class B.

The manufacturer declares under sole responsibility that this equipment is compliant to Directive 1999/5/EC, 2004/108/EC, 2006/95/EC via the following. This product is CE marked.
For Directive 1999/5/EC, 20004/108/EC, 2006/95/EC
ETSI EN 300 328 V1.7.1:2006
EN 60950-1:2006+A11:2009
ETSI EN301 489-1 V1.8.1:2008
ETSI EN301 489-17V2.1.1:2009
ETSI EN62311:2008
CE

Paul Prohodski
July 18, 2012
1098/TF, Boston, MA, USA
Director
Directeur
Director
FCC Interference Statement
This equipment has been tested and found to comply with the limits for a Class B digital device pursuant to Part 15 of the FCC Rules. These limits are designed to provide reasonable protection against radio interference in a commercial environment. This equipment can generate, use, and radiate radio frequency energy and, if not installed and used in accordance with the instructions in this manual, may cause harmful interference to radio communications. Operation of this equipment in a residential area is likely to cause interference, in which case the user, at his own expense, will be required to take whatever measures are necessary to correct the interference.
FCC Part 15.21 information for user
You are cautioned that changes or modifications not expressly approved by the party responsible for compliance could void your authority to operate the equipment.
FCC Section 15.105 Information to the user
Note:
This equipment has been tested and found to comply with the limits for a Class B digital device, pursuant to Part 15 of the FCC Rules. These limits are designed to provide reasonable protection against harmful interference in a residential installation. This equipment generates, uses and can radiate radio frequency energy and, if not installed and used in accordance with the instructions, may cause harmful interference to radio communications. However, there is no guarantee that interference will occur in a particular installation. If this equipment does cause harmful interference to radio or television reception, which can be determined by turning the equipment off and on, the user is encouraged to try and correct the interference by one or more of the following measures:
-- Reorient or relocate the receiving antenna.
-- Increase the separation between the equipment and receiver.
-- Connect the equipment into an outlet on a circuit different from that to which the receiver is connected.
-- Consult the dealer or an experienced radio/TV technician for help.
RF Exposure statement
IMPORTANT NOTE:
FCC Radiation Exposure Statement:
This equipment complies with FCC radiation exposure limits set forth for an uncontrolled environment. This equipment should be installed and operated with a minimum distance of 20 cm between the radiator and your body.


- Wireless-N Router USER MANUAL
- NOTICE
- Contents
- Contents 3
- Installing the Wireless-N Router ....5
- Using the Configuration Manager....10
- Connecting Devices Wirelessly to the Wireless-N Router 28
- Configuring Wireless Security Manually ....36
- Using the Configuration Manager's Advanced Program....40
- Package Contents
- System Requirements
- Connecting a DSL or Cable Modem to Your Router
- Connecting a Smartphone or a Tablet to Your Router
- If you are considering using the router with a tethered phone or tablet, please consider the following:
- Connecting an Android based Smartphone or Tablet to Your Router
- Connecting a Modem or a non-Android based Smartphone or Tablet to Your Router
- Troubleshooting Your Internet Connection
- Resetting the Router to the Factory Configuration
- 2
- Using the Configuration Manager
- Launching the Router's Configuration Manager
- Launching the Configuration Manager's Setup Wizard
- Step 1. Setup Login
- Step 2. Setup Time Zone
- Step 3. WAN Type Setup
- Selecting the WAN Type
- Configuring the Static IP Address
- Configuring the Dynamic IP Address
- Configuring PPPoE
- • LAN IP Address
- - Username
- - Password
- - Primary DNS
- - Secondary DNS
- Configuring PPTP
- Configuring L2TP
- - IP Address
- - Subnet Mask
- - WAN Gateway IP
- • Server IP Address/Name
- - L2TP Account
- - L2TP Password
- Configuring for a Mobile Broadband Modem, or tethering-capable smartphone or tablet
- • APN
- • PIN
- - Dialed Number
- - Account
- Step 4. Wireless Settings
- Wireless Security Settings
- Configuring Authentication and Encryption
- WPA-PSK/WPA2-PSK Authentication
- WEP Authentication and Encryption
- Step 5. Summary
- Step 6. Finish
- 3
- Connecting Devices Wirelessly to the Wireless-N Router
- Establishing your Wireless Network
- Connecting a Windows 7 Computer with Built-in Wireless Capabilities
- To disconnect from the current network:
- Connecting a Windows Vista Computer with Built-in Wireless Capabilities
- Connecting a Windows XP Computer with Built-in Wireless Capabilities
- Connecting a Macintosh OS X Computer with Built-in Wireless Capabilities
- Connecting a Wireless-enabled Computer or Device (including the iPhone or other cellular phones, the iPod Touch, etc.) to the Wireless-N Router
- Connecting a Computer with a Wireless adapter to the Wireless-N Router
- Setting up your Network using WPS
- Configuration Methods
- Method One
- Method Two
- Method Three
- Configuring Wireless Security Manually
- WPA2/ WPA Configuration
- WEP Configuration
- 5
- Using the Configuration Manager's Advanced Program
- Changing Default Settings
- Online Help
- Launching the Configuration Manager's Advanced Program
- Configuring Basic Settings
- The Basic Setup Page
- LAN IP Address
- 3G Failover
- WAN Type
- APN, PIN Code, Dialed Number, Username and Password
- Authentication
- Primary DNS and Secondary DNS
- Connection Control
- Maximum Idle Time
- Keep Alive
- MTU
- Using your 3G modem as a Backup
- Click Save.
- The DHCP Server Page
- The Wireless Setting Page
- Wireless Module
- Wireless Network Name(SSID)
- SSID Broadcast
- Channel
- Wireless Mode
- For WEP Authentication:
- For WPA-PSK/WPA2-PSK Authentication:
- Encryption
- Key Format
- Encryption WEP Key 1, 2, 3, 4
- The Change Password Page
- Configuring Forwarding Rules
- The Virtual Server Page
- Common Services
- Service Ports
- Server IP
- Protocol
- Enable
- Use Rule#
- The Port Triggering Page
- Trigger
- Incoming Ports
- Popular applications
- The Miscellaneous Page
- Set IP Address of DMZ Host
- UPnP setting
- Configuring Security Settings
- Status Page
- Packet Filtering Page
- Filtering Policies
- Filtering Rules
- The Domain Filters Page
- Domain Filter
- Log attempted URL Access
- Privilege IP Address Range
- Domain Suffix
- Action
- The URL Blocking Page
- URL Blocking Enable
- Block Setting
- URL
- The MAC Address Control Page
- MAC Address Control
- Association control
- DHCP clients
- Configuring Advanced Settings
- The System Log Page
- IP Address for Syslogging
- E-mail alert settings
- SMTP Server IP and Port
- SMTP Username and Password
- E-mail addresses
- E-mail Subject
- The Dynamic DNS Page
- The QoS Page
- QoS Control
- Available Upstream bandwidth
- Local: IP
- Local: Ports
- Remote: IP
- Remote: Ports
- QoS Priority
- User Rule#
- The SNMP Page
- Enable SNMP
- Get Community
- Set Community
- IP 1, IP 2, IP 3, IP 4
- SNMP Version
- WAN Access IP Address
- The Routing Table Page
- Dynamic Routing
- Static Routing
- The System Time Page
- Time Zone
- Daylight Saving time
- The Schedule Rule and Schedule Rule Setting Pages
- Configuring Toolbox Settings
- The System Information Page
- The Firmware Upgrade Page
- The Backup Setting Dialog
- The Reset to Default Dialog
- The Reboot Dialog
- Appendix A: Mobile Broadband Settings
- Appendix B: How to Set Up Tethering on the iPhone
- Appendix C: Registering Your Product and Getting Help
- Limited Warranty
- CE Declaration of Conformity
- FCC Interference Statement
- FCC Part 15.21 information for user
- FCC Section 15.105 Information to the user
- RF Exposure statement
Brand : ZOOM
Model : Wireless-N
Category : Router