DH-2018P - Surveillance Camera IDIS - Free user manual and instructions
Find the device manual for free DH-2018P IDIS in PDF.


| Product Type | DirectIP PoE Switch |
| Model | DH-2018P |
| Brand | IDIS |
| Dimensions (W x H x D) | 430mm x 44mm x 180mm (16.93" x 1.73" x 7.09") |
| Weight (Main Unit) | 2.05 kg (4.52 lbs) |
| Weight (Packaging) | 3.1 kg (6.83 lbs) |
| Rated Input | AC 100-240V, 50/60Hz |
| Power Consumption | Max. 160W |
| PSE Power | Max. 140W |
| PoE Standards | IEEE 802.3af-2003 and IEEE 802.3at-2009 |
| Copper Service Ports | 16 RJ-45 connectors (10/100BASE-TX) with PoE |
| Copper Uplink Ports | 2 RJ-45 connectors (10/100/1000BASE-T) without PoE |
| Switching Capacity | 7.2 Gbps |
| DirectIP Feature | Automatic network IP configuration |
| LED Indicators | Power, PoE Max, Service Port L/A and PoE, Uplink Port L/A and SPD |
| Operating Temperature | 0°C to 40°C (32°F to 104°F) |
| Operating Humidity | 10% to 90% |
| Storage Temperature | -30°C to 60°C (-22°F to 140°F) |
| Cleaning Instructions | Use a dry cloth. Do not use water, thinner, or organic solvents. |
| Safety Precautions | Keep away from humid/dusty environments. Ensure proper ventilation (15cm clearance back, 5cm sides). Do not open cover. |
| Electrical Approvals | FCC, UL, CE, CB, KC (Class A) |
| Mounting | Rack mountable (brackets included) |
Frequently Asked Questions - DH-2018P IDIS
User questions about DH-2018P IDIS
0 question about this device. Answer the ones you know or ask your own.
Ask a new question about this device
Download the instructions for your Surveillance Camera in PDF format for free! Find your manual DH-2018P - IDIS and take your electronic device back in hand. On this page are published all the documents necessary for the use of your device. DH-2018P by IDIS.
USER MANUAL DH-2018P IDIS
Before reading this manual
This operation manual contains basic instruction on installing and using DirectIP™ PoE Switch, an IDIS product.
Users who are using this product for the first time, as well as users with experience using comparable products, must read this operation manual carefully before use and heed to the warnings and precautions contained herein while using the product. Safety warnings and precautions contained in this operation manual are intended to promote proper use of the product and thereby prevent accidents and property damage and must be followed at all times.
Once you have read this operation manual, keep it at an easily accessible location for future reference.

• Unauthorized reproduction of this manual is prohibited.
- The manufacturer will not be held responsible for any product damage resulting from the use of unauthorized parts and accessories or from the user's failure to comply with the instructions contained in this operation manual.
- It is recommended that first-time users of DirectIP™ PoE Switch and individuals who are not familiar with its use seek technical assistance from their retailer regarding product installation and use.
- If you need to disassemble the product for functionality expansion or repair purposes, you must contact your retailer and seek professional assistance.
- Both retailers and users should be aware that this product has been certified as being electromagnetically compatible for commercial use. If you have sold or purchased this product unintentionally, please replace with a consumer version.
Safety Symbols
| Symbol Type Description | ||
 | Warning | An important instruction or set of important instructions that can lead to severe injury or even death if not followed. |
 | Caution | An instruction or set of instruction that can lead to personal injury and/or property damage if not followed. |
In-Text
| Symbol Type Description | ||
 | Caution | Important information concerning a specific function. |
 | Note | Useful information concerning a specific function. |
FCC Compliance Statement
THIS EQUIPMENT HAS BEEN TESTED AND FOUND TO COMPLY WITH THE LIMITS FOR A CLASS A DIGITAL DEVICE, PURSUANT TO PART 15 OF THE FCC RULES. THESE LIMITS ARE DESIGNED TO PROVIDE REASONABLE PROTECTION AGAINST HARMFUL INTERFERENCE WHEN THE EQUIPMENT IS OPERATED IN A COMMERCIAL ENVIRONMENT. THIS EQUIPMENT GENERATES, USES, AND CAN RADIATE RADIO FREQUENCY ENERGY AND IF NOT INSTALLED AND USED IN ACCORDANCE WITH THE INSTRUCTION MANUAL, MAY CAUSE HARMFUL INTERFERENCE TO RADIO COMMUNICATIONS. OPERATION OF THIS EQUIPMENT IN A RESIDENTIAL AREA IS LIKELY TO CAUSE HARMFUL INTERFERENCE, IN WHICH CASE USERS WILL BE REQUIRED TO CORRECT THE INTERFERENCE AT THEIR OWN EXPENSE.
WARNING: CHANGES OR MODIFICATIONS NOT EXPRESSLY APPROVED BY THE PARTY RESPONSIBLE FOR COMPLIANCE COULD VOID THE USER'S AUTHORITY TO OPERATE THE EQUIPMENT. THIS CLASS OF DIGITAL APPARATUS MEETS ALL REQUIREMENTS OF THE CANADIAN INTERFERENCE CAUSING EQUIPMENT REGULATIONS.
WEEE (Waste Electrical & Electronic Equipment)
Correct Disposal of This Product
(Applicable in the European Union and other European countries with separate collection systems)
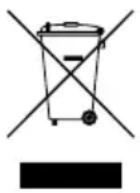
This marking shown on the product or its literature, indicates that it should not be disposed with other household wastes at the end of its working life. To prevent possible harm to the environment or human health from uncontrolled waste disposal, please separate this from other types of wastes and recycle it responsibly to promote the sustainable reuse of material resources.
Household users should contact either the retailer where they purchased this product, or their local government office, for details of where and how they can take this item for environmentally safe recycling.
Business users should contact their supplier and check the terms and conditions of the purchase contract. This product should not be mixed with other commercial wastes for disposal.
Safety Precautions
Information contained in this section of the manual serve to prevent accidents and property damage through proper use of the product. Please read the following instructions carefully and follow them at all times.

Warning Failure to comply can lead to severe injury or even death.
Installation
Make sure to turn off the product before installing it and to use a dedicated power outlet.
- Presents overheating, fire, and electric shock hazards.
Do not use the product in an excessively hot (50°C or above), cold (0°C or below), or humid environment.
- Presents a fire hazard.
Set up the product in a shaded area providing protection against exposure to direct sunlight and maintain an even ambient temperature. Do not set up the product in the vicinity of heat-generating objects and appliances such as candles and heaters.
- Presents a fire hazard.
There are high-voltage components inside the product. Do not attempt to open the cover or disassemble, repair, or modify the product.
- Presents fire, electric shock, and physical injury hazards.
Connection ports on the rear of the product protrude out slightly, and placing the back of the product too close to a wall will cause the cables to bend excessively and even break. Maintain a distance of at least 15cm between the back of the product and the wall it faces.
- Presents fire, electric shock, and physical injury hazards.
Do not use the product in an particularly humid, dusty, or sooty environment.
- Presents electric shock and fire hazards.
Always keep the operating environment clean and free of dust. Use a piece of dry cloth to clean the product. Do not use water, thinner, or organic solvents.
- Failure to do so can damage the product's finish and presents an electric shock hazard.
Power
Voltage fluctuation of the power supply must be within 10% of the voltage rating, and the power outlet must be grounded. Do not plug in electrical appliances such as a hair dryer, iron, and refrigerator into the same power outlet as the product.
- Presents overheating, fire, and electric shock hazards.
Do not bend the power cable excessively or place heavy objects on top of it.
- Presents a fire hazard.
Do not pull on the power cable or handle the power plug with wet hands. Do not insert the power plug into a loose power outlet.
- Presents fire and electric shock hazards.
You may want to install a UPS (Uninterruptible Power Supply) system for safe operation in order to prevent damage caused by an unexpected power stoppage. Any questions concerning UPS, consult your UPS retailer.
Product Use
Do not place a cup or container filled with a liquid on top of the product.
- The liquid may spill over and damage the product's internals and cause a fire hazard.
Avoid dangerous situations such as placing the product or its power cable on a humid/wet floor, using an ungrounded extension cord, using a damaged (exposed) power cable, and failing to properly ground the product. Contact the retailer or a specialist if you encounter a problem.
- Presents fire and electric shock hazards.
If there is a strange noise or smell coming from the product, unplug the power cable and contact the service center right away.
- Presents fire and electric shock hazards.

Caution
Failure to comply can lead to minor injury and/or product damage.
Installation
Do not set up the product in an area that is exposed or susceptible to strong magnetism, radio waves, and/or impact and avoid setting up the product in the vicinity of wireless transmission devices such as a radio or a television.
- Set up the product in an area devoid of magnetic objects, radio waves, and vibrations.
Set up the product in an open and well-ventilated area.
- Environmental factors greatly affect the product's performance and durability. Allow at least 15cm of clearance behind the product and at least 5cm of clearance on either side of the product.
Set up the product on a flat and stable surface. Do not stand the product on its side or at an angle.
- The product may tip over or drop on the floor, which can lead to a malfunction and/or personal injury.
Ensure the product's power plug is easily accessible.
- It must be easy to pull out the power plug in the event of a serious malfunction or fire.
Do not set up the product in an area susceptible to strong impact or vibrations.
- Failure to do so can cause the product to malfunction.
Product Use
Do not allow conductive objects to enter inside the product's ventilation openings.
- Failure to do so can cause the product to malfunction.
Do not place heavy objects on top of the product.
- Failure to do so can cause the product to malfunction.
Do not unplug the power cable or pick up/move the product while it is in operation.
- Failure to do so can cause the product to malfunction.
Always remember to turn off the product before connecting an optical cable.
Do not remove the optical cable's rubber cover until it's time to connect it to the product. The cover protects the cable from contamination. Once removed, store it at a safe location for future use.
Do not look directly into the tip of the optical cable or the laser beam emitting through it. In addition, do not point the laser at your eyes.
Regularly inspect the operating status of the product and contact the retailer or service center right away if any issues are identified.
1
Part 1 - Introduction 8
Product Features 8
Accessories 10
Overview 10
Front Panel 10
Rear Panel 14
2
Part 2 - Installation 15
Tools for Installation 15
Mounting to a Rack (DH-2018P only) 15 15
Installation 16
Port Connection 17
DirectIP™ NVR Connection 17
DirectIP™ Camera Connection 18
Cascading 19
Port Connection Warnings and Tips 19
3
Part 3 - Miscellaneous 20
Troubleshooting 20
Specifications 21
Product Features
This multi-port, DirectIP™-based, and IEEE 802.3af and IEEE 802.3at Power over Ethernet-enabled layer2 fast Ethernet PoE Switch offers the following features:
- DirectXIP™
– Automatic network IP configuration
- Individual port data transmission to DirectIP™ NVR (Network Video Recorder)
- PoE
- IEEE 802.3af/at compliant
– Power to application over Ethernet cabling
– Central power control for greater network utility
– PoE alternate B power supply

Power feeding over 4/5 & 7/8 data twisted.
- Advanced Interface
- 100Mbps data transfer rate on service ports
- 1Gbps data transfer rate on uplink ports
- Switch Function
– Standard Ethernet bridge
This PoE switch is able to provide data and power at the same time to the connected network cameras through Ethernet cables by using PoE-enabled ports. It does not need a separate power outlet for each network camera and it will reduce the installation costs.
This PoE switch provides intelligent services such as QoS, security, ACL (Access Control List), and multicast management to ensure stable network communications and to establish high-performance network.
Two of service ports are RJ-45 connectors that support 10/100/1000 BASE-T without PoE (Power Over Ethernet) function. The other ports are RJ-45 connectors that support 10/100 BASE-TX with PoE function.
DirectIP™ PoE Switch Connection Diagram
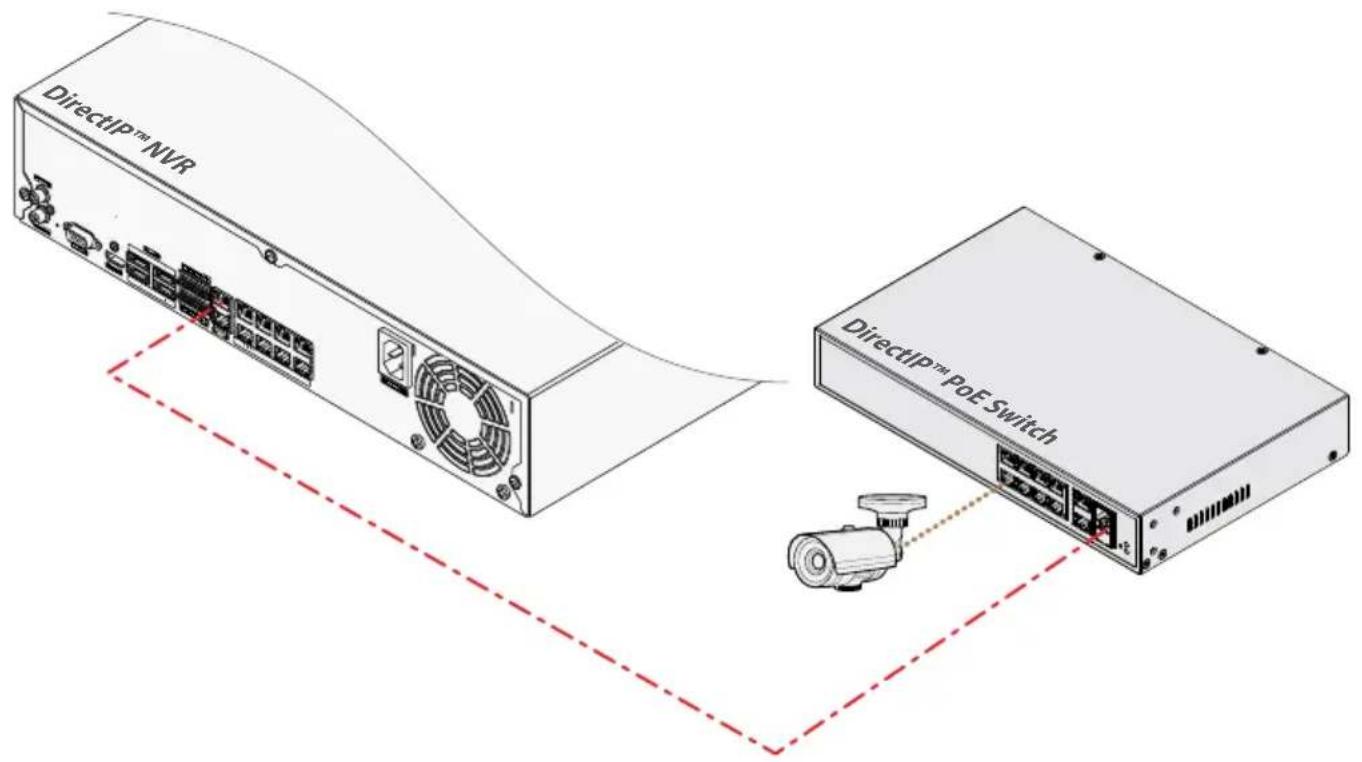
| Types of Cables | |
| UTP Cable (Data only) | |
| UTP Cable (Data + PoE) | |
Accessories
Upon unpackaging the product, check the contents inside to ensure that all the following accessories are included.
- DH-2010P/2018P
- Power Cable
- Manual
- Rack Mount Brackets: 2EA (DH-2018P only)
- Screws (6EA for DH-2018P only)
Overview
Front Panel
DH-2010P
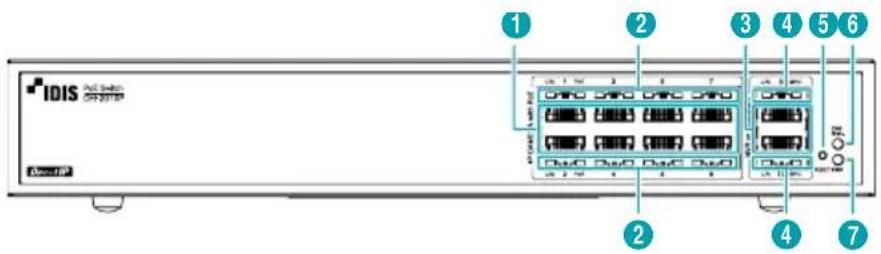
DH-2018P

| 1 | RJ-45 Service Ports | 2 | RJ-45 Service Port LEDs | 3 | RJ-45 Uplink Ports |
| 4 | RJ-45 Uplink Port LEDs | 5 | Reset Switch | 6 | PoE Max. LED |
| 7 | Power LED |
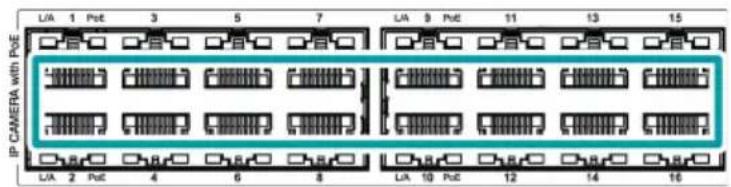
① RJ-45 Service Ports
These are PoE-enabled RJ-45 ports. Connect a network camera to one of these ports.
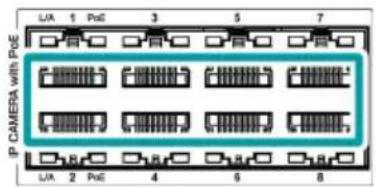
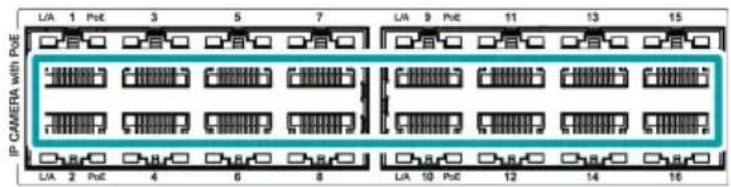
- PoE-supported network cameras will receive power over the signal line, without the use of an external power source.
• Each port is enabled with Auto-MDI/MDI-X detection and operates as a 10/100Mbps full/half duplex mode.
② RJ-45 Service Port LEDs
These LEDs indicate the status of the RJ-45 service ports.
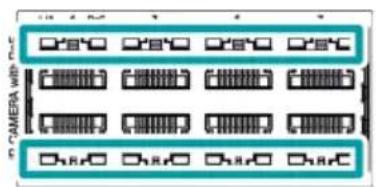
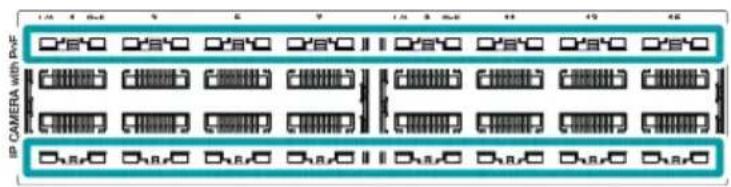

• The LED color indicates connection and communications speeds with the connected device.
• Each LED indicates L/A (network link/activity) or PoE status based on the position of the PoE LED button.
LED Status Indications
| Mode Status | Color Description | |
| L/A(Link/Activity) | On Amber Normal network connection at 10/100Mbps | |
| Blinking Amber | Data transmission over the network in progress at 10/100Mbps | |
| Off - No network connection or a problem with the connection | ||
| PoE | On Green | Connected and transmits power over the network normally to an IEEE 802.3af PoE-supported network camera |
| Off - Not connected to a PoE-supported network camera | ||
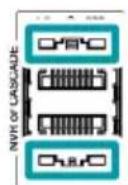
③ RJ-45 Uplink Ports
RJ-45 uplink ports are used to connect the switch to a higher tier device. These ports are useful when cascading multiple network devices.
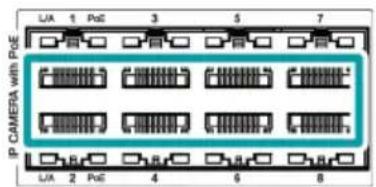

- If not using for uplinking purposes, these ports can be used as service ports, but they do not support PoE.
• Each port is enabled with Auto-MDI/MDI-X detection. - The ports operate in different modes based on the network speed. (10/100Mbps: full/half duplex, 1000Mbps: full duplex)
④ RJ-45 Uplink Port LEDs
These LEDs indicate the status of the RJ-45 uplink ports.
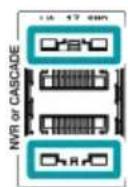

The LED color indicates connection and communications speeds with the connected device.
LED Status Indications
| Mode Status | Color Description | |
| LA (Link/Activity) | On Amber Normal network connection at 10/100/1000Mbps | |
| Blinking Amber | Data transmission over the network in progress at 10/100/1000Mbps | |
| Off - No network connection or a problem with the connection | ||
| SPD (Speed) | On Green Normal network connection at 1000Mbps | |
| Off - No network connection or a problem with the connection | ||
⑤ Reset Switch
The reset switch, which is located to the left of the Power LED button, is used to reset the product's settings. Pressing the reset switch immediately reboots the product.

If the product does not reboot after pressing the switch, press and hold the switch for 5 seconds. You will need a straightened paper clip to press the reset switch.
⑥ PoE Max. LED
PoE Max. LED indicates PoE statuses.
LED Status Indications
| Mode Status | Color Description | ||
| PoE Max. | On Red | Power to the connected PoE-supported network camera has reached maximum level allowed | |
| Blinking | Red | The room of PoE power that could be supplied to the RJ-45 service ports is not enough to ensure IEEE 802.3af 1 port (15.4W) | |
| Off | - | Normal to supply power to the PoE-supported network cameras which are connected to the RJ-45 service ports. |
⑦ Power LED
Power LED indicates the system's power on/off status.
The LED lights up in red to indicate the system is powered on.
Rear Panel
DH-2010P
DH-2018P

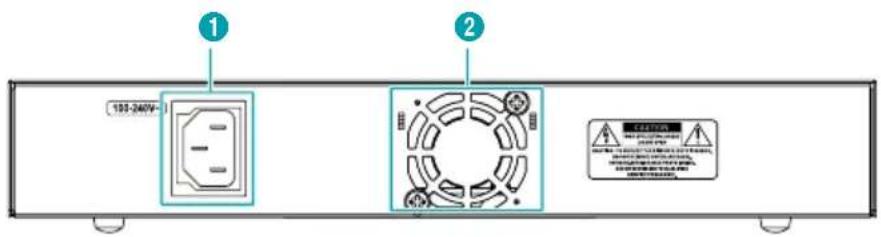
| 1 | Power Connector | 2 | Vent |
① Power Connector
Connect the power cable to this connector. This product does not feature a separate power on/off button and will turn on the moment power is supplied.

- Organize the power cable so that it will not cause people to trip over or become damaged from chairs, cabinets, desks, and other objects in the vicinity.
- Do not run the power cable underneath a rug or carpet.
- The power cable is grounded. It's plug, however, should not be modified even if the power outlet does not feature a grounding contact.
• Use a dedicated power outlet.
Tools for Installation
Check the following accessories. You will need more tools beside the accessories which are not provided.
Tools for mounting to a rack (DH-2018P only)
- Rack Mount Brackets: 2EA, Screws: 6EA
- Regular headed screwdriver: Medium (0.6 cm/0.24 inch)
Tools for removing top or bottom cover
- Regular headed screwdriver: Small (0.3 cm - 0.12 inch)
Mounting to a Rack (DH-2018P only)

You may drop the product or be injured while mounting the product to a rack or unmount it. To prevent the damage or injury, please keep the followings:
• If you mount only one product on a rack, mount it at the utmost bottom.
• If you mount more than one product on a rack, mount the heavier product at the bottom.

Make sure that the amount of airflow is enough between the products or with the wall, floor, or ceiling to prevent the product from being overheated.:

- 6 screws are provided for rack mount bracket. Please keep them in a safe place.
- If a safety base is provided with a rack, you can mount the product more safely and easily by using the safety base.
Part 2 - Installation
Installation
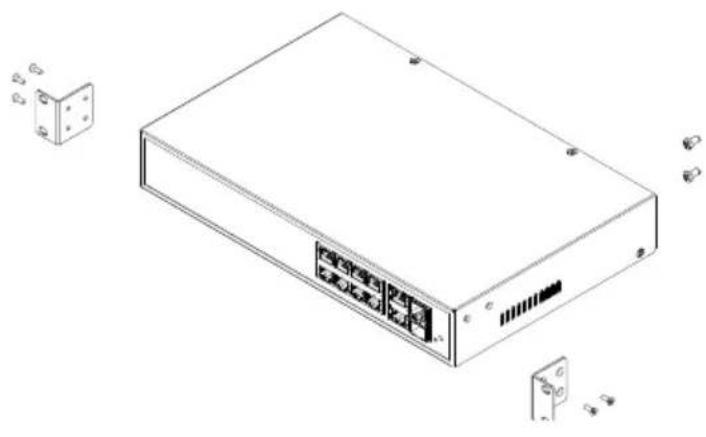
1 Place the product in a even and safe place, and prepare for a regular headed screwdriver of medium size (0.6 cm/0.24 inch)..
2 Screw brackets to the two sides (3 points for each) of the front panel by using the provided screws and the prepared regular headed screwdriver of medium size. See the first image below.
3 Mount the product to the rack by screwing brackets to the rack by using screws provided with the rack.
natural_image
Line drawing of a rectangular electronic device with ports and connectors, shown with additional small components nearby (no text or symbols)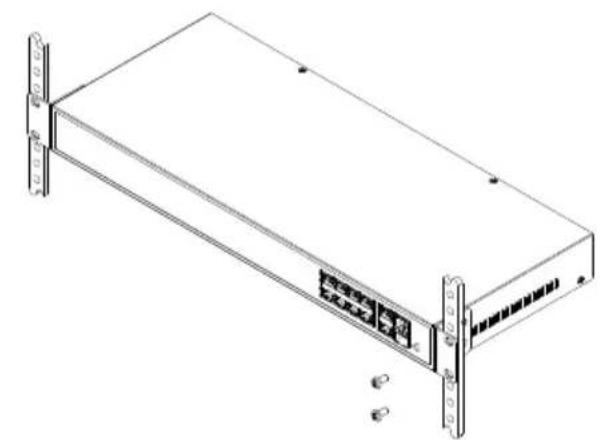
natural_image
Line drawing of a server rack unit with mounting flanges and drive slots (no text or symbols)Braket to the product Product to the rack
Port Connection
DirectIP™ NVR Connection
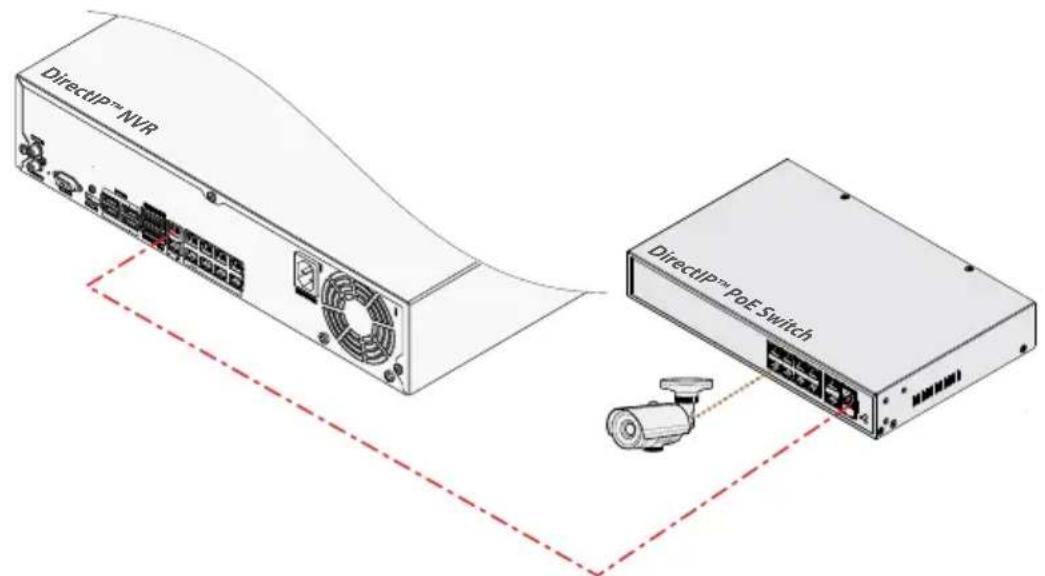
1 Connect the DirectIP™ NVR's VIDEO IN/Ext. port to the system's RJ-45 uplink port using a UTP cable.
2 Check the RJ-45 uplink port SPD LED's status and verify that a normal connection has been established.

- If you connect the DirectIP™ NVR's VIDEO IN/PoE port to the system's RJ-45 uplink port, the network bandwidth may not be enough, and the NVR may not record video normally.
- If the PoE switch is not connected to network connection at 1000Mbps, the network bandwidth may not be enough, and the NVR may not record video normally.
Part 2 - Installation
DirectIP™ Camera Connection
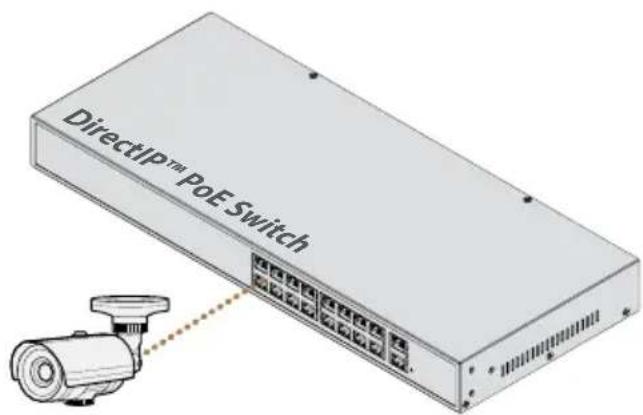
1 Connect the system's RJ-45 service port to the network camera's RJ-45 port using a UTP cable.
2 Check the RJ-45 service port LED's status and verify that a normal connection has been established.

PoE cameras connected to RJ-45 service ports can receive power through the UTP cable.
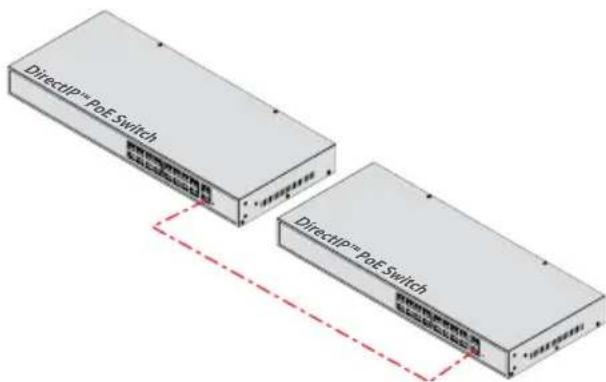
Cascading
1 Connect the RJ-45 uplink ports of system 1 and system 2 using a UTP cable.
2 Check the RJ-45 uplink port SPD LED's status and verify that a normal connection has been established between the two products.

If the PoE switch is not connected to network connection at 1000Mbps, the network bandwidth may not be enough, and the NVR may not record video normally.
Port Connection Warnings and Tips

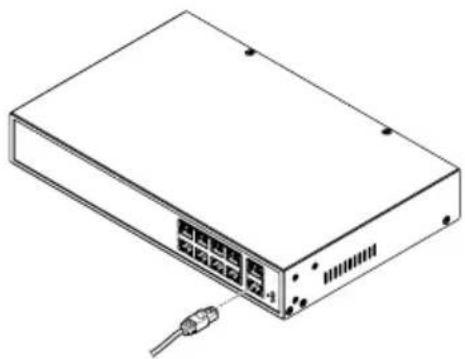
Keep the UTP cable length to less than 100m (328 ft).

- Only use category 5 or higher UTP cables with RJ-45 connectors to connect to the system. The system's ports can automatically distinguish between MID and MDIX connectors, so there is no need to use a crossover cable when connecting to a different device's TX port.
- The system's RJ-45 uplink ports may be used as service ports, but they do not support PoE.
natural_image
Isometric line drawing of a network switch device with ports and an external cable (no text or symbols)[RJ-45 Port Connection]
Part 3 - Miscellaneous
Troubleshooting
| Problem Check | |
| Power LED will not turn on. | Check the power cable.Check the power supply status to the outlet the power cable is connected to. |
| The system shuts down shortly after powering on. | Check power connection components for electric leakage.Check the outlet for electric leakage and current stability.Make sure the system's vents and ports are clean.If the problem persists, it could indicate a problem with the system's internals. Please contact the service center. |
| The system will not boot up. Press the reset switch on the front panel and see if the system boots up normally.Unplug the power cable and then plug it in again. | |
| The system is unable to recognize network interface. | Check the interface cable and the cable's connection status.Check each port's LED. |
Specifications
| Model DH-2010P DH-2018P | |||
| CPU Embedded MIPS | |||
| System Memory 256MB SDRAM, 32M Flash | |||
| Switching Capacity 5.6Gbps 7.2Gbps | |||
| Copper Service Port | 8 RJ-45 Connectors(10/100BASE-T) | 16 RJ-45 Connectors(10/100BASE-T) | |
| Copper Uplink Port 2 RJ-45 Connectors (10/100/1000BASE-T) | |||
| Rated Input AC100-240V, 50/60Hz AC100-240V, 50/60Hz | |||
| Power Consumption Max. 90W Max. 160W | |||
| PSE Power Max. 70W Max. 140W | |||
| PoE-supported Standards IEEE 802.3af-2003 and IEEE 802.3at-2009 | |||
| PoE-supported Network Camera Connection | Up to 8 IEEE 802.3af cameras or 2 IEEE 802.3at cameras | Up to 16 IEEE 802.3af cameras or 4 IEEE802.3at cameras | |
| Environmental Conditions | Operating Temperature | 0°C - 40°C (32°F - 104°F) | |
| Operating Humidity | 10 ~ 90% | ||
| Storage Temperature | 30°C - 60°C (-22°F - 140°F) | ||
| Dimensions (W x H x D) | 280mm x 44mm x 180mm(11.02" x 1.73" x 7.09") | 430mm x 44mm x 180mm(16.93" x 1.73" x 7.09") | |
| Weight (Main Unit) | 1.35Kg (2.98 lbs.) | 2.05Kg (4.52 lbs.) | |
| Weight (Packaging) | 2.1Kg (4.63 lbs.) | 3.1Kg (6.83 lbs.) | |
| Electrical Approvals | FCC, UL, CE, CB, KC | ||

• Dimensional width is exclusive of rack-mounting wings.
• These product specifications may change without prior notice.
Коммутатор РоЕ
DirectIP™
DH-2018P

natural_image
Technical line drawing of a server rack unit with ports and connectors, showing front and side views (no text or symbols)For more information, please visit at
www.idisglobal.com
- Before reading this manual
- FCC Compliance Statement
- WEEE (Waste Electrical & Electronic Equipment)
- Correct Disposal of This Product
- (Applicable in the European Union and other European countries with separate collection systems)
- Safety Precautions
- Warning Failure to comply can lead to severe injury or even death.
- Installation
- Power
- Product Use
- Caution
- 1
- Part 1 - Introduction 8
- 2
- Part 2 - Installation 15
- 3
- Part 3 - Miscellaneous 20
- Product Features
- - DirectXIP™
- - PoE
- - Advanced Interface
- - Switch Function
- Accessories
- Overview
- Front Panel
- ① RJ-45 Service Ports
- ② RJ-45 Service Port LEDs
- LED Status Indications
- ③ RJ-45 Uplink Ports
- ④ RJ-45 Uplink Port LEDs
- ⑤ Reset Switch
- ⑥ PoE Max. LED
- ⑦ Power LED
- Rear Panel
- ① Power Connector
- Tools for Installation
- Mounting to a Rack (DH-2018P only)
- Part 2 - Installation
- Port Connection
- DirectIP™ NVR Connection
- DirectIP™ Camera Connection
- Cascading
- Port Connection Warnings and Tips
- Part 3 - Miscellaneous
- Коммутатор РоЕ
- DirectIP™
Brand : IDIS
Model : DH-2018P
Category : Surveillance Camera