
RFM-FD8 - Car surveillance camera CRUX - Free user manual and instructions
Find the device manual for free RFM-FD8 CRUX in PDF.


| Product Type | Multi-camera video interface module |
| Brand | CRUX |
| Model | RFM-FD8 |
| Input Voltage | 12V DC (vehicle power) |
| Camera Inputs | Front, Left, Right, Cargo, Trailer, Camera #7 (up to 7 total, including factory backup camera) |
| Camera Power Output | +12V for each camera (purple/white, green/white, orange/white, red/white) |
| Turn Signal Integration | Automatic camera trigger via left/right turn signal inputs (pink/black, grey/red) |
| Steering Wheel Control (SWC) | Press and hold SEEK UP to toggle cameras; SEEK DOWN to toggle automatic turn signal trigger |
| DIP Switch Configuration | 8 switches to enable/disable each camera (ON/OFF); DIP 8 must be ON |
| Included Components | RFM-FD8 module, RFM-FD8 harness, CSV-FD-15 F150 side mirror camera |
| Optional Cameras | CFD-15KL, CFD-15KM, CFF-01, CFF-02, CFF-03 (sold separately) |
| Vehicle Applications | Ford F150 2016-2020 with 8" screen (Sync 3 and removable OEM side mirror camera cover) |
| Installation Note | Requires RFID harness for vehicles without factory backup camera (RVCFD-790 sold separately) |
| Compatibility Restriction | Not compatible with telescopic side mirrors |
| Front Camera Auto-Show | Front camera displays for 10 seconds when shifting from Reverse to Drive |
| Maintenance | Clean with dry cloth; avoid liquids |
| Safety | Disconnect vehicle battery before installation |
| Spare Parts & Repairability | Optional add-on cameras available; no internal serviceable parts |
| General Information | Designed to add multi-view camera capabilities to compatible Ford F150 trucks |
Frequently Asked Questions - RFM-FD8 CRUX
User questions about RFM-FD8 CRUX
0 question about this device. Answer the ones you know or ask your own.
Ask a new question about this device
Download the instructions for your Car surveillance camera in PDF format for free! Find your manual RFM-FD8 - CRUX and take your electronic device back in hand. On this page are published all the documents necessary for the use of your device. RFM-FD8 by CRUX.
USER MANUAL RFM-FD8 CRUX
- Adds front, left & right camera inputs plus 4 more video inputs on vehicle with factory installed backup camera.
- Uses the steering wheel control buttons to toggle between the sources.
- Turn signals automatically trigger the corresponding side camera.
- Turn signal camera trigger can be turned on or off by using the SWC button.
PARTS INCLUDED:

natural_image
Three black automotive sensor modules: a black rectangular device, a multi-colored cable with wires, and two circular sensors (no visible text or symbols)RFM-FD8 Module RFM-FD8 Harness CSV-FD-15 F150 Side Mirror Camera
OPTIONAL ADD-ON CAMERAS:
Optional add on cameras are available to complete the multi-view capability of the RFM-FD8. Cameras available and sold separately include: (More cameras can be found at www.cruxinterfacing.com)

CFD-15KL Tailgate Handle Camera CFD-15KM Tailgate Handle Camera with
Moving Parking Lines
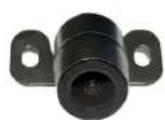


CFF-01 Bullet Type Front Camera (Recommended)
CFF-02 Square Body Front Camera CFF-03 Grille Mount Front Camera
INSTALLATION DIAGRAM:
To Vehicle Harness

flowchart
graph TD
    A["Factory Screen"] --> B["Control Unit"]
    B --> C["CRUX Device"]
    C --> D["Connect this 6-pin plug if OEM backup camera is being used"]
    D --> E["Front and Rear Camera Power Output +12V (purple/white)"]
    D --> F["Left and Right Camera Power Output +12V (green/white)"]
    D --> G["Cargo and Trailer Camera Power Output +12V (orange/white)"]
    D --> H["Camera #7 Power Output +12V (red/white)"]
    D --> I["Right Turn Signal Input (grey/red)"]
    D --> J["Left Turn Signal Input (pink/black)"]
    E --> K["Front Camera Input"]
    E --> L["Right Camera Input"]
    E --> M["Left Camera Input"]
    E --> N["Cargo Camera Input"]
    E --> O["Aftermarket Backup Camera Input"]
    E --> P["Trailer Camera Input"]
    E --> Q["Camera #7 Input"]
DIP SWITCH SETTINGS:
| DIP#ONOFF | — | — |
| 1 No Function – Leave OFF | ||
| 2 Front Camera ON Front Camera OFF | ||
| 3 Left Camera ON Left Camera OFF | ||
| 4 Right Camera ON Right Camera OFF | ||
| 5 Cargo Camera ON Cargo Camera OFF | ||
| 6 Trailer Camera ON Trailer Camera OFF | ||
| 7 Camera #7 ON Camera #7 OFF | ||
| 8 Set to ON | ||
OPERATION:
Sample Side Mirror Mounted Camera Installation:

natural_image
Two-panel photo showing hands cleaning a car's door and side panels (no visible text or symbols)- Remove the felt liner inside the door pull and remove the screw.
natural_image
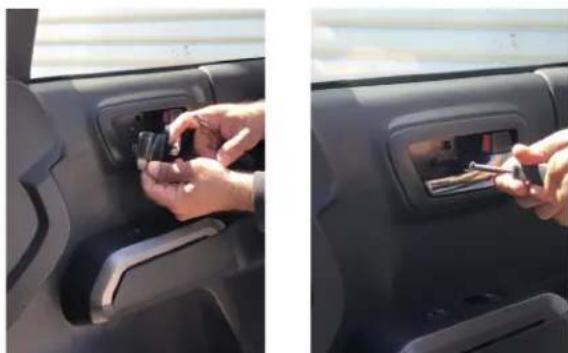
Interior view of a car showing hands inserting a small device into the dashboard (no visible text or symbols)- Remove the door unlock handle cover and remove the screw.

natural_image
Interior view of a car showing a hand adjusting the dashboard panel and a close-up of the air vent with a red circle highlighting the valve (no text or symbols visible)- Use a plastic pry bar to remove the window sail. Remove the trim panel clips

natural_image
Two-panel photo showing a man adjusting the door of a car interior; no visible text or symbols.- Unhook the door panel by pulling it upward. Unplug the speaker and doorlock harness.

natural_image
Close-up of a car rear camera component being connected to a red cable, showing the cable being inserted (no text or symbols visible)- Use a fine hooked pick tool to remove the OEM side mirror cover. Fish the camera cable through the hole.

natural_image
Close-up of a car's side mirror and camera lens assembly, showing internal components and a hand adjusting the lens (no text or symbols visible)- Tuck in the camera cable inside the cavity and snap in the CSV-FD15 side mirror cover with camera.
RFM-FD8 module installation: (Note: Sample installation is with a 4" screen radio. Installation is similar with an 8" screen.

natural_image
Close-up of hands installing or adjusting a black plastic container on a car's front, with a white fence and fence in the background (no visible text or symbols)- Lift the rubber mat on the dashboard upper tray and remove the 2 screws.

natural_image
Interior view of a car dashboard with hands adjusting the air gap and highlighted camera module (no text or symbols visible)- Carefully pull out the radio bezel. This is held by multiple clips.
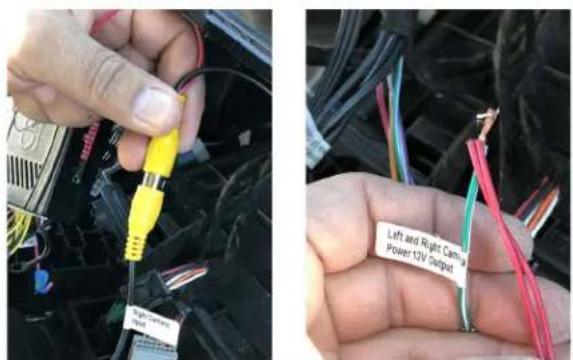
- Install the cameras and run the video and power cables towards the radio. Make the video and power connections. The RFM-FD8 provides +12V power to the cameras.

natural_image
Close-up of a car interior showing a hand adjusting the dashboard with a yellow circle highlighting a component (no visible text or symbols)- Remove the tray and remove the 2 screws holding the radio bezel.

natural_image
Two-panel photo showing hands installing or adjusting a power strip device into a car's engine compartment (no visible text or symbols)- Remove the factory screen, unplug the male connector and plug it into the RFM-FD8 T-harness. Plug the other end of the T-harness to the screen.
natural_image
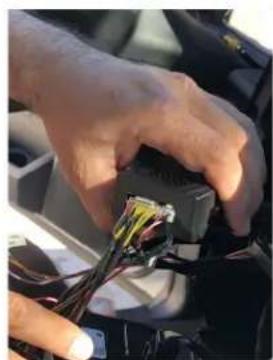
Close-up of hands installing or adjusting a black plastic component with wires (no visible text or symbols)- Plug the white, 18-pin connector of the T-harness to the RFM-FD8 module.
OPERATION:

natural_image
Interior view of a Ford car dashboard and steering wheel (no visible text or symbols)- Press and hold the SEEK UP button to toggle between the cameras. Each press of the button thereafter toggles to which ever cameras are turned on using the DIP switches.

natural_image
Interior view of a car dashboard with air filters and a digital display showing navigation screens (no visible text or symbols)- The front camera (if installed) will automatically show on the screen for 10 seconds when the gear is put to Drive from Reverse.

natural_image
Interior view of a car dashboard with a digital display showing a person in motion (no visible text or symbols)- The left and right turn signal triggers the respective side camera. See diagram on page 2 for wire connection information. To turn OFF/ON the automatic camera trigger function, select the turn signal to be turned OFF/ON then press and hold the SEEK DOWN button on the SWC.

natural_image
Interior view of a car dashboard with digital display and air vent grilles (no visible text or symbols)View with cargo camera installed.
natural_image
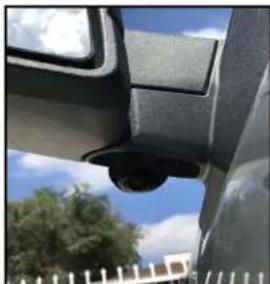
Close-up of a car's side profile showing the front wheel and dashboard, with trees and a fence in the background (no visible text or symbols)CSV-FD15 side mirror mounted camera.
VEHICLE APPLICATIONS:
FORD
2016 – 2020 F150 with 8" screen (with Sync 3 and removable OEM side mirror camera cover at the bottom)
NOTES:
- Please use with RVCFD-790 (sold separately) if there is no factory backup camera present.
- Not compatible with telescopic type side mirrors.

5 of 5
rev.12032021
Brand : CRUX
Model : RFM-FD8
Category : Car surveillance camera