ELNEXTTRIMMER401G - Beard trimmer Electroline - Free user manual and instructions
Find the device manual for free ELNEXTTRIMMER401G Electroline in PDF.


| Product Type | Beard Trimmer |
| Brand | Electroline |
| Model | ELNEXTTRIMMER401G |
| Dimensions (mm) | 24.7 x 24.7 x 59 |
| Weight (g) | 106 |
| Power Source | 1 x AA battery (included) |
| Operating Time (approx.) | 60 minutes |
| Rotating Speed (rpm) | 4,500 ~ 6,500 |
| Main Material | ABS |
| Included Accessories | Sideburn trimmer, eyebrow trimmer, nose/ear trimmer, guide combs (3mm & 6mm for eyebrow, sideburn), cleaning brush |
| Attachment Types | Eyebrow, sideburn, nose/ear |
| Guide Comb Sizes | 3 mm and 6 mm |
| Blade Material | Stainless steel (not explicitly stated, but standard) |
| Water Resistance | Not waterproof; do not immerse main body |
| Cleaning Method | Remove battery, brush accessories, wash with water (accessories only), wipe main body with soft cloth |
| Battery Type | AA (1.5V, LR03) |
| Warranty Period | 2 years |
| Intended Use | Personal facial hair trimming (eyebrows, nose, ears, beard, sideburns) |
| Safety Features | Sharp blade warning, not for children, do not use on damaged skin, no immersion |
| Disposal | Do not dispose with household waste; recycle at WEEE collection point |
| Country of Origin | Made in China |
Frequently Asked Questions - ELNEXTTRIMMER401G Electroline
User questions about ELNEXTTRIMMER401G Electroline
0 question about this device. Answer the ones you know or ask your own.
Ask a new question about this device
Download the instructions for your Beard trimmer in PDF format for free! Find your manual ELNEXTTRIMMER401G - Electroline and take your electronic device back in hand. On this page are published all the documents necessary for the use of your device. ELNEXTTRIMMER401G by Electroline.
USER MANUAL ELNEXTTRIMMER401G Electroline
natural_image
Line drawing of a pair of hair purifiers with no text or symbolsAA
natural_image
Line drawing of a medical or laboratory tool with a pointed tip and curved handle, no text or symbols presentnatural_image
Technical line drawing of a mechanical tool or caliper with no visible text or symbolsnatural_image
Technical line drawing of a mechanical tool or tool with no visible text or symbolsnatural_image
Simple line drawing of a spray bottle with a handle (no text or symbols)natural_image
Line drawing of a hand holding a tool with a textured grip (no text or symbols)natural_image
Illustration of an eye with eyebrow and eyelid, showing a brush applying product to the eyelid (no text or symbols)natural_image
Line drawing of a stylized hand with spiral crown (no text or symbols)natural_image
Diagram showing two mechanical components with directional arrows indicating motion or force (no text or symbols)natural_image
Diagram of a robotic arm with a tool, showing motion and rotation direction (no text or symbols)natural_image
Line drawing of a hand holding a brush with an arrow pointing to a textured surface (no text or symbols)natural_image
Simple line drawing of a bottle with a flared top and narrow neck (no text or symbols)natural_image
Close-up of a hand applying makeup to a small object, no visible text or symbolsnatural_image
Symbol of a trash bin crossed with two crossed lines, no text or numbers presentThank you very much for purchasing our product. We kindly ask you to read and save this instruction manual carefully as it provides important information on safe use and maintenance.
INDEX
- Safety warning
- Product description
- Before first use
- Operation
- Cleaning and Maintenance
- Troubleshooting
- Technical specifications
- Disposal
- Warranty and Compliance
1 Safety warning
! warn
For your safety and to reduce the risk of injury or electric shock, follow all of the following safety measures:
1) This equipment may be used by children aged 8 and over and persons with reduced physical, sensory, or mental abilities or lack of experience and knowledge if they have been given supervision or instruction in using the equipment safely and understand the hazards involved.
2) Children are not allowed to play with this device.
3) Cleaning and maintenance should not be performed by children without supervision.
4) Never touch the inside blade as it is very sharp.
5) Make sure the blade is securely attached before using the knife.
6) Do not use it on other areas except eyebrows, nose, ears, beard, and other facial hair.
7) Please check whether the blade is damaged before use and make sure the blade is not bent or pressed too tightly. A damaged blade may cause cuts when used. Do not use the device if it is damaged.
8) Do not trim if the skin is damaged.
9) This device is for personal use only and is not suitable for commercial use.
10) Keep your device dry and do not immerse it in water or any other liquid.
11) Do not expose equipment to rain or moisture during use or storage.
12) Personal repairs to the device are prohibited, and please do not attempt to dismantle the device without permission.
13) Do not use this device on children.
14) This device must not be turned on without supervision.
15) The device must be turned off after use.
16) Do not use the device if it does not work properly after being dropped or immersed in any liquid.
17) Do not discard this device with other normal household waste when it has reached the end of its useful life. Please hand it over to an official recycling point for recycling. Doing so will help protect the environment.
2 Product description:
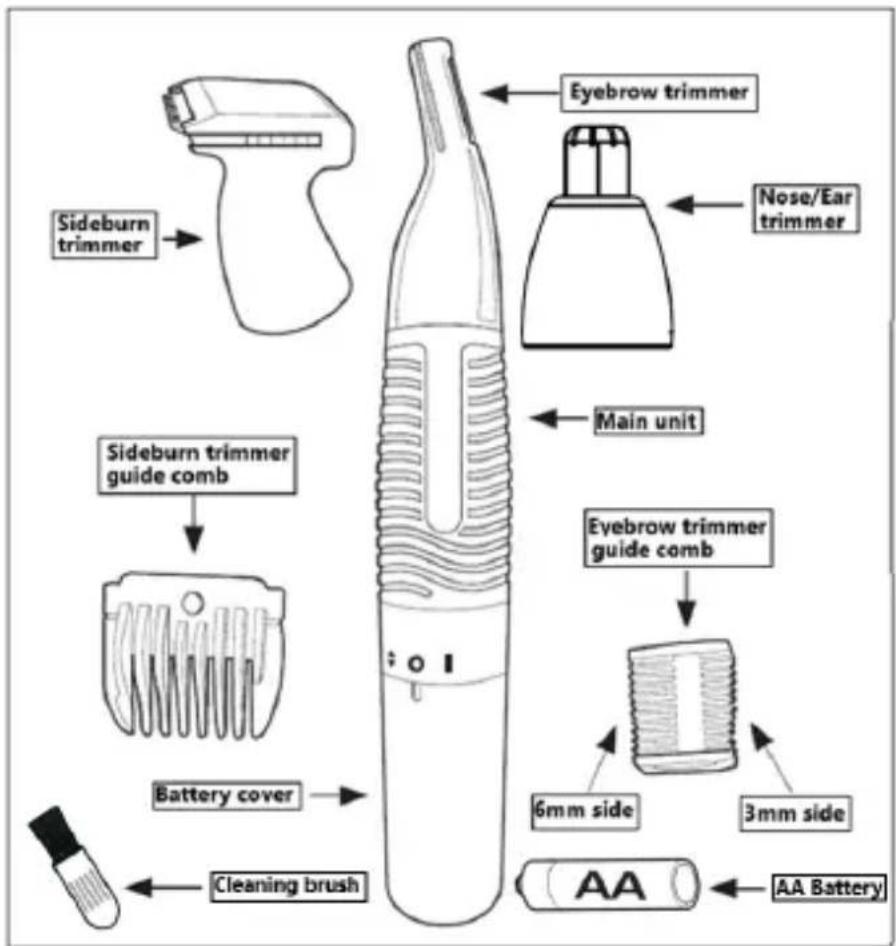
- Eyebrow trimmer
- Nose / ear trimmer
- Main unit
- Eyebrow trimmer guide comb
- 3mm side
-
6mm sides
-
AA batteries
- Sideburn trimmer
- Sideburn trimmer guide comb
- battery cover
- Cleaning brus
3 Before first use
Before using this device for the first time, please follow the instructions below
1) Turn the battery compartment cover counterclockwise so that the I symbol on the cover points to and remove.
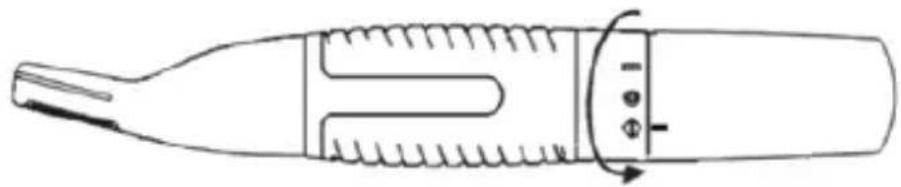
natural_image
Line drawing of a mechanical tool or device with no visible text or symbols2) Insert an AA battery into the battery compartment
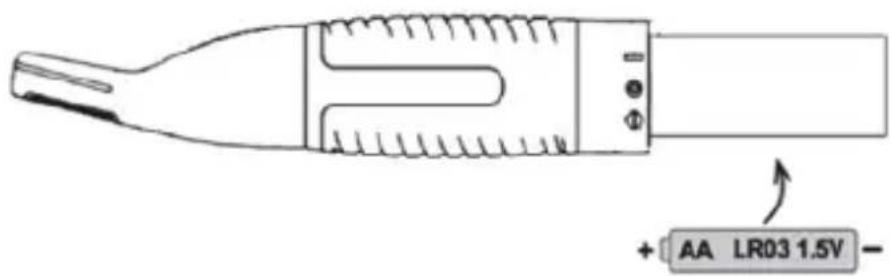
3) Turn the battery compartment cover with the I symbol clockwise until the I symbol on the compartment cover points to Ⓞ

natural_image
Technical line drawing of a mechanical tool or tool with no visible text or symbols4) Turn the battery cover further clockwise until the I symbol on the battery cover faces the I on the main body, and the device will turn on.

natural_image
Technical line drawing of a mechanical tool or tool with no visible text or symbolsNote: When the device cannot be turned on, the battery needs to be replaced.
4 Operation guide
Your multifunctional facial trimmer set is suitable for trimming facial hair such as eyebrows, nostrils, ears, and beard.
Please test on an area with lighter hair growth first when using it for the first time.
How to use the eyebrow trimmer attachment
natural_image
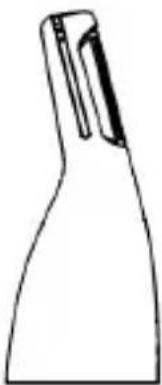
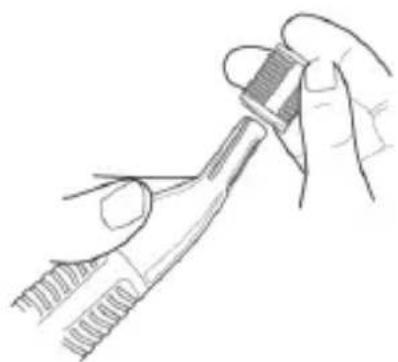
Simple line drawing of a spray bottle with handle and pointed tip (no text or symbols)1) There is an eyebrow trimmer guide comb with side lengths of 3 mm and 6 mm, which is used for cutting on different sides of the eyebrow trimmer. Just install the eyebrow trimmer guide comb on the eyebrow trimmer head.
Tip: We recommend you try the longer 6mm brow trimmer guide comb first. If you are unable to remove the hair cleanly, try using the shorter 3mm brow trimmer guide comb for further processing.
natural_image
Line drawing of a hand holding a tool with a handle (no text or symbols)2) Rotate the battery cover to the ON (I) position to turn on the trimmer.
3) Place the trimmer on your eyebrows and trim them according to their natural shape, moving slowly from the widest section to the thinnest section to remove excess eyebrows.
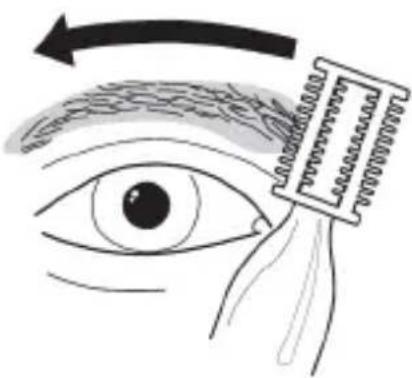
4) Twist the battery cover to the (O) position to close the eyebrow trimmer.
NOTE: Be careful when using an eyebrow trimmer without a comb as it will completely remove all hair in its path.
Never use an eyebrow trimmer on your eyelashes.
How to use the sideburn trimmer attachment
natural_image
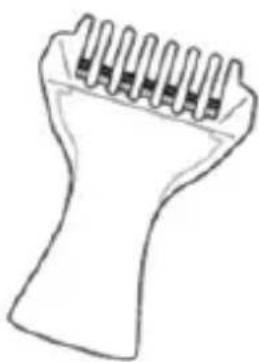
Line drawing of a stylized object resembling a hand or tool, with no text or symbols present.The method of using the sideburn trimmer and guide comb can refer to the method of using the eyebrow trimmer and its guide comb.
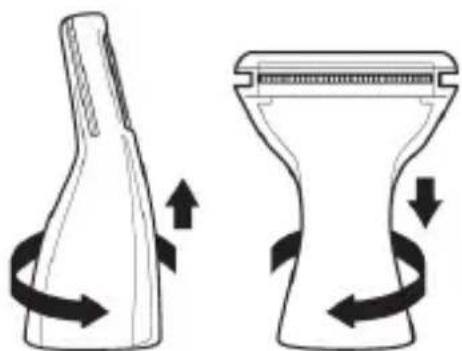
1) Turn the installed blade attachment counterclockwise as shown in the figure below, remove it from the main body, and replace it with the sideburn trimmer. As shown in the picture below, place it on the main body and twist it clockwise until it locks.
natural_image
Diagram showing two mechanical components with directional arrows indicating motion or force (no text or symbols)2) Make sure the guide comb is correctly placed on the sideburn trimmer.
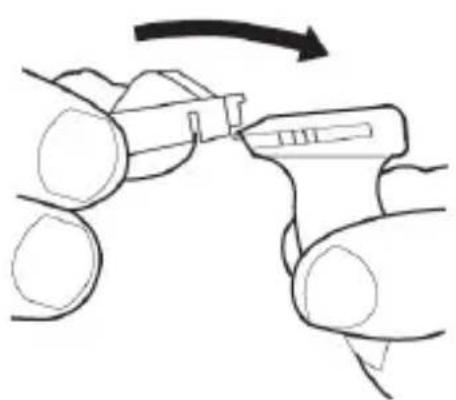
natural_image
Diagram of a robotic arm with a tool, showing motion direction (no text or symbols)3) Rotate the battery cover to the ON (I) position to turn on the sideburn trimmer.
4) If you want to trim your beard most effectively, you need to comb your beard in the direction of its natural growth and move the trimmer in the opposite direction of hair growth. At the same time, pay attention to the curved surface of the comb to keep in contact with the skin.
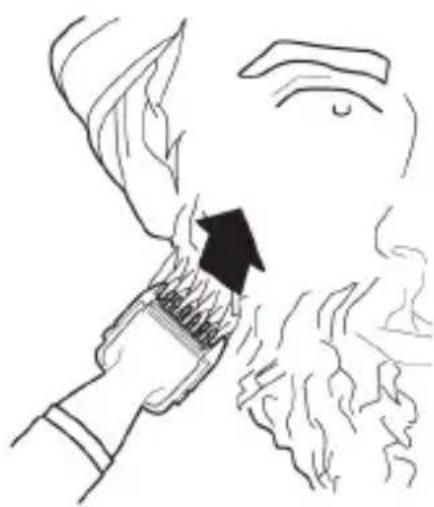
natural_image
Line drawing of a hand holding a brush with an arrow pointing to a textured surface (no text or symbols)5) Twist the battery cover to the (O) position to close the sideburn trimmer.
How to use the nose / ear trimmer attachment
natural_image
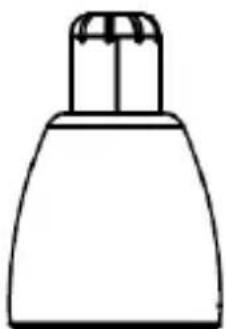
Simple line drawing of a bottle with a flared top and narrow neck (no text or symbols)1) Rotate the installed head attachment counterclockwise to remove it from the main body, then replace it with the nose / ear trimmer attachment as shown in the picture
above, place it on the main body and rotate it clockwise to the locking position.
2) Rotate the battery cover to the ON (I) position to turn on the nose / ear trimmer.
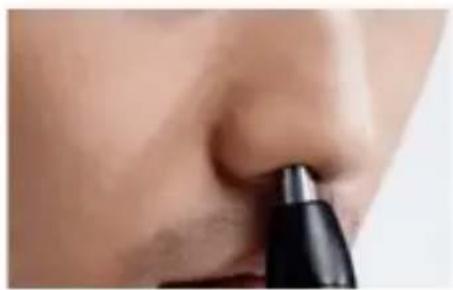
3) Use the tip of the head of the nose / ear trimmer to remove the protruding hair from the nostril or ear.
natural_image
Close-up of a person applying eyeliner to the lower ear area (no visible text or symbols)WARNING: This attachment should only be used to remove hair from listed areas. In addition, do not insert the nose / ear trimmer more than 0.5cm into the ear or nostril, otherwise there is a risk of injury.
4) Turn the battery cover to the (O) position and close the nose / ear trimmer
5 Maintenance and cleaning
- Remove the battery before cleaning.
- Loosen and remove the installed accessories.
NOTE: Do not attempt to disassemble accessories.
- Brush off accessories and the main body of the device with the brush provided.
- Clean accessories with tap water.
Note: Do not clean the main body of the device in water.
- Wipe the main body of the device with a soft cloth.
- Allow the accessory to dry completely before reinstalling it on the device.
6 Troubleshooting:
| Fault | possible reason | Solution |
| Unable to start | Battery installed incorrectly | Unscrew the battery cover and install the battery correctly |
| Unable to start | Accessories installed incorrectly | Unscrew the fitting and install the fitting again. |
| Unable to start | Too much hair between blade teeth | Use a cleaning brush to clean away excess hair. |
| The machine is running too slow or cutting poorly or making too much noise. | The head has not been lubricated for a long time. | Use your own lubricant to make the blades run faster for smoother trimming. |
| The machine runs too slowly resulting in poor pruning. | The battery is almost empty. | Replacement battery. |
7 Technical specifications:
Battery 1 x AA (included)
operating hours about 60 minutes
Rotating speed 4,500 \~ 6,500 rpm
Replaceable accessories Ear / nose trimmer sideburn trimmer eyebrow trimmer
The main material ABS
Dimensions (mm) 24.7 x 24.7 x 59mm
Weight 106 grams
8 Disposal
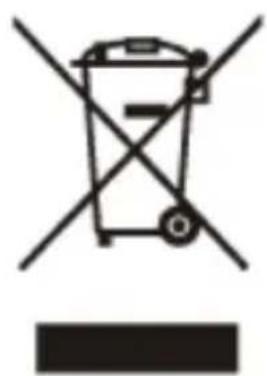
Processing of electric and electronic equipment at the end of their service life (applicable in member countries of the European Union and other European countries operating a selective waste collection system). This symbol, affixed to the product or its packaging, indicates that the product must not be processed with household waste. It must be brought to an electric and electronic waste collection point for recycling and disposal. By ensuring the appropriate disposal of this product you also help in preventing potentially negative consequences for the environment and human health. The recycling of materials helps preserve our natural resources. For further information regarding the recycling of this product, please contact your municipality, local waste disposal centre or the store where the product was purchased.
natural_image
Symbol of a trash bin crossed with no text or numbers, accompanied by a black rectangular block below (no readable text or symbols)In accordance with Legislative Decree of March 14, 2014, No. 49, “Implementation of Directive 2012/19/EU on Waste Electrical and Electronic Equipment (WEEE)” the crossed-out wheeled bin symbol on the appliance or its packaging indicates that the product must be collected separately from other waste at the end of its life. Therefore, the user should dispose of the end-of-life appliance at the appropriate collection points for electronic and electrical waste or return it to the retailer when purchasing a new equivalent appliance, on a one-to-one basis. Proper separate collection for the subsequent disposal, treatment, and environmentally friendly disposal of the discarded appliance helps to prevent potential negative effects on the environment and health and promotes the recycling of the materials the appliance is composed of. Unauthorized disposal of the product by the user may result in the application of administrative sanctions provided by current regulations.
9 Warranty and Compliance
This Electroline Warranty applies only to Electroline products purchased for personal use and not those intended for resale.
Your Electroline product is warranted in accordance with the terms and conditions of this warranty against defects in workmanship and conformity for a period of a 2 years, and that period begins upon delivery of the item, if purchased from an official dealer.
The warranty will not be valid if the product has been opened, in the presence of physical damage, damage resulting from incorrect use, modifications, repairs by unauthorized persons, negligence and in the event that the product has been used for purposes other than those for which it was intended; furthermore, the legal guarantee will not apply if the purchase methods or other circumstances demonstrate, with reasonable
certainty, that the purchase itself is not exclusively aimed at private consumption .
In the event that the product is defective, it can be returned to the retailer along with a description of the type of malfunction, proof of purchase, and any accessories.
If the product is still under warranty, you will receive a replacement product (if available) from the dealer.
These are not covered by the warranty:
- Accidental damage or damage resulting from incorrect or improper use, contact with liquids; damage caused by accidents or force majeure events such as fire, earthquake, flood, vandalism, theft or other external cause.
- Cosmetic damage such as scratches, dents, or other breakage of plastic parts, caused by handling errors.
• Defects resulting from normal product wear and tear (product aging).
- Incompatibility with other hardware/software products not listed in the minimum system requirements.
- Consumable accessories such as batteries, protective covers, and fuses, which normally wear out over time. Problems due to noncompliance related to labour or materials are excluded.
In no event shall the manufacturer be liable for incidental or consequential damages, including any loss of business profits or other commercial damages resulting from the use of the product.
Due to the rapidly evolving nature of our products, the content of this manual may be subject to change without prior notice.

Made in China

natural_image
Abstract white curved line on black background, resembling a stylized 'e' or logo (no text or symbols)electroline
Manufactured and imported by Exertis Supply Chain Services Limited. Unit 21 Fonthill Business Park, Clondalkin. Dublin 22, D22 FR82, Dublin, Ireland
"Electroline" used under license from Unieuro
- INDEX
- Safety warning
- ! warn
- Product description:
- Before first use
- Before using this device for the first time, please follow the instructions below
- Operation guide
- Maintenance and cleaning
- Troubleshooting:
- Technical specifications:
- Disposal
- Warranty and Compliance
- These are not covered by the warranty:
Brand : Electroline
Model : ELNEXTTRIMMER401G
Category : Beard trimmer